 Emmanuel
Animabot is a 24 DOF Advanced Hexapod Robot like no other. He was created to interact with its environment through multiple sensors but also with people. He is (and will be) capable of recognizing persons, talk, listen, show emotions and play. The goal of this project is to really have a daily life companion to interact with, like Aibo from Sony or other robotic toys.
This project started back in 2001 with much simpler versions than this one, and after years of improvement and tons of design, I think I finally reached my objective in term of looks and capabilities.
More detailed information about the construction, design and previous versions of Animabot are available on my website: https://anim4bot.com/ as well as my other projects.
Components & Characteristics:
• Energy: Li-Ion 11.1V 7800mAh
• Power: Custom 140W PSU based on LM25119PSQ
• Charger: Custom, based on LTC4015
• Brains: STM32F415VGT6 + Raspberry Pi 3B+
• OS: RTOS + Raspian
• Programming Language: C, Python
• Communication: 2x Bluetooth + WiFi
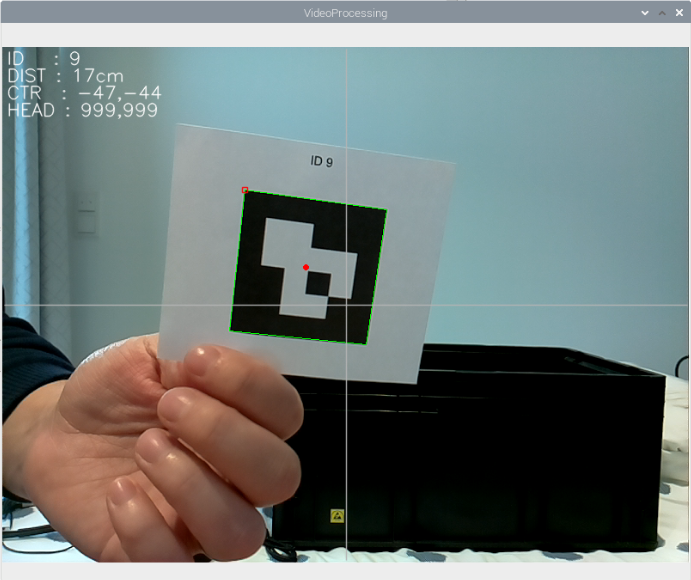
• Vision: 5Mpx Micro Camera
• Displays:
- 2x 0.49" OLED for the Eyes
- 1x 1.81" Flexible OLED for robot status
• Actuators:
- Legs: 18x Herkulex DRS-0101
- Hood: 1x KST DS215MG
- Head: 2x KST DS215MG
- Ears: 2x Hitec HS-40
• Sound: 2x 1W stereo speakers + buzzer
• Interface:
- Capacitive touch switch with RGB led
- Gesture sensor
• Control: Autonomous and Remote-controlled
• Sensors:
- 1x IMU 6-DOF
- 2x LM75B temperature monitor
- 1x IR telemeter(GP2Y0A21)
- 1x Magnetic switch for charging dock
• Target environment: indoor/outdoor
• Size [LxWxH]: 28cm x 36cm x 16cm
• Weight: 2,5kg
Mechanic
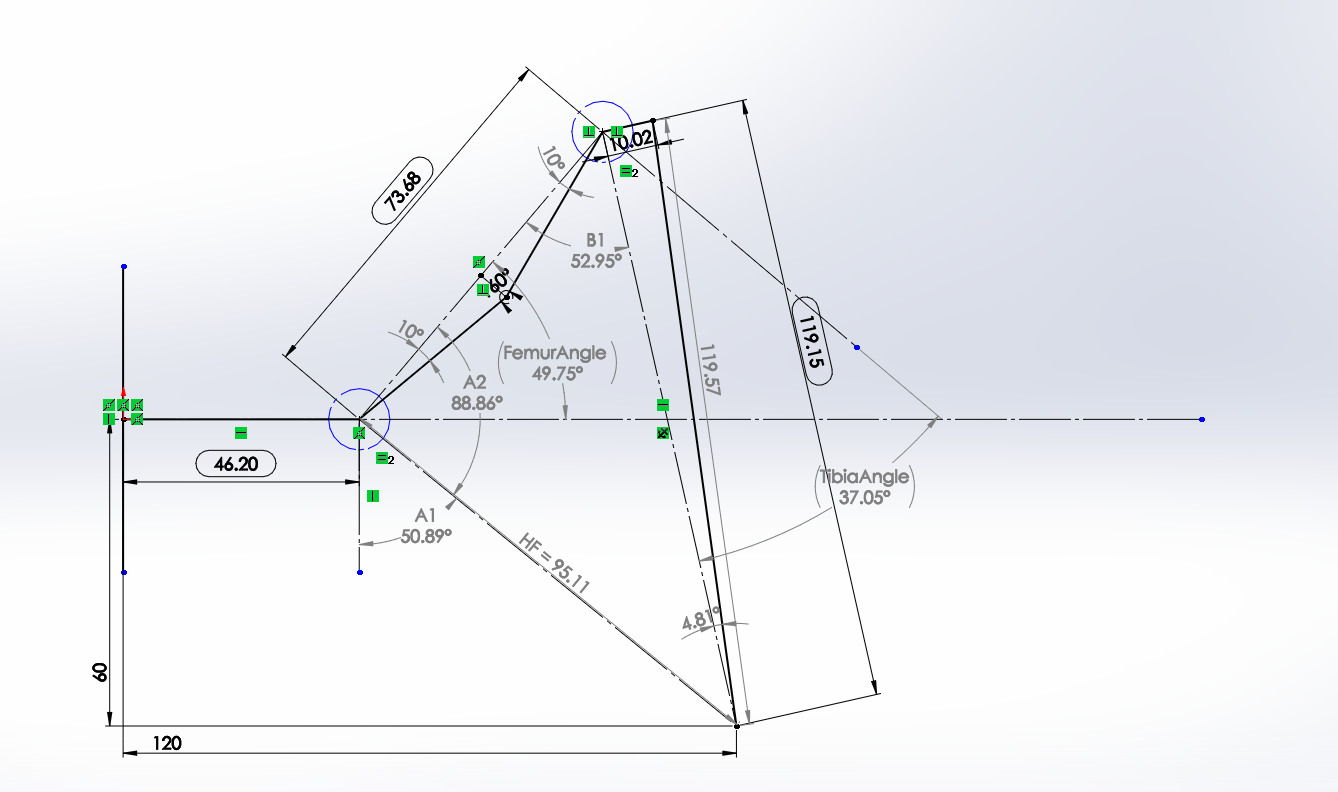
All the design has been done on Solidworks (which I use since more the 10 years now) and is fully 3D printed by SLA process. The print has been externalized to China to ensure best result. I do have a 3D printer at home, but the quality and precision needed by the design are too high for FFF process. After being printed, the parts are sanded, mat painted (RAL9007) with a soft touch coating. The end feeling and result is stunning !
The robot is composed of 3 main body zones: Head, Body and Legs. The Lower body contains the battery, Motherboard and Control Interface. The upper body is composed of 2 parts which allows me much easier assembly and better reliability. The upper body will be constantly screwed to its lower counterparts and the Upper Cover (Raspberry Pi location) will be screwed on the Upper body. As you can imagine, this will allow me to access all the internal part of the robot without removing the legs (which is currently a huge problem on the Rev2), by simply unscrewing the Top Cover. The Head, Rpi, servos are directly mounted on the Top Cover, and connected by only 3 cables to the Motherboard for easy assembly/access. I installed on the belly a connector composed of 2 concentric copper rings (to avoid polarity inversion) for a future docking station.
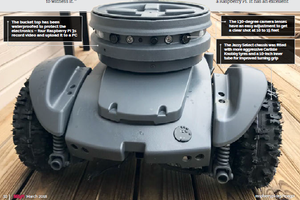
The rear side of the robot contains the main switch of the motherboard, the charger connector and the Raspi On/Off button. There is also the curved OLED display allow me to show different information and animations (battery charge, current mode, sensors info, etc..)
The Raspberry Pi is completely hidden inside a special compartment which I call hood. The Rpi has been modified and I got rid of all connectors in order to fit it inside ! The...
Read more »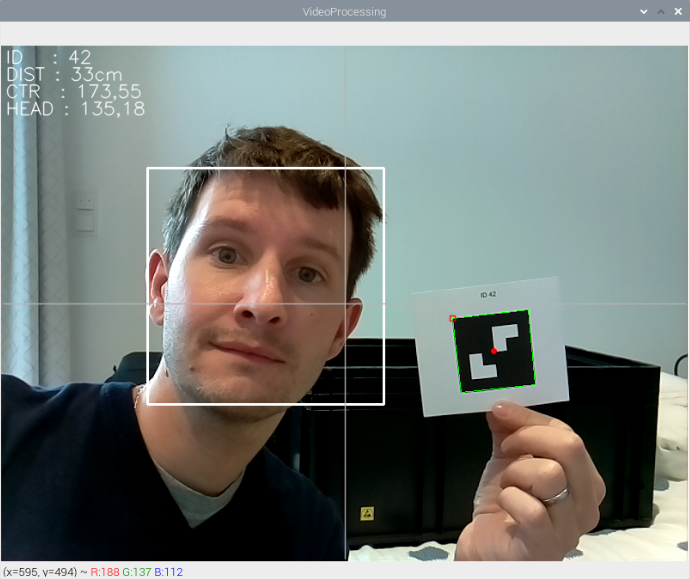

")


 Josh Starnes
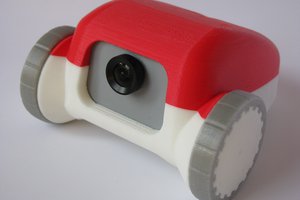
 Max.K
Max.K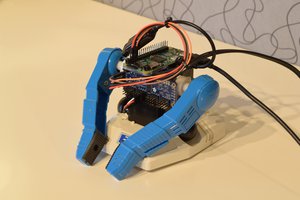

 Husarion
looks really clean . Do you have a video of it moving ?