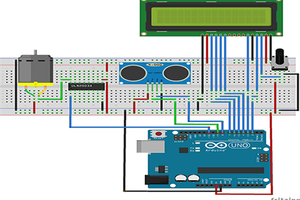
Step 1: Testing and Reading Values from Moisture Sensor
First of all we wrote the code to take input from moisture sensor. We wired the moisture sensor with Arduino and uploaded the code. We could now read data from Serial Monitor on Arduino IDE.
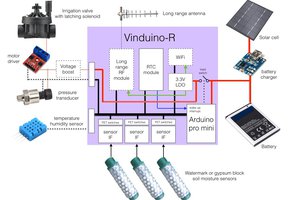
Step 2: Integrating Water pump
Now we want to use water pump that will work when moisture level is low and stop when plant has enough moisture. We used the motor controller to control our motor pumps. We did the required programming and wiring for it and now our system had a water pump that pumps water when required.
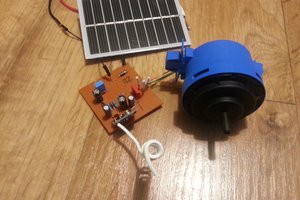
Step 3: Making Hardware (Structure)
Now we are going to work on the hardware to keep our plants and system in one place. The idea of this project is to water small indoor plants that we can set on a plant shelf on wall. We decided to use wood to make a shelf for 3 plants that can be hanged on wall.
Step 4: Making an App
In this step, we will make an Android app through MIT App Inventor. It will show us the status of plants moisture level at all time. We will use BT module to send/receive data from sensor to app.
Step 5: Testing
 hIOTron
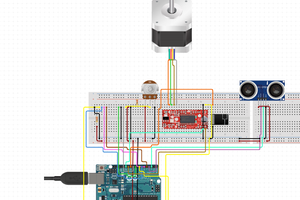
 Reinier van der Lee