 loren
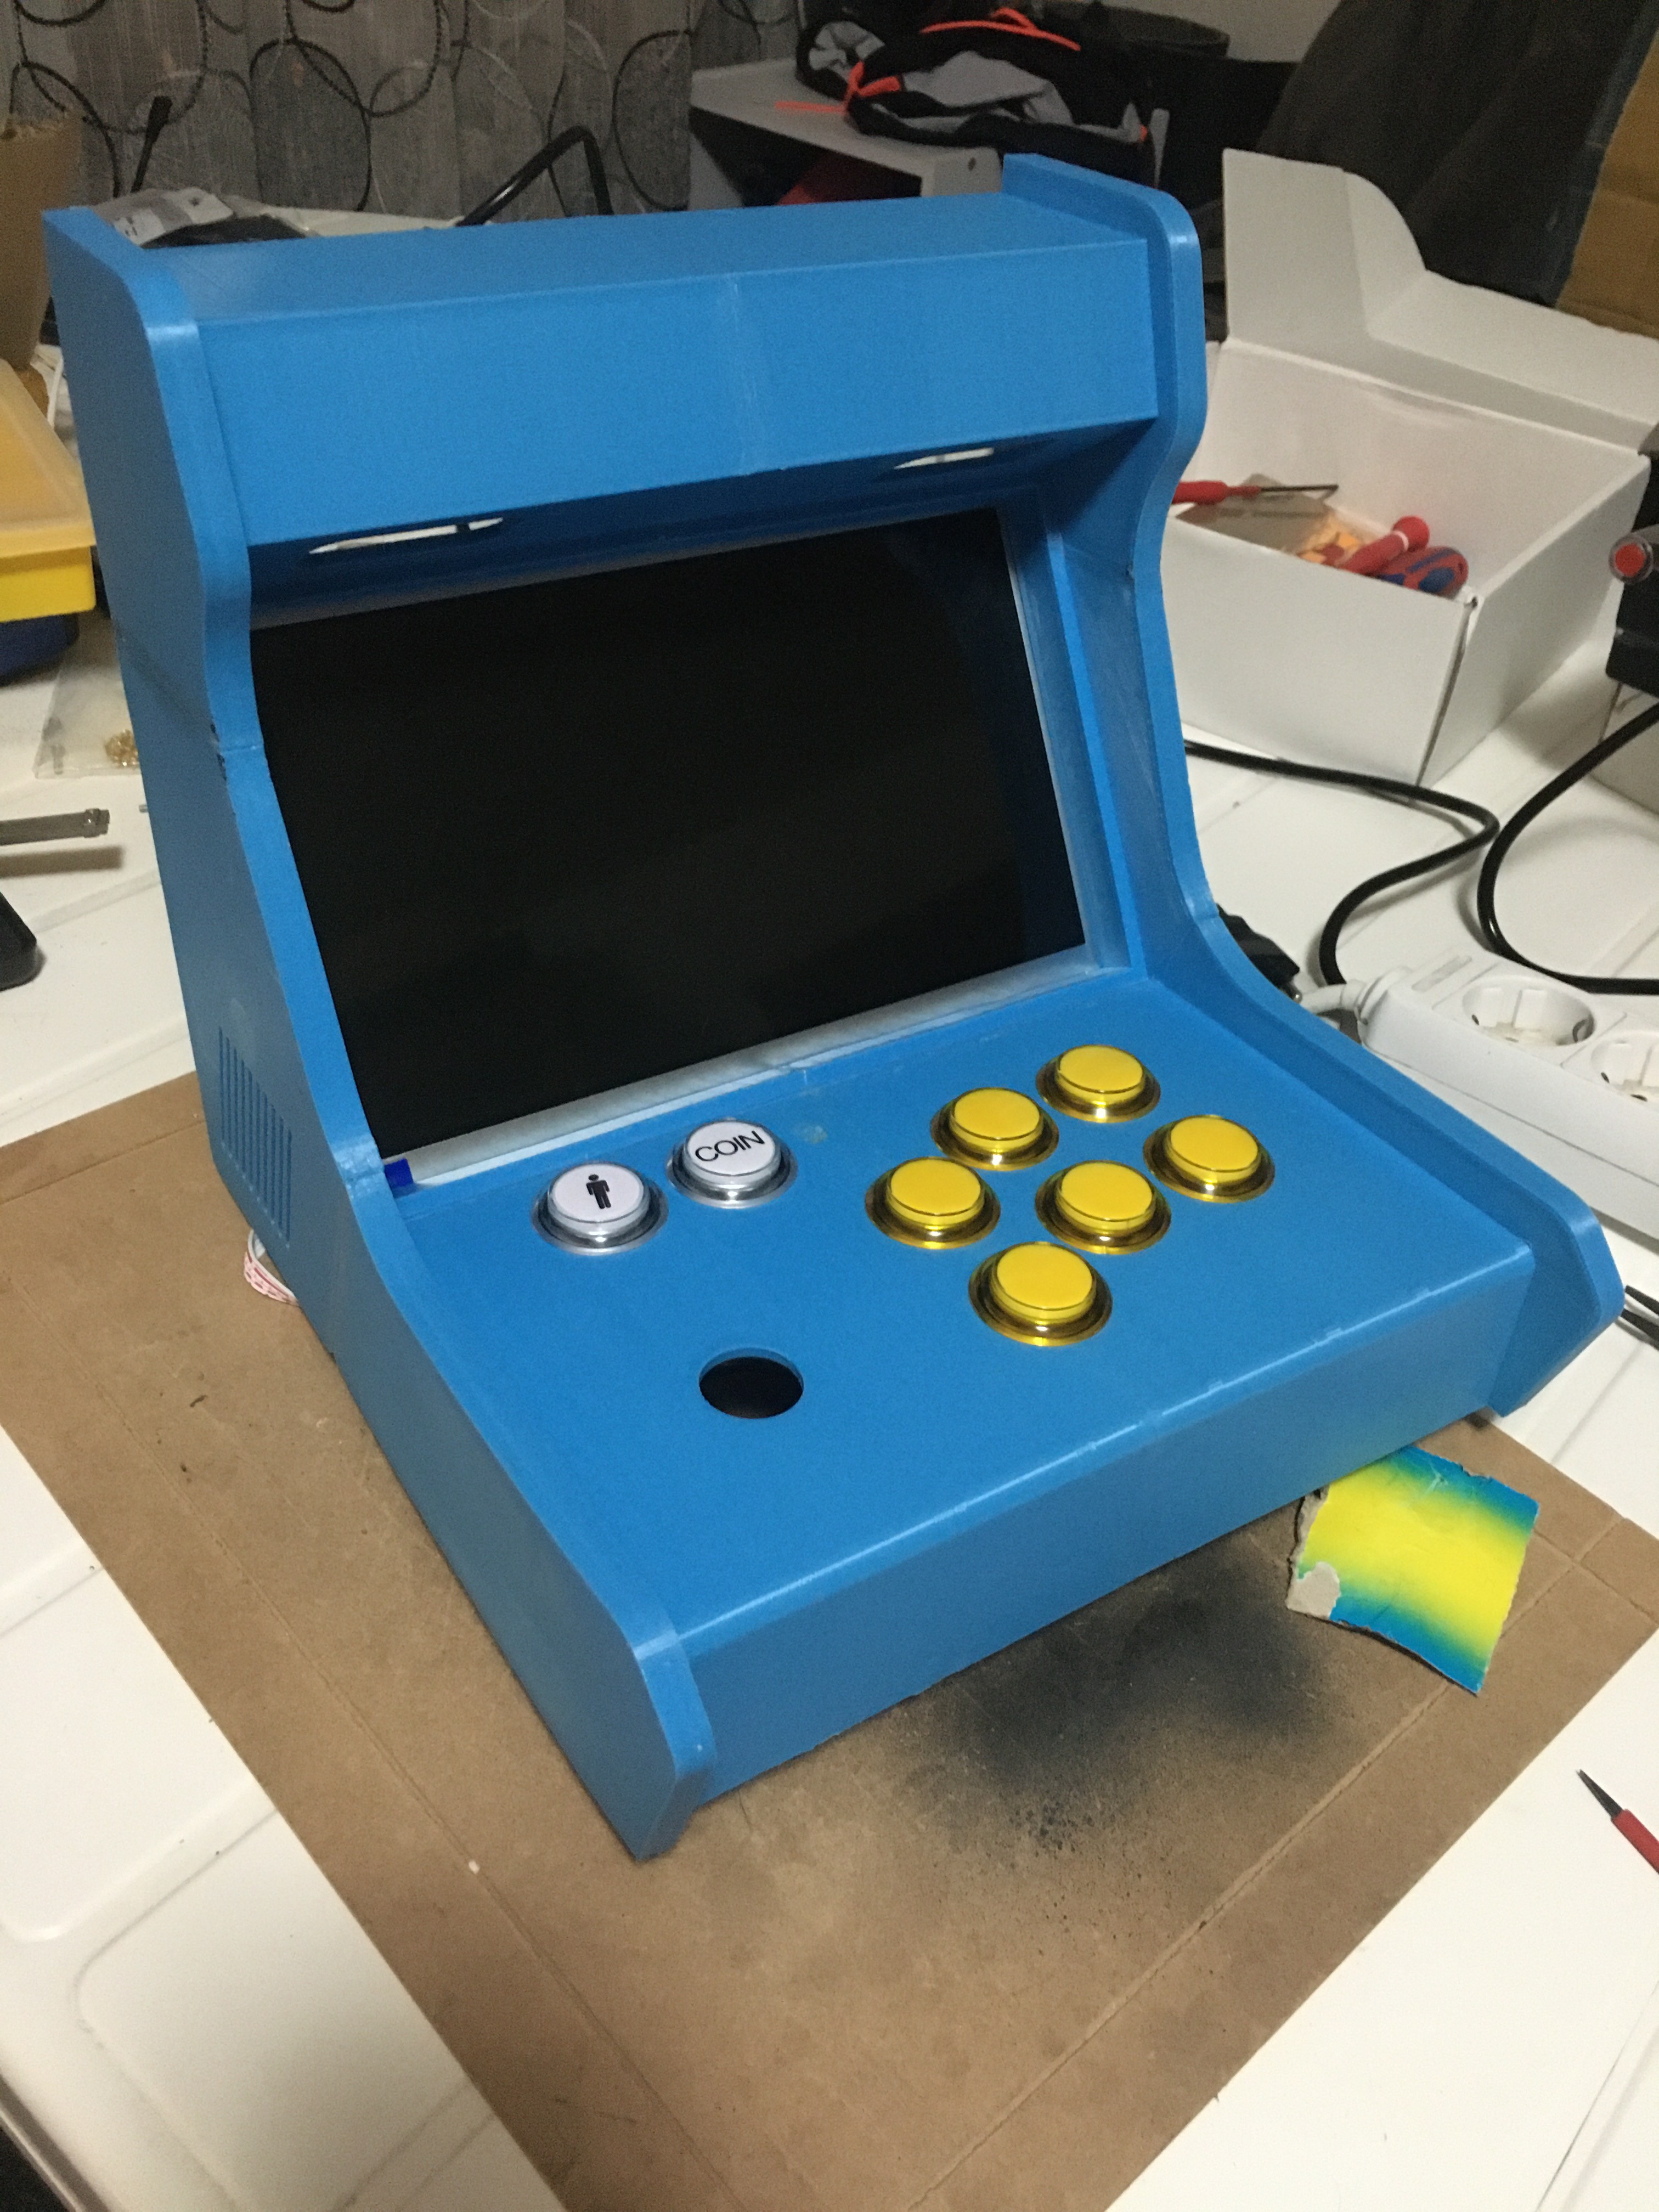
lorenThe project is done! Although I haven't created yet detailed instructions, I've added all the needed STL files to this Hackaday page. Let me know if you build one, I'll be amazed to see your Dualcade and feature it here!
0%
0%
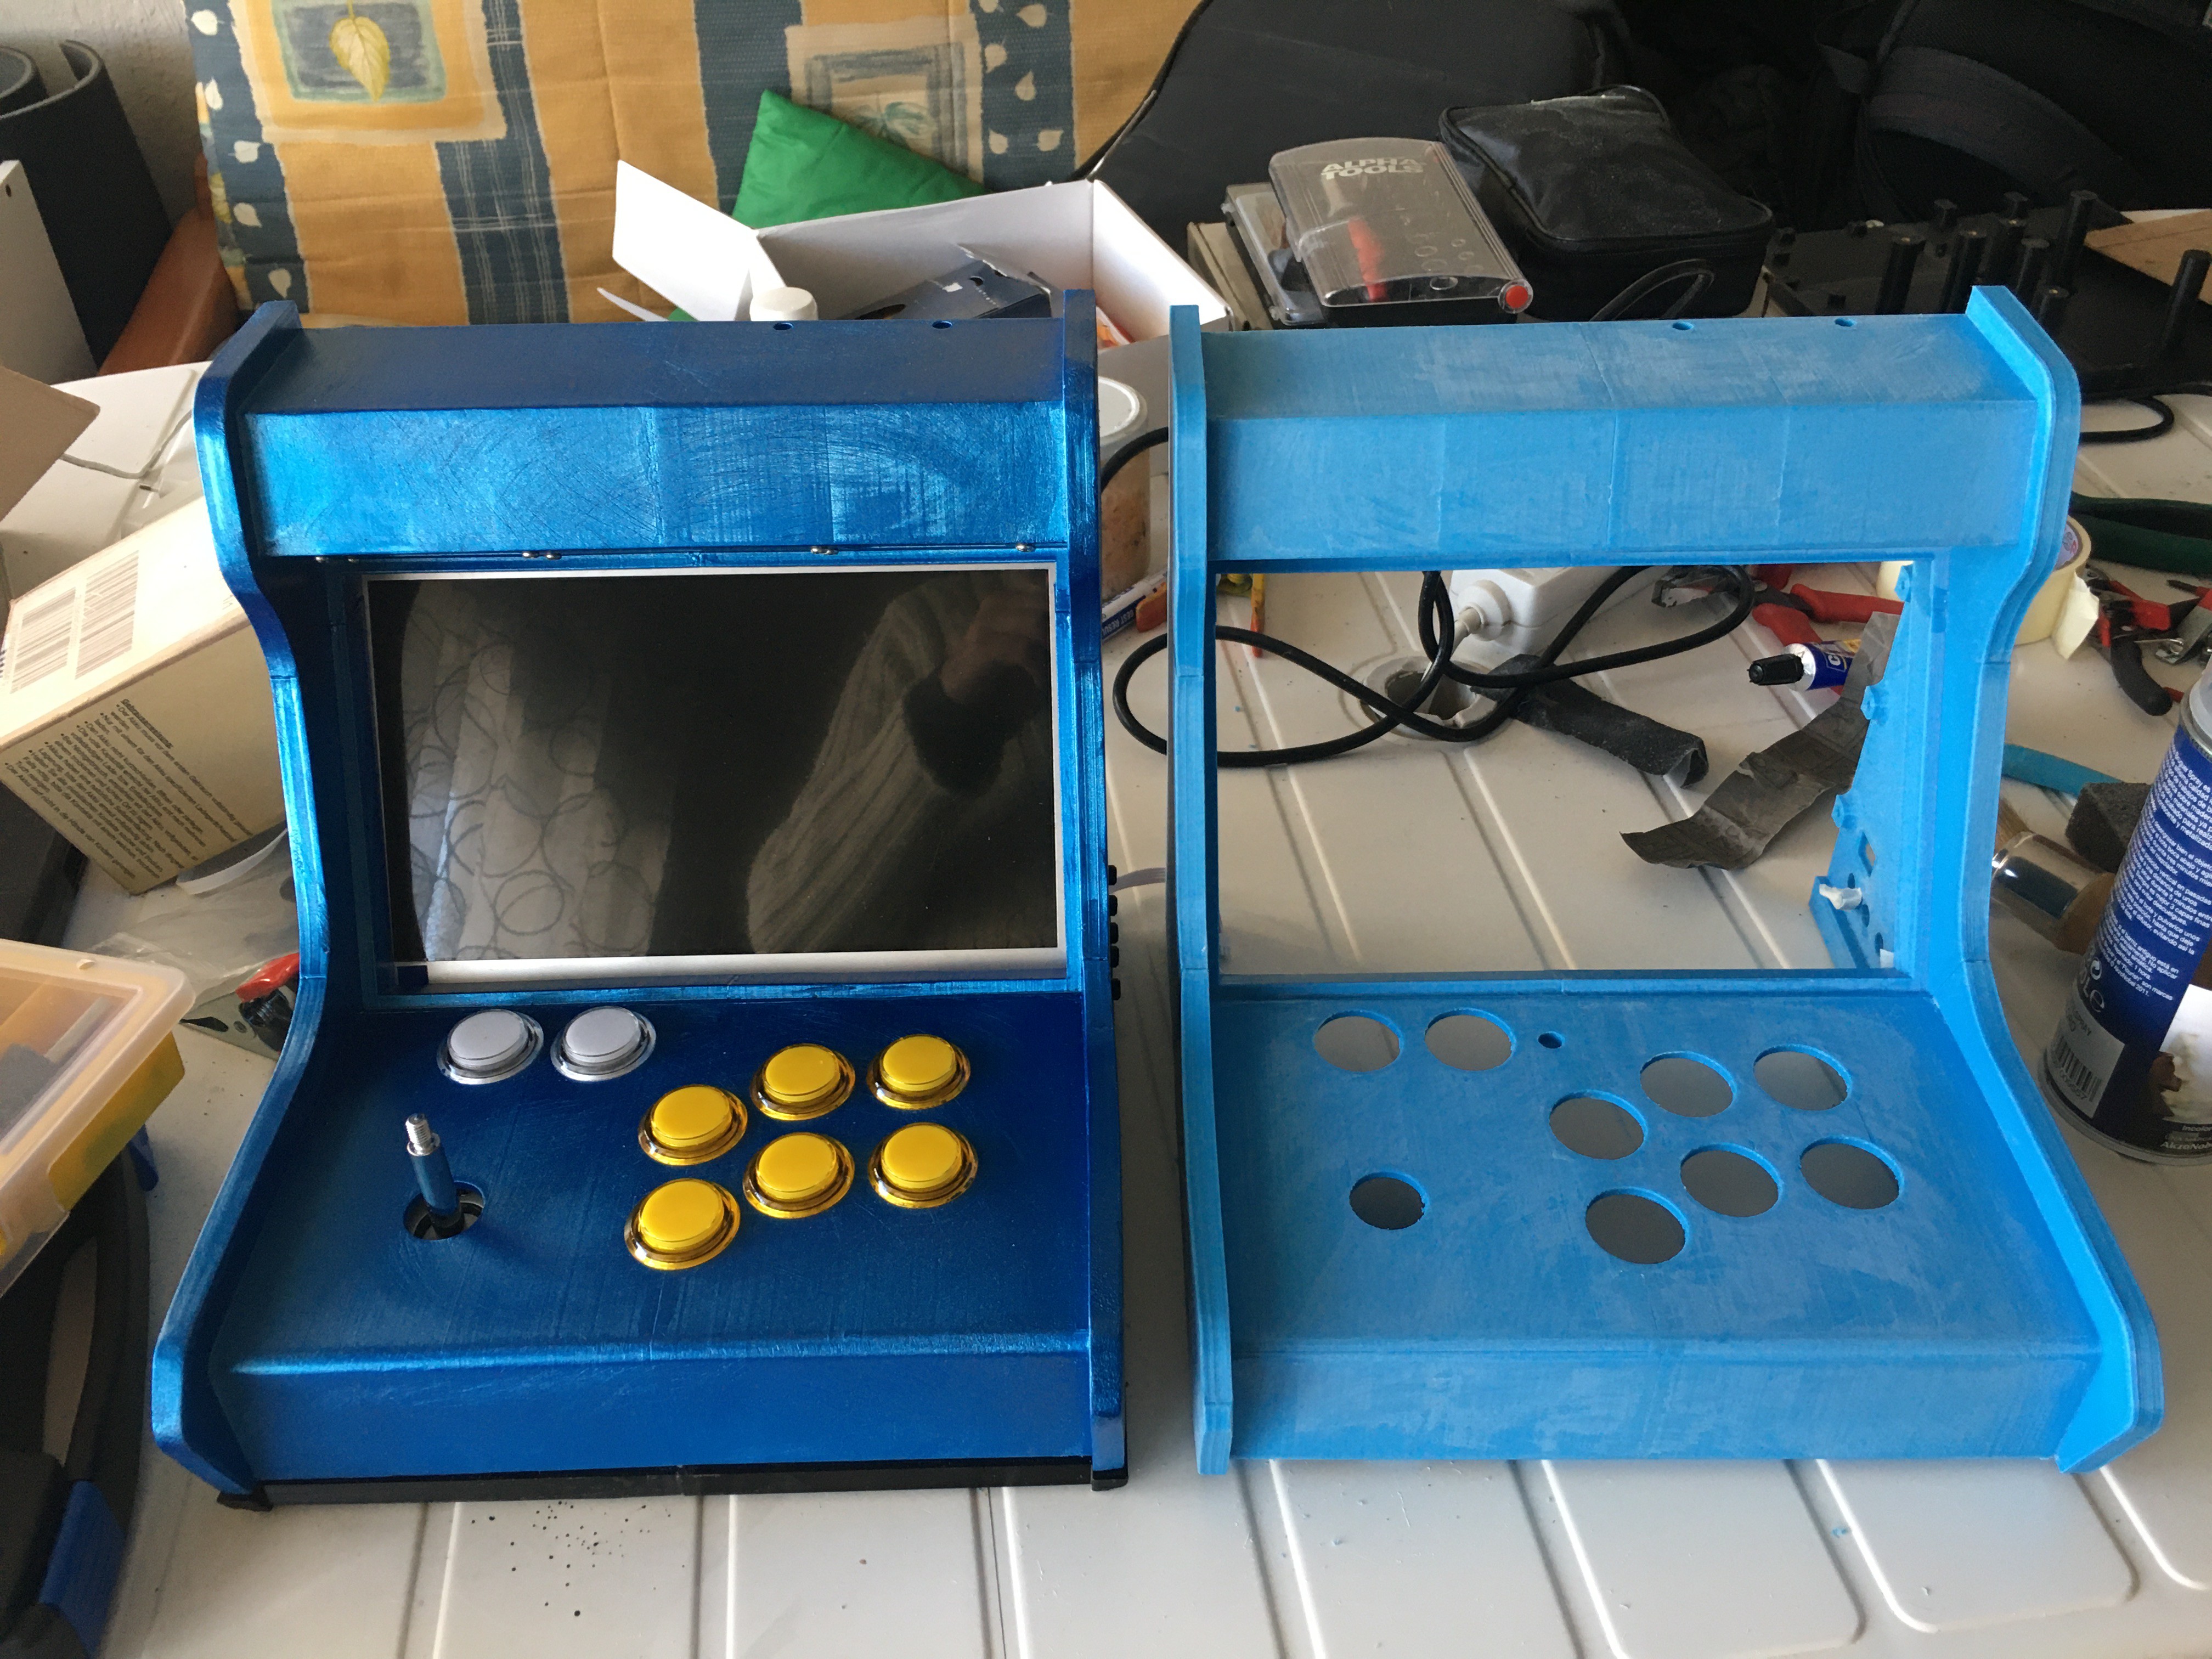
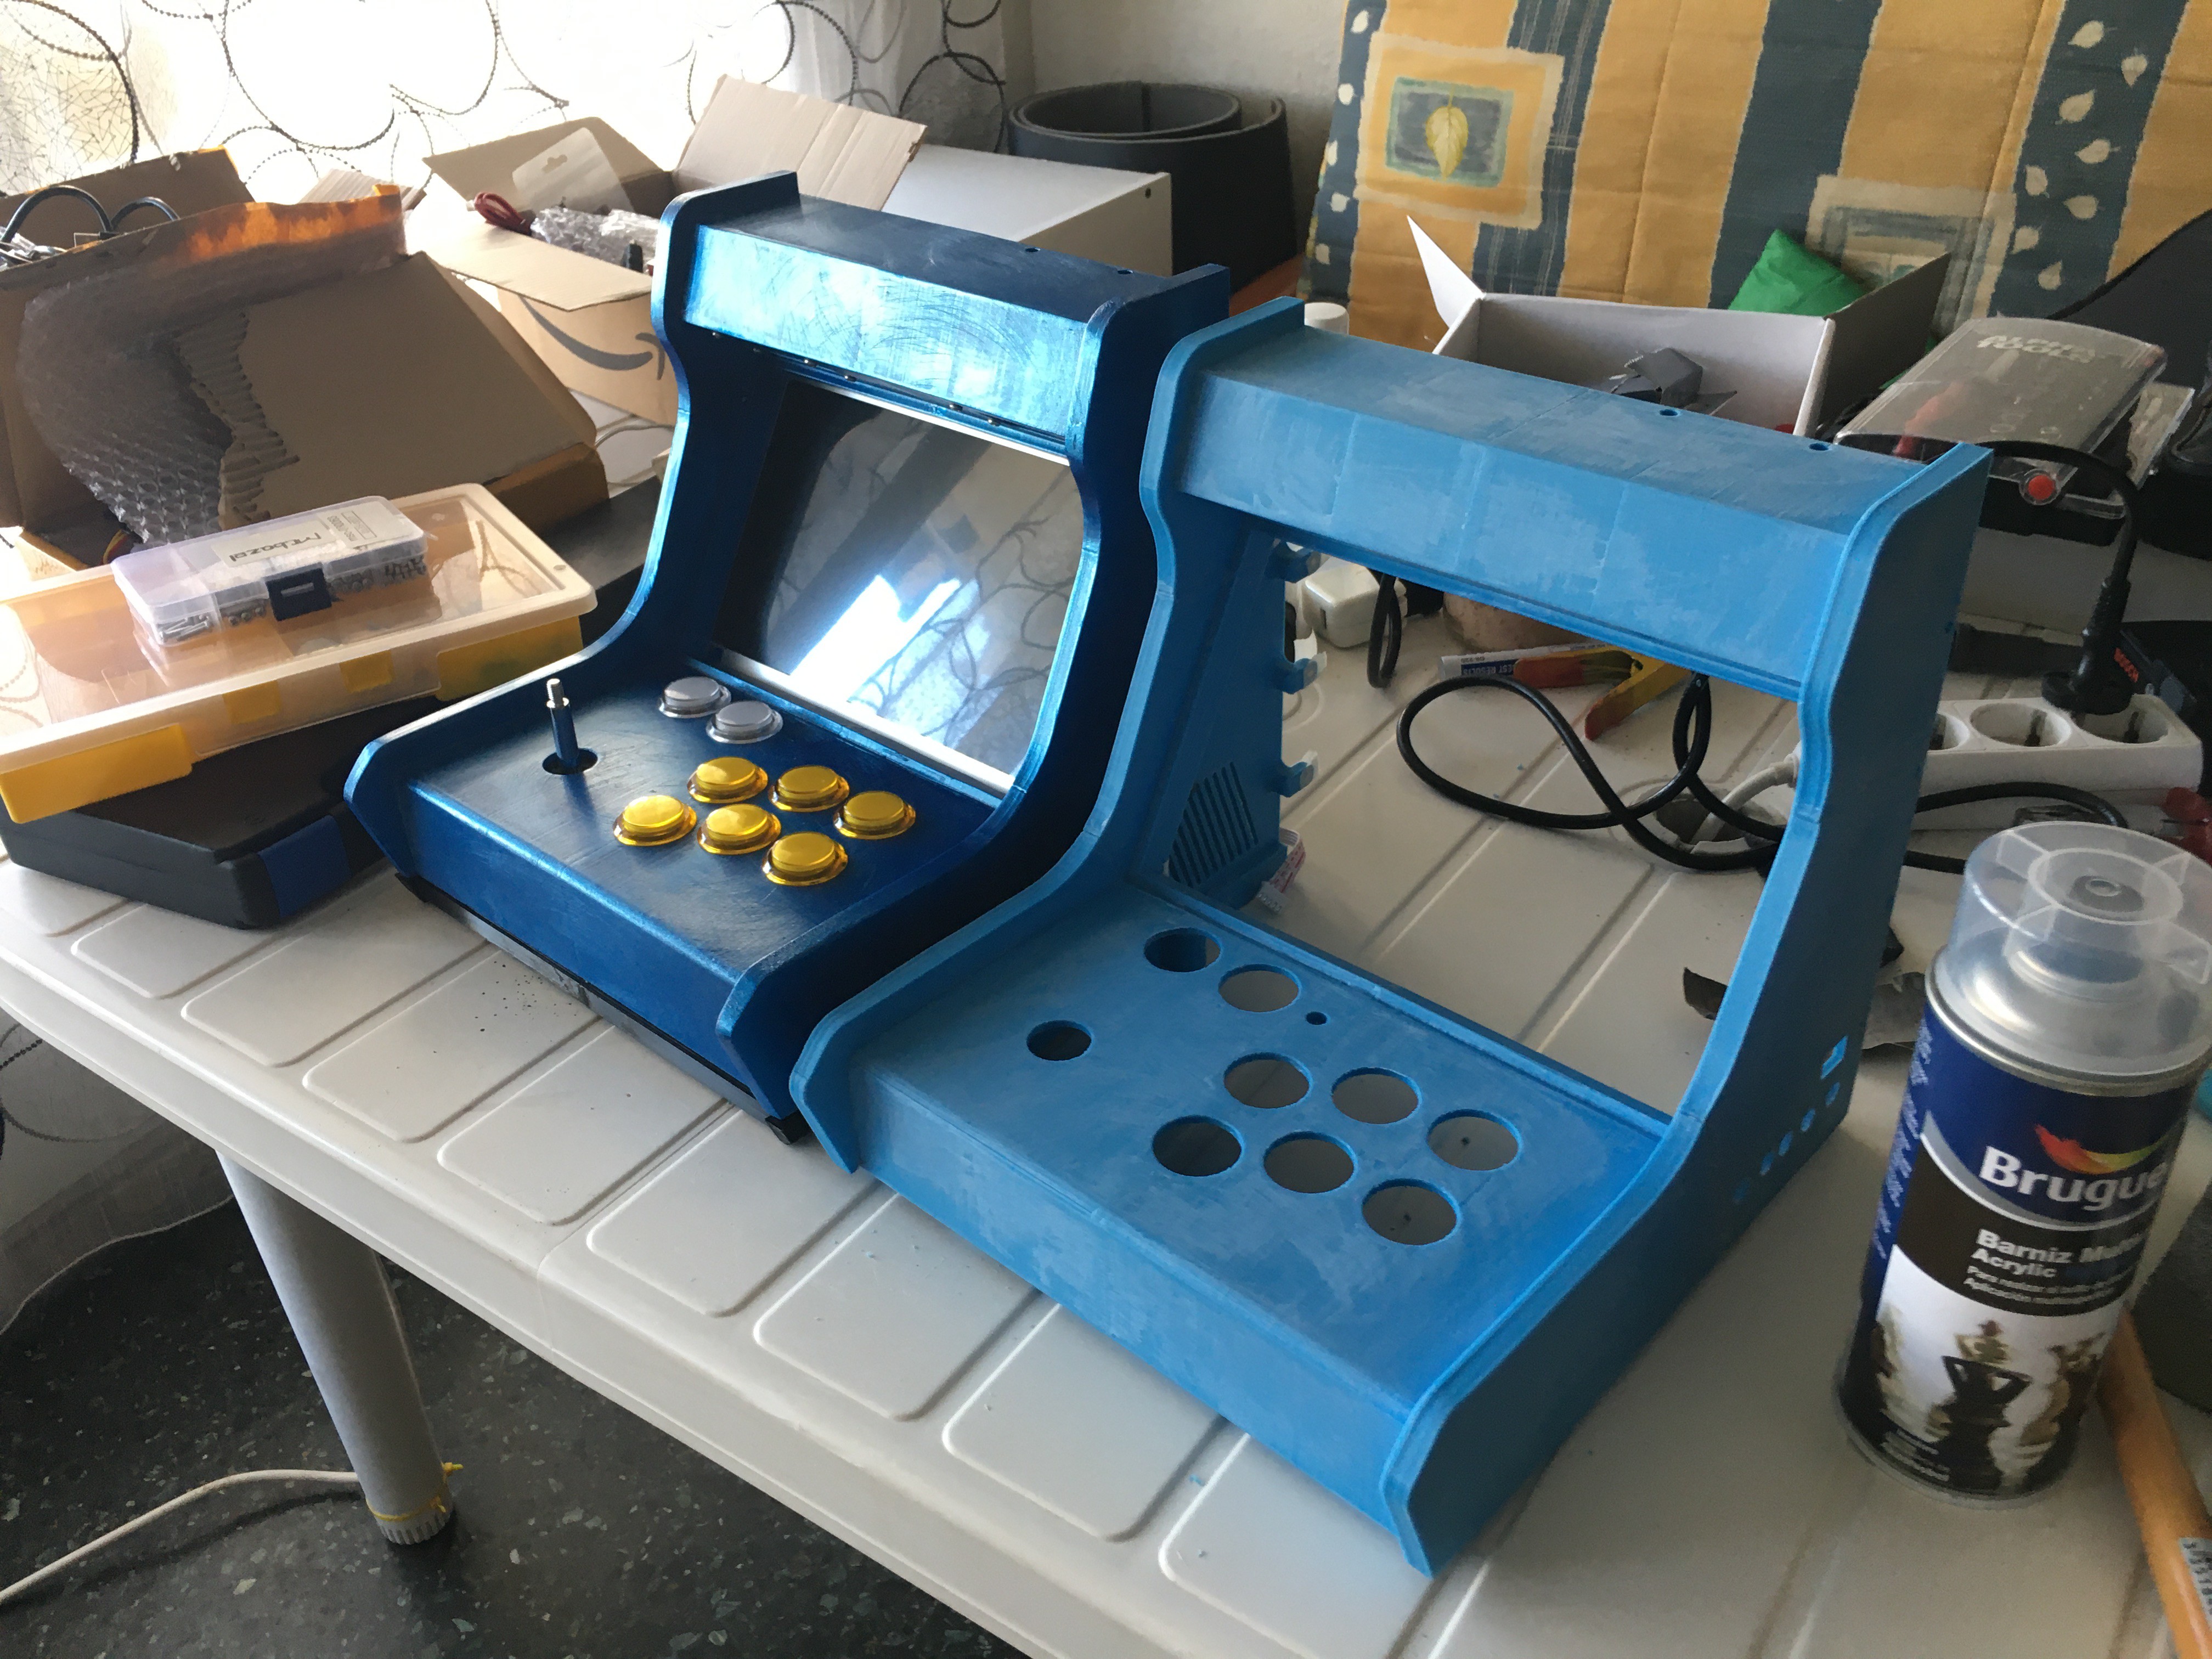
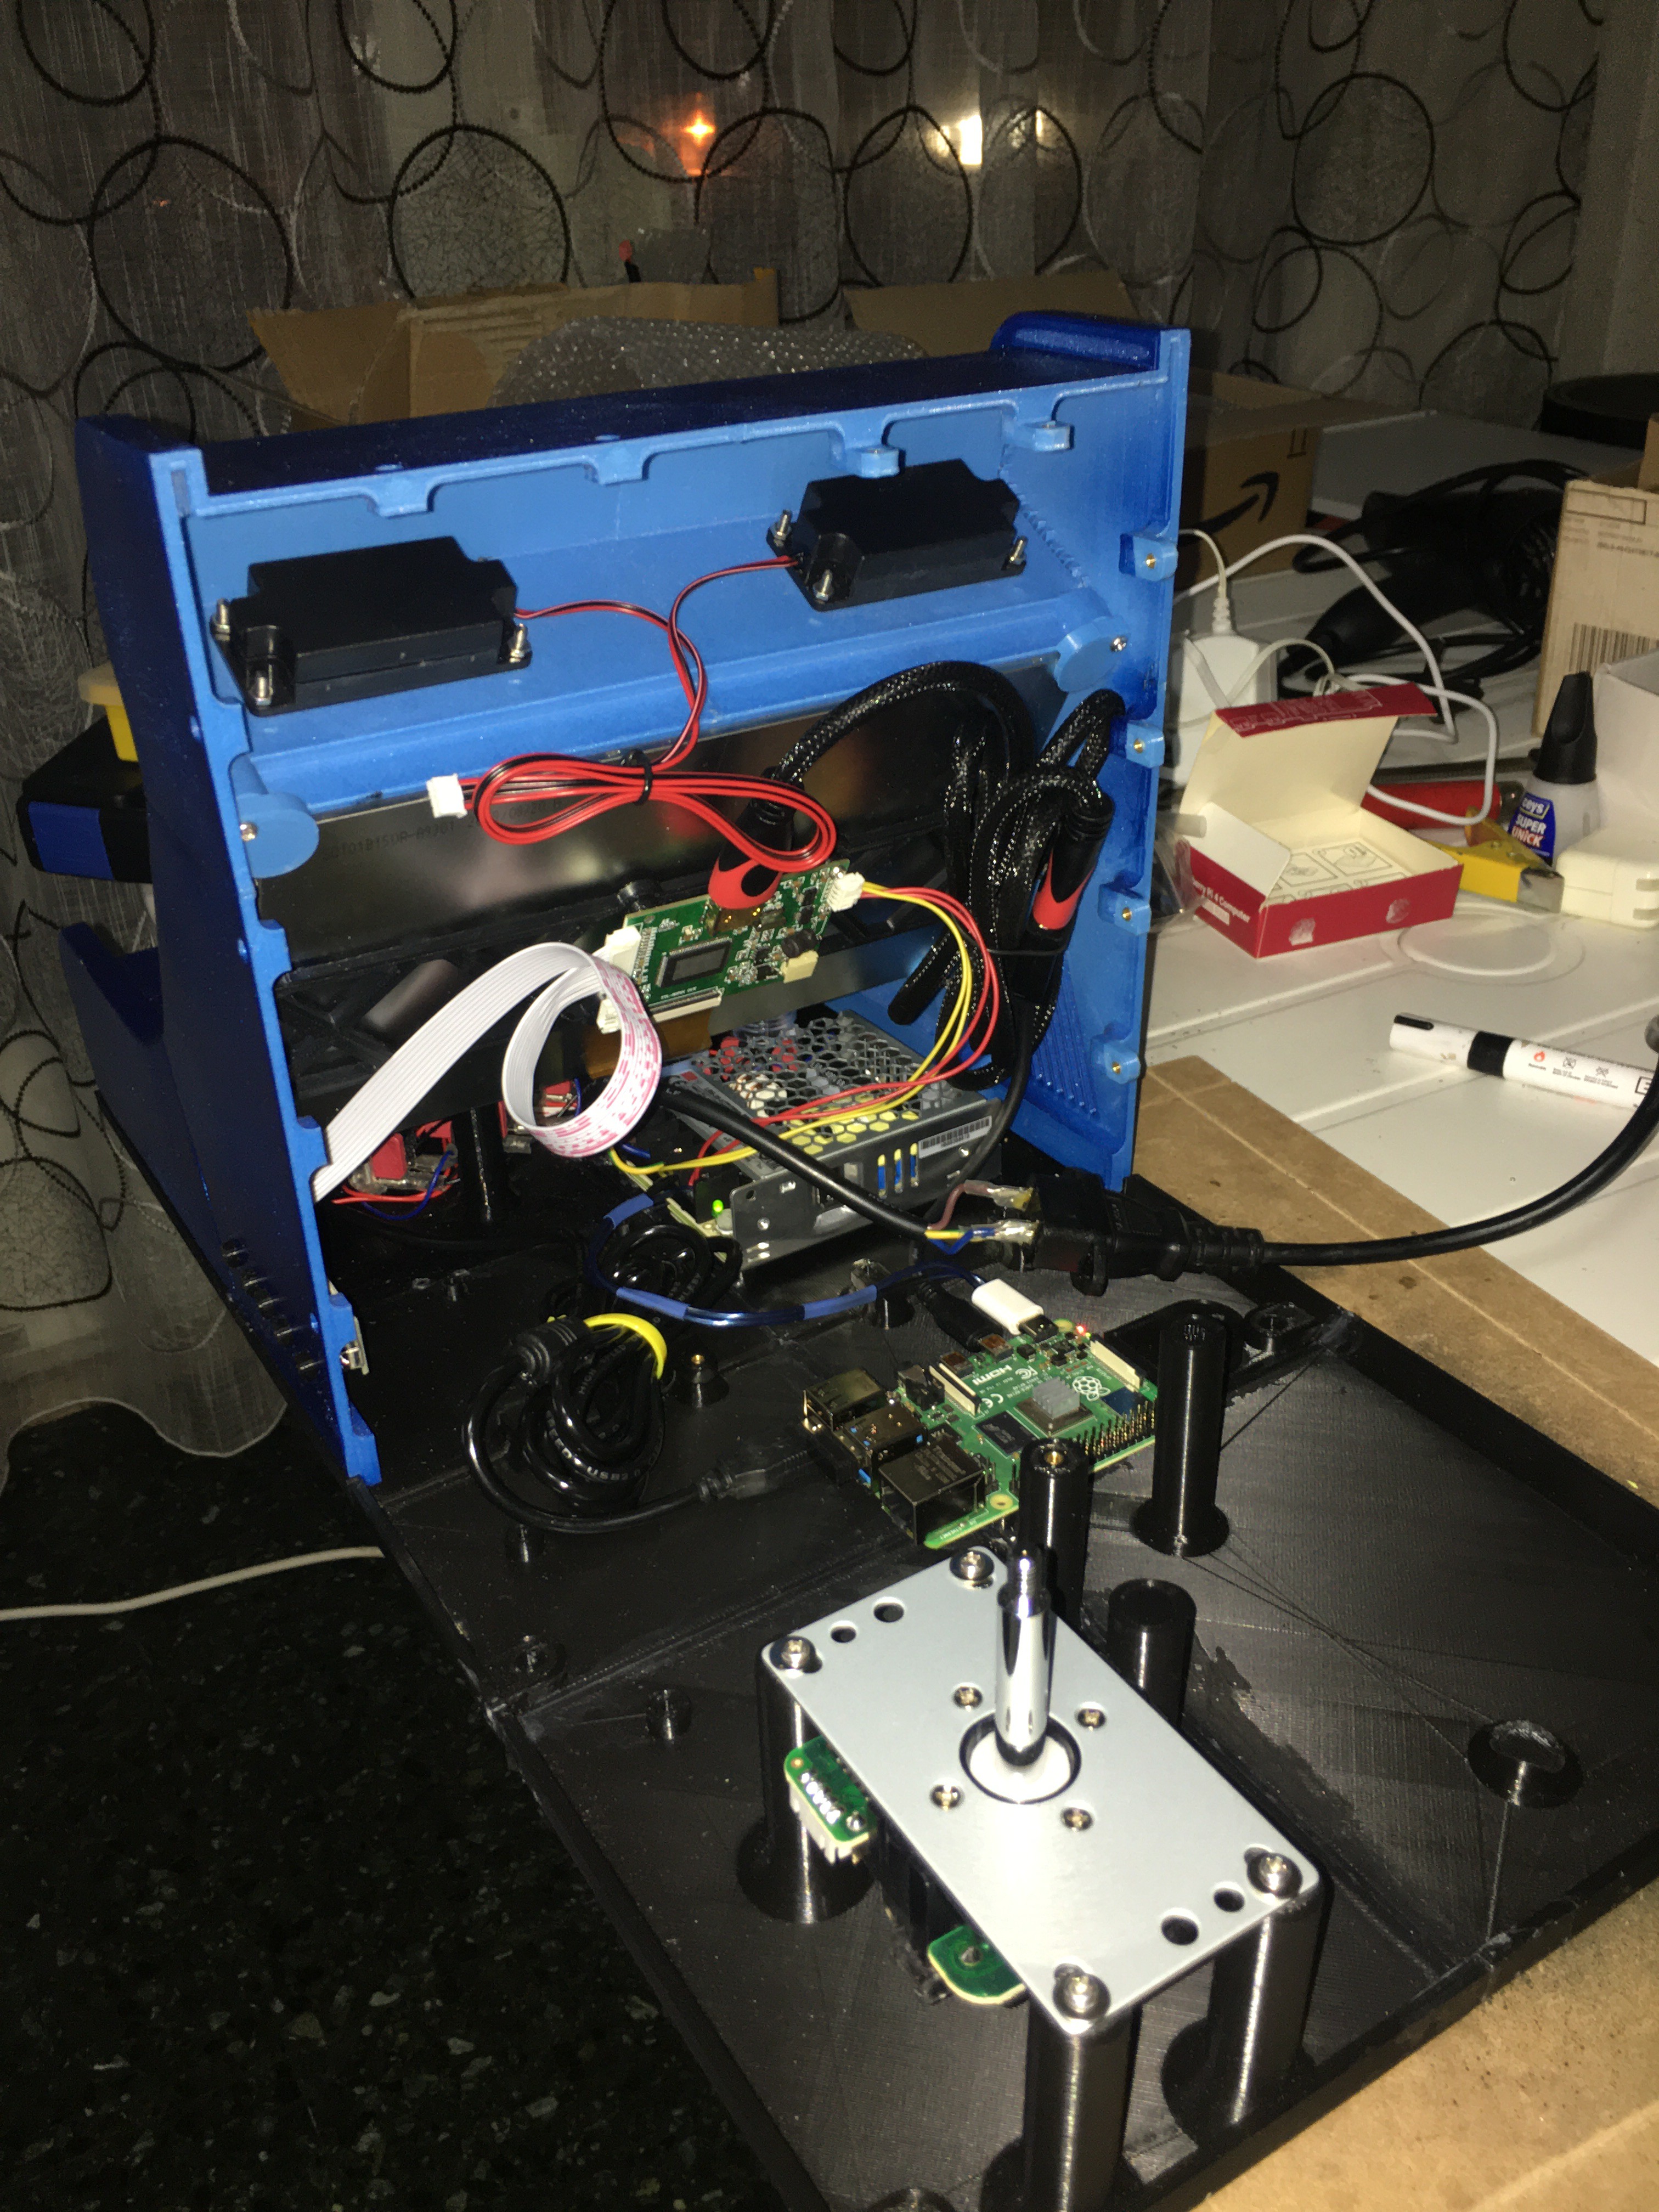
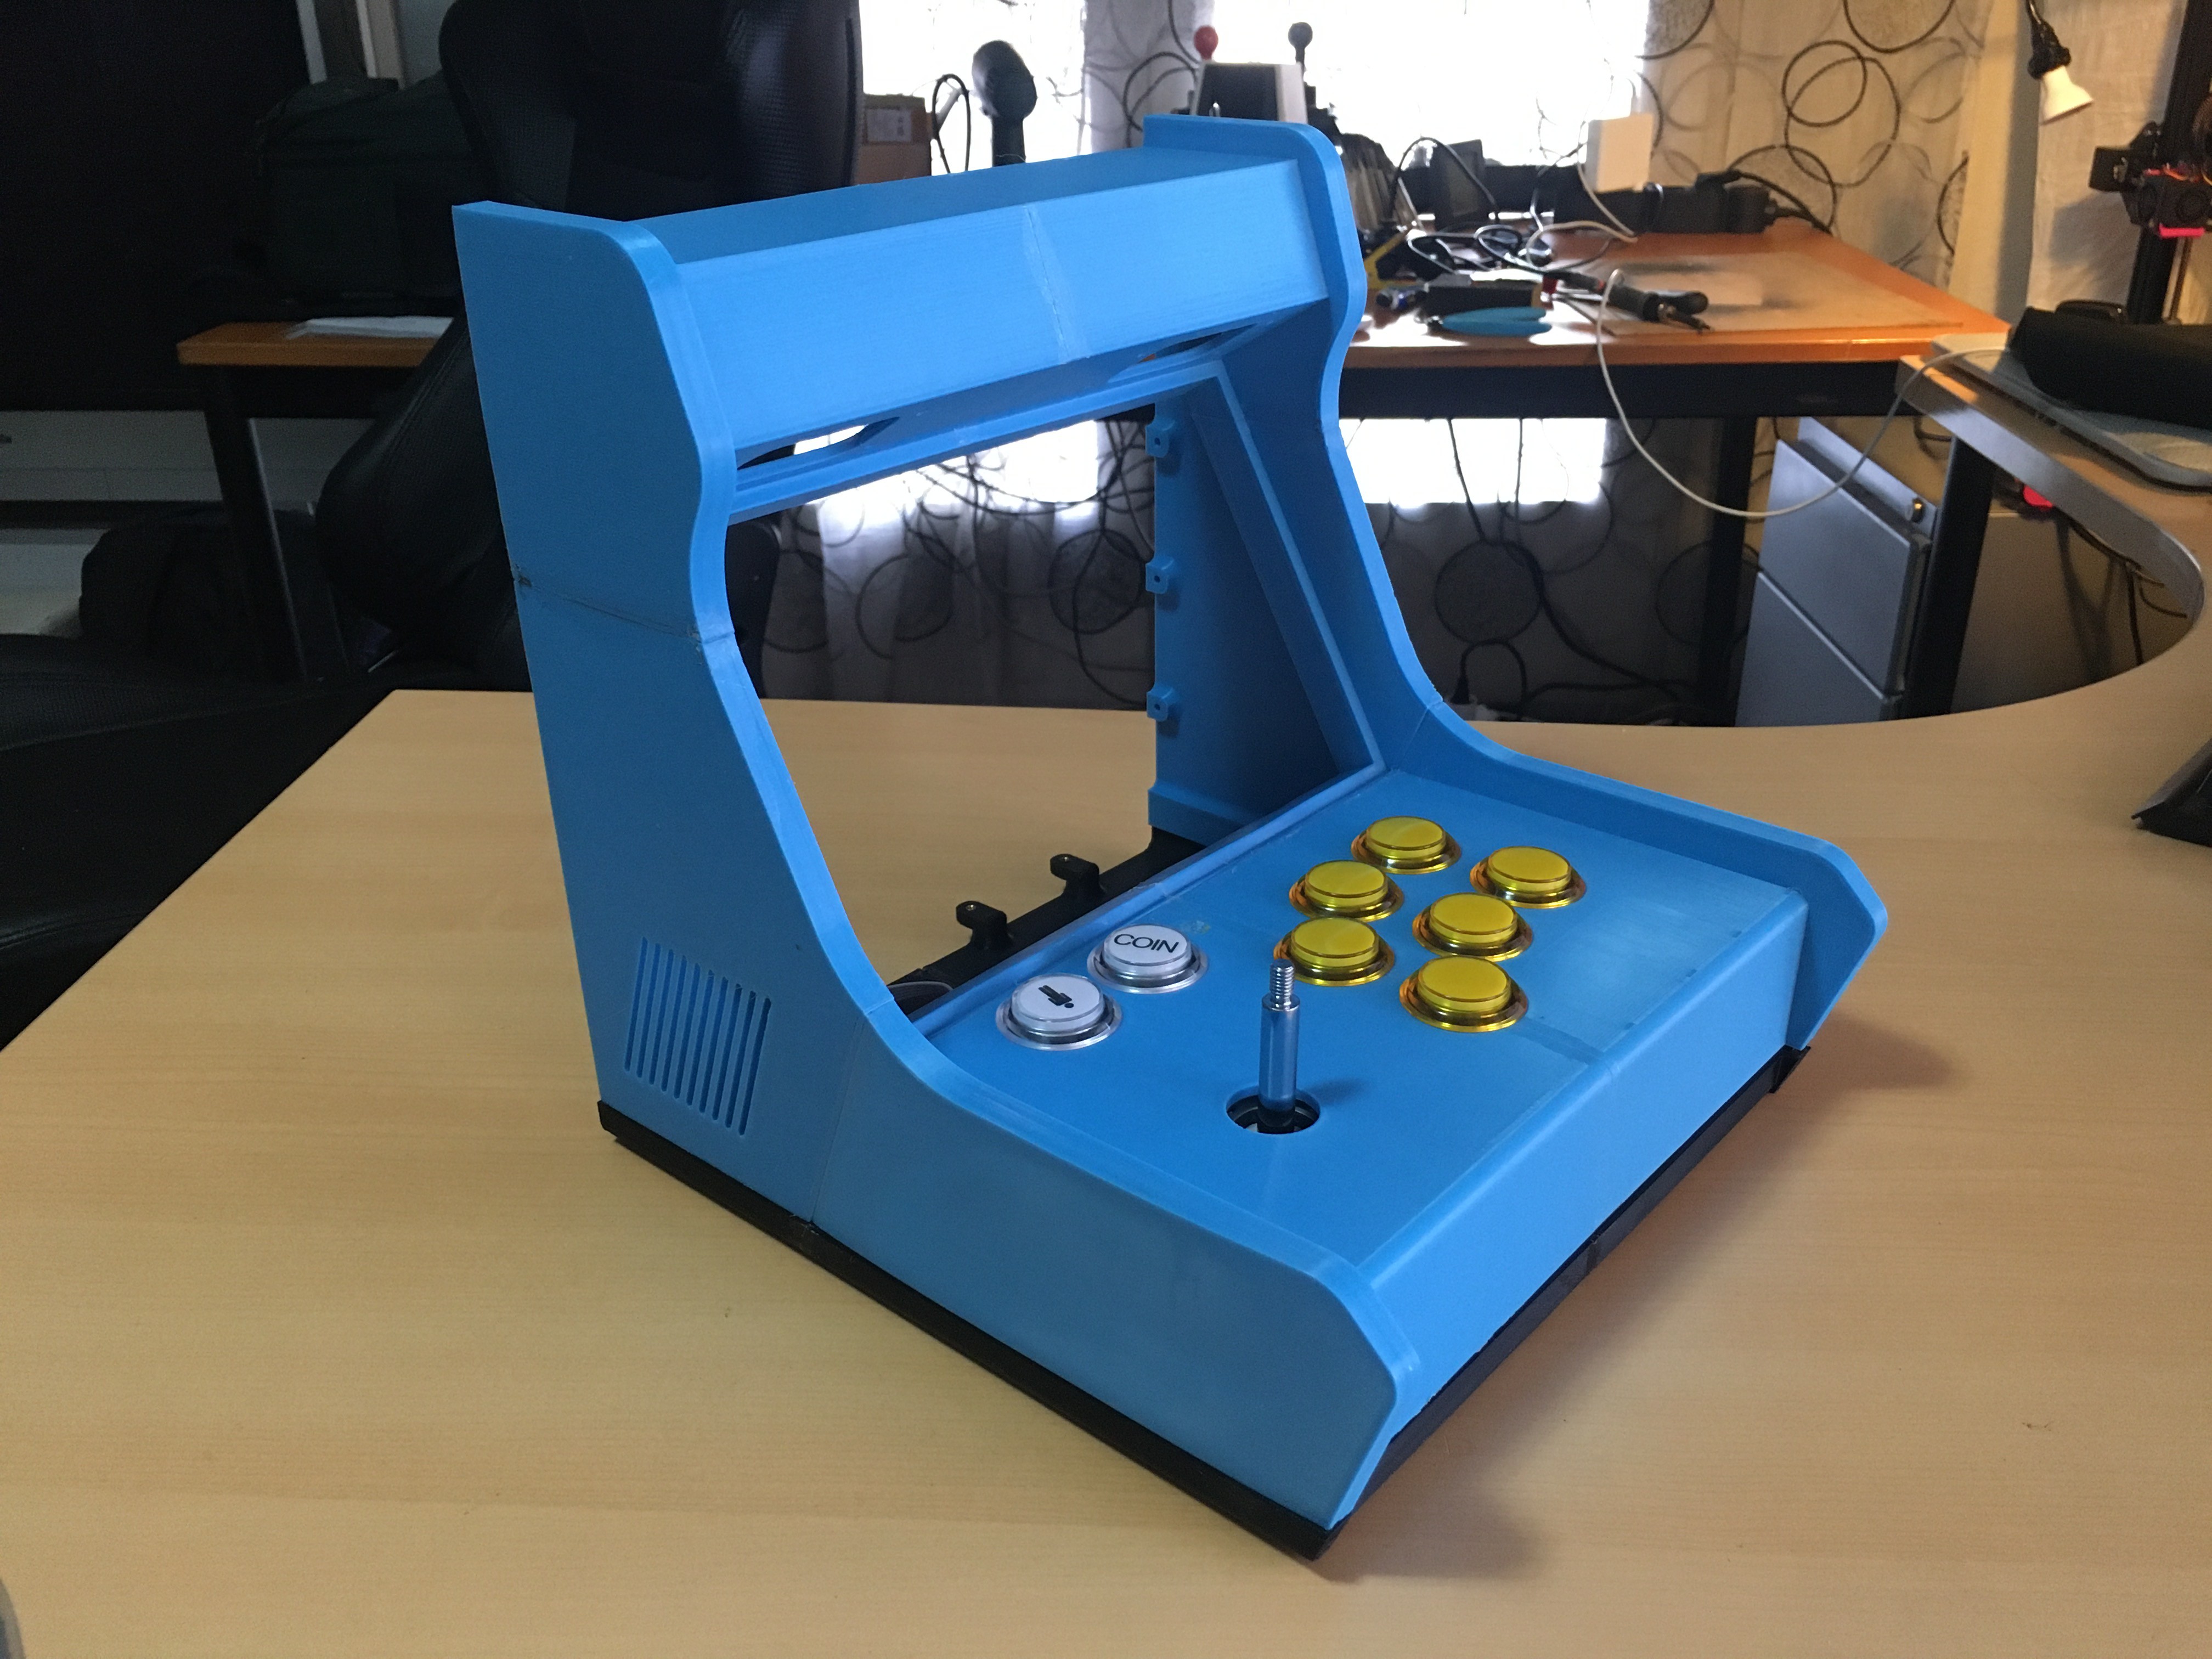
Dualcade
A do-it-yourself, 3D-printable, tabletop arcade cabinet to enjoy two-player games in the 80's arcade style. The perfect party ice-breaker!
Become a Hackaday.io member
Already have an account? Log in.
Just one more thing
To make the experience fit your profile, pick a username and tell us what interests you.
Pick an awesome username
hackaday.io/
Your profile's URL: hackaday.io/username. Max 25 alphanumeric characters.
Pick a few interests
Projects that share your interests
People that share your interests


 ProgressTH
 ProgressTH
 Lex Kravitz