 Ahron Wayne
In the original LadyBug, I used a teeny tiny stepper motor to add rotational capability for not just 2D scanning, but 3D scanning of a small sample:
I wanted to do the same thing here. So I made a bracket for a standard Nema Stepper motor:
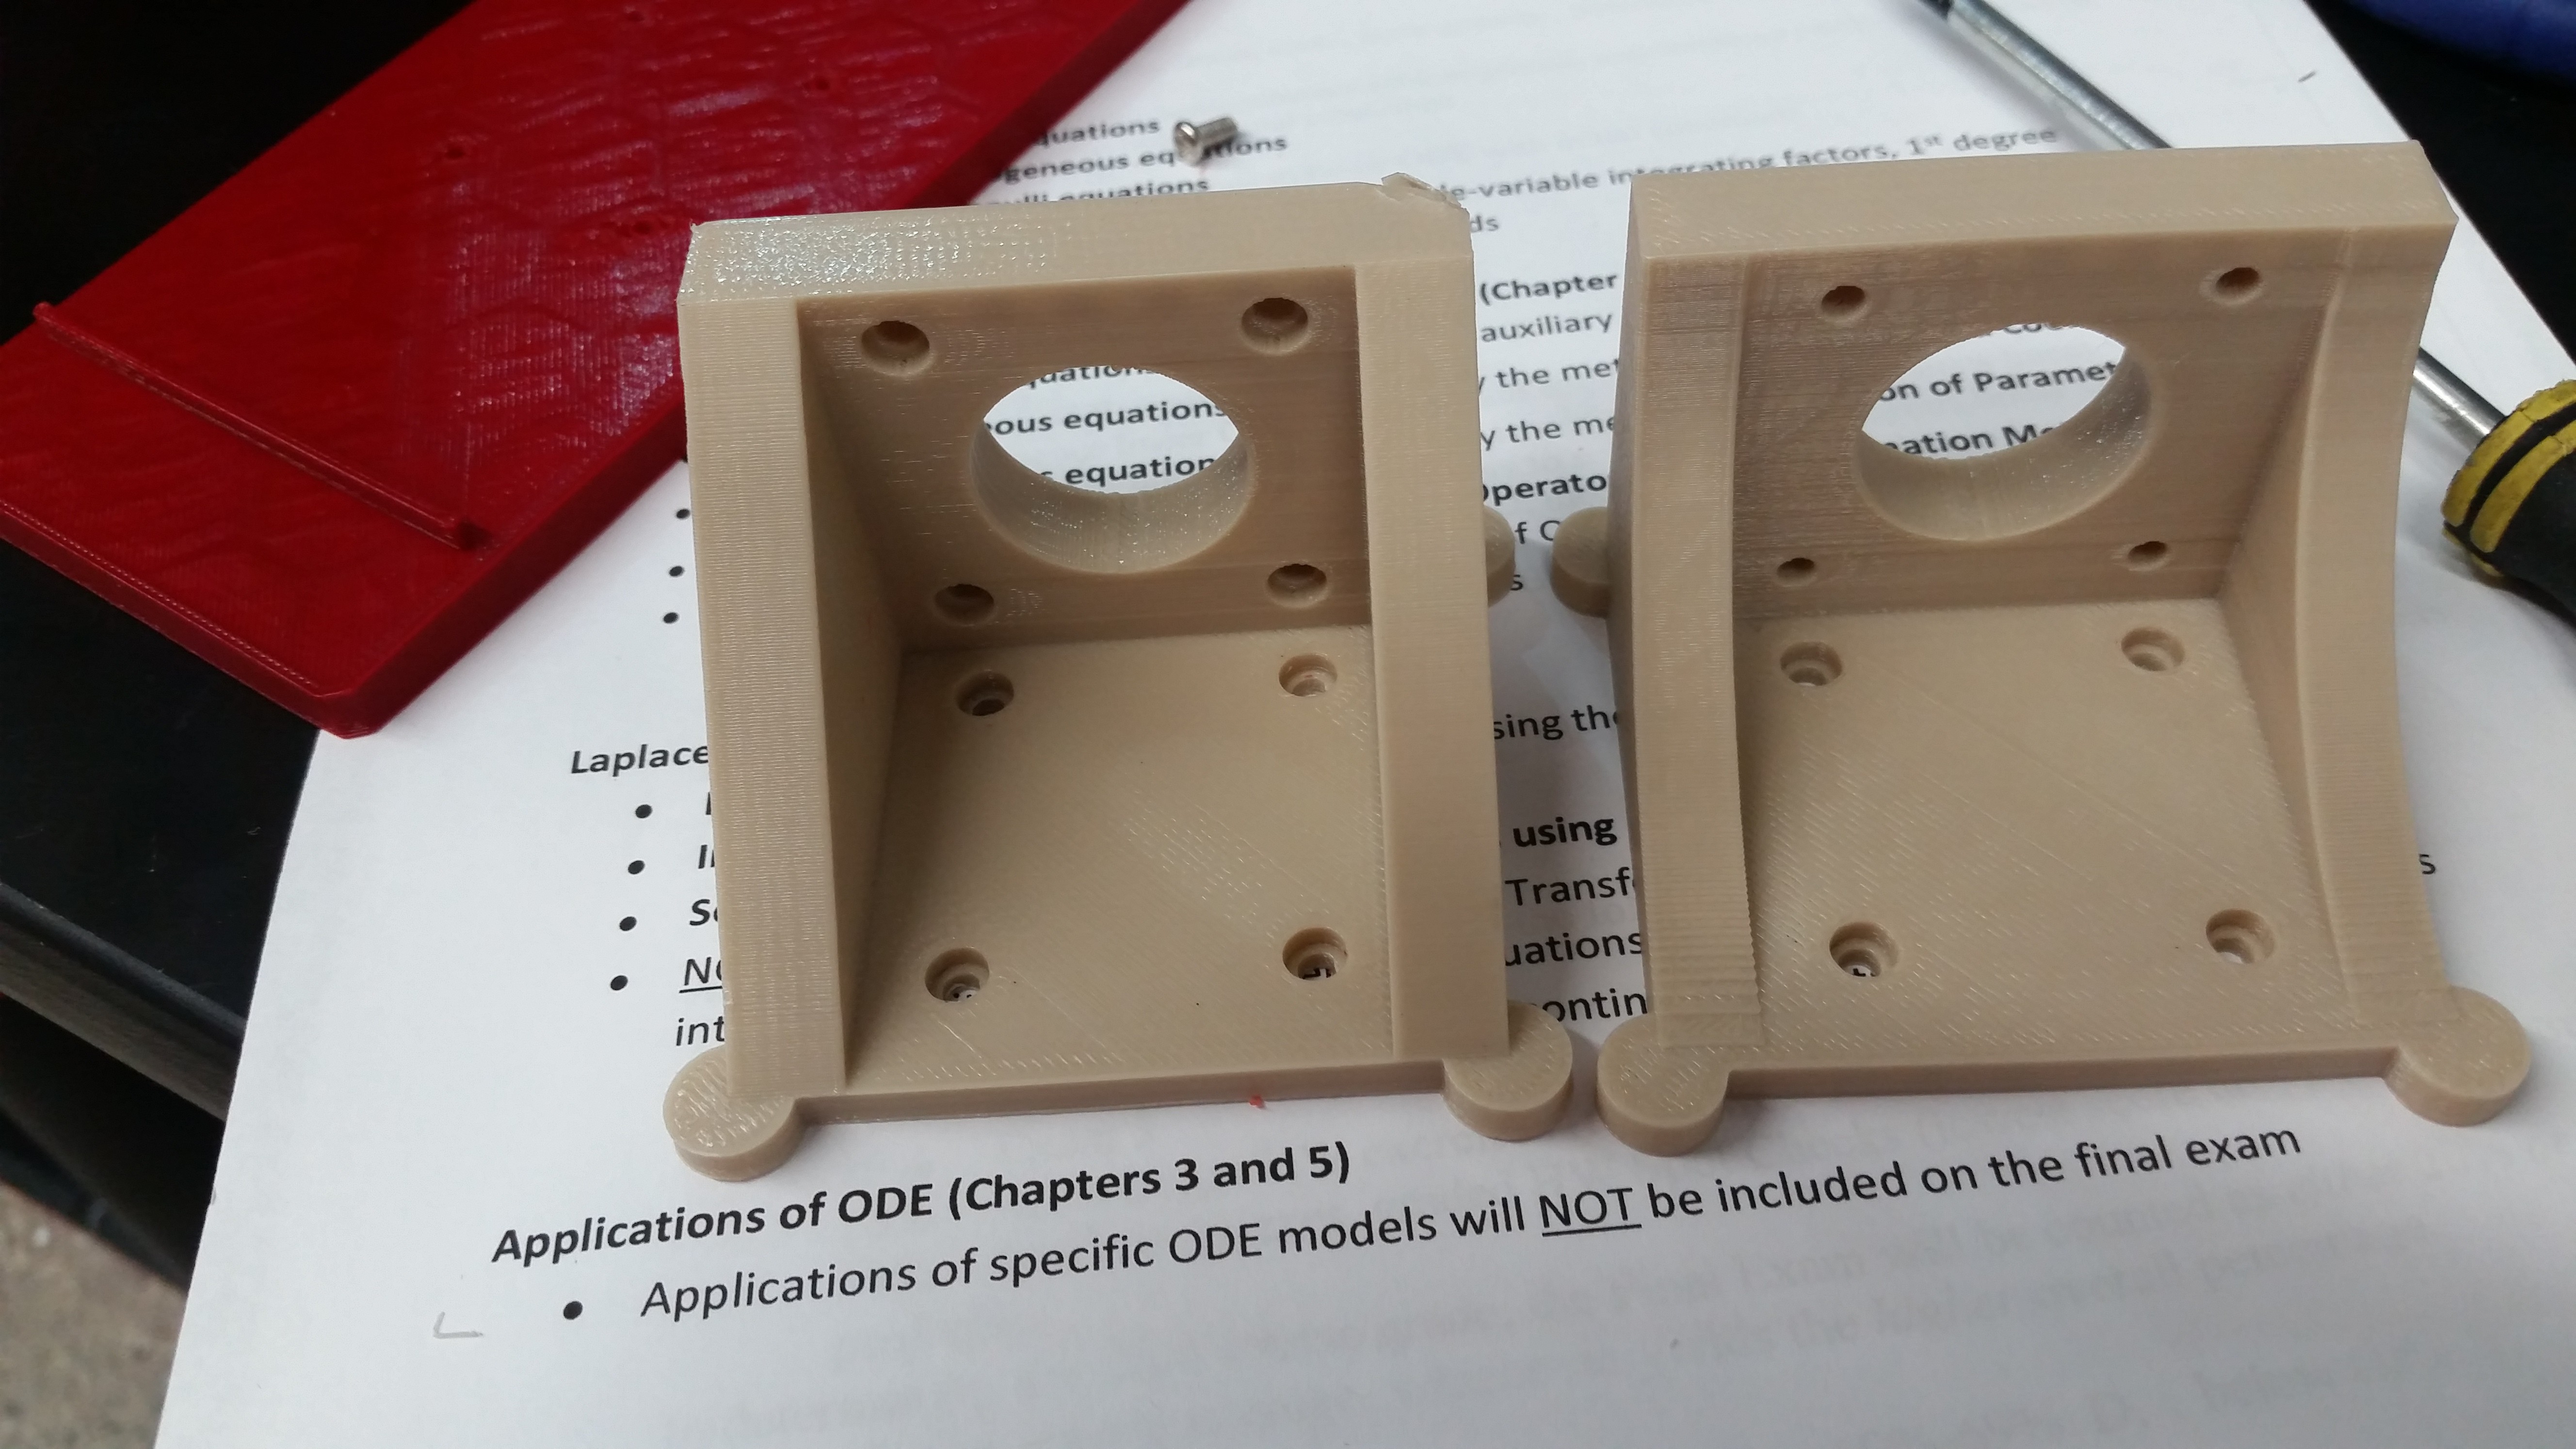
(first version to left had big old triangles that got in the way, and recessed holes were on the wrong side. Fixed on the one on the right).
The bracket screws into the red piece on the background, which I made to fit into where the removable printer build plate would slide in. Much easier to install and remove for switching back and fourth between 3D and 2D scanning.
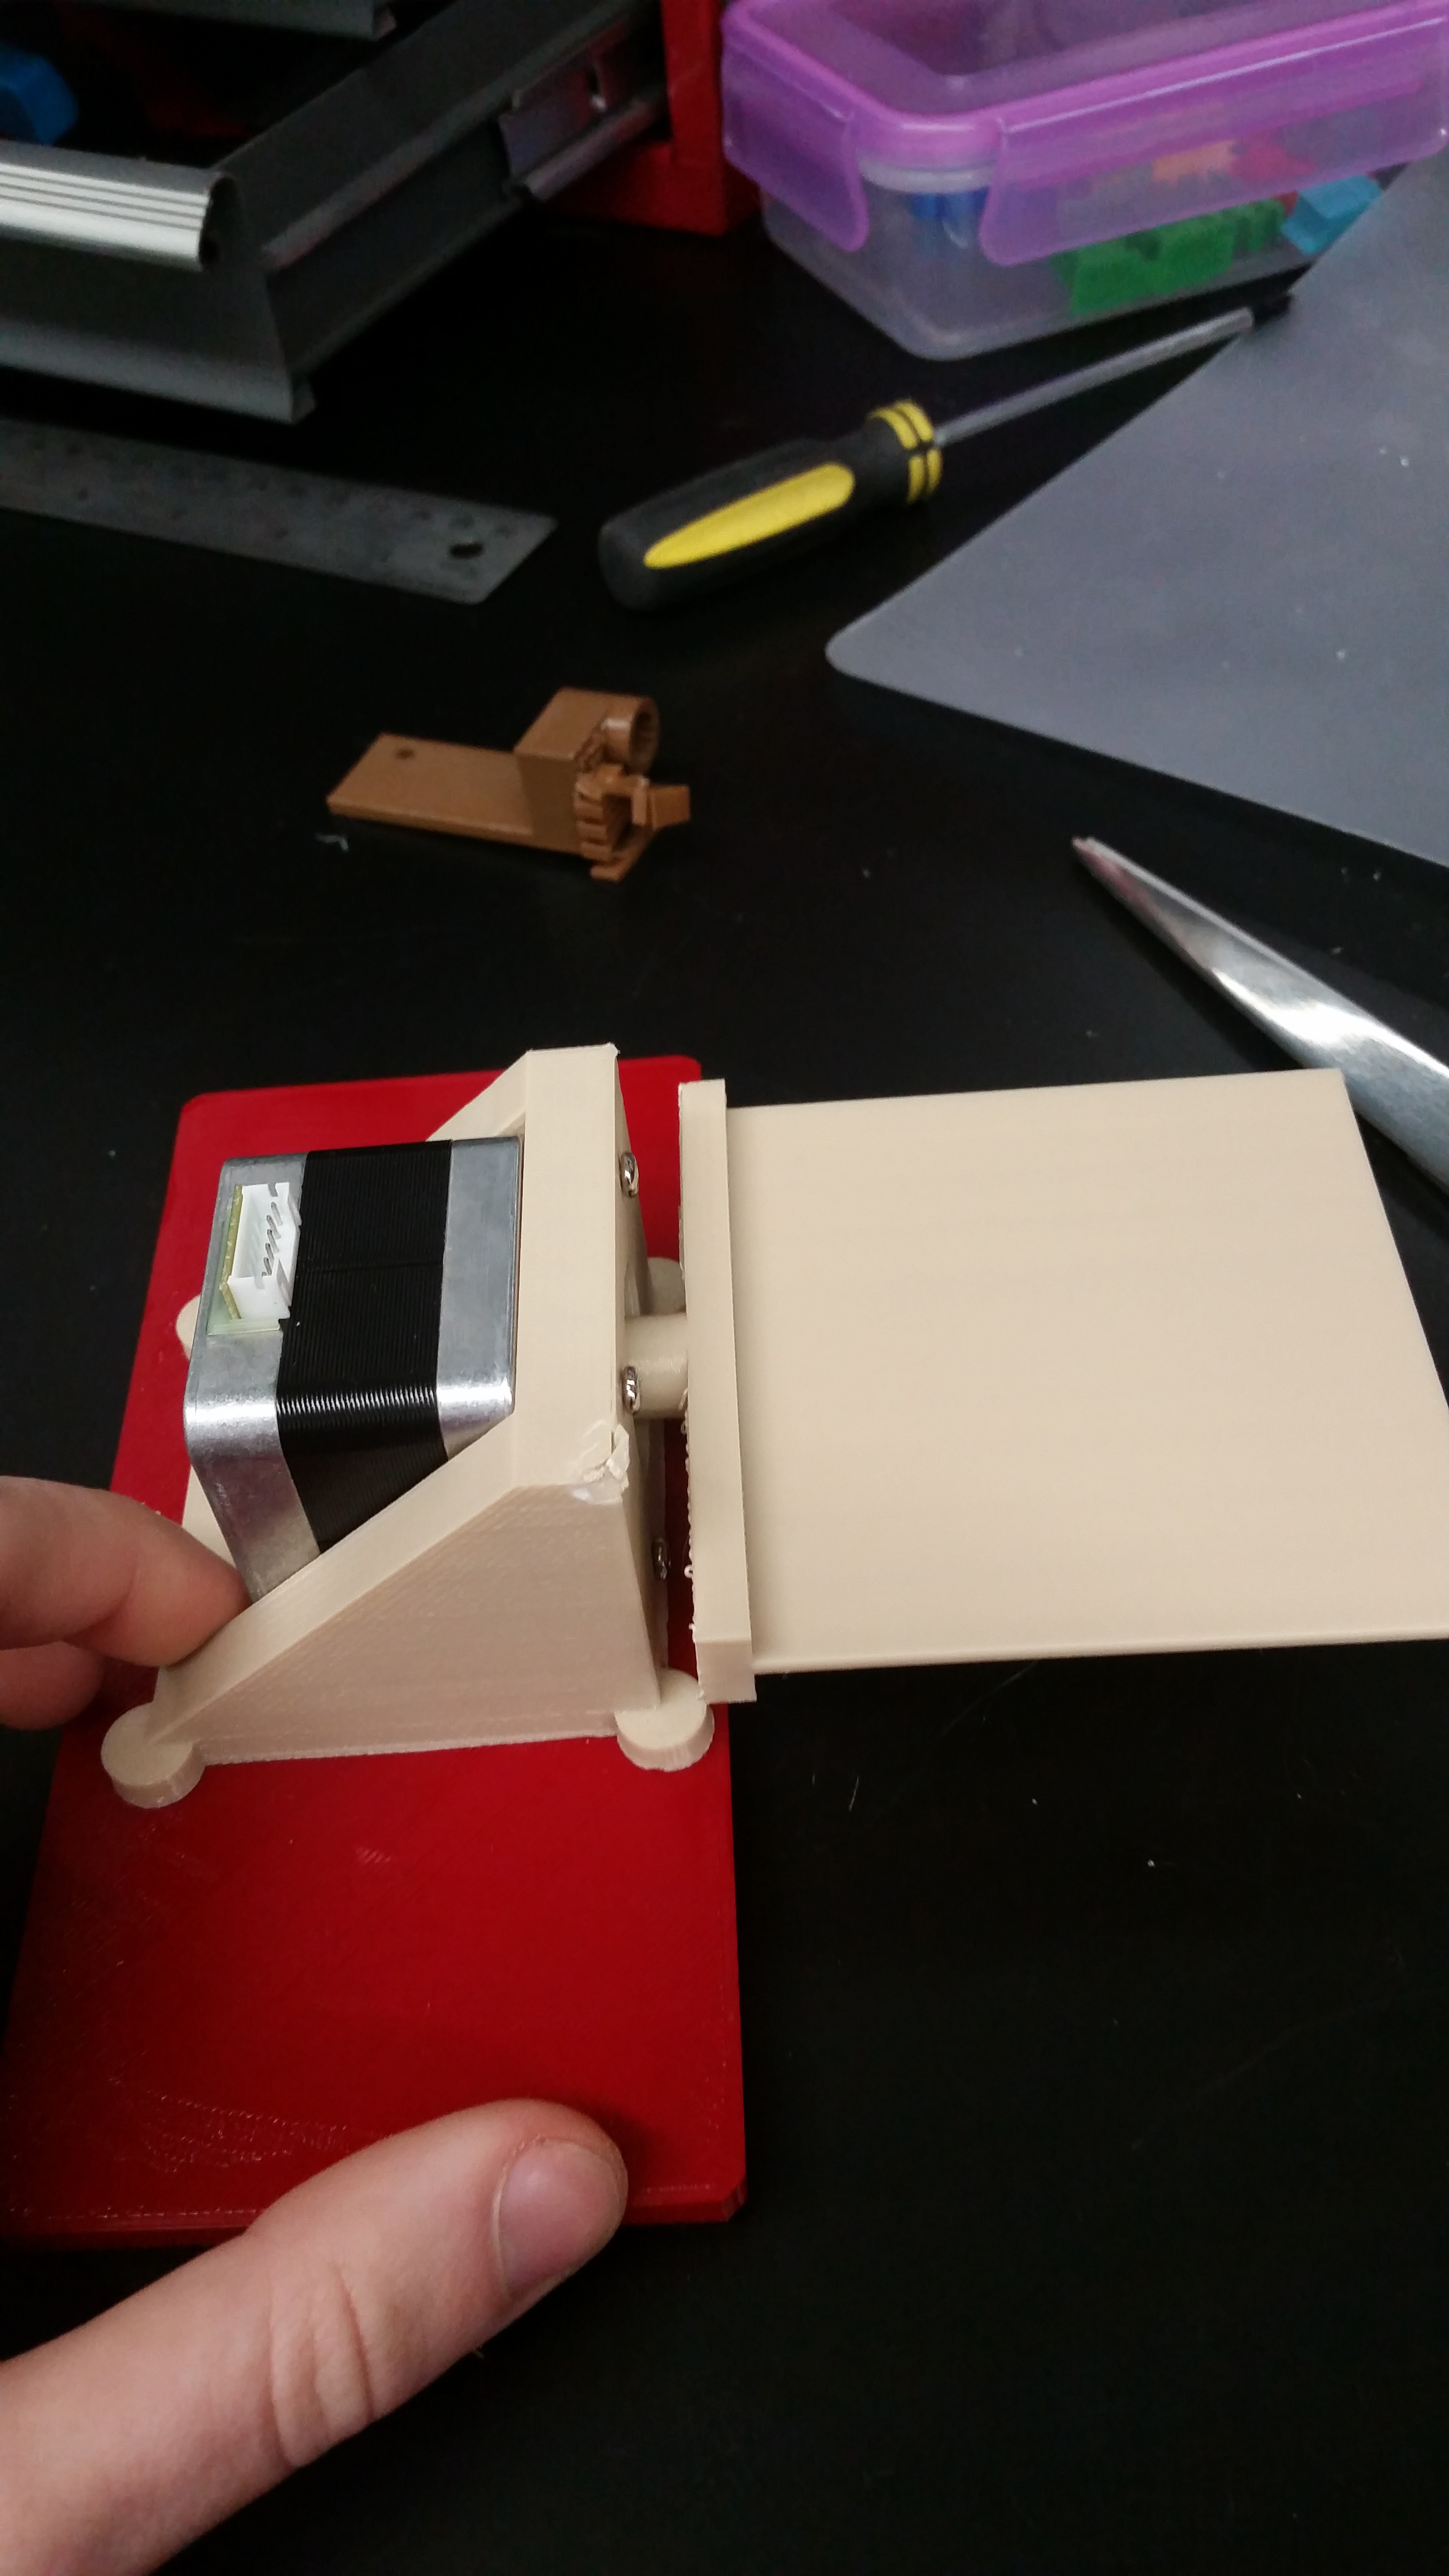
Here it is installed onto the slideable plate, with some kind of flat scanning surface attached to the spinny part. I guess that's so you could build up a 3D image of flat things like textiles? I'm not really sure. I haven't actually used it yet, because I got caught up in making the machine even more complicated to the point of uselessness. I did that, by...
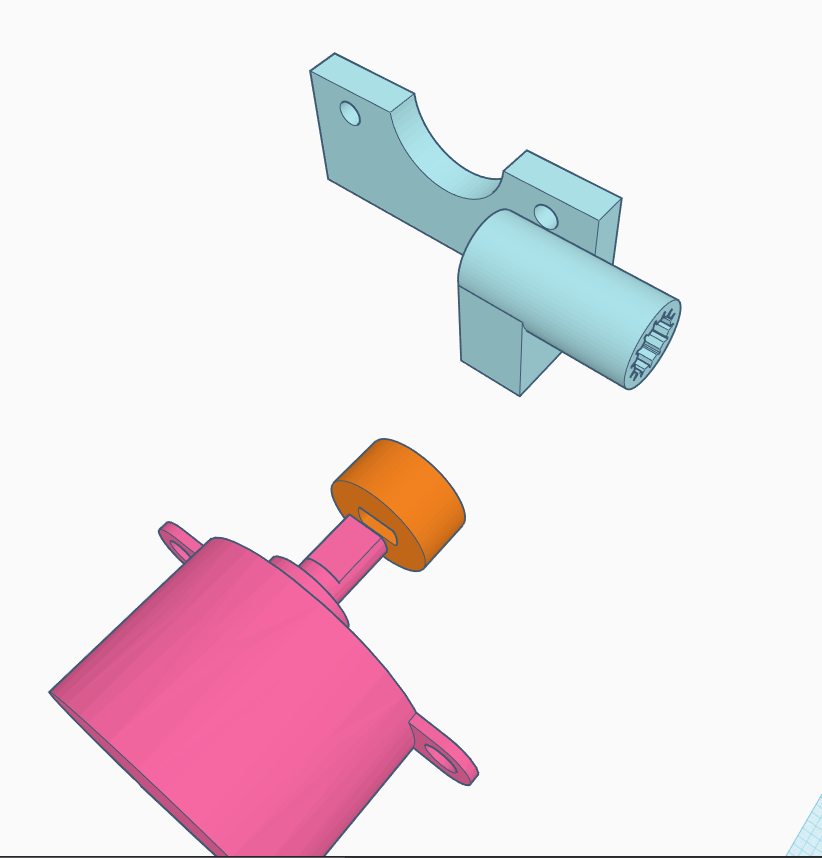
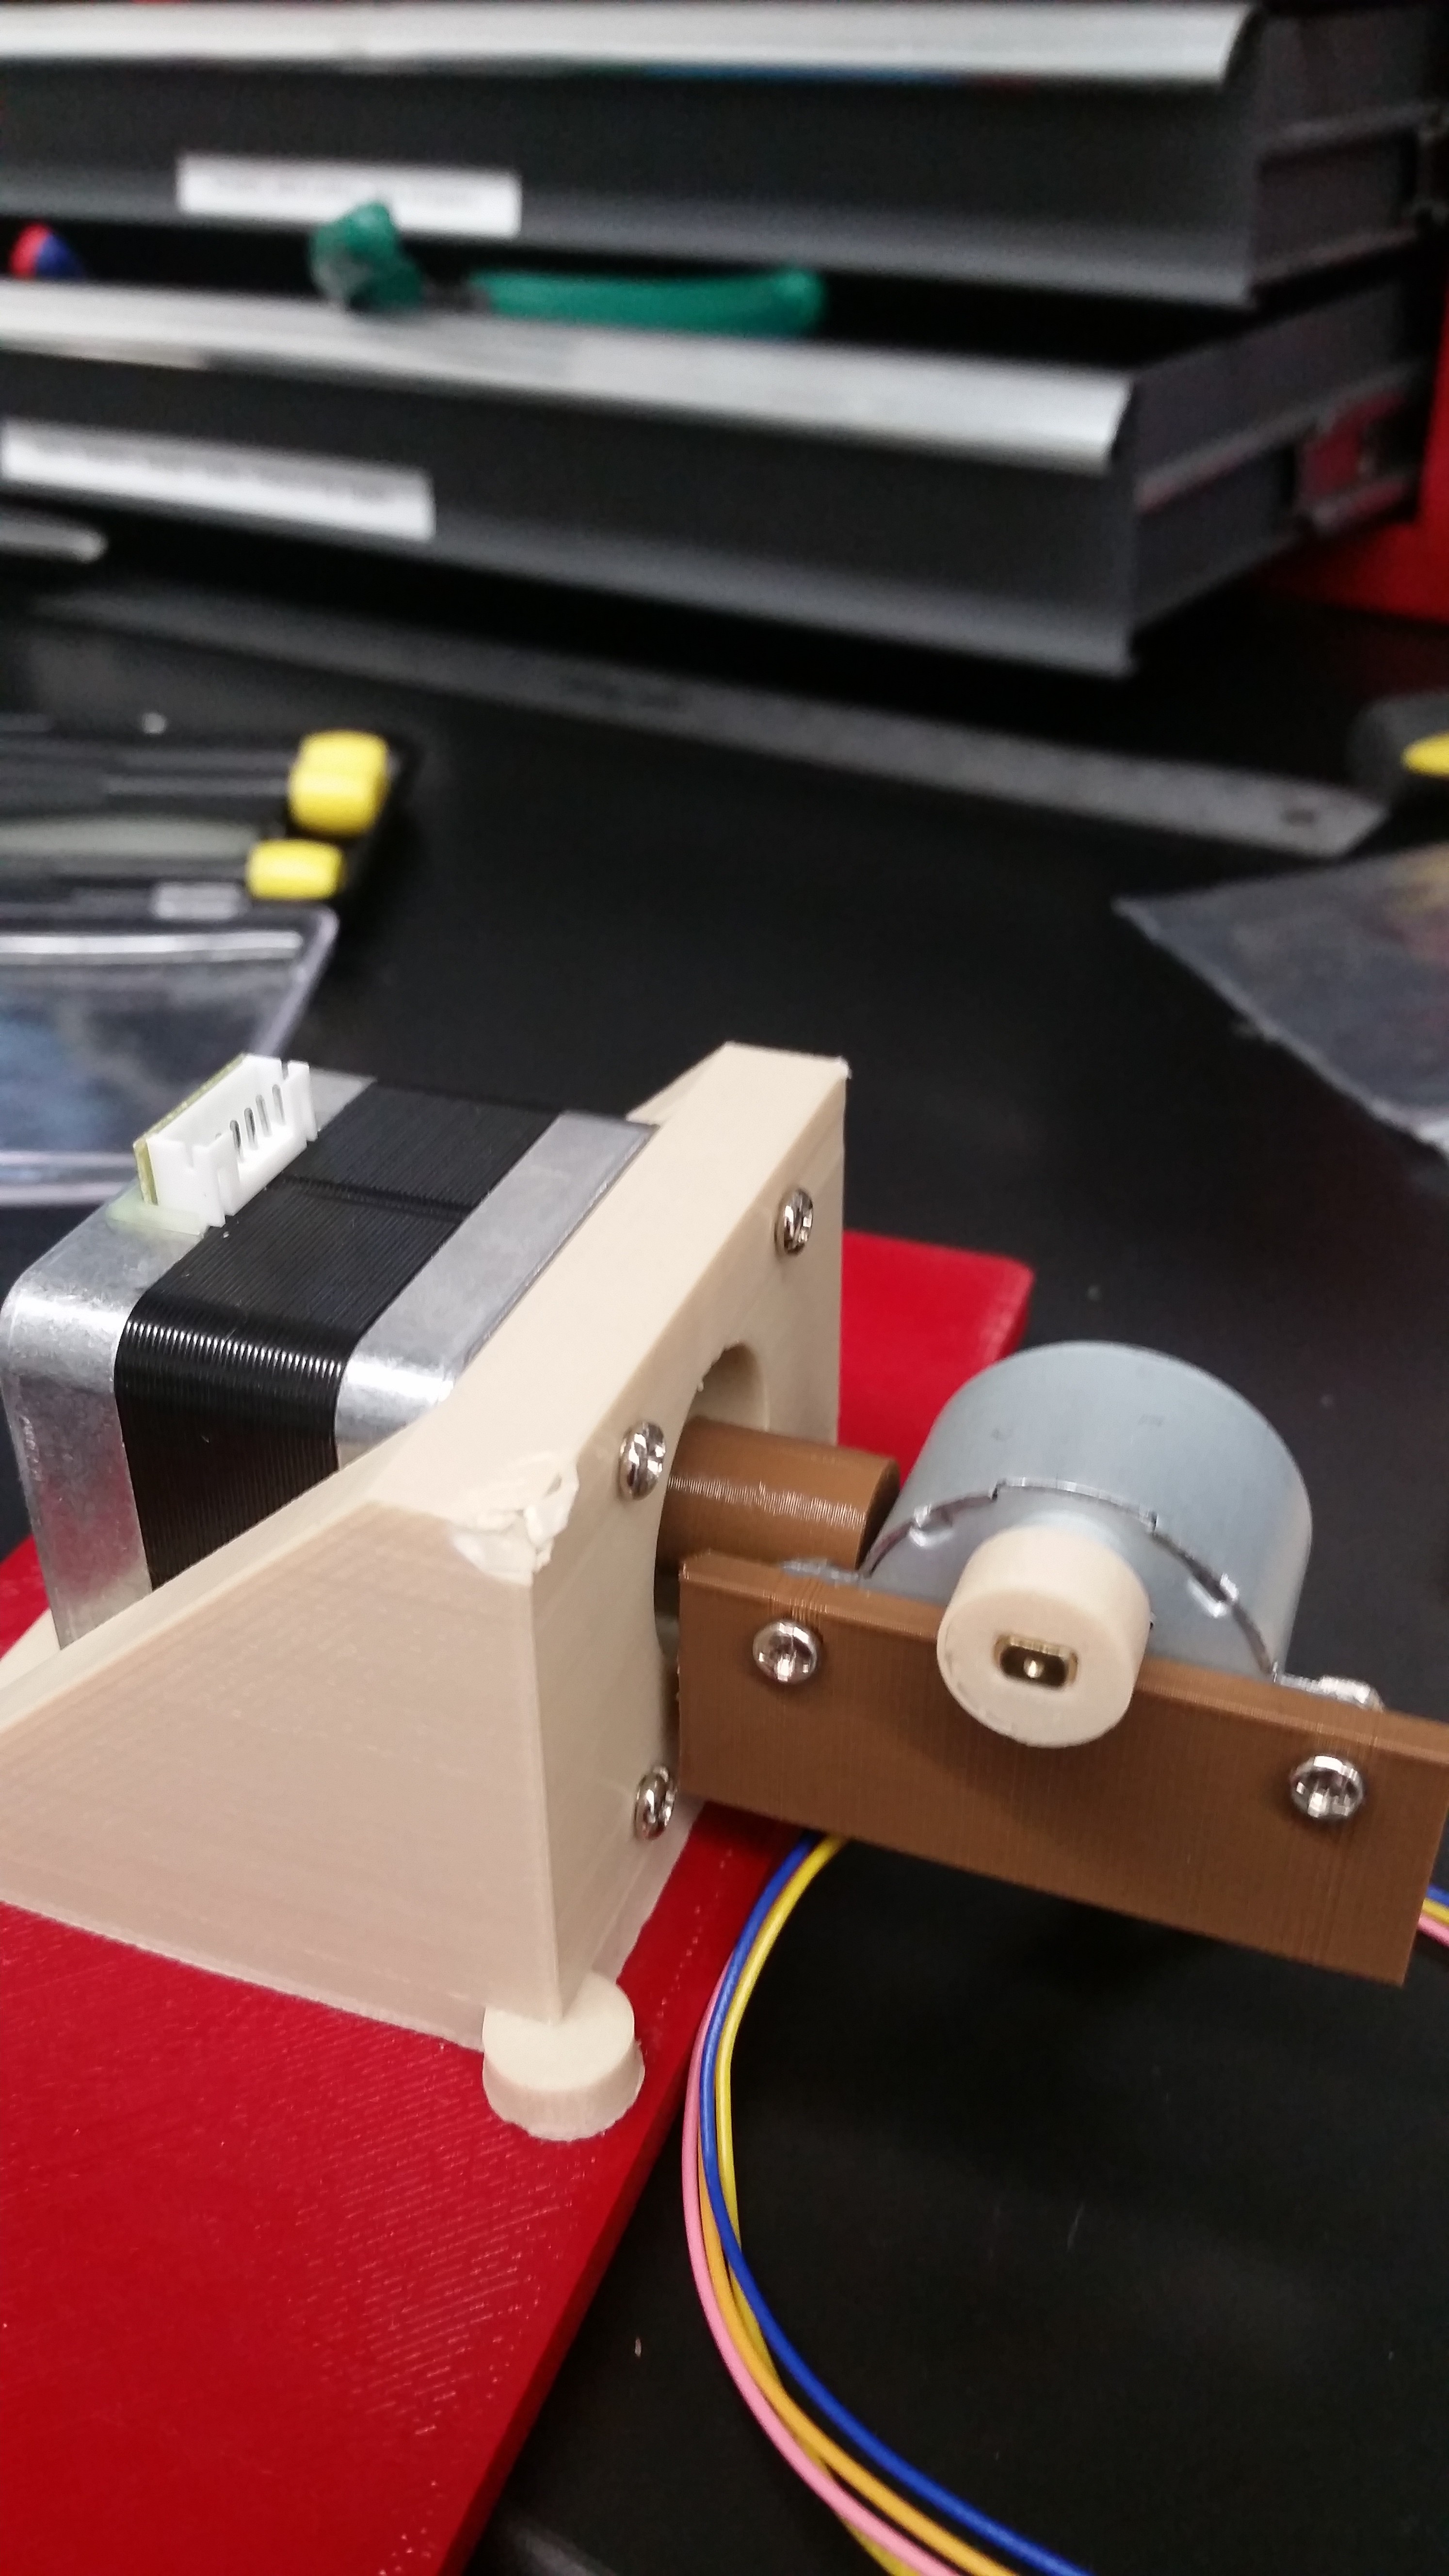
...creating a very precarious and not-printing-optimized piece to attach the output shaft of the fourth stepper motor to a fifth stepper motor. That is, the fifth stepper motor (the pink one) is the one that rotates your sample, and the big NEMA becomes a tilt motor, which rotates the fifth one. See? complicated!
Here it is in nice PLA:
And here it is in disgusting but functional ABS, after the PLA one melted:
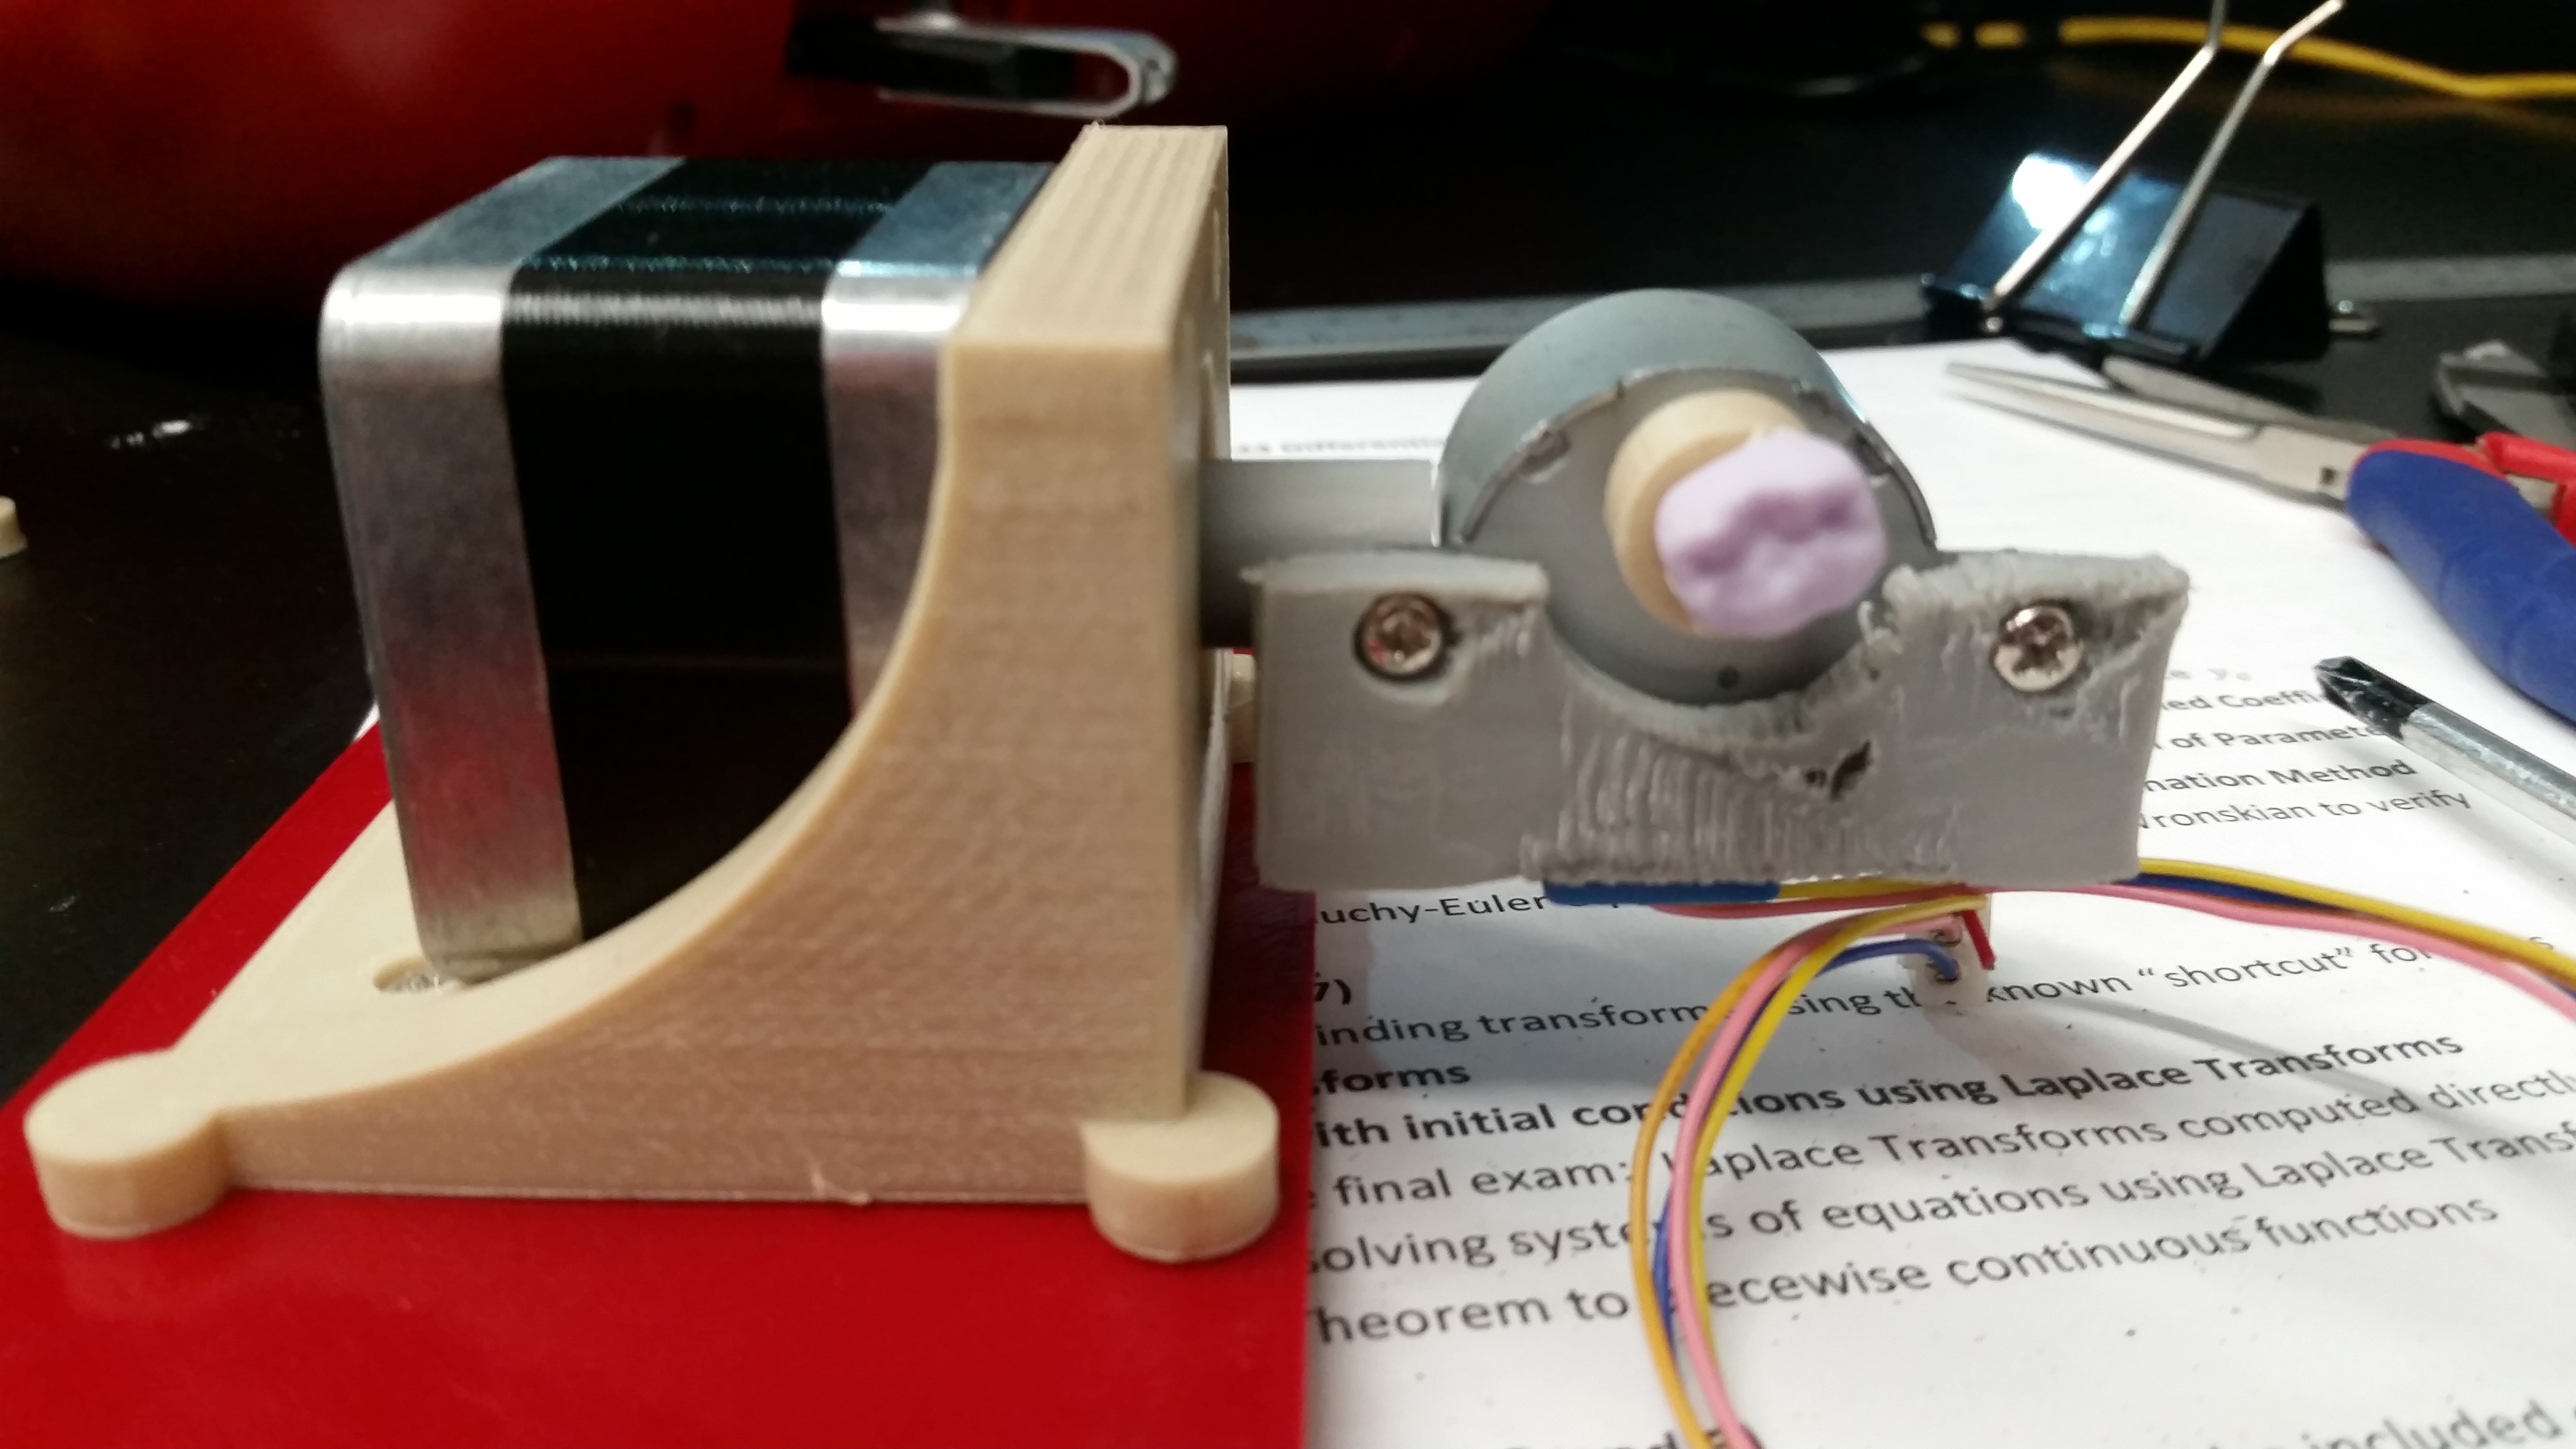
(that's a prosthetic tooth. turns out dentistry is a lucrative market for 3D scanning.)
Let's cut to the chase: there it is in action.
(PS, this is my first-ever edited video of any kind basically. I'm not good at everything.)
So it absolutely does work as intended, which is neat. One problem which I'm very happy to have solved at its core is eluded to in the video. And that is, if you are tilting something, it is not just going to change the angle, but is going to be shifted in the X and Z dimensions as well. I was aware of this for a few days and just tried not think about it because it looked like a lot of really hard math. But it turns out it's actually pretty simple.
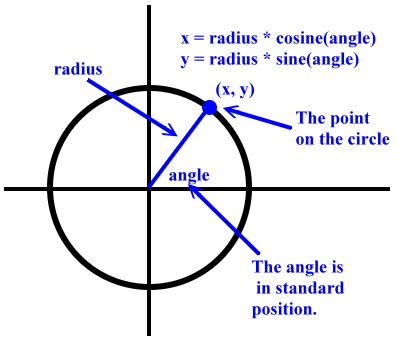
It's really basic geometry. You're sweeping out the path of a circle. If you know the radius --- the distance from the axis of rotation to the point of your object --- and you know the angle change, which you can figure out based on the number of steps and your stepper motor --- well, that's all you need. This all has to be converted a couple of times between steps and real units, which required me to measure things for the first time, but overall I'm quite happy with how well it works. I'm going to have to calibrate it and maybe make the radius dynamic (it's just set ahead of time right now), but it at least gets you in the right ballpark of where you're supposed to be.
Yeah.
Okay. There you go.
Discussions
Become a Hackaday.io Member
Create an account to leave a comment. Already have an account? Log In.