 HarryTheB
At the end of November 2019 my trusty old iomega StorCenter NAS started behaving eratically and would keep disappearing from the network and locking up every few hours. I immediately made sure I had several copies of the data and started the search for a replacement. But it dawned on me that whatever I would buy would ultimately go the same way: unsupported and unfixable.
So, with the new Raspberry Pi 4 having USB3 ports and a long running desire to make a circular neopixel clock at some point, it dawned on me that there are two devices that run 24 hours a day: my NAS and my trusty old Tix clock that I bought several years ago.
Why settle for another boring NAS when I can make the ultimate NAS come Clock combination? So began the flying saucer clock project...
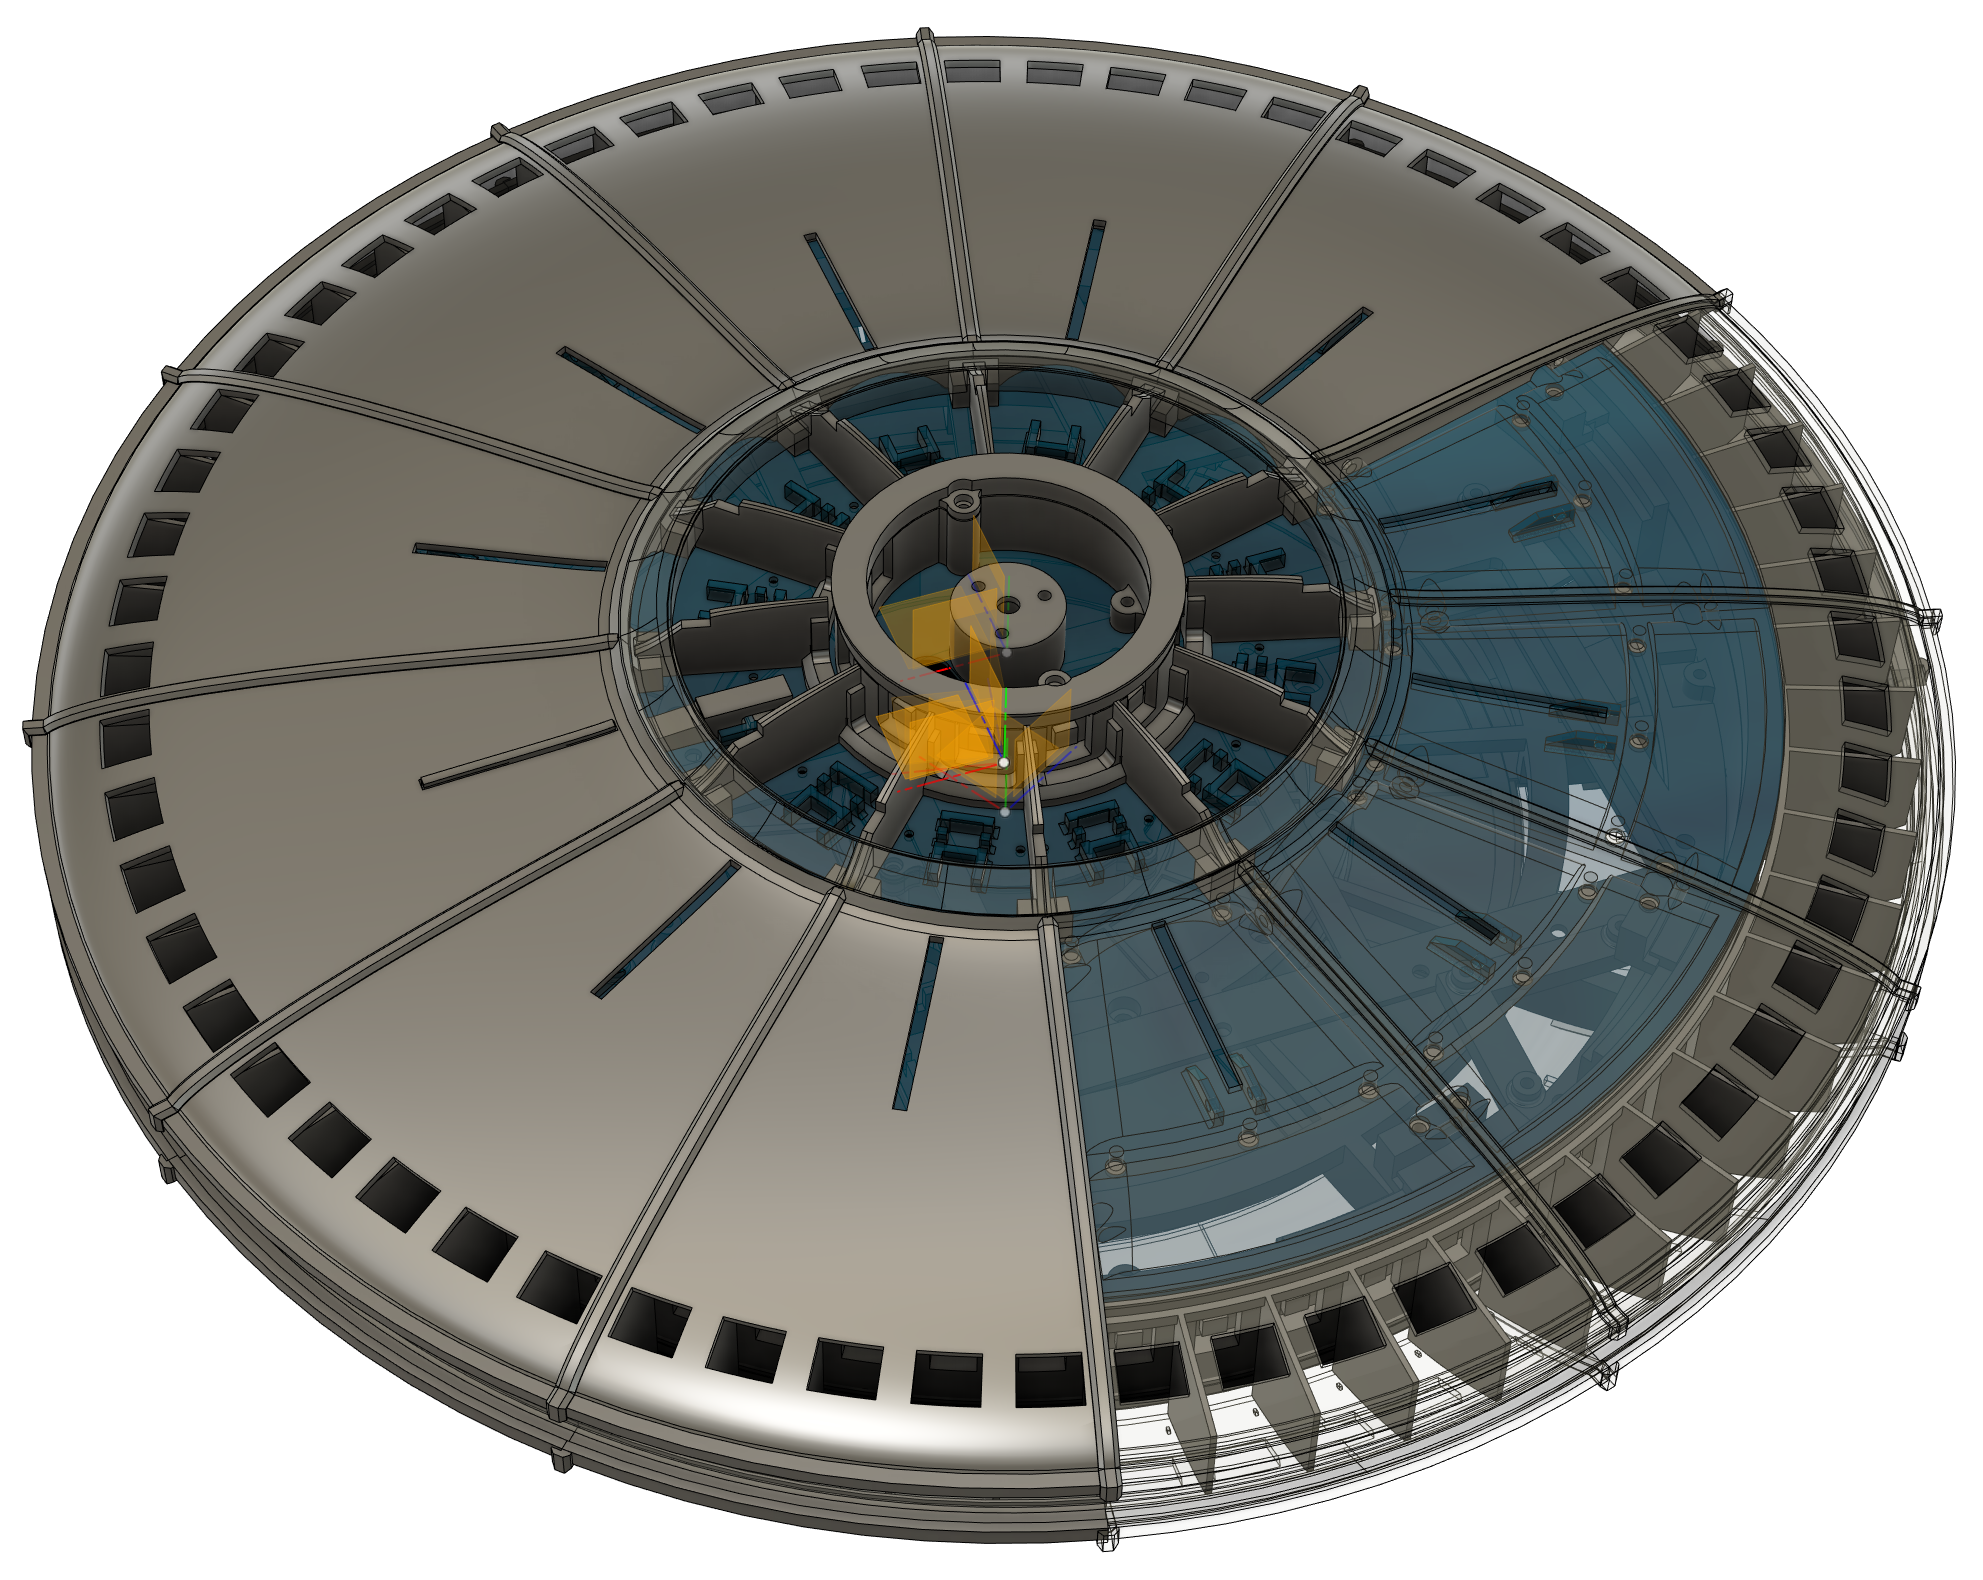
I started in Fusion 360 designing some LED support rings, to support the WS2812B LEDs (neopixels). These were quite complicated interlocking beasties to begin with, but were later simplified with greater tolerances to allow for 3D printing on my CR10-S5. The outer diameter of the 60-pixel ring, using a 60 LED/m strip ended up being 326mm, with the LED being mounted at a radius of 158.4mm giving a circumferance of slightly under 1m to match the actual LED strip length of 995mm - just over 60 LEDs per m, which cost me one of many failed prints!
It's worth noting that once the diffusers and body plates were designed this turned out to be a big print - the final saucer came in at a diameter of 400mm. This was going to be a job for the big printer, although it's little brother (CR-10S) came in handy for a lot of the smaller parts.
The inner ring of the saucer contains 12 LEDs behind diffusers made from a ring of transparent PLA with black PLA colour separators, which are lit according to the current hours. The minutes and seconds are shown on the outer 60 LED ring. This also displays the hour as a series of 5 LEDs lit blue and also hour markers shown at spacing of every 5. There is plenty of scope to tune the colours and display.
This pic shows the UFO design viewed from the top in Fusion 360:
And from the bottom:

As well as telling the time, the UFO now stores all my home data on a 3TB 3.5" hard disk. A second disk is used to give 'tiered' backups "time machine" style so I can go back in time if files change or are accidently deleted, or if one of the kids were to let some malware loose whilst downloading something they shouldn't! This uses a fairly simply SAMBA setup with an account for each member of the family and some other shares for photos and TV recordings. A Node.js script is used to run rsync commands hourly to create multiply linked backup copies of the files for the "time machine" backup. In time I might need to increase the size of the second disk to take account of the extra file copies, however using rsync to create links to unchanged files means that so far I'm not seeing much increase over the single copy of data on the first disk.
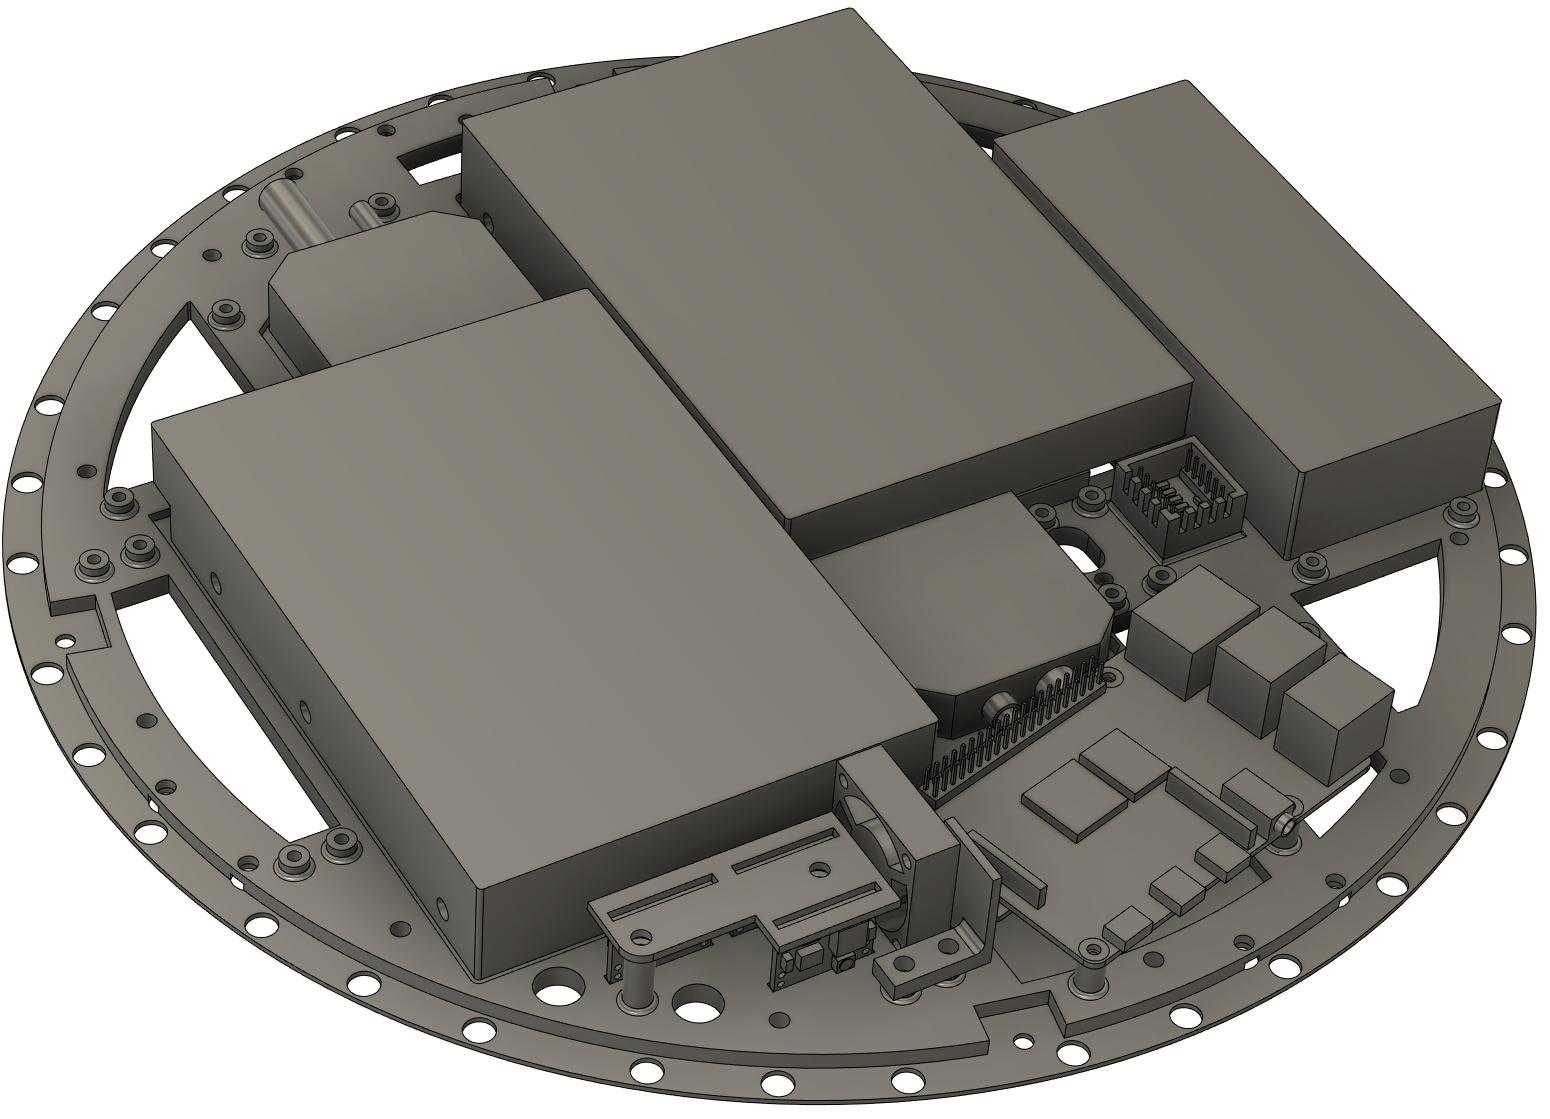
This image shows how I modelled the NAS components in the middle of the flying saucer in Fusion 360:
Because having 2 functions is not enough, the saucer can also display some UFO effects. The 12 transparent lengths that run from the inner ring towards the outer ring can be pressed to activate switches. The switches are connected to the pi's GPIO pins and trigger UFO effects. There are another 12 LEDs in a ring at the bottom of the saucer, so one of the effects pulses those and will be used with a little add-on (TBD) for cow abduction.
Another feature is that the 'client' code that handles the button presses is separate from the 'server' code that handles the LED display. The client can be disconnected and the server can accept OPC data from my PC or other source. I used this set up when I was DJ'ing on News Years' Eve together with my large LED matrix displays (another project to be documented at some point) for some extra "light" entertainment! I printed out and built another flying saucer that chained data from the output of the last LED on first saucer to the first LED on the second. There will no doubt be a fleet of these things over the coming months.
It took a lot of prints and fine tuning to get the details right and to get everything to fit, but I'm really happy with the end result and it looks spectacular, especially at night time where it glows ominously in the corner of my home office.
This project has taught me a great many lessons. I think the most important is always to give your designs as much tolerance as possible! It's also a good idea to include extra mounting points so you can add to the project in the future. One mod I will make very soon is to make the fan temperature controlled as the NAS gets accessed infrequently and I can't imagine it needs to be on very often. I have used a digital temperature sensor and fan on a previous project so will probably re-use that. I'm now getting quite proficient with Fusion 360 but found a feature I hadn't used before when checking through the design. On the Inspect menu is a little item called 'sectional analysis' that lets you inspect the cross section of the design in any direction and check that everything fits together as you expect. It's also often worth printing a small sections of interlocking large parts first to check they work as expected.
I am happy to release the designs for the flying saucer on a non-commercial share-alike CC license should anyone wish to make their own. If there is interest I might offer to print out the larger parts for a reasonable price to those who don't have a large format 3D printer like the CR-10S5. The code is also pretty straightforward and I'm happy to publish that if anyone would like it.