 lion mclionhead
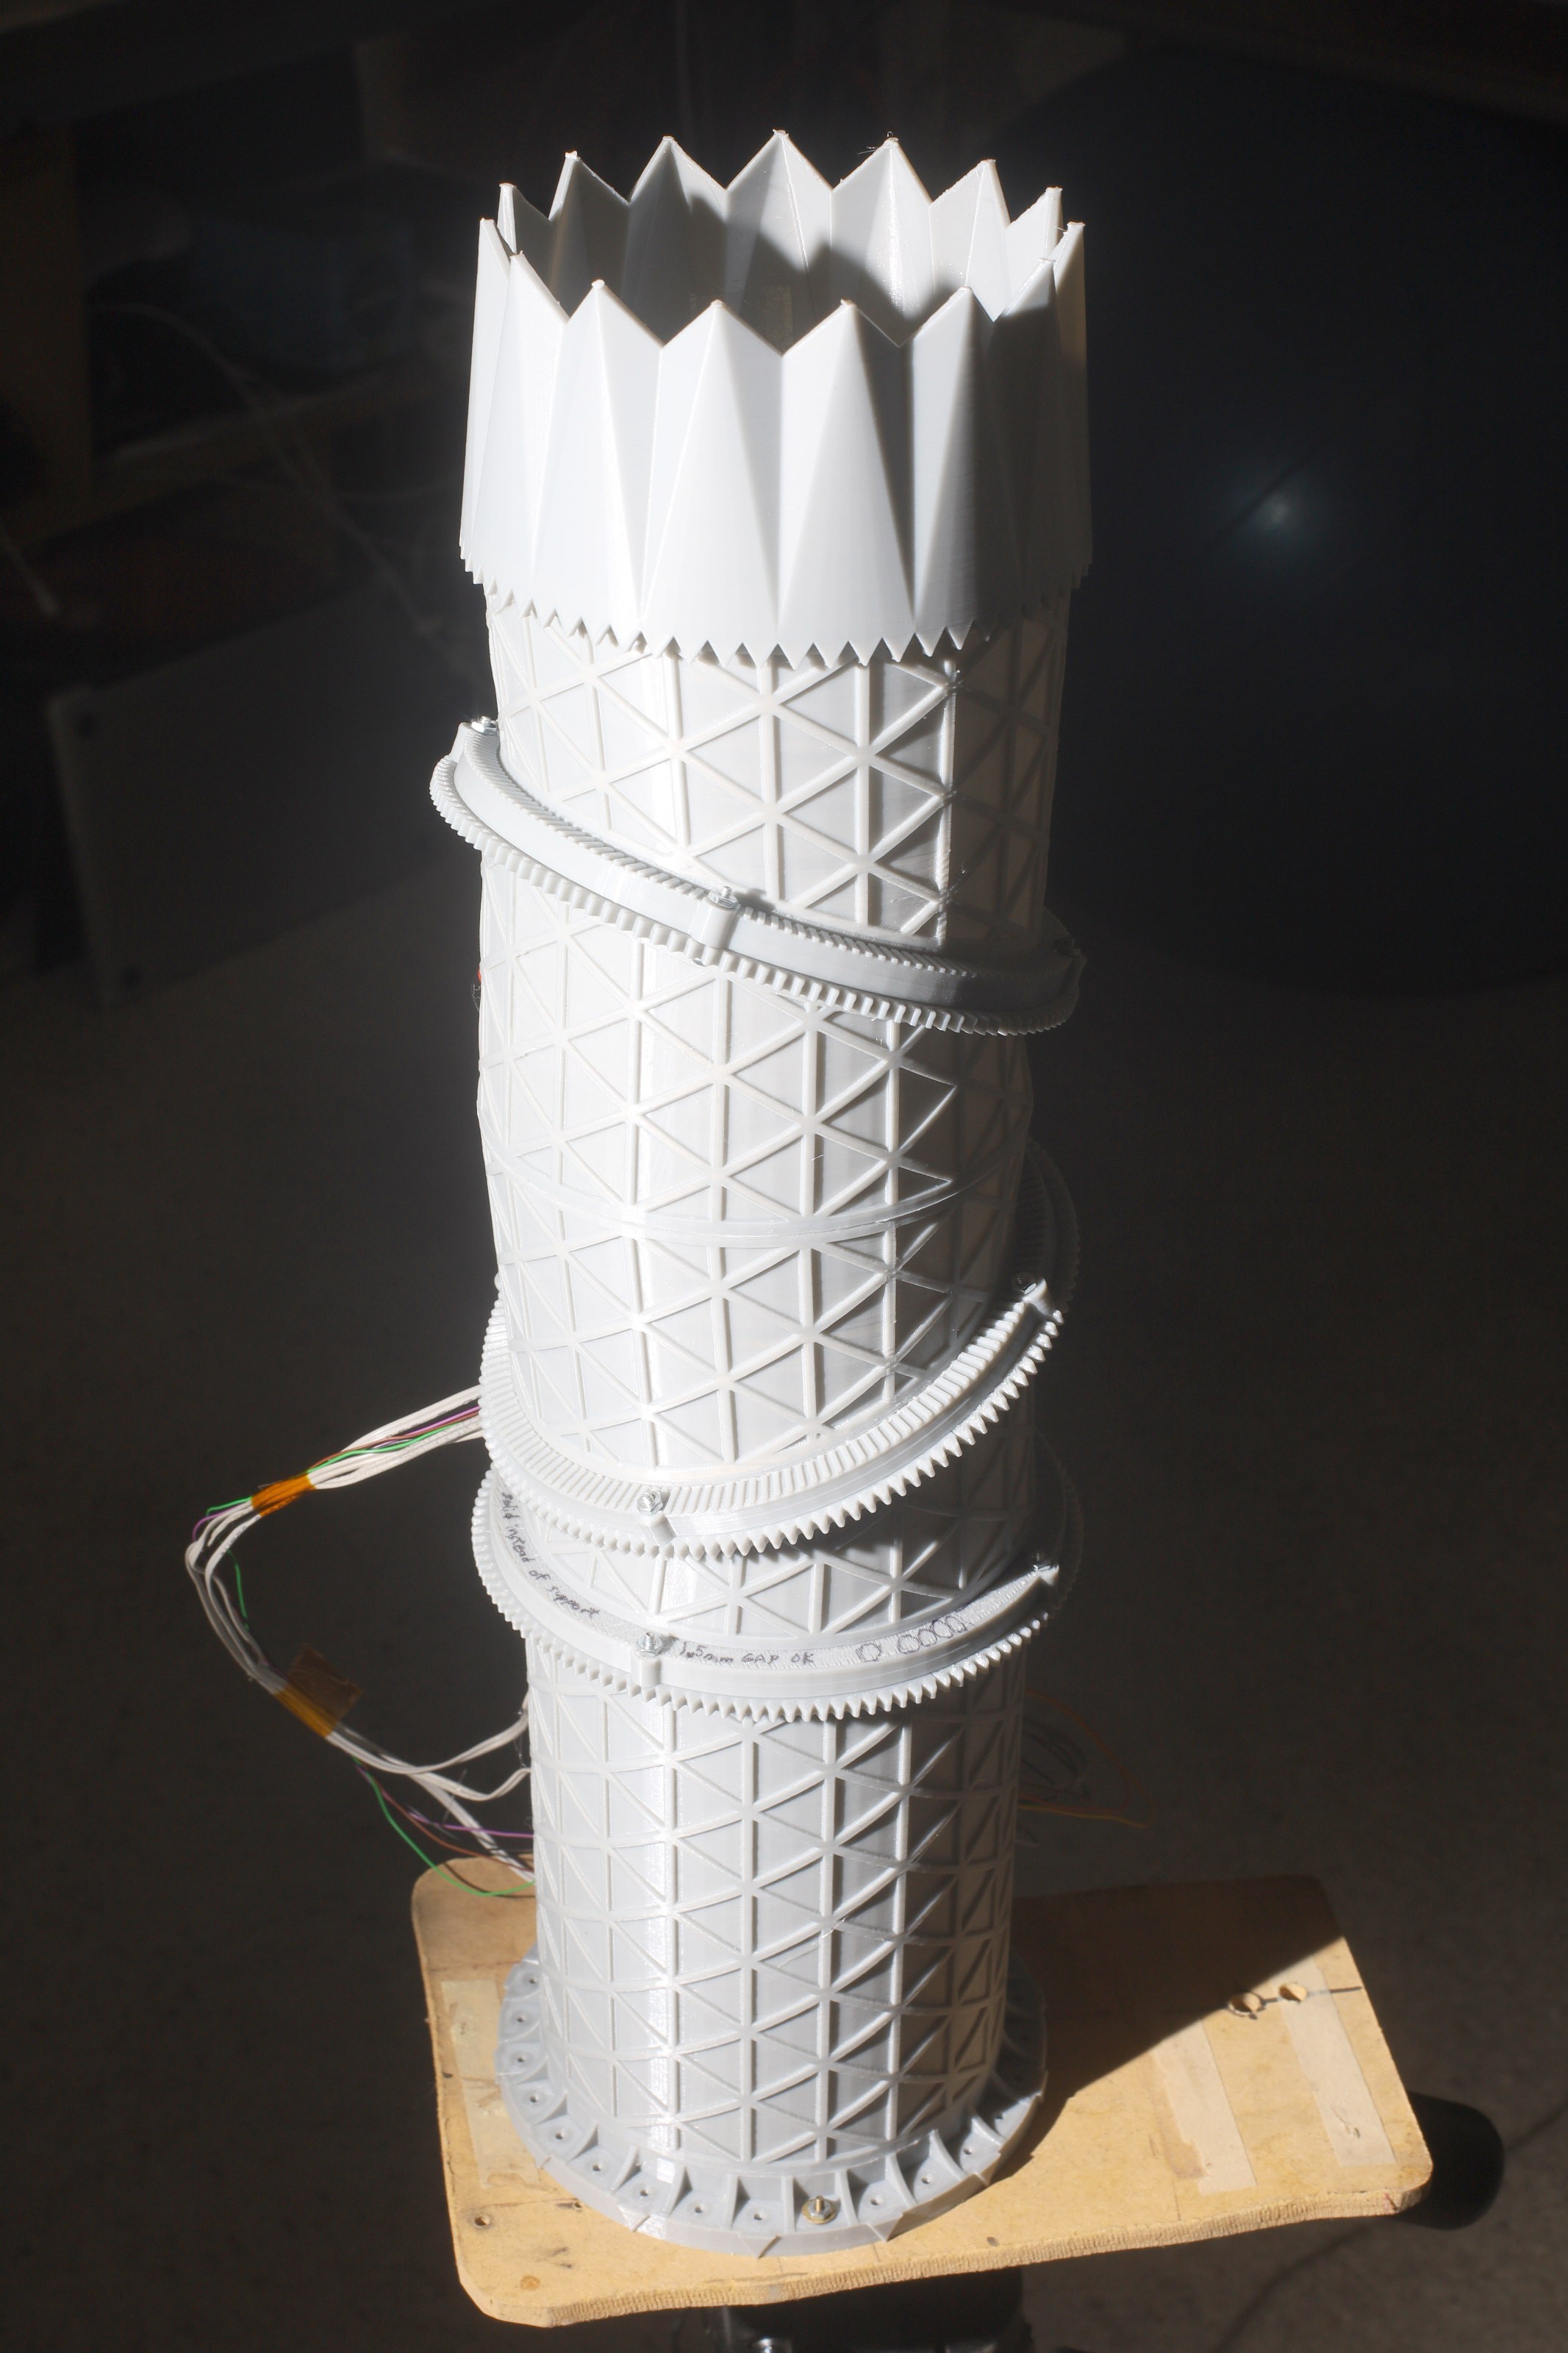
It was the lion kingdom's 1st 3D printing project. The journey began with much CAD modeling that would later be refined. Custom C programs made isogrid segments that were too slow to model in Freecad. The mane limitation in 3D printing is the CAD software. The whole thing was printed on just the baseline $170 Creality Ender 3 & $20 of filament. It printed & printed over 7 days while the tower of isogrids grew.
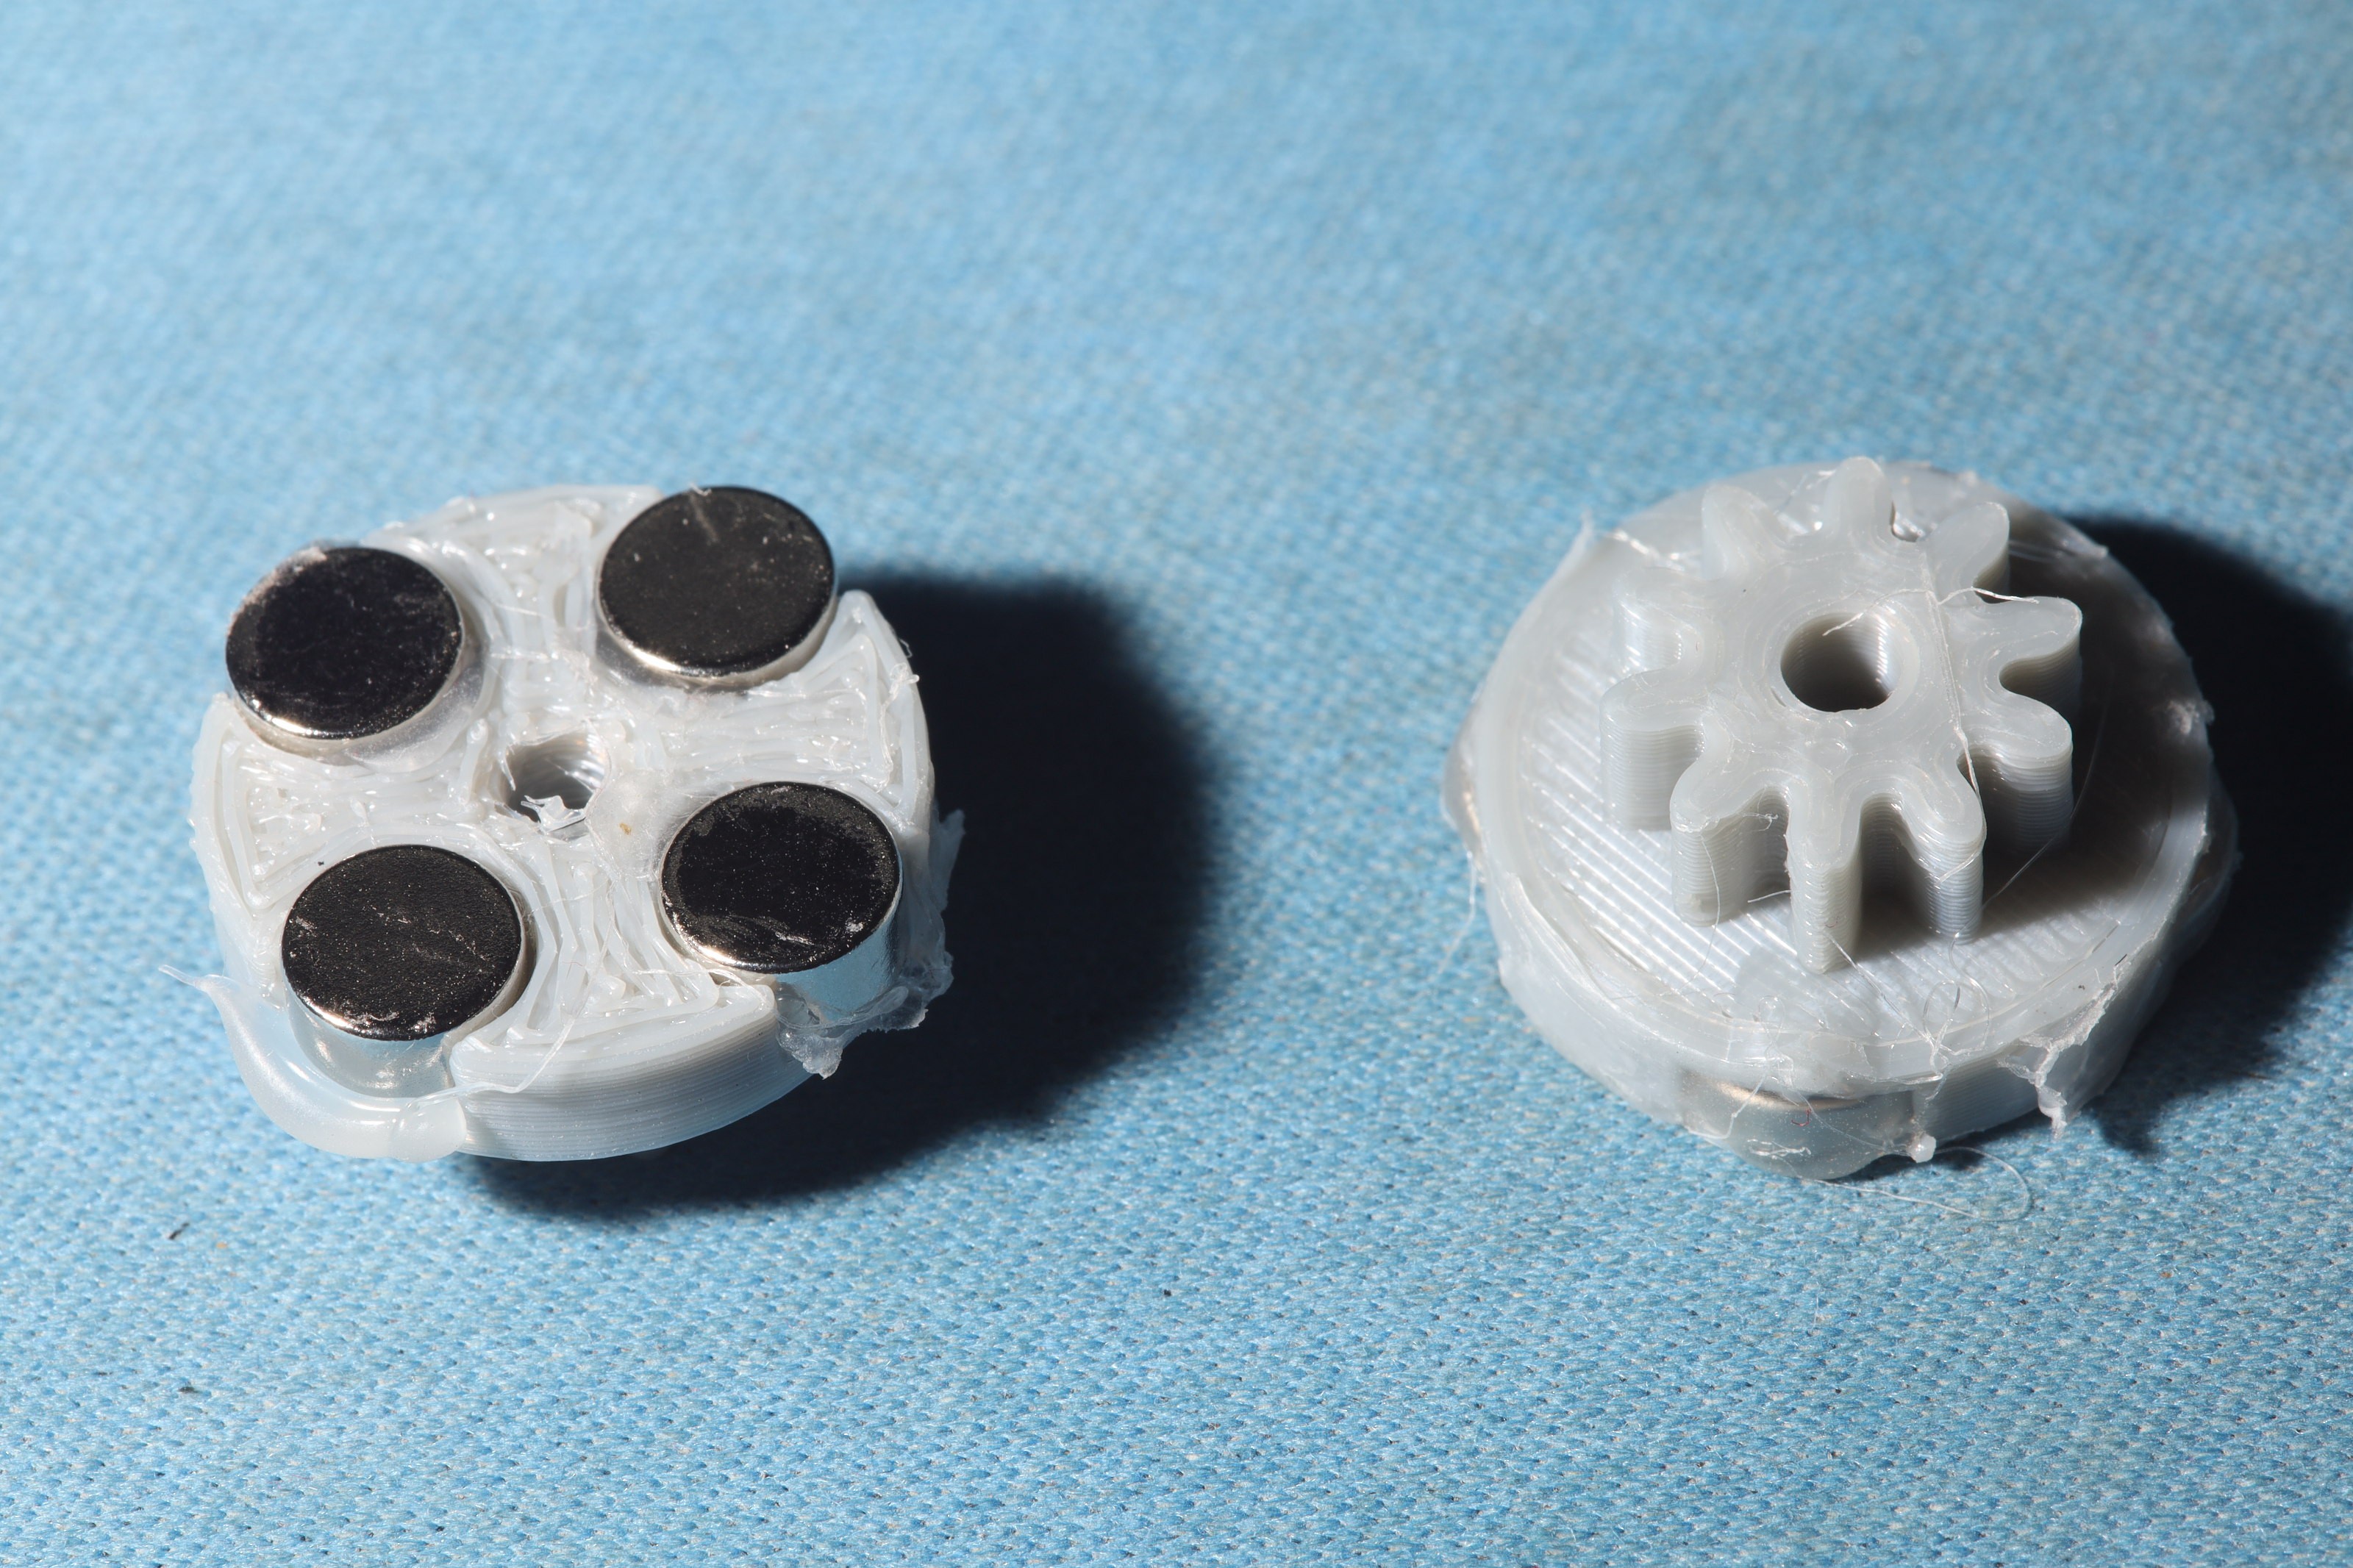
 The 1st part printed by lion was this pinion gear.
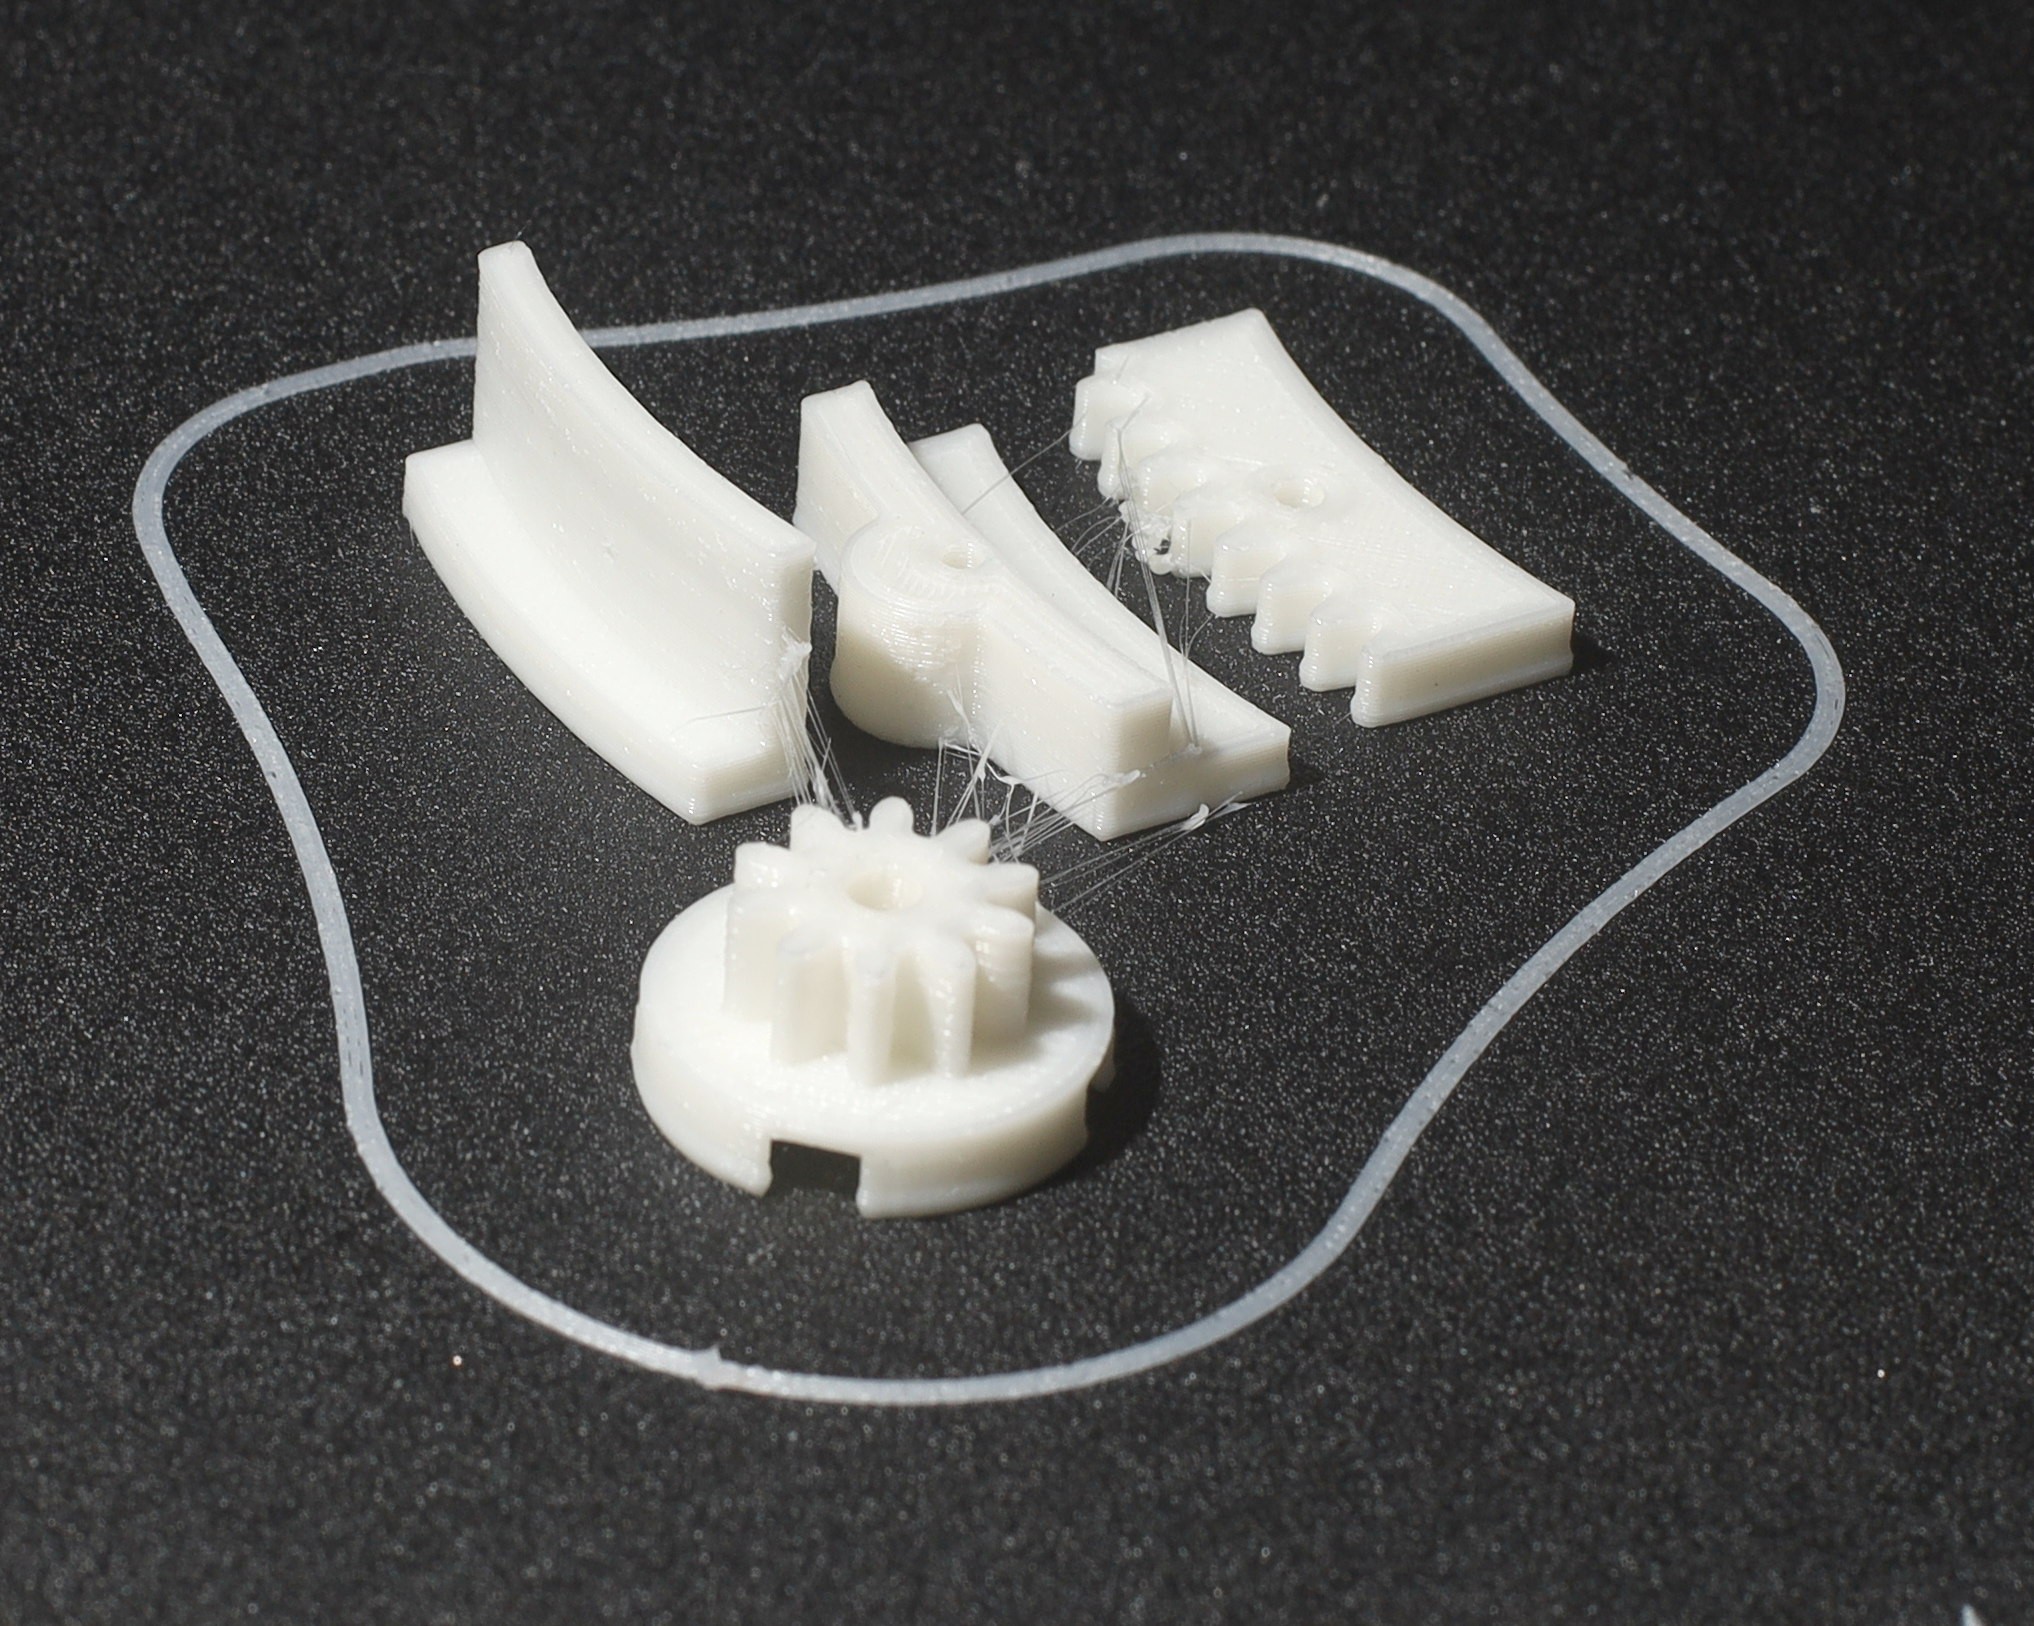
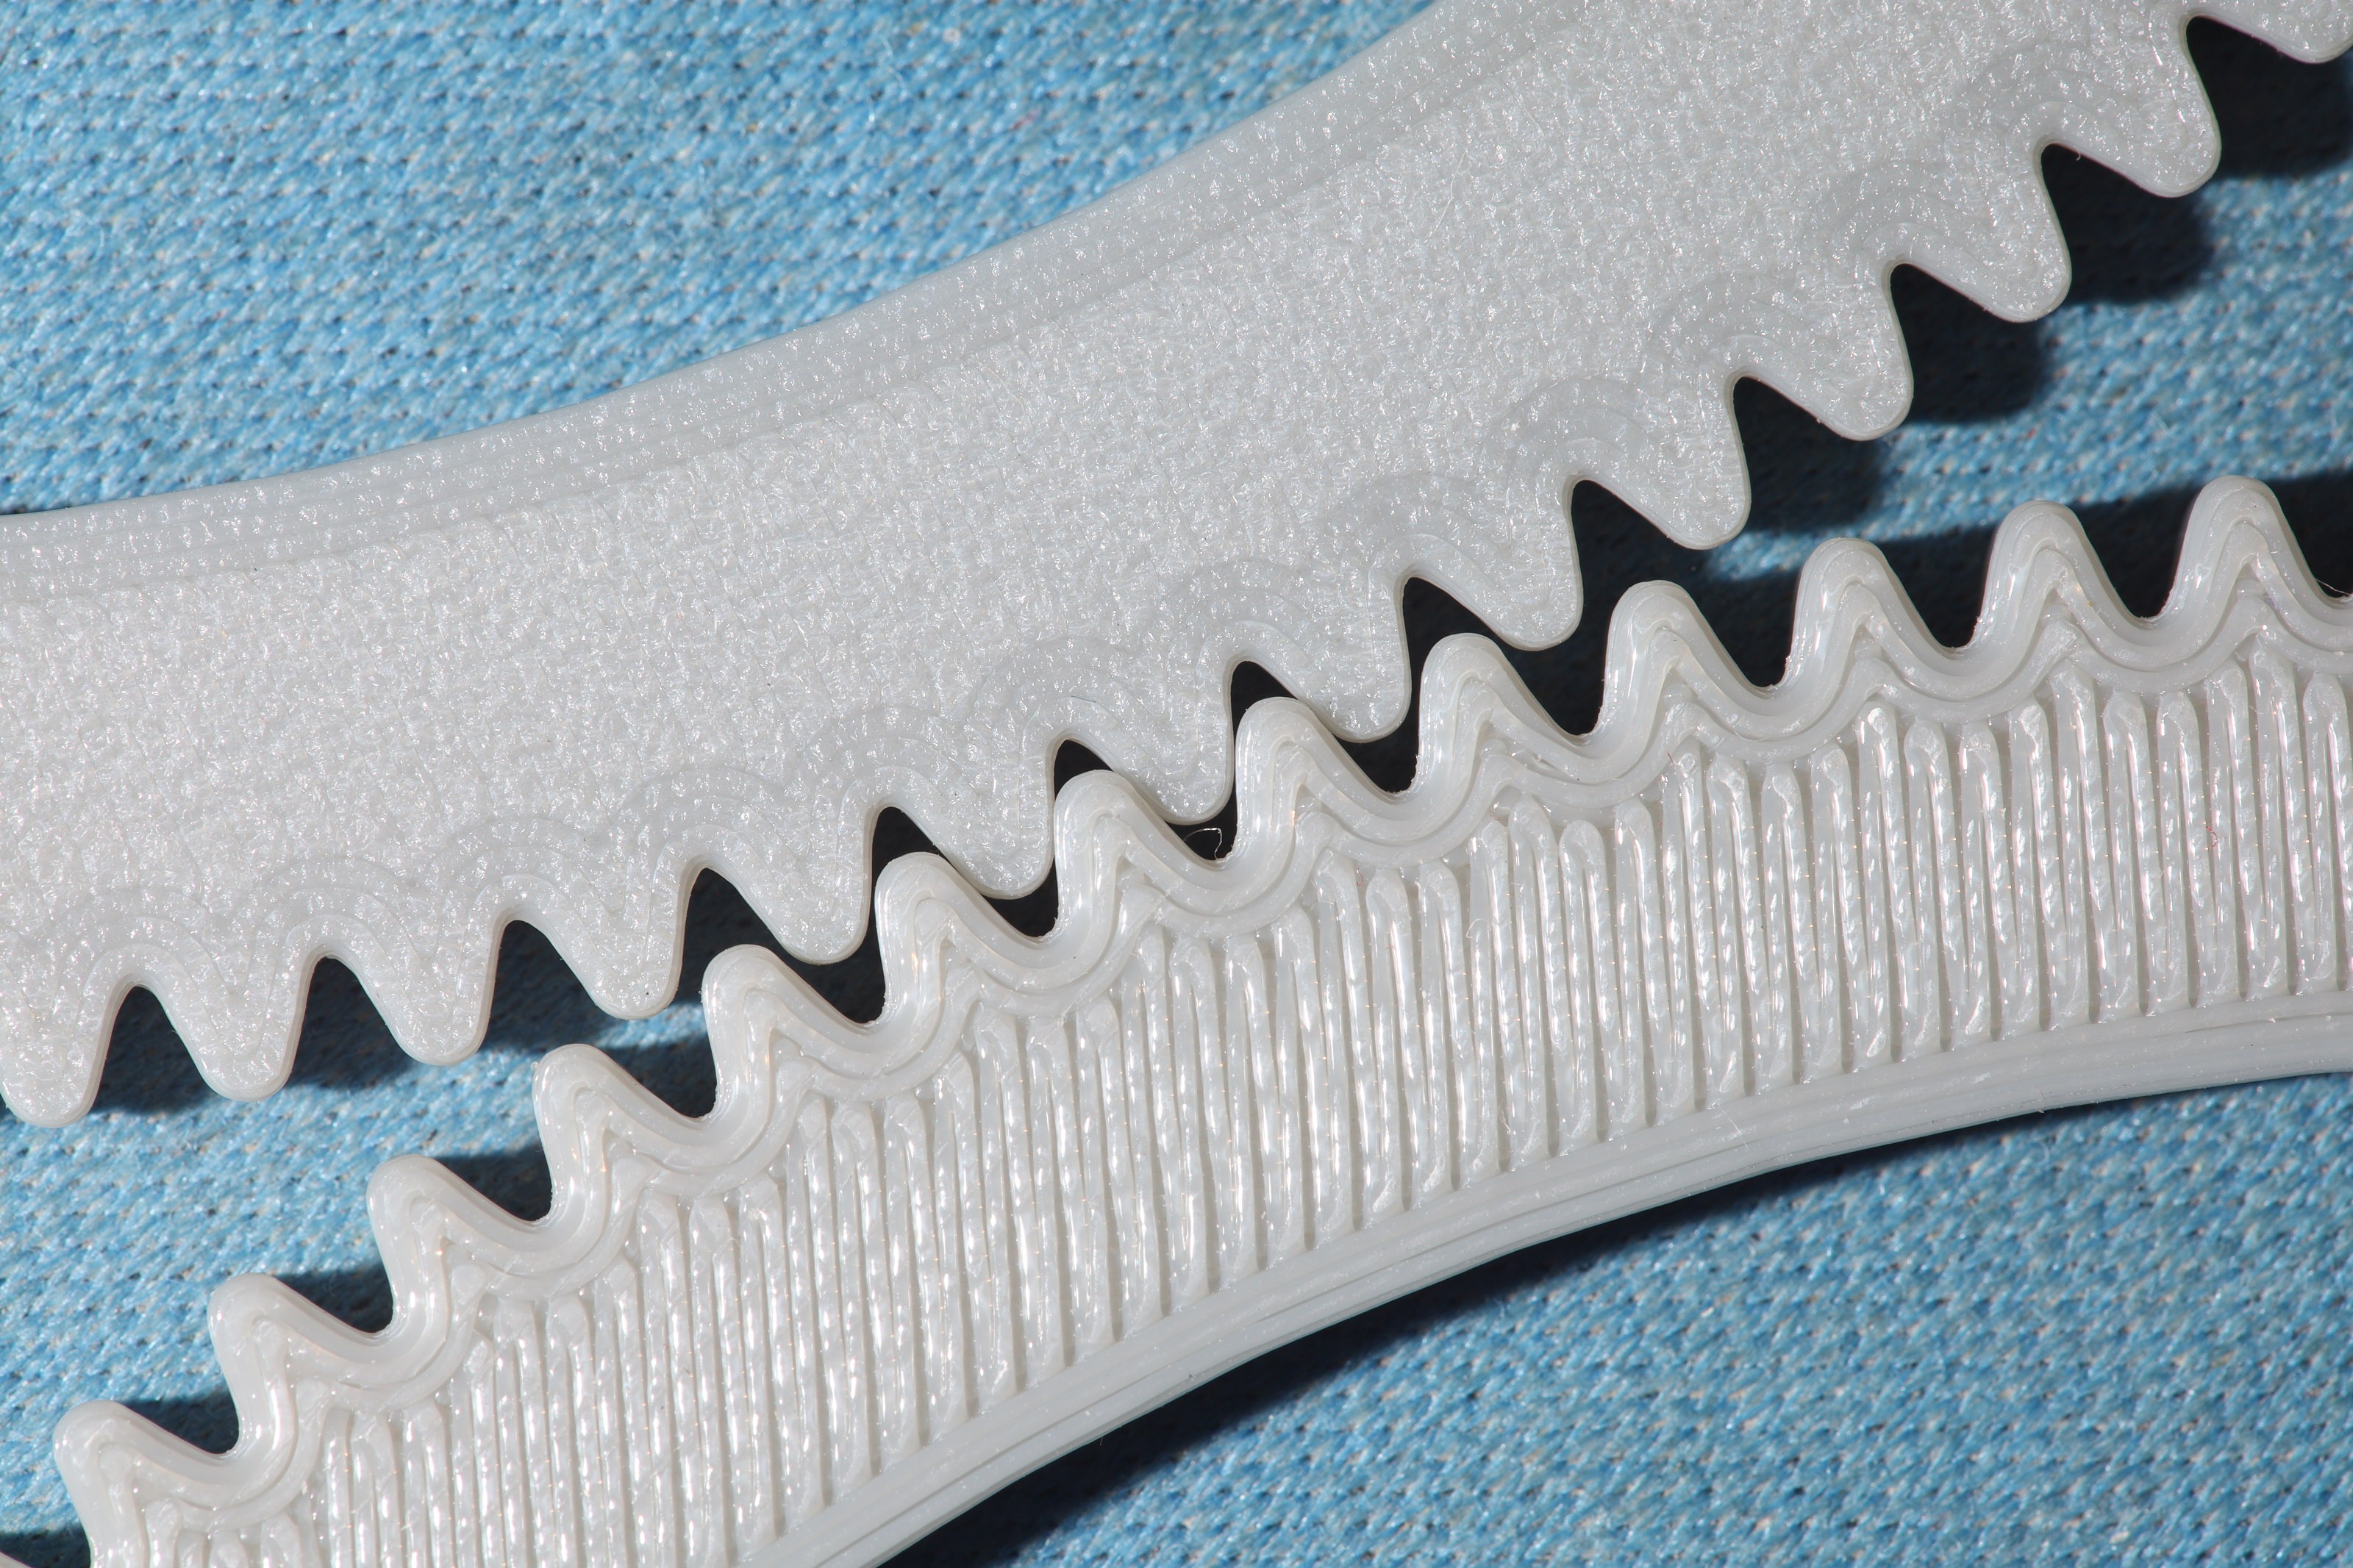
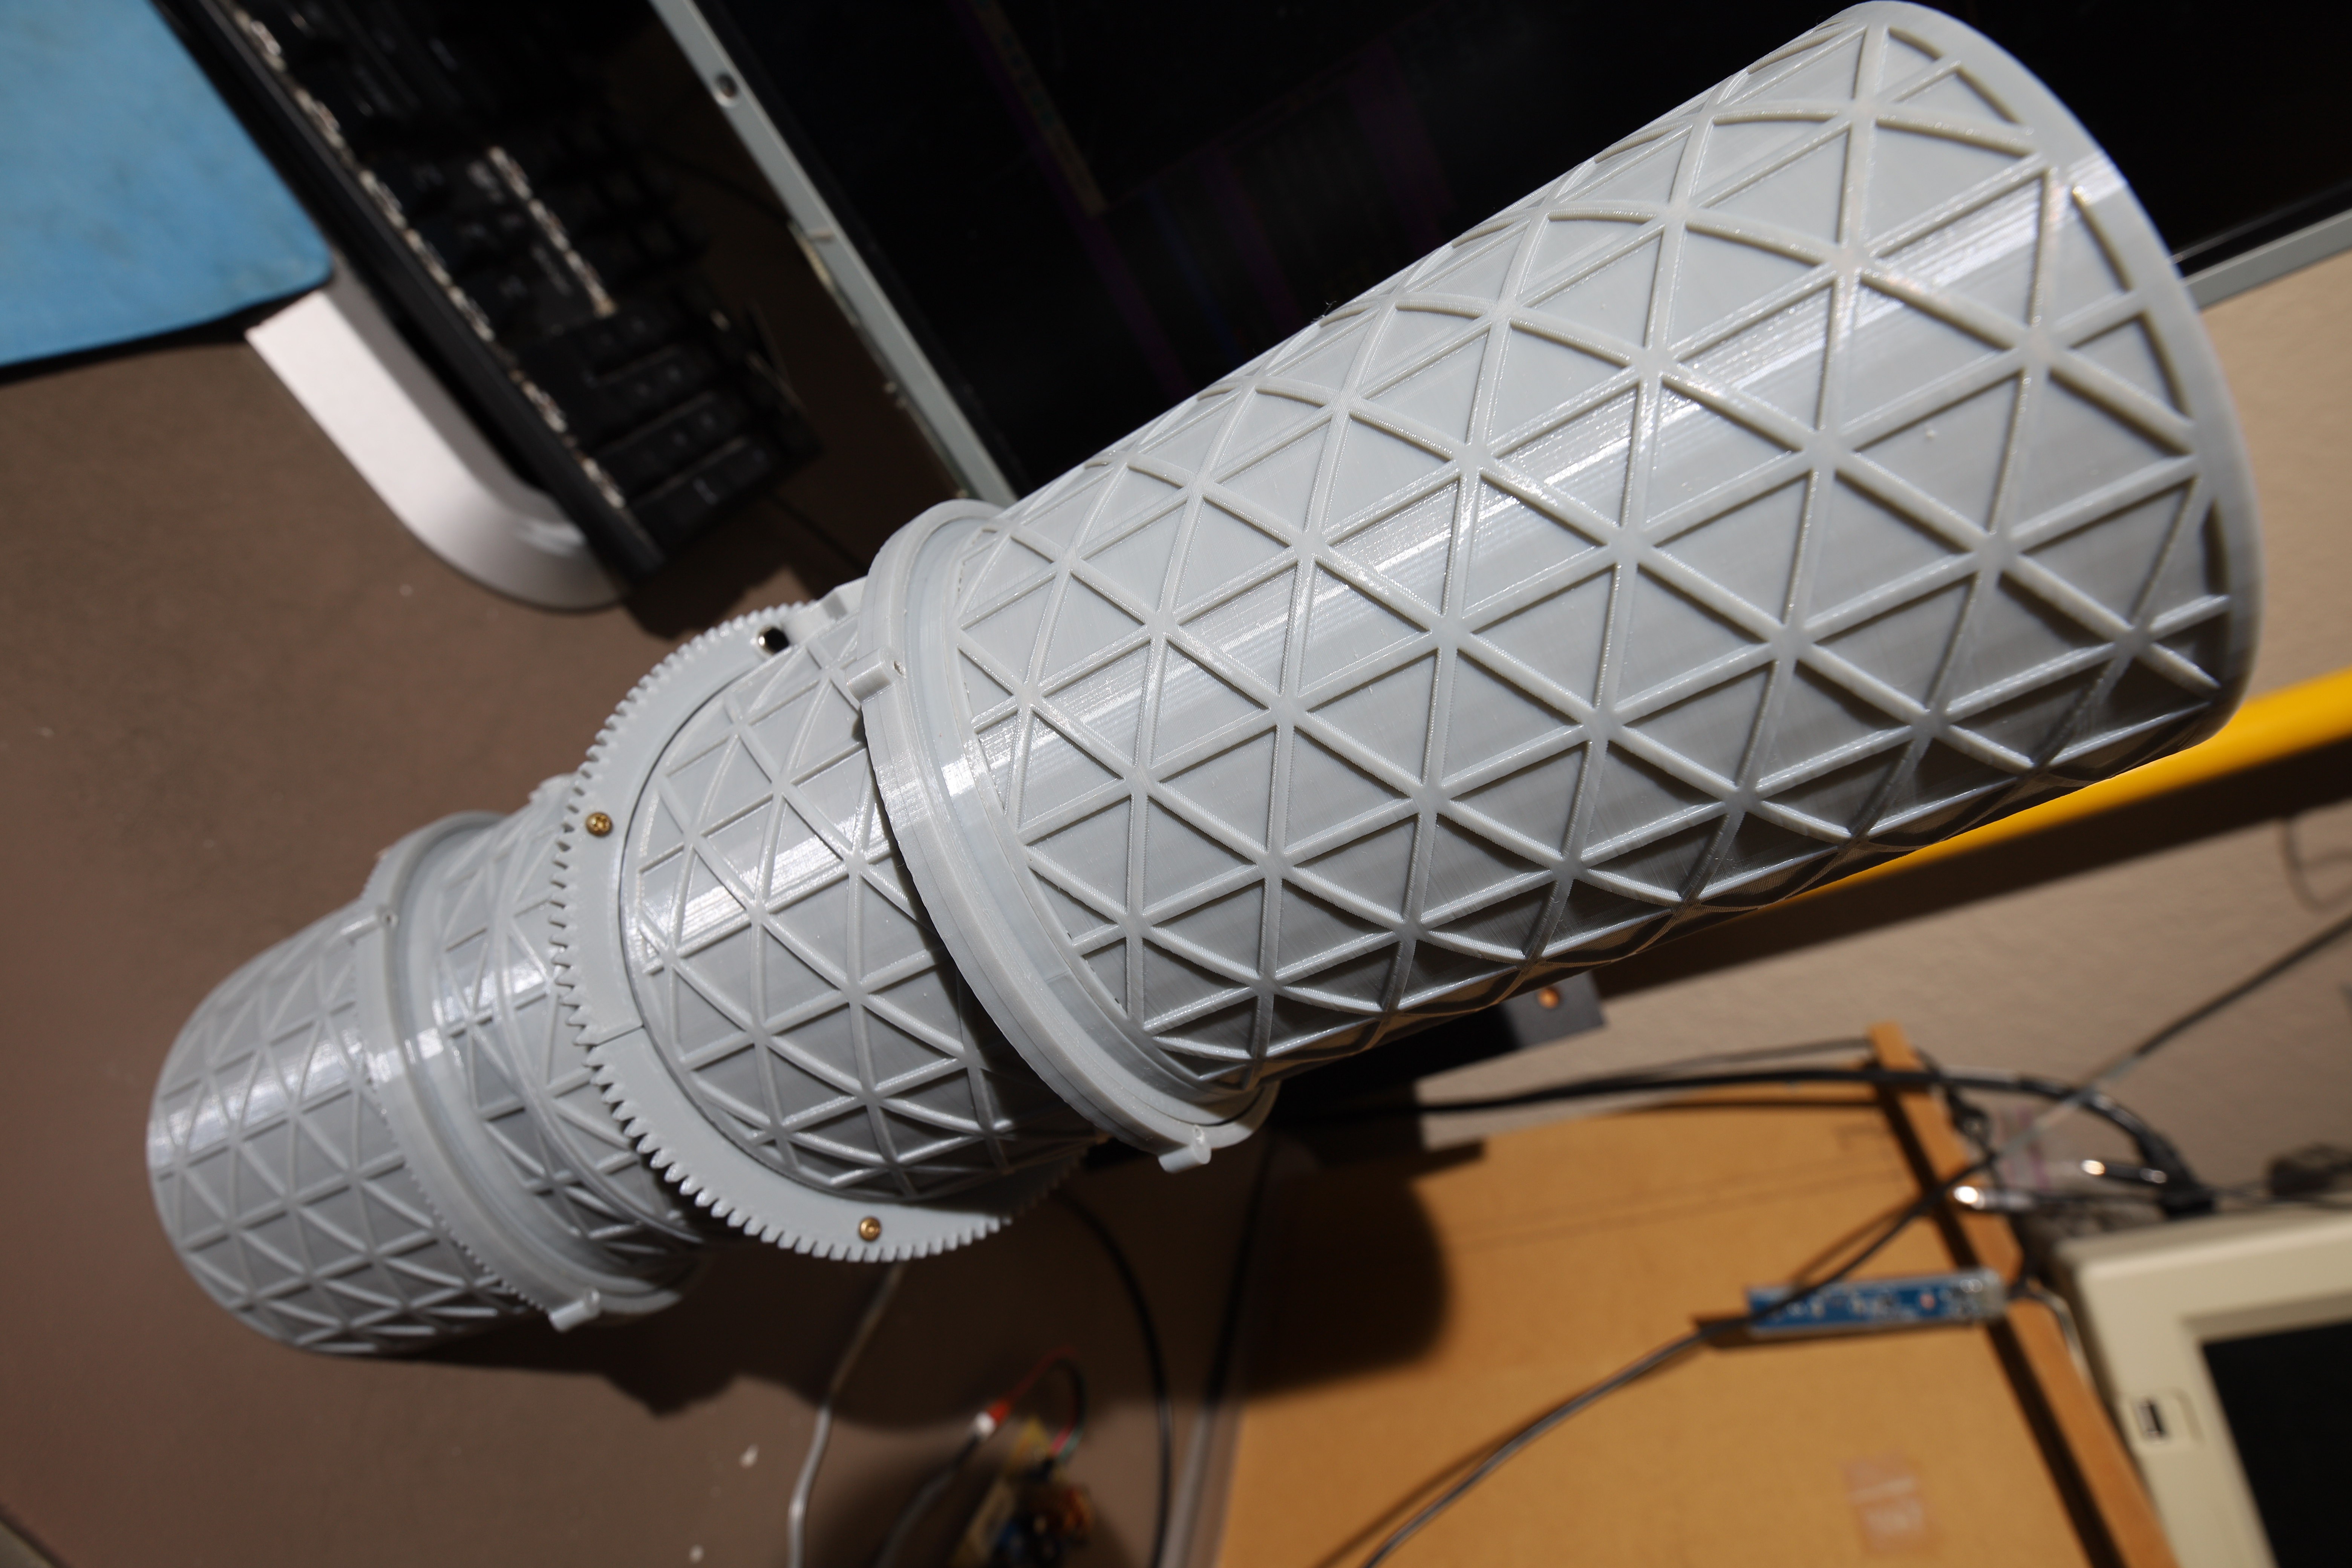
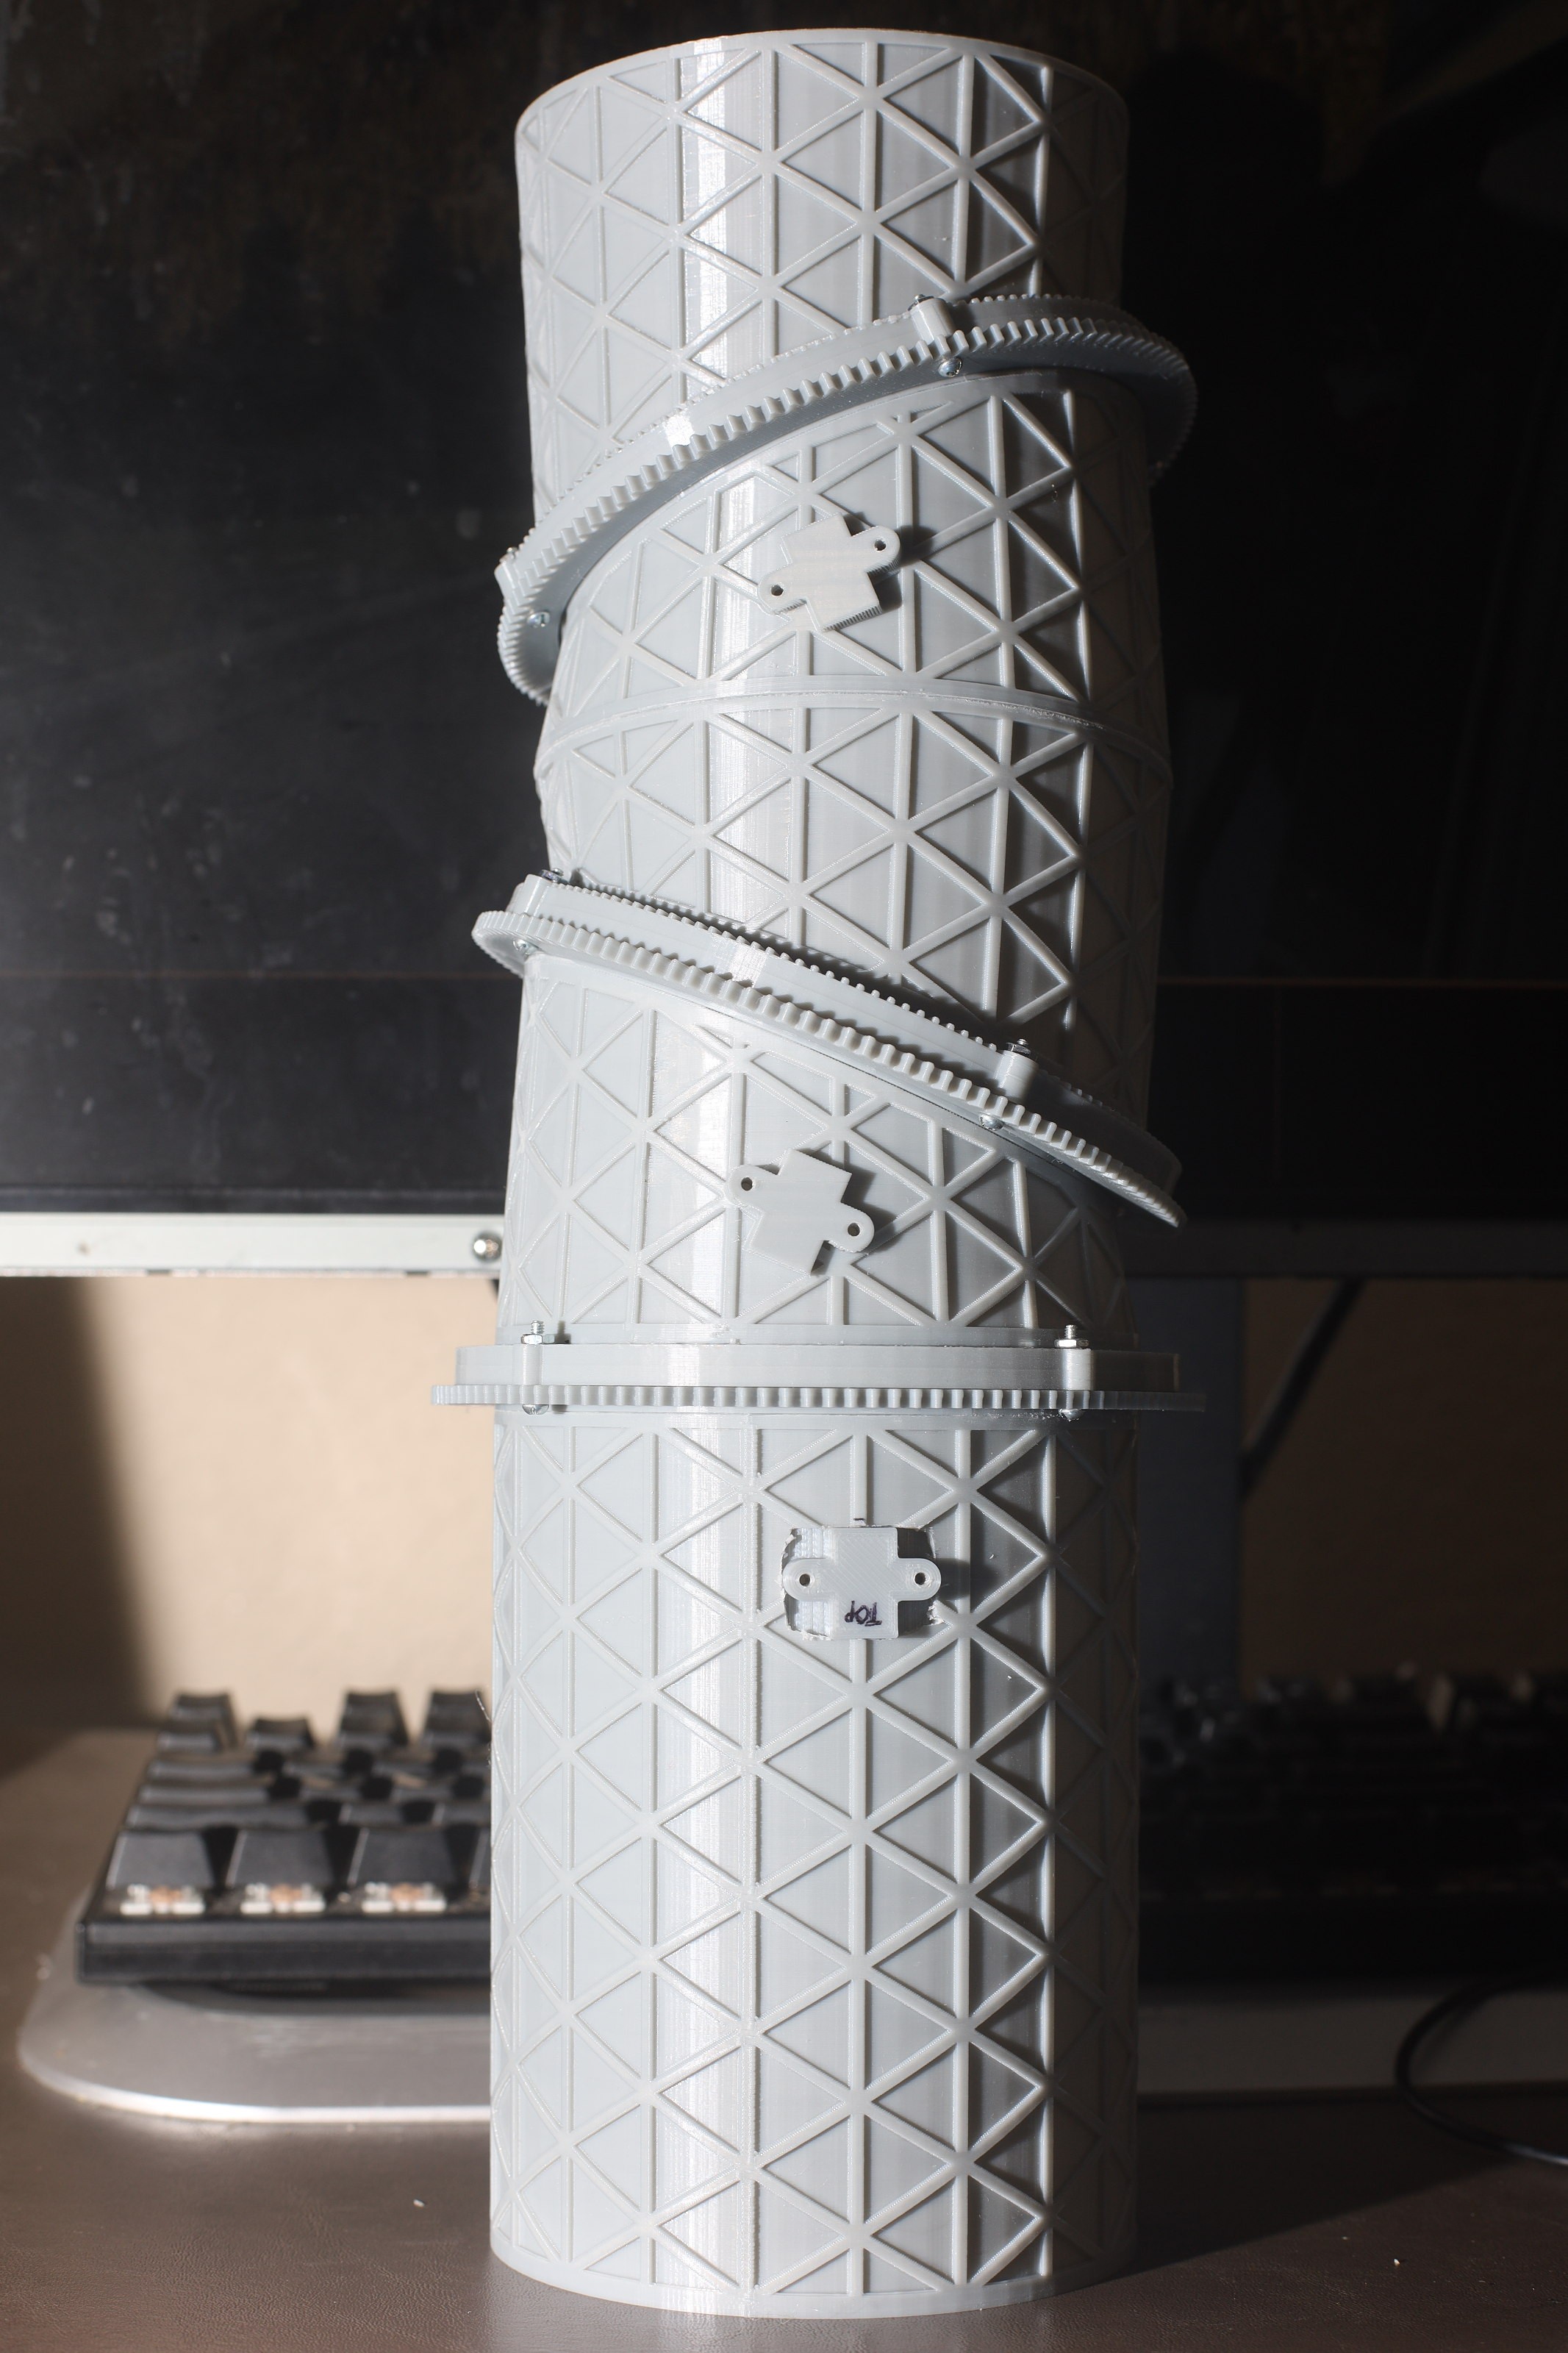
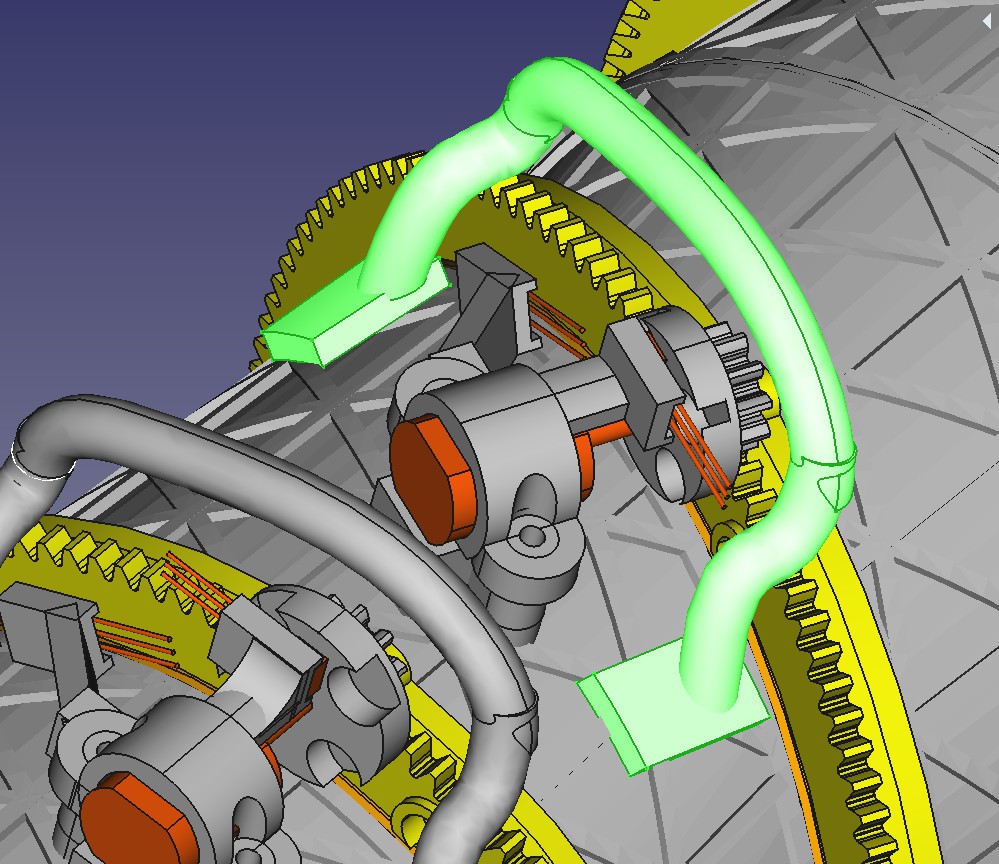
Printing subsections was key to determining the required clearance & minimum gear sizes. 3D printed parts expanded by 0.2mm per side. 2 3D printed parts needed 0.4mm between them to slide past each other. A structure of this size could get by with 3mm deep gears.

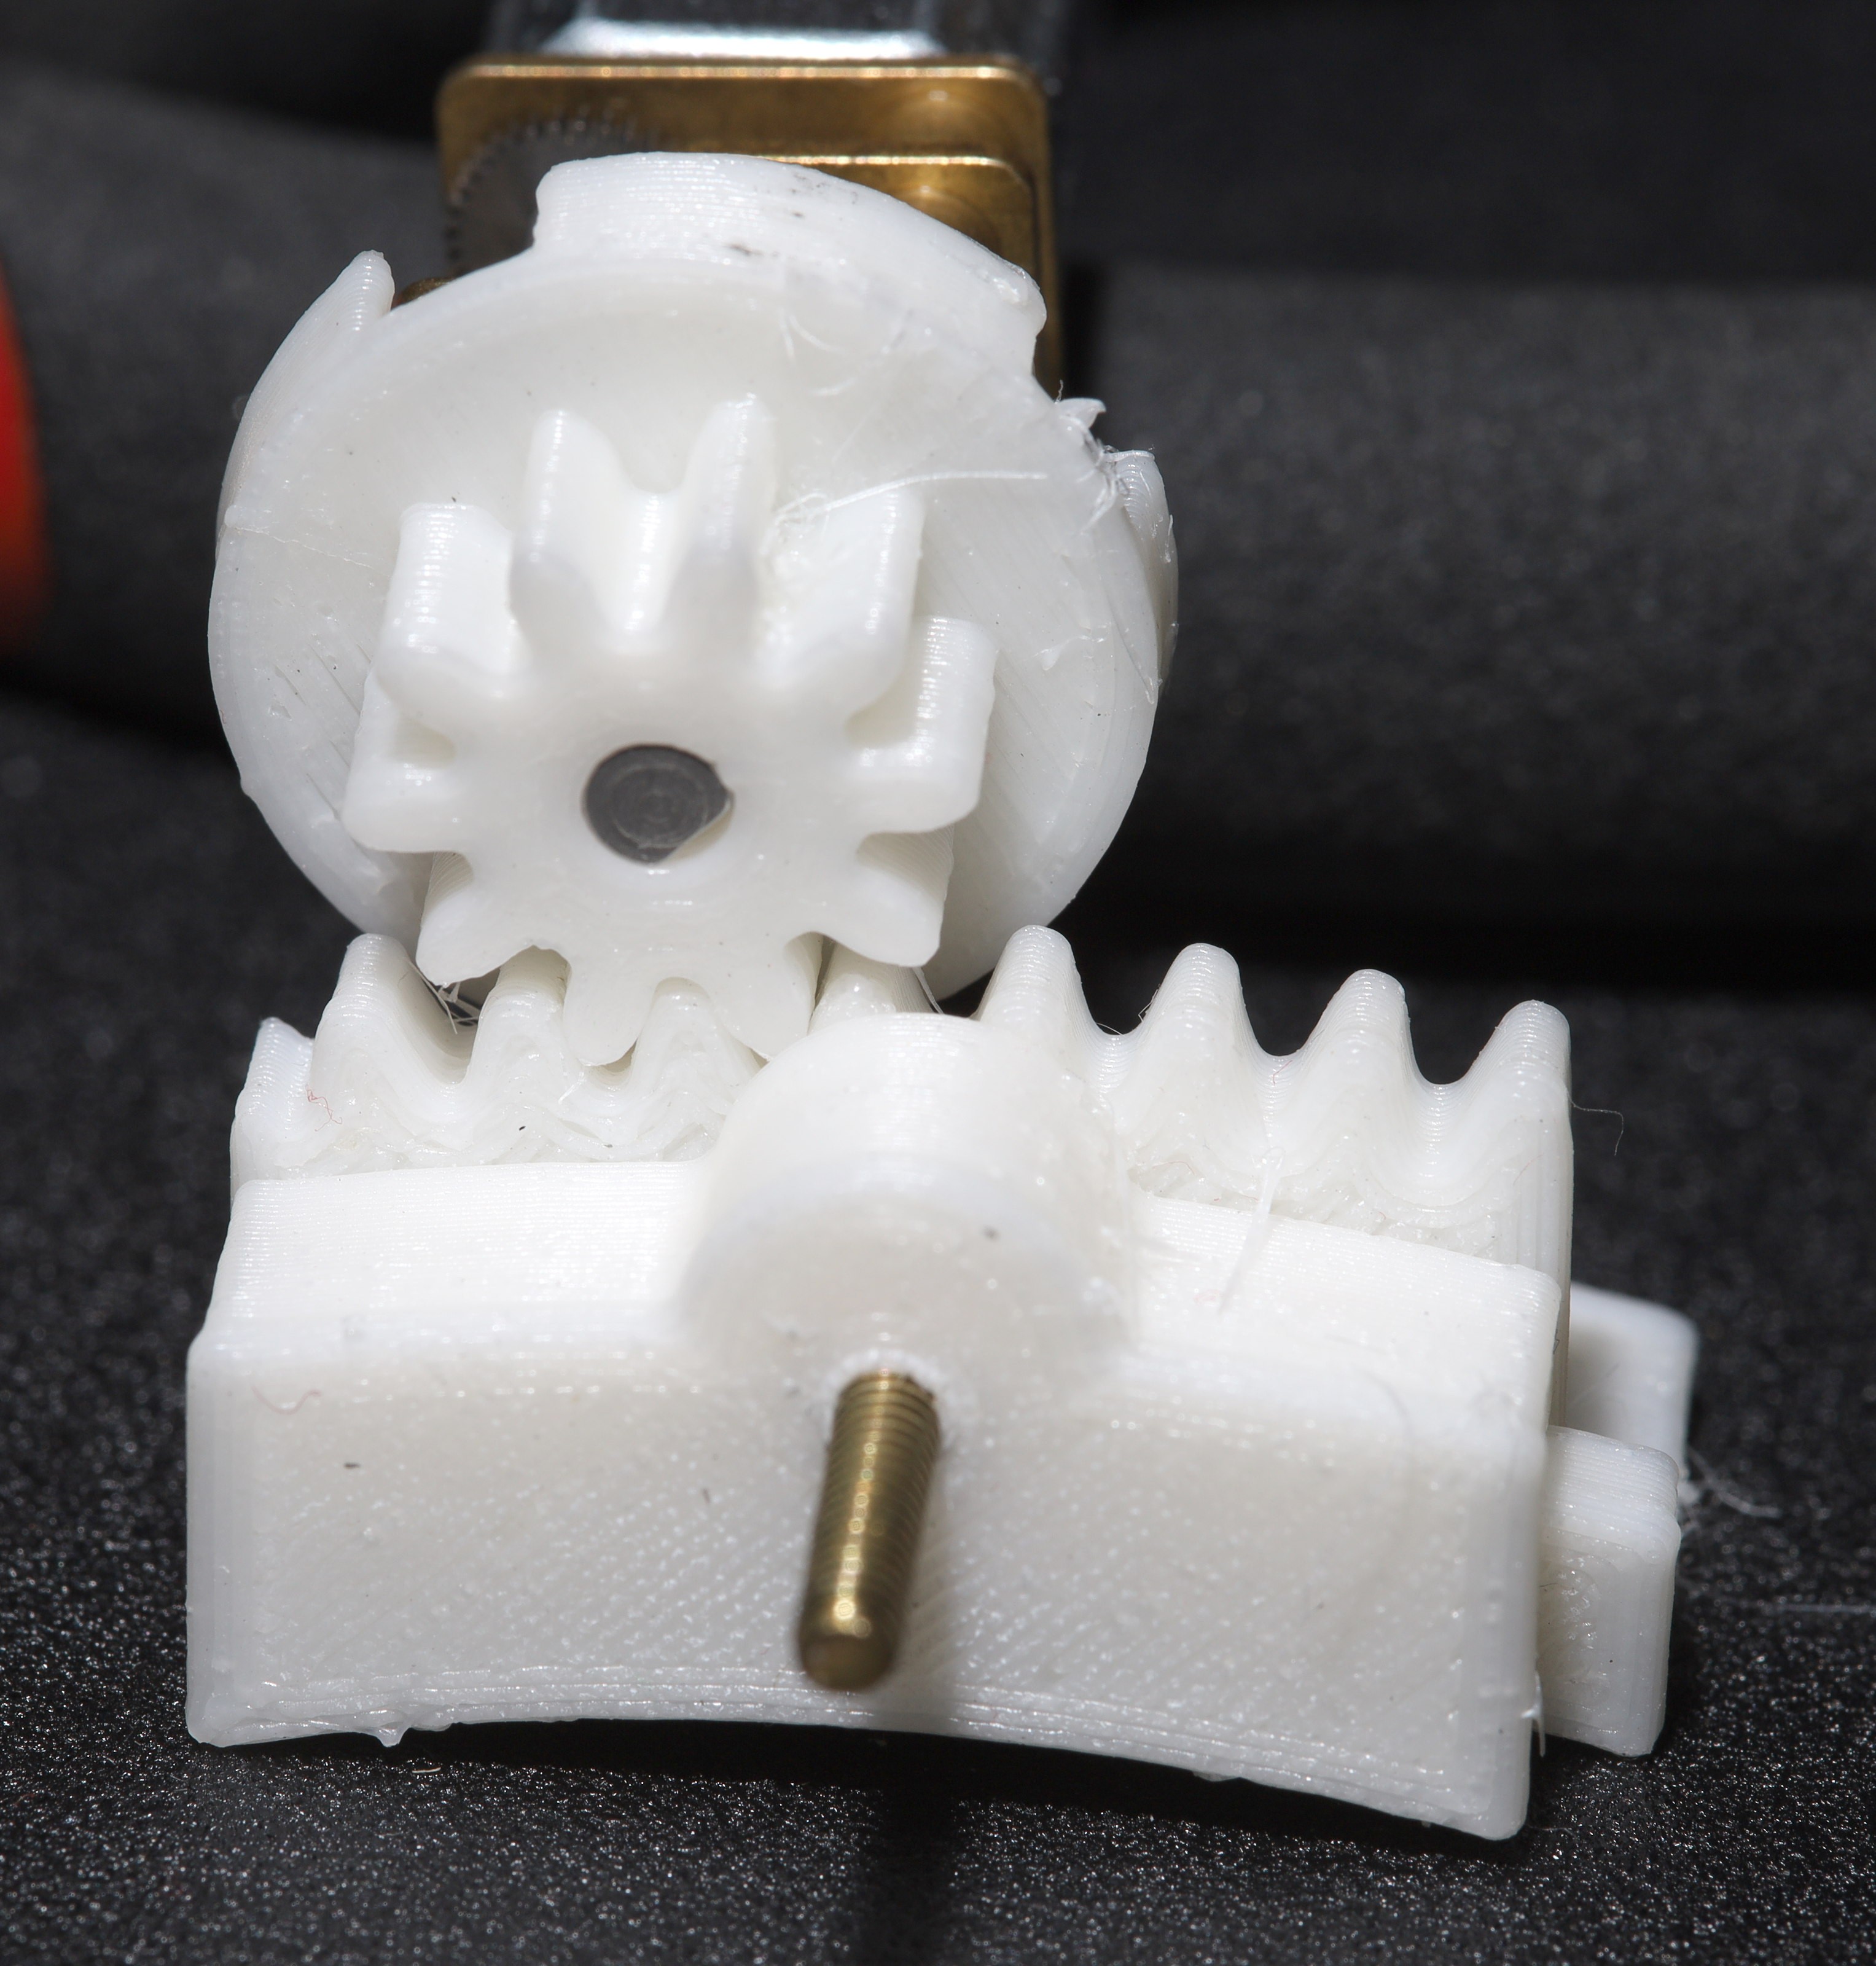
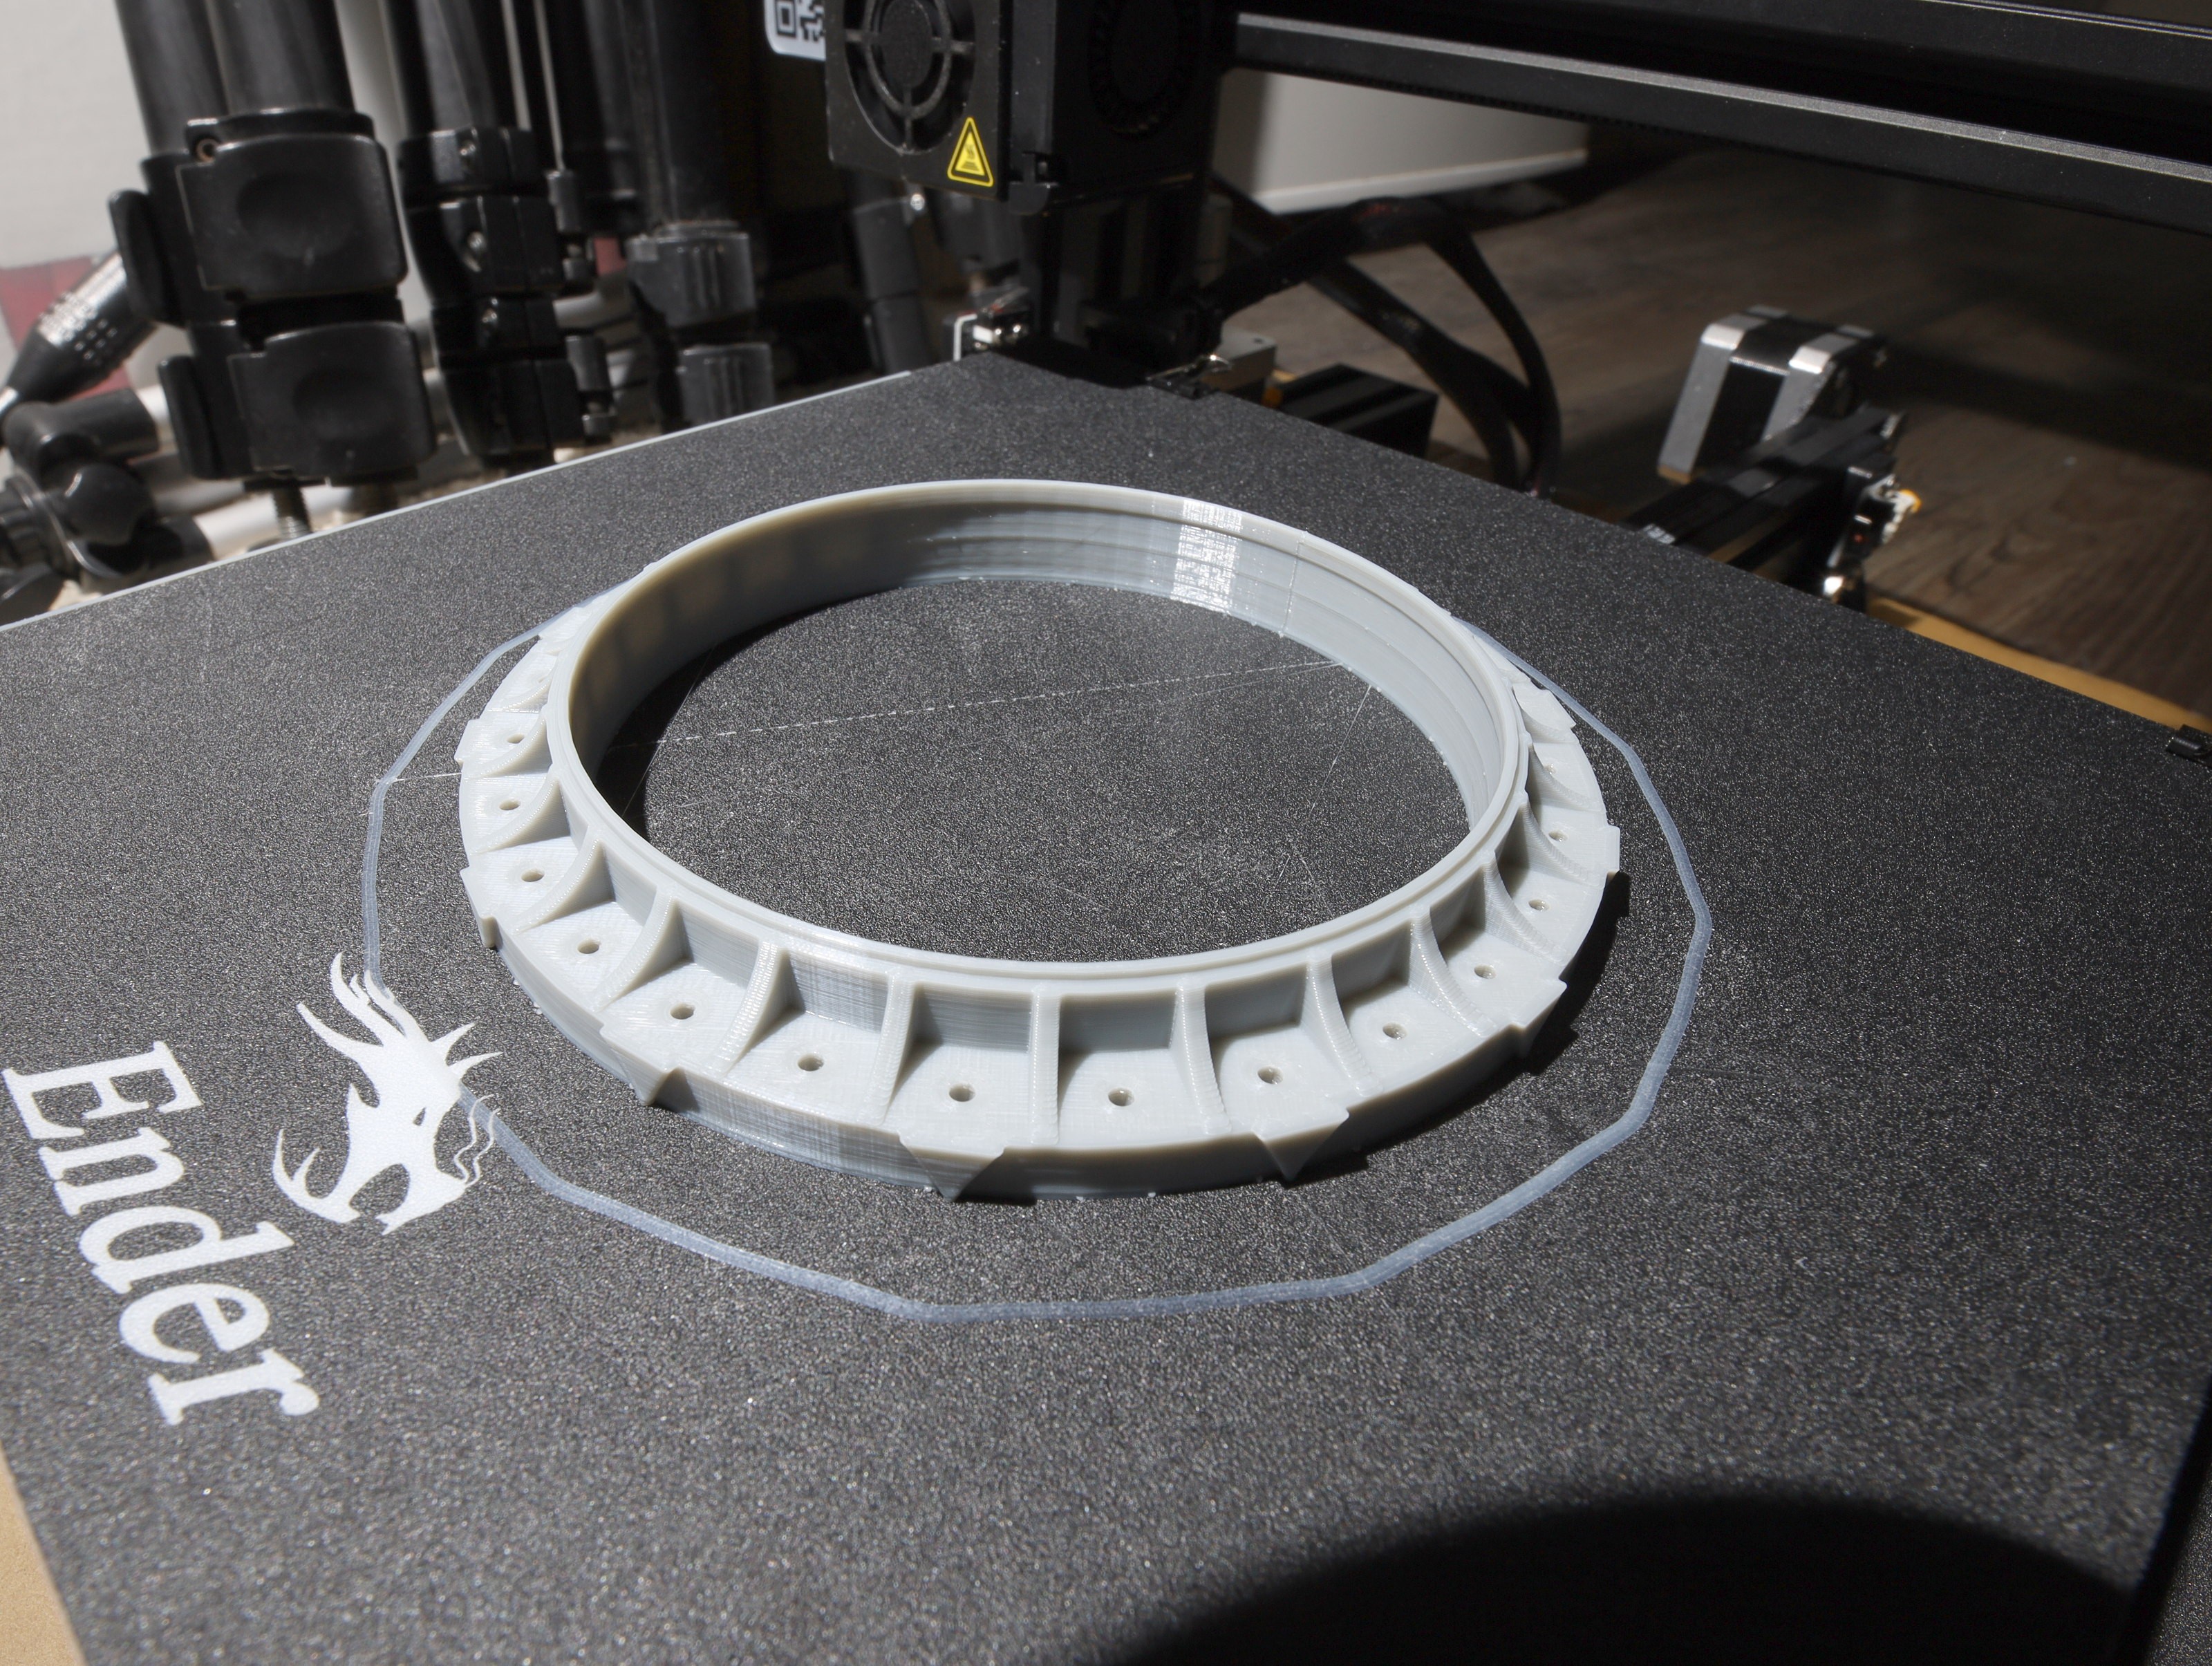
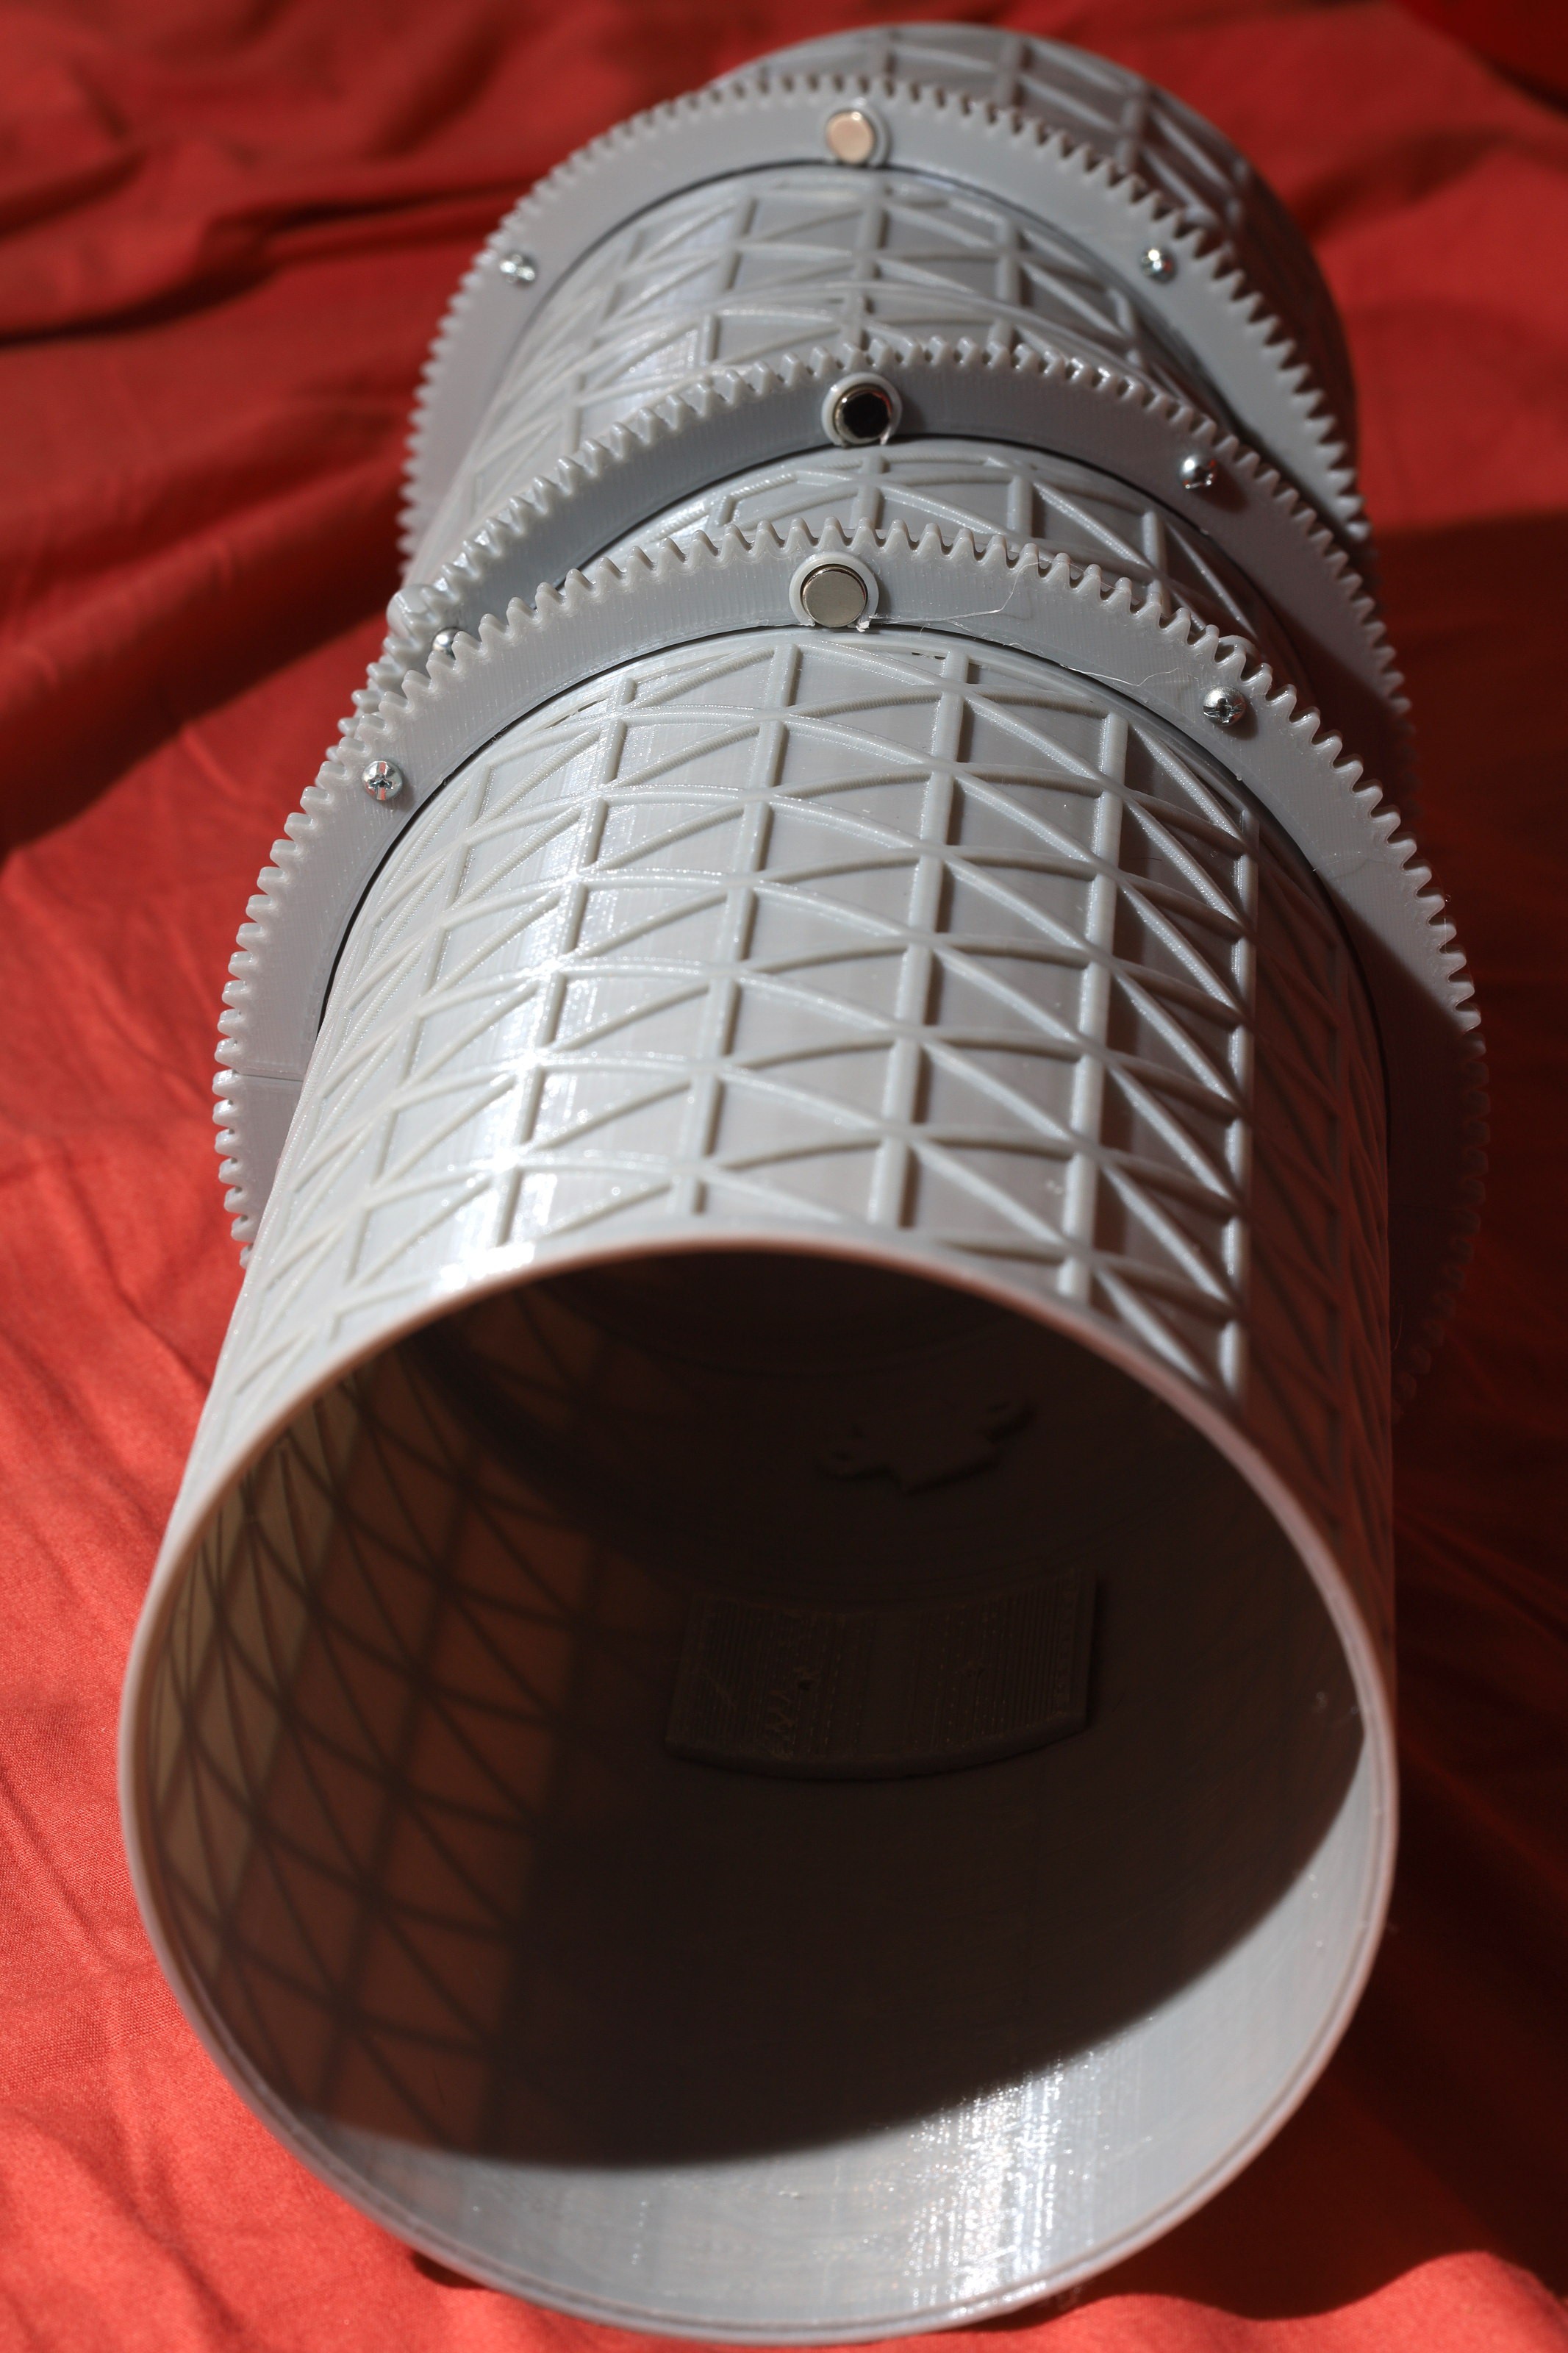
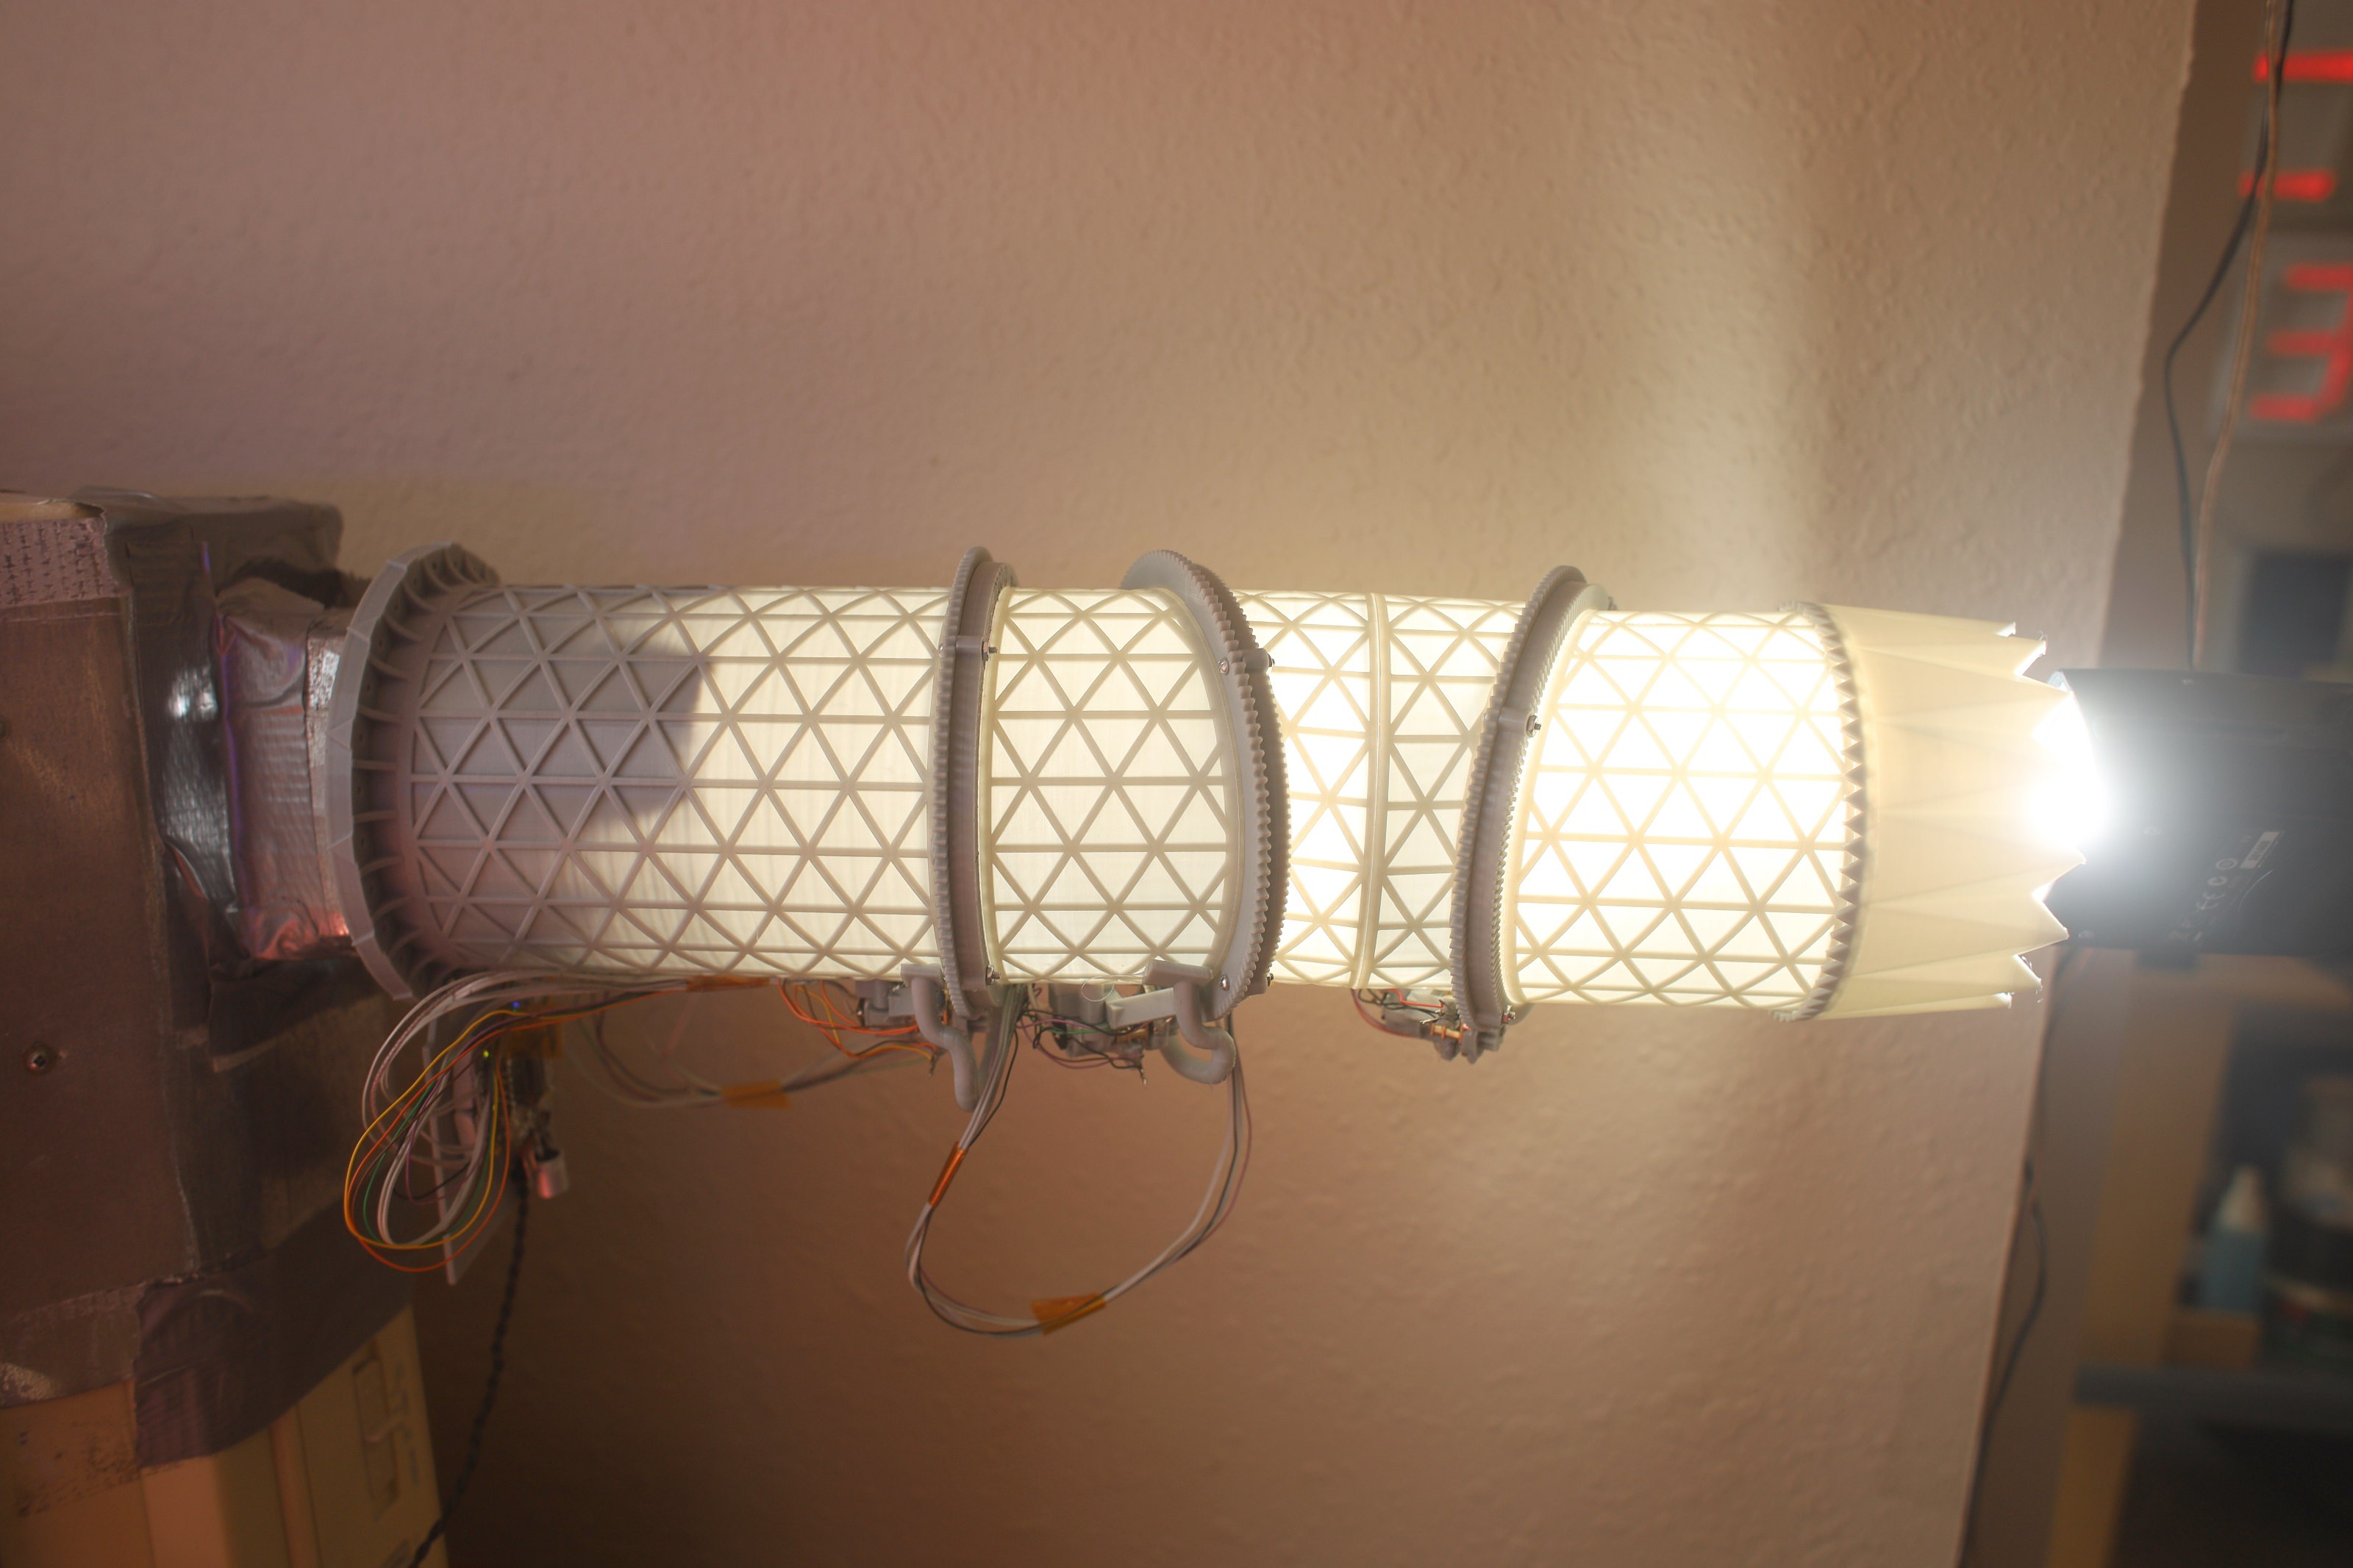
The bearings & gears were the 1st parts printed. It was remarkable to see 122 tooth gears like this pop out of the printer after being just dreams for home fabricators for all time. The bearing parts got 0.5mm of separation to guarantee they wouldn't bind. The most loaded bearing still needed silicone grease.

Printing without support or a raft yielded a much smoother bottom side.
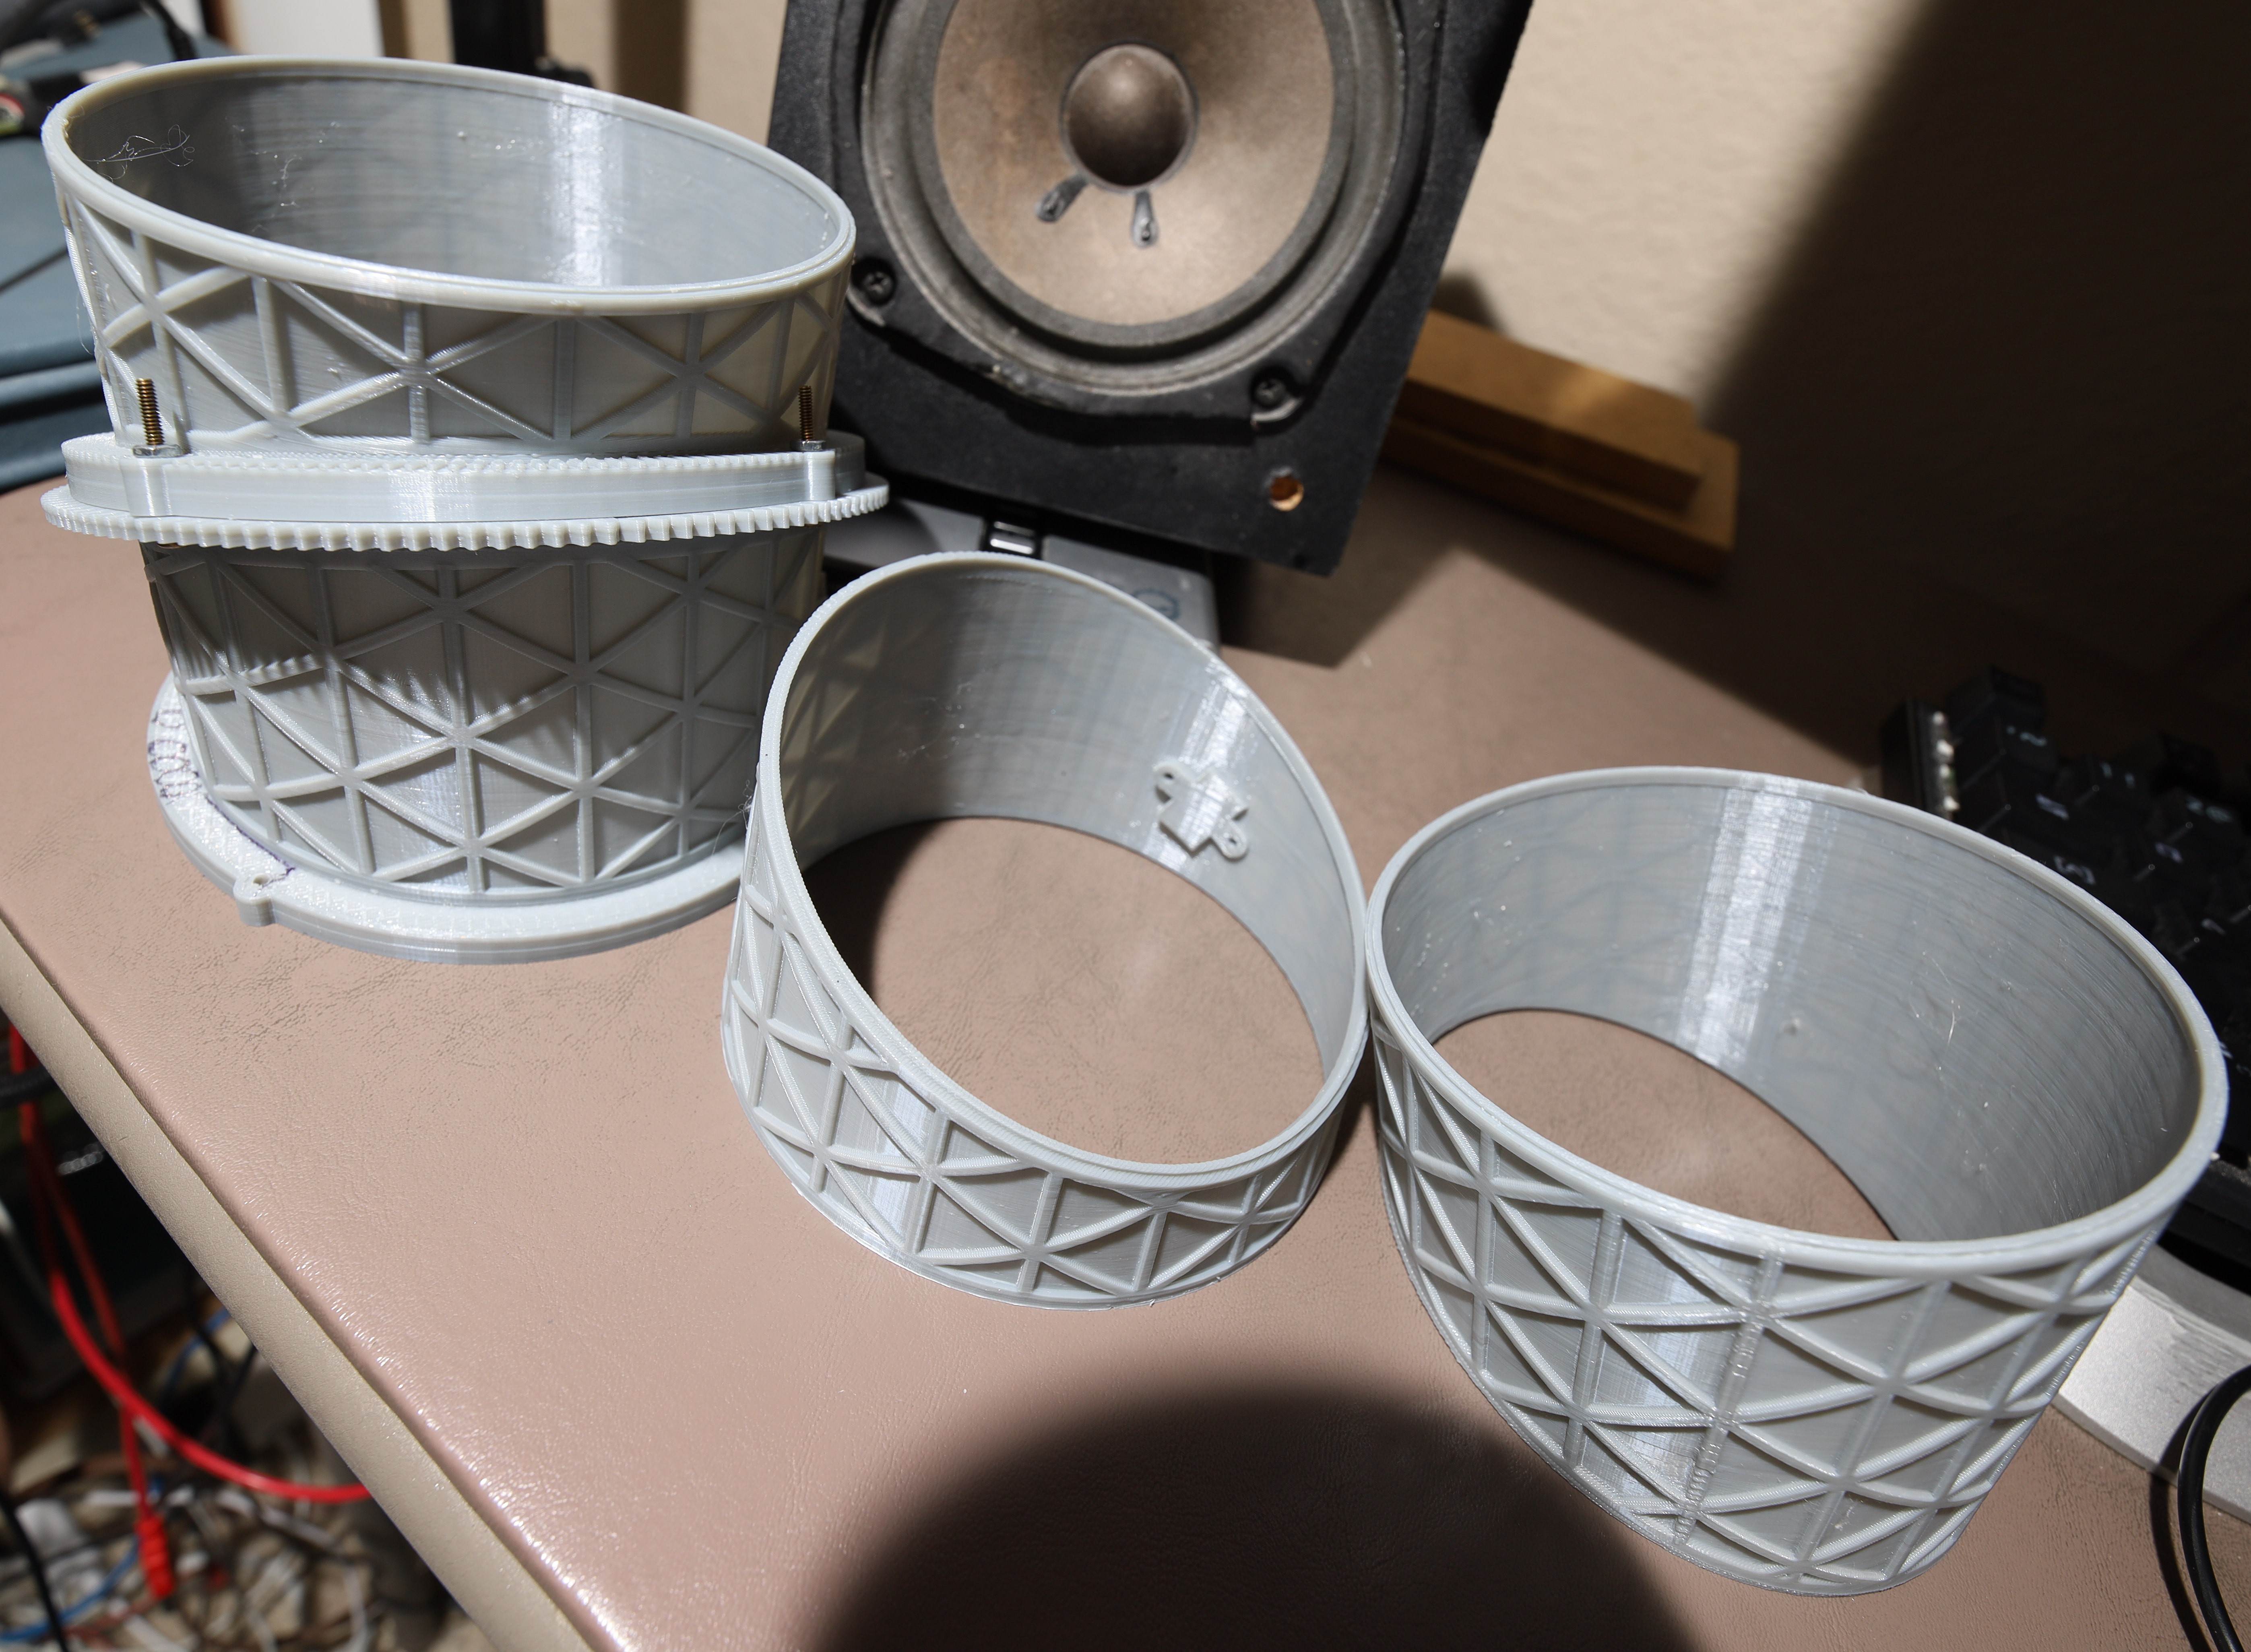
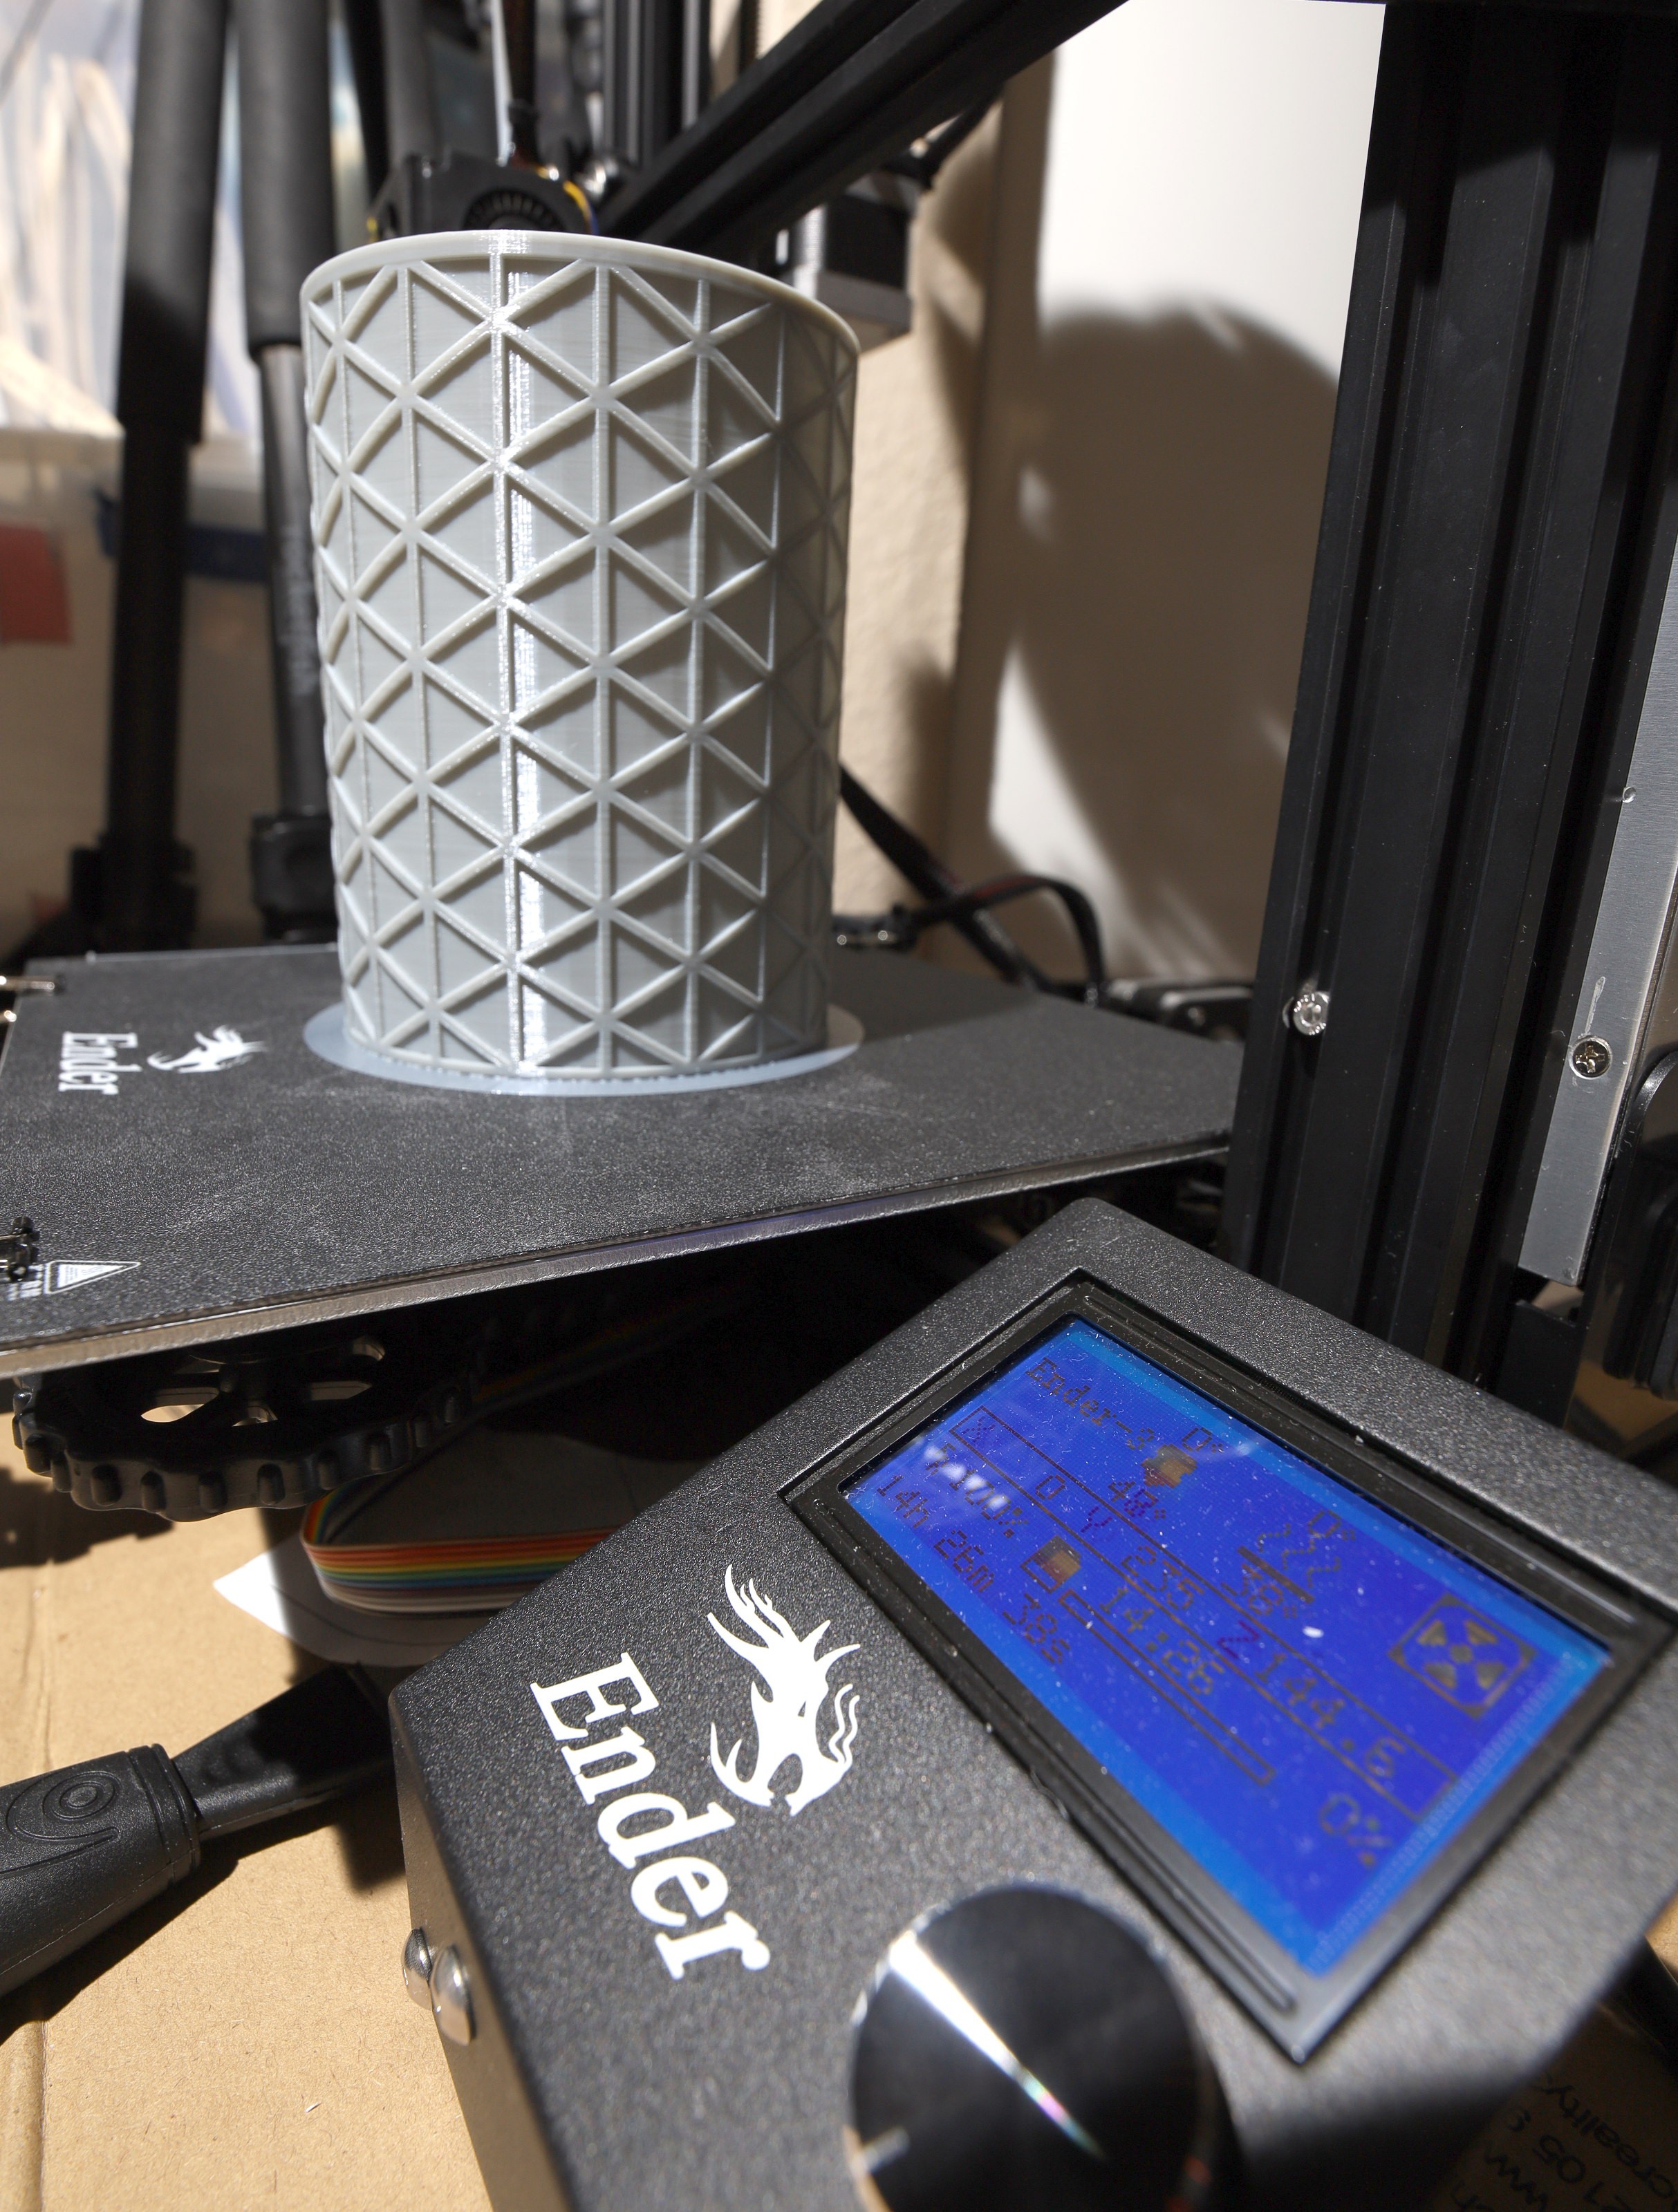
The longest printout was 14 hours for the longest isogrid tube. Sadly, it lacked a motor mount which later had to be bodged on.

The boundary sensors used hall effect sensors instead of limit switches.
Attention then turned to the electronicals.
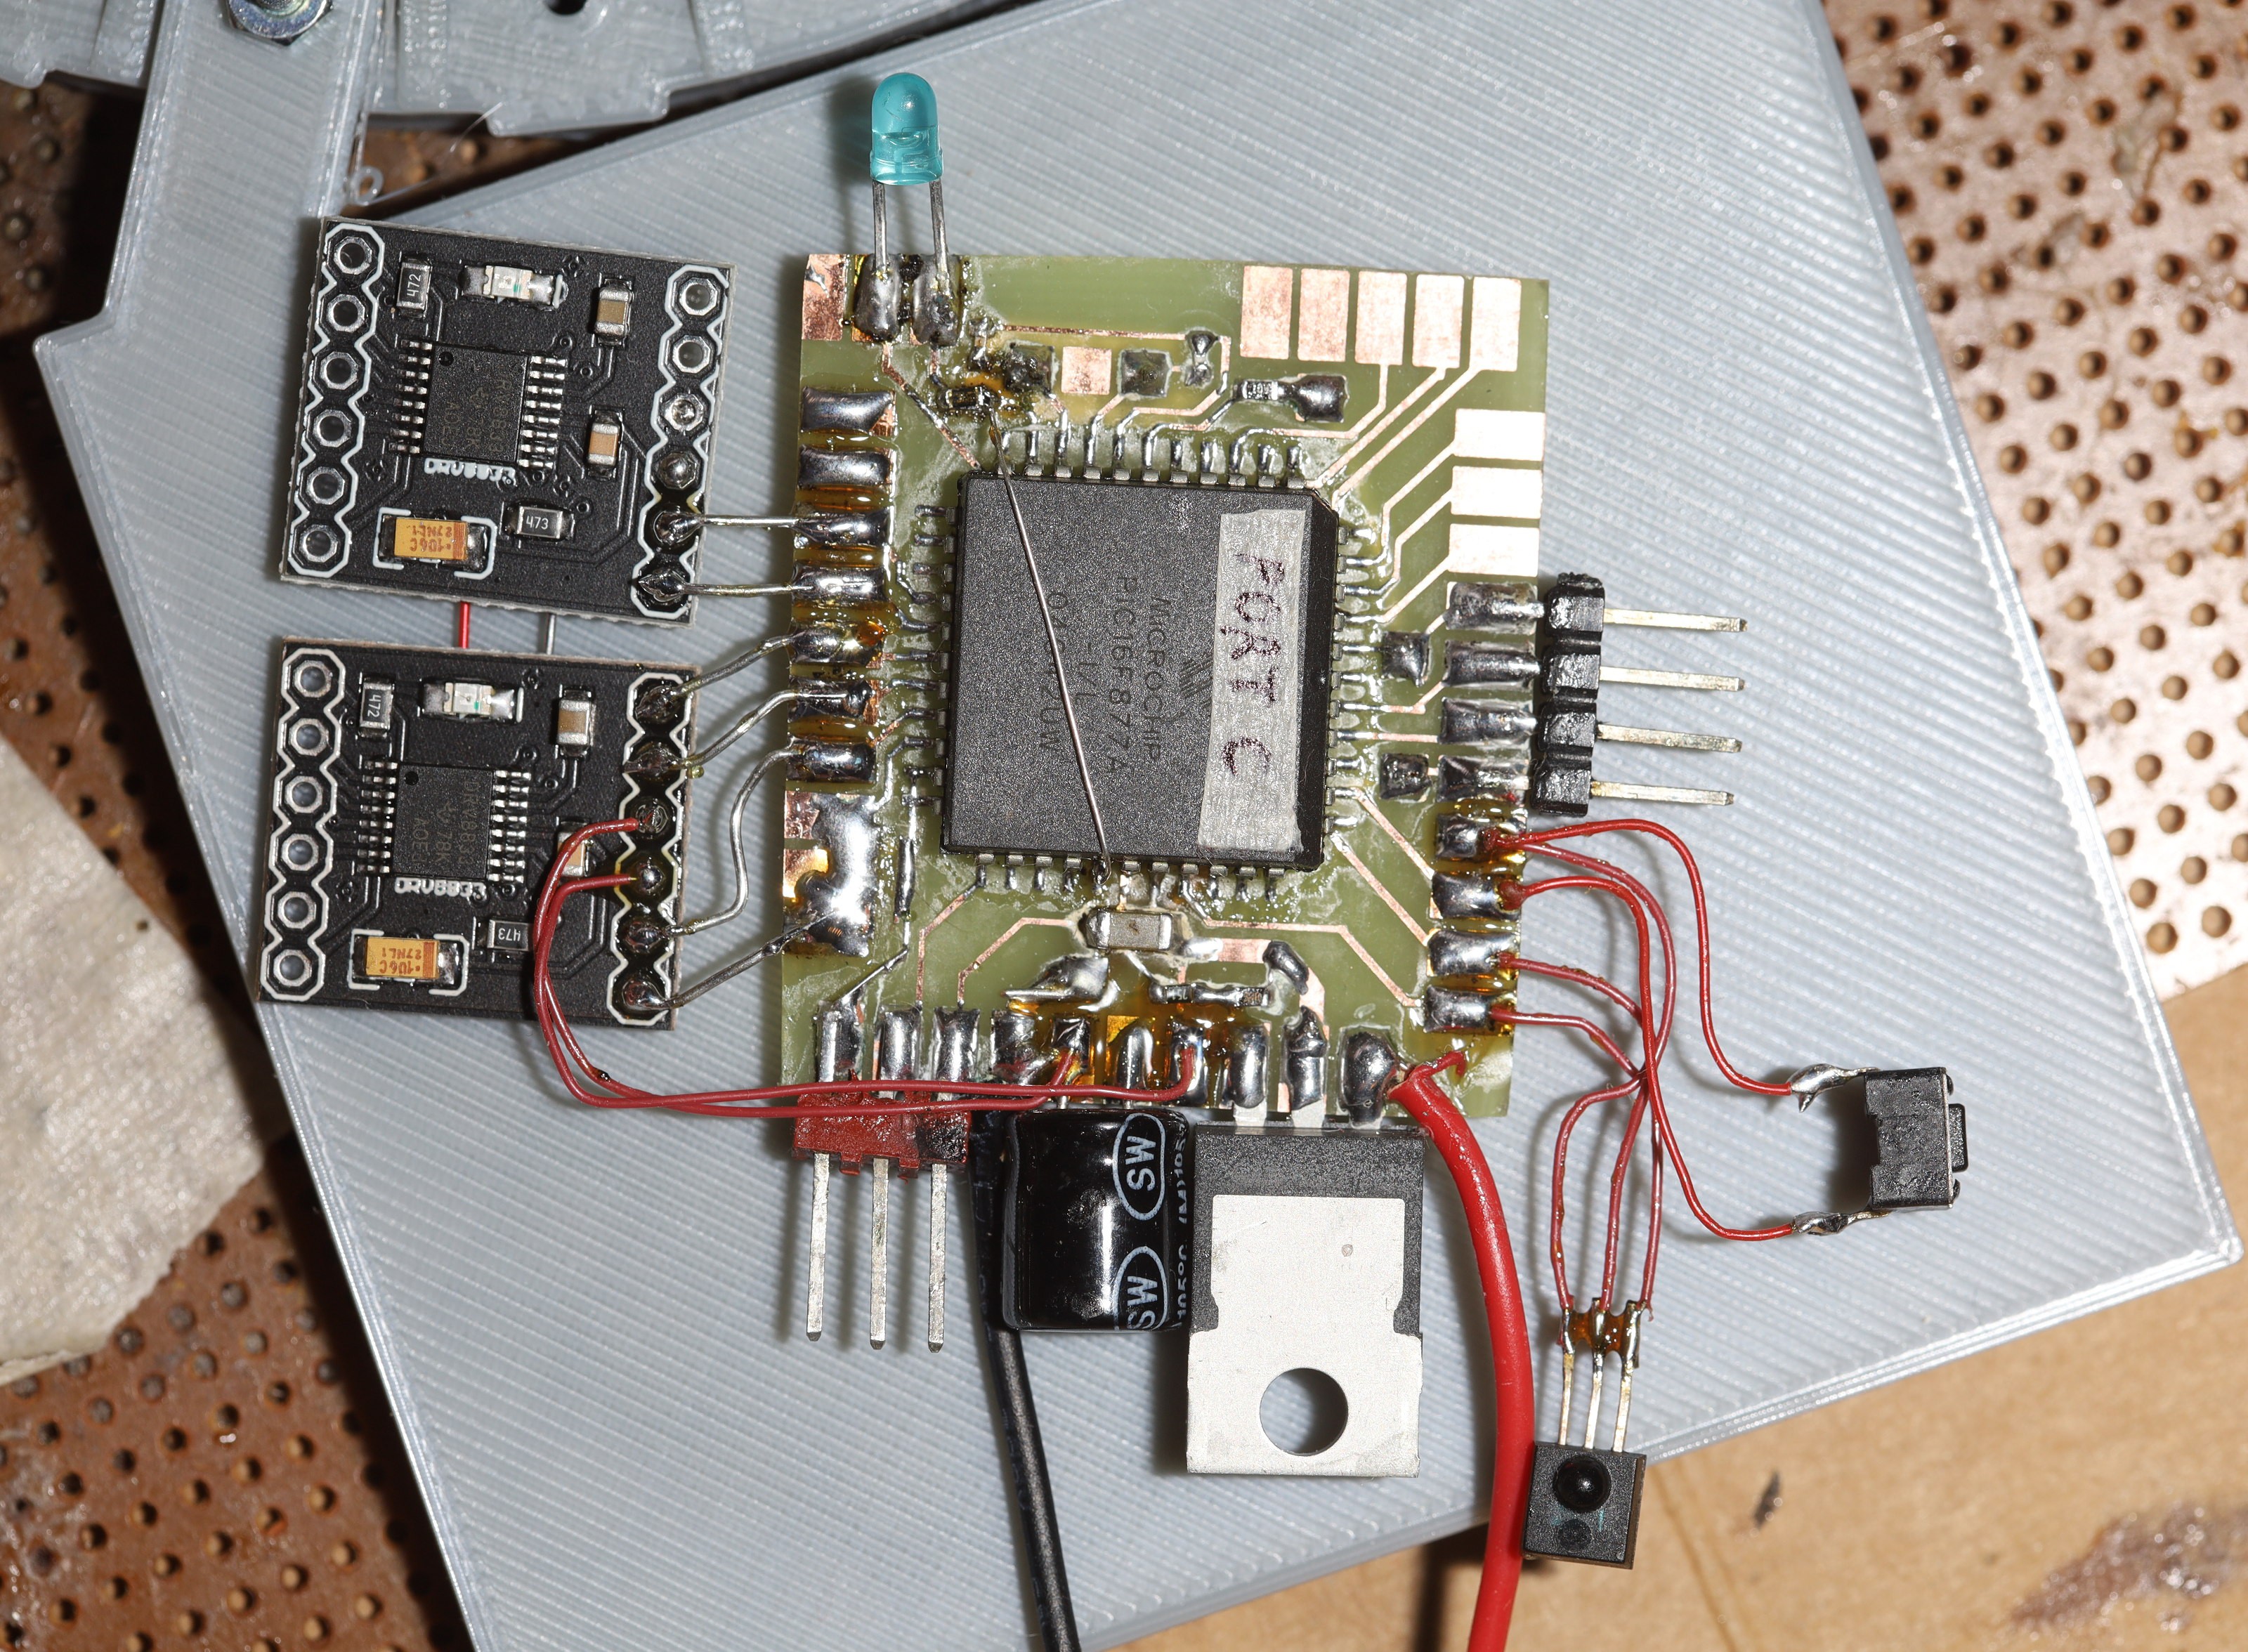
So the lion kingdom uses vintage microcontrollers because they look cool, there's an abundant supply in the apartment, the current task needs hardly any computing power, & modern C compilers don't tie your program to a specific chip. It wasn't that way 20 years ago when these microcontrollers 1st arrived. They all have dead pins which are normally labeled.
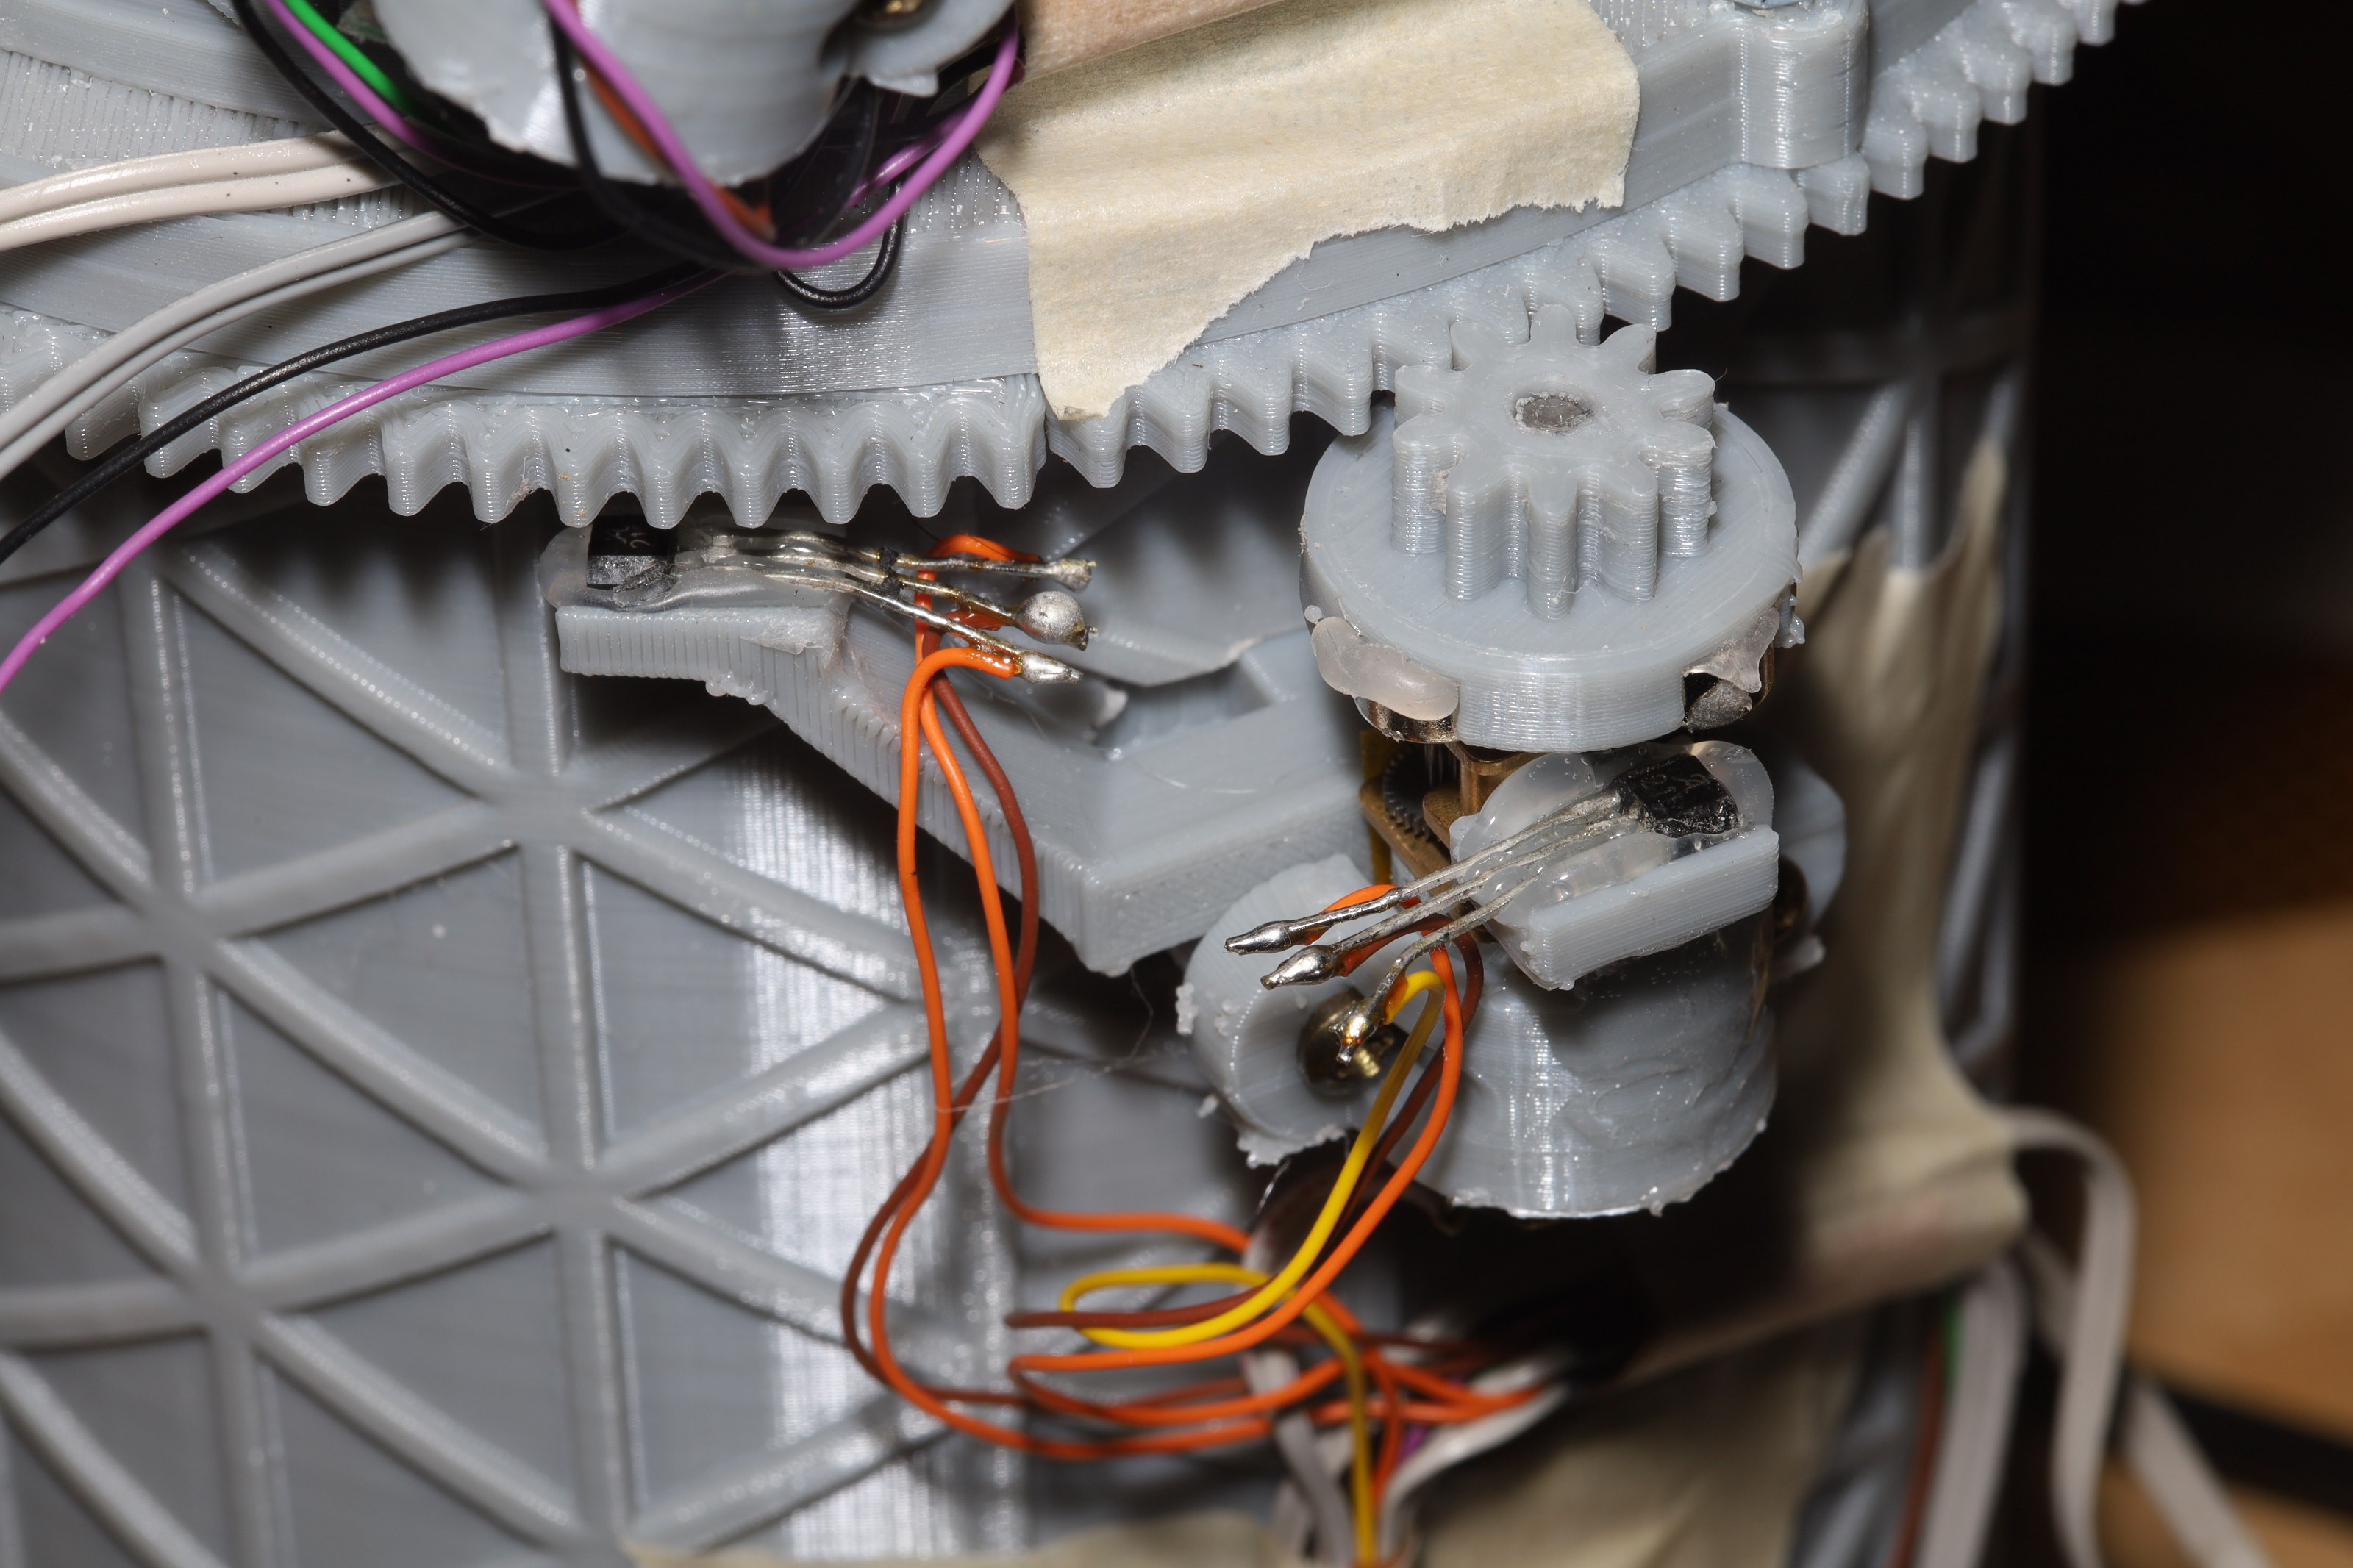


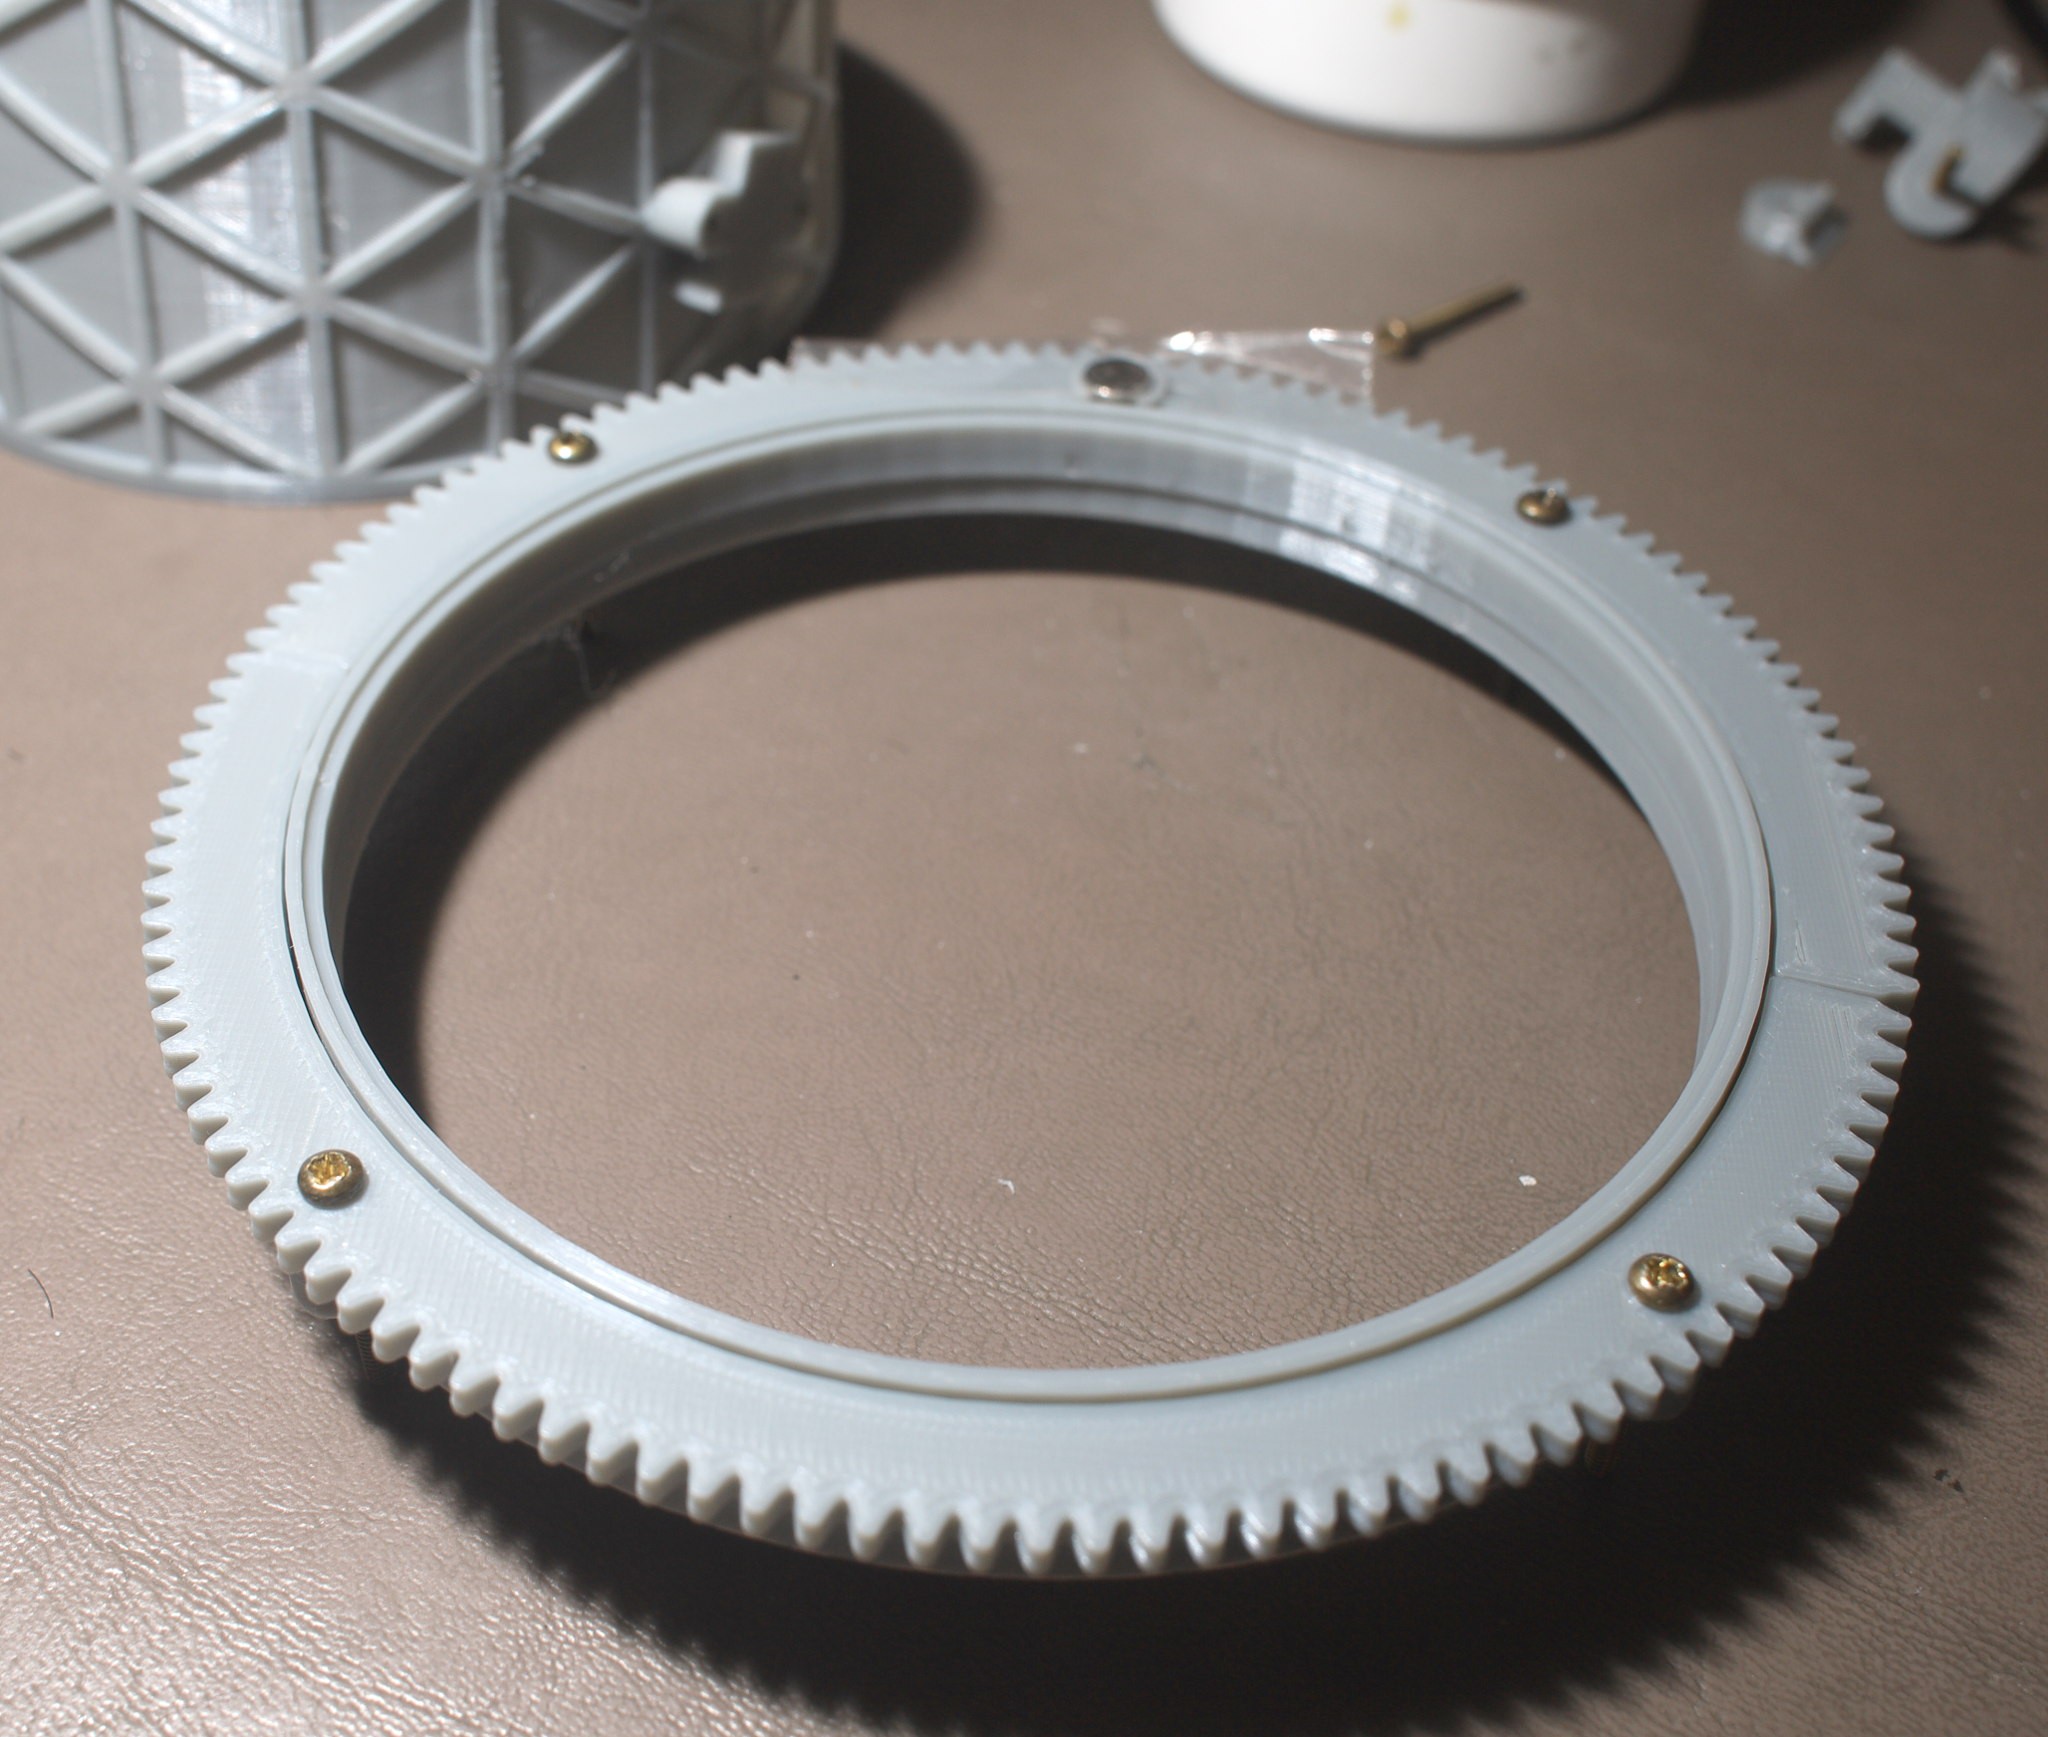
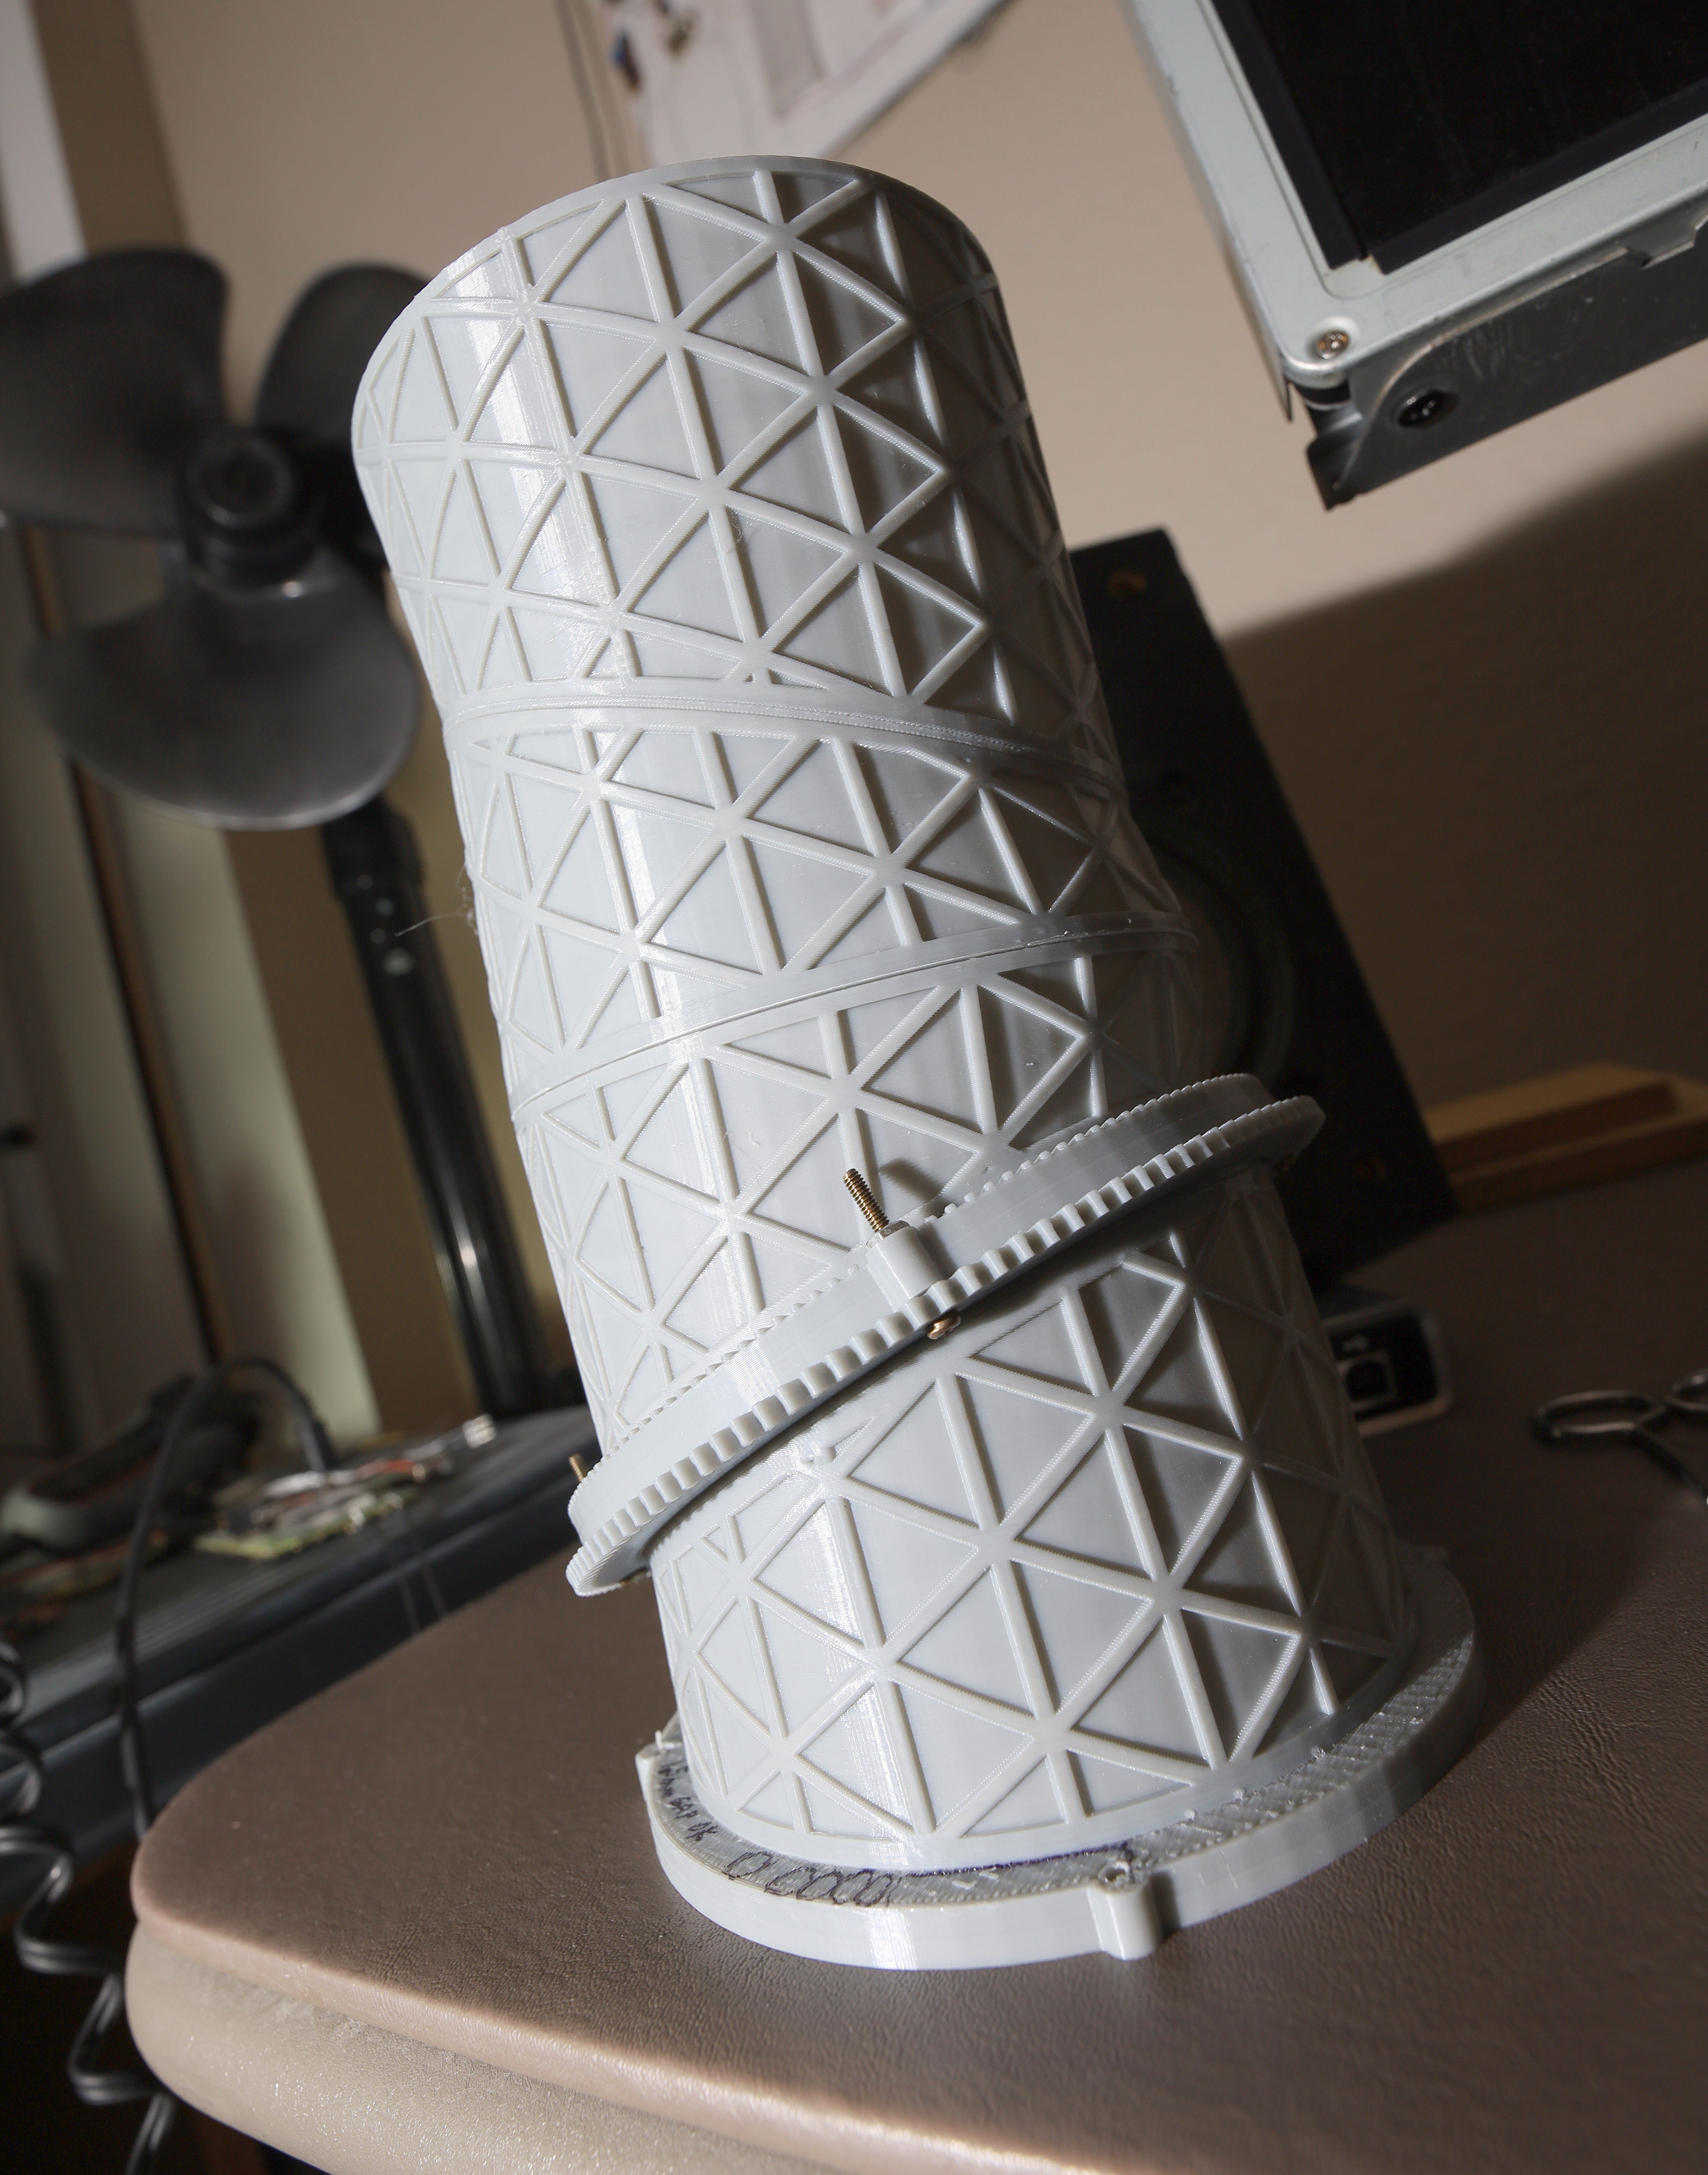
Mocking up the cables outside the robot was key. Wrapping the cable in captain tape & hot gluing the captain to the plastic proved to be the best way to farsten it. Cable guards were hot glued on to keep the cables out of the gears. A 6mm diameter proved to be the narrowest PLA worm size before it crumbled. A revision would definitely involve screwing them onto the tubes instead of gluing them.
Much firmware development followed, manely impacted by the motor control algorithms & the IR code processing. It suffered from lack of encoder precision & motors that are too fast. It used leftover polulu #2365 & #2366 motors. It would have been better with 200:1 gear ratio motors with integrated encoders from adafruit.
Inferior motor encoders caused it to be not as smooth as the gootube videos, but good enough to be functional. Another problem is the IR remote can only move it in steps. A smaller pinion with no hole for the shaft might have bought more accuracy. Never tested the minimum wall thickness for a 3D printed gear.

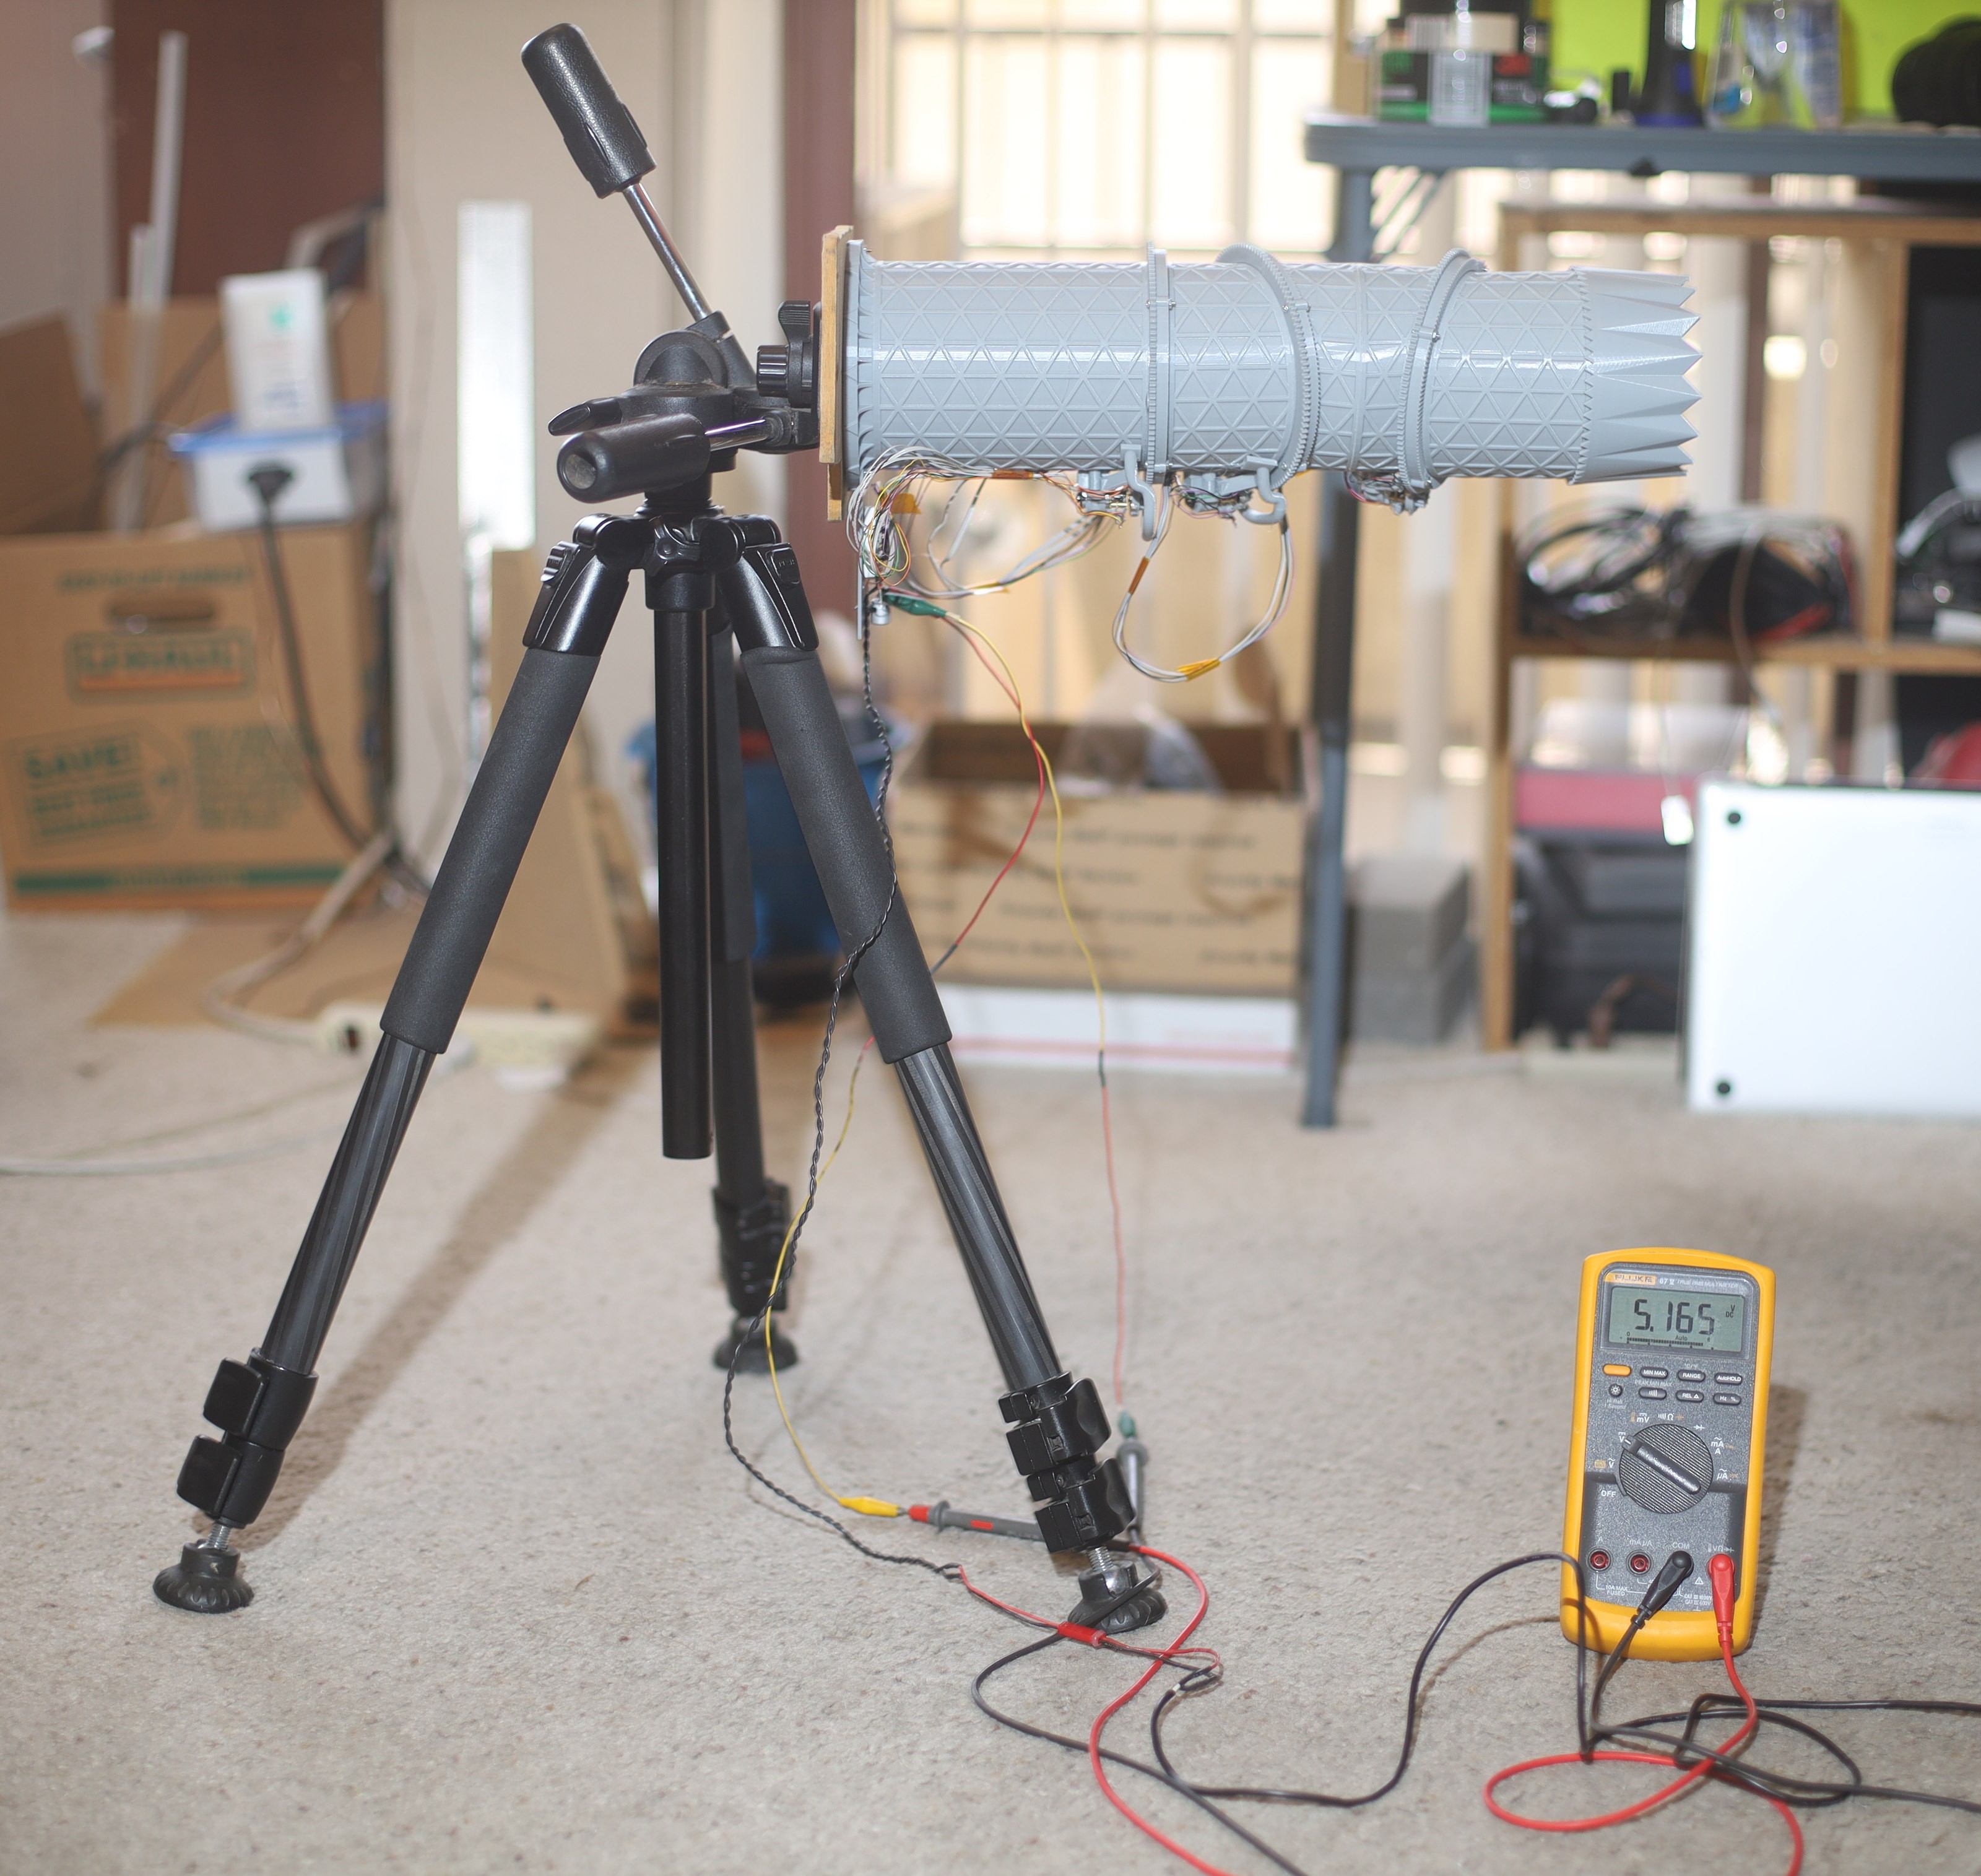
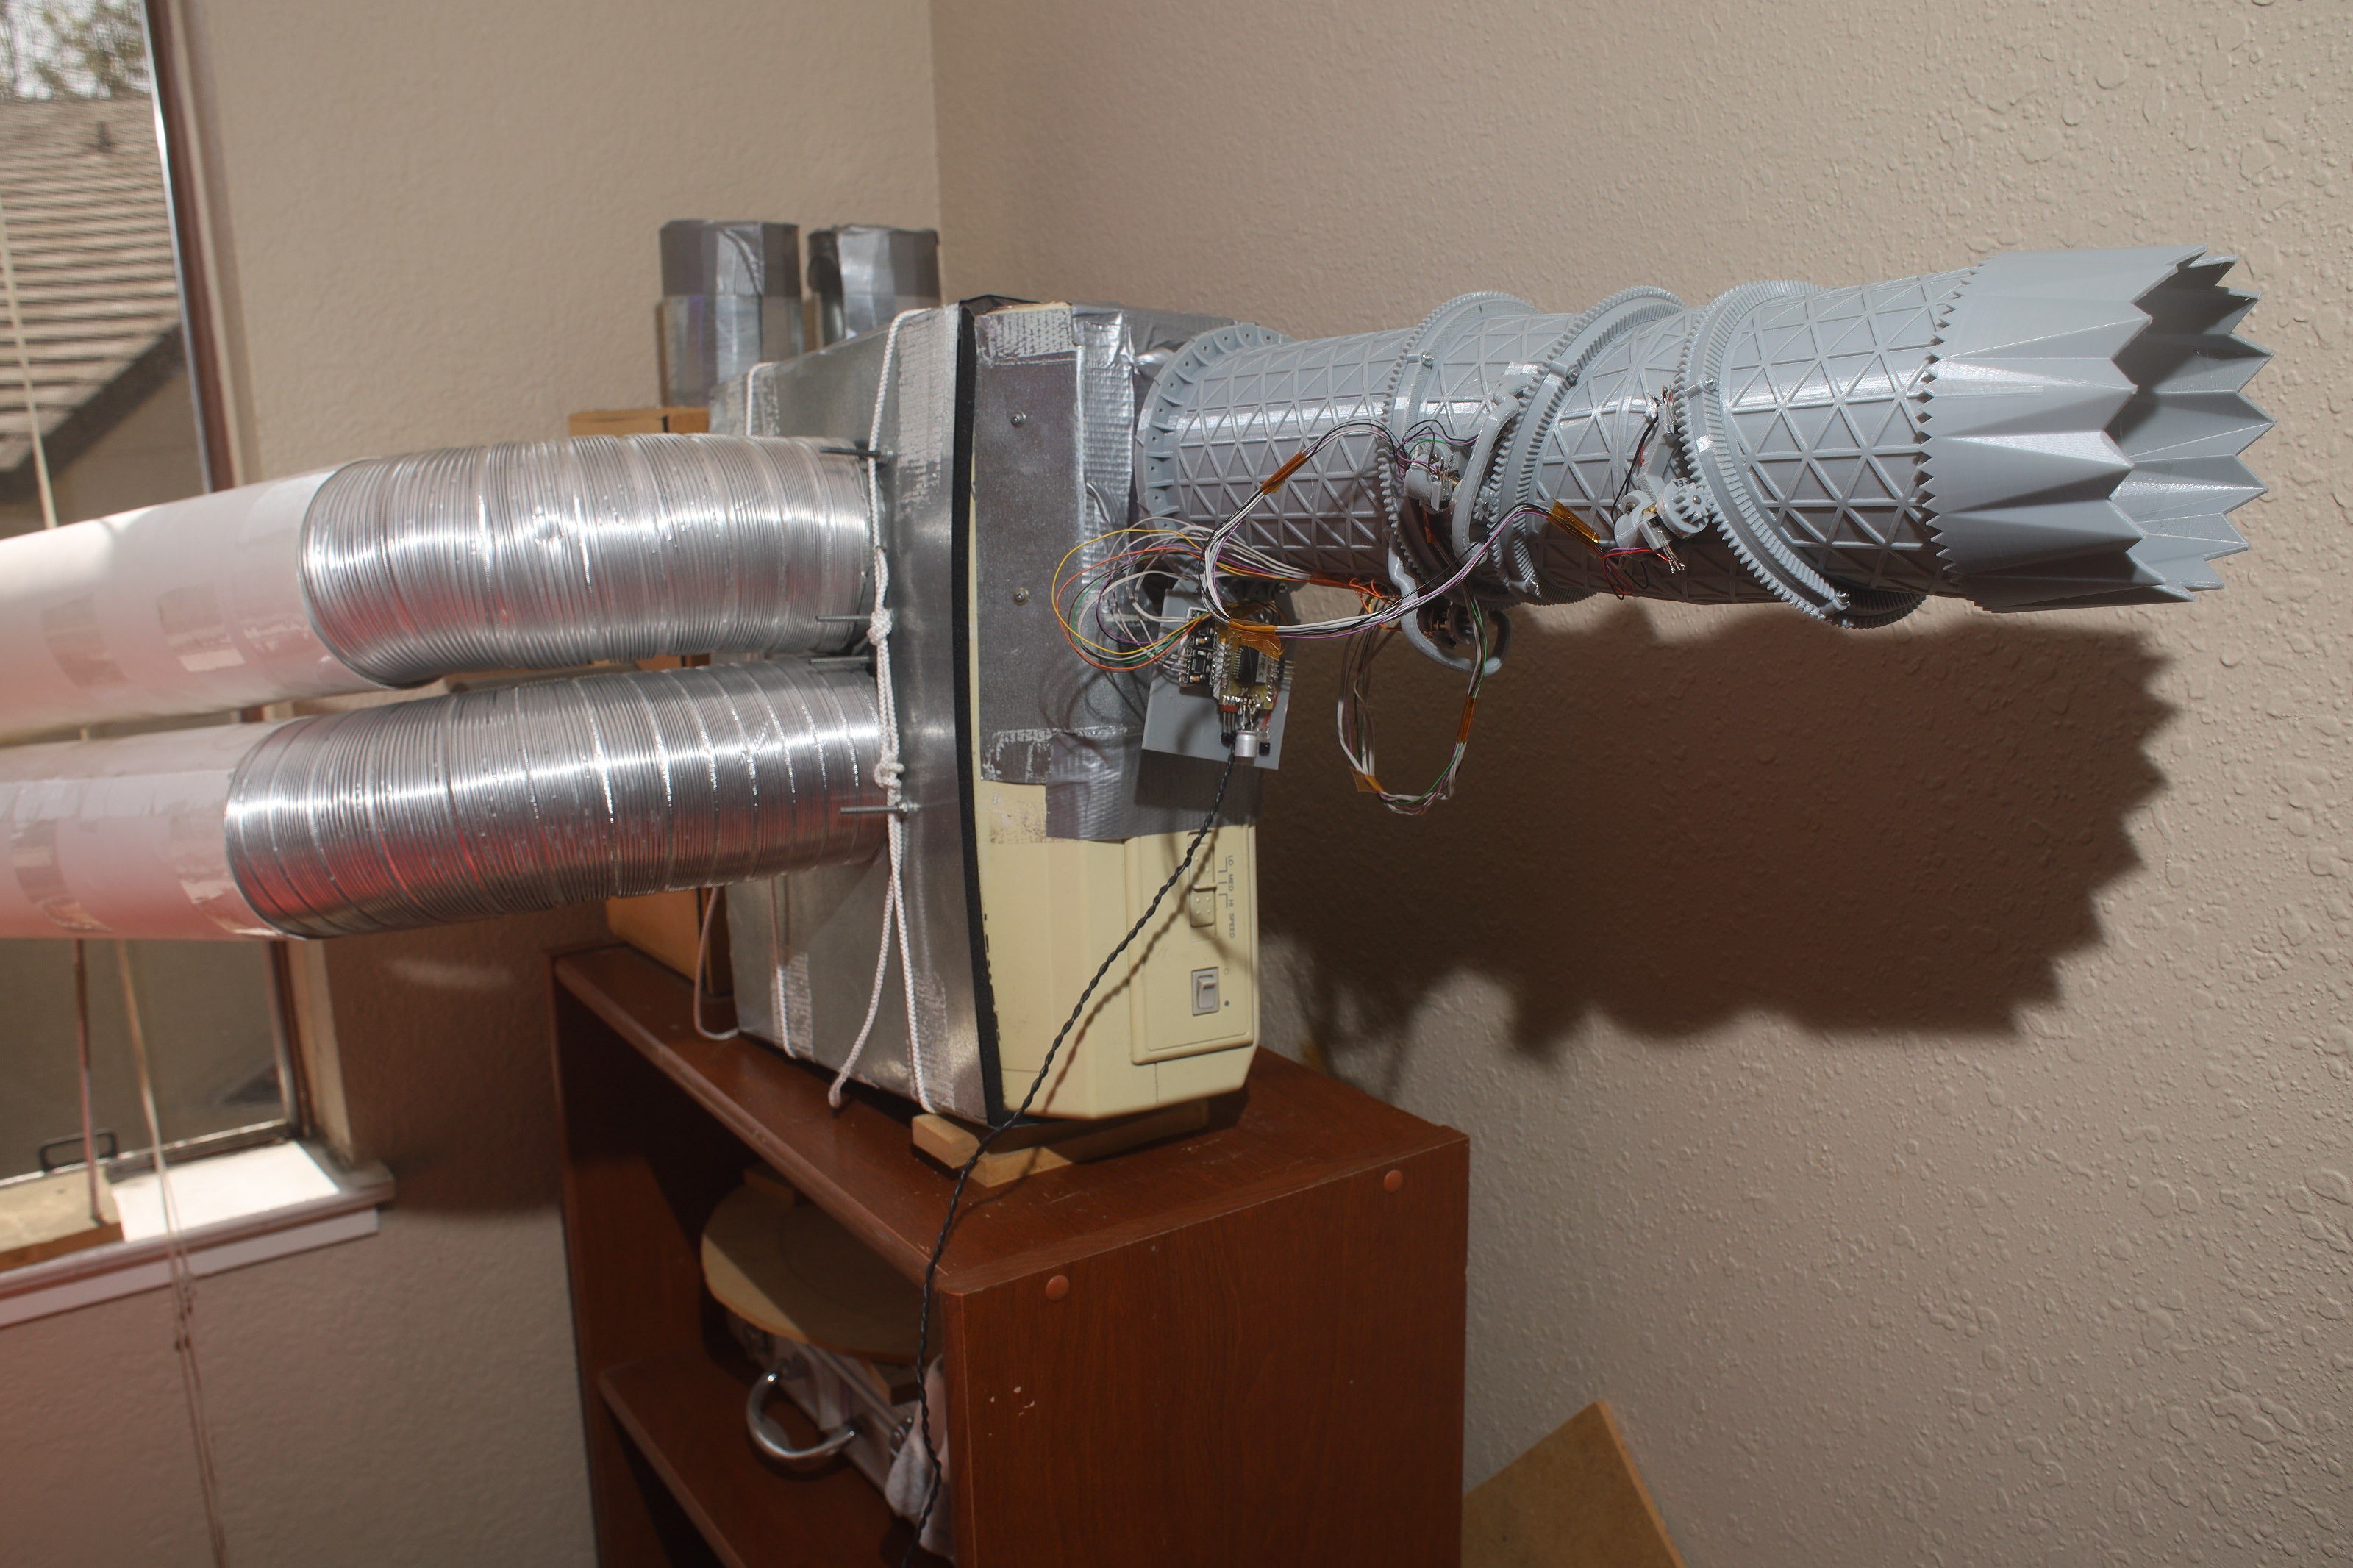
Mounting it sideways tested the maximum load. The ideal power supply was a raspberry pi 5.2V. The motors have very high transient loads when all 3 fire at the same time. USB phone chargers couldn't manetain the minimum 4V during the transient loads.
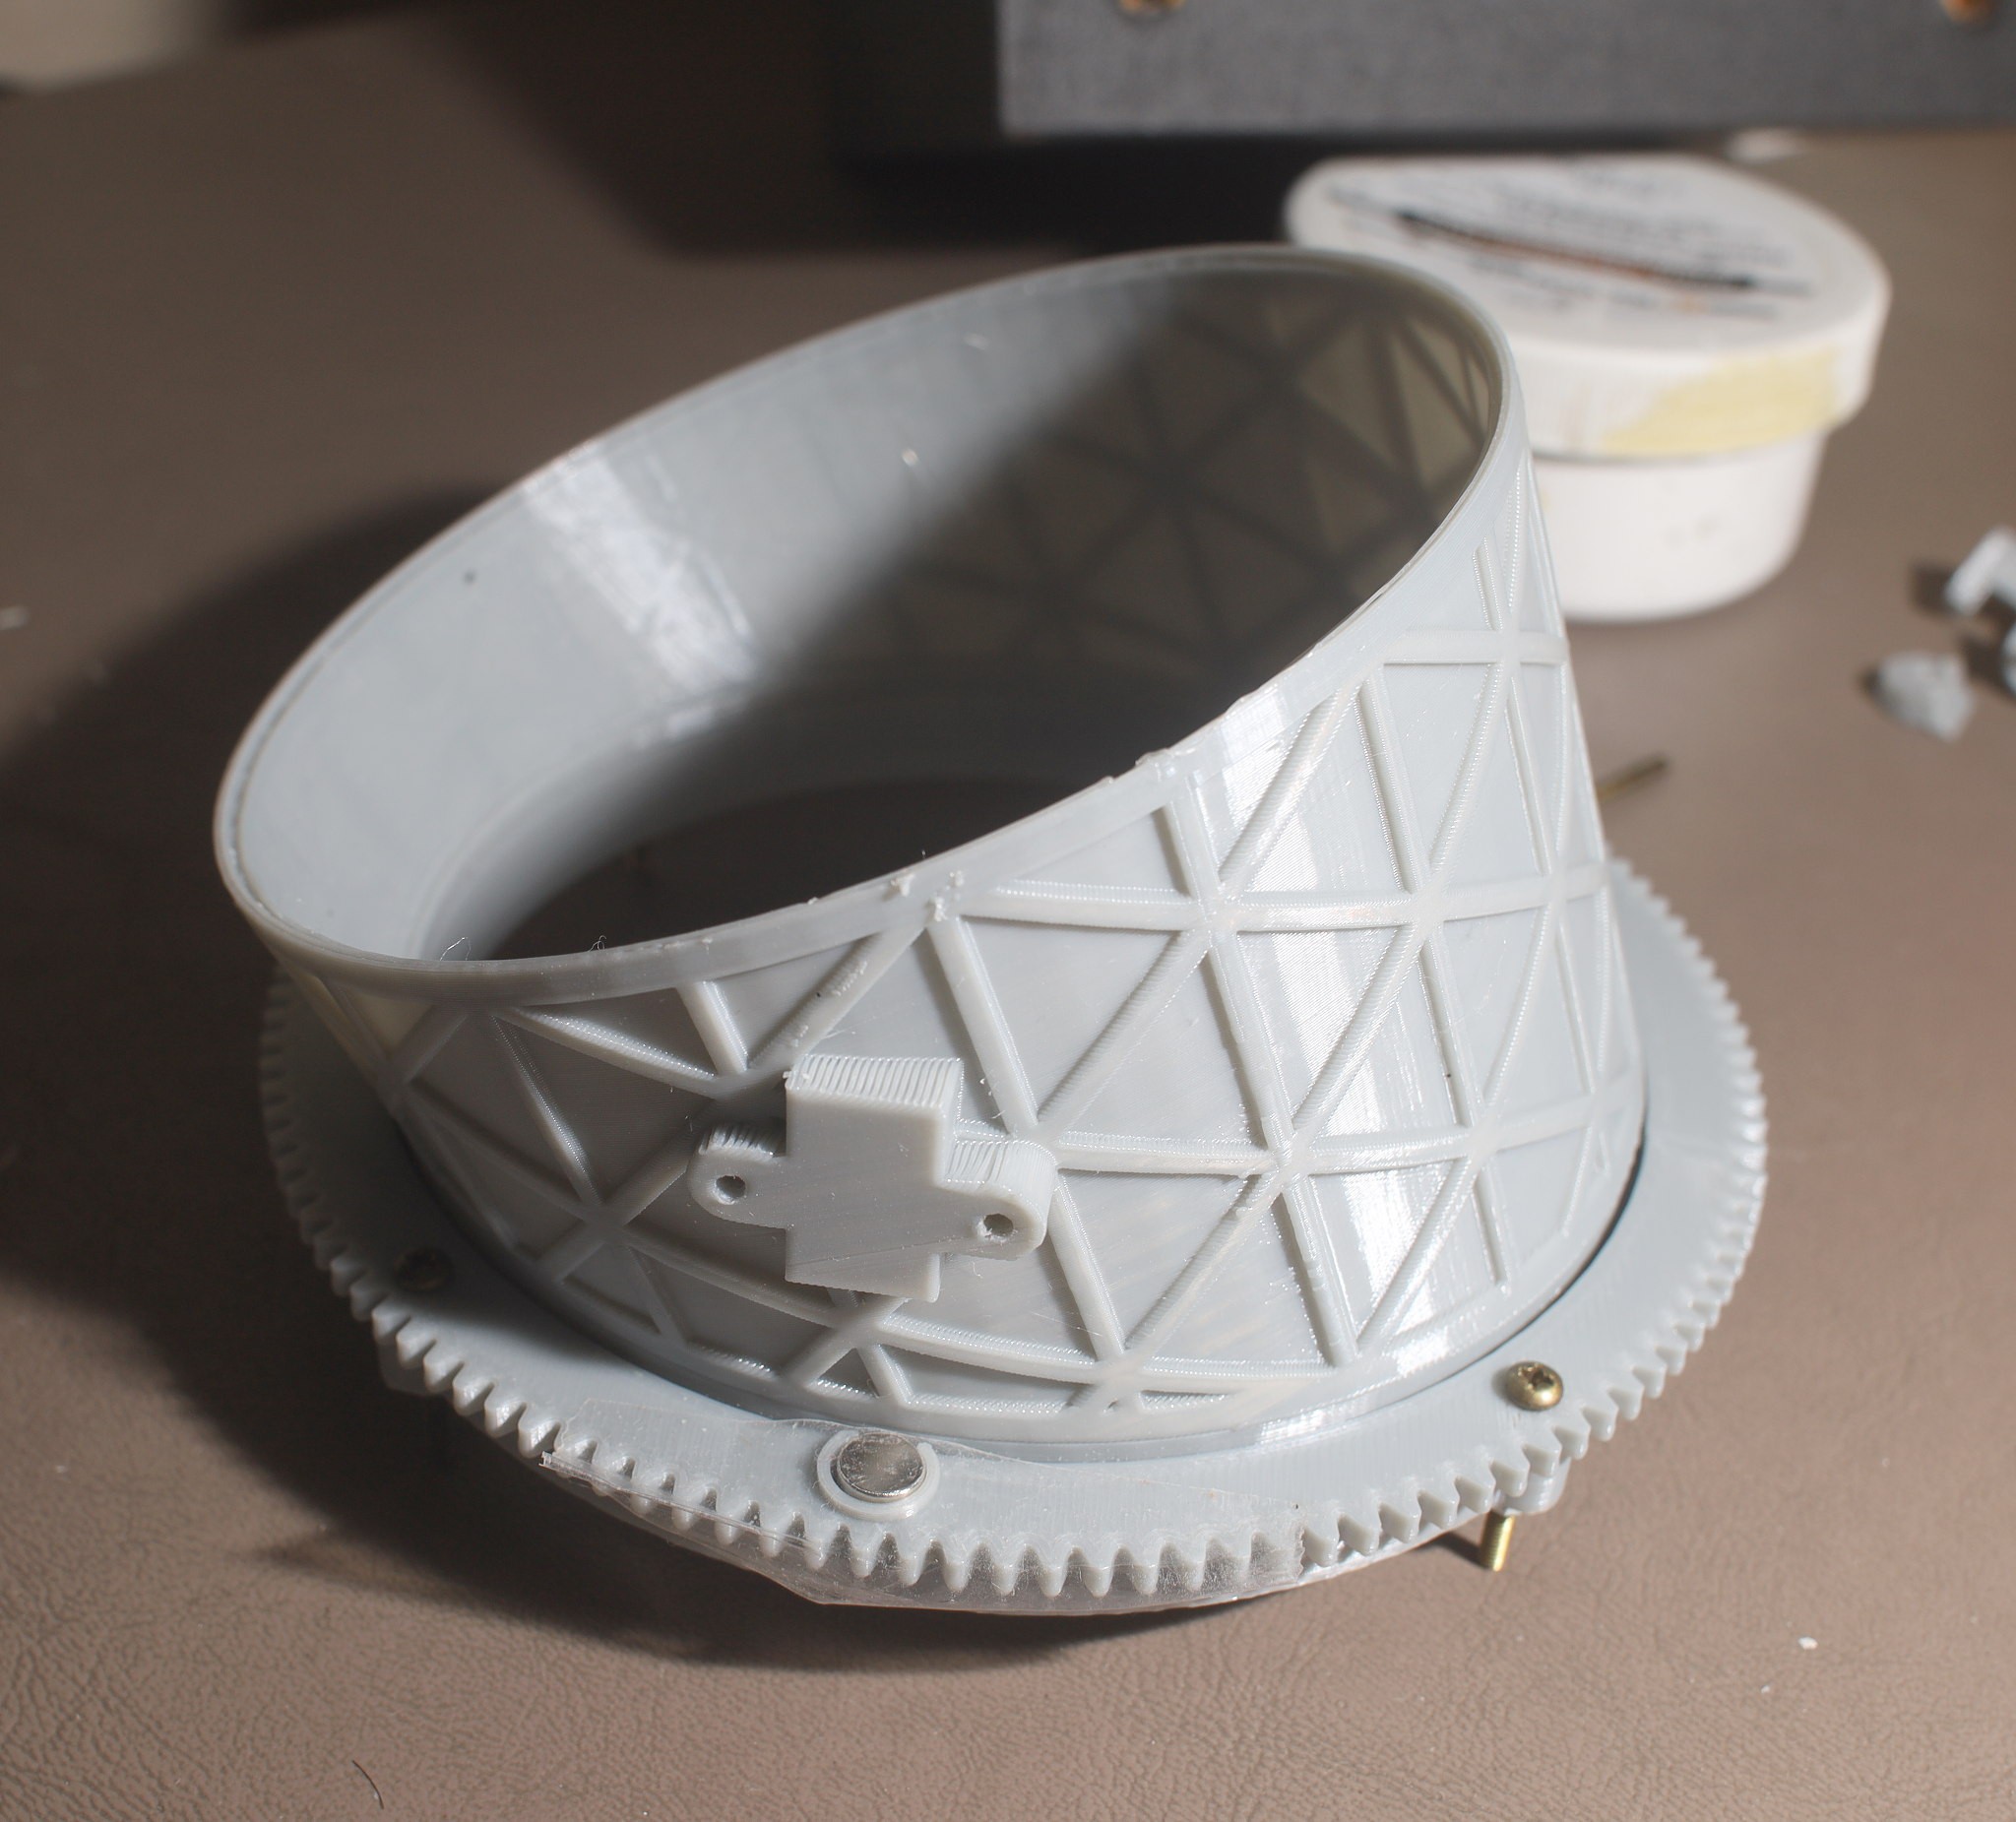
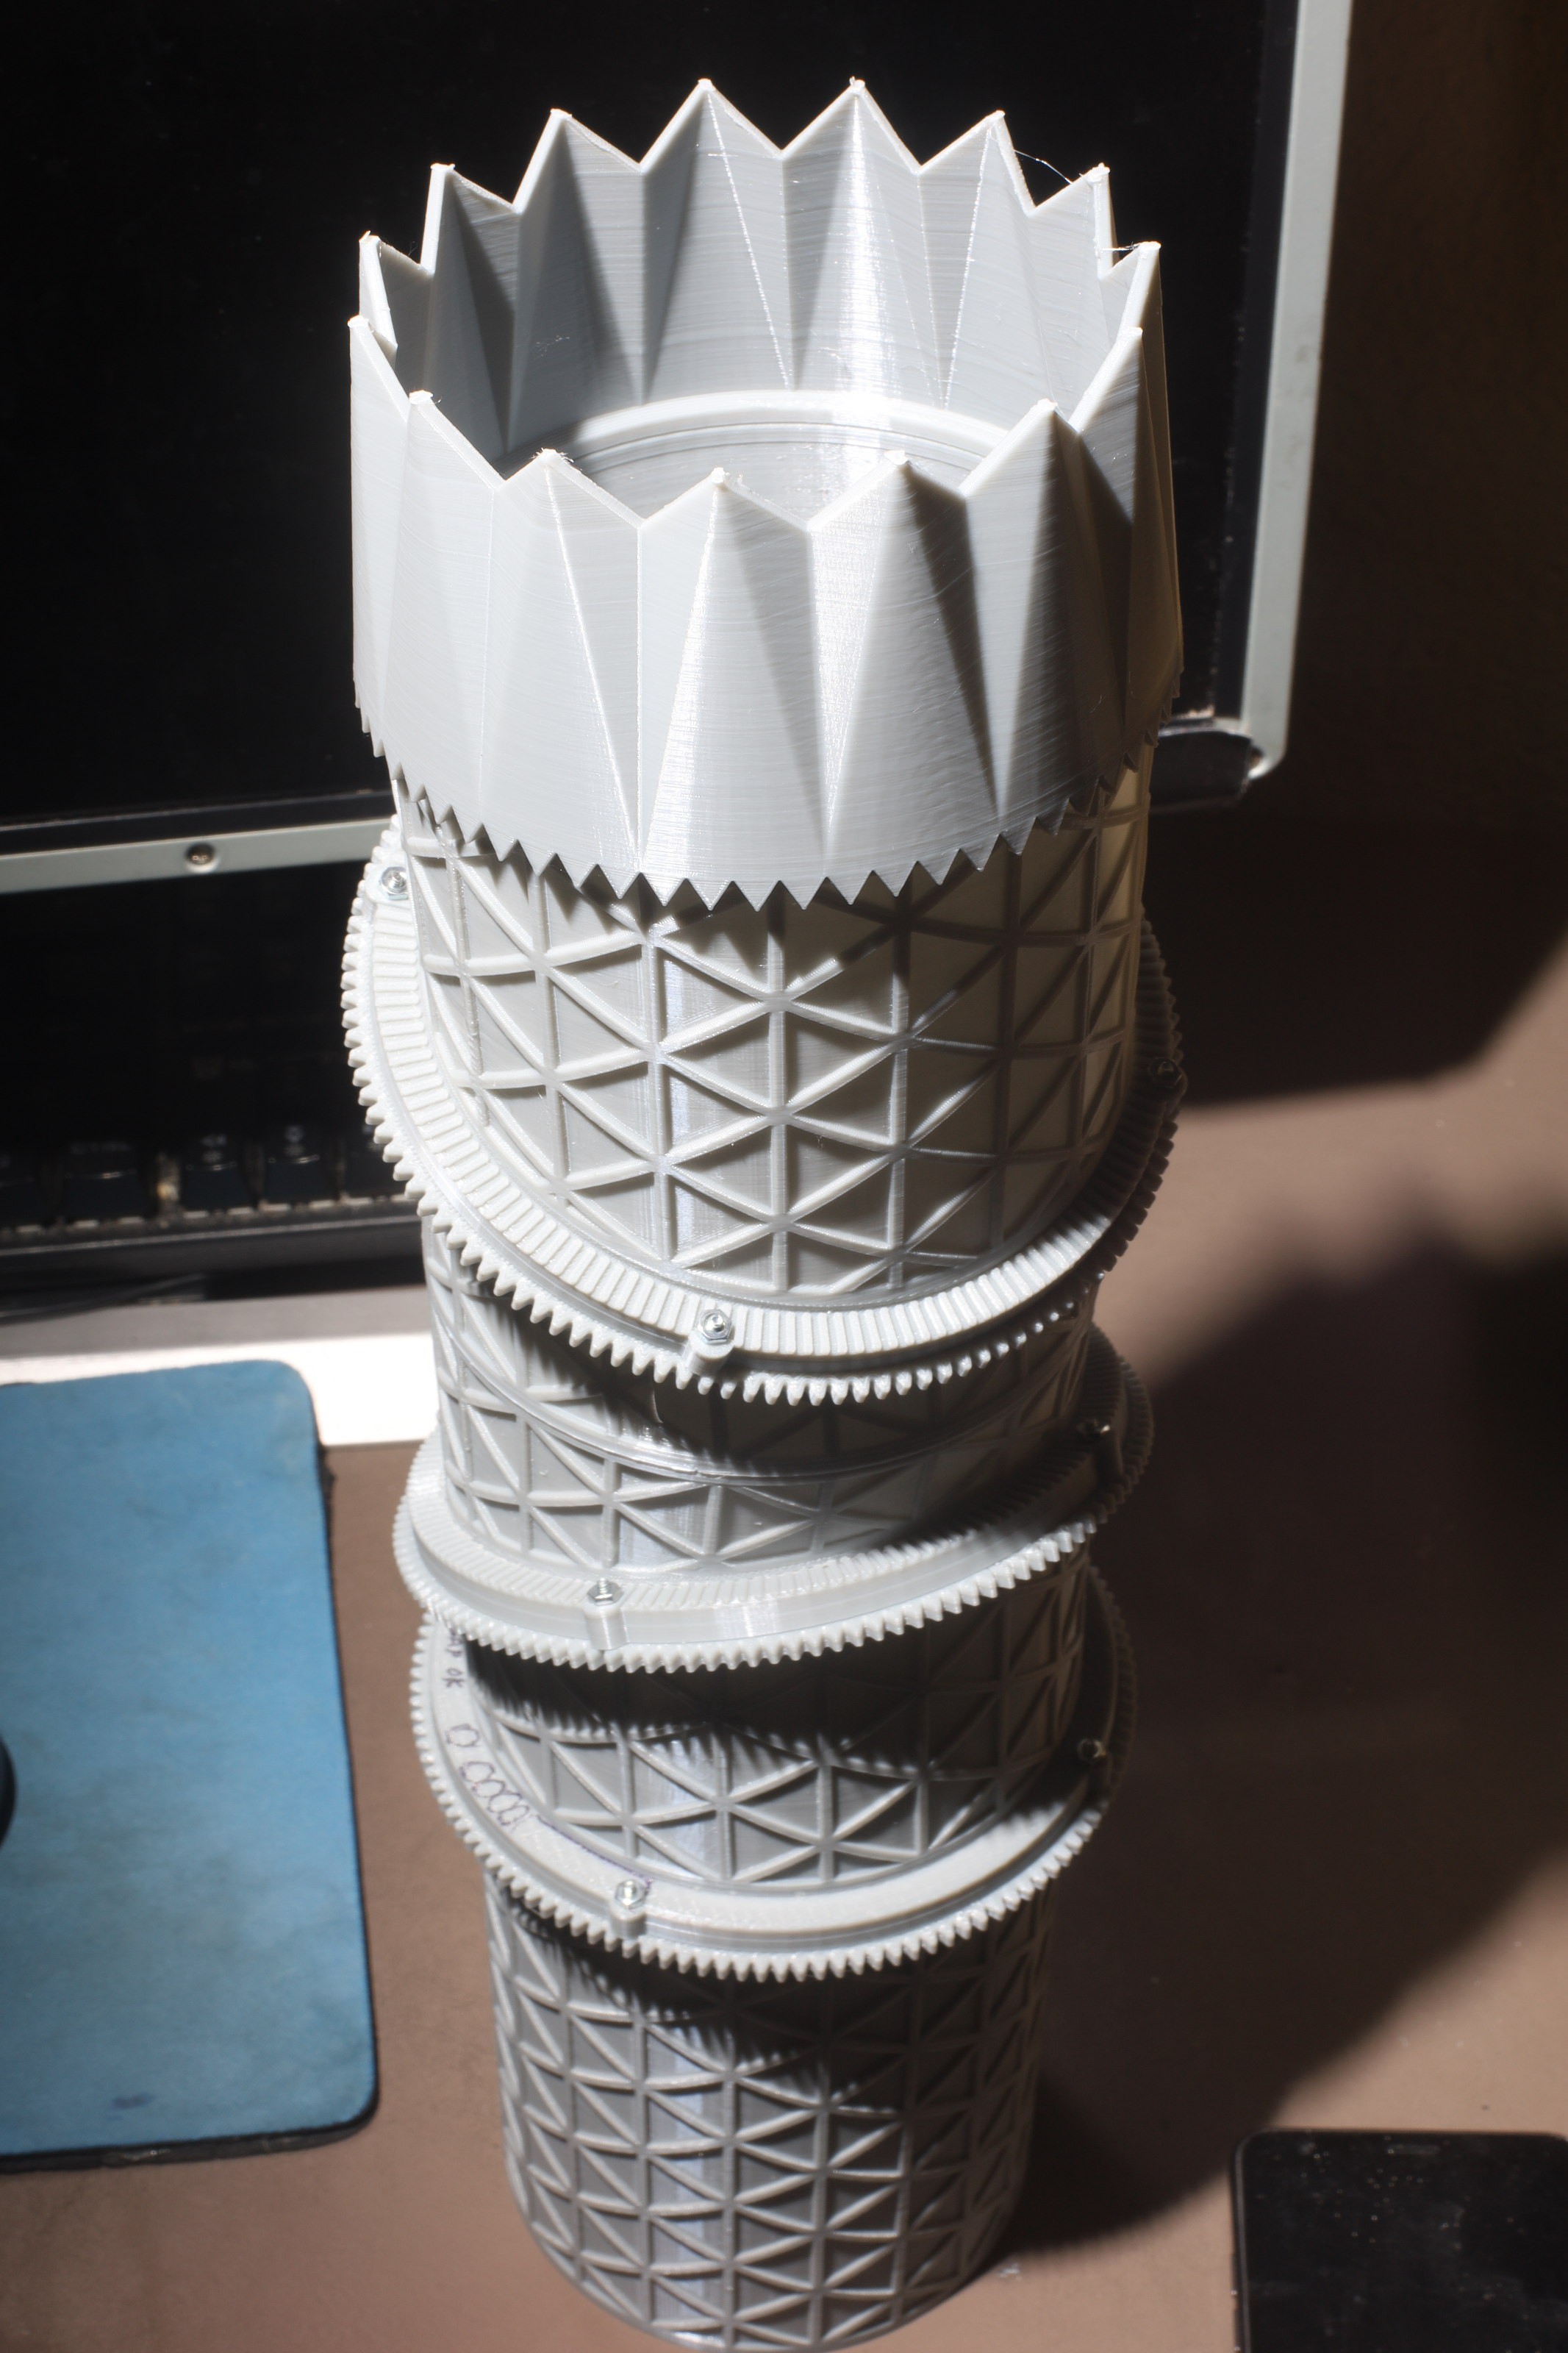
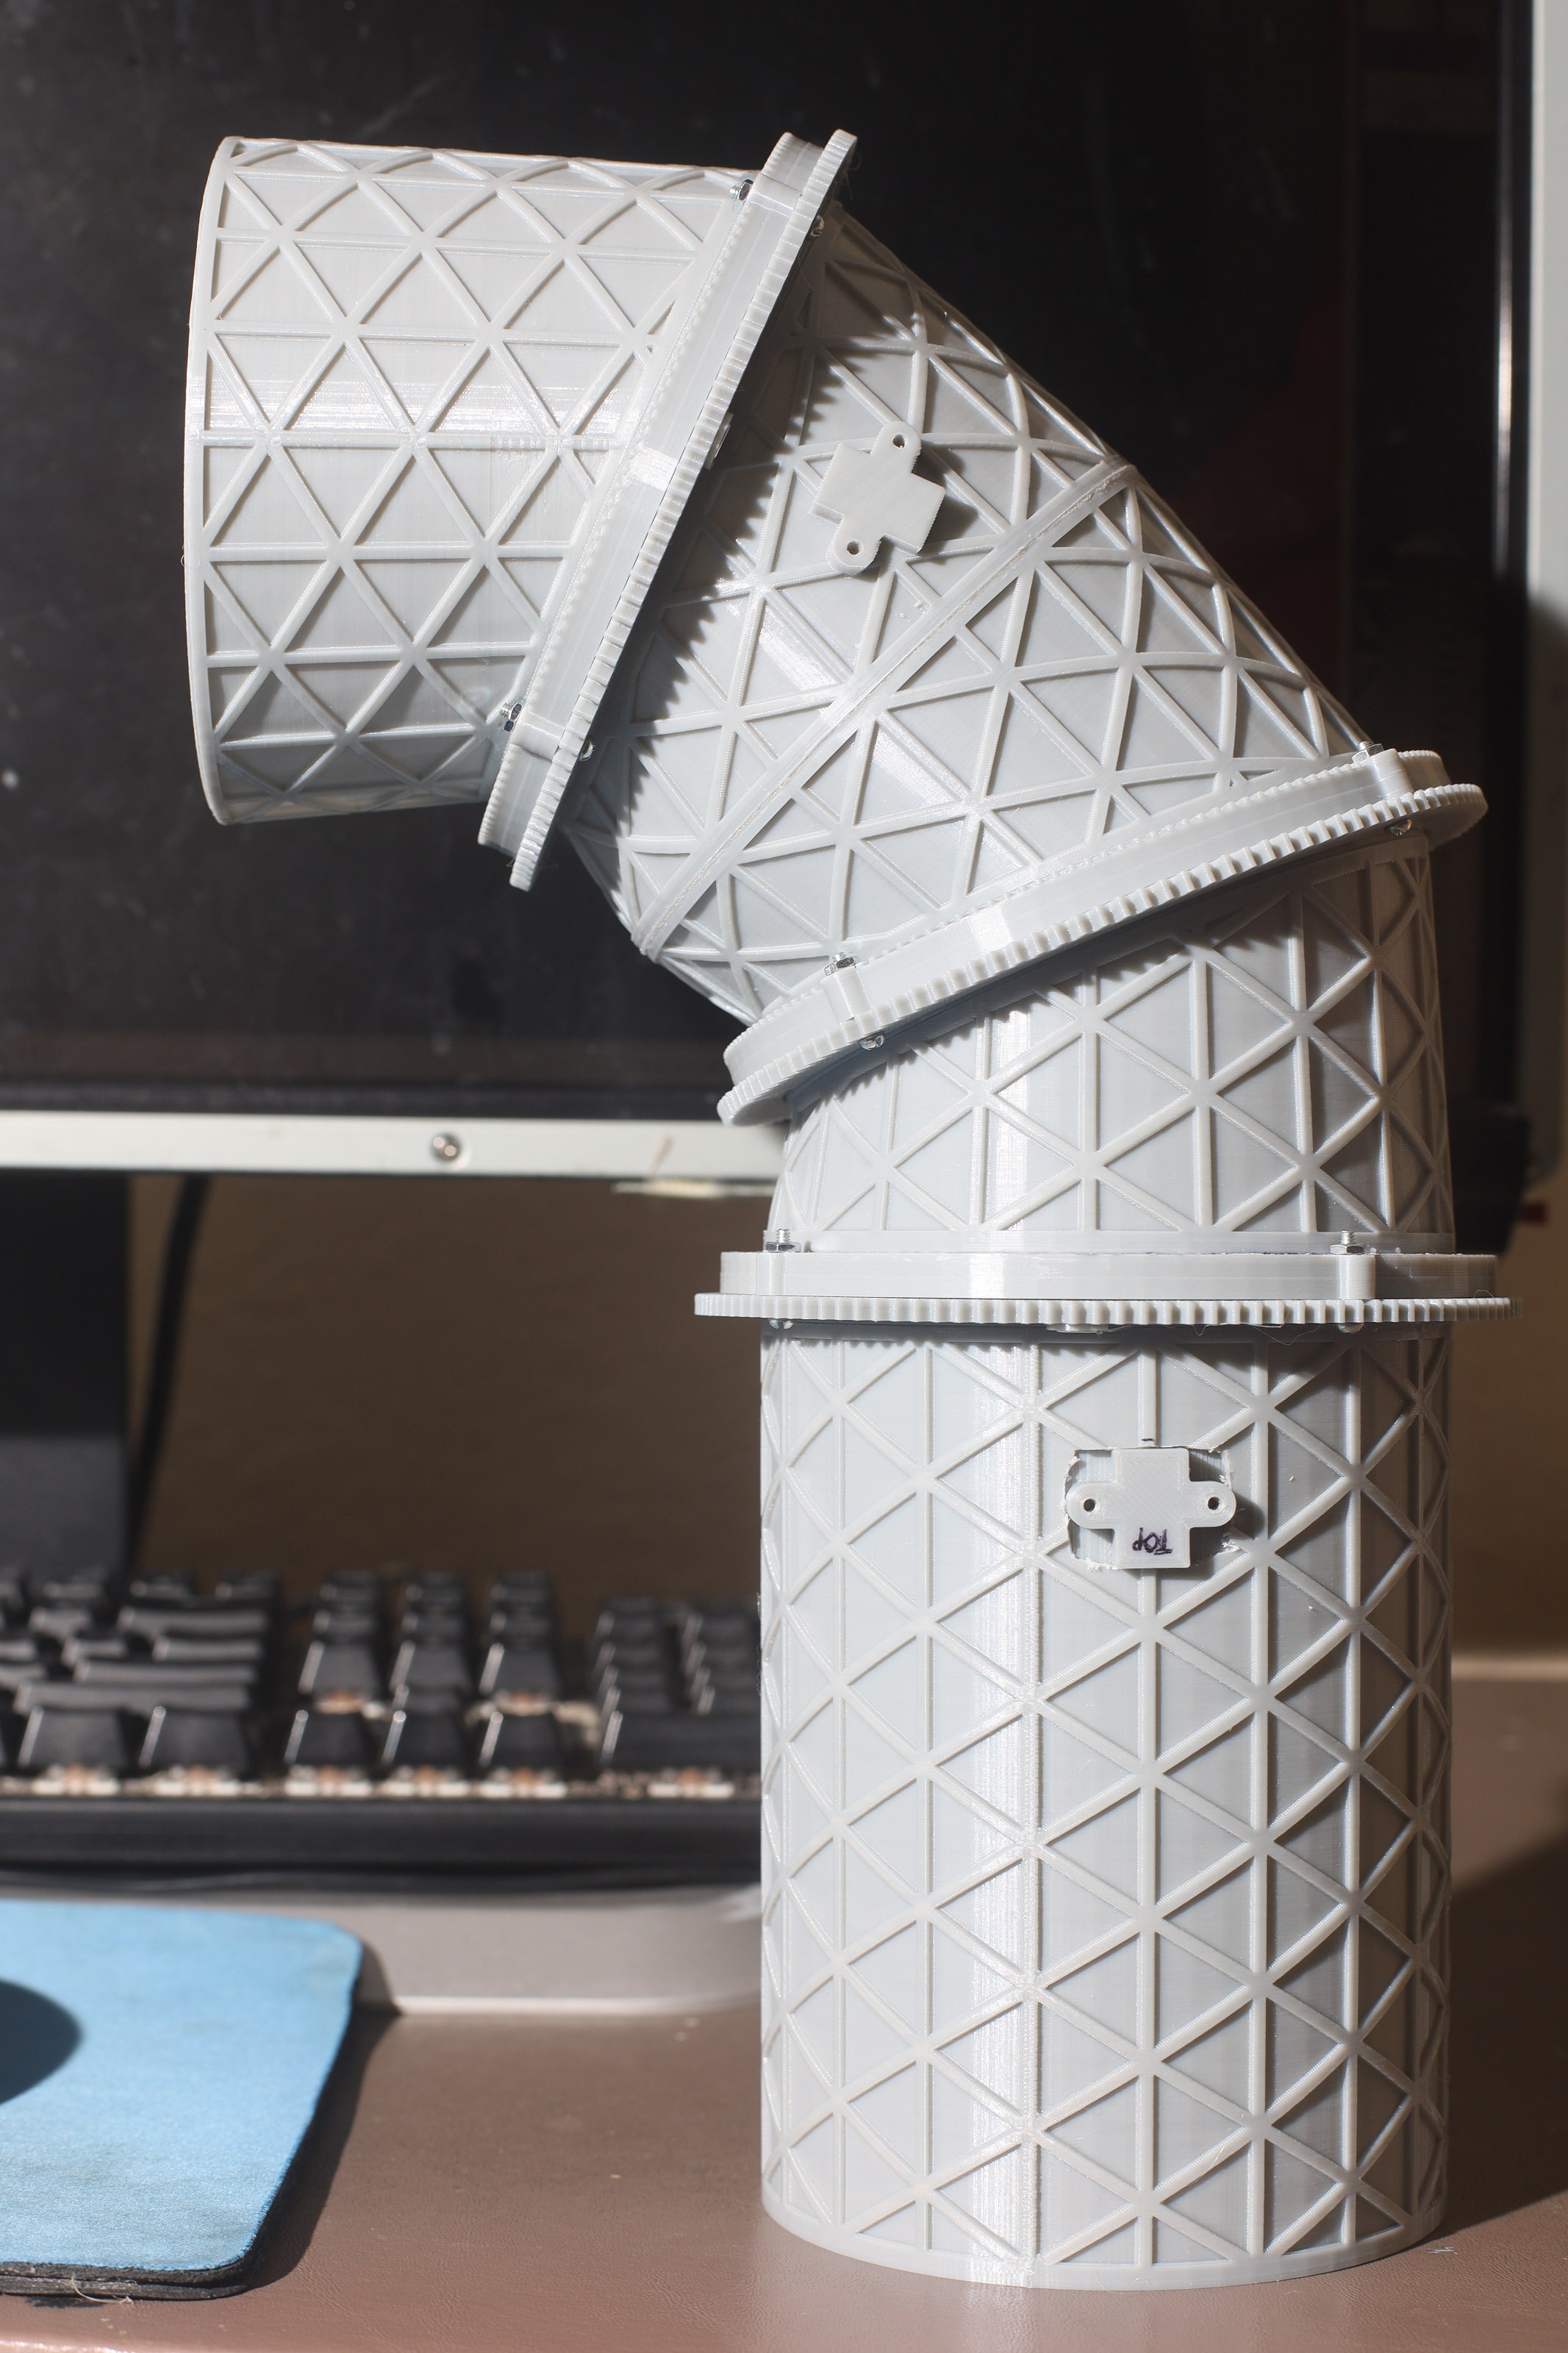
Once installed on the blower, the blower didn't entirely fit in the nozzle, but going halfway seemed to be enough. It would need to blend into a rectangular isogrid to entirely fit on the blower.

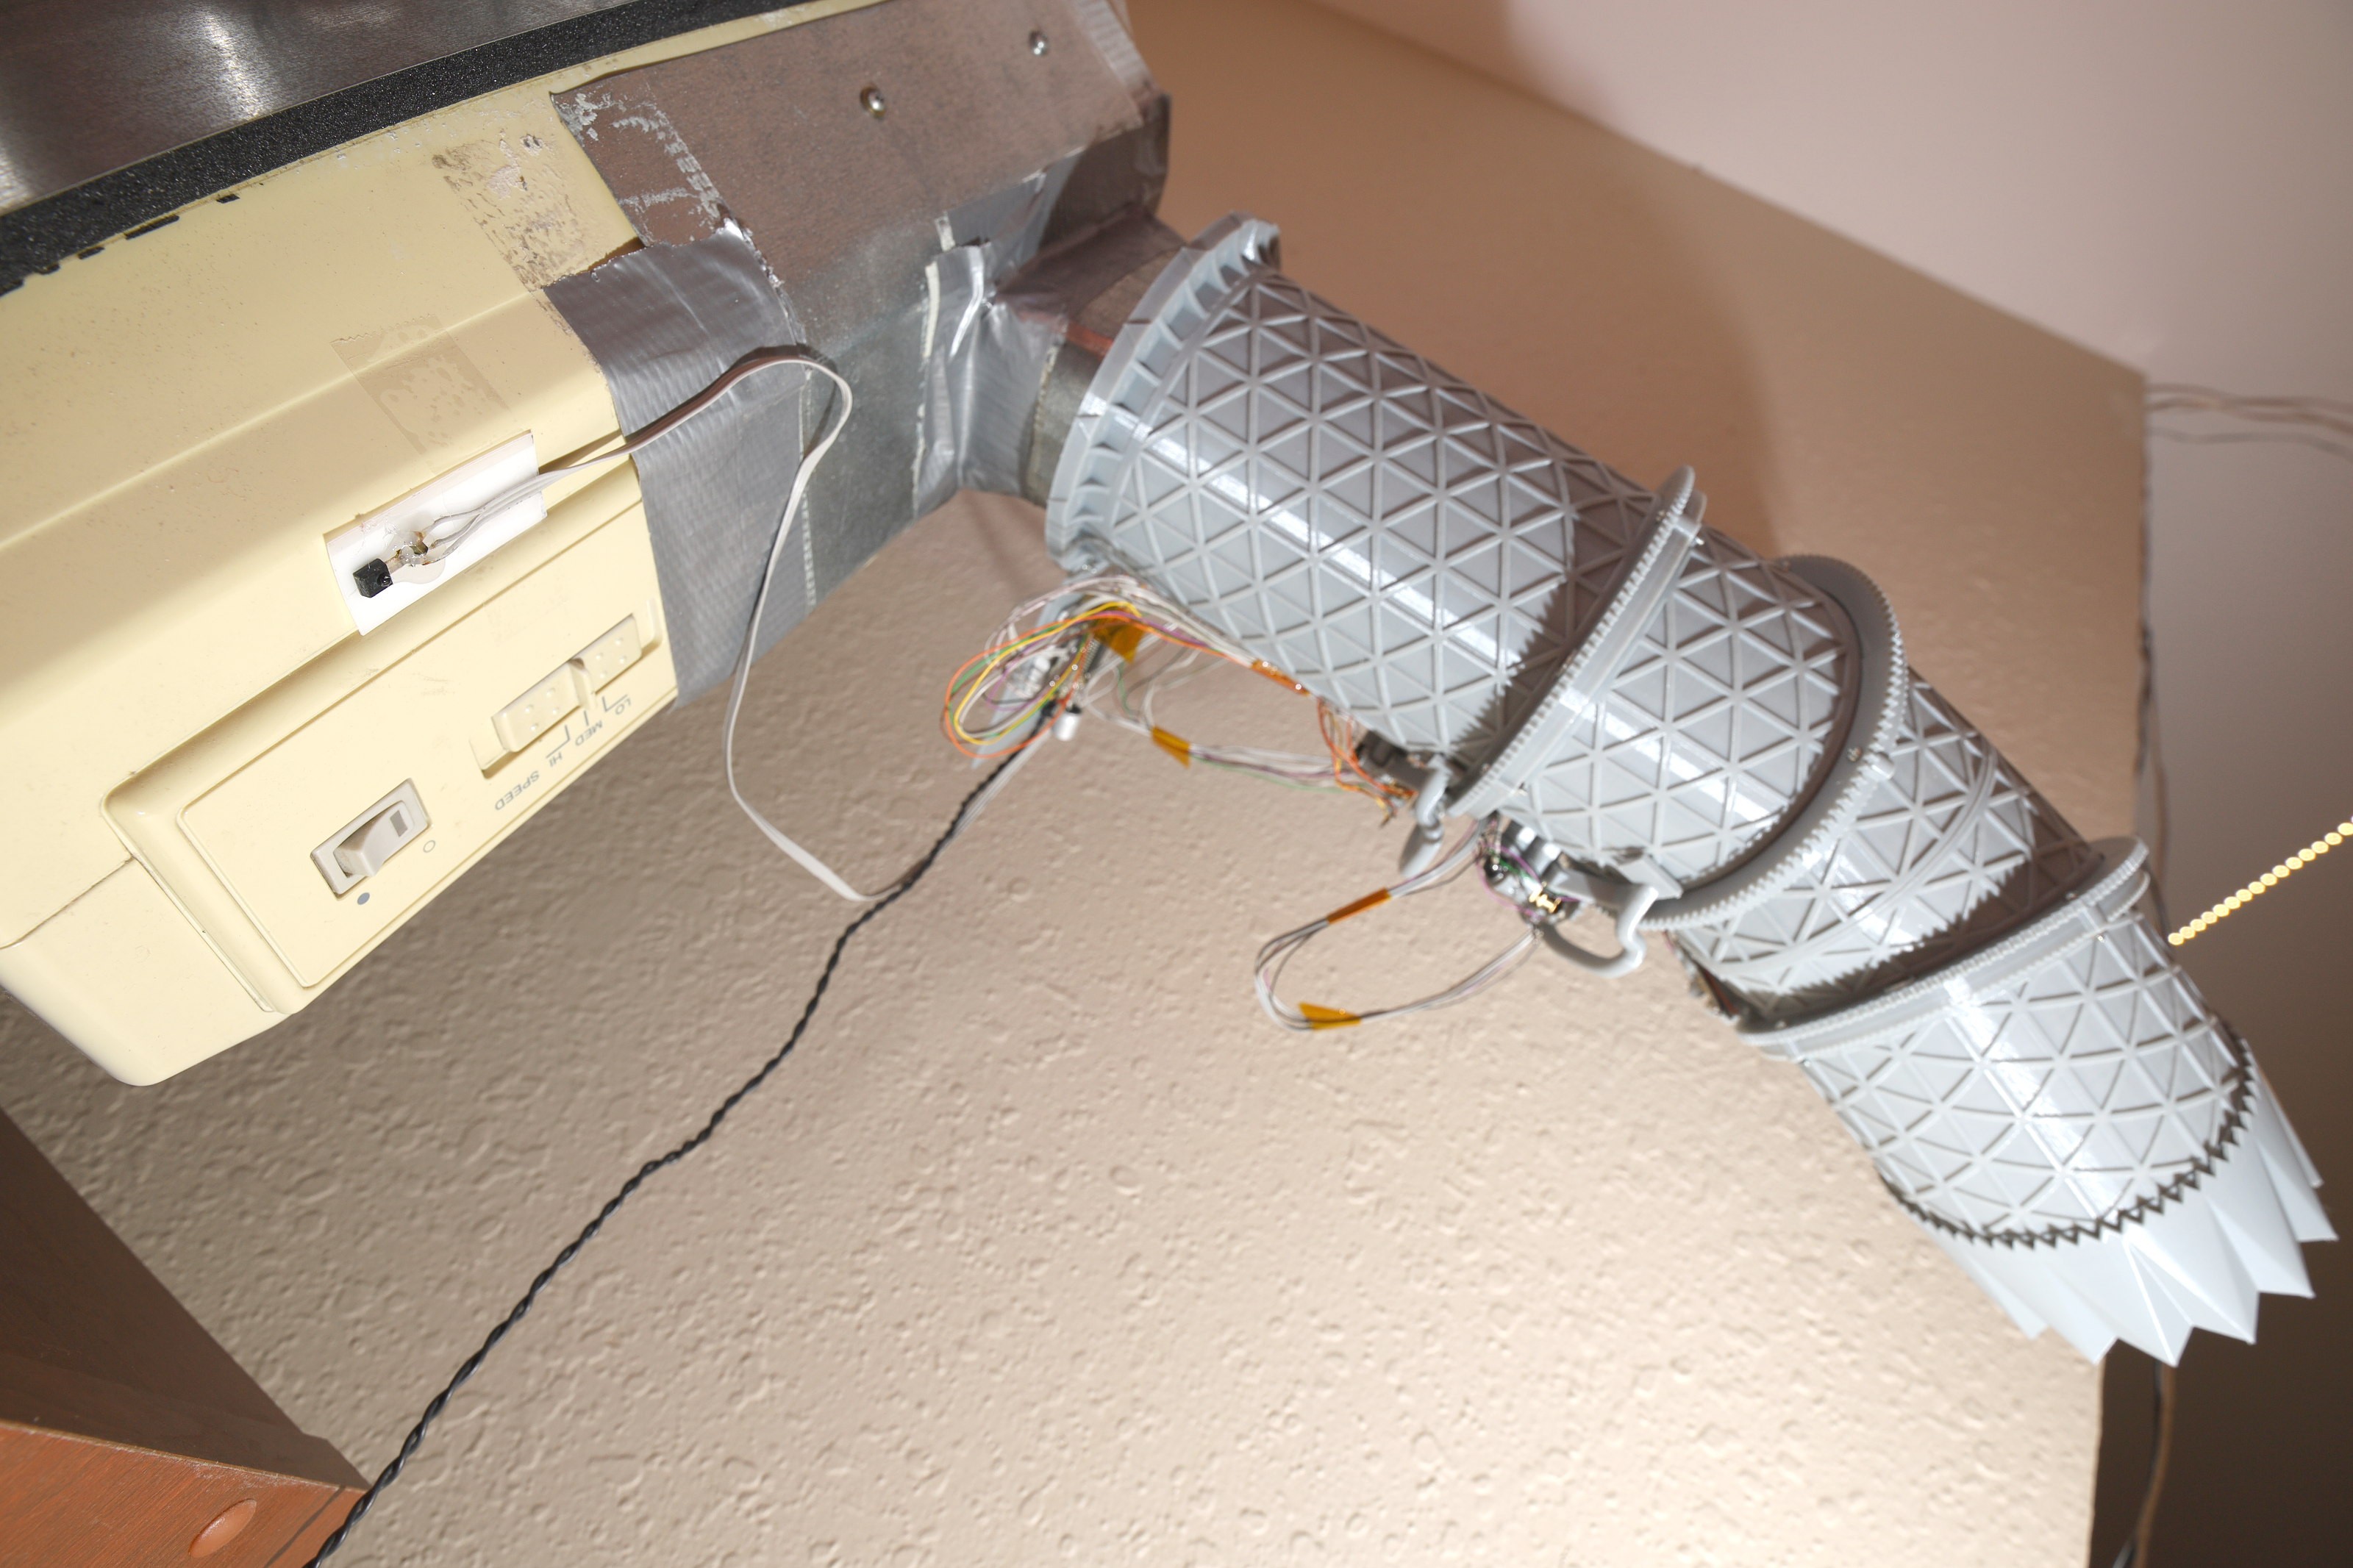
The IR receiver was repositioned away from the cables.
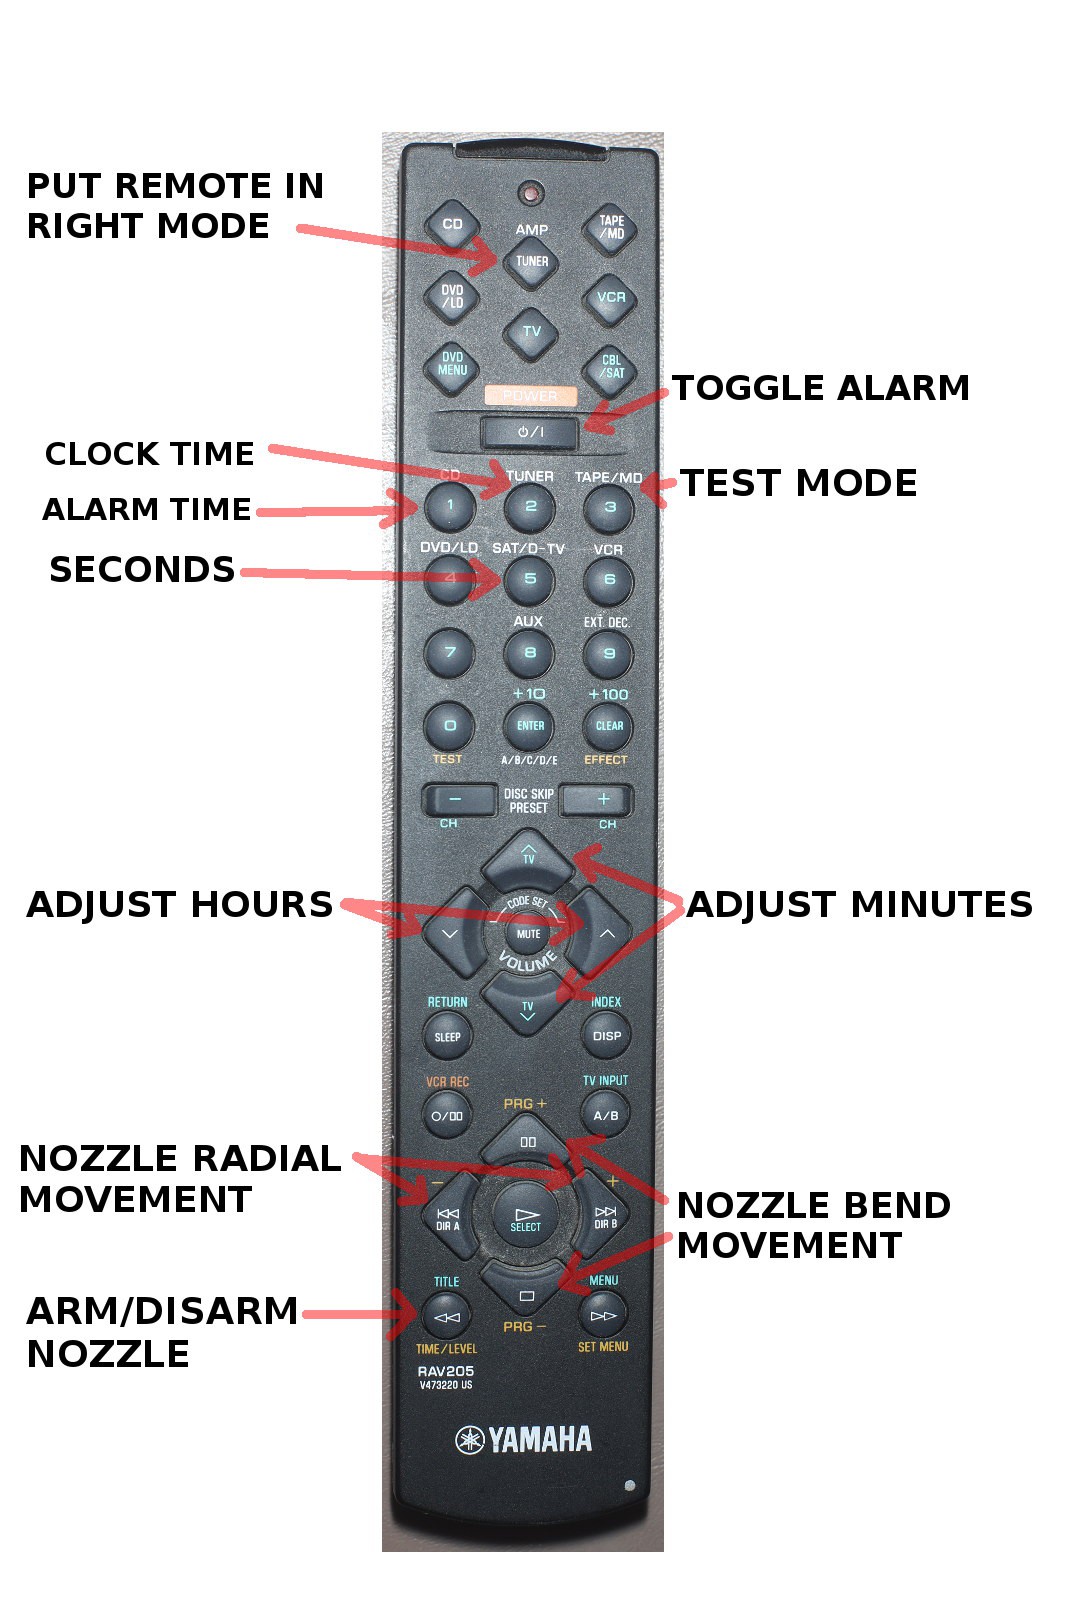
The heroineclock remote control got a few more buttons for moving the nozzle.
It worked as required on the blower. 15 years of wishing for a remote controlled nozzle finally came to an end. The bearings & contortions didn't impede the airflow as much as expected, but that's why it's a fighter jet nozzle.
Discussions
Become a Hackaday.io Member
Create an account to leave a comment. Already have an account? Log In.