 Brian Brocken
Thank you to JLCPCB for sponsoring this project, The build quality of the PCB's are amazing! Order yours at https://jlcpcb.com. you can now order any color for only 2 dollars!
At first I created this UMC in order to control my 3D printed servo I made a while back. I soon realised I could create a modular system that could be used in a great veriaty of applications, which would be very usefull for a lot of people.
The UMC allows you to turn almost any geared brushed motor of about 500 watt, 12V into a radio controlled servo. You could for example turn a windscreen wiper motor into a servo. Windscreen wiper motors are pretty strong, affordable, and pretty easy to get by most of the time if you know where to look. If this is not an option for you, you could simply order a motor with a gear reduction attached to it. If you want to use a specific motor for your project you could also create your own gear reduction, perhaps by the use of 3D-printing, like I did with my 3D-printable servo project (project can be found here: https://hackaday.io/project/162855-3d-printable-high-torque-servogear-reduction)
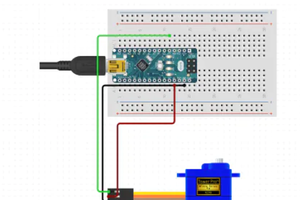
I tried to keep the design of the UMC as simple as possible, it only has 2 IN-ports: Power-in and signal from the receiver (RX), and 2 OUT ports to the servo: Power-out and feedback position signal from the servo. This only makes for 4 connections to reduce the complexity of the system.
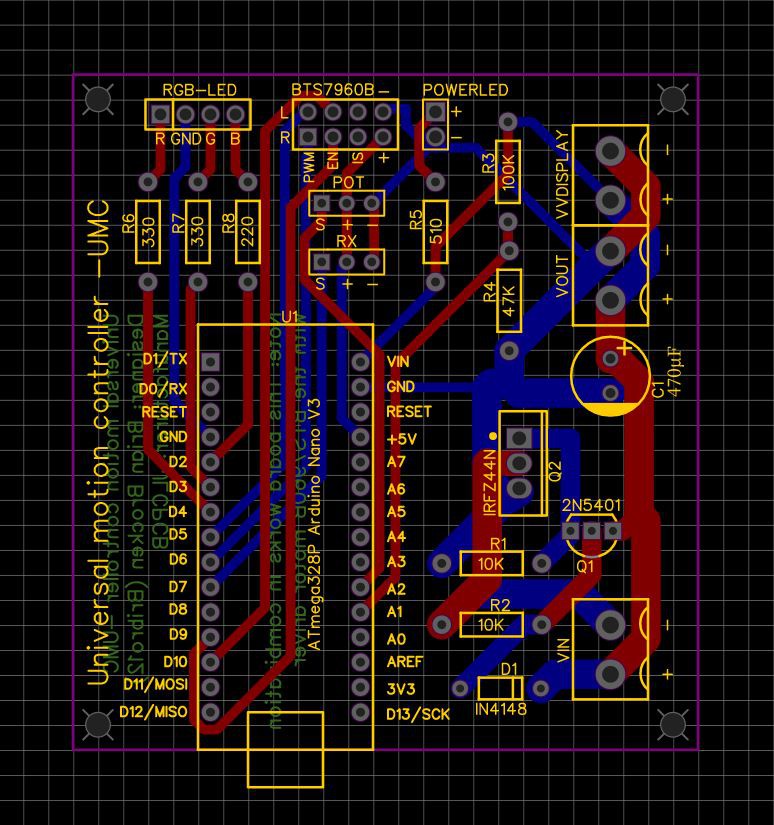
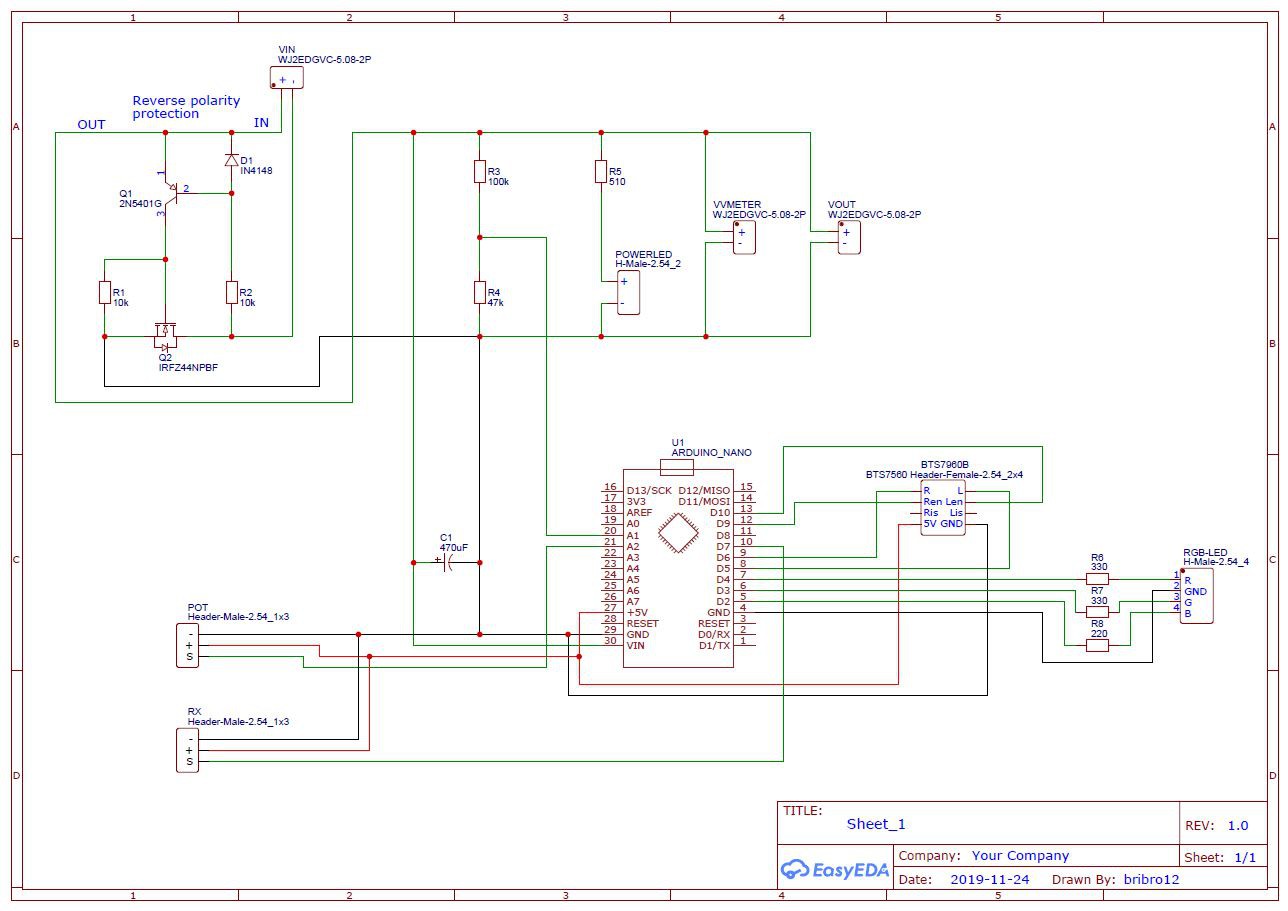
I design the controller PCB in EasyEDA and the PCB's were made by JLCPCB. The controller I used on the PCB is an Arduino Nano. The PCB itself features a reverse polarity protection system, a voltmeter, Power LED, RGB LED and various connectors to the potentiometer, RX and the BTS7960B motor driver. I used the BTS7960B motor driver to control the speed and direction of the electric motor used in the servo.
I tried out two different controlling methods (programs) for the posistion of the output shaft.
1. With a PID-controller
2. With a two-point controller (actually 6-points)
The 2-point contoller had in my opinion the best response to a given setpoint. I actually used about 6 points for this method. If the error (Setpoint-Input) was between 15 - 100 write 11PWM to the motor, between 101-200 -> 40 PWM and above 201-> 80PWM, the same goes for the PWM in the other direction. The output shaft followed the given setpoint with prety good accuracy. However, the servo lacked the holding torque with this method because the motor was given a preset voltage (PWM) when the error between the setpoint and position feedback were between certain levels. I wasn't able to let the servo run on a max PWM setting (255) because if it would turn on for just a moment, the servo would spin heavily and out of control. I used a max PWM setting of about 80, at this setting the servo runs smooth without or very little oscillation.
With the PID-method, I found it very hard to get the right PID values, they still aren't that great. I used a PID library for this. The response of the servo to a given setpoint was prety choppy and not that great. The holding torque however was much better than with the 2-point controller. This is due to the I-value of the PID-controller that keeps integrating when the error remains. So the voltage (PWM) to the motor would be ramped up when the error wouldn't go away.
Both programs can be found in the files section on this page. I also included the program I used for the windscreen wiper motor. I used the same 2-point controller for it as with my 3D-printed servo, but with slightly different values.
The case is designed to be snap fit together so that the number of screws required is reduced.
Video:

 hIOTron
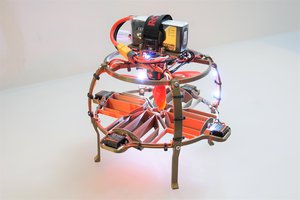
 Benjamin Prescher
 Arduino KIT
great work . I think i would be even cooler to just include the controller in the motor box to make a complete package. PID is a PITA to get right. I abandoned a robot arm as i could never get the pid to stop precisely under load. If you tune it without load it stops differently underload.