 engineerkid1
Step 1: Gather the Supplies
Getting electronics supplies online can be a bit worrisome because you do not know if the components / modules you purchased are in working condition or not. So to erase these doubts I recommend UTSource.net for buying the components. They provide high quality components at affordable rates and deliver them at your door step in good condition. Also if you are a maker or hobbyist, do check their PCB Service. You can get up to 16 layers of PCB's designed that too at affordable rates.
Things we need to make this project are -
2. Old DVD Writer (working)
3. SMPS to power the DVD Writer
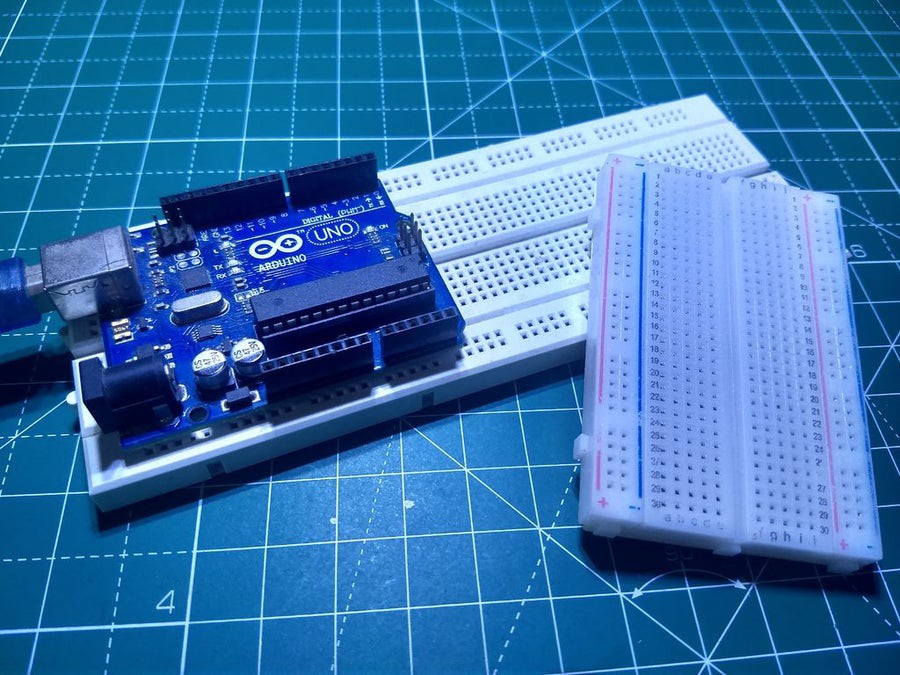
4. Bread Boards
5. RC 522 RFID Module
6. Relay Module
7. IR Sensor
8. Connecting Wires
Step 2: Circuit Diagram

Make all the connections as shown in the diagram above.
If you want to see how I modified the DVD Writer to make it work with the Arduino then Click Here .
The IR sensor gives the status of the door's open or closed state.
As we bring the correct RFID card in the readers proximity the door opens. It will stay open for a short time and then close again. But let's assume that a person entered by using the correct tag and now he wants to come out. This could be achieved using another RFID module at the inside but I went on with a easy method.
I gave a switch in the inside to open the door. This will help the person to get outside.
Step 3: Coding
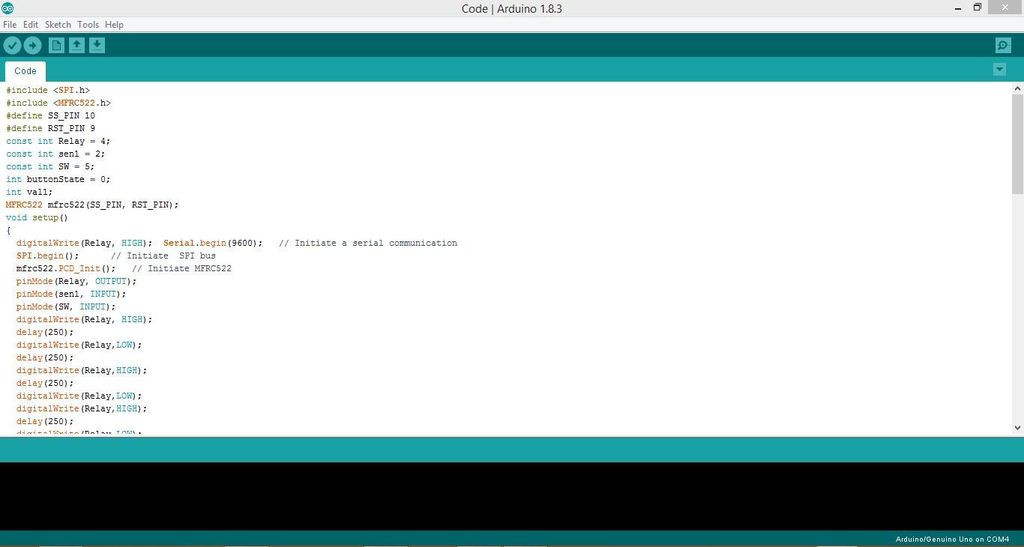
The code for this project is given below. But before uploading the code you will have to find the Tag number of your RFID Tag. And to do that check out this instructable >> Click Here .
Now change the UID in the code below and upload it to your Arduino Board.
#include <SPI.h>
#include <MFRC522.h>
#define SS_PIN 10
#define RST_PIN 9
const int Relay = 4;
const int sen1 = 2;
const int SW = 5;
int buttonState = 0;
int val1;
MFRC522 mfrc522(SS_PIN, RST_PIN);
void setup()
{
  digitalWrite(Relay, HIGH);  Serial.begin(9600);   // Initiate a serial communication
  SPI.begin();      // Initiate  SPI bus
  mfrc522.PCD_Init();   // Initiate MFRC522
  pinMode(Relay, OUTPUT);
  pinMode(sen1, INPUT);
  pinMode(SW, INPUT);
  digitalWrite(Relay, HIGH);
  delay(250);
  digitalWrite(Relay,LOW);
  delay(250);
  digitalWrite(Relay,HIGH);
  delay(250);
  digitalWrite(Relay,LOW);
  digitalWrite(Relay,HIGH);
  delay(250);
  digitalWrite(Relay,LOW);
}
void loop()
{
  val1 = digitalRead(sen1);
  Serial.println("SEN1");
  Serial.println(val1);
  buttonState = digitalRead(SW);
  Serial.println("Button");
  Serial.println(buttonState);
  {
  if (val1 == HIGH && buttonState == HIGH)
  {
    digitalWrite(Relay, HIGH);
    delay(250);
    digitalWrite(Relay,LOW);
    delay(4000);
    digitalWrite(Relay,HIGH);
    delay(250);
    digitalWrite(Relay,LOW);
  }
  else
  {
    digitalWrite(Relay, LOW);
  }
  rfid();
  }
}
void rfid()
{
    if ( ! mfrc522.PICC_IsNewCardPresent())
  {
    return;
  }
  if ( ! mfrc522.PICC_ReadCardSerial())
  {
    return;
  }
  String content= "";
  byte letter;
  for (byte i = 0; i < mfrc522.uid.size; i++)
  {
     content.concat(String(mfrc522.uid.uidByte[i] < 0x10 ? " 0" : " "));
     content.concat(String(mfrc522.uid.uidByte[i], HEX));
  }
  content.toUpperCase();
  int val1 = digitalRead(sen1);
  if (val1 == HIGH && content.substring(1) == "F4 90 E0 1F") //change here the UID of the card/cards that you want to give access
  {
    Serial.println("Authorized access");
    digitalWrite(Relay,HIGH);
    delay(250);
    digitalWrite(Relay,LOW);
    delay(4000);
    digitalWrite(Relay,HIGH);
    delay(250);
    digitalWrite(Relay,LOW);
  }
  else
  {
    Serial.println("Unauthorized access");
  }
}
The .ino file for this code is given below. You can directly download it.
If you have any trouble with the code then please drop a comment below. I will try my best to answer your queries.
 Boris van Galvin
 Dan Fruzzetti
 ElectronicABC