 The Tech Lab
With the current pandemic in the world, the situation seems pretty scary. The Corona virus might be anywhere. As far as we know, one might carry the virus for a few days without even showing any symptoms. Scary indeed.
But hey, don't get too scared. There are some easy ways we can fight against this virus. One is to wash our hands, properly. Our hands are the main carrier of all sorts of germs. We frequently touch our eyes, nose, and mouth without even noticing it. Germs from unwashed hands might get into our food as well, some of which may even grow in the food and when we eat those, they can make us seriously sick. And washing hands with soap can mostly kill them.
But how long do you think you wash your hands? Do you sing the happy birthday song? Once or twice? Is it always enough or do you actually just scratch your hands a little for 5 seconds and wash it off?
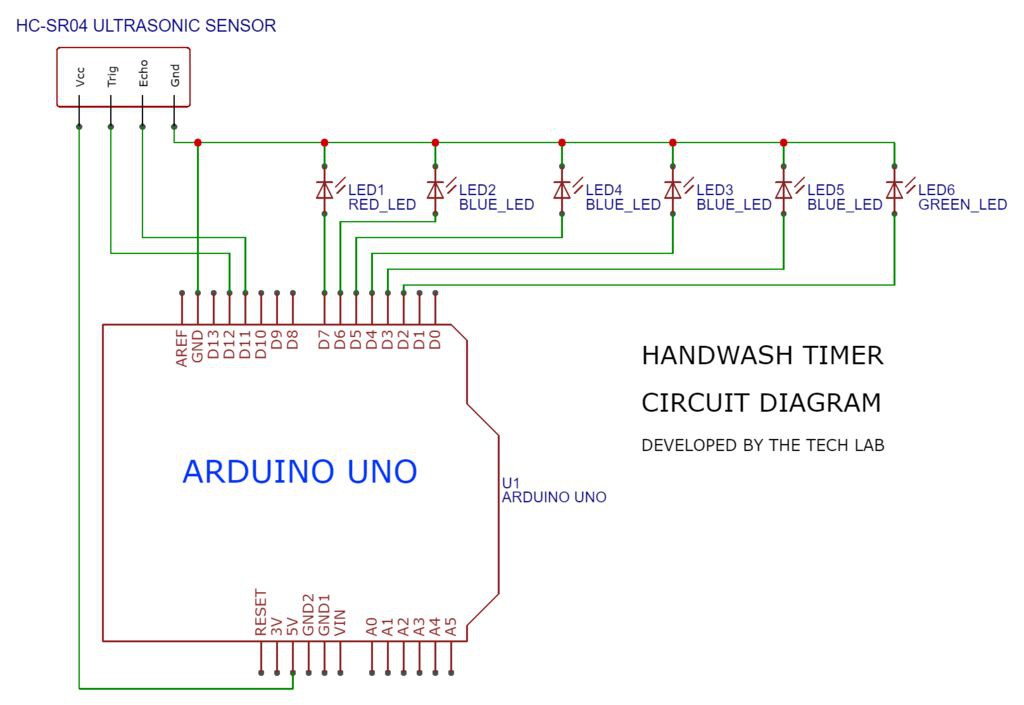
If we actually count our typical hand washing time, most of us barely washes for 10 seconds, which is definitely not enough. So here at The Tech Lab, we wanted to make something simple, something to force us to wash for at least a good 20 second.
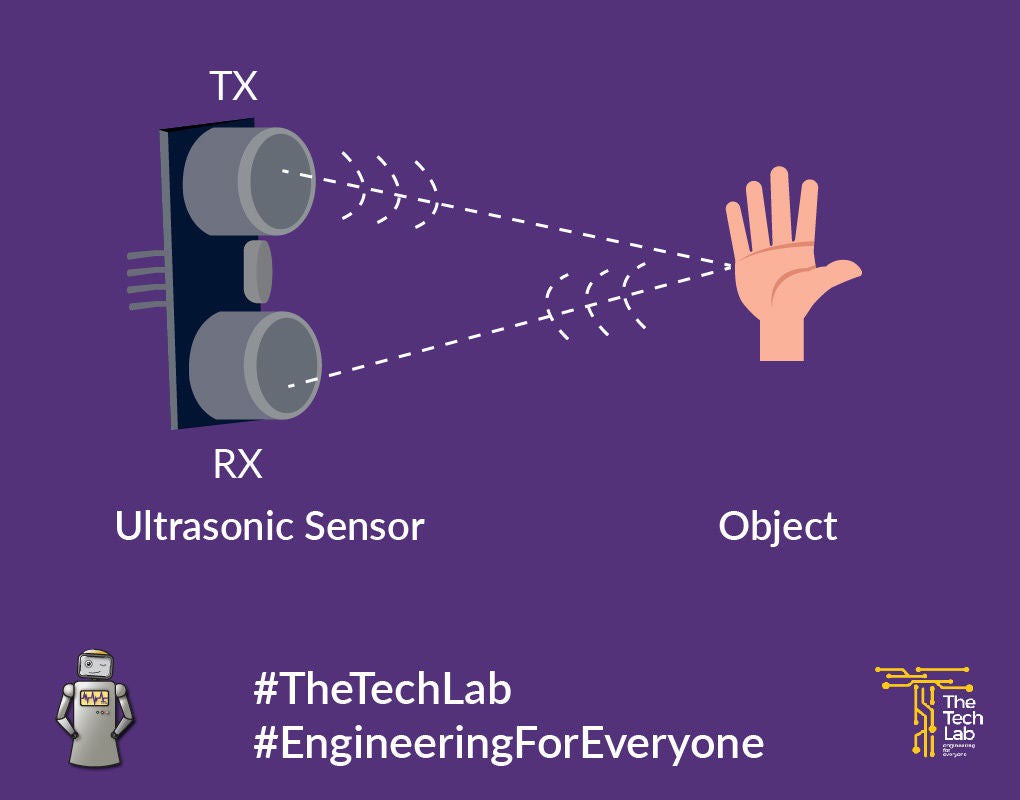
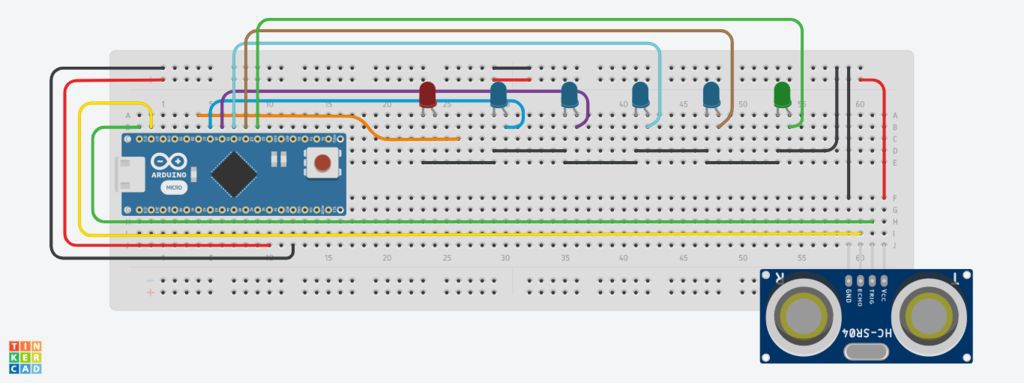
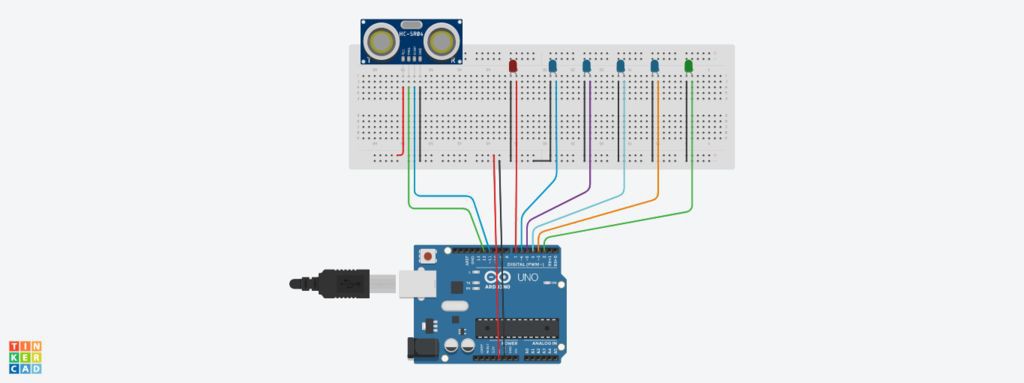
This simple timer sits next to your hand soap dispenser. It has a sensor on top that detects when you take your hand in front of the soap dispenser. Then it starts counting down 20 seconds, lighting up one LED after another. Once the green LED turns on, you have washed your hands long enough to kill most of the germs, and you can wash the soap off with water.

 hackaday
 Gerben
 PMT
PMT
 Michał Nowotka