Silícios Lab
In many systems, there is a great need to measure and indicate process temperatures to users. In these processes, the temperature is a critical factor and may influence the safety of the systems.
Thus, systems that measure and indicate temperature are required. So, through this project, you'll learn how to construct your temperature indicator system using Arduino Nano and you'll obtain your PCB Project to construct your own Temperature Indicator System.
Supplies:
To construct this project you'll need:
- PCBWay Custom PCB
- TM1637 Module - UTSOURCE
- DS18B20 Temperature Sensor - UTSOURCE
- Arduino UNO - UTSOURCE
The Project
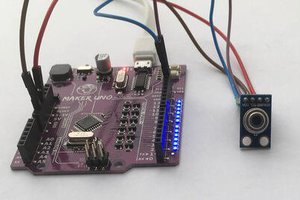
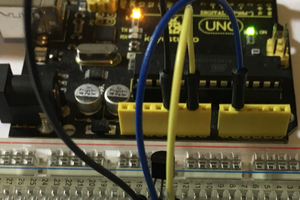
The project is constructed through an Arduino Nano, DS18B20 Sensor, and TM1637 Display. Everything can be seen in Figure presented above.

Figure 1 - Electronic Project on the Protoboard.
Through this circuit is possible to see the temperature is indicating in the TM1637 Display. The Electronic Schematic to construct your circuit is presented below.

Figure 2 - Electronic Schematic of the Temperature Indicator System.
Through this circuit, the printed circuit board was designed. And the electronic schematic is presented below.
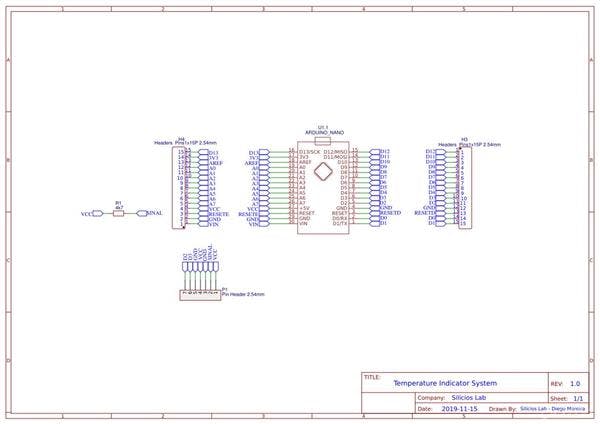
Figure 3 - Electronic Schematic of the Printed Circuit Board.
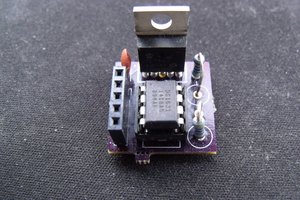
After the electronic schematic circuit, was constructed the Printed Circuit Board presented in Figure 4.

Figure 4 - Printed Circuit Board of the temperature indicator.
Therefore, after constructing the printed circuit board, we'll offer the code to measure the temperature. The code is presented below.
    javascriptCopy

    #include <OneWire.h>
#include <DallasTemperature.h>
#include <TM1637Display.h>

#define ONE_WIRE_BUS 8 //Digital Pin to connect the DS18B20 Sensor


OneWire oneWire(ONE_WIRE_BUS);
DallasTemperature sensors(&oneWire);
DeviceAddress sensor1;

TM1637Display display(2,3);

const uint8_t DEGREES[] = {0x0, 0x0,  SEG_A | SEG_B | SEG_G | SEG_F,  // Degree Symbol  SEG_A | SEG_F | SEG_E | SEG_D,  // C  };

unsigned int temperature = 0;
byte PreviousValue = 0;

void setup()
{    sensors.begin();    display.setBrightness(7);   // set display to maximum brightness
    if (!sensors.getAddress(sensor1, 0))    {              Serial.println("Sensor not found!");    }
}

void loop()
{    //Request sensor data    sensors.requestTemperatures();
    int tempC = sensors.getTempC(sensor1); //Read temperature of DS18B20 Sensor
       if(tempC != PreviousValue)       {        PreviousValue = tempC;        display.setSegments(DEGREES); //Display the Variable value        display.showNumberDec(tempC,false,2,0);        delay(2000);       }            }
From this code, you'll verify the temperature value in your system.
Conclusion
Through this project, you can apply in several projects like a brooder, incubator, liquid heating systems, and other projects. In addition to you can use a PCB like a shield for Arduino Nano, because it has pins to connect other devices.
You can download the files in the PCBWay.com website and create your own project.
Acknowledgment
Thanks to the PCBWay for supporting the our YouTube Channel and produce and assembly PCBs with better quality.
The Silícios Lab thanks UTSOURCE to offer the electronic components.
 Boz
Boz