Close
0%
0%

Raspberry Pi Zero W V1.3 Development Board

Buy the Raspberry Pi Zero W V1.3 Development Board at the Best Price only at Robu.in

Similar projects worth following
Ever dreamt of your own single-board computer? Well, Raspberry Pi makes it easier for you to build your own single-board computer. The Raspberry Pi is a single-board computer that plugs into monitor, TV, or directly connects wireless with a laptop and is a low-cost device. You can use a standard USB keyboard and mouse to operate it.
The Raspberry Pi Foundation recently launched the Raspberry Pi Zero W, an improved version of the original Raspberry Pi Zero that adds built-in Wi-Fi and Bluetooth. The Pi Zero W is a small-scale version of the popular Raspberry Pi (RPi) Linux single-board computer (SBC). You can build the same awesome Raspberry Pi projects with a Pi Zero W.
Through this blog you will get hardware overview of the board and how to install the software of Raspberry Pi. Also, you will get to know about some additional features of the Raspberry Pi Zero W like the Camera Serial Interface (CSI) and many more.

Hardware Overview 

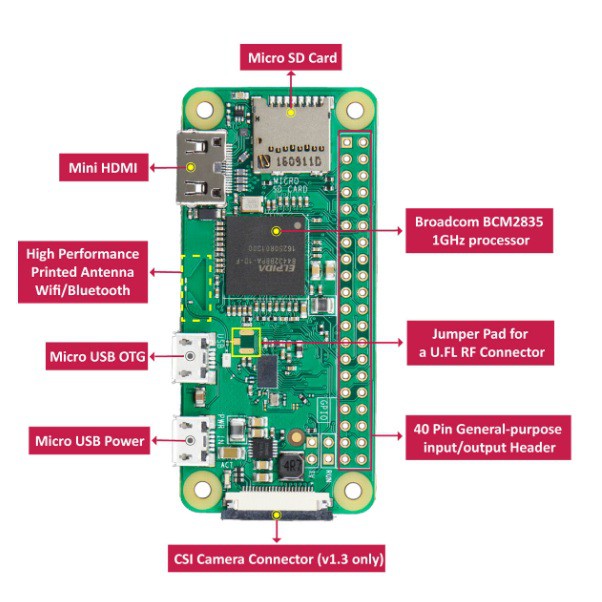
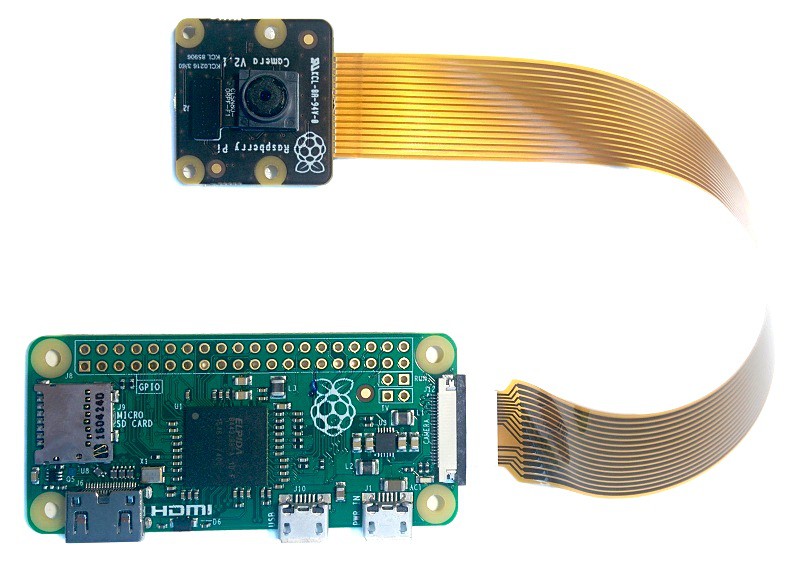
  It is a fully working 32-bit computer with a 1 GHz ARMv6 single core microprocessor (ARM1176), a VideoCore 4 GPU, and 512 MB of memory. The GPU is capable of driving a full HD display at 60 fps. You also get access to the 40 General Purpose Input and Output (GPIO) ports, however the header is unpopulated, meaning there are no pins.

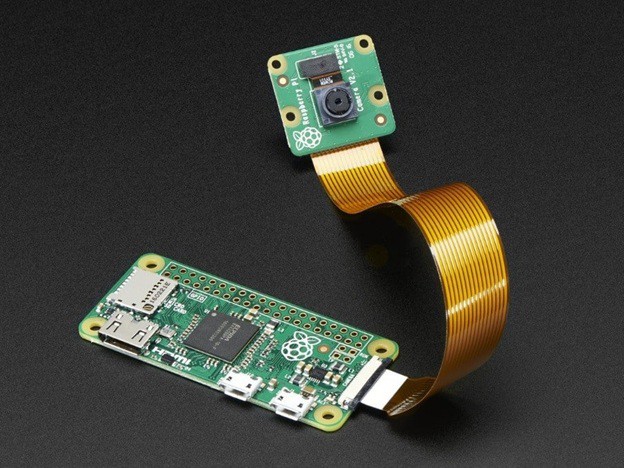
The Zero W is meant to be bare bones, cheap, and versatile, so hobbyists and professionals alike can make anything they’d like. Geeks are using this board in small DIY projects to building drones.

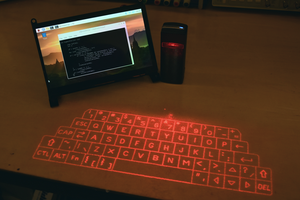
Like the original Pi Zero, the System-on-a-Chip (SoC) is near the middle of the board, while the various ports are found towards the bottom. There is a mini-HDMI port for the display as well as two micro-USB ports – one for power and the other for data. To use the micro-USB port to connect peripherals like a keyboard or mouse you will need a micro-USB B male to USB A female adapter.

Software

The operating system of choice for all Raspberry Pi boards is Linux, specifically the Debian based Raspbian. Installing Raspbian is a breeze. You need to download the New Out Of the Box Software (NOOBS) zip archive and extract it onto a blank microSD card. Boot the Pi Zero W from the card and follow the on screen instructions. Once complete the Zero will reboot into the Raspbian desktop environment.

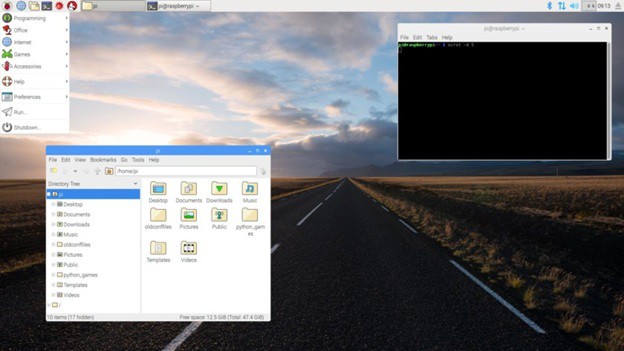
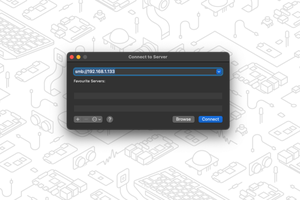
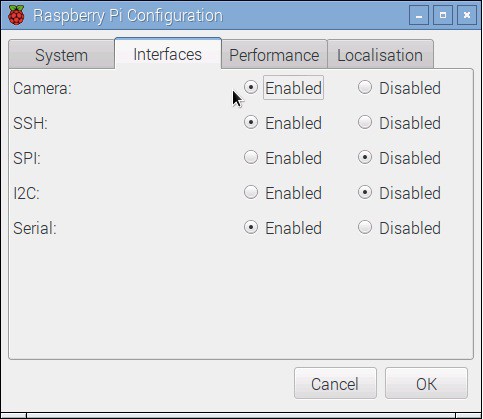
When the desktop appears you will probably want to configure the networking. Click on the network icon (near the clock at the top-right of the screen) and you will see a list of all available wireless networks. Select the one you want and enter the password. If you right-click the network icon and choose the Wireless & Wired Network Settings option from the pop-up menu, you can manually enter a static IP address.

While you are in Raspberry Pi Configuration, you can also set the hostname of your Pi Zero W and also configure the auto login options. Under the Interfaces tab you should also enable SSH login which will allow you to connect to your Pi Zero W over SSH.

With the Wi-Fi network configured and SSH enabled, you are now ready to disconnect the keyboard, mouse and monitor, and reboot to access your Zero W remotely.

document - 1.17 MB - 05/22/2020 at 13:28

Download

  • 1 × Raspberry Pi Zero W v1.3
  • 1 × Raspberry Pi Case
  • 1 × Raspberry Pi Camera Module

  • 1
    Camera Interfacing

    The key feature of the of the Raspberry Pi Zero W V1.3 was to support camera serial interface (CSI connector) which used to be equipped on high end Raspberry Pi. Thus, Pi Zero w began to be able to connect with cameras.

    Indeed, numerous Raspberry Pi users choose to add Raspberry Pi cameras to have various applications. It was a shame that Pi Zero 1.2 cannot access cameras, but 1.3 supports the function again.

    However, Pi Zero 1.3 still does not support DSI interface. Per the general usage, Raspberry Pi users use CSI interface more frequently than DSI interface. That might be the reason why Pi Zero 1.3 regained the CSI support first.

    The steps to connect Raspberry Pi Zero and the camera module are given below

    • Connect your camera module to the CSI port on your Raspberry Pi, this is the long thin port adjacent to the HDMI socket.
    • Gently lift the collar on top of the CSI port.
    1.  Insert the wider end of the adapter cable with the conductors facing in the same direction as the camera’s lens.
    2. Finally, attach the adapter to the Pi Zero by gently lifting the collar at the edge of the board and inserting the smaller end of the adapter with the conductors facing the back of the Pi Zero.

    Your setup should look something like this:

    Now, apply power to your Pi. Once booted, start the Raspberry Pi Configuration utility and enable the camera module: You will need to reboot after doing this (but this is one-time setup so you won’t need to do it again unless you re-install your operating system or switch SD cards). 

    If everything is working correctly, the camera should start, a preview from the camera should appear on the display and, after a 5 second delay it should capture an image before shutting down the camera.

    Final Thoughts

    Having built-in Wi-Fi and Bluetooth makes the Raspberry Pi Zero W versatile and flexible.The possible uses and projects for the Zero W are endless and it lends itself well to Internet-of-Things projects. Sensor data gathering (via the GPIO ports), plus a 1 GHz 32-bit processor, plus wireless connectivity equals a winning formula.

    For any IoT project that requires a cheap processor board with built-in wireless connectivity, I suggest you buy a bucket load of Pi Zero W boards. Also the interesting thing is that new official cases are available with the board. The case consists of 2 parts

    •  Standard base featuring a cut-out to allow access to the GPIO
    • Three lids: a plain lid, a GPIO lid, camera lid.

    To get Raspberry Pi Zero W board along with the case at the best Price click at the link below. Also do visit Robu.in for more Raspberry Pi boards along with their accessories at the best price possible. The link is given below.

    Raspberry Pi Zero-W V1.3 Development Board With Official Case

    Raspberry Pi

View all instructions

Enjoy this project?

Share

Discussions

Similar Projects

Does this project spark your interest?

Become a member to follow this project and never miss any updates