I would really like for this to be an accessible project, to allow anyone with an interest in robotics and machine learning to have their own AI artist. With low costs and no specialized tools: no 3D printer, no Laser-cutters, not even a full wood-shop. Of course with those you could expand on this, but this really lends itself to anyone interested.
All the cardboard is hand cut with a pen-knife, hot glued together, with some screws here and there. You will need a soldering-iron, though you might even be able to get away with really long jumper wires. The most expensive part is the maxSonarEZ1, which I've made optional.
In the pictures you can see the completed robotic arm, it is fairly large. Other pictures include, an example of the computer vision that I've coded for the program to determine which colors to paint and where (right now it is extremely simplified, using only 6 colors, for ease of coding. I will expand on this as I go). This image is the one that looks like an 8-bit image, this was a picture I took with my webcam (So it's actually a self-portrait!).
The other is what the end results might look like, they are generated images processed in Runway ML using the Coco GAN created by running the computer vision image.
And of course the electronic diagram, made using Fritzing.
I really hope other people find this helpful and give it a try!

 Sascha Grant
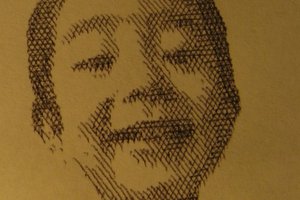
 shlonkin
 David Preece
 Alexey Frunze
Great first prototype. It works remarkably well for something made from cardboard. What are your plans for a controller for this?