 opentag
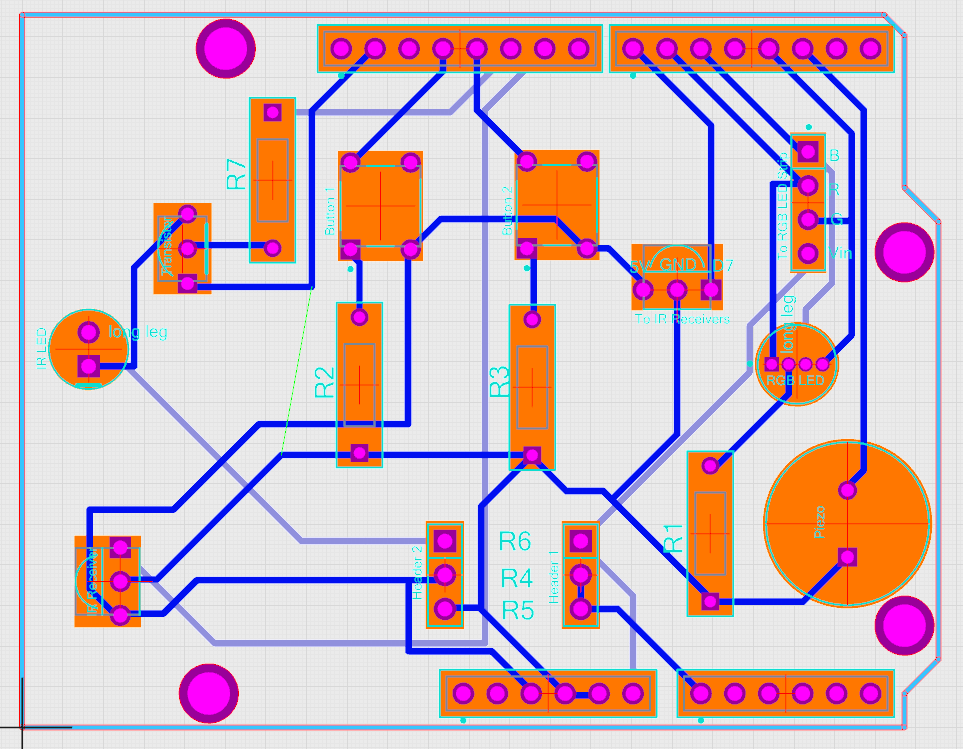
It was relatively simple to put together an arduino shield using Upverter. They had an arduino shield template (fortunately, so I didn't have to make one), and I could fork off of that to make my own. It only took me a couple of hours to attach all the components in the schematic and then wire up the board.
I never actually learned how to do circuit design in class. It was something that I picked up by doing it. That's how you learn things sometimes. Not by reading it from a book or sitting in a lecture, but by actually doing it. There are some great tutorials out there on how to do it. Like this one that shows you how to make your own arduino shield, or this one that shows you how to make a simple circuit board.
Alas, I used to have this arduino shield in Fritzing, but when I dug up my old files and started to edit them, I realized just how annoying that software is. It was very hard to select individual traces on the board, and moving them around was near impossible. I spent an hour trying to move about three traces that were wrong, and eventually I gave up. Deciding it was easier to rebuild the entire shield in upverter than try to fix it in Fritzing. So I did. And it was.
I guess that's my internal lesson for myself. Use a good tool and this process will actually be pretty straightforward. While upverter still didn't have all the parts I was using in my design, it had most of them, and I could use parts that had the same footprint as substitutes.
Oh, yeah, if you copy the design, some of the components are incorrect. I didn't put the correct ones in, as they either didn't have them or it was easier to put in something else. The actual parts list is on my website, not Upverter.
Discussions
Become a Hackaday.io Member
Create an account to leave a comment. Already have an account? Log In.