In the last log, I was experimenting with integrating Roku into our platform, using a ESP32-based "breadboard keyboard" for Roku remote emulation. In this log, I am going to discuss replacing the input control with the IMU-based gesture control prototype. I will also detail the hardware updates made to the gesture control remote, which was just shipped to UCPLA a few days ago!
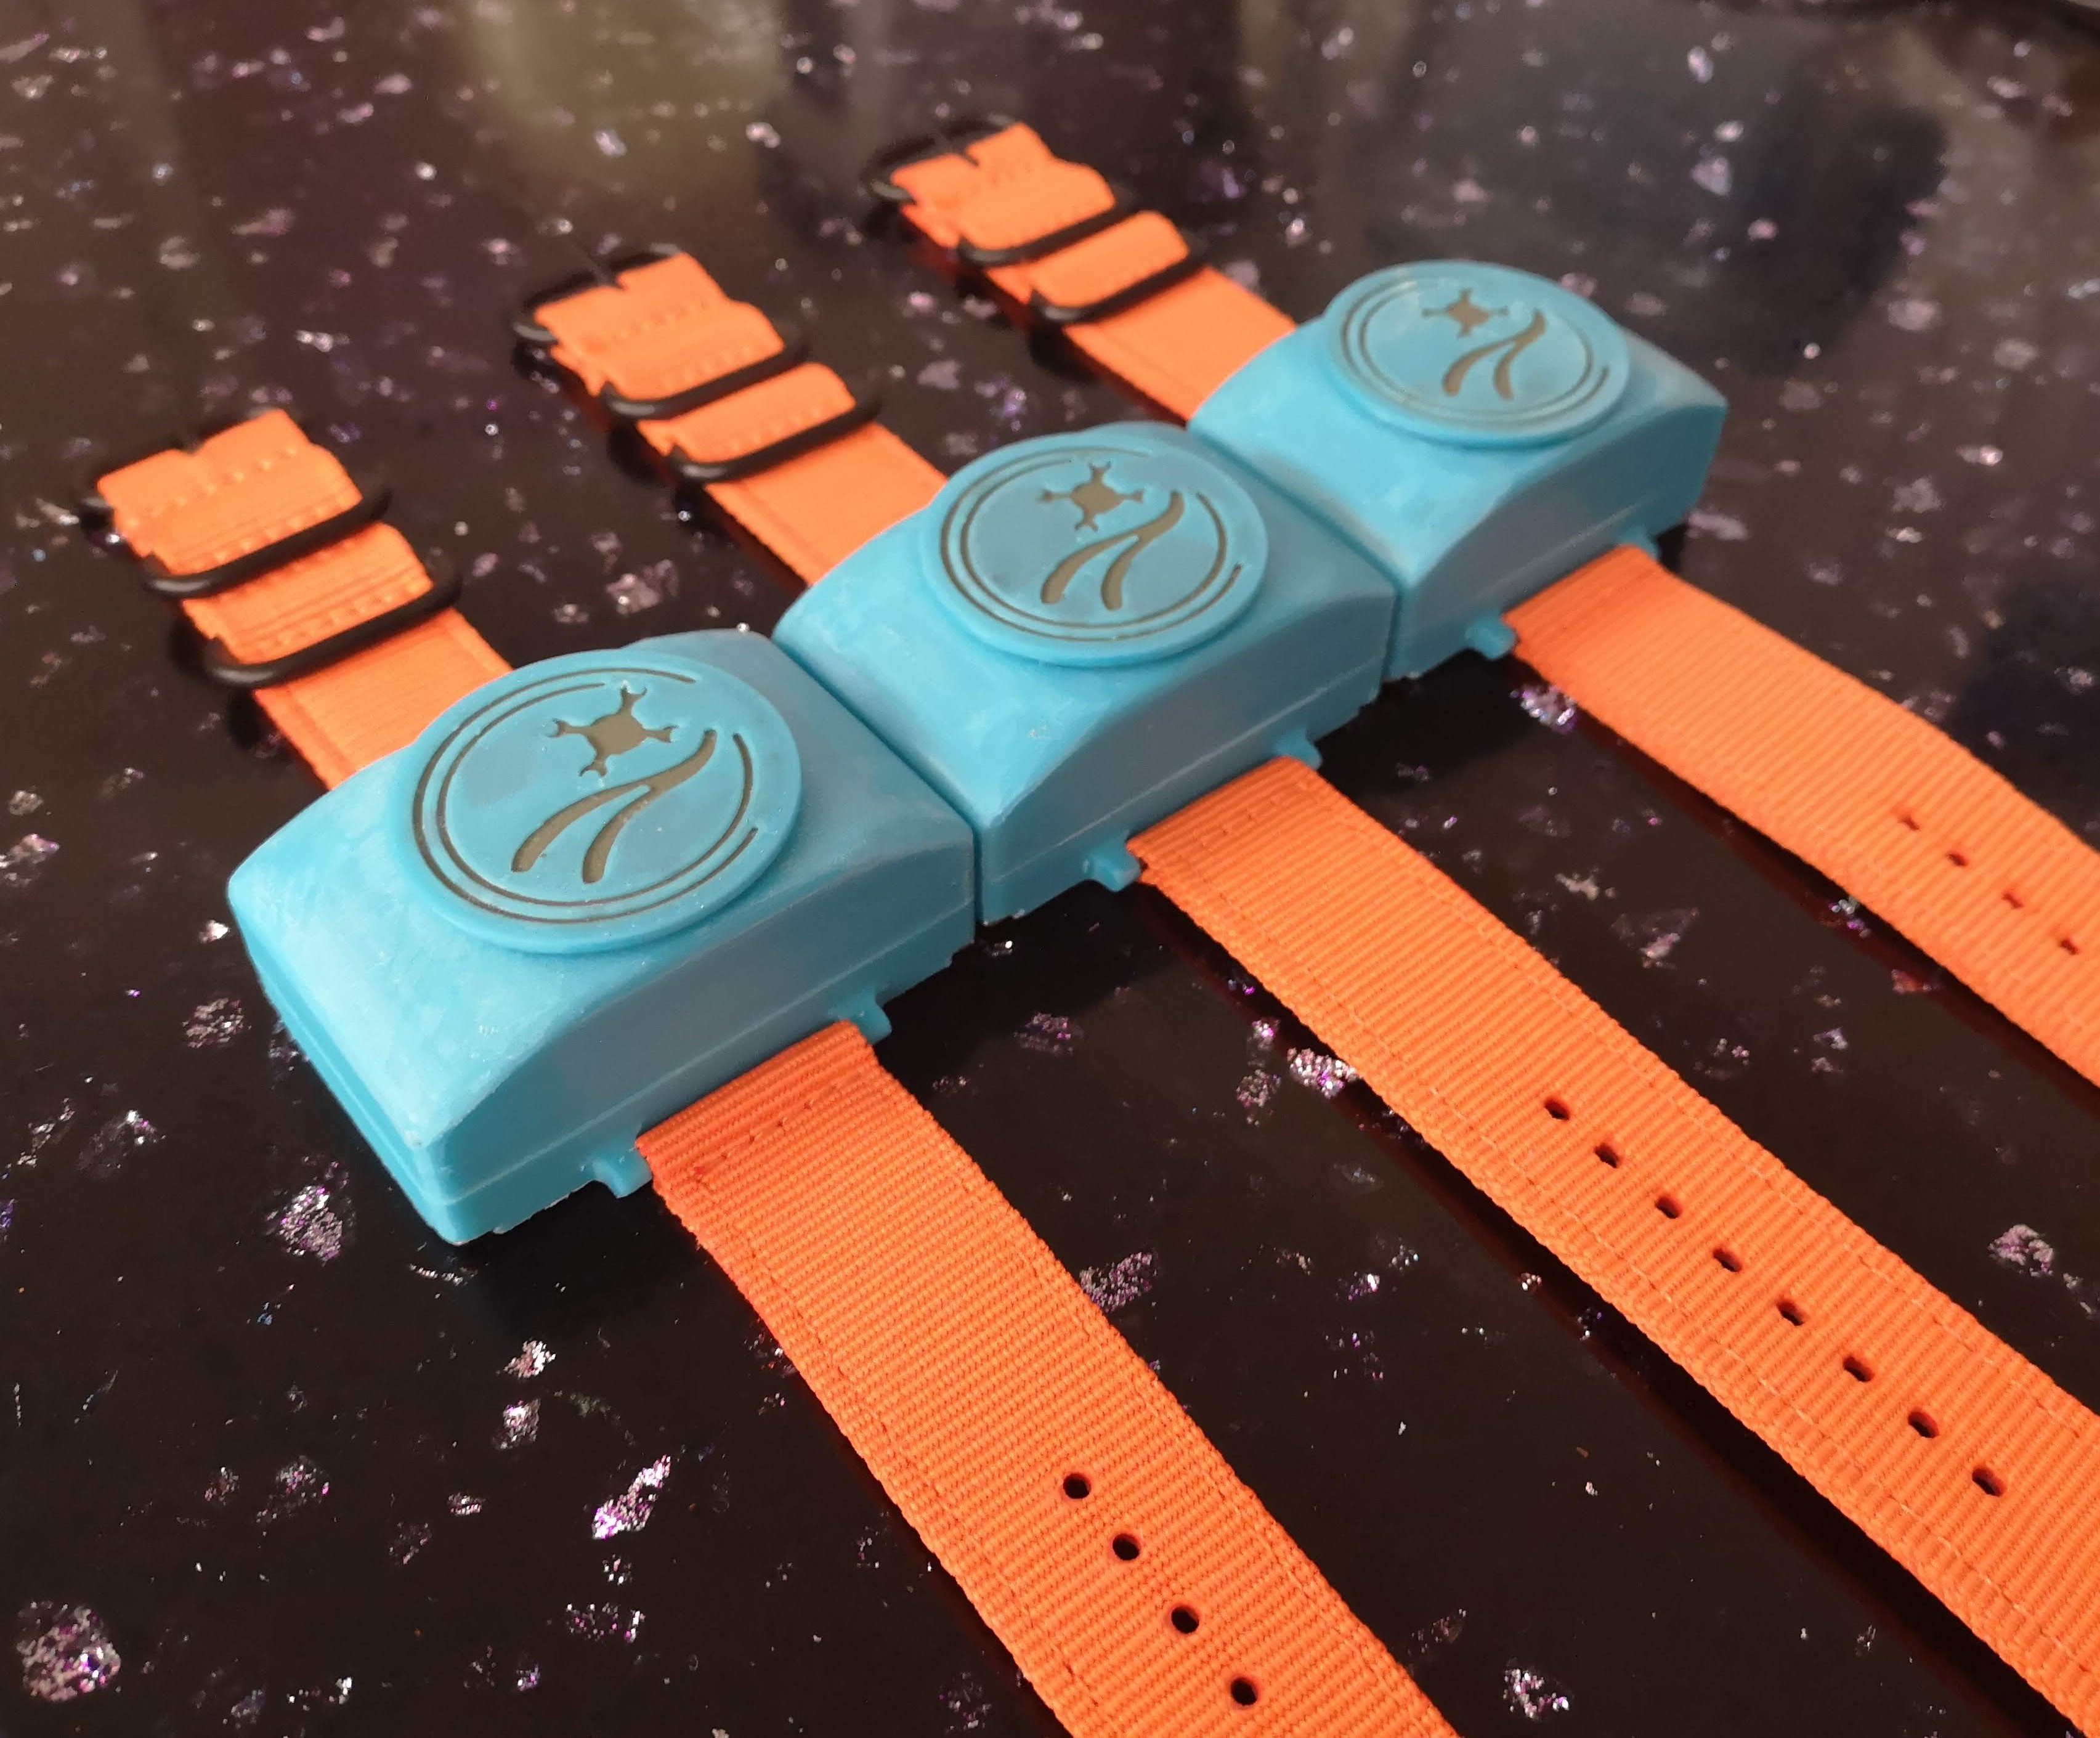
Hardware Updates to the Gesture Control Remote
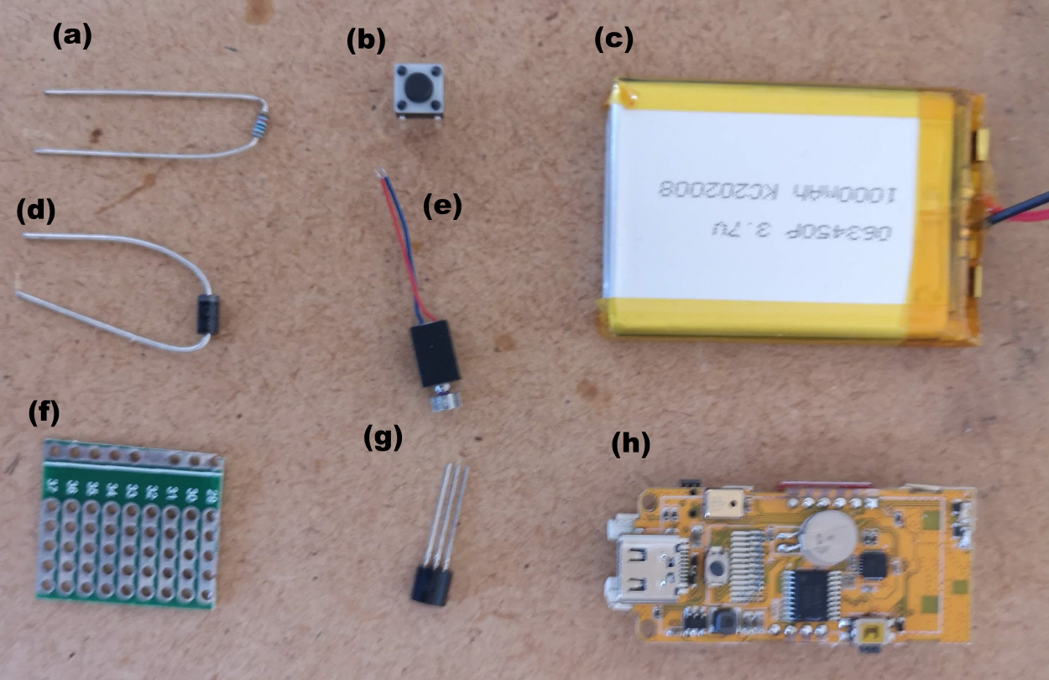
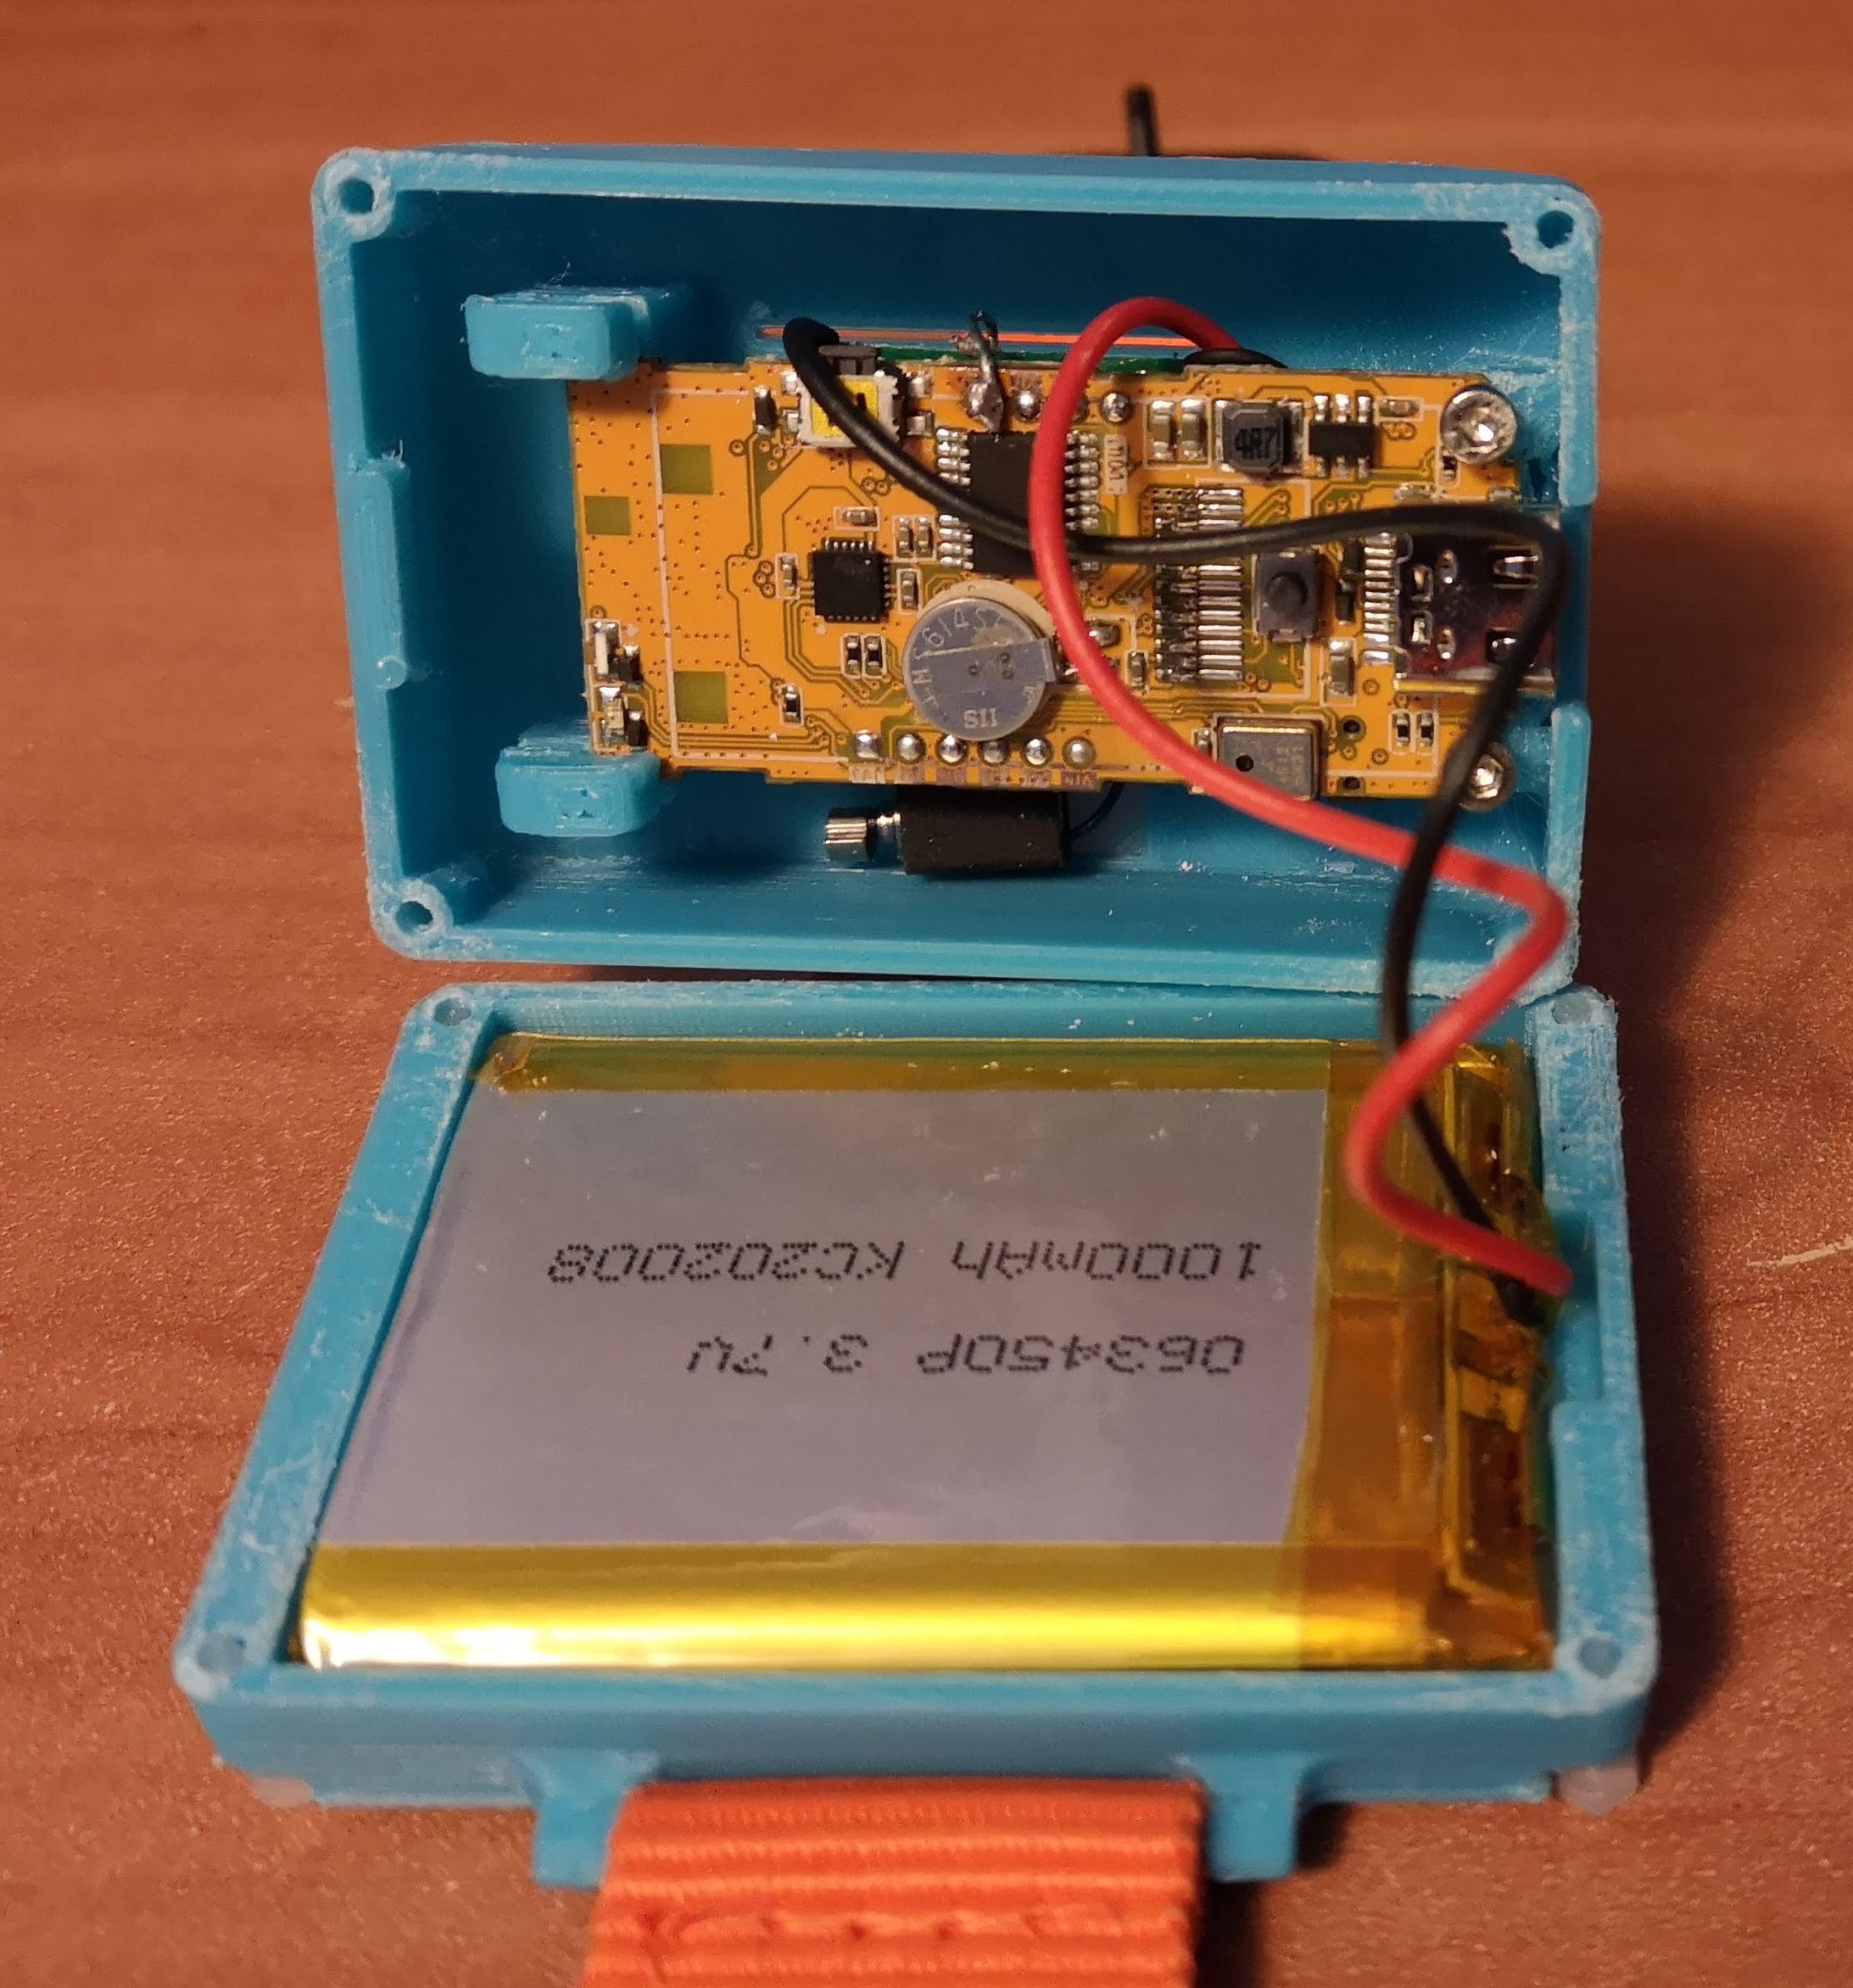
Up until now, the gesture control prototype was the M5StickC microcontroller. The limitations that needed to be addressed were 1) increasing battery life, 2) adding a user-friendly switch, and 3) adding a vibrating motor. These details were discussed in a previous log and developed further here. One change in direction was made from that previous log to this one. Instead of using a reed switch, I decided to stick with a tactile switch for switching device states. After reading more thoroughly about the hazards of rare-earth magnets for devices like pacemakers and hearing aids, it was better to play if on the safe side and make sure nothing we give to the user is dangerous.
Below are some images of the electronic components as well as the 3D printed enclosure (more detailed documentation is being prepared and will be uploaded soon).


Software Problems: ESP-NOW and MQTT Doesn't Work Simultaneously
While transitioning from the breadboard keyboard to the gesture control remote for using a Roku, I ran into the biggest technical issue faced in this project. With the breadboard keyboard, a button press would publish a MQTT message, which would be received by the Raspberry Pi running Home Assistant. However, when I tried to integrate the gesture remote with MQTT, the ESP-NOW communication between the gesture remote and the dongle stopped working. I spent quite some time debugging this and looking around for answers, but couldn't get it to work. I also tried replacing one of the communication methods with bluetooth or painlessMesh, but wasn't happy with either approach because messages were sometimes missed.
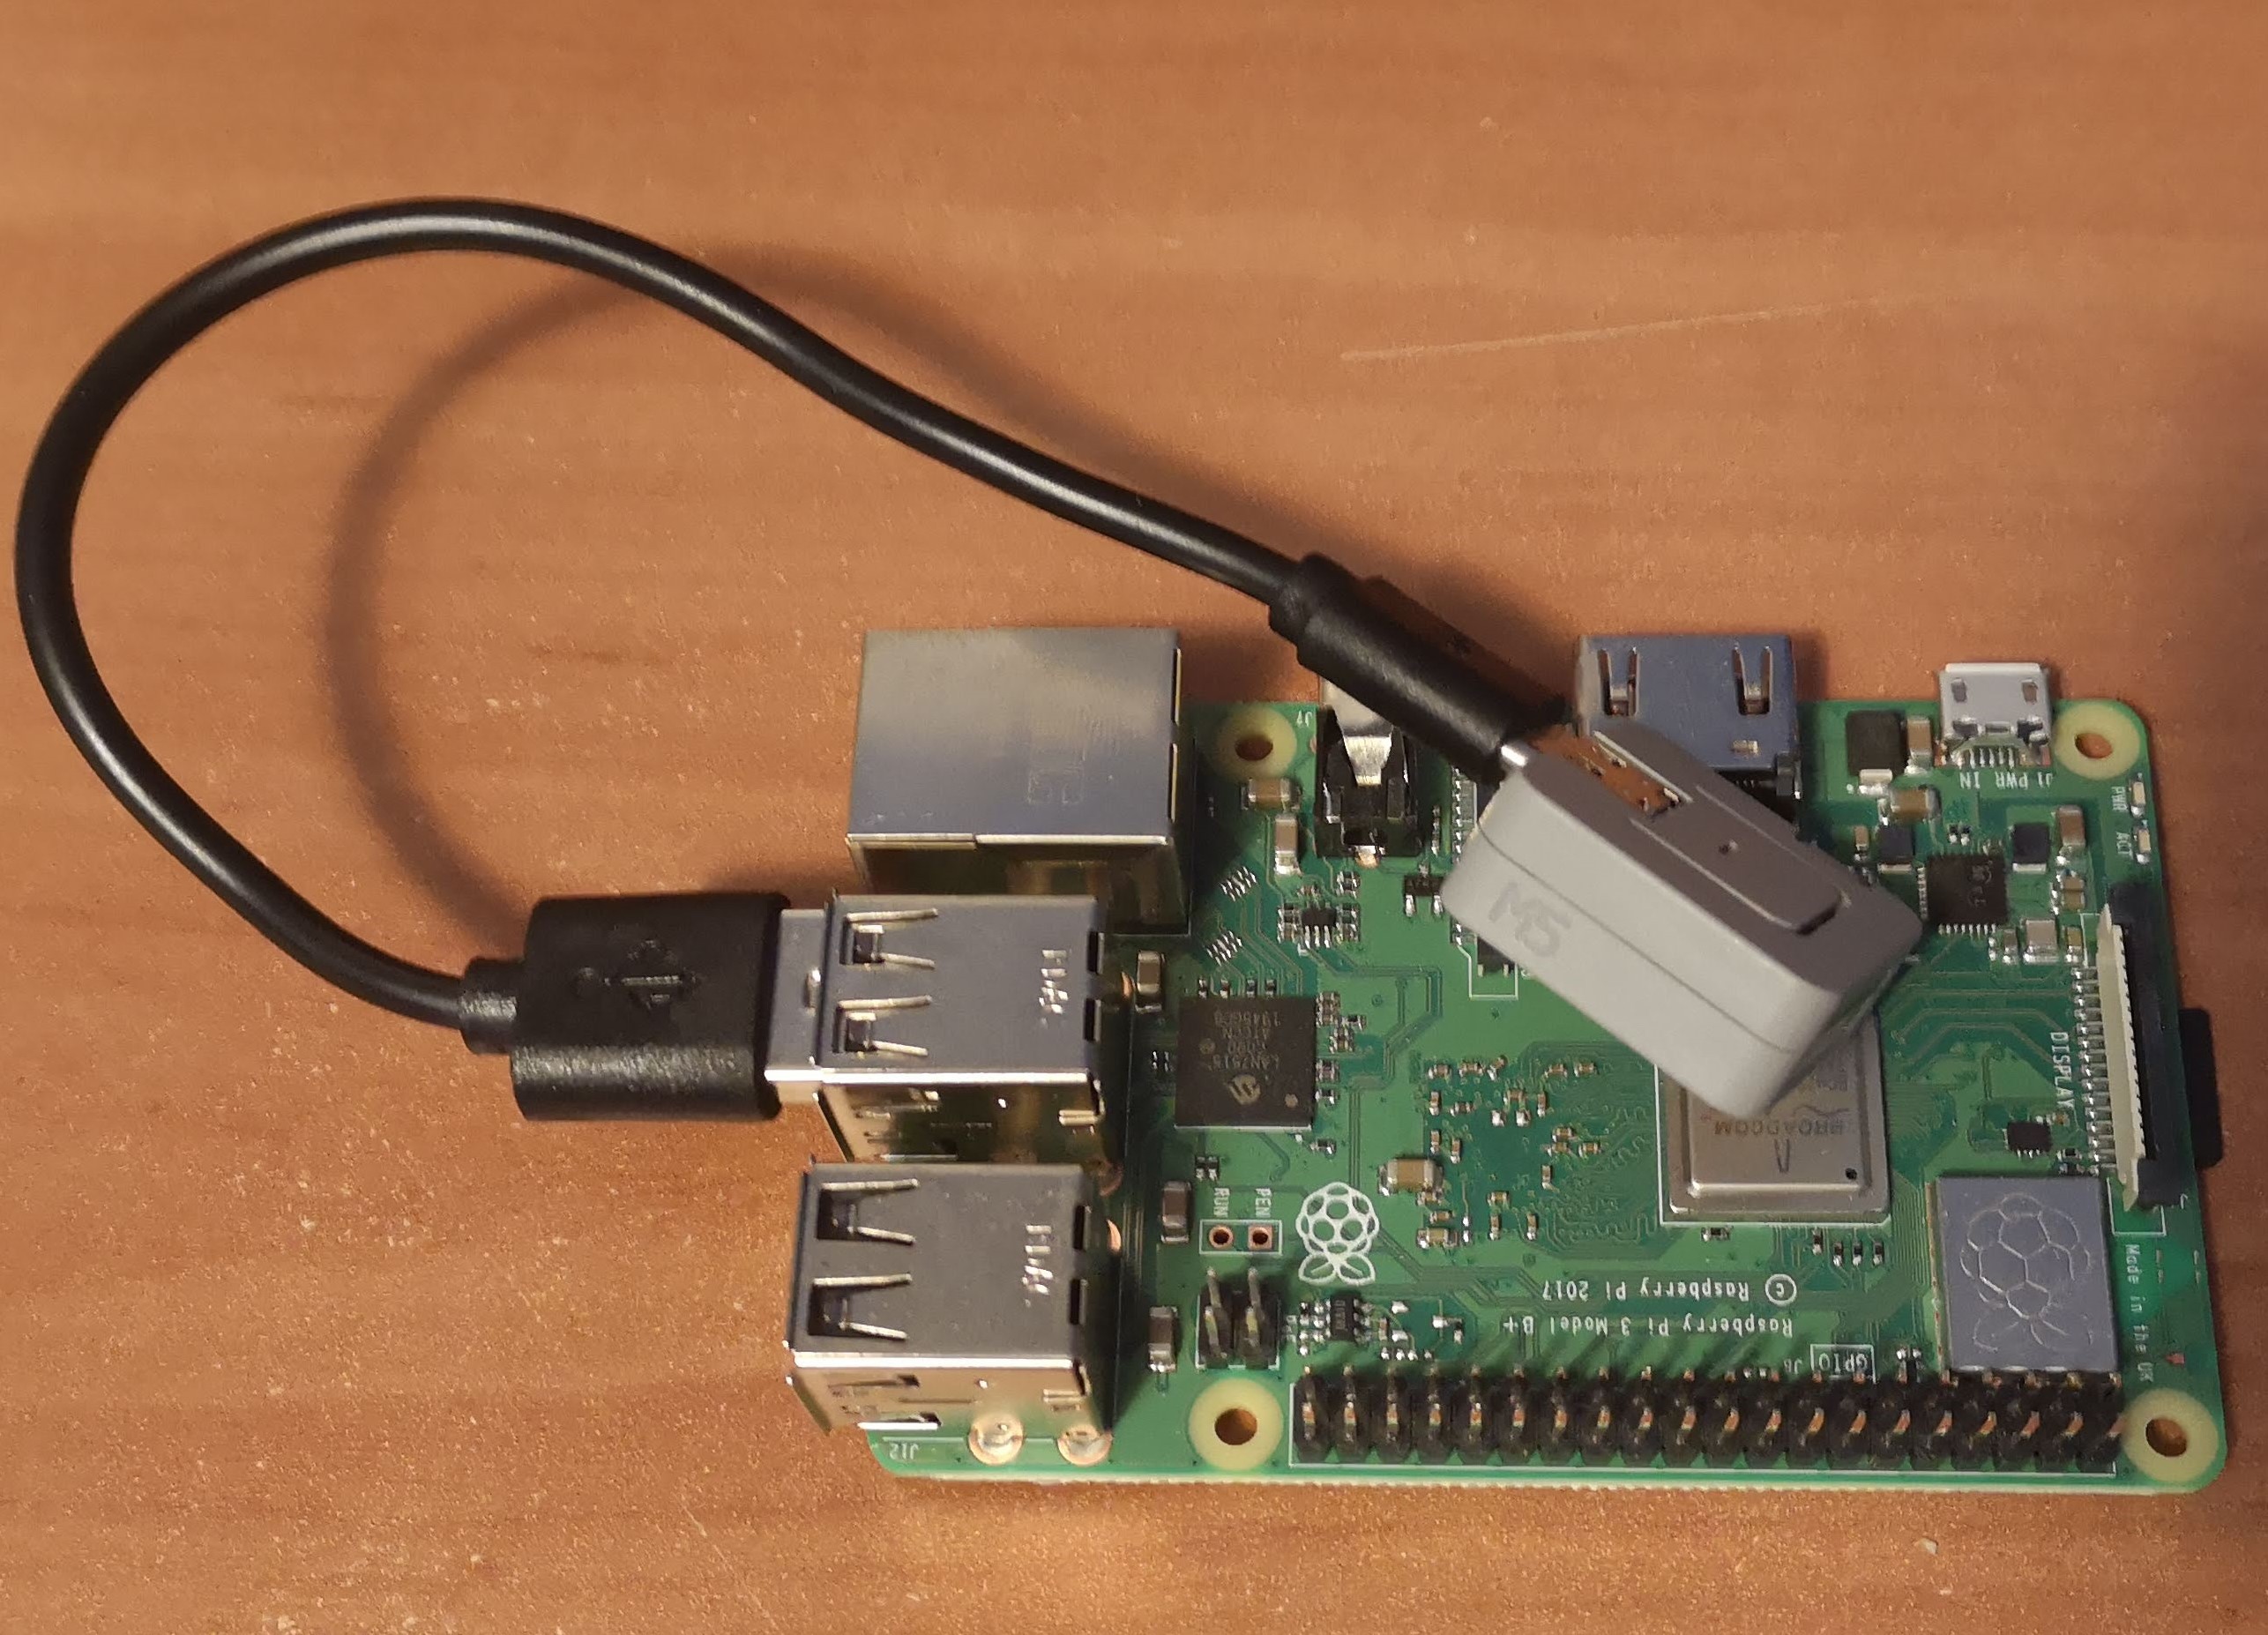
In the end, I settled for a workaround where I have an ESP32-based board plugged into a USB port of the Raspberry Pi. The ESP32 board communicates with the dongle through ESP-NOW, waiting on a message, which is then relayed to the Raspberry Pi through serial communication to trigger a home automation action.
Looking at this problem again, I think the question comes up: Why is the dongle necessary? Why can't the gesture remote handle the signal processing and directly send MQTT messages to the Raspberry Pi. There were two initial reasons why this was done, and they might not be valid reasons depending on the situation. First, I wanted the gesture remote to be as power efficient as possible and the only task it was supposed to do was sending IMU signals. Second, I wanted to keep the option open to connect the dongle to multiple input devices and combine the signals together before triggering an action for increased functionality. I am not a software person and fully believe there is a better solution than what I have done so far, so this setup needs to be scrutinized further.
Gesture Control for Roku Testing
The keyword in this project is designing something that is "universal", so we want an input device that can be used to control a phone, a computer, and something like a Roku (and a million other things). Previous testing established a Bluetooth connection between the gesture remote and a computer. Because Bluetooth doesn't depend on WiFi and has relatively low latency, I wanted to keep using Bluetooth for using computers/phones/tablets especially when considering a user using something like Photoshop.
In addition to Bluetooth for a computer, I added the functionality of the Roku control via ESP-NOW to the Raspberry Pi/Home Assistant as described in the previous section. Switching from sending Bluetooth to ESP-NOW was done by pressing the button on the gesture control remote. The video below is a demo of switching from playing a computer maze game to navigating Roku to play a Netflix show and then back to playing the computer maze game.
In this example, we've been able to demonstrate we can press arrow keys on a computer and control a Roku media player. I believe these proof-of-concepts can translate well to other applications. For instance, instead of setting up Home Assistant to use a Roku, there are minimal changes that need to be made in order to use something like Chromecast or other smart devices (which I hope to demonstrate as well). In regards to the computer, the next step is to integrate mouse movement to open up more possibilities. One targeted application is using Photoshop, which would complement the services UCPLA offers to their community.
Discussions
Become a Hackaday.io Member
Create an account to leave a comment. Already have an account? Log In.