 EK
EKNote: The content in this update was on August 13th. Here’s an update that was supposed to follow Mech Update #07, but during the time it was skipped ahead to Mech Update #09. After update #07, it was re-prioritized to work on the Onboard Gateway enclosure rather than the spool box design in order to try to meet shipping deadlines to get the 3D printed pieces to Tobi and Leo.
To get started on the designs rapidly, block prototypes of the circuit boards were printed in order to determine the sizing better. The buoy used the Buoy B board:
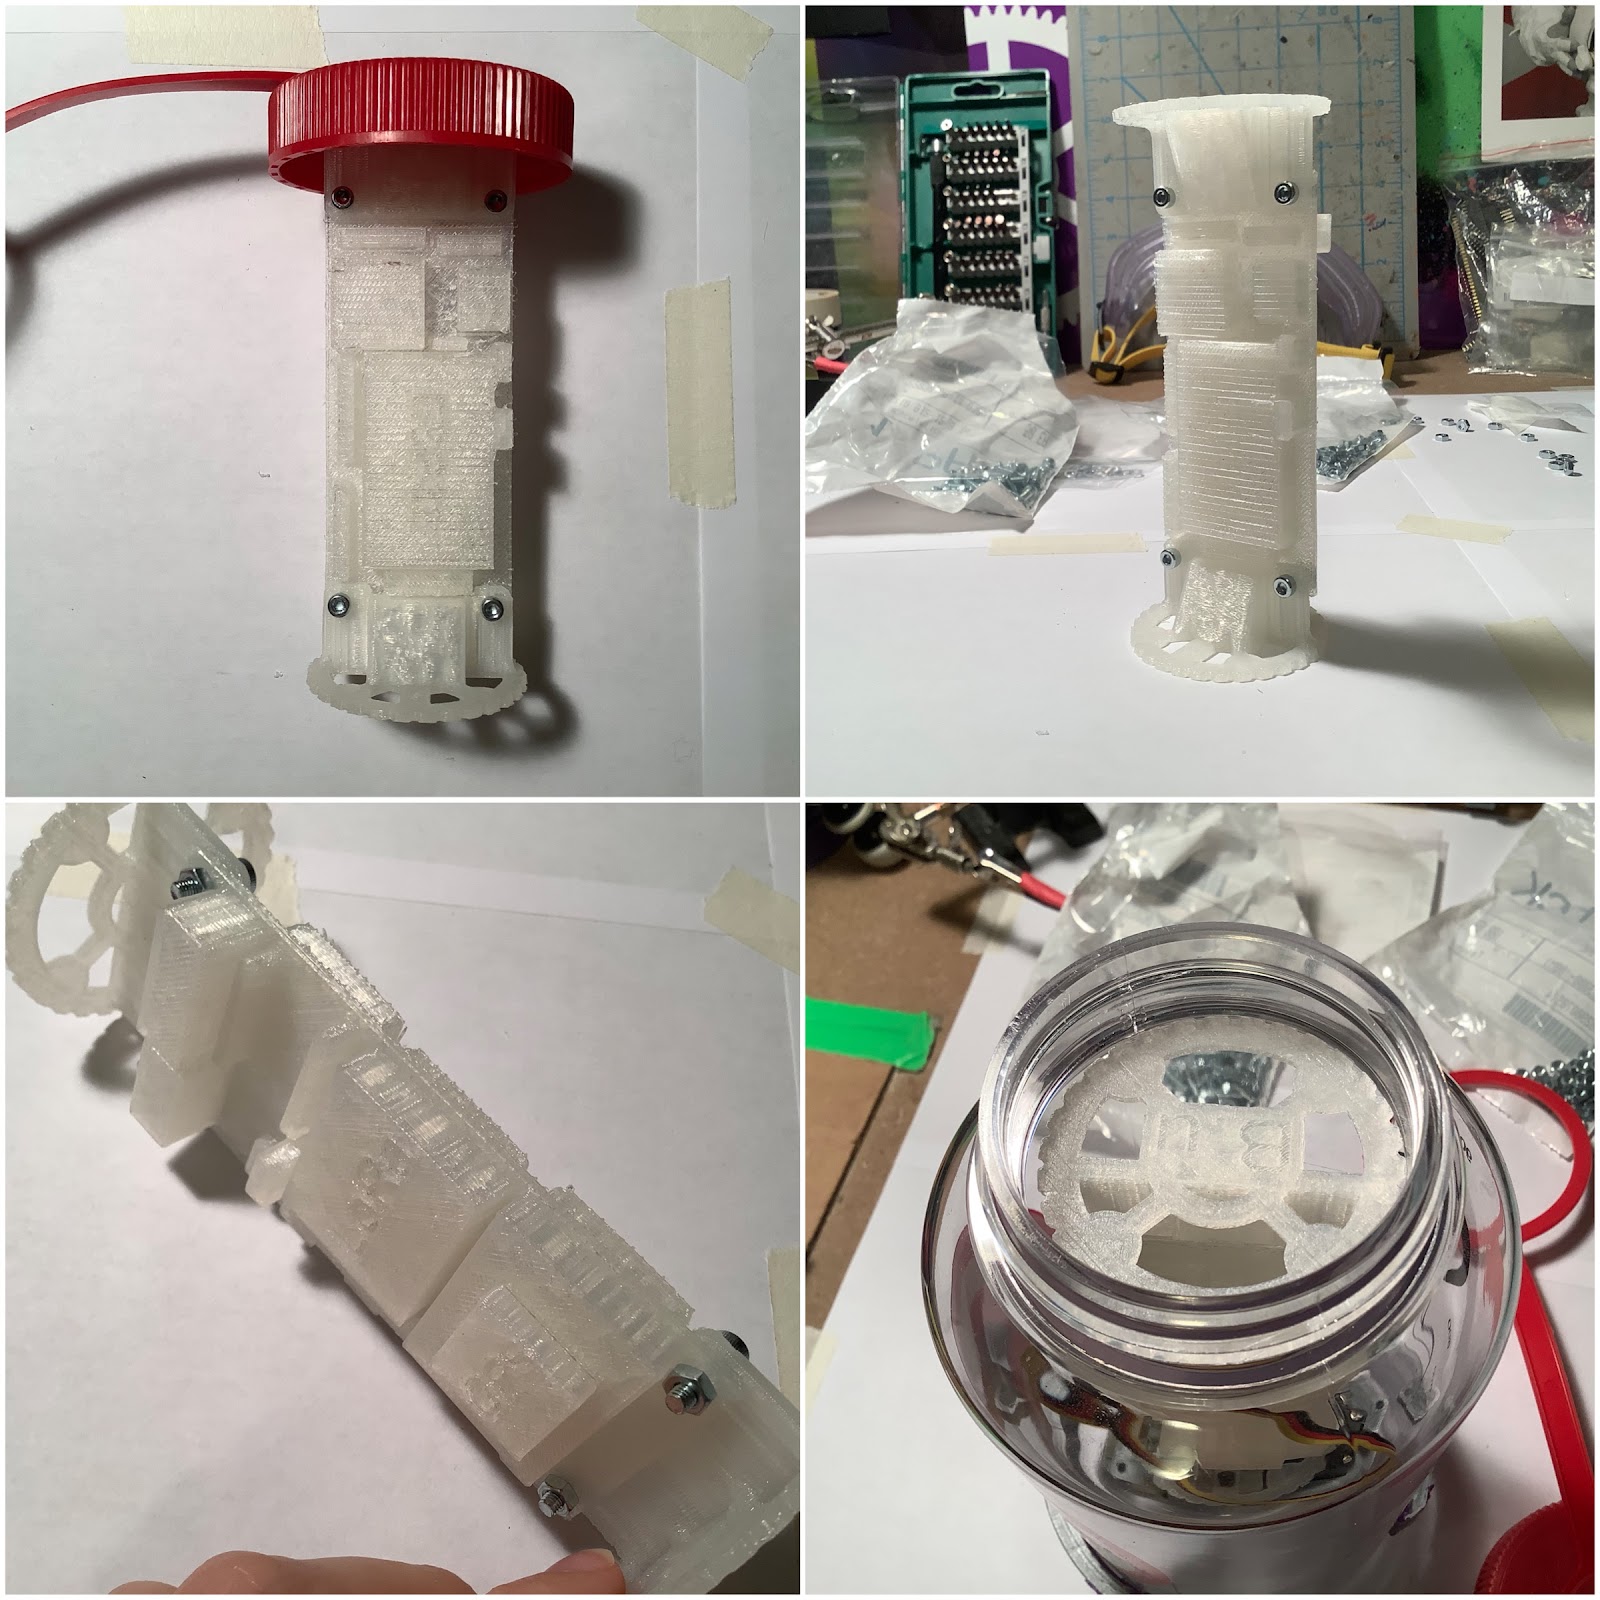
The bottom right photo shows that there is some space between the end of the stage piece and the edge of the lip of the enclosure. This will need future modifications with another piece that can attach to the inside of the lid.
The future modification can also be used to move the servo closer to the end of the enclosure:

Read on for more of the design and also the Onboard Gateway design!
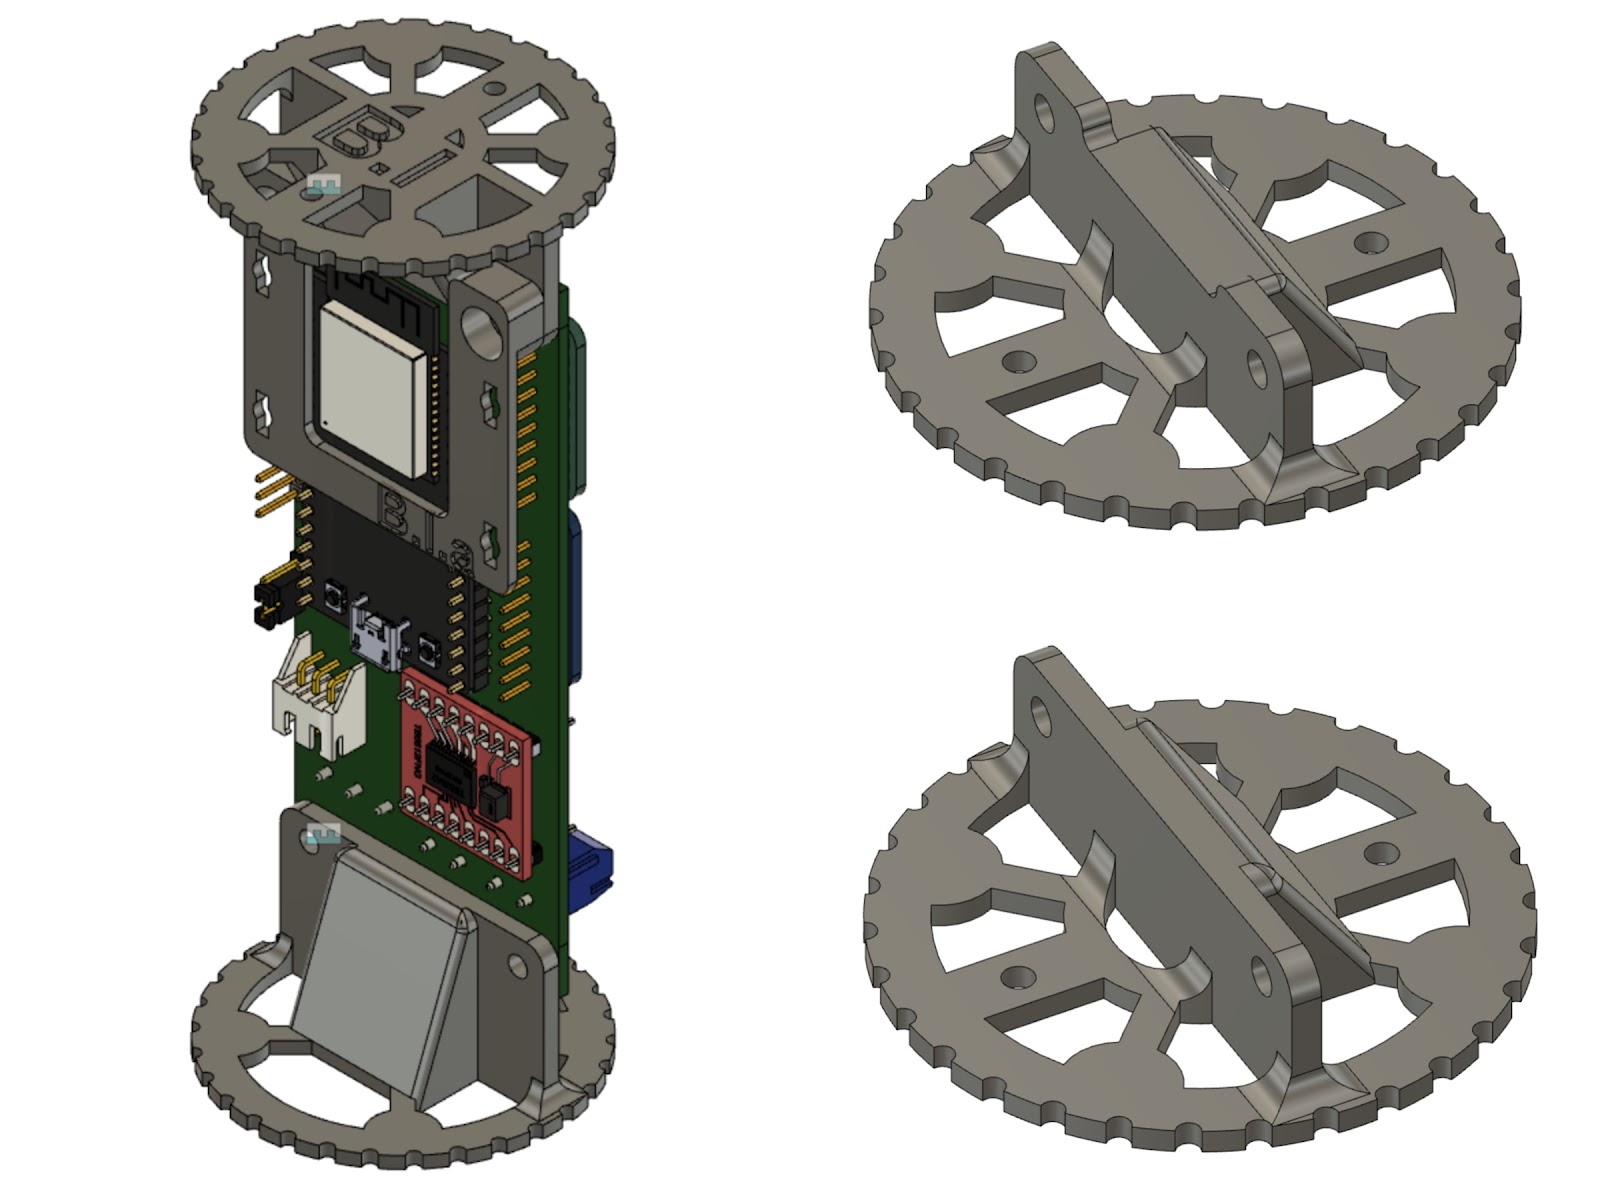
Here is what the buoy assembly looks like with the board. There could be brackets which also attach to the 3D printed pieces to hold additional sensors or boards, etc.
The piece needed to extend the position of the assembly to attach onto the lid consists of a thicker stage to hide the head of the screw in so that it’s flush with the lid, and a variety of spacer sizes for testing:
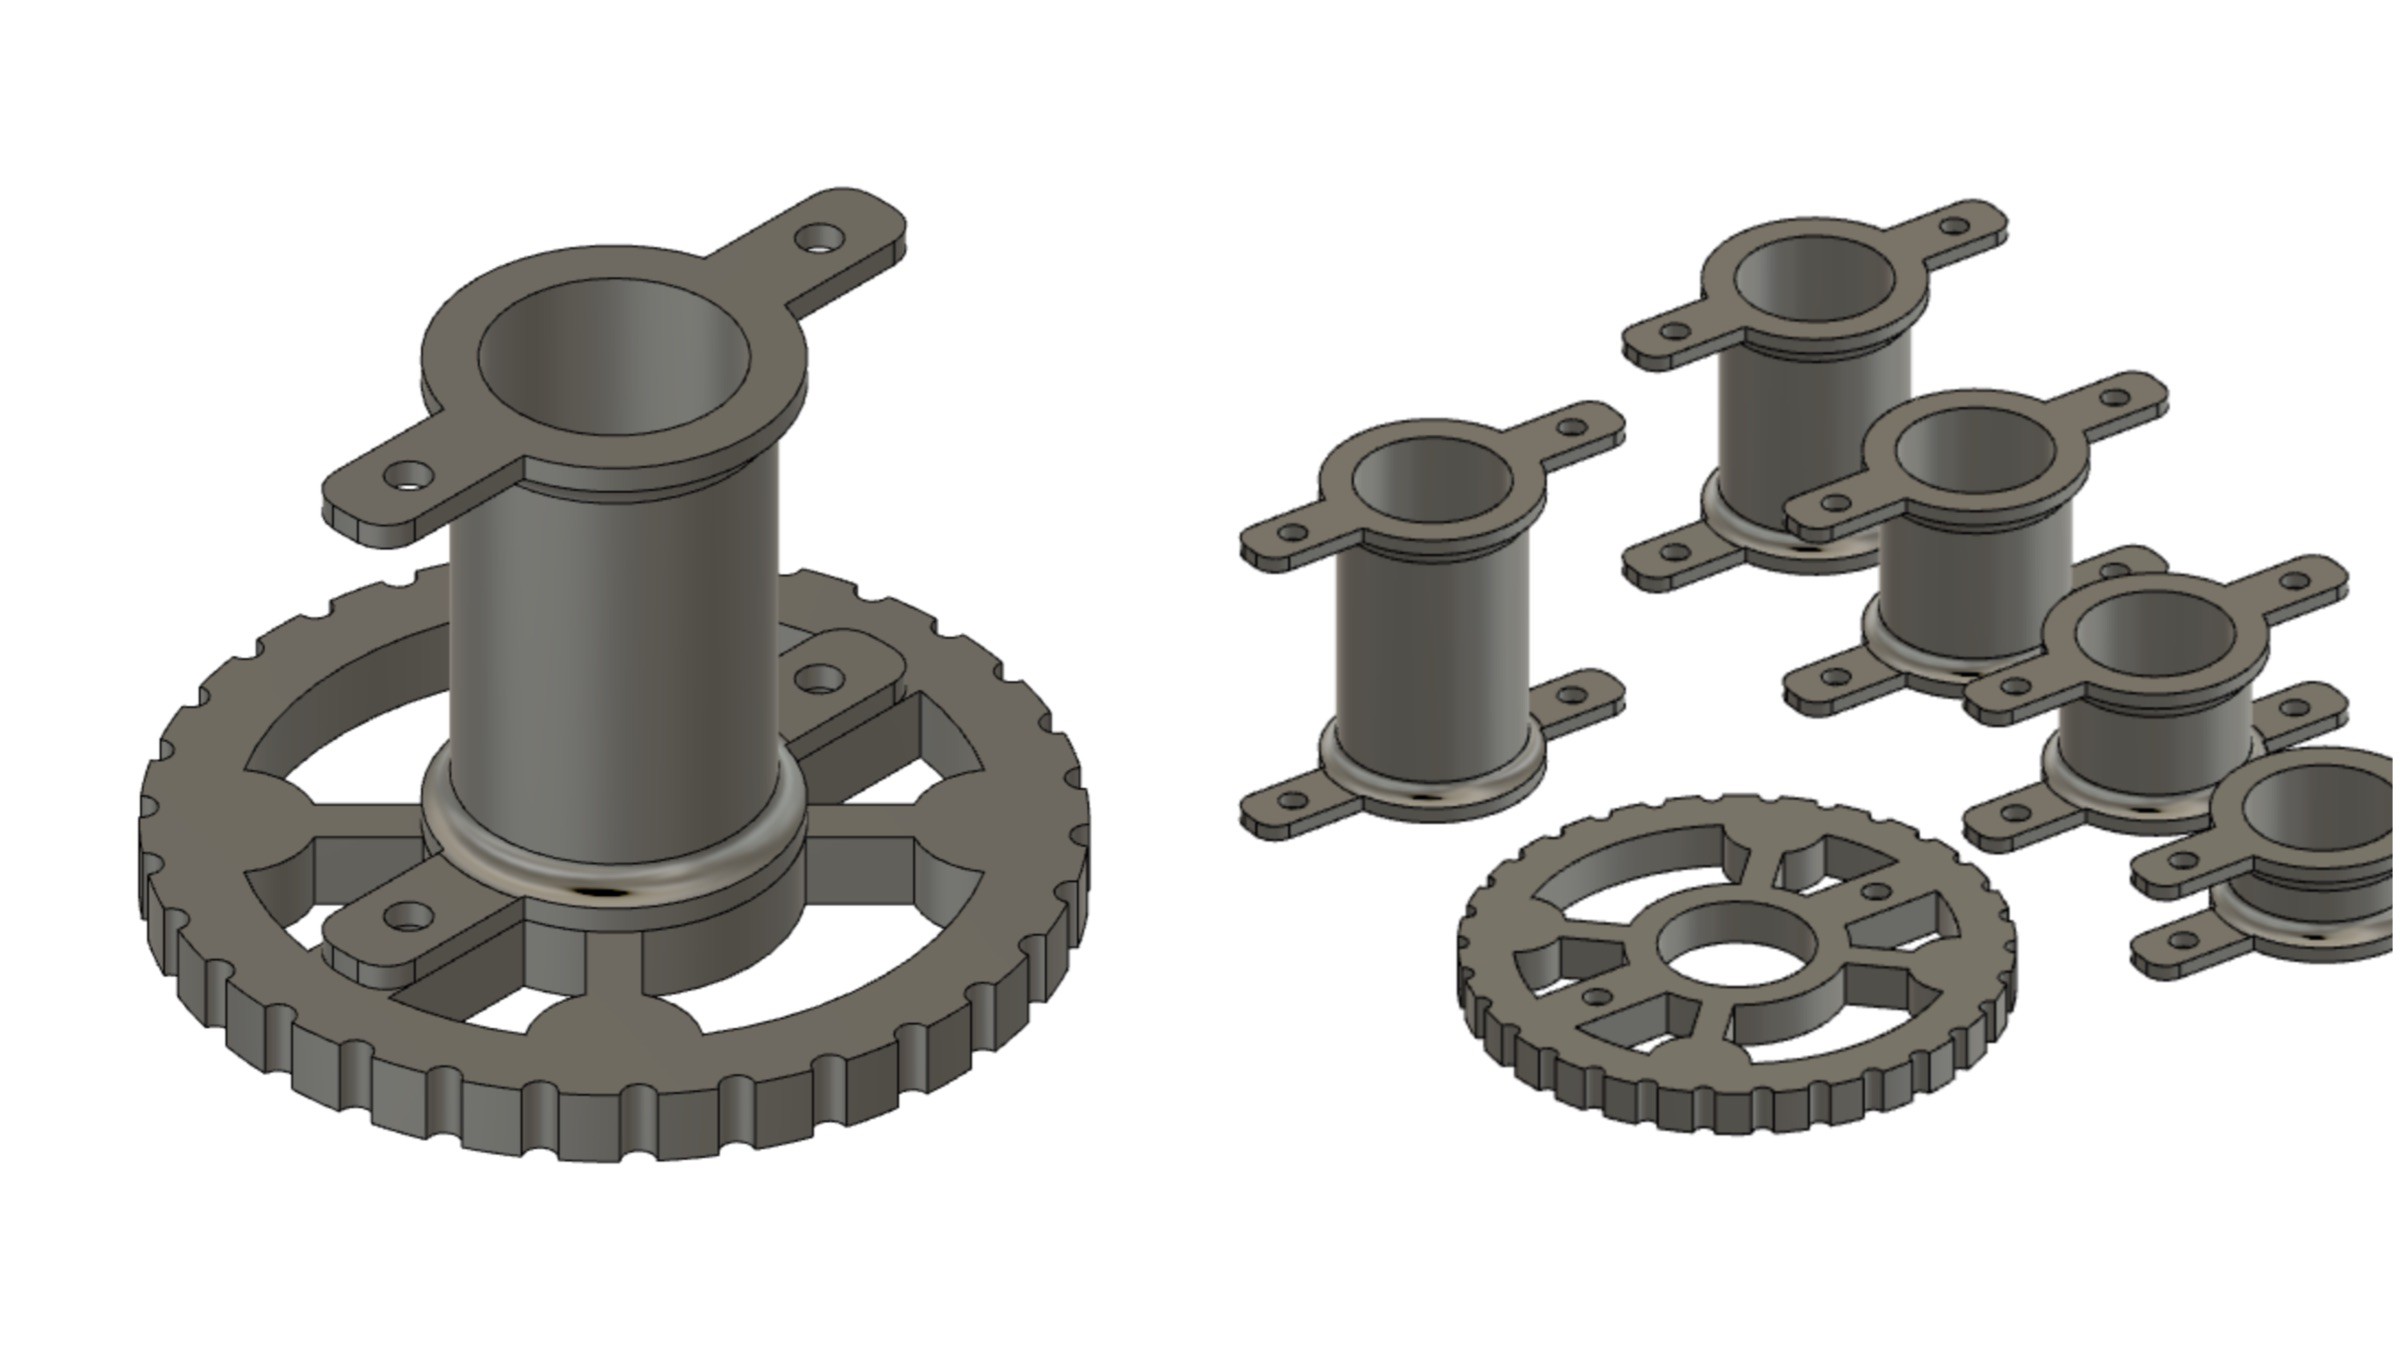
The size of the spacer that worked was the longest one.
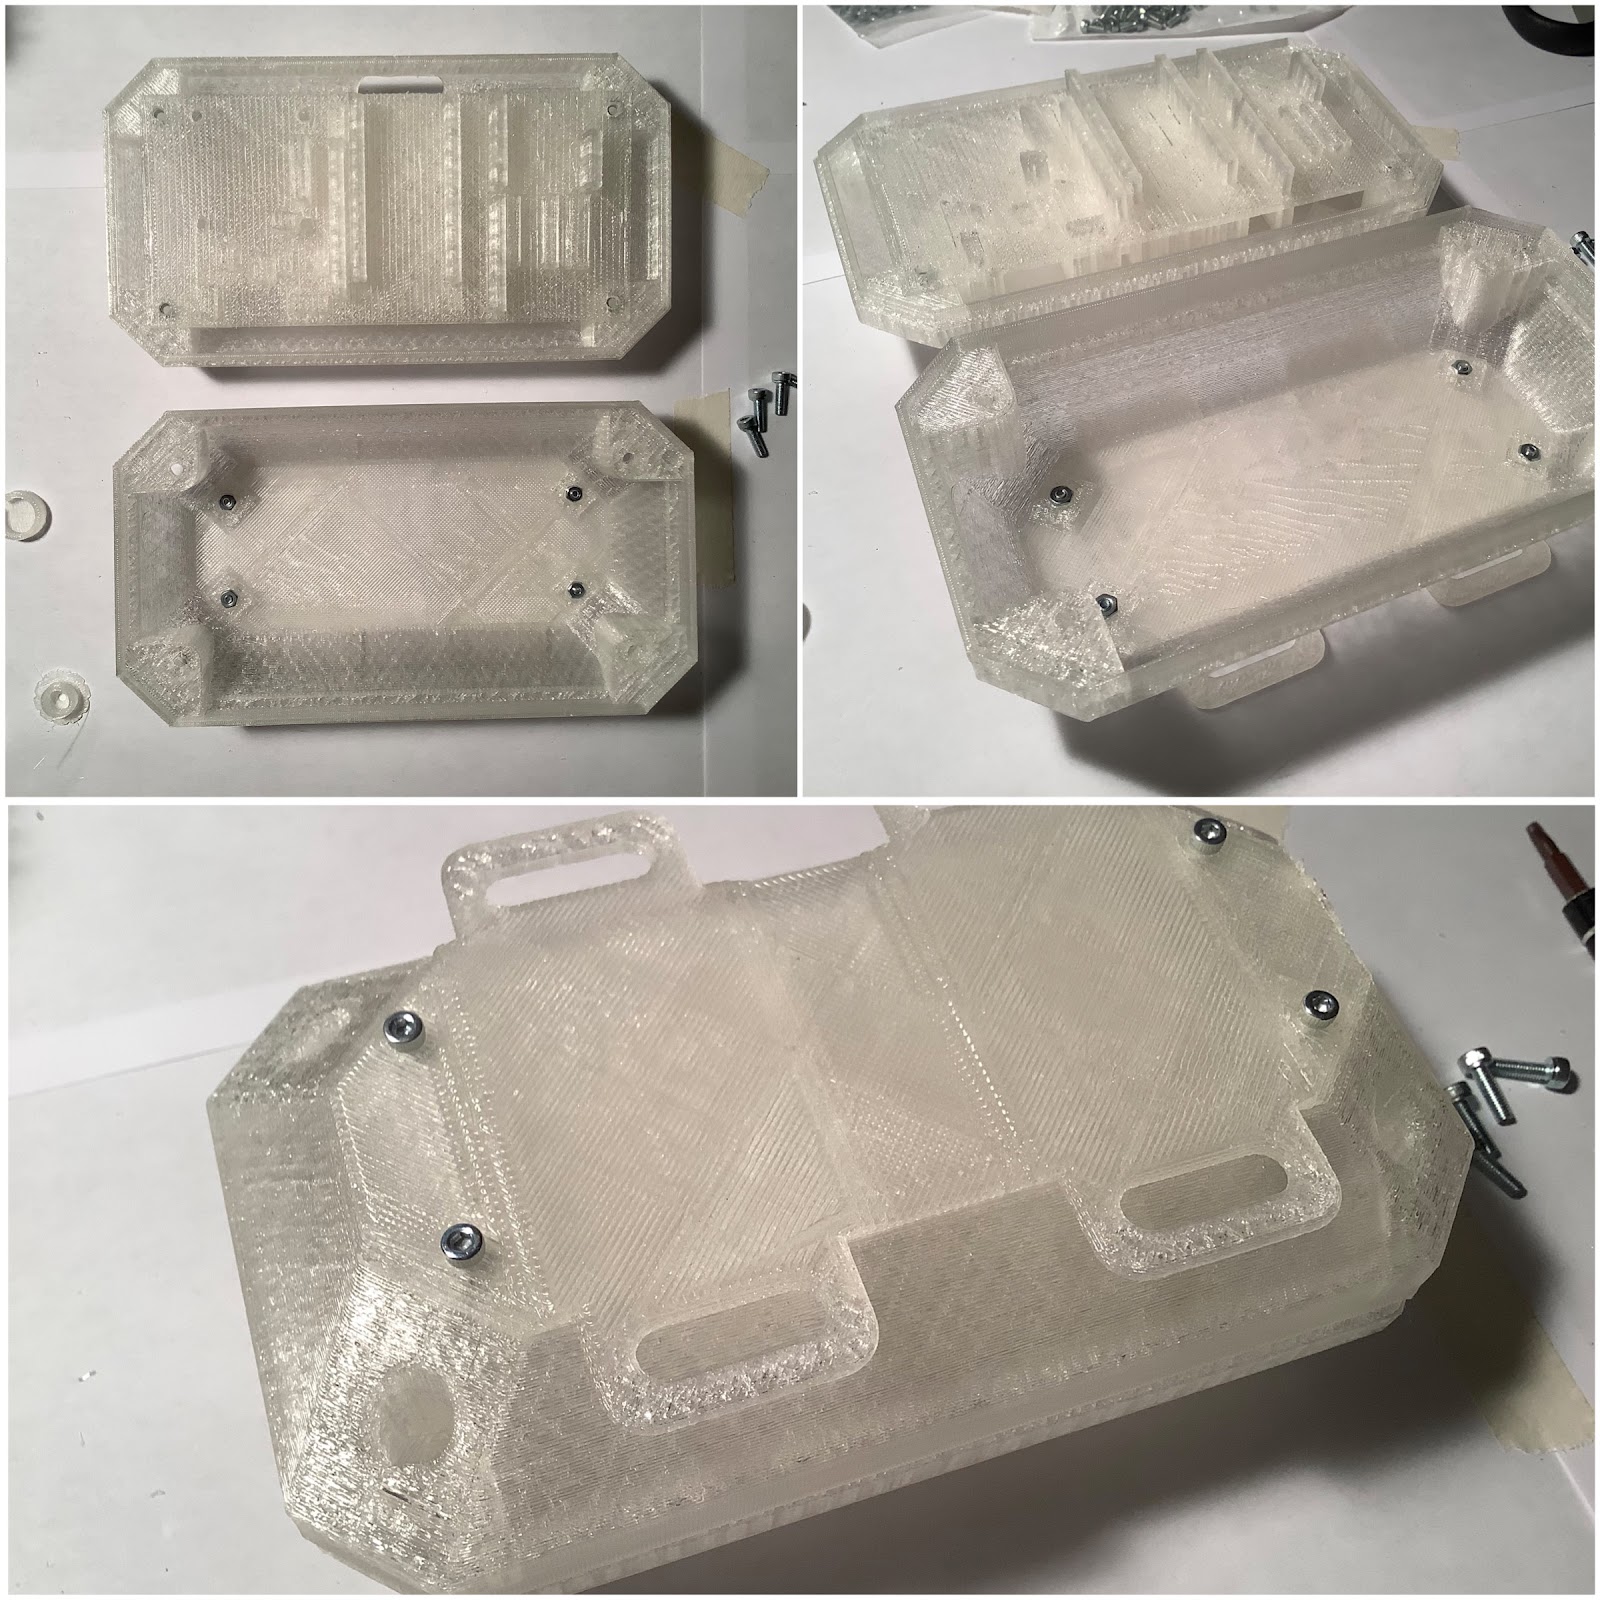
Next up is the design for the Onboard Gateway. Instead of a rectangular box, it has chamfered edges, mimicking a ‘gemstone’ shape. This choice was based purely on aesthetics. To be honest, I’m not sure if that was the right decision during a design sprint when functionality and user feedback matter the most.

A notch in the corner (bottom right) needed to be removed in order to have enough space for the LoRa breakout board. Here’s what the prints looked like:

The block print of the electronics is > 1.6mm, which is the thickness for “usual” circuit boards. This presented some challenges when trying to close it properly.

The bottom of the enclosure features a customizable plate. This one can be used as a wearable, with a band going through the slots. The size of the enclosure seems like it could be placed on a forearm.
After these first few iterations were printed and tested, there were some design fixes for the next iteration. Here are the notes:

This update shows a valiant attempt at trying to do the best effort possible to meet a deadline — by working around the clock with zero sleep that 24 hour period. In the end, this may have led to less than peak performance on my end over the subsequent 2 weeks. That was a learning experience. The prints didn’t meet the deadline, and now we have to re-plan to figure out when to send them.
Stay tuned for future Onboard Gateway enclosure updates (likely in update #12, time traveller!).
Discussions
Become a Hackaday.io Member
Create an account to leave a comment. Already have an account? Log In.