 Michael Gardi
Turing Machines 101
The Turing machine was invented in 1936 by Alan Turing. By providing a mathematical description of a very simple device capable of arbitrary computations, he was able to prove the properties of computation in general.
A Turing machine mathematically models a mechanical machine that operates on a tape. More explicitly, a Turing machine consists of (mostly from Wikipedia):
- A tape divided into adjacent cells. Each cell contains a symbol from some finite alphabet. The alphabet contains a special blank symbol and one or more other symbols. The tape is assumed to be arbitrarily extendable to the left and to the right, so that the Turing machine is always supplied with as much tape as it needs for its computation. Cells that have not been written before are assumed to be filled with the blank symbol.
- A head that can read and write symbols on the tape and move on the tape left and right one (and only one) cell at a time.
- A state register that stores the state of the Turing machine, one of many. Among these is the special start state with which the state register is initialized.
- A finite table of instructions that, given the state the machine is currently in and the symbol it is reading on the tape (symbol currently under the head), tells the machine to do the following transition steps in sequence:
- Write a symbol from the finite alphabet replacing the one that was there. Note that the symbol written might be the same as before or different
- Move the head either one cell to the left or one cell to the right.
- Assume the same or a new state as prescribed by the go to state.
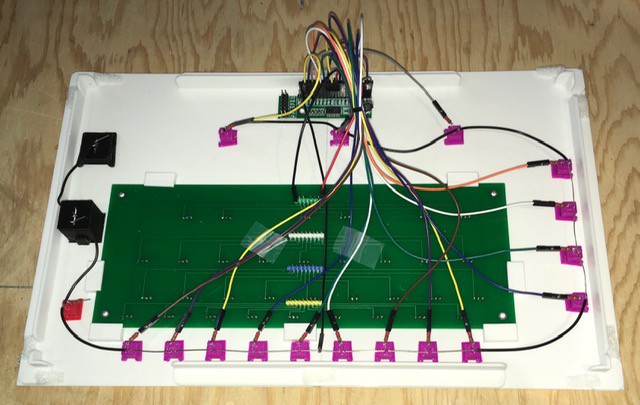
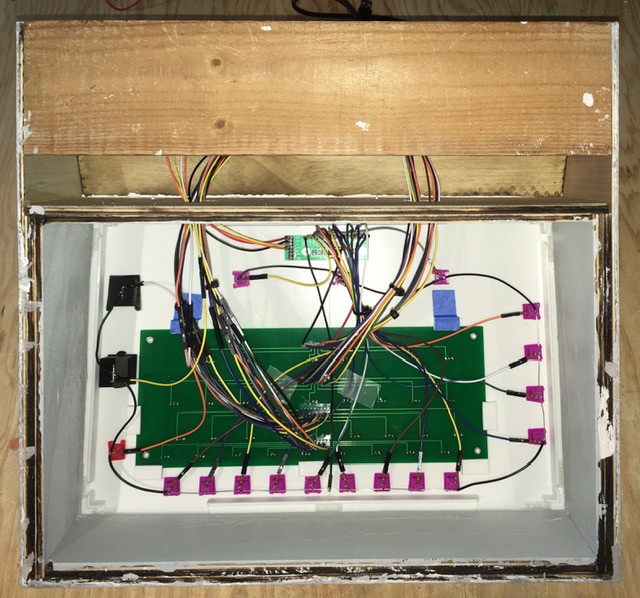
About TMD-1
There are numerous variations to the general Turing machine described above. Some have multiple tapes and/or heads. Some tapes are bound (have an end) on the left or right or both. In addition Turing machines have varying numbers of symbols in their alphabets and varying numbers of states. The Turing Machine Demonstrator (TMD-1) will have the following characteristics:
- One tape and one head.
- The alphabet used will have three symbols: {0, 1, b}. 0 will be the blank symbol and b is an endmarker as described below.
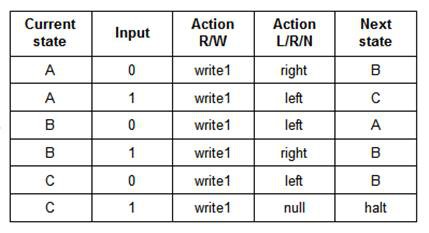
- There will be three states: {A, B, C}. A will be the start state plus there is a special HALT state H.
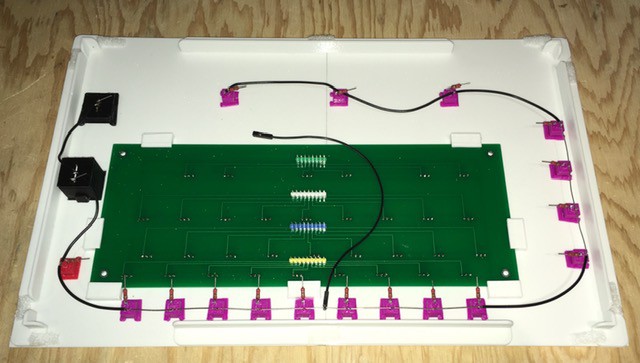
Tale of the Tape
Having a tape that is "arbitrarily extendable" to the left or right would pose some serious implementation issues, not to mention being complete overkill for a 3-symbol / 3-state Turing machine. So I have chosen to implement a restricted form of Turing machine called a "linear bounded automata" (LBA).
In addition to the normal Turing machine behaviors, an LBA has the following three conditions:
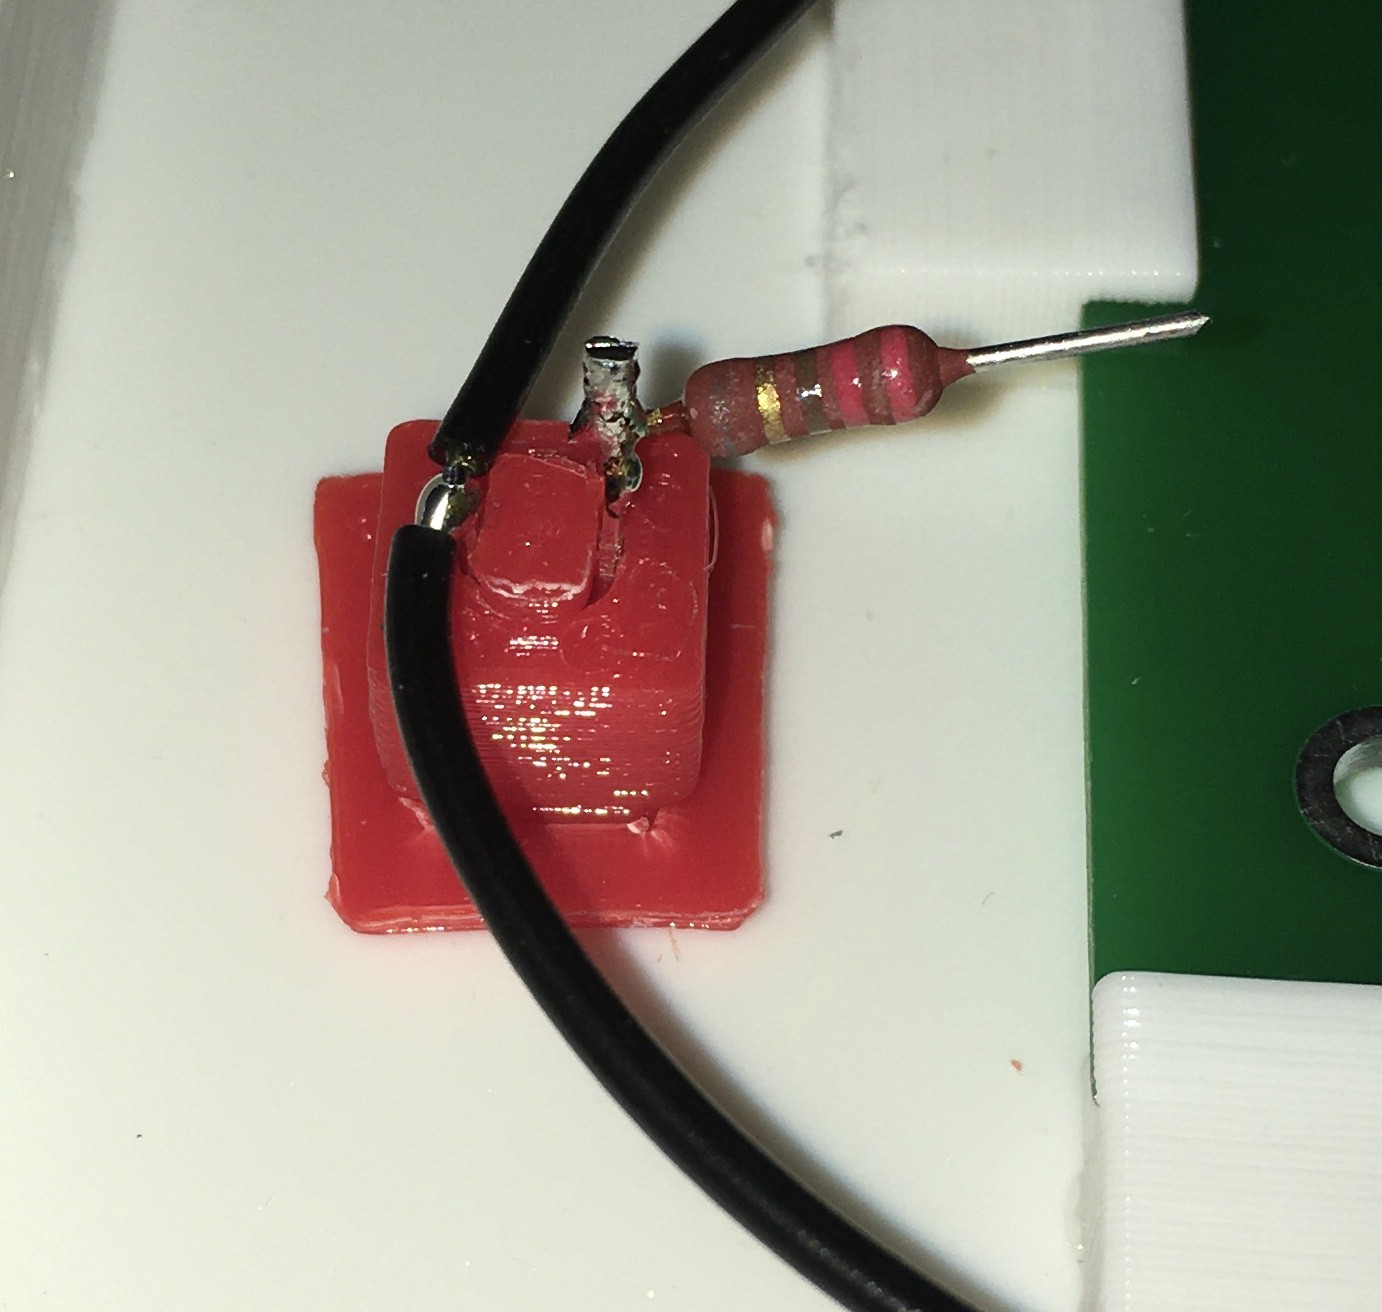
- The input alphabet includes two special symbols, serving as left and right endmarkers. In an effort to simplify things even further, TMD-1 will only have a single endmarker symbol (b) in it's input alphabet.
- Transitions may not print other symbols over the endmarkers. In addition, TMD-1 will not allow an endmarker to be written to the other part of the tape (b is not part of the tape alphabet).
- Transitions may neither move to the left of the left endmarker nor to the right of the right endmarker. For TMD-1 such a move will HALT the machine.
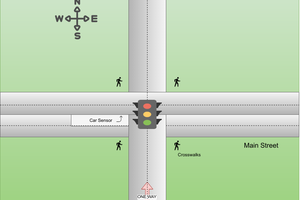
In other words, instead of having potentially infinite tape on which to compute, computation is restricted to the portion of the tape containing the input plus the two tape squares holding the endmarkers. It will look something like this:
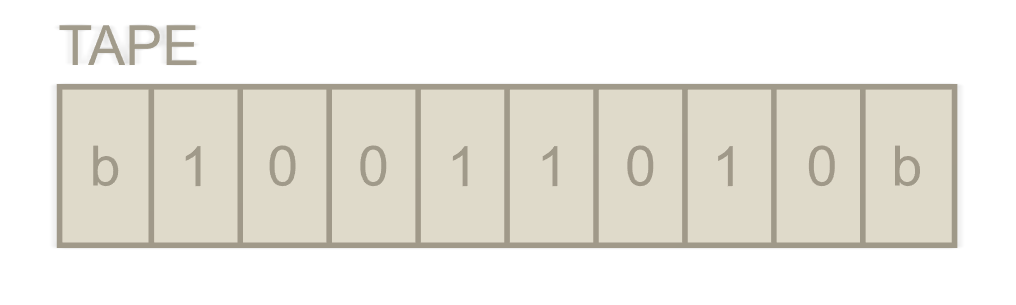
The end cells (endmarkers) cannot be changed and furthermore cannot be written to the other portion of the tape. So the "input" part of the tape will only ever contain zeros and ones.
Only Eight Cells?
One might think having an eight cell "input area" would limit the tasks TMD-1 could perform. In actual fact I could not find any interesting programs that...
Read more »


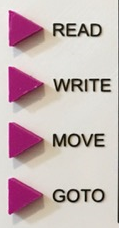
 State Register: The current active state will be highlighted here. By definition the state 'A' will always be the starting state.
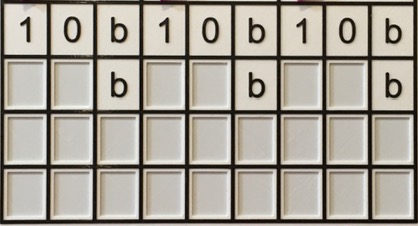

 Transition Indicator: Once the READ step has been performed, the current active transition column determined by the combination of current state and symbol being read will be highlighted.


 Al Williams
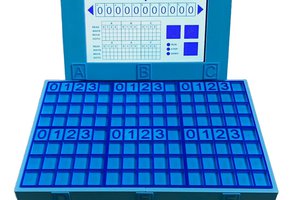
 mrWheel
Would your reproduction DEC H-500 have enough logic to implement the state machine for this (excluding the tape)?
Or maybe implement it in TTL? https://archive.org/details/byte-magazine-1976-12/page/n115/mode/1up