 Xark
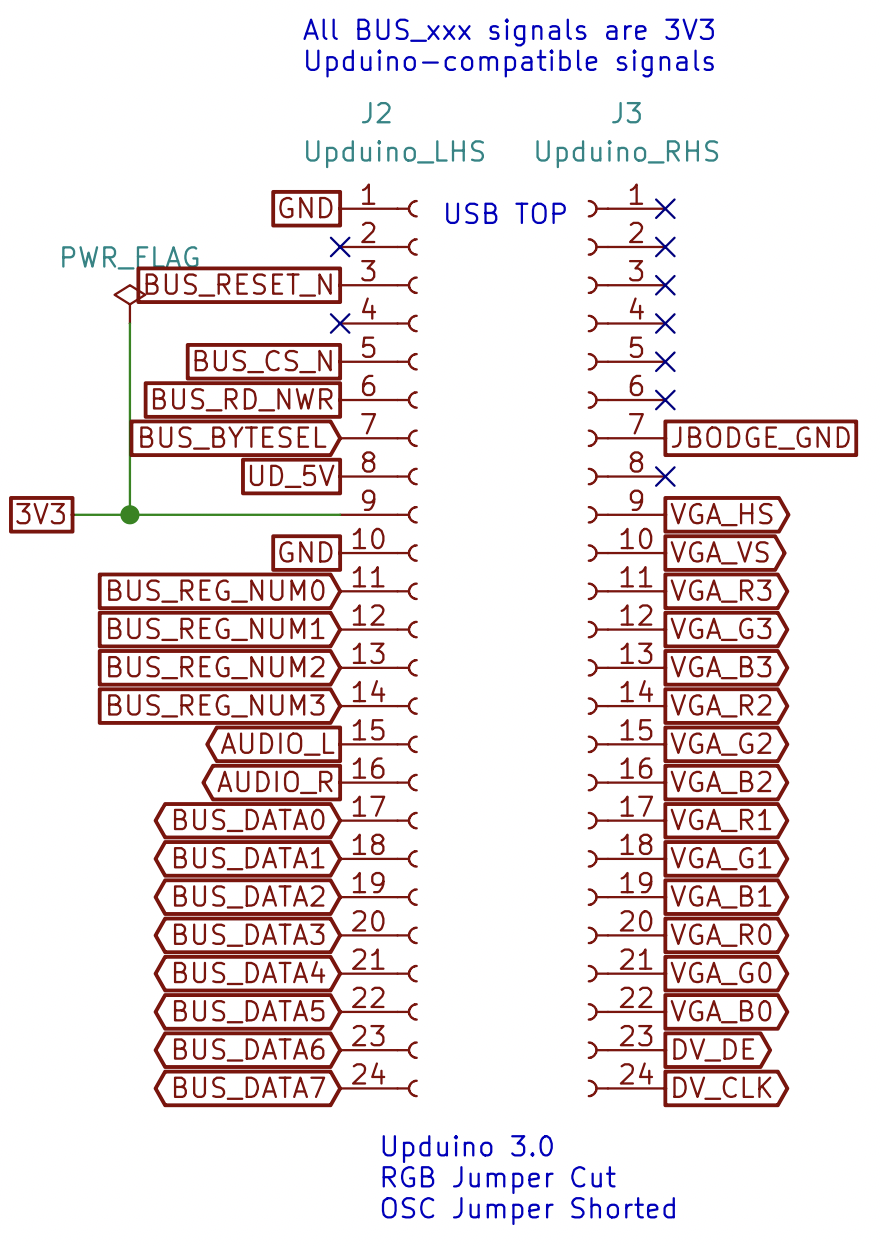
XarkAfter a bit of a lull, Xosera development has heated up recently after @Ross Bamford designed a bus interface for his #rosco_m68k retro computer. This inspired me to get it actually up and running on a real computer (vs the "tech-demo" it has been). The prototype PCB uses an Upduino 3.0 FPGA board (available from Tindie). This board breaks out all iCE40UP5K FPGA pins and Xosera uses all of them (with one input-only pin to spare). The rest of the PCB is mostly 3.3v/5v voltage level shifters and programmable GALs to handle the full m68k bus signals (this FPGA doesn't have enough pins for the full m68k bus). The prototype uses a dual PMOD header to connect either a Digilent VGA PMOD or 1BitSquared DV PMOD both of which provide a 4096 color image in 640x480 or 848x480 (16:9 480p) with Xosera.
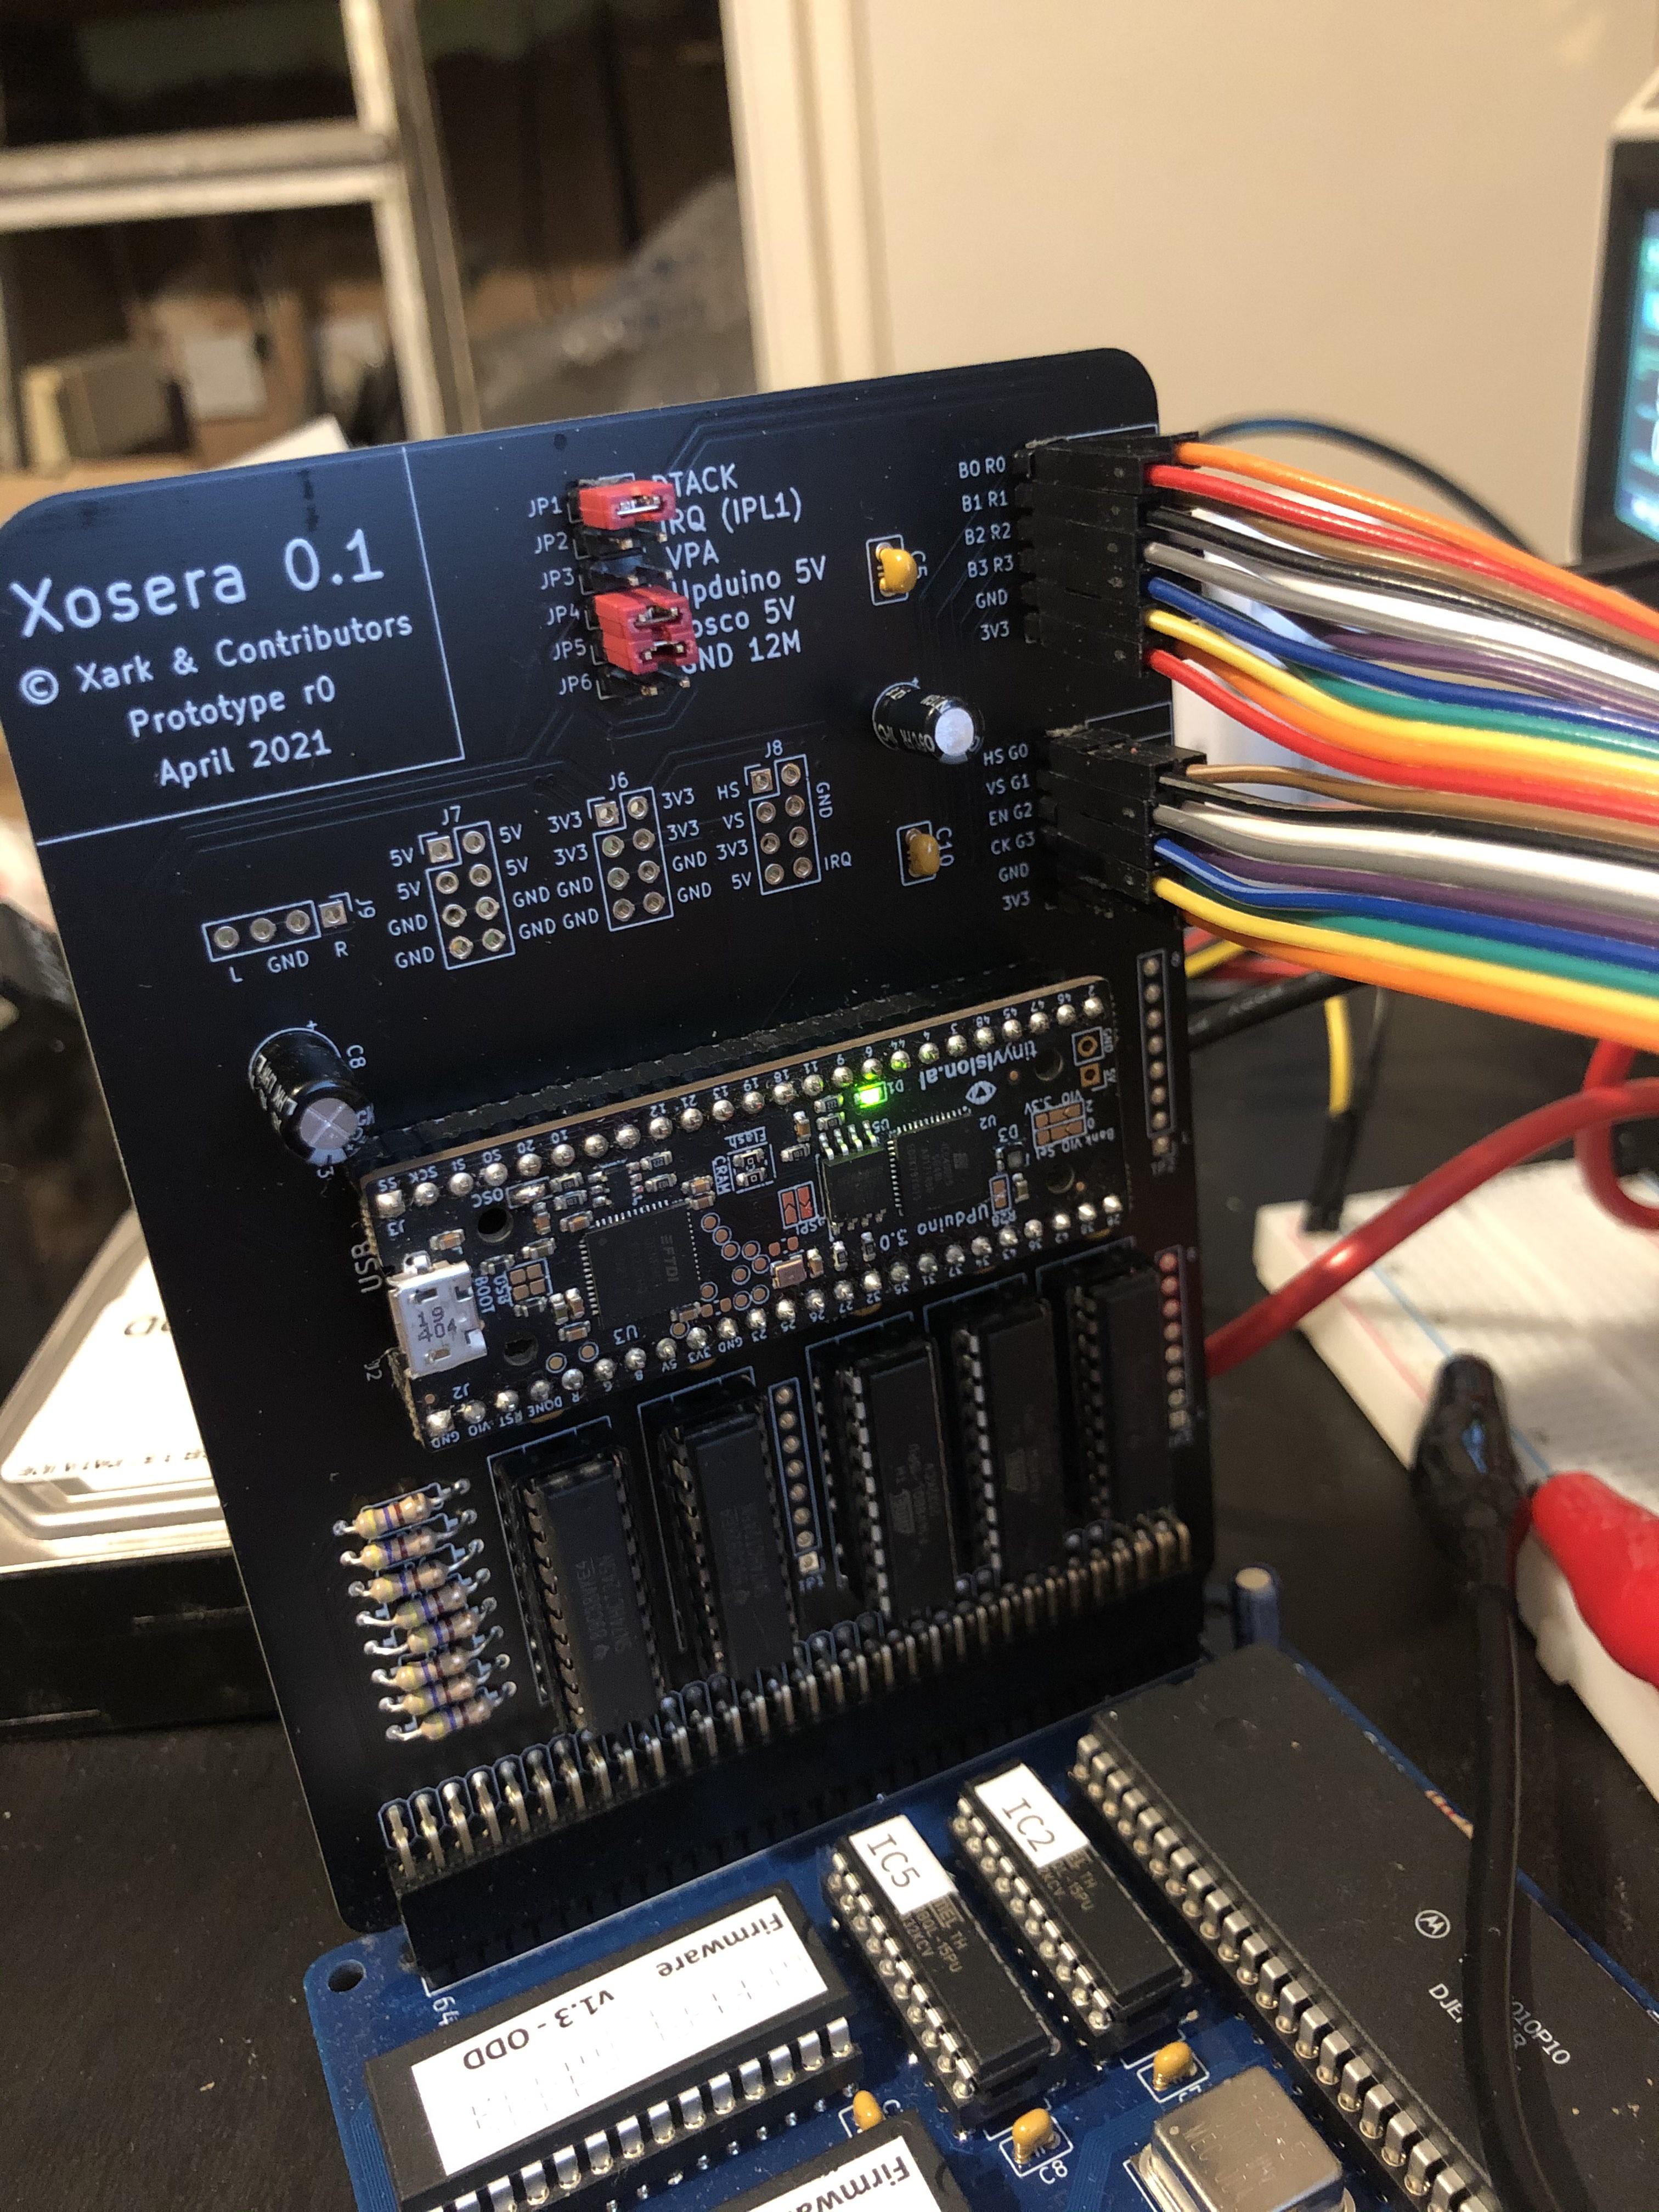
The Xosera "bus interface" consists of a bi-directional 8-bit parallel data bus, along with a 4-bit register address, byte select signal (like a low address bit) along with read-not-write and a chip-select.
For the rosco_m68k computer this is mapped into the address space "8-bit 6800 style" where only half of the 16-bit 68k data bus is hooked up. The 68k has a special instruction to write data to "odd bytes" only called MOVEP, that allows you to do a reasonably fast 16 or 32-bit access to an 8-bit peripheral (like Xosera).
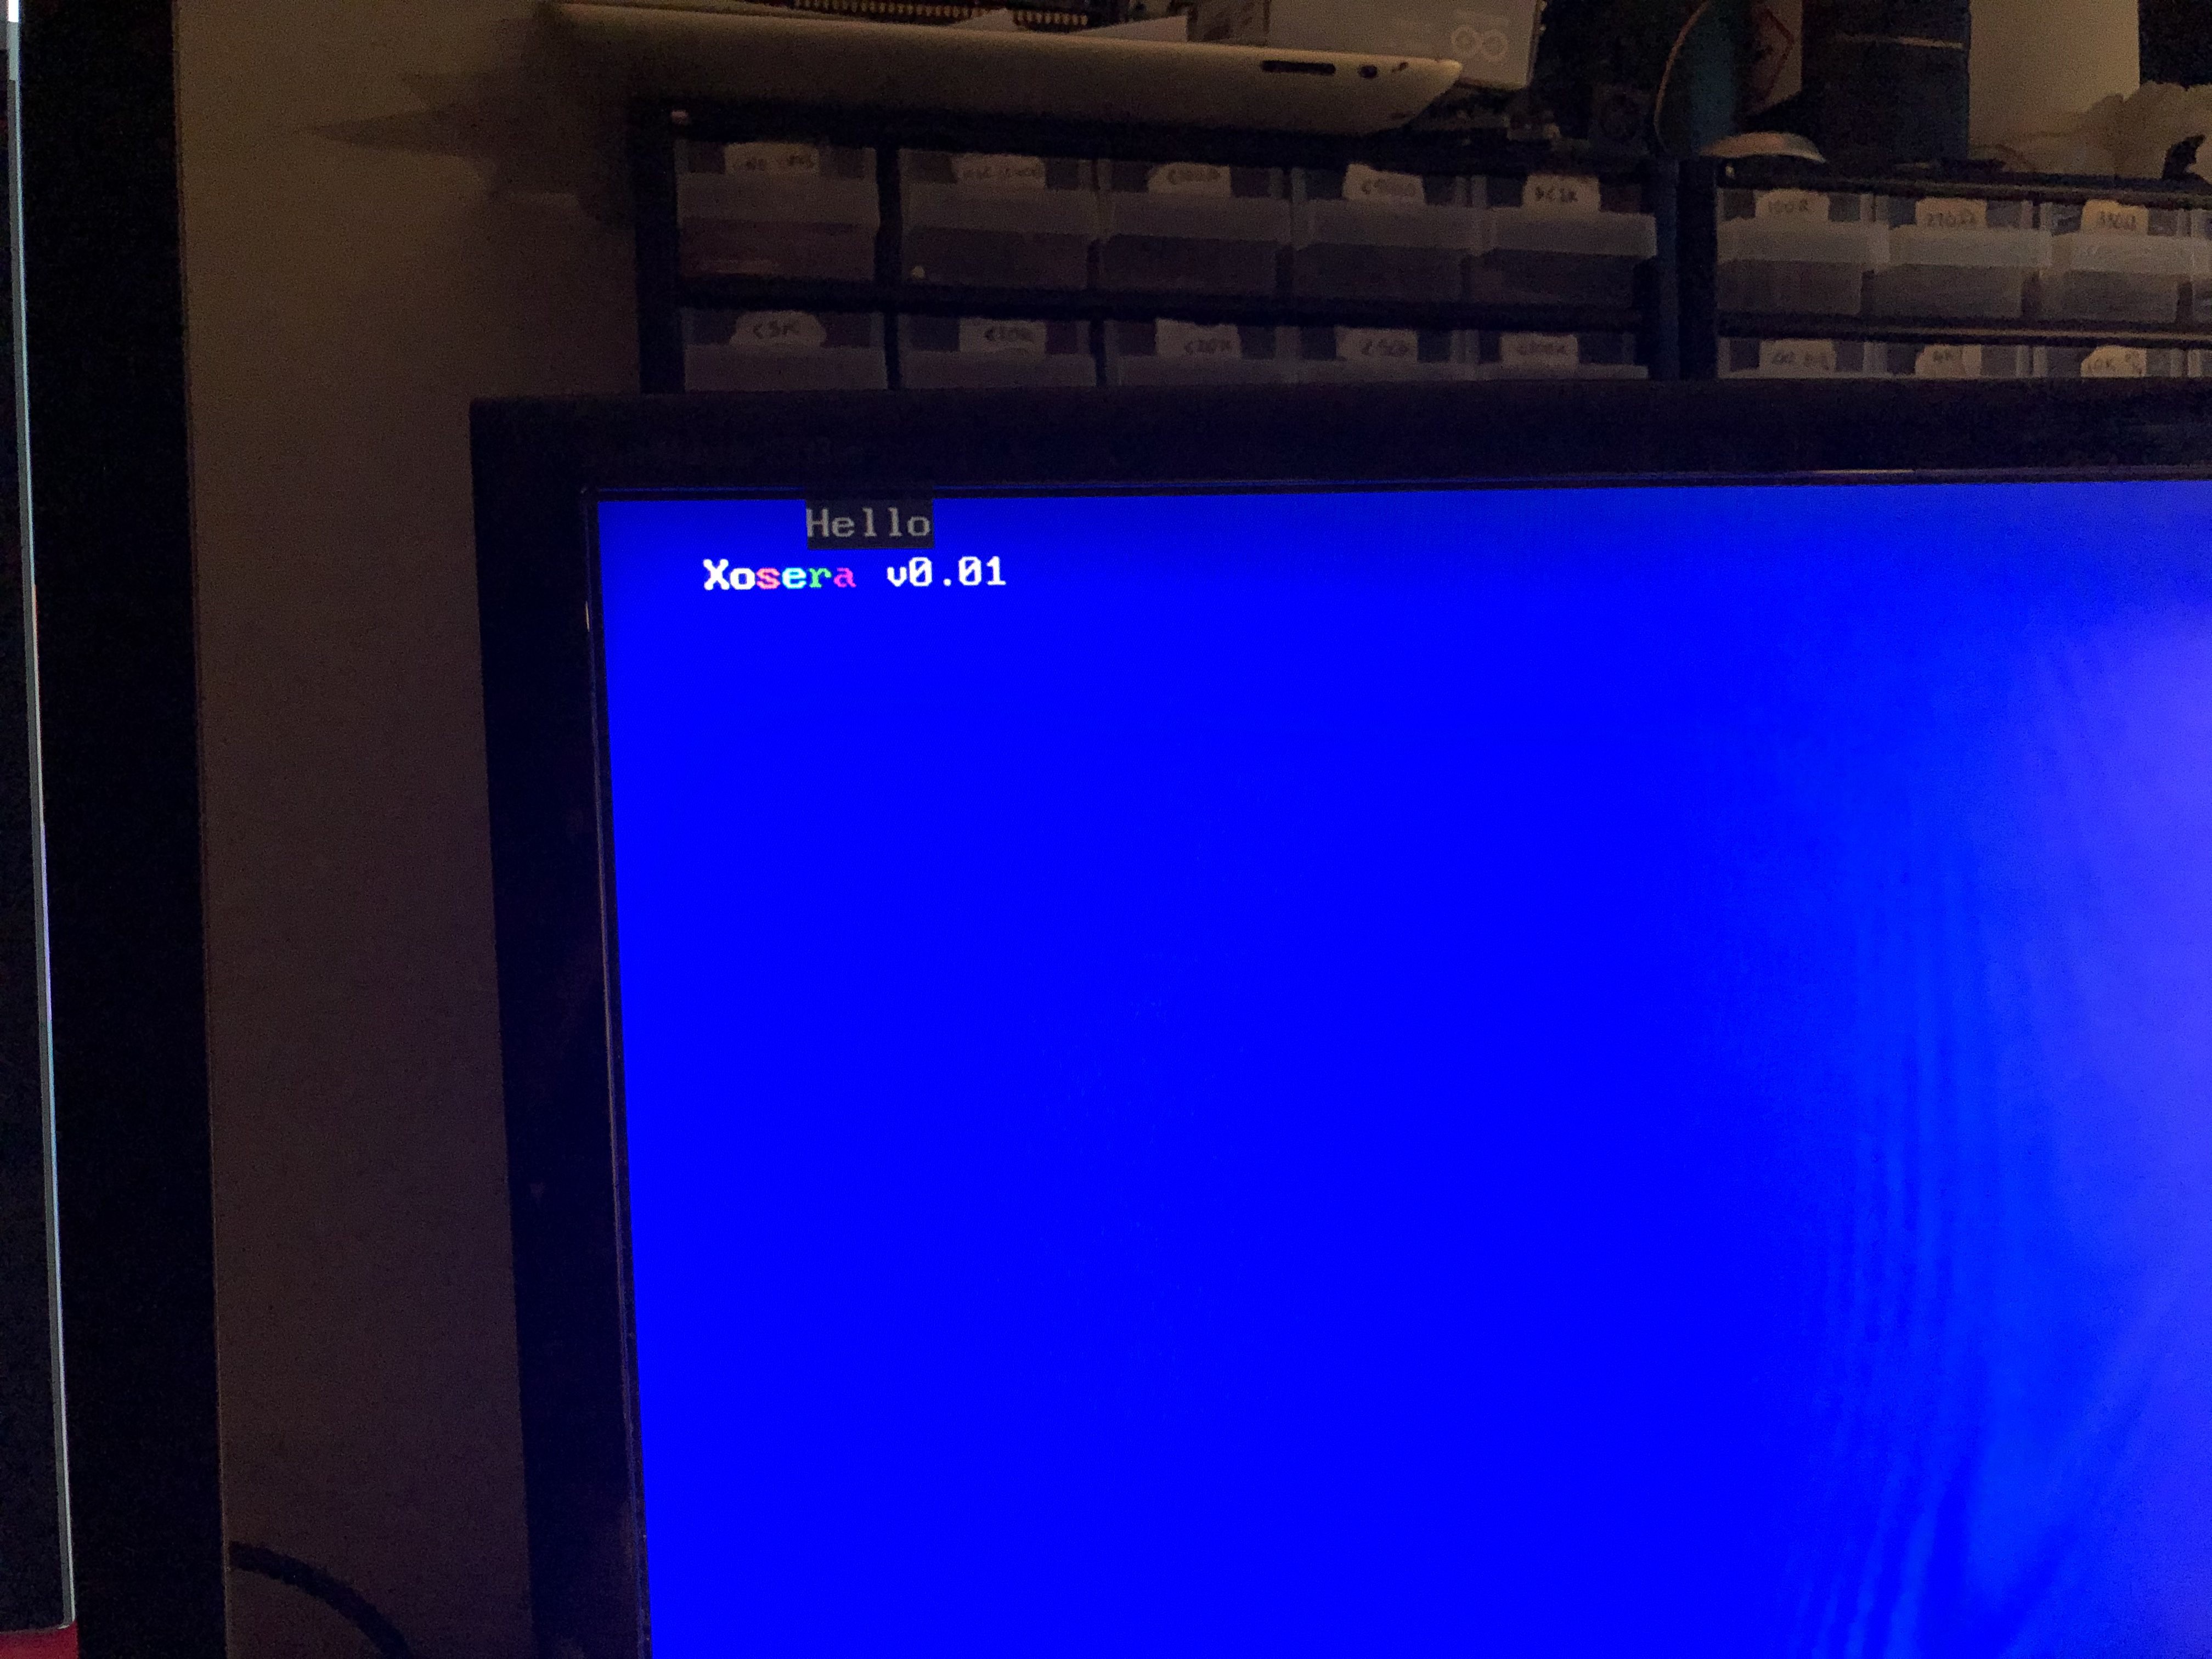
There were a few issues getting the bus interface working with the rosco_m68k, but we mostly ironed those out with everything splayed out on a breadboard. The main problems were some issues with sampling the data bus one cycle too early and some minor issues getting the FPGA tri-state working properly so the CPU can do reads from Xosera. We also added a simple "glitch filter". The FPGA samples the 68k bus at the pixel clock frequency (typically about 25 or 33 MHz) and seems to have no trouble keeping up with the 8/10 MHz 68k without any DTACK or wait states (the 68k bus uses several cycles for a memory transaction). Here is an "exciting" picture of the first time 68k was able to draw anything (well, we were pretty excited 😅).
Since we had been testing with a breadboard setup we were hopeful, and Ross informed me the PCB worked on his first test (I am still awaiting my PCB to cross the ocean). Ross has coded up the start of a little "Snake" game on the rosco_m68k in 68000 assembler.
Now the main thing is to add more cool features to the "gateware" (the programmable "hardware" design in the FPGA). Currently it is text mode with 8x8 or 8x16 16 color text mode (with re-definable font, with 8KB tile memory), 256 color palette, and basic ability to set VRAM display address, fine scroll, text size etc.
I'd like to have 2 planes of 16-color graphics (probably pixel-doubled, or using tile mode, since just 128KB of VRAM) and one page of 256-color. Something that is in the same ballpark with classic Atari ST or Amiga graphics (but not a clone of any system).
There is a basic blitter, but it is not fully wired up yet (it is used to clear VRAM at init). Here is a link to the current WIP "register map" (subject to change).
I have a breadboard setup using an 8MHz 3.3v AVR pro mini that has also been fun to do some testing with while I wait for my PCB. Xosera is probably pretty easy to get working with most any parallel bus or I/O port (like 8-bit computers etc.). Here is my AVR setup using a DV PMOD at the end of a ribbon-cable "braid".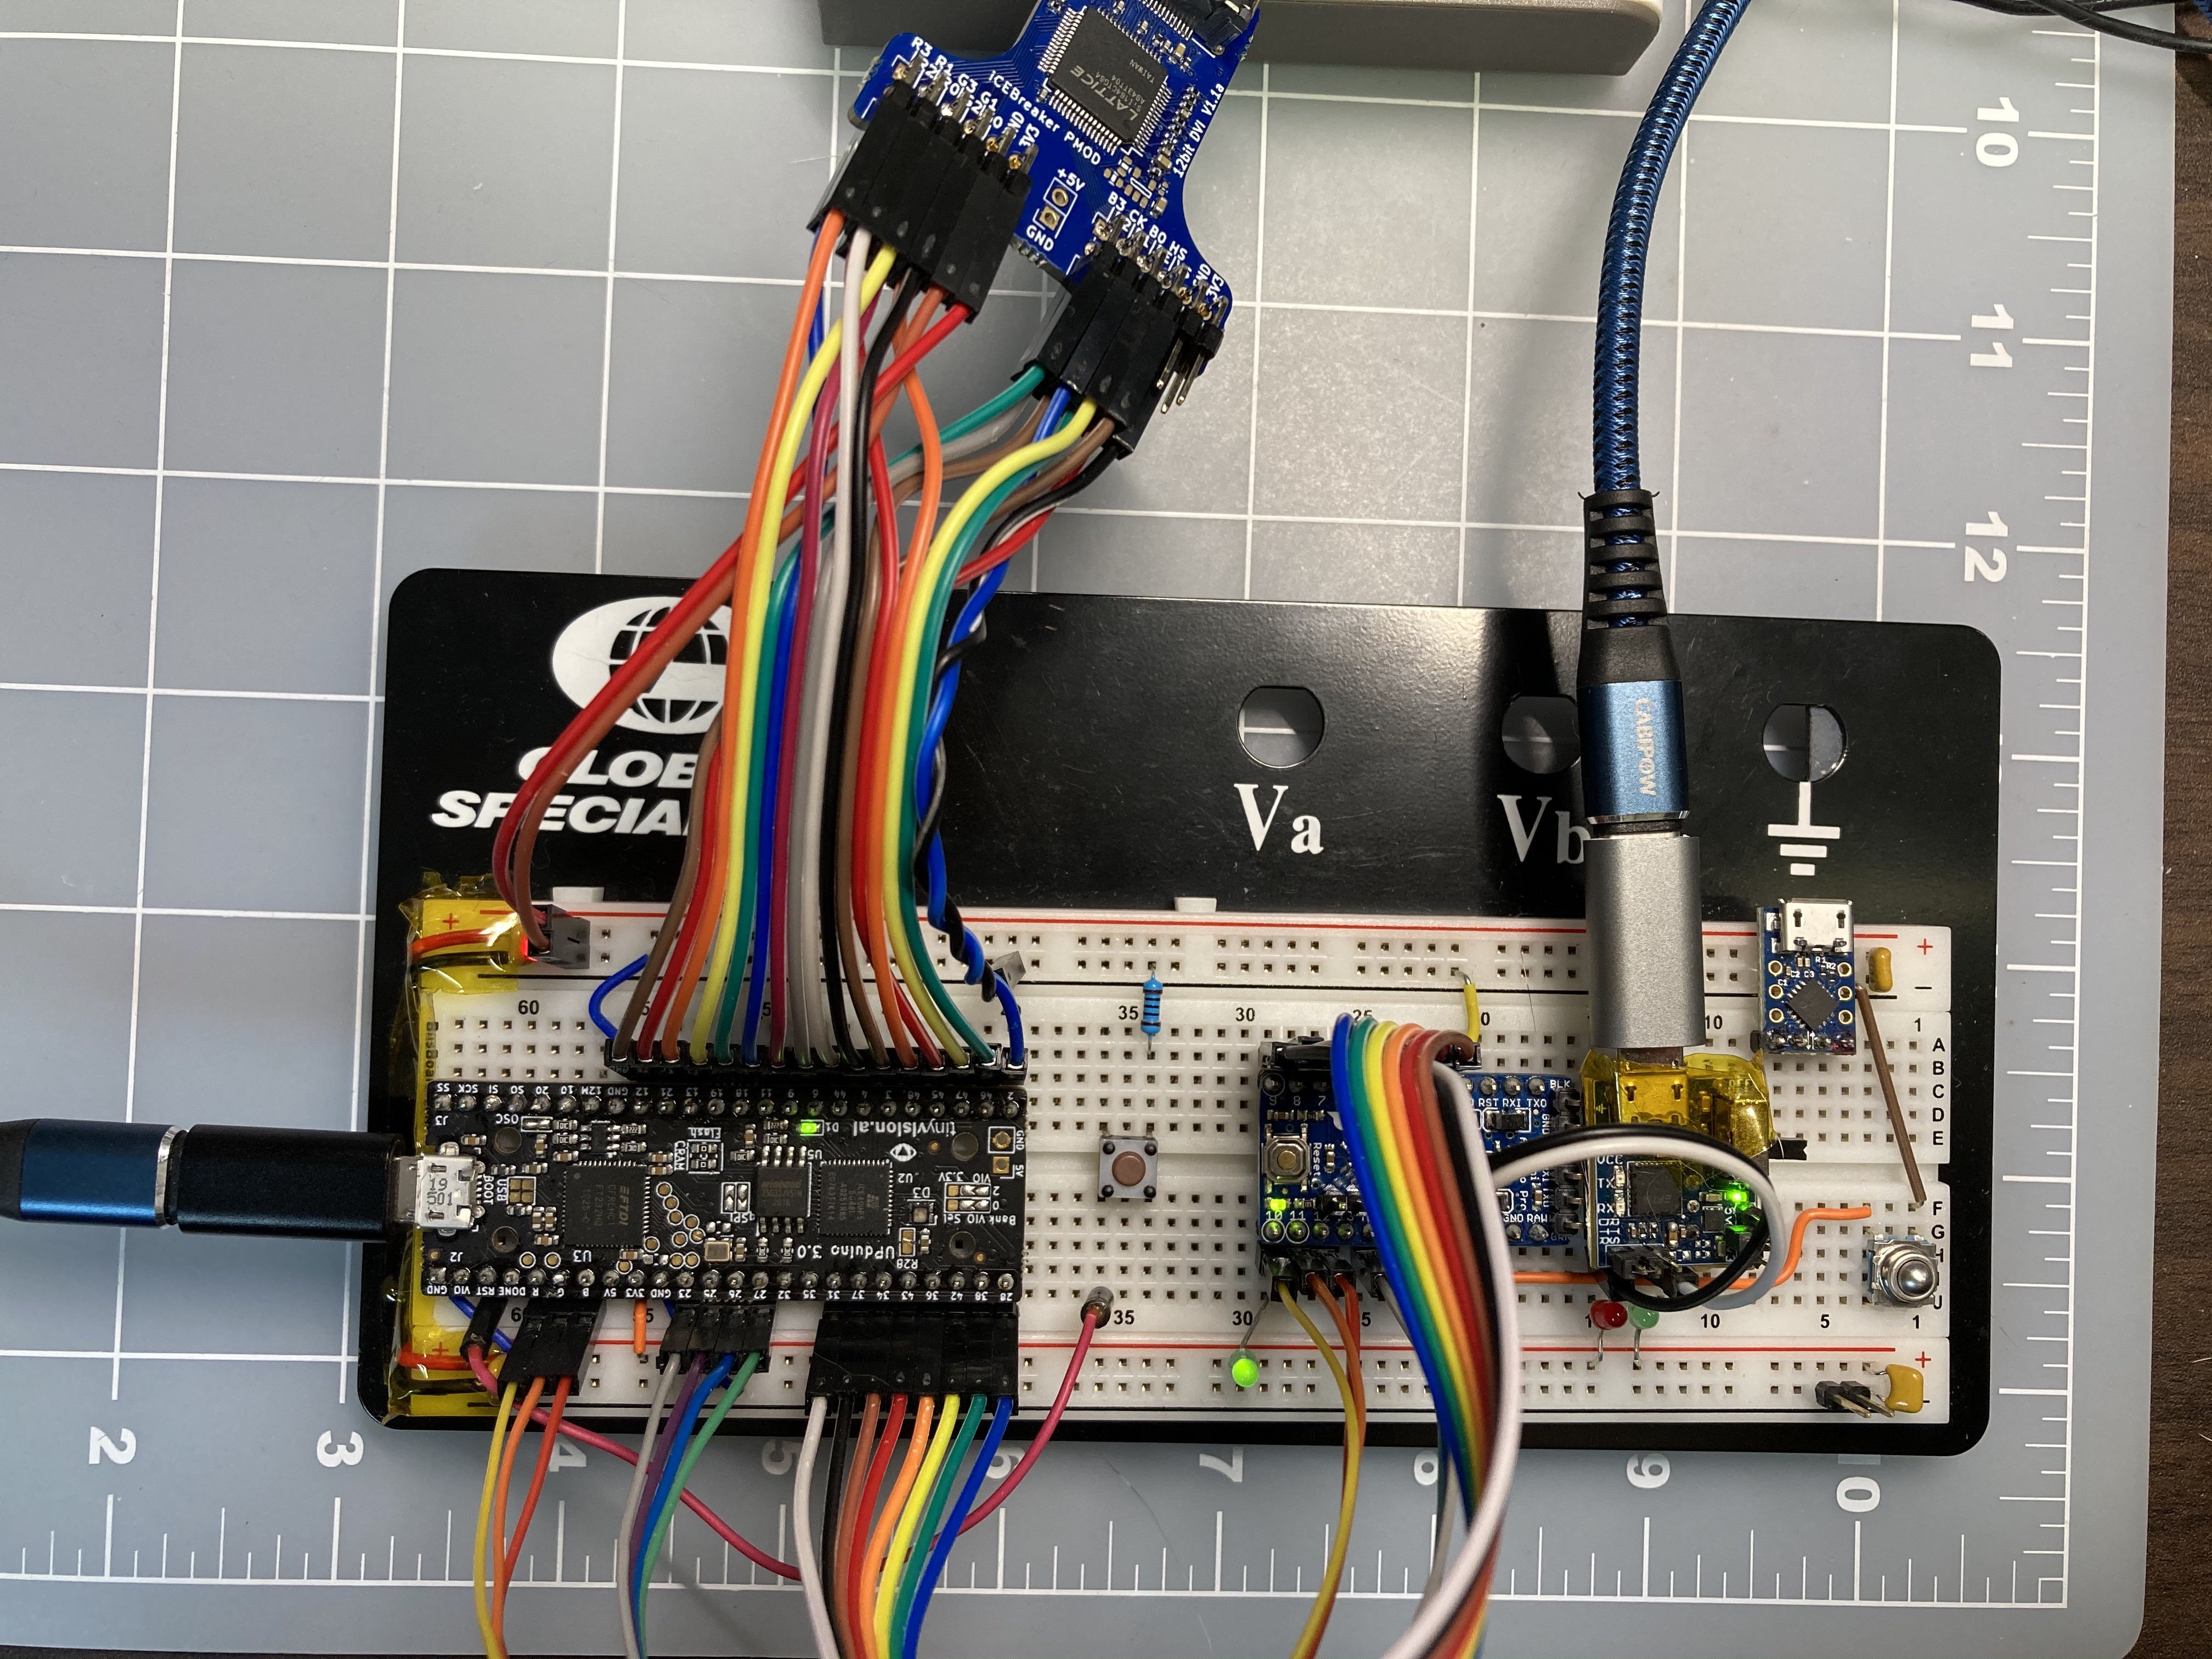
Here is an animated GIF showing the output of a quick and dirty testing program for Xosera executing on the AVR. The AVR can write to all 128KB of VRAM in about 66 milliseconds (or painfully slower if you use the Arduino GPIO library calls).
 Still early in development (in earnest), but seems a promising start. Now I am working on some graphics features as well as adding the ability to read/write to the "bus registers" via SPI or UART (to make testing easier from PC, and may handy for some uses).
Feel free to drop by the rosco_m68k Discord chat server if you have questions or want more info.
Thanks for reading! - Xark 🙂
Discussions
Become a Hackaday.io Member
Create an account to leave a comment. Already have an account? Log In.