 Johannes
Bivert module
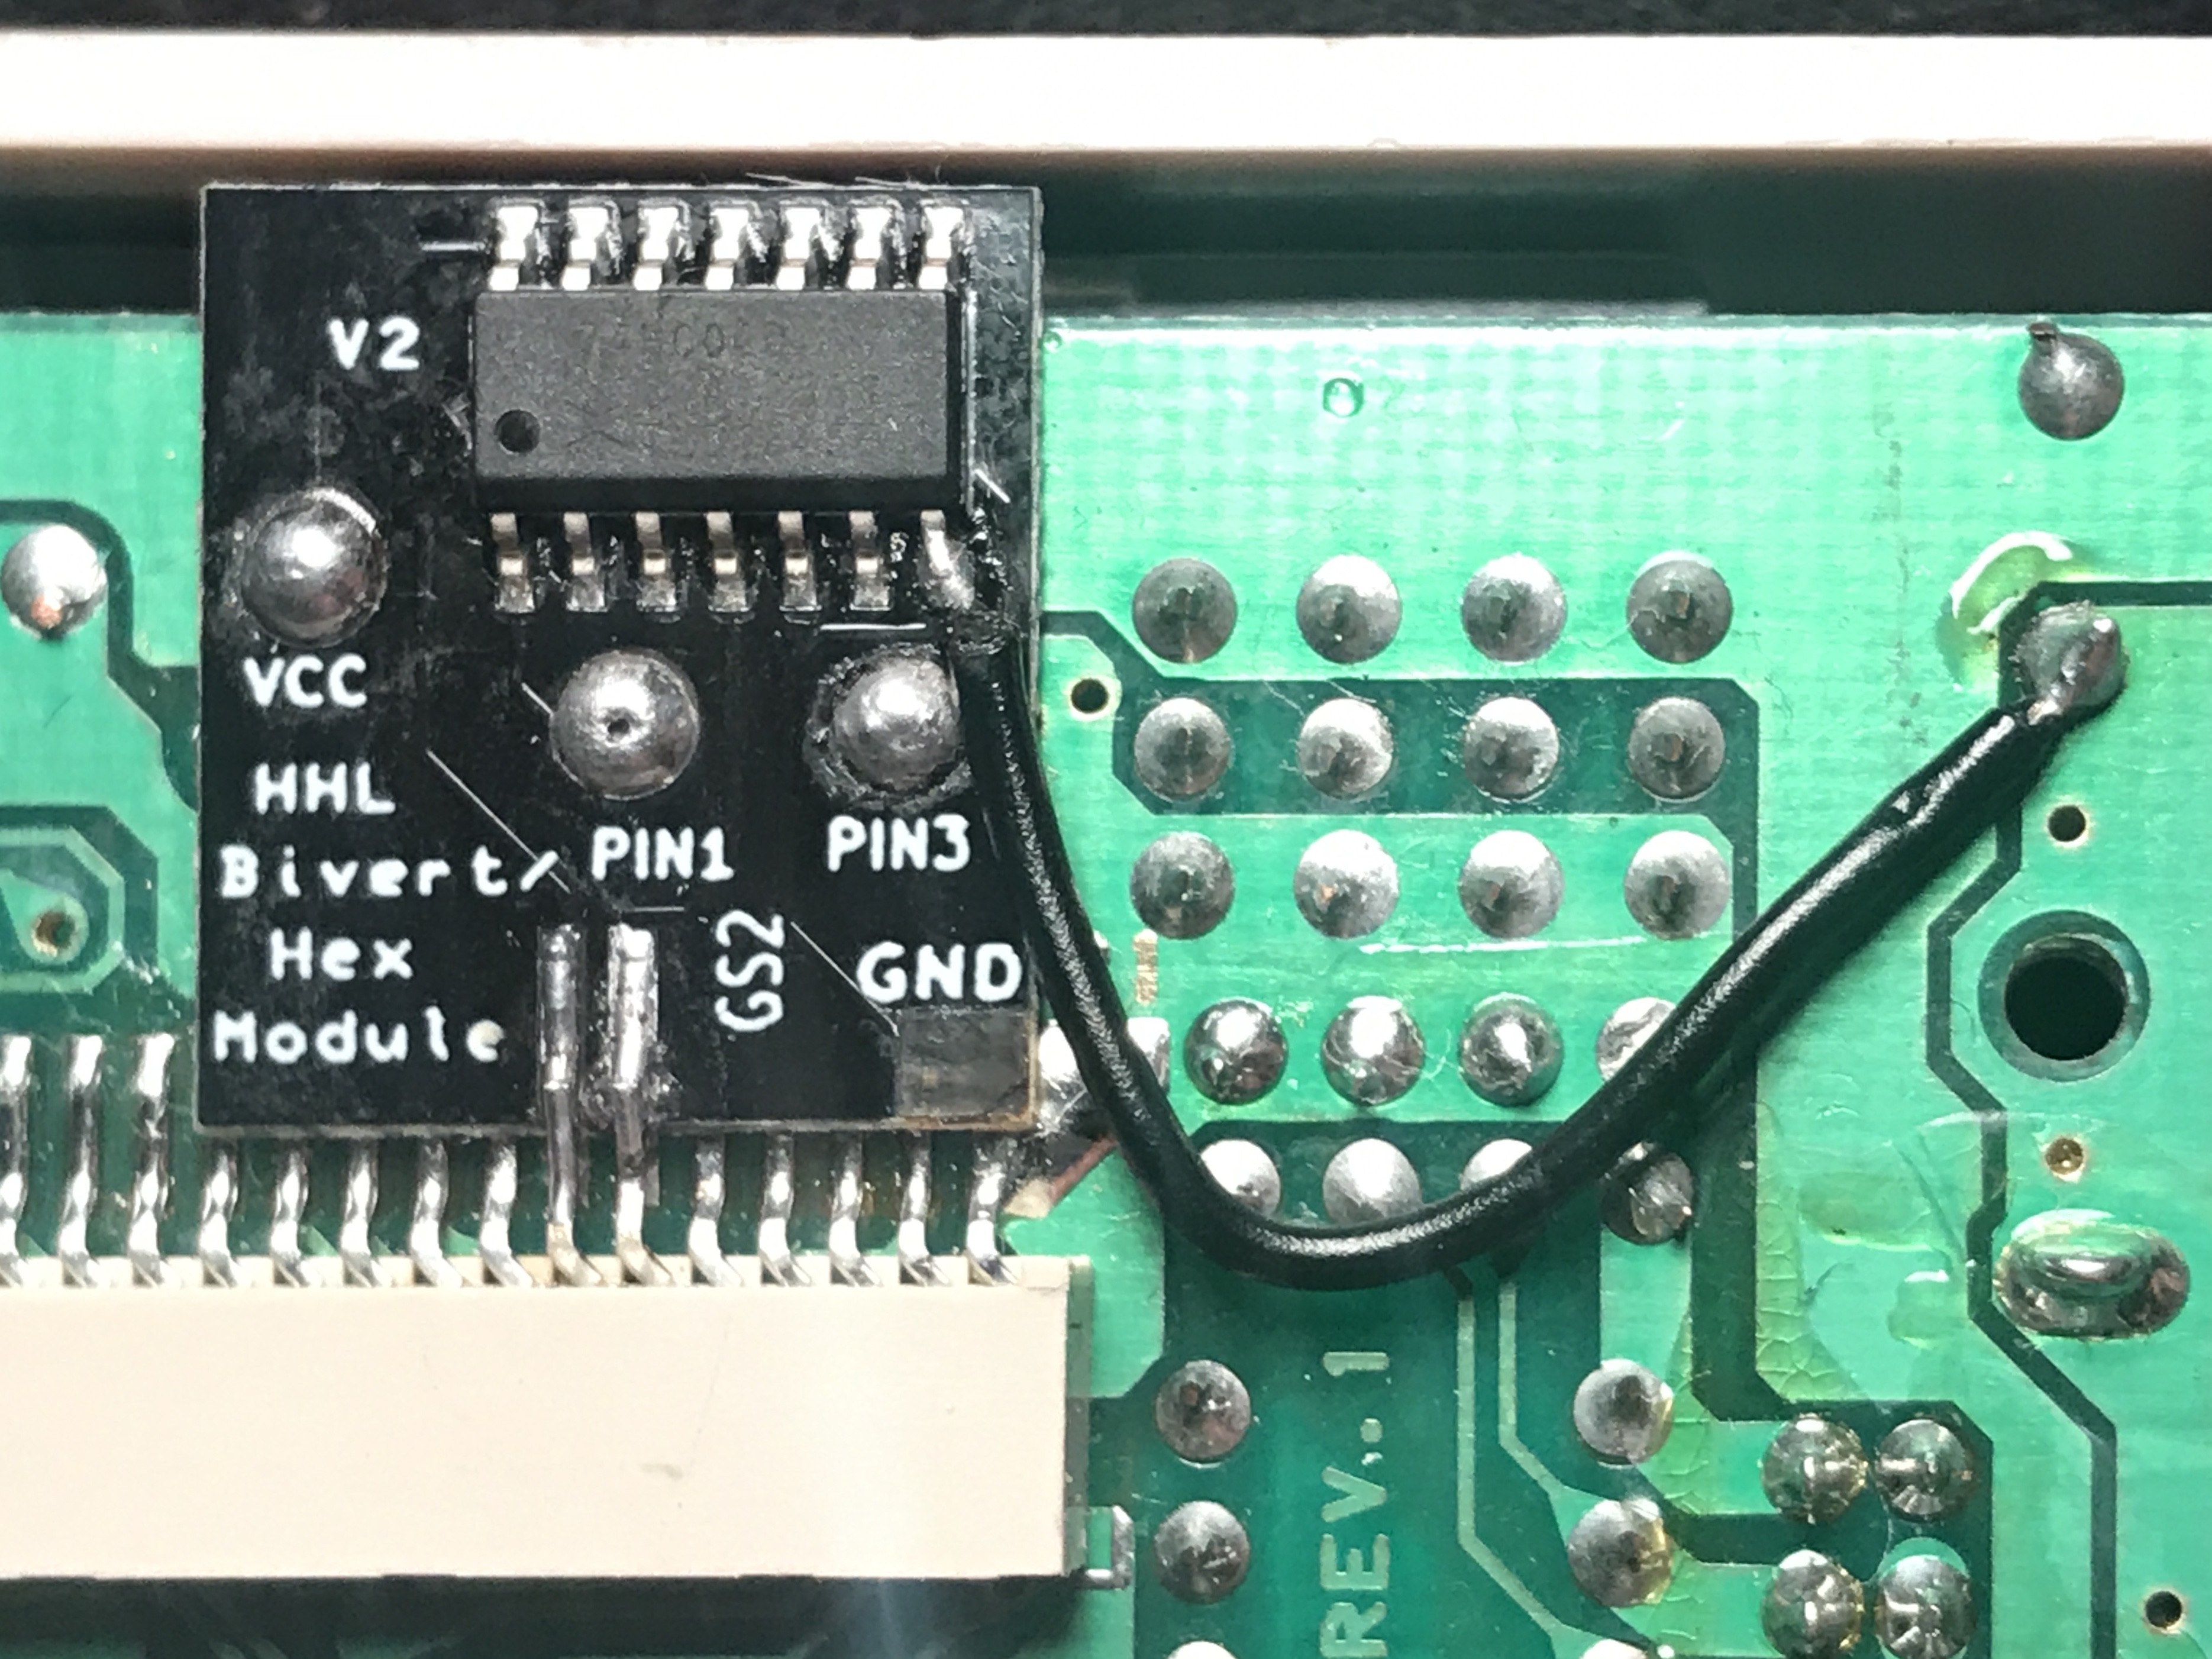
To make full use of the RGB backlight, you'll want to install a "bivert" chip. This will initially invert the pixels, but then you rotate the polarizing film 90° which inverts them back again, resulting in an overall better contrast.
The bivert module from Handheld Legend is a 74HC04D Hex Inverter (SO14 SMD package) mounted on a small adapter board. I followed this guide. Basically, you first desolder and lift the 6th and 7th pins (from the right) of the ribbon cable connector and then place the chip under the two lifted pins. Align it up, solder the two pins to the adapter board, fill up the three holes with solder and lastly connect a wire from the ground pad of the adapter to ground on the main board.
I managed to lift the GND pad on the adapter by barely touching it with the soldering iron, so be careful here. I botched a wire directly from the ground pin on the chip instead.
Color switch
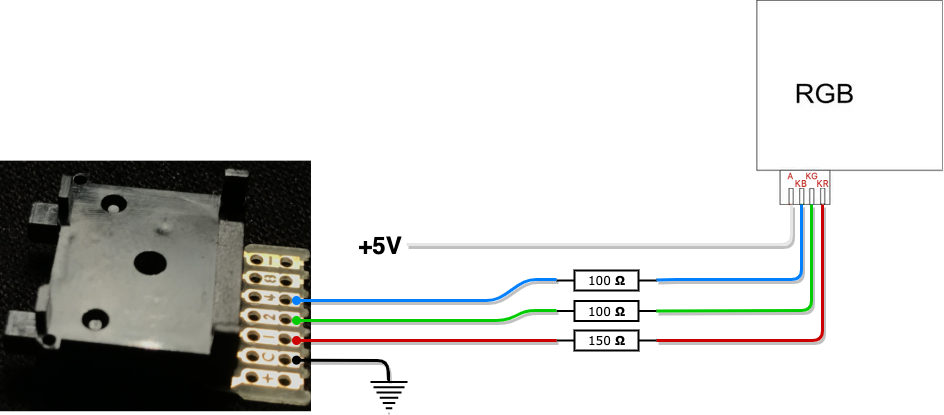
The module comes with some 28 gauge wire (red, green, blue, white) and three resistors (2x 100 ohm for the green and blue LED's and 1x 150 ohm for the red LED).
In the instructions found here, there's an image to show you where to connect the wires, but it misrepresents the module in that the connections are horizontally flipped. This means that if you only look at the orientation of the module, you'll connect the wires reversed.
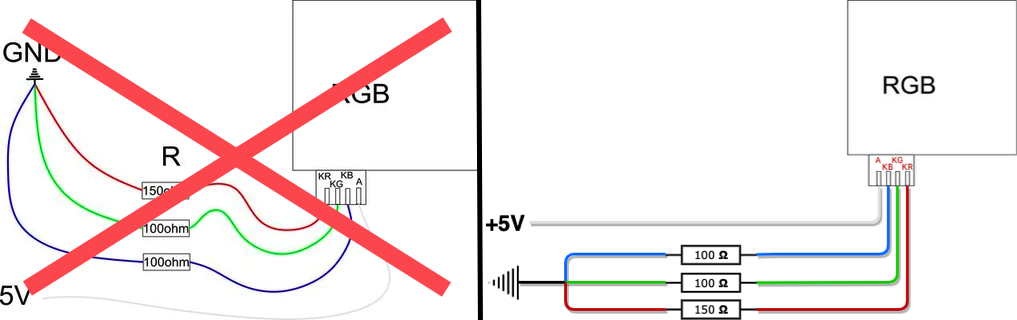
Now, the instructions says you can "change color based on which connections are grounded. Mix your ground connections to make a variety of colors!", and that's it. This implies that you either choose one permanent color combination, or come up with your own switching solution.
Since I bought the RGB module I obviously want to be able to switch between colors, and I think the instructions should include at least an example of how this can be done!
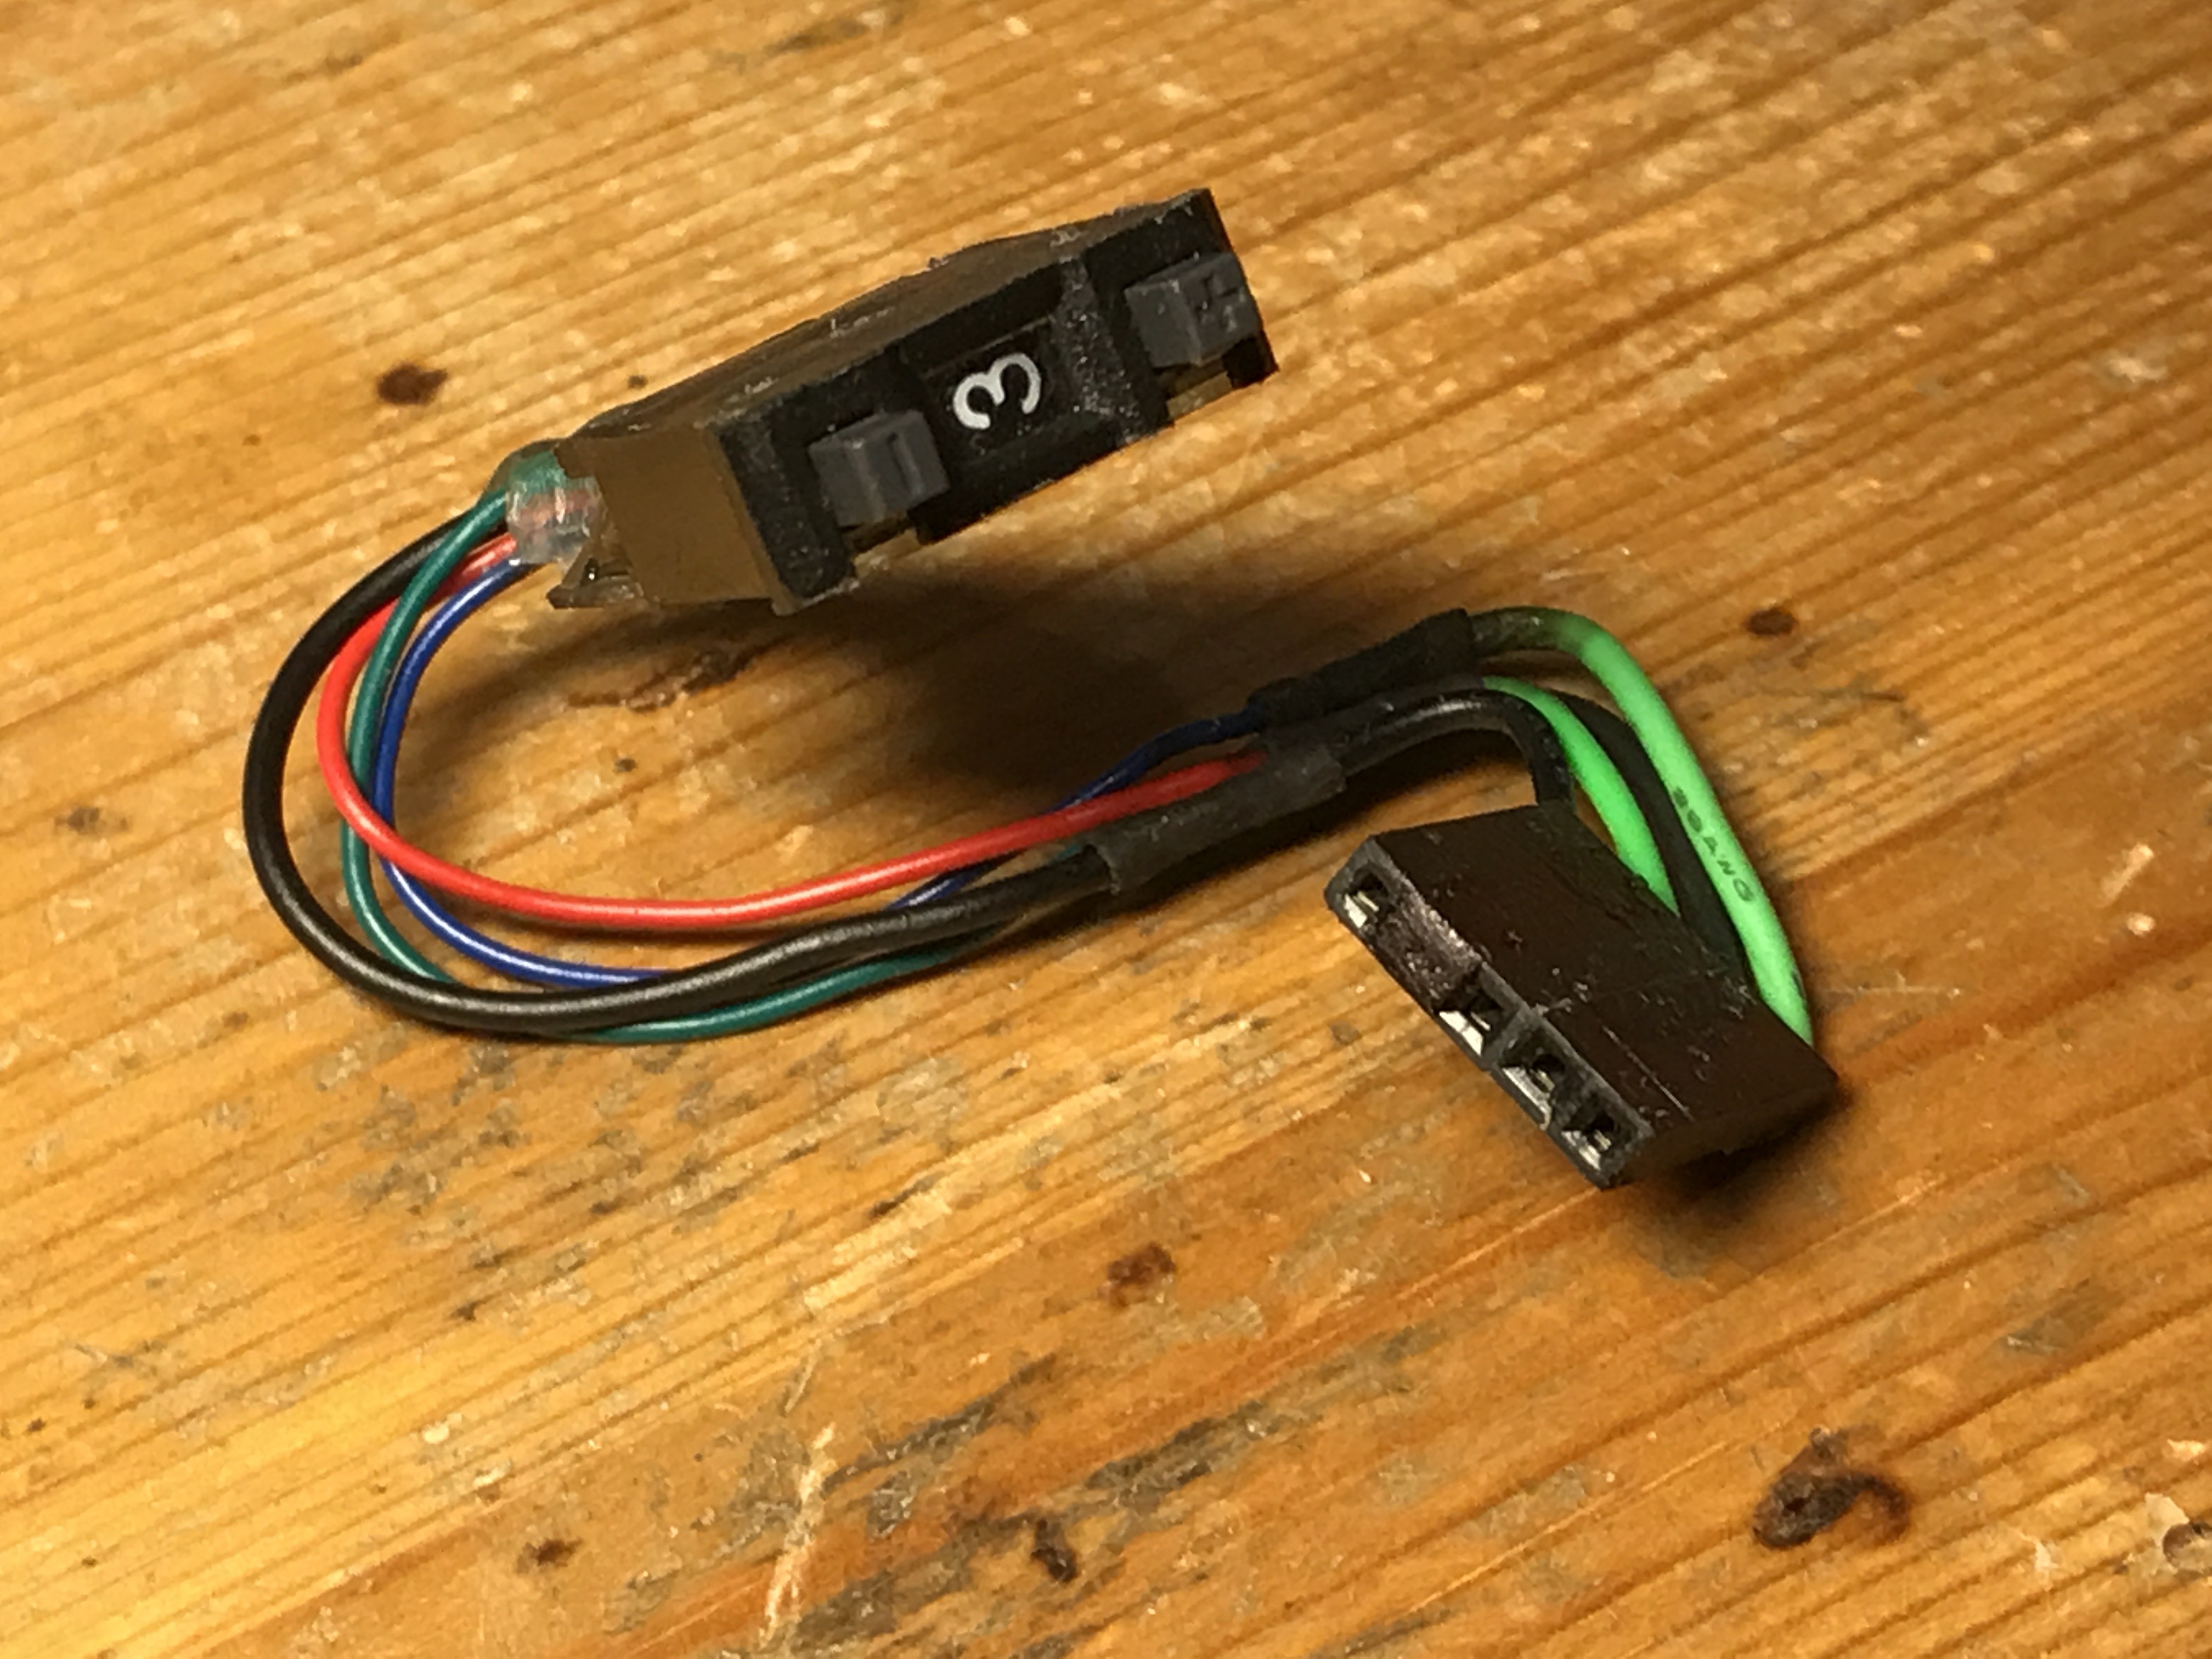
I looked through my bins and found a digital switch from Fujisoku which could cycle through all the colours, as well as indicate which one is active.
Here's how I wired it up:
| # | Binary | Color | Comment |
| 0 | 0000 | Off | Don't expect your old screen back, you see nothing. |
| 1 | 1000 | Red | Works very well in low light, somewhat dim in daylight. |
| 2 | 0100 | Green | Works very well. |
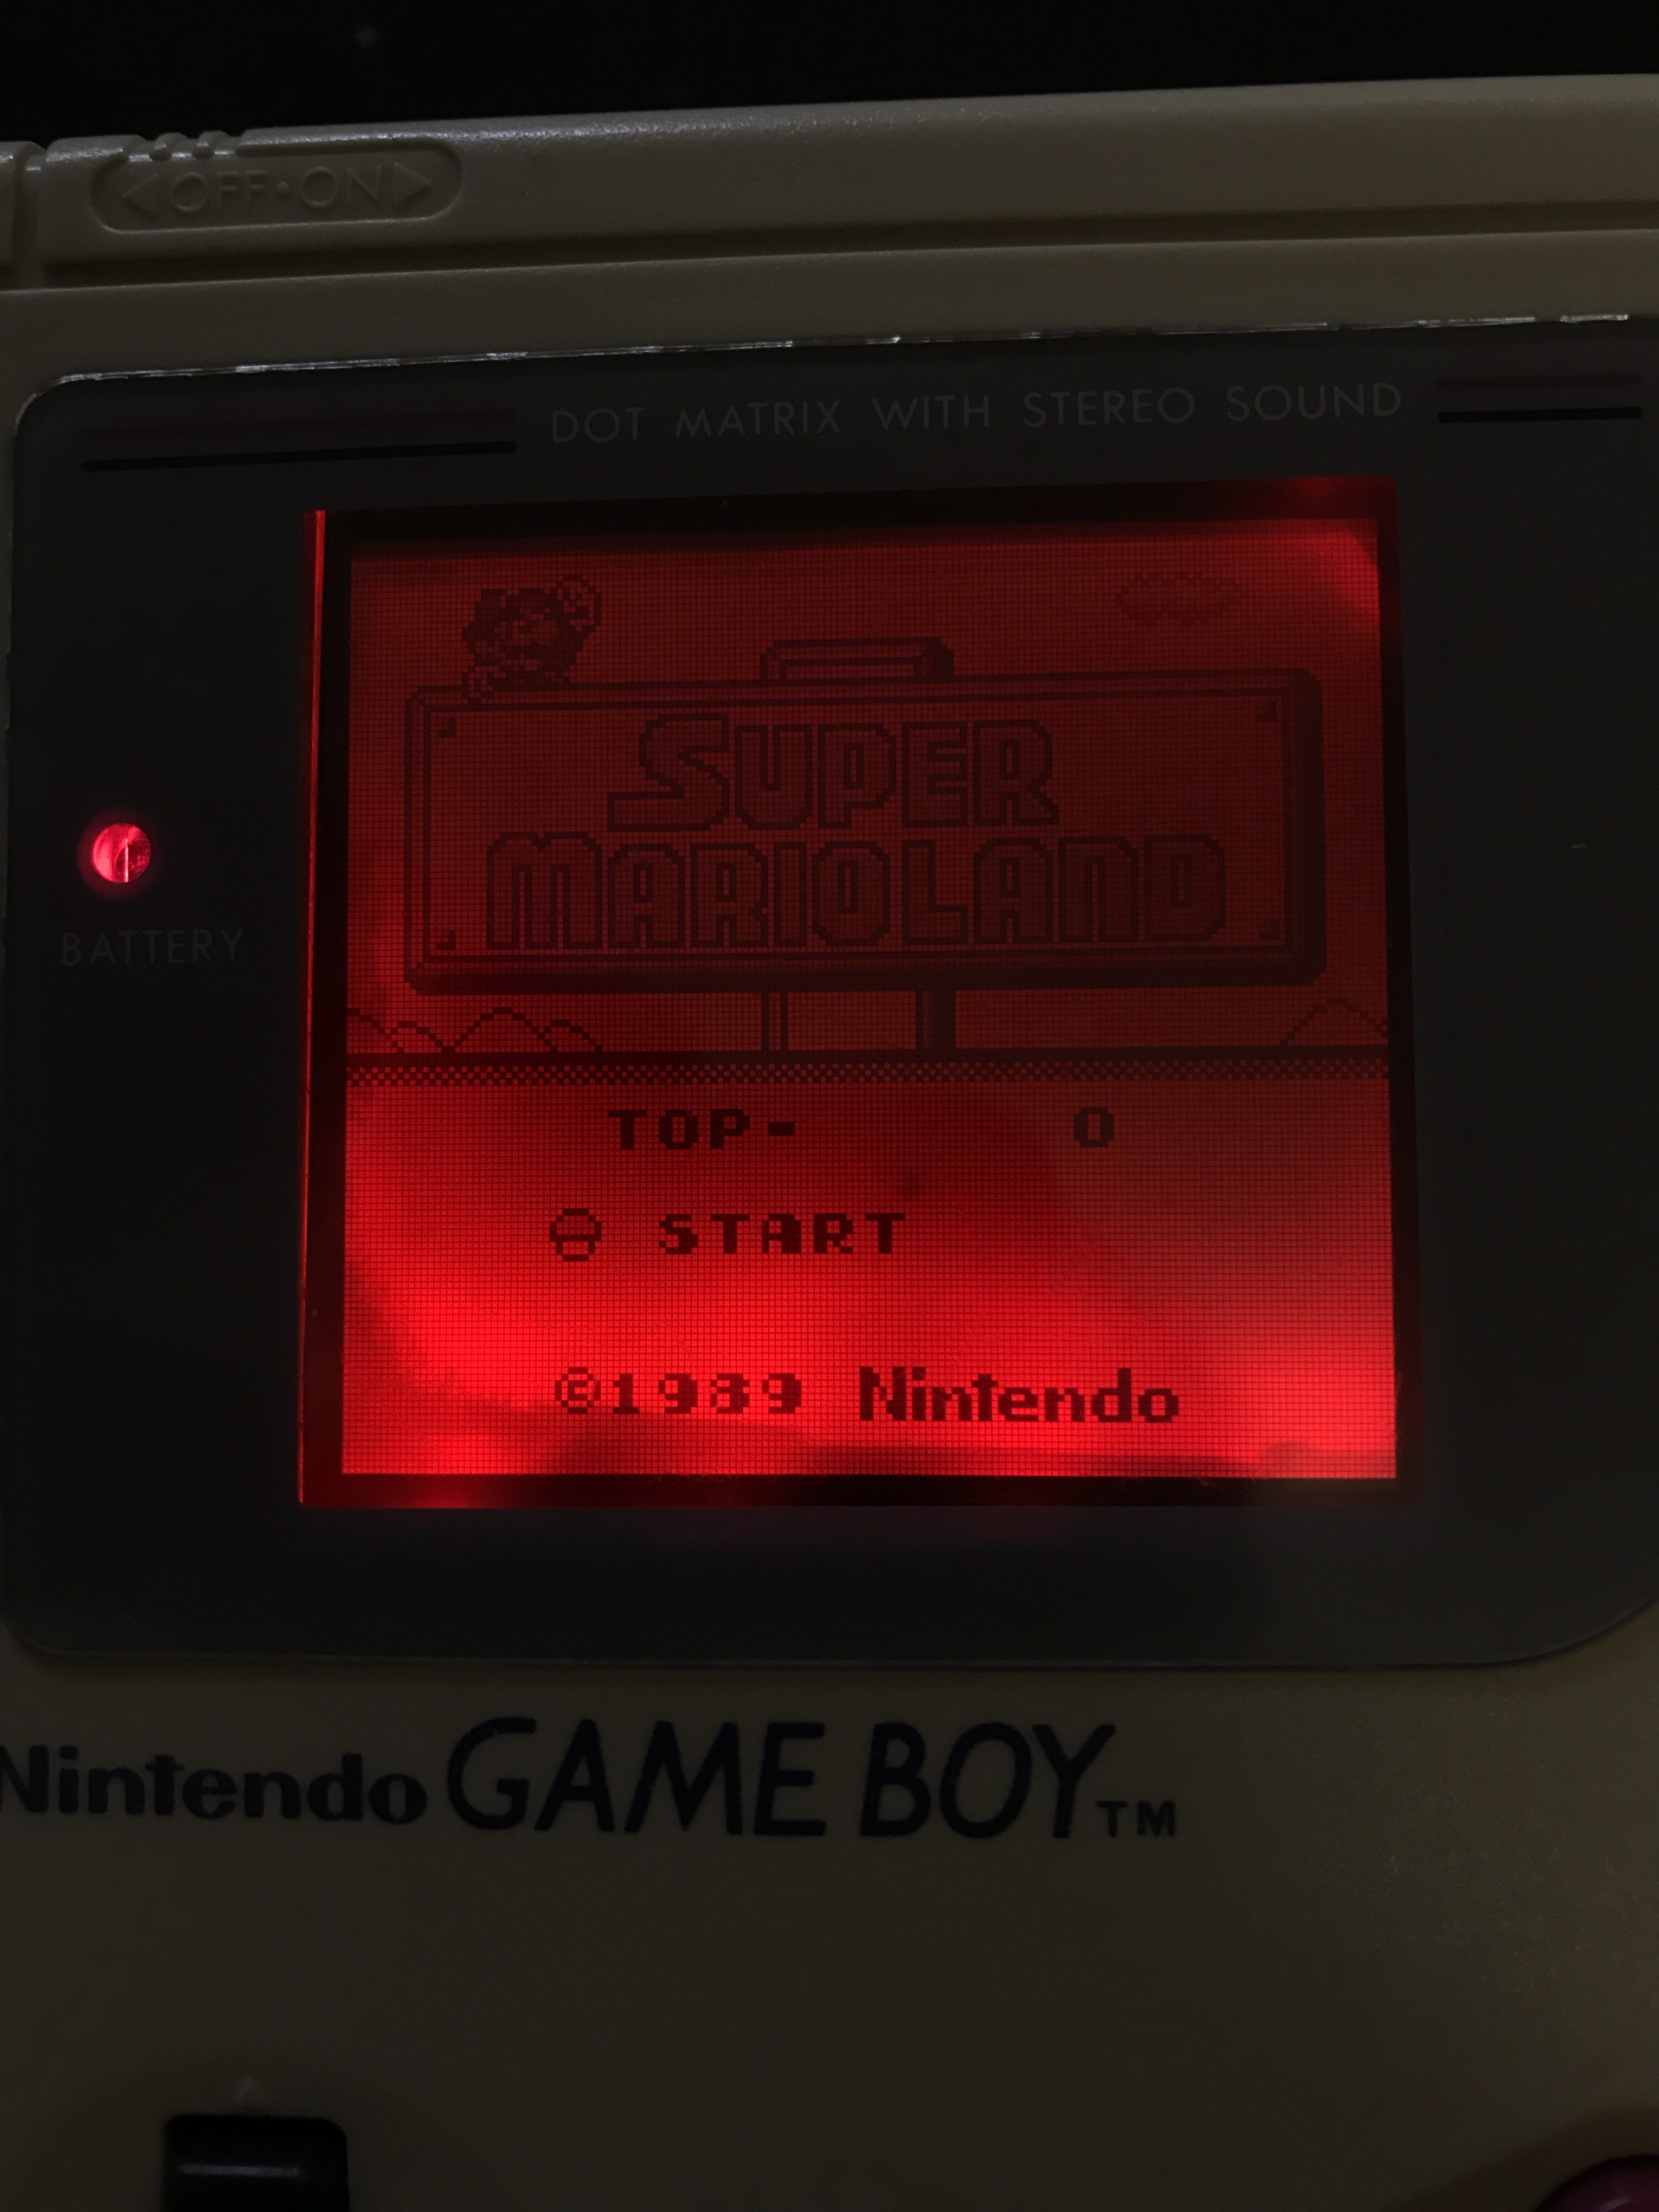
| 3 | 1100 | Red + Green = Yellowish green | Works very well - My favourite. |
| 4 | 0010 | Blue | Hard to get good contrast without inverting. |
| 5 | 1010 | Red + Blue = Violet bluish? | Weird effect, hard on the eyes. |
| 6 | 0110 | Green + Blue = Aqua/Turquoise | Works very well. |
| 7 | 1110 | Red + Green + Blue = Light bluish | Works very well. |
| 8 | 0001 | Off | |
| 9 | 1001 | Red |
The only possible location for this switch was under the headphone jack PCB, but it didn't really fit.
I moved the three green inductors to the top of the PCB and extended one of the capacitors out to the side with some wire. The switch fit reasonably snugly after I shaved off some excess plastic, so I cut a hole for it in the top case next to the phone jack.

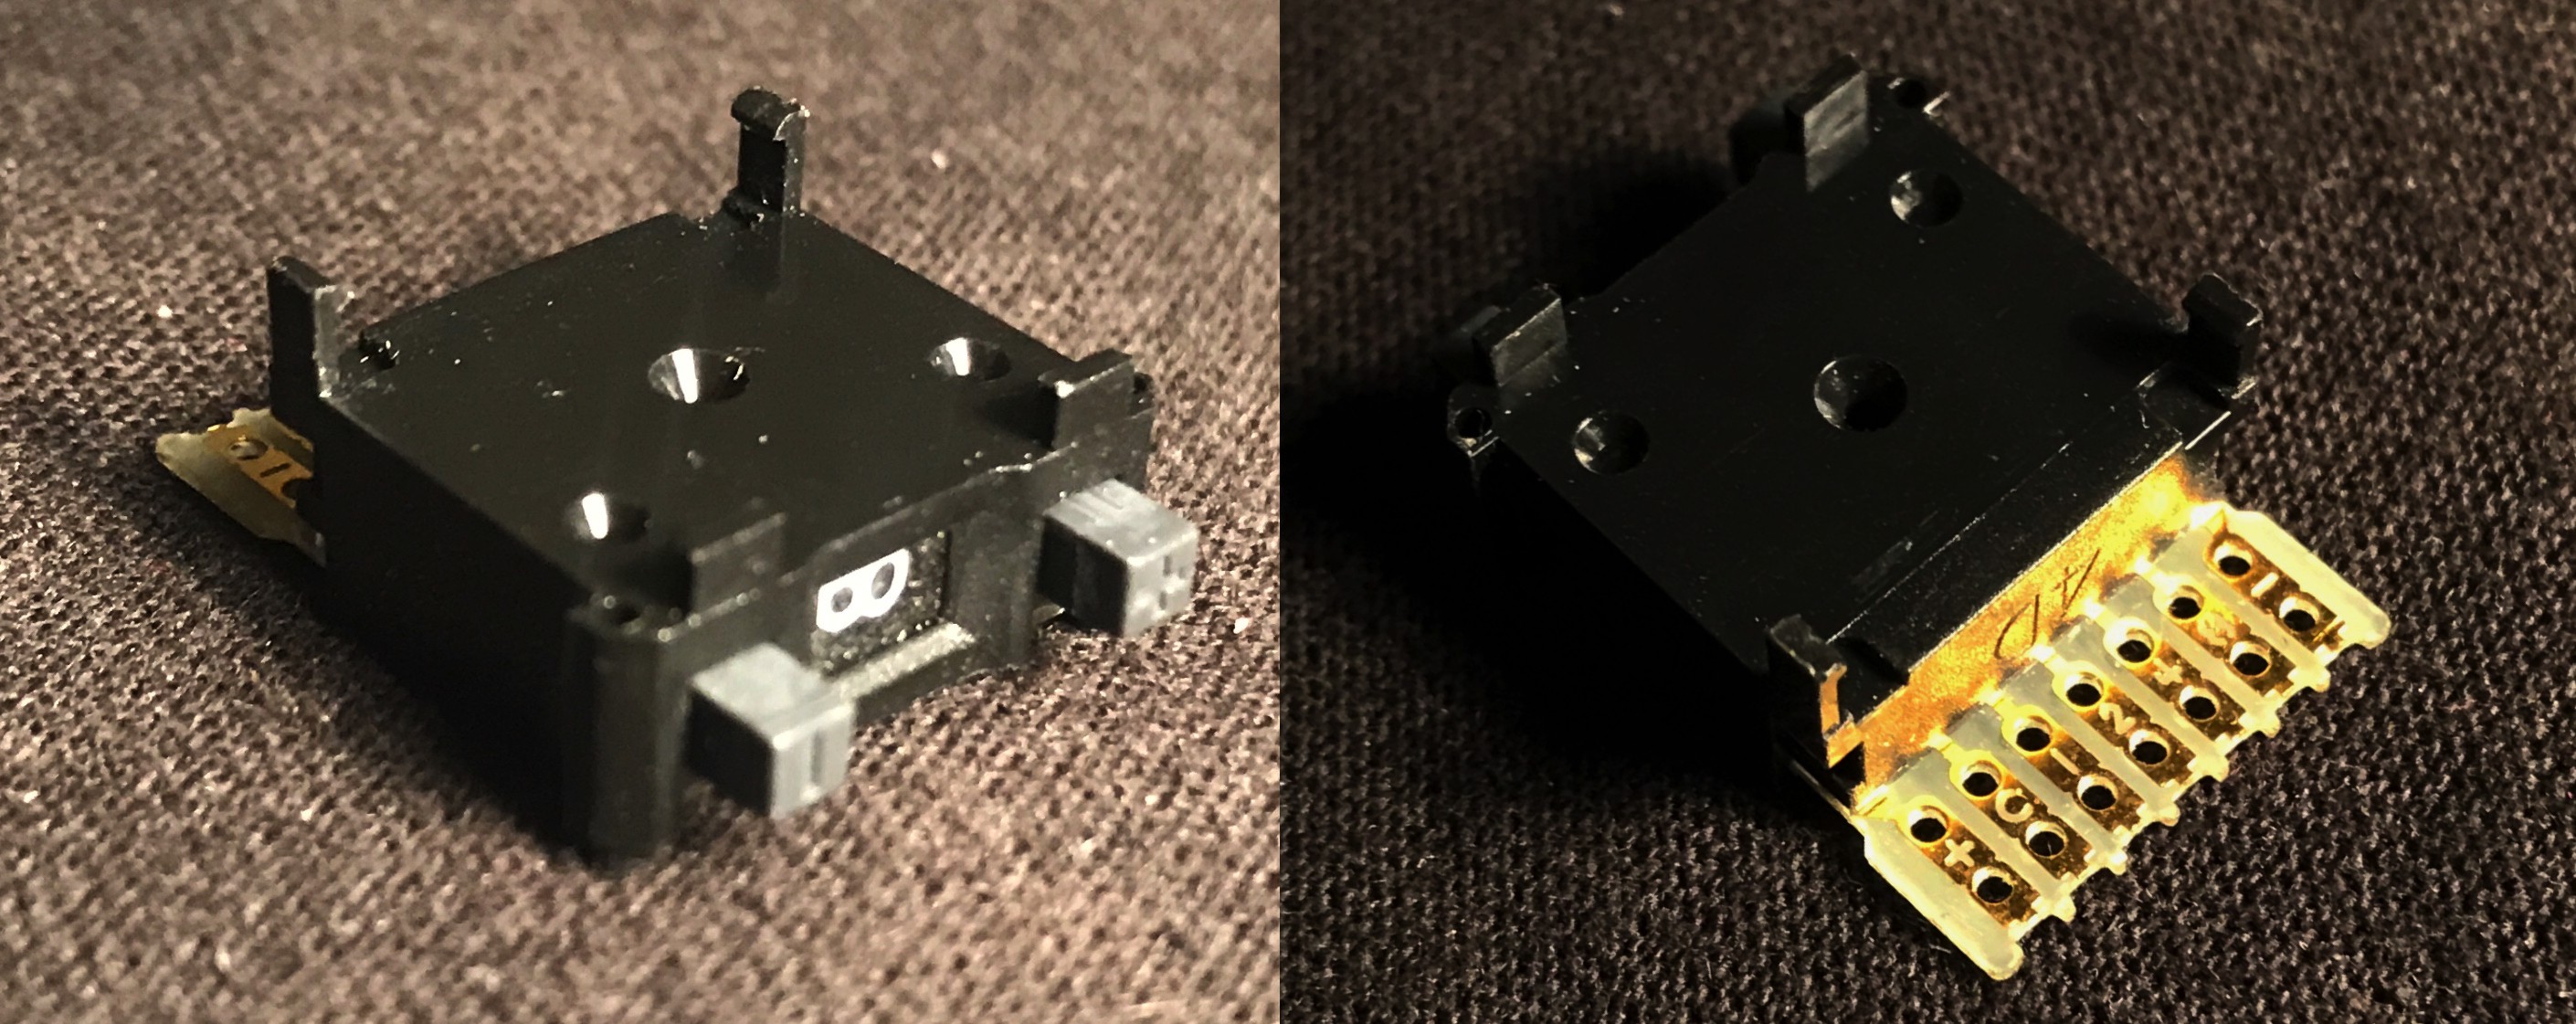
Instead of soldering the wires directly to the RGB module, which would permanently connect the two halves of the unit, I soldered a 0.1" spaced header to the switch wires and a matching connector to the wires coming from the backlight through a hole in the main board. This way I can easily take the Game Boy fully apart if I ever work on it again. The unused pin makes it impossible to connect it the wrong way.

Backlight module
Installing the module, I followed the instruction video mentioned in the bivert section above, in combination with this instructable. Both are linked to by Handheld Legend although neither one mentions the RGB version.
Anyway, everything went pretty smoothly (though removing the adhesive from the screen turned out to be quite cumbersome), until I decided to try and clean some corrosion off the contrast pot and consequently spilled alcohol all over the display...
I wiped it off, but when I turned the GB on for the first time after the mod, the screen looked like this:
Not content with the unevenness, I disassembled the unit again and took the module apart. Surrounding...
Read more »
 Alexander Williams
 Vincent
 Samuel