 Raspibotics
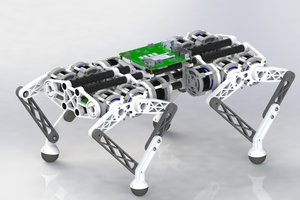
MABEL (Multiple Axis Balancer Electronically Levelled)
MABEL is quite different from other balancing robots in that the legs are able to move and the robot does not need to run in a fixed position. This is where the Raspberry Pi and the servo controller come into play. I've written an Inverse Kinematics class in python that takes an (X, Y) coordinate and works backwards to calculate the angle of each individual robot joint required to move precisely to that position. Briefly, since we know the length of each leg section is constant, we can draw a virtual triangle using the X and Y component as the third line in the triangle and calculate the angles in the triangle using the cosine rule. Here upper refers to the distance between the upper leg pivot and lower leg pivot (92mm), lower refers to lower leg pivot to wheel centre (75mm), X and Y are given by the user (also in mm).
In code this looks like:
# IKSolve.py is an inverse kinematics module for MABEL to move the wheel (effector) in 2D Cartesian coordinates.
# Contributors: (@raspibotics)

# ***USAGE GUIDANCE***
# x translates the robot leg vertically and y translates the leg horizontally, each value should be in integer mm
# x is the distance between the upper leg pivot and wheel centre (Vertically) - acceptable range for MABEL (160-98mm)
# y is the distance between the upper leg pivot and wheel centre (Horizontally) - acceptable range for MABEL (-50, 50mm)

from math import acos, degrees, atan2


class IKSolve:  # IKSolve - Inverse Kinematics solver for MABEL

    def __init__(self, ru_home, rl_home, lu_home,  # IKSolve Constructor, Values are default leg section lengths in mm
                 ll_home, upper_leg=92, lower_leg=75):

        self.ru_home, self.rl_home = ru_home, rl_home  # Right leg servo home positions
        self.lu_home, self.ll_home = lu_home, ll_home  # Left leg servo home positions

        self.a_const_0 = (upper_leg ** 2) - (lower_leg ** 2)  # b^2 - a^2
        self.a_const_1 = 2 * upper_leg  # 2*b (c is unknown)

        self.b_const_0 = (upper_leg ** 2) + (lower_leg ** 2)  # b^2 + c^2
        self.b_const_1 = 2 * upper_leg * lower_leg  # 2bc

    def translate_xy(self, x, y, flip=False):  # translate_xy(x, y) Calculates the required angles to move to (x, y) mm
        if x == 0 and y == 0:  # (0, 0) resets servos to home position
            return self.ru_home, self.rl_home, self.lu_home, self.ll_home
        else:
            try:
                angle_a = degrees(acos(((self.a_const_0 + (x ** 2)) /  # A = Cos^-1((b^2+c^2-a^2)/2bc)
                                        (self.a_const_1 * x))))
                angle_a += degrees(atan2(y, x))  # Tan^-1(y/x)
                angle_b = 180 - degrees(acos((self.b_const_0 - (x ** 2 + y ** 2)) /  # A = Cos^-1((b^2+c^2-a^2)/2bc)
                                             self.b_const_1))
            except ValueError:
                print('Value specified is outside range of capable movement. Please specify a different value...')
                return
        if flip is not False:
            return (self.ru_home - round(angle_a)), (self.rl_home + round(angle_b)), (
                    self.lu_home + round(angle_a)), (self.ll_home - round(angle_b))
        else:
            return (self.ru_home + round(angle_a)), (self.rl_home - round(angle_b)), (
                    self.lu_home - round(angle_a)), (self.ll_home + round(angle_b))


IKSolve = IKSolve()

print(IKSolve.translate_xy(...
Read more »


 pat92fr
 Duane Degn
 deʃhipu
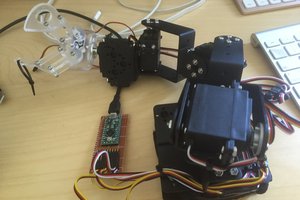
 Tim Wilkinson
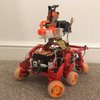
Wow that looks great, do you have any thoughts on what to do if it does fall over/on its own? Can it self right somehow? My other feedback would be to use gearing at the bottom wheels so you have more clearance, otherwise the off road capability is impressive.