Having reverse engineered both the Lubitel camera and studied Instax cartridges, I had got all the necessary information to start designing my camera. I set a couple of guiding principles for myself. Firstly, the design should be comprised of as little newly introduced plastic as possible. Secondly, it should made up of as many donor components as possible. Thirdly, it should look nice and be handy.
I used OpenSCAD for modeling, Prusa Slicer for slicing and two Prusas for proof printing. I chose OpenSCAD because I needed the model to be parametric, i.e. it freely adjusts to given parameters like thread diameter, inter-lens distance, mirror position, etc. In doing so, I sacrificed some artistic possibilities with the camera design.
The goal for the first stage was to develop a camera body that incorporates all the components, and then check the viability of the whole construction. My main concern was that the components may hamper each other. The initial body design was simple: the front panels carried two lenses; the top panel carried the grounding glass, the viewing shaft, and the mirror; and the back panel had holes to screw on the developer unit. It took me some time to prepare a proper 3D model. The main issue of the delay was the viewing lens thread. I measured its diameter and pitch, but for some reason the lens didn’t match any of the proof prints I made. The main thing I missed was the simple fact that the lens had a quadruple thread. Once I had figured that out, I quickly finished the model and printed it with a white PLA filament I had on hand. I used black acrylic paint to blacken the internal surfaces of the camera body.

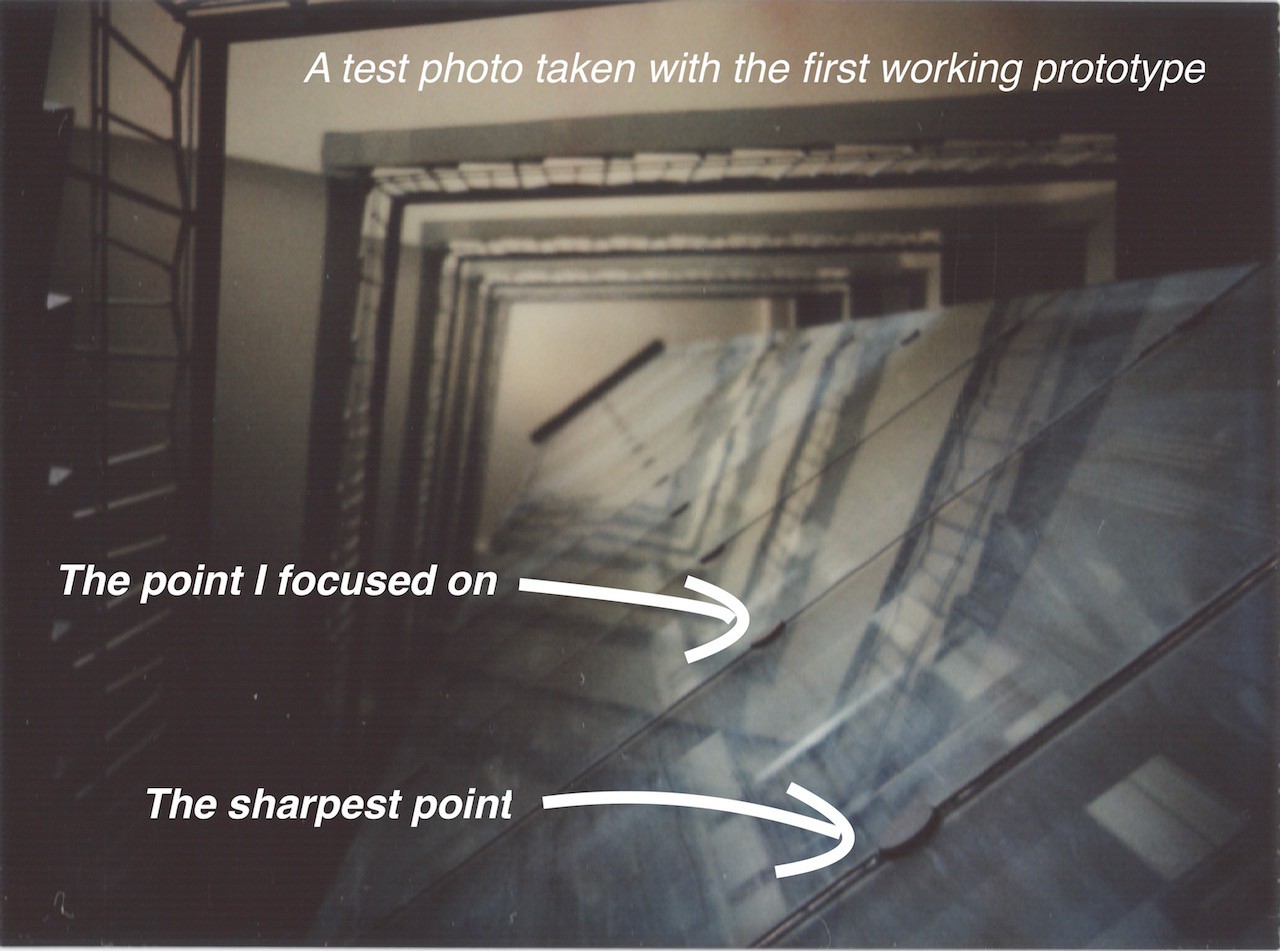
I put together the body and the components, re-hauled the shutter, aligned the lenses according to the instructions, and loaded a cartridge with colour film. I took several photos. Colours and exposure were fine; however, the images didn’t look as sharp as I expected after my experience with the simple frame prototype. I decided to check the accuracy of focusing mechanism with some sort of a testing rig. The appropriate rig should have distinctive features (like contrast lines or edges) and be rather long to cover different focusing distances. The elevator shaft in our house was well-suited to this task. I took two more photos with the elevator as a test rig. I got sharp details on the photos, but I was not satisfied. Curiously, the sharp details I obtained were not those which I intended to focus on. What a fiasco!
Discussions
Become a Hackaday.io Member
Create an account to leave a comment. Already have an account? Log In.