Close
0%
0%

Accurate Apollo DSKY Replica

Or how I try to create an exact mechanical (and functioning) replica of the Apollo Guidance Computer DSKY

Similar projects worth following
This is a long overdue writeup of a project I did last year: creating the most realistic (mechanically-wise) replica of an Apollo DSKY, from the original mechanical plans.

While functioning like a real DSKY, I don't plan on replicating the original electronics, with the 100s of relays and so forth. For now, a Raspberry Pi running VirtualAGC is doing the grunt work, the display is a simple LCD and the status lights are LEDs.
I do plan on improving that later on.

  • 1 × 750g Spool of Grey PLA I used ICE's "Gentle Grey"
  • 1 × 750g Spool of Black PLA I used ICE's "Brave Black"
  • 1 × Nextion 3.5" Display GUI Files are in the Github repo
  • 5 × White LEDs 3 or 5mm
  • 5 × Orange LEDs 3 or 5mm

View all 17 components

  • 1st version wrap-up and video, thoughts for MkII

    M.daSilva09/18/2020 at 07:51 0 comments

    Here's a small video I made yesterday about this project:

    To sum it up, here's what I got done in this first version:

    • Main parts of the DSKY have been modeled as per MIT drawings;
    • They were printed, while doing the minimal amount of changes possible;
    • Functional DSKY keyboard (using Cherry MX keys);
    • Functional alarm lights (using LEDs);
    • Functional display (with a Nextion 4.3" LCD);
    • Working VirtualAGC emulator;

    There are still a few things that didn't go as planned, and that I'd like to improve:

    • While the brass inserts worked out OK most of the time, I cracked some areas of the main housing while press-fitting them. For the next version, I'll look into heat-setting them;
    • The keyboard is not at good as I want it to be: the keycaps didn't print too well, and the keys "scratch" against the walls of the front cover. Maybe sanding them smooth will improve the feeling. I'm also looking into replicating the original buttons;
    • The outside finish is something to be expected from a 3D printed model. I'd like to try using a primer and painting the external parts to get a smoother finish;
    • Status lights are simple LEDs for now... No diffuser there, so each LED shows as a bright spot on the mask. I'll work on that in the next version;
    • The display could also use some more work. I found three possible ways to do that: find a better suiting LCD display, design custom 7-segment LED display, or go all in and look into creating the real EL panel display (such as what Ben at Applied Science did).
    • Status and Display panels are now interconnected with simple ribbon wires, I want to make them modular and use a nice flat multi pin connector;
    • Talking about connectors: the main one on the back is a NOS USSR part I found on eBay (how ironic...), I'll spend more time looking for a more resembling part.
    • Side project: I want to make the "Universal DSKY Handling Fixture" and a cool carrying case for it!

  • Internal AGC Emulator

    M.daSilva09/02/2020 at 20:16 0 comments

    I think it's worth taking the time to describe the emulator's structure. As a picture is worth a thousand words, here's the general working diagram.


    Inside the main housing is a Raspberry Pi running Raspbian. On top of it, an instance of yaAGC is executed at startup. This emulator usually runs Comanche 55, the original CM guidance software for Apollo 11. The emulator usually connects to yaDSKY, a virtual DSKY emulator through a TCP connection on port 19798. However, Ron Burkley and Mike Steward worked on a small python script that can send the keypresses and recover the display data. I slightly modified that script to output the display data through a serial link. I'll upload everything to my GitHub once I'm home :)

    There are still some quirks though. Due to the many interfacing layers, the Nextion display often lags behind yaAGC and skips some registers. Same thing happens with the status lights, some of them stay on or off when they shouldn't. In the future, I'll bypass that Arduino Nano entirely and directly connect the Nextion display/alarm indicators to the Rpi's GPIO.


  • Display/Alarm interface

    M.daSilva08/29/2020 at 20:14 0 comments

    Another Arduino was used to light up the status/alarm lights.

    Pictures are coming! My DSKY is currently halfway across Europe, so this is all coming from the pictures I took on my phone.

    I chose to use a Nextion LCD for the display. A custom GUI was created, to display the three registers, noun, verb and prog numbers.


    With this serial line connected to the ATMEGA328, I still had enough lines to connect each status light to a pin of the controller. I wrote a simple piece of code that parses a serial text line which contains the status light information, the registers, verb, noun and program name.

  • Keypad: first iteration

    M.daSilva08/29/2020 at 11:57 0 comments

    When I started designing this project, I quickly though about Cherry MX switches (or clones): they're cheap and widespread. The blue ones also have a nice cliky feeling that I like.

    As for the wiring, I settled for a simple matrix with diodes to avoid ghosting. An ATMEGA32u4 scans the matrix and acts as a keyboard to send the matching keypresses. I based my design on the infos found here.

    No time for a PCB for the first iteration, everything was hand-wired.


    Don't mind the yellow print, it was a trial run. Next picture shows the later grey version.

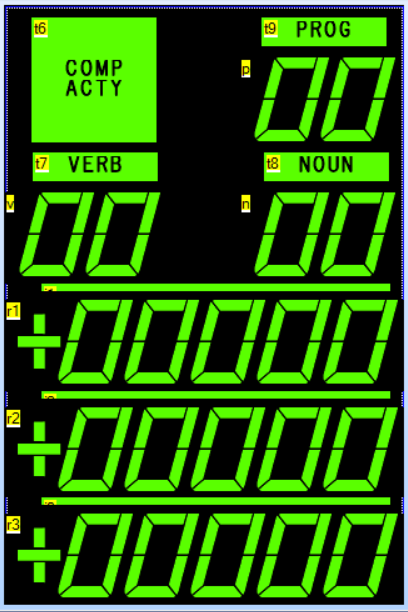
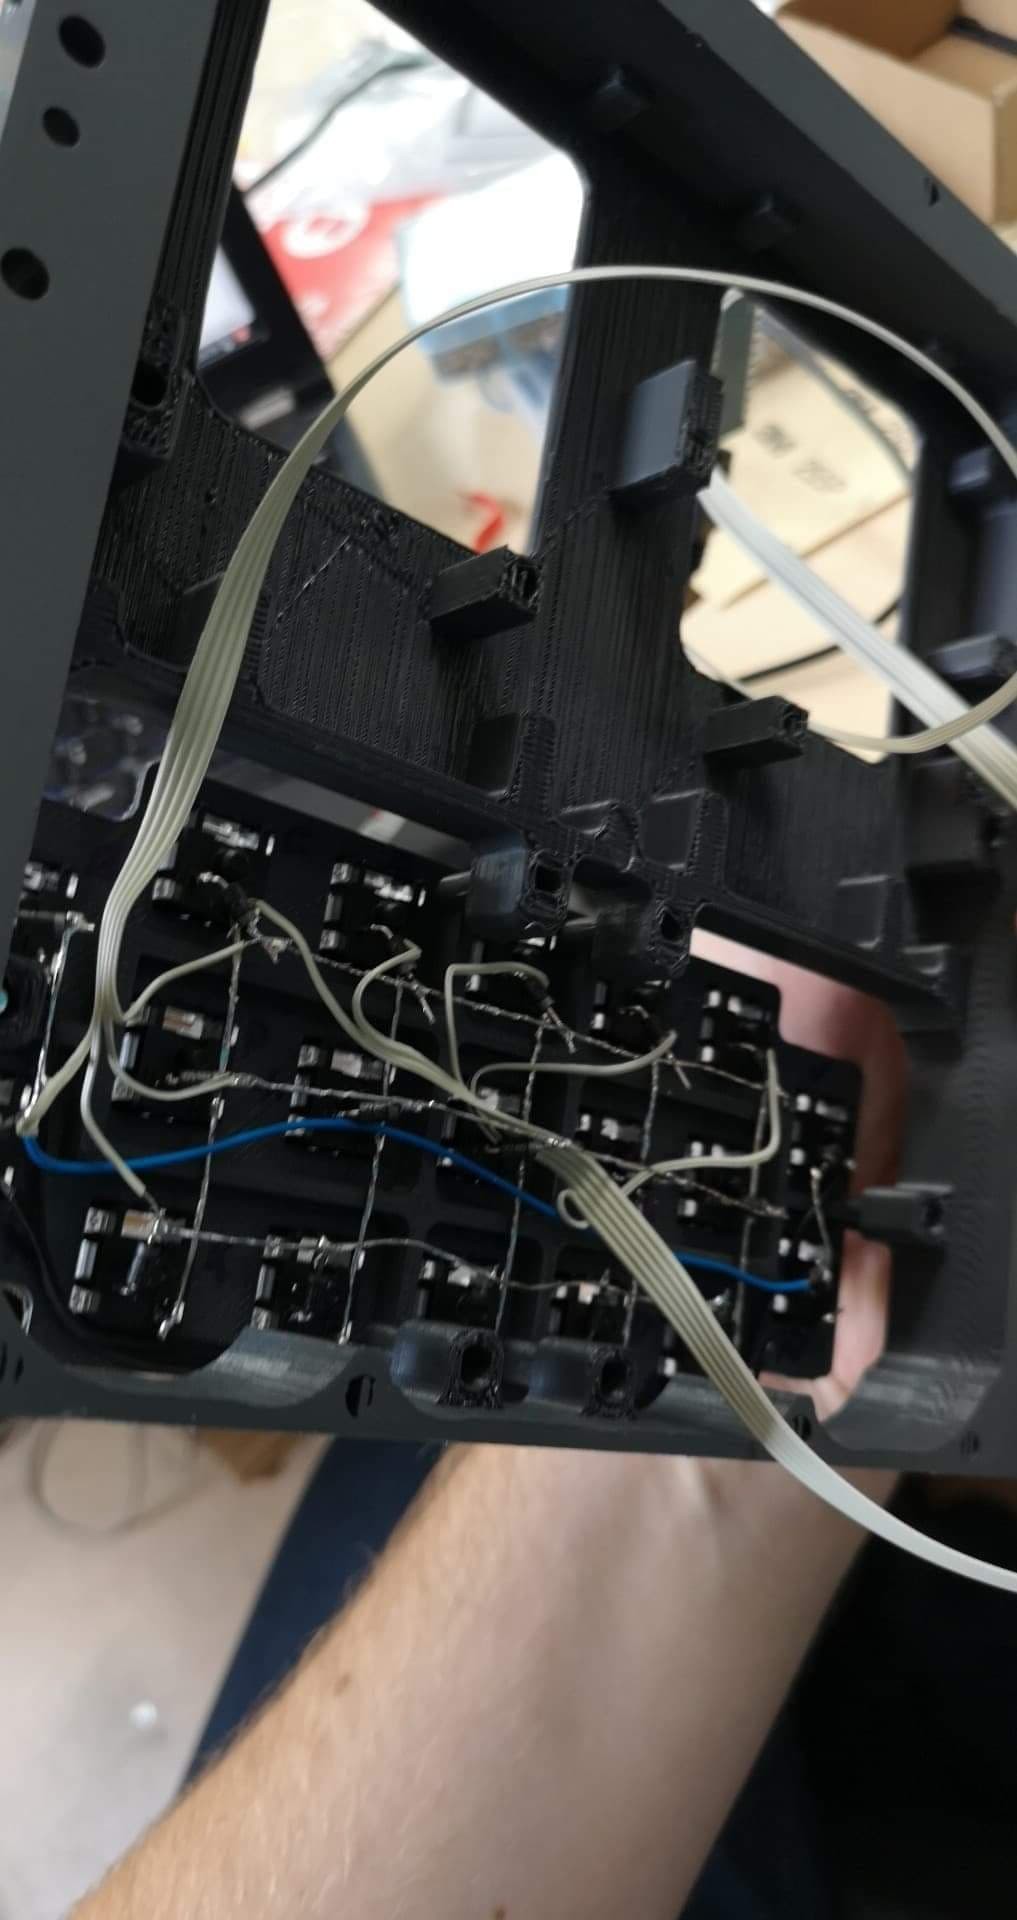
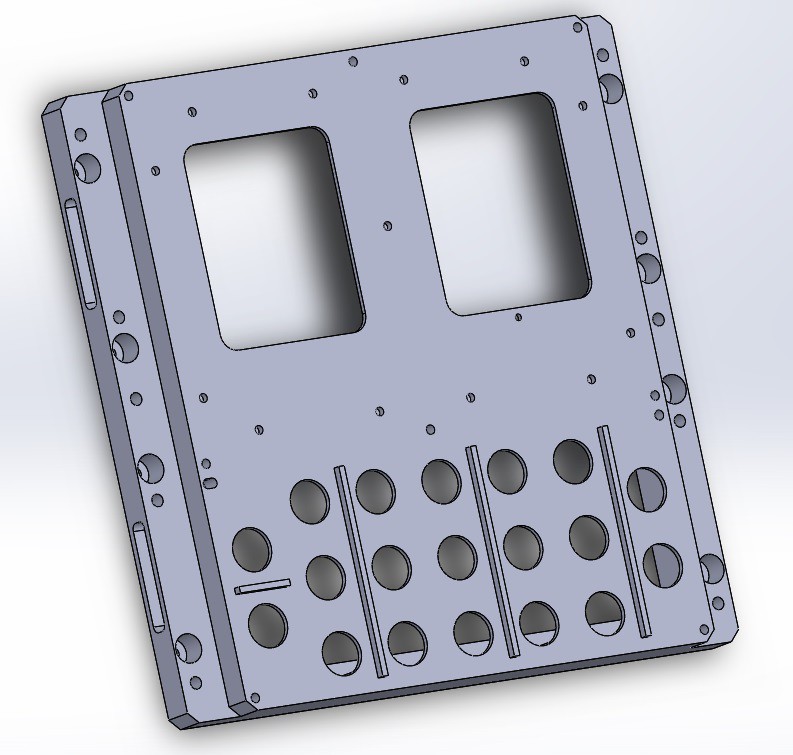
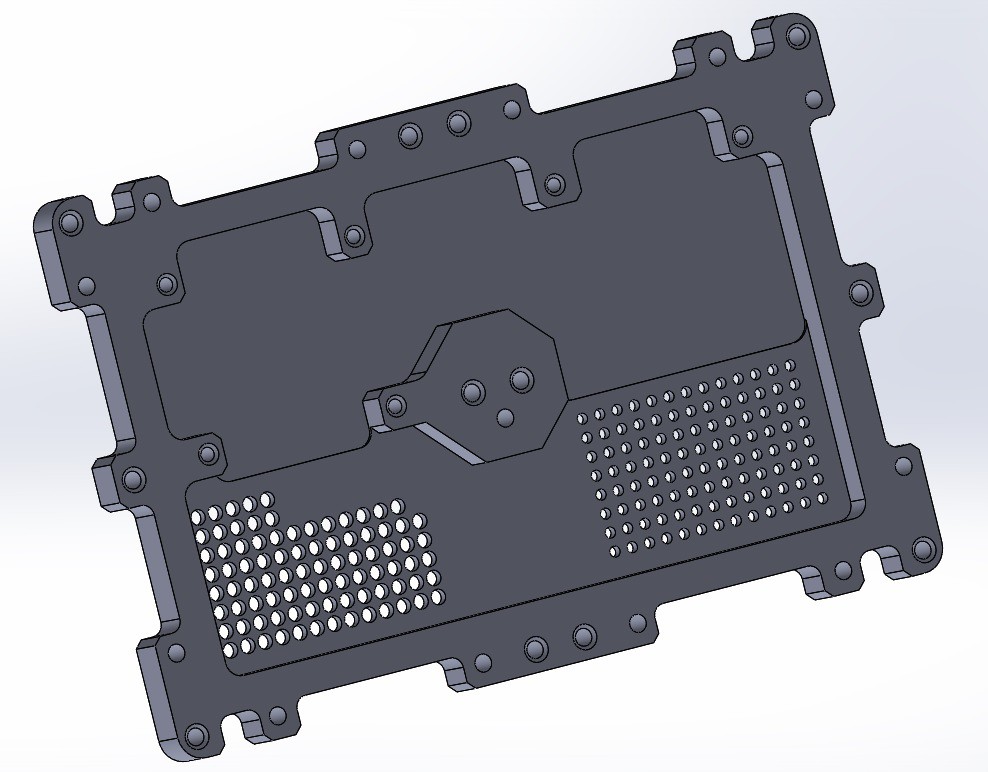
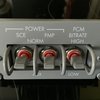
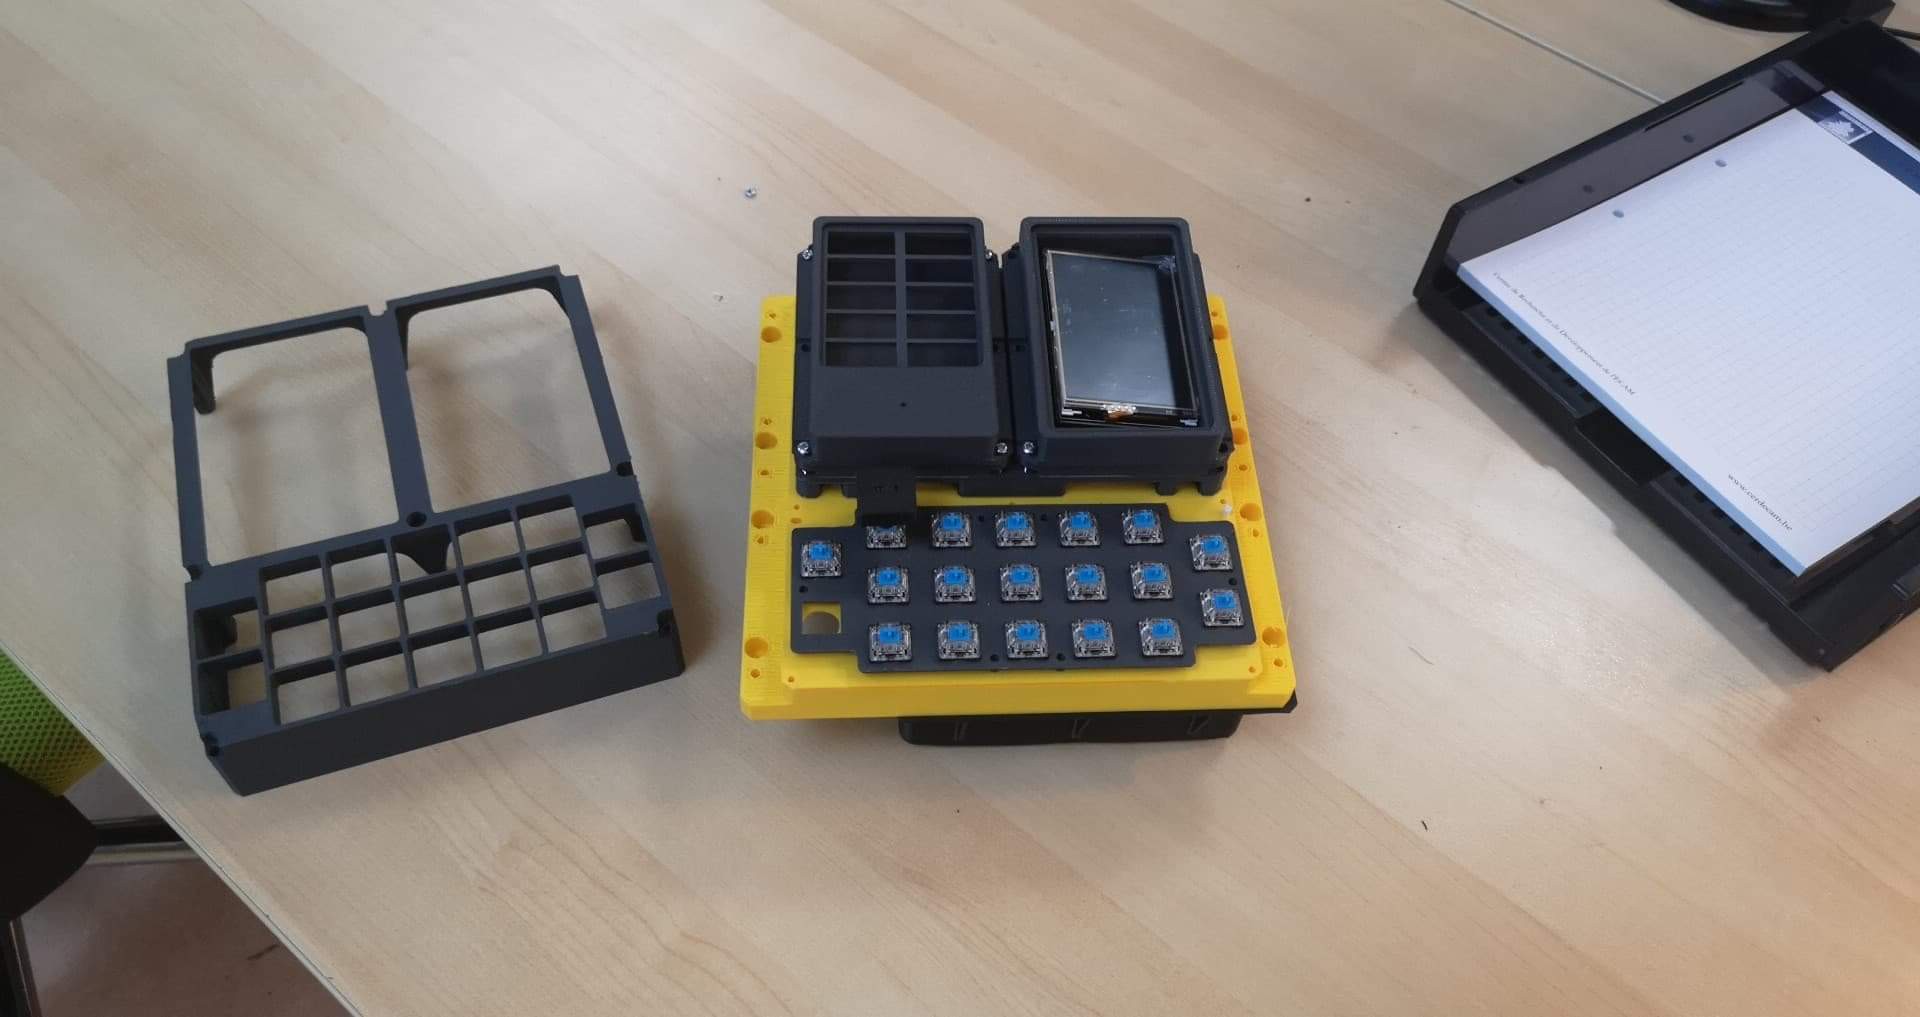
    All wired and working. I'm not really 100% happy about the keycap/cherry MX interface... I'll redo them at some point.

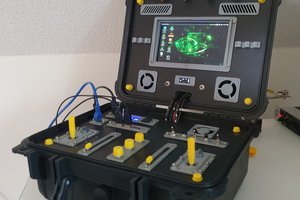
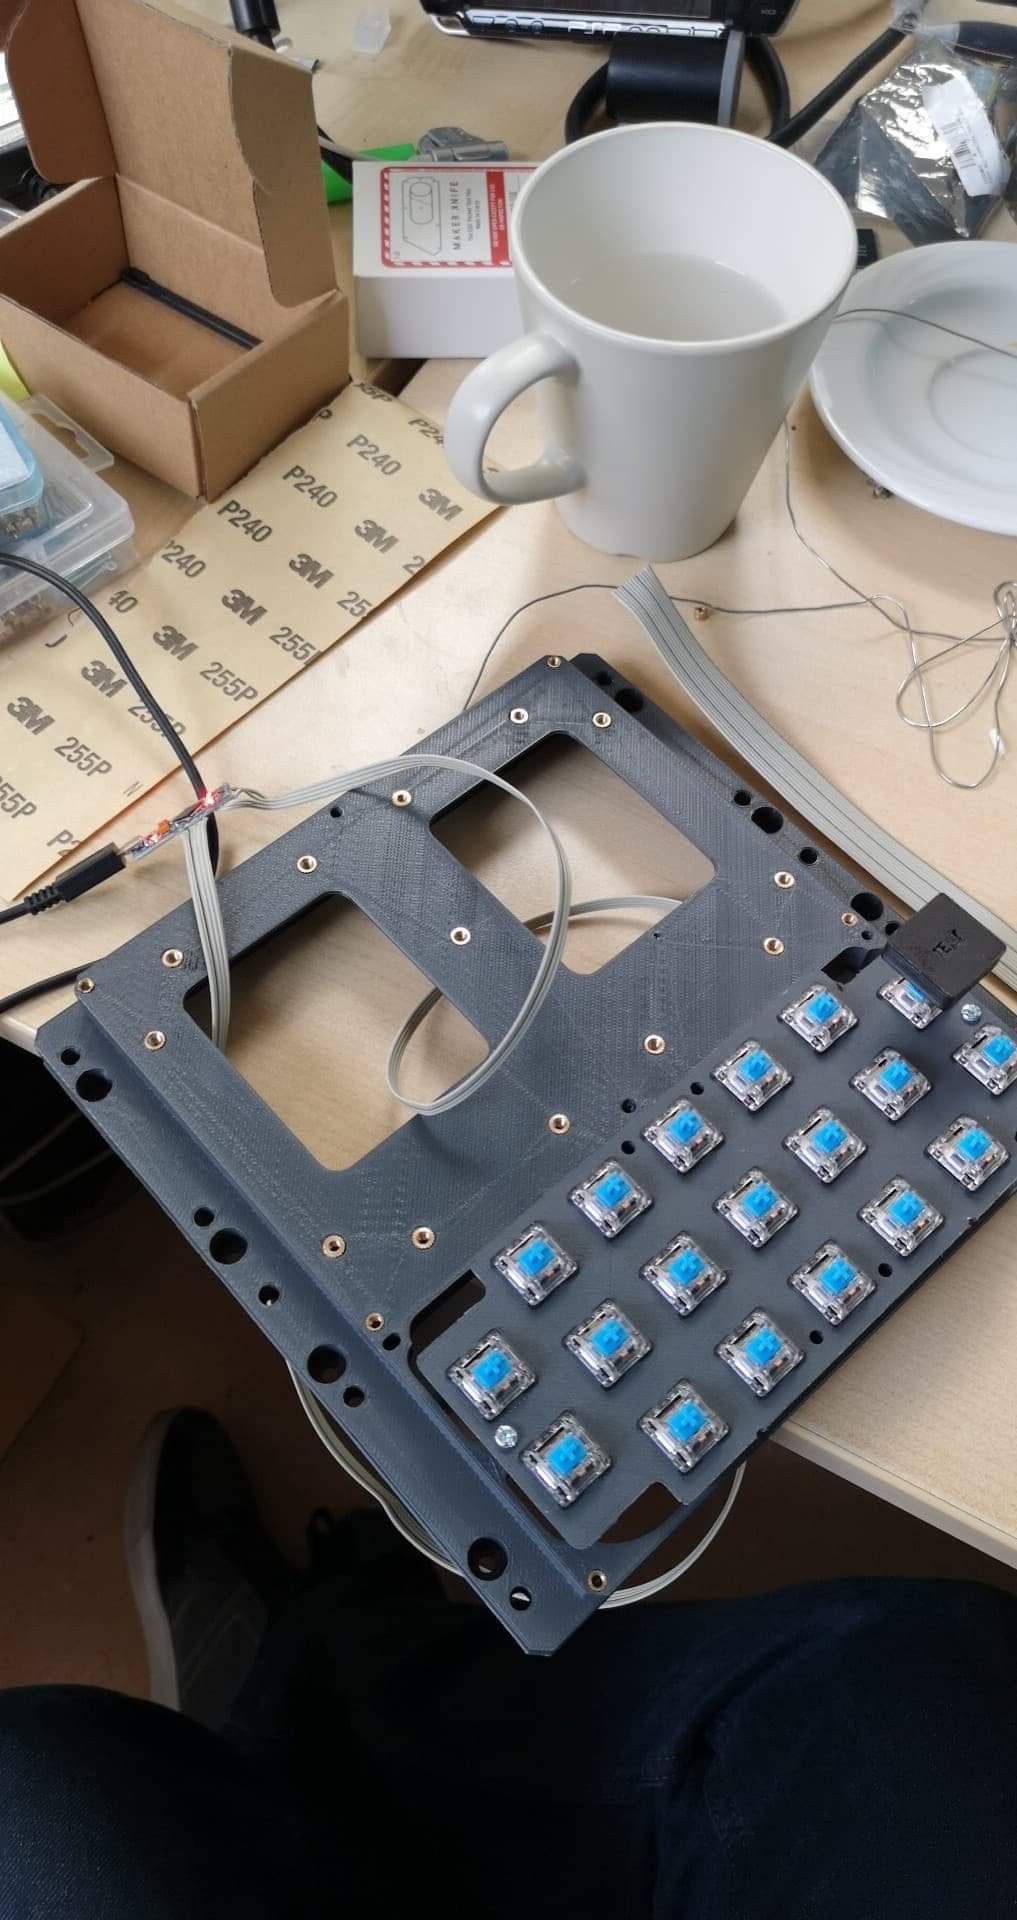
    Here's a small video showing the keyboard in action. The laptop on the left is running yaDSKY and is connected to my keyboard, the one on the right is running yaAGC with a virtual display. Both are connected to the same network.
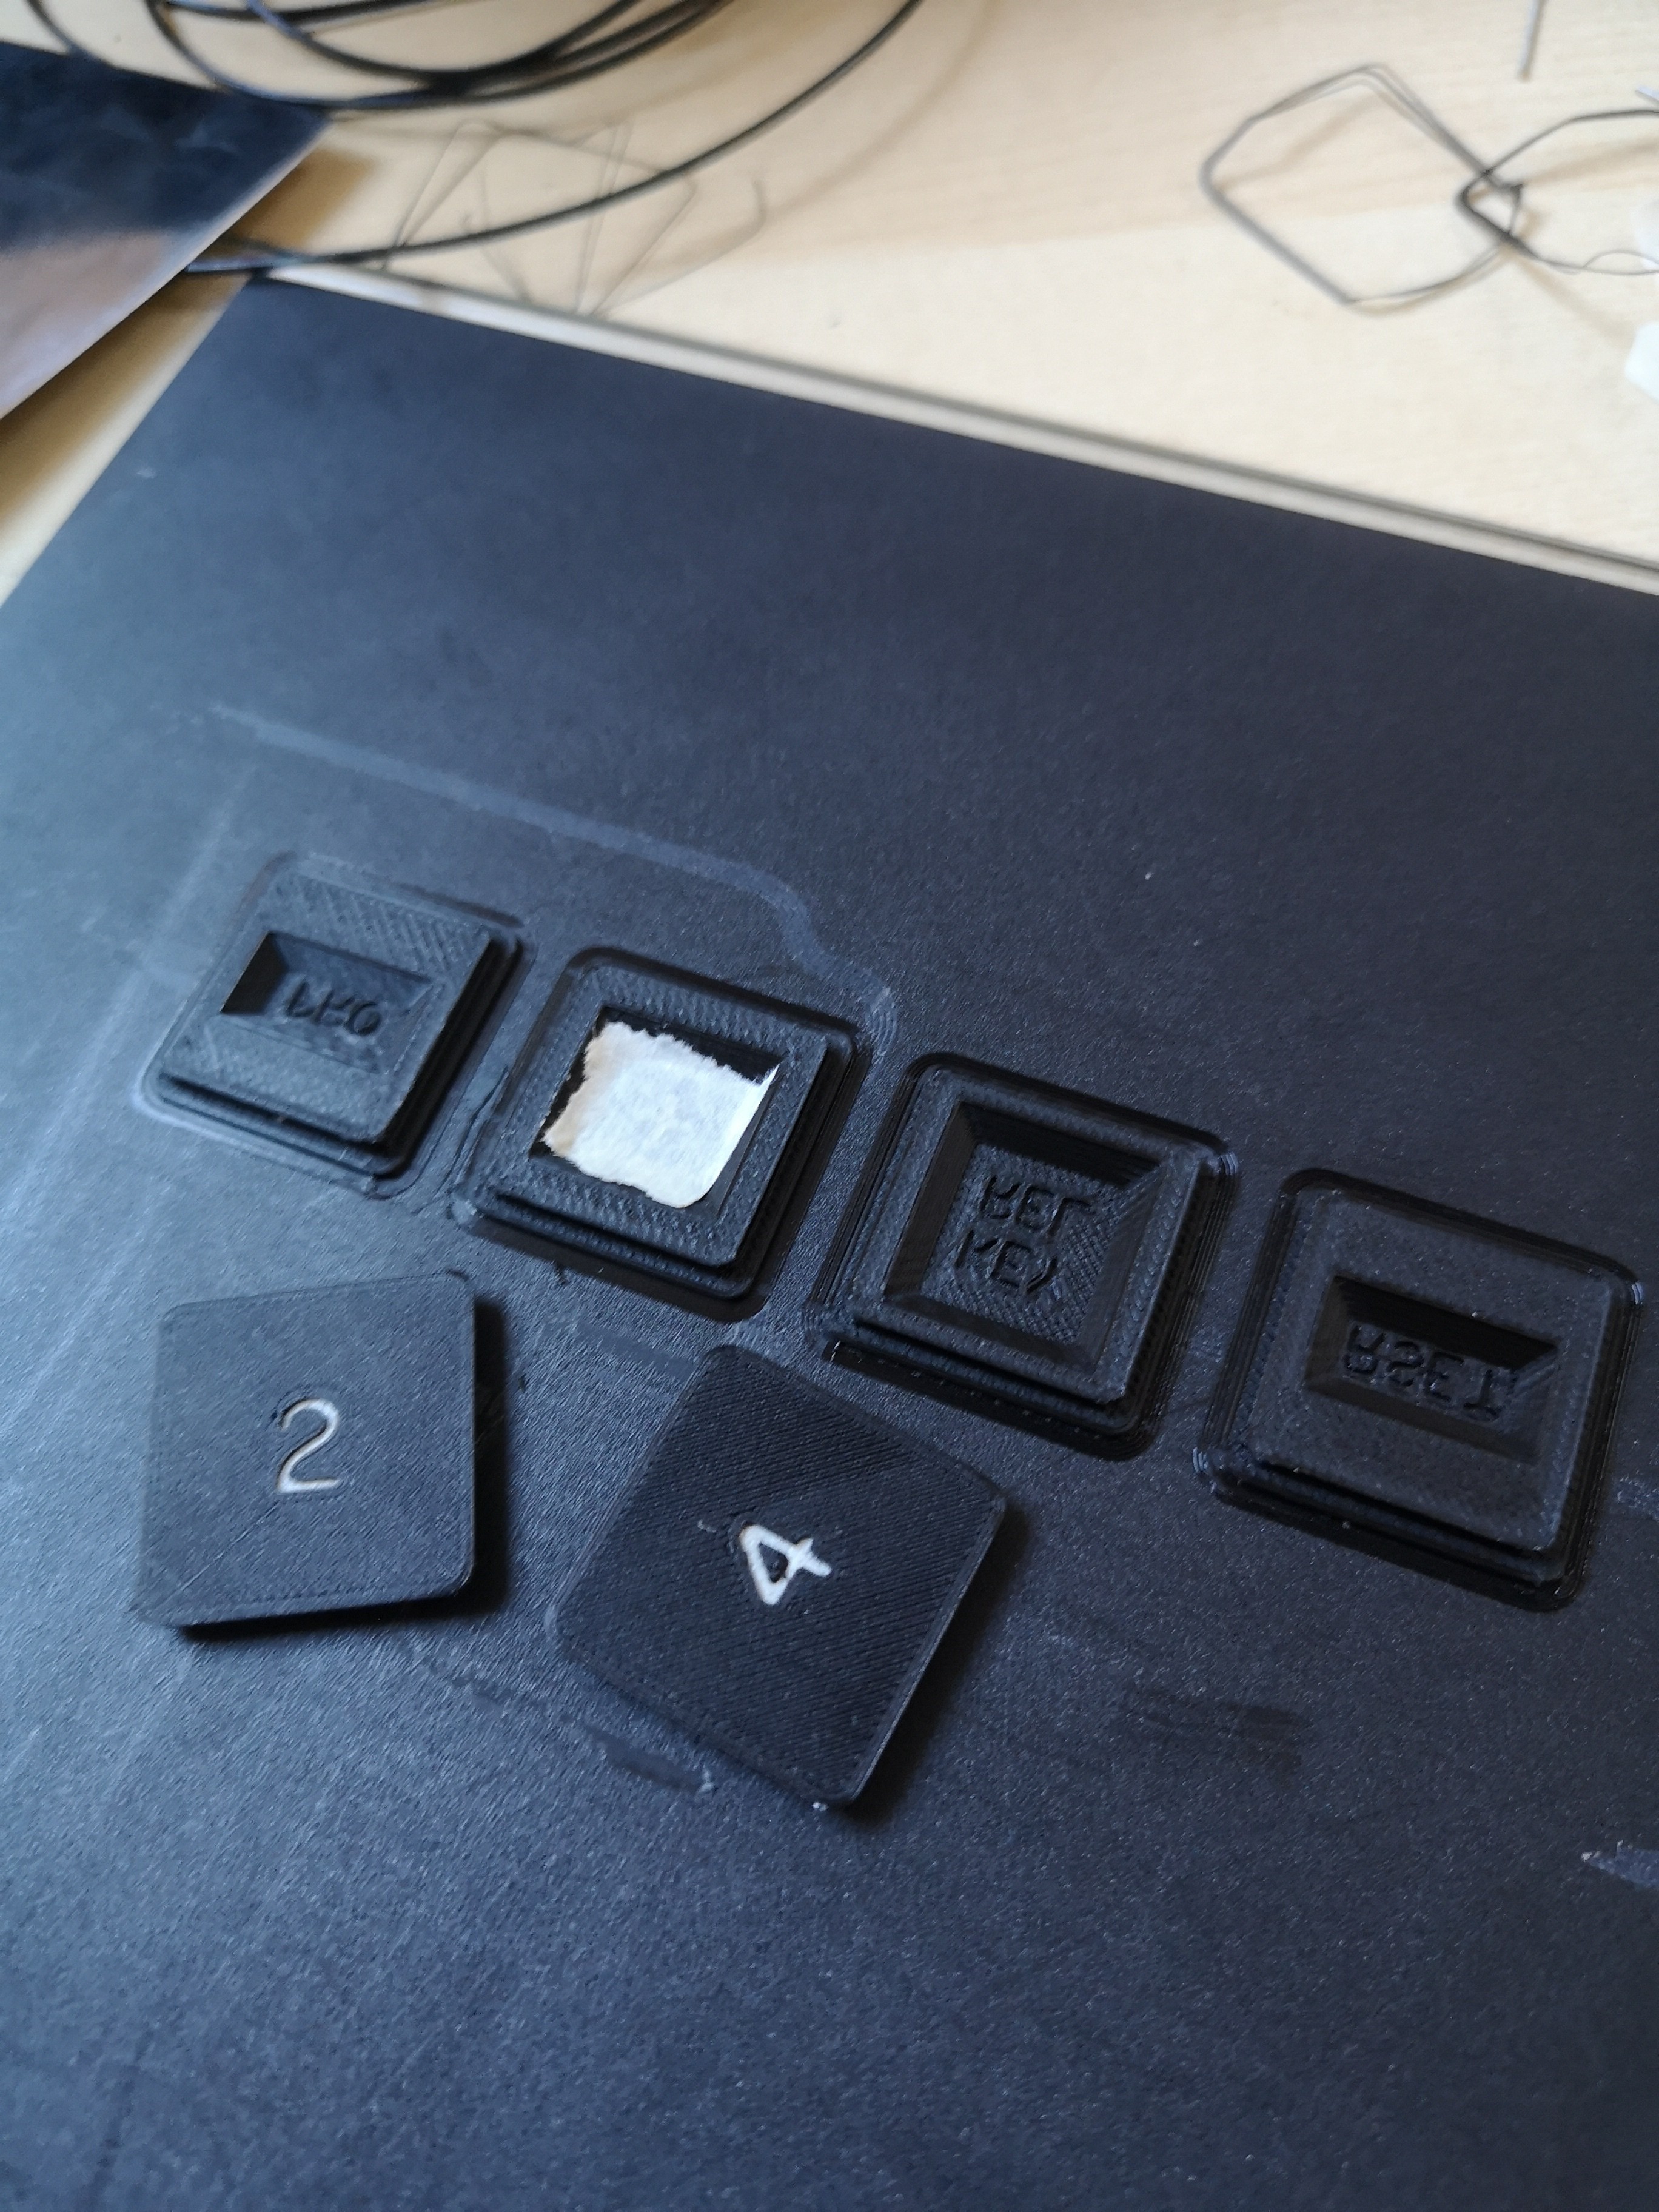
    I'm running a simple lamp test program (V35E).

  • 3D Printing

    M.daSilva08/29/2020 at 11:40 0 comments

    It was time to print everything and dry-fit the parts. Some mistakes were made, bed adhesion was an issue: some parts didn't stick enough to the bed, others were so stuck I slipped and stabbed my hand with the spatula...

  • Modifying the models for manufacturing

    M.daSilva08/29/2020 at 10:09 0 comments

    As I didn't have access to a CNC mill (and it's been a long time since I used one), creating a replica out of aluminium was out of the question for now. Using a 3D printer seemed like a good option, as I could also test-fit my parts. Mistakes will also be much cheaper.

    I also want the replica to be fully functional. While the external features could absolutely not be touched, I had to modify the internals to accommodate my keypad and indicator design. The main housing's internals could also be heavily simplified as only a Raspberry Pi and a handful of components were going to be used.


    A plate had to be designed to hold the cherry MX switches, and the non-functional model of the indicators were "carved out" for my electronics.

    The mounting plate hole size were also modified to press-fit threaded inserts.


  • 3D CAD Modelling from the original drawings

    M.daSilva08/29/2020 at 07:45 0 comments

    Solidworks was the software used for this entire project. STEP files have been added to the VirtualAGC's repo, an each model has an accompanying .md file describing the eventual differences between the plans and the models, if any. If you need the original Solidworks files, send me a PM.

    • Threaded bores have been modeled as simple holes;
    • Engineering intervals (e.g. [2.304-2.296]) have been averaged.
    • Part numbering (stenciled paint) have not been added into the models.

    Reading American plans was a challenge for me, as I was trained and learned to create European plans. While the imperial units required little time to get adjusted to, the biggest change of conventions was how the faces were laid out. In Europe, we use the First Angle Projection (ISO standard), while US adopted the Third Angle Projection used on those plans. There's an interesting article on this matter here.

    2004929-001: Front Cover

    I started with this part, which will set most of the external dimensions for the front part of the DSKY. Several versions of the same plan existed in the NARA SW scans, which allowed to lift 99% of the uncertainties over some dimensions (overlapping traces due to the quality of some scans). For me, the most interesting face is the back one, with all the pockets to make this part as light as possible, while keeping maximum structural integrity. No expenses spared here!

    2004900: Rear Cover

    This is also a beautiful part. Stiffening ribs all over.

    2004968: Front Housing

    This housing holds the front parts of the DSKY: indicators plate, keypad, cover. It is pretty intricate, with a bunch of pockets and fillets that took me some time to figure out. I had to print several iterations of this plan to lift a few ambiguities.

    2004919: Indicator adapter plate

    It holds the two indicator modules and carries the pins for both connectors. This part was probably much easier to mill...

    1006315: Indicator gasket

    I didn't understand what this part was all about until I read a bit more about the DSKY. After the Apollo 1 disaster and the whole "pure oxygen" issue, the Command Module and LEM designers had to switch to a nitrogen/oxygen mix inside the vessels. In order to limit the risk even further, a bunch of the electronic modules (I don't exactly know which ones) were pressurized with 100% nitrogen. The DSKY was one of them. You can still remove the front cover and indicator modules without breaking the seal, hence those heavy gaskets.

    2004699(000 and 001): alarm and display covers

    Nothing too special about those. They're both very similar, only difference resides in the bottom blanking part. The LM version of the alarm cover has a taller opening as more status lights were used. Those parts mate with the respective modules with shouldered screws and C-clips.

    1006387 and 1006315: alarm and display indicators

    This is where it got tricky: I couldn't find much on those displays apart from the external dimensions. Those are thus dimensional models.

    2004705: Main Housing

    This is a behemoth. It holds the display driver, the keypad controller, the interface with the main AGC module.

    The drawings are extremely hard to read, features constantly overlap and I only found a couple of schematics. This is why only the external features are finished for now. The internal features still have to be tackled with. I'll work on this someday, as for me this is vital to get a complete and accurate model for preservation purposes.

    As for my replica, what I have here is plenty enough.

    EDIT: I finally got around to finishing this thing. Took me 5 extra hours to get everything right. 

    1005022: Keycap

    There are 19 variants of this part, each for every key. It snaps onto the lower part of the switch assembly.

    Misc parts

    A few parts have not been described here: the connector plates for the indicators, screws, etc. Some of them have been modeled, others haven't. I'll update this section when (if) I...

    Read more »

  • Understanding the MIT plans structure

    M.daSilva08/28/2020 at 21:27 0 comments

    Now that we had a good source for the mechanical dimensions, I could start making the 3D models...

    Not so fast. The DSKY had many iterations, different versions, each one using older and newer parts, and getting through this whole structure can be a bit overwhelming at first. Thankfully, Ron over at the VirtualAGC website created a nice way of exploring the numerous parts that make a complete AGC/DSKY.

    The AGC has a complex history, but it can be roughly summarized to :

    • Block I: used in the ill-fated Apollo I, and 4-5-6
    • Block II: all the later missions.

    Once again, I cannot recommend the VirtualAGC website enough, it goes in much greater detail into the story of this machine.

    Ron mentioned that people seemed to be interested in 3D CAD models based on the actual mechanical drawings. At first, I just wanted to use the external dimensions from the MIT plans for an accurate 3D printed replica,... However, I could go the extra mile and pitch into the effort of preserving a part of the space exploration history. Creating an exact 3D model is a much greater challenge than just keeping the internal dimensions, but much more rewarding.

    I could then create a copy of the model if I ever needed to adapt some features for 3D printing.

    First thing was select which version to work on. The Block II DSKY is much more recognizable than the Block I, and there was much documentation available... For some reason, I decided to base all my models on the latest iteration: Skylab 4 (CSM-118).

    Digging though the Assembly Diagram reveals the essential parts for this project:

    2003994-121: AGC DSKY ASSEMBLY

    1. 2003885-011: MAIN HOUSING ASSEMBLY, AGC DSKY
      1. 2003947-011: WIREWRAP IDM PLATE ASSY, MAIN HOUSING, AGC DSKY
        1. 2004705: PLATE, IDM, MAIN HOUSING, AGC DSKY
        2. 2003951-021: CONNECTOR PLATE ASSY, MAIN HOUSING, AGC DSKY
          1. 2004923-011: PLATE, CONNECTOR, MAIN HOUSING, AGC DSKY
      2. 2003882-011: CONNECTOR PLATE, WIRED ASSY, AGC DSKY
        1. 2003951-021: CONNECTOR PLATE ASSY, MAIN HOUSING, AGC DSKY
          1. 2004923-011: PLATE, CONNECTOR, MAIN HOUSING, AGC DSKY
    2. 2004900: COVER, REAR, AGC DSKY
    3. 2003949-041==>2003949-031: FRONT HOUSING ASSEMBLY, AGC DSKY
      1. 2004968-021: HOUSING, FRONT, AGC DSKY
      2. 1006351: GASKET, BONDED, RUBBER, RETAINED
      3. 2003959-011: ADAPTER PLATE ASSY, AGC DSKY
        1. 2004919-021: PLATE, ADAPTER, AGC DSKY
        2. 2003957-011: CONNECTOR PLATE ASSY, INDICATOR, DIGITAL, AGC DSKY
          1. 2004920: PLATE, CONNECTOR, INDICATOR, DIGITAL, AGC DSKY
        3. 2003958-011: CONNECTOR PLATE ASSY, INDICATOR, ALARM, AGC DSKY
          1. 2004921: PLATE, CONNECTOR, INDICATOR, ALARM, AGC DSKY
      4. 2003948-011: CONNECTOR PLATE ASSY, FRONT HOUSING, AGC DSKY
    4. 2004739-001==>2004929-001: COVER, FRONT, AGC DSKY
    5. 1006387-003: INDICATOR, ALARM, SPECIFICATION CONTROL DRAWING
    6. 1006315-001: INDICATOR, DIGITAL, ELECTROLUMINESCENT, SPECIFICATION CONTROL DRAWING

    In bold are the individual parts that need to be modeled to create the assembly.

  • Material Gathering

    M.daSilva08/28/2020 at 21:07 0 comments

    When I started the project, I looked at various designs of DSKY replicas, including:

    • Open DSKY: a functioning replica, that uses 7-segment displays, LEDS and tactile switches. The overall design resembles the original DSKY while still being a mono-block unit;
    • 50th Anniversary DSKY: a completely functioning replica, with LEDS and a LCD. The buttons are Cherry MX keys. Mechanically, it is gorgeous: milled aluminium, and the dimensions closely match the original (as everything is based from photographic analysis and measurement on real models).  However, the design files are closed source.

    I found other builds back then, but I can't remember which ones. One thing I could do was start from photographic models and try to match the features as much as possible, while making calculated guesses.

    One day, while browsing the VirtualAGC website and incredible details on the internals of the AGC and the DSKY, I came across the "Electrical and Mechanical" section. Thanks to the efforts that Ron (and his team) put into this, a lot of NARA (National Archives) SW Aperture Cards were scanned, which included the original MIT plans: mechanical dimensions, assembling diagrams, etc... For the most important parts of the DSKY! Eureka! I now have accurate dimensions.

    https://ia803003.us.archive.org/BookReader/BookReaderImages.php?zip=/17/items/apertureCardBox459NARASW_images/apertureCardBox459NARASW_jp2.zip&file=apertureCardBox459NARASW_jp2/apertureCardBox459NARASW_0993.jp2&id=apertureCardBox459NARASW_images&scale=4&rotate=0

    ...Which are in 2D. Off to create CAD models out of those!

View all 9 project logs

  • 1
    Print all the parts

    Print all the STL files available on the Github Repository. I highly recommend starting by the front housing 2004968E, as it is the one you'll have to work on the most (cleanup and inserts). Some parts will require using supports. A brim is very helpful too!

  • 2
    Press or heat fit the inserts in the parts

    Use your preferred method to get all those inserts in. Don't forget to add support to the backside of the part if you're press-fitting the inserts.

  • 3
    Wire the keyboard

    Push all the Cherry MX keys in, then solder them in the following matrix arrangement (you can wire it in other patterns, but you'll have to change the Arduino code).

View all 9 instructions

Enjoy this project?

Share

Discussions

rjscott03 wrote 09/16/2022 at 02:07 point

Hi im curious as to what connector you used? Im currently in the planning phase and would like to set up a BOM.

  Are you sure? yes | no

noah thayer wrote 03/06/2022 at 20:57 point

Question for you,

I am stuck on the Arduino code for the display. I keep getting an error that says 

'class Nextion' has no member named 'init'.

I think there is an issue with the Nextion.h library not having the command "myNextion.init()". is there an old version of the Nextion library that was used? any help would be appreciated.

  Are you sure? yes | no

Bernd.J wrote 12/20/2021 at 21:03 point

Good Afternoon,

first off: Thx a lot for this amazing work! 

I'm in the process of building the DSKY cause it's cool and later on I'd like to control a robot-arm that I've build a while ago, using the DSKY. However, right now I'm having a rather trivial problem: I can't find the "2004699(000 and 001): alarm and display covers" STL files anywhere. Not on the github repo nor elsewhere. Am I too blind??? Can somebody point me to it?

cheers

Bernd

  Are you sure? yes | no

dotslash wrote 05/26/2021 at 16:35 point

Hey mate,

I am currently on the keycaps, some have little isles in the letters in them. In your logs you have this pic https://cdn.hackaday.io/images/1161821598701090888.jpg

How exactly do you do there? Is this some kind of glue tape?

Are those keys hollow when you stick them together like this?

https://cdn.hackaday.io/images/9565741598695552597.jpg

  Are you sure? yes | no

dombeef wrote 04/25/2021 at 19:30 point

Hey, I'm pretty far along and am working on attaching the raspberry pi to the displays + keyboard, do you mind sharing your modified pyDSKY2.py script? It's not in the github repo unfortunately. Thanks for all your help!

Plus here's how my version looks so far ;^) https://i.imgur.com/yxO7qVI.jpg

  Are you sure? yes | no

M.daSilva wrote 04/28/2021 at 11:22 point

It looks amazing! My script is up now, on Github :)

  Are you sure? yes | no

dotslash wrote 03/02/2021 at 21:46 point

any update?

Thanks!

  Are you sure? yes | no

M.daSilva wrote 03/03/2021 at 12:15 point

Yep, I just pushed everything on the Github :)

  Are you sure? yes | no

dotslash wrote 02/18/2021 at 09:43 point

Hi, 

I am pretty far now in the project. Would it be possible if you upload the keycaps? Then I could try to print them with FDM.

Thanks again for this AWESOME project.

  Are you sure? yes | no

M.daSilva wrote 02/18/2021 at 11:00 point

Hi! Congrats on moving along in the project! I'm still far from home and far from my personal computer (where the solidworks files are stores), but I'm coming back home tomorrow... You'll have them by the week-end!

  Are you sure? yes | no

garak wrote 01/23/2021 at 15:48 point

Hi, can you give some details of how you "talk" to the virtual AGC? You mentioned some phyton scripts that you modified.

I would like to try that approach. I basically have the DSKY, the nextion and the indicator panel running and would like to connect it to a raspberry pi instead of creating my own, fake AGC on an esp32 running micropython...

Cheers

Bernd

  Are you sure? yes | no

M.daSilva wrote 01/24/2021 at 10:56 point

Hey Bernd, I used the stock VirtualAGC program, with a slightly modified pyDSKY2.py python script (found in the VirtualAGC repository https://github.com/virtualagc/virtualagc/blob/master/piPeripheral/piDSKY2.py ). This scripts acts as yaDSKY, and connects to virtualAGC via a TCP port, parsing the display's content and sending the keypresses back.
I added a routine that writes to a serial port (where I connected the Arduino managing the display and indicator lights)... I don't have my main PC here sadly, I can't send it over to you right now. Even if I could, I strongly suggest using a more streamlined approach (e.g. connecting the nextion directly to the Rpi, and the status lights on the GPIOs). That will require a bit more work on the python script to talk to the display and manage the LEDs, but it'll be much faster.
Cheers,
Manoel

  Are you sure? yes | no

Vlad Mihailescu wrote 02/01/2021 at 21:13 point

Hello Manoel,

I have too started building a DSKY unit and I want to follow your advice and use the RPi instead of Arduino for a more streamlined approach. I modified your UI for the 272x480 display of the 4.3" display and would like to ask you for advice on modifying the piDSKY2.py file to write to the Nextion display. I know the script parses the data from the VirtualAGC so it's just a matter of sending that data to the display. I have the RPi talking to the display and after reading the piDSKY2.py file a few times I have a better grasp on what it does. In your opinion, what is the best approach into passing the values of the virtual display over to the Nextion? Should I go into all the methods in piDSKY2.py and edit them so when a change is made to the virtual display it passes that to the Nextion or is there a better way?  Any advice you can give me I will greatly appreciate.

Regards,

Vlad

  Are you sure? yes | no

dombeef wrote 12/27/2020 at 05:31 point

Hey, I'm looking to print this out, but I noticed that your github is missing a few files, notably the back case shell and the button keys. Is there any way you can update those missing files(even if I do have to edit the stp files!) so that I can fully print and assemble this for a scientific showcase for a school? Thanks a ton for all the work you've already put into it!

  Are you sure? yes | no

M.daSilva wrote 01/04/2021 at 17:09 point

Hi! Glad you like the project! I don't know how I managed to forget such important parts... The back case is on the Github now.
Regarding the keyboard, I can upload the keycaps, but I strongly suggest you look at @Stefan Köhler 's design which is much cleaner.
Please take some pictures of your version! I'd love to see it :)

  Are you sure? yes | no

dombeef wrote 01/06/2021 at 23:18 point

Thank you! I've actually already designed my own keycaps, and hope they'll print out fine once I get to that point of printing everything out. I've also redesigned a bit of it for ease of assembly + closer appearance to the original, hopefully it'll all work well :)

I'll gladly send over pics once I finish this up!

  Are you sure? yes | no

dombeef wrote 01/25/2021 at 19:25 point

I'm still working on the actual electronics/writing up my changes into a project on here, but here's the outside pretty much finished up as a sneak peak ;^) : https://i.imgur.com/yxO7qVI.jpg

  Are you sure? yes | no

Stefan Köhler wrote 12/10/2020 at 15:11 point

If you‘re looking for a font for the indicators: https://github.com/dakotafelder/open-gorton, and then I‘ve laminated the printout for a finer „finish“....

  Are you sure? yes | no

M.daSilva wrote 12/12/2020 at 10:02 point

Thanks! I used the fonts from this repo: https://github.com/ehdorrii/dsky-fonts and they're pretty realistic :)

  Are you sure? yes | no

Stefan Köhler wrote 11/29/2020 at 15:38 point

Hi guys,

What a cool project... started  „my“ DSKY already... maybe (as a complete newbee :surely! ) I‘ll come up with some questions sooner or later... For the time beeing any additional documentation is highly welcome... BR from Germany!

  Are you sure? yes | no

M.daSilva wrote 11/29/2020 at 15:57 point

Enjoy! If you have any questions, feel free to ask them. I don't have much more to write about now, but you'll see it here when I will :)

  Are you sure? yes | no

Stefan Köhler wrote 11/30/2020 at 20:42 point

Hi, may be an easy one: I bought the Nextion 4.3" Display Bildschirm 4,3 Zoll LCD Modul NX4827T043 TFT Touch Panel 480x272 and its far too big for the housing. Can you tell me which exact display model you have used?

  Are you sure? yes | no

M.daSilva wrote 11/30/2020 at 20:54 point

My bad, I made a mistake in the description! I bought the 4.3" version at first, but got to the same conclusion... I had to switch to the NX4832T035

  Are you sure? yes | no

Stefan Köhler wrote 12/10/2020 at 11:38 point

Hi, It would be nice if you give some "insight" in the indicator setup. Maybe a photo from the inside?  Have you, and if yes how, mounted the LED's? And also: Maybe I'm blind but I am missing the KeyCap File in GitHub.. Any idea where it could hide? Thx for your support!

  Are you sure? yes | no

M.daSilva wrote 12/12/2020 at 10:00 point

Hi Stefan, sadly I don't have access to it right now. But the LEDs are soldered to a basic perfboard, along with dropping resistors. The cables run through the back opening and are soldered to one of the Arduino Nanos. To avoid "bleed through" from the LEDs, I added the "Led_splitter" part (you can find it on the Github repo). Hope it helps!

  Are you sure? yes | no

Stefan Köhler wrote 12/14/2020 at 15:55 point

Hi Manoel, thx for the reply about the mounting of the LED‘s , yet another art I‘ll have to master ;-) My project is now already looking like a DSKY... I‘ve redesigned the Frontplate for the Nextion in Fusion 360 (first time worked with it) since in my printout the gaps between the DSKY Front and the Display are too big. After I‘ve done that I appreciate your effort even more! Any news on the keycap-file?

  Are you sure? yes | no

Stefan Köhler wrote 12/16/2020 at 11:56 point

Hi Manoel, just created a project here https://hackaday.io/project/176363-rebuilding-mechanically-accurate-apollo-dsky ... Having lots of fun and thanks again for sharing your stuff!

  Are you sure? yes | no

Stefan Köhler wrote 12/30/2020 at 22:20 point

Hi Manoel, here is another question: What library for the nextion.h do you use in the dsky_display.ino. I‘m struggeling to get the code compiled in VisualStudioCode and suspect a problem with the library there.  And since I’m thinking about on an alternative keyboard: Could you please put the „non-modified“ files for 2004968 also on Github? Thx in advance for your help.

  Are you sure? yes | no

M.daSilva wrote 01/04/2021 at 16:55 point

PM sent!

  Are you sure? yes | no

dotslash wrote 10/08/2020 at 10:52 point

Hey there,

I am in the process of building this.

It would really help if you could make a model of all pieces attached to each other and if this should be in grey or black PLA. You could write this in the file name. What are your print settings? Do you have some special infill like honeycombs?

I bought some cheap threaded insert hakko adapters on amazon that work great.

If you don't find a good replacements for the keys, I have access to a good lasercutter and a cheap CNC called MPCNC so I could send you some parts. Also I could make gerber files for the PCBs if there isn't any better solution.

I also have access to a big industrial tormach cnc, but using this is not cheap.

Really love your work. I want to make this as a gift for someone and would help you with the documentation.

  Are you sure? yes | no

M.daSilva wrote 10/08/2020 at 11:11 point

Hey, glad to know you're making it! I also really appreciate your offer! If you want, you can add documentation on the GitHub and make a PR, I'll gladly accept it :)

I have an assembly file somewhere, I'll dig it up
The file name follow a convention we set during the first steps of 3D modelling, and for the sake of having a coherent naming scheme (related to the original parts), I can't rename it... However, the color scheme is straightforward: I printed everything in Grey (ICE Filament's "Gentle Grey"), apart from the main housing, keys and LCD bezel which are in black. Print settings aren't that special: I tried to avoid supports as much as I could, square infill.

I'll look into the insert adapters, I'll probably find one for my Weller, thanks for the tip! (pun intended)

Thank you for the offer about the keys! I might have found a way to print it by making a white base, pausing the print then switching the filament. Still got a few tries to make it right, the backlighting is still getting through the rest of the frame, not only through the white parts. 

  Are you sure? yes | no

dotslash wrote 10/09/2020 at 10:47 point

100% infill or less?

  Are you sure? yes | no

M.daSilva wrote 10/09/2020 at 11:20 point

I used 50% or less. To be honest, some parts are so thin that it doesn't really matter at this point

  Are you sure? yes | no

M.daSilva wrote 10/08/2020 at 11:00 point

That's really cool! I almost made the same design, I'll try to send a few pics tonight :)

BTW, how did you make the display?

  Are you sure? yes | no

garak wrote 01/24/2021 at 10:24 point

The Display is a nextion 4.3". I had to modify the casing for that. I shared the design Files with Stefan Köhler. It is a Fusion 360 Project.

  Are you sure? yes | no

Stefan Köhler wrote 12/26/2020 at 10:11 point

Hi, very impressive: any chance you share your design files? And I‘m also curious about your Display... 

  Are you sure? yes | no

dotslash wrote 09/28/2020 at 13:19 point

Hi, I would love to print this.

However, I can only find 

2004968E-ModFor3DPrint.STL

in your github repo. Could you tell me where I could find the rest? 

Thank you :)

  Are you sure? yes | no

M.daSilva wrote 09/28/2020 at 15:22 point

Hey, my bad, forgot some files... You should all find them now on the Github repo :)

  Are you sure? yes | no

Starhawk wrote 09/16/2020 at 19:04 point

Two words: Fran Blanche ;)

  Are you sure? yes | no

M.daSilva wrote 09/16/2020 at 19:09 point

Her videos actually helped me figure out how some of the parts went together ;)

  Are you sure? yes | no

Starhawk wrote 09/16/2020 at 19:24 point

You ought to contact her and see if she can tell you the proper color of the LCD ;) I gather it's not the same as modern EL nightlight stuff, never mind the usual green LEDs... I kind of want to know myself.

  Are you sure? yes | no

M.daSilva wrote 09/17/2020 at 05:38 point

She didn't turn on the DSKY she tore down. However, the exact color of the display is referenced by Specification Control Drawing 1006315 (see  https://archive.org/stream/apertureCardBox439Part2NARASW_images#page/n222/mode/1up ). The light output wavelength is referenced at 5300 Angstroms, which is a lime-ish green.

However, I did reach out to her for close-up pictures of the buttons, but she didn't have any other pics :)

  Are you sure? yes | no

Tom Nardi wrote 08/30/2020 at 06:25 point

An Apollo DSKY with Cherry MX Blue switches is one of those things I'd never even  considered before...but now must have if my life is ever to be complete.

  Are you sure? yes | no

M.daSilva wrote 08/31/2020 at 16:31 point

The clickyness is pretty nice... But I'm now working on replicating the exact switch used inside the original. It uses a microswitch, along with a small EL panel to illuminate the "keycap". An engineering marvel!

  Are you sure? yes | no

Queadlunn wrote 09/17/2020 at 05:22 point

Would you be willing to release your print file for the keyswitch plate? I've been poking at a DSKY using box jade switches but haven't been able to get it right...

  Are you sure? yes | no

M.daSilva wrote 09/17/2020 at 05:24 point

Hey! My bad, I forgot to upload this file to my Github, it's going to be fixed in a few minutes :)

  Are you sure? yes | no

Bharbour wrote 08/29/2020 at 20:50 point

This is very cool! Nice job!

  Are you sure? yes | no

M.daSilva wrote 08/31/2020 at 16:30 point

Thank you! I'm very happy with the first version, but I hope to revisit it this yearè

  Are you sure? yes | no

Similar Projects

Does this project spark your interest?

Become a member to follow this project and never miss any updates