Close
0%
0%

Clavemlux

Key Light with 3D printed frame powered by ESP32

Similar projects worth following
Clavemlux is a Key Light that can be built at home. It is enclosed by a 3D printed frame with sign white opaque acrylic and controlled by a ESP32

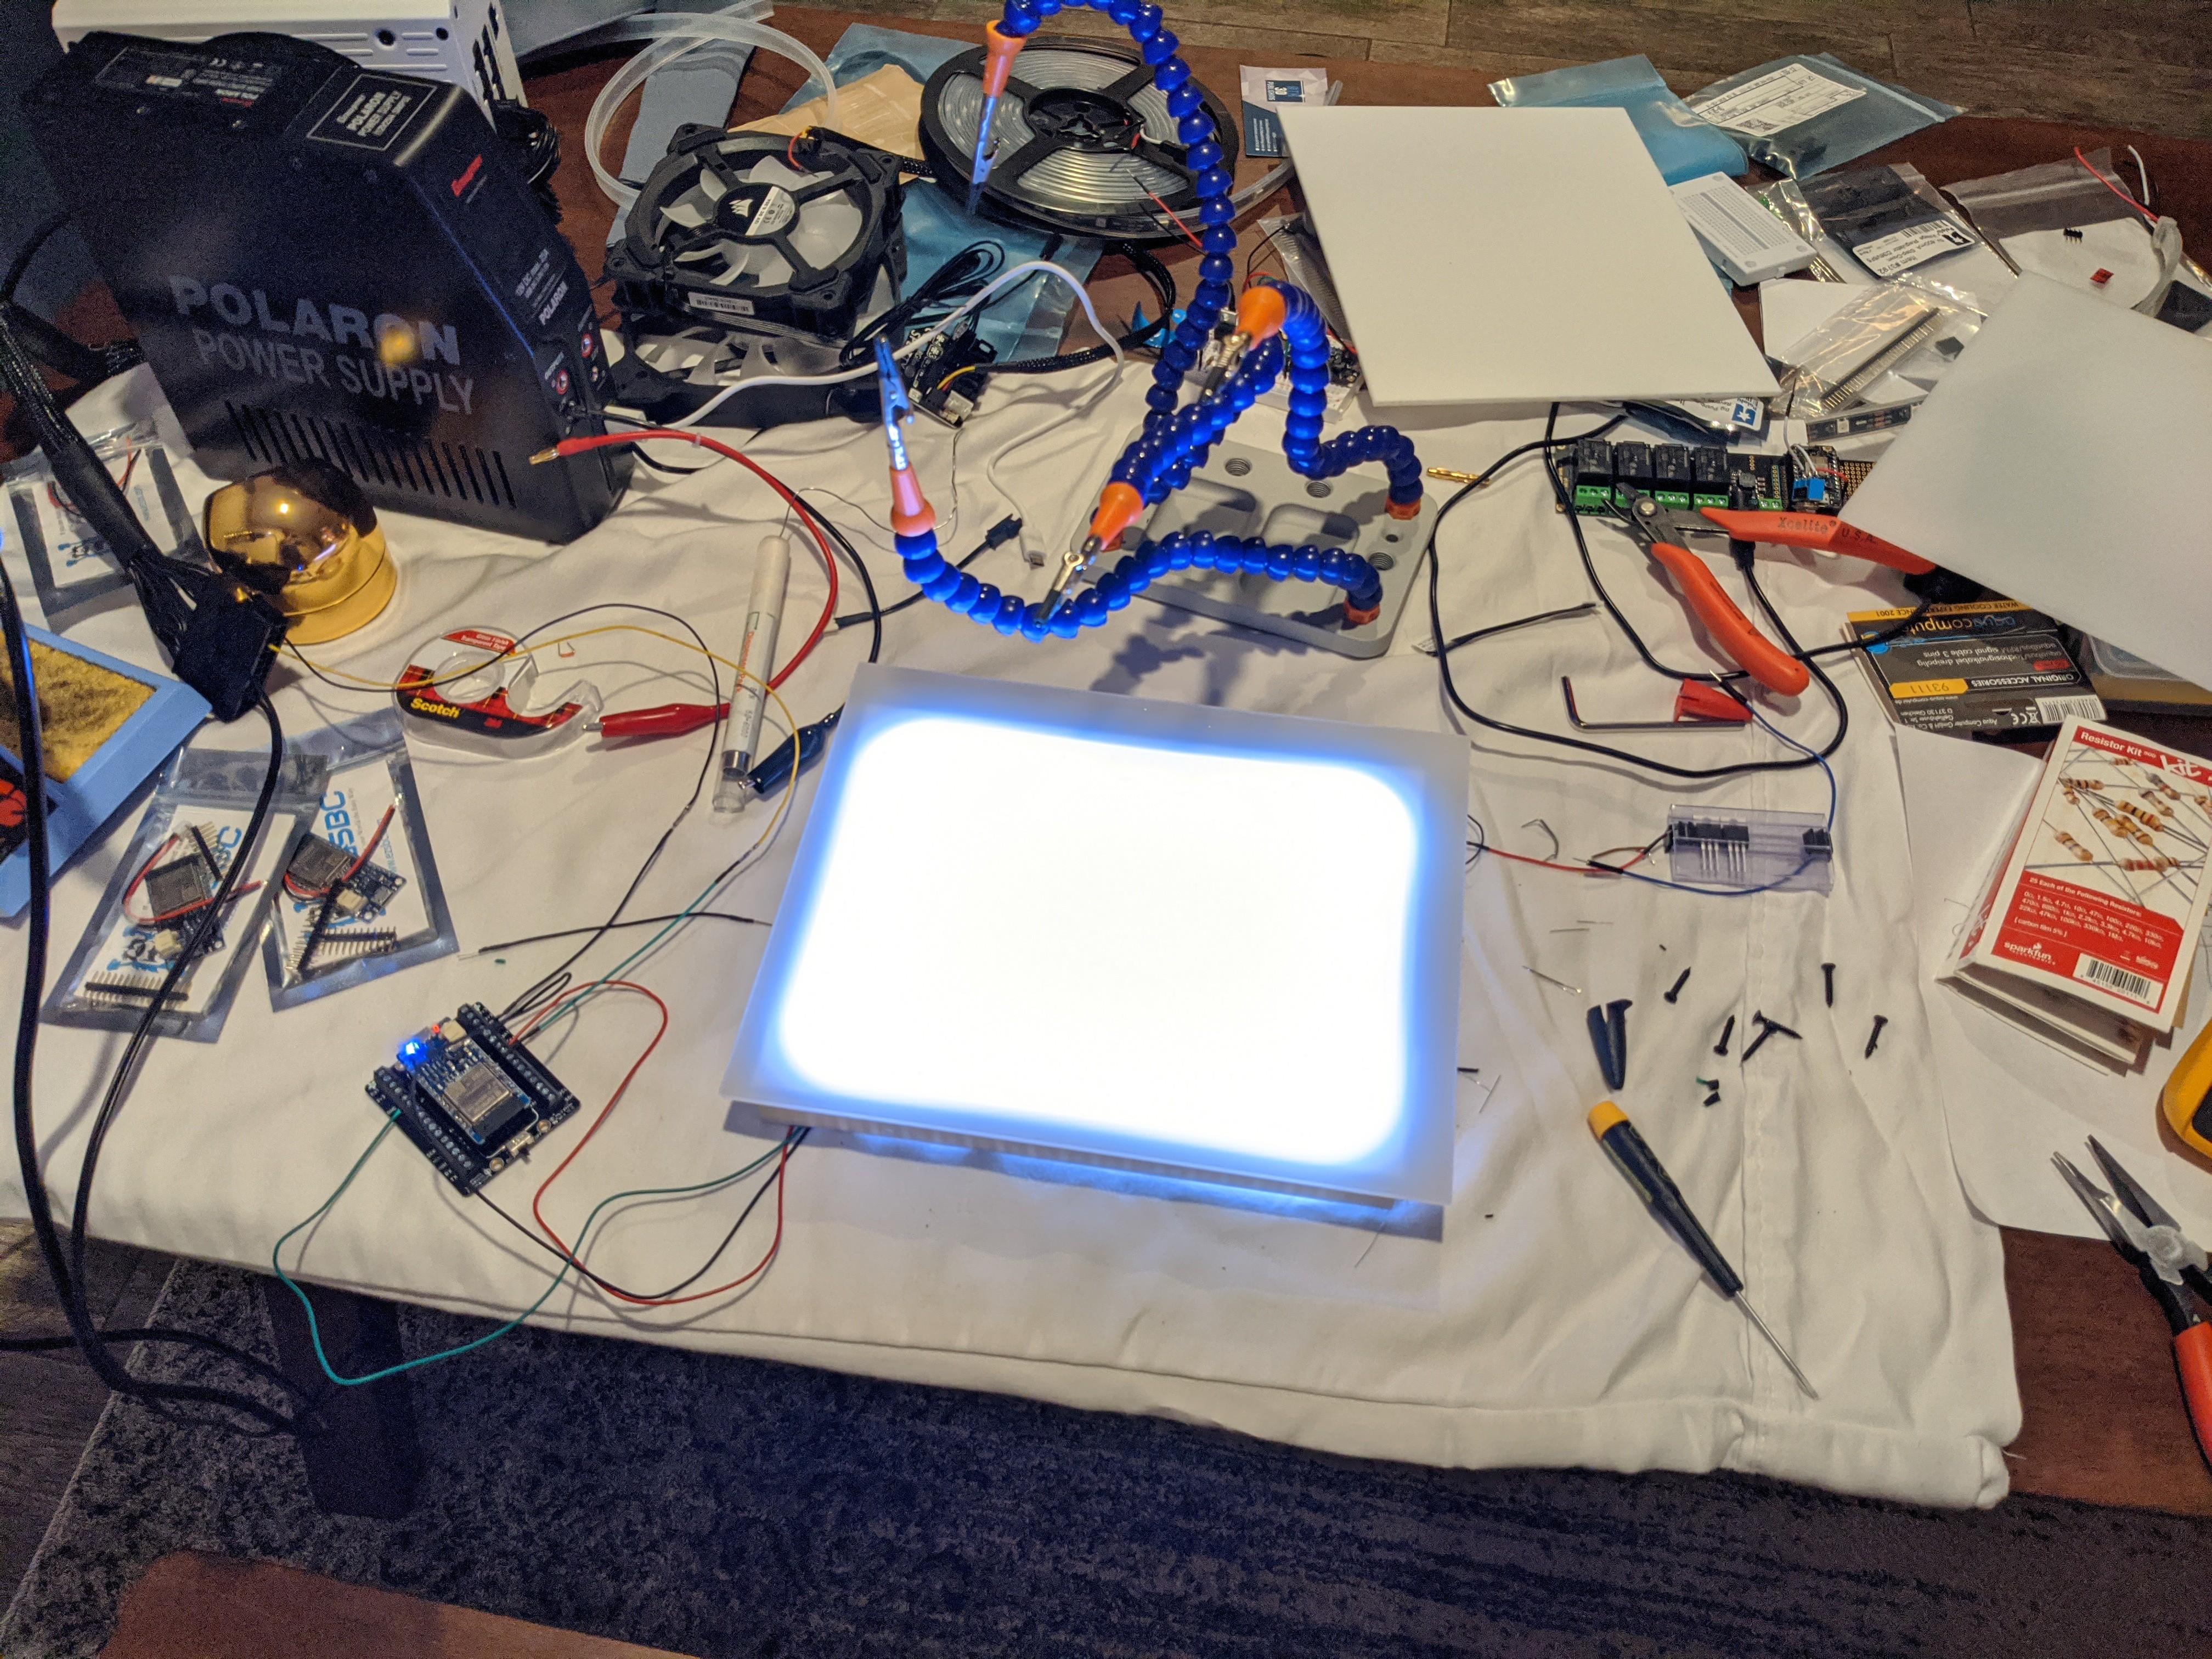
It is in the research phase and I am playing with different LED strips, panel opacity, sizes, power supplies, and other parts. I'm taking lots of notes from various other projects and videos.

The goals of the project:

  • A key light that is bright enough to fill out subject lighting of me and my face on camera.
  • Controllable over WiFi (will likely use ESP32 with ESPHome for control).
  • Lightweight enough to be mountable on 1/4 inch camera mounts and desk clamps.
  • Able to be powered on at a good brightness for long periods of time without overheating (maybe limiting output to 75% full).

  • 1 × 3D printed frame parts This will be the 3D printed frame pieces. Likely, a frame, front plate for holding the acrylic, back plate for enclosing the box, and another smaller cover for mounting the ESP32 and wiring.
  • 1 × Laser cut acrylic panel in "sign white" color This will be the piece allowing the light through. It should be opaque enough to let light through but keep the light uniform.
  • 2 × MOSFETs. Maybe IRLZ34NPBF or IRLB3813PBF.
  • 2 × 10k ohm resistor These will be for pulling the MOSFET gate low when no PWM signal.
  • 2 × 220 or 330 ohm resistor These will be between the ESP32 analog pins and MOSFET gate

View all 10 components

  • CRI, CCT, lm, W, V, and other acronyms!

    Andy Shinn09/05/2020 at 22:06 0 comments

    The beginning of my idea to build a key light akin to the Elgato Key Light. I don't necessarily think it can be done better or cheaper. But it should be fun to try. In the end I will gain a useful tool in lighting for my otherwise dark office space where I use my camera most. Hopefully, the project turns out well enough that you will want to build your own!

    I've ordered 3 different CCT LED strips to test brightness. I've also ordered some MOSFETs to build a simple circuit that can be PWM driven by a ESP32. The LED strips are all 12V but different watts per feet and lumens per watt. I've still got a lot of unanswered questions such as:

    • Voltage? Is it worth going 24V for a small amount of LEDs?
    • is 30 LED per meter good enough or should I look at 60 or even 120?
    • Unsure of the target lumens per watt and lumens per foot?
    • What power supply? Maybe a Mean Well APV-35-12 or 24?
    • The ESP32 will be 5V (USB) or 3.3V. A step down regulator like Pololu D36V6x or D24V10Fx?
    • What CRI should I target? What does it even mean?

    I ordered a simple 3D printed frame and some "sign white" 1/8 inch acrylic panels from TAP Plastics to test different opacities. I only had 5V RGB LED strip available to test and although the opacity looks OK. The LEDs are not nearly bright enough (the below image brightness was blown up a bit to show more how it looks to the naked eye).

    Hopefully, the 12V strips will look better and give me a chance to test max brightness, heat, power requirements, and frame sizing. My prototype drawing is a simple frame that can be printed and sandwich a panel between parts to hold it in place.

    The frame will likely need to be much larger so I can safely fit at least one 1/4 inch threaded insert somewhere for mounting. Undecided where the power supply, ESP32, and wiring will go.

View project log

Enjoy this project?

Share

Discussions

Andy Shinn wrote 04/21/2021 at 16:28 point

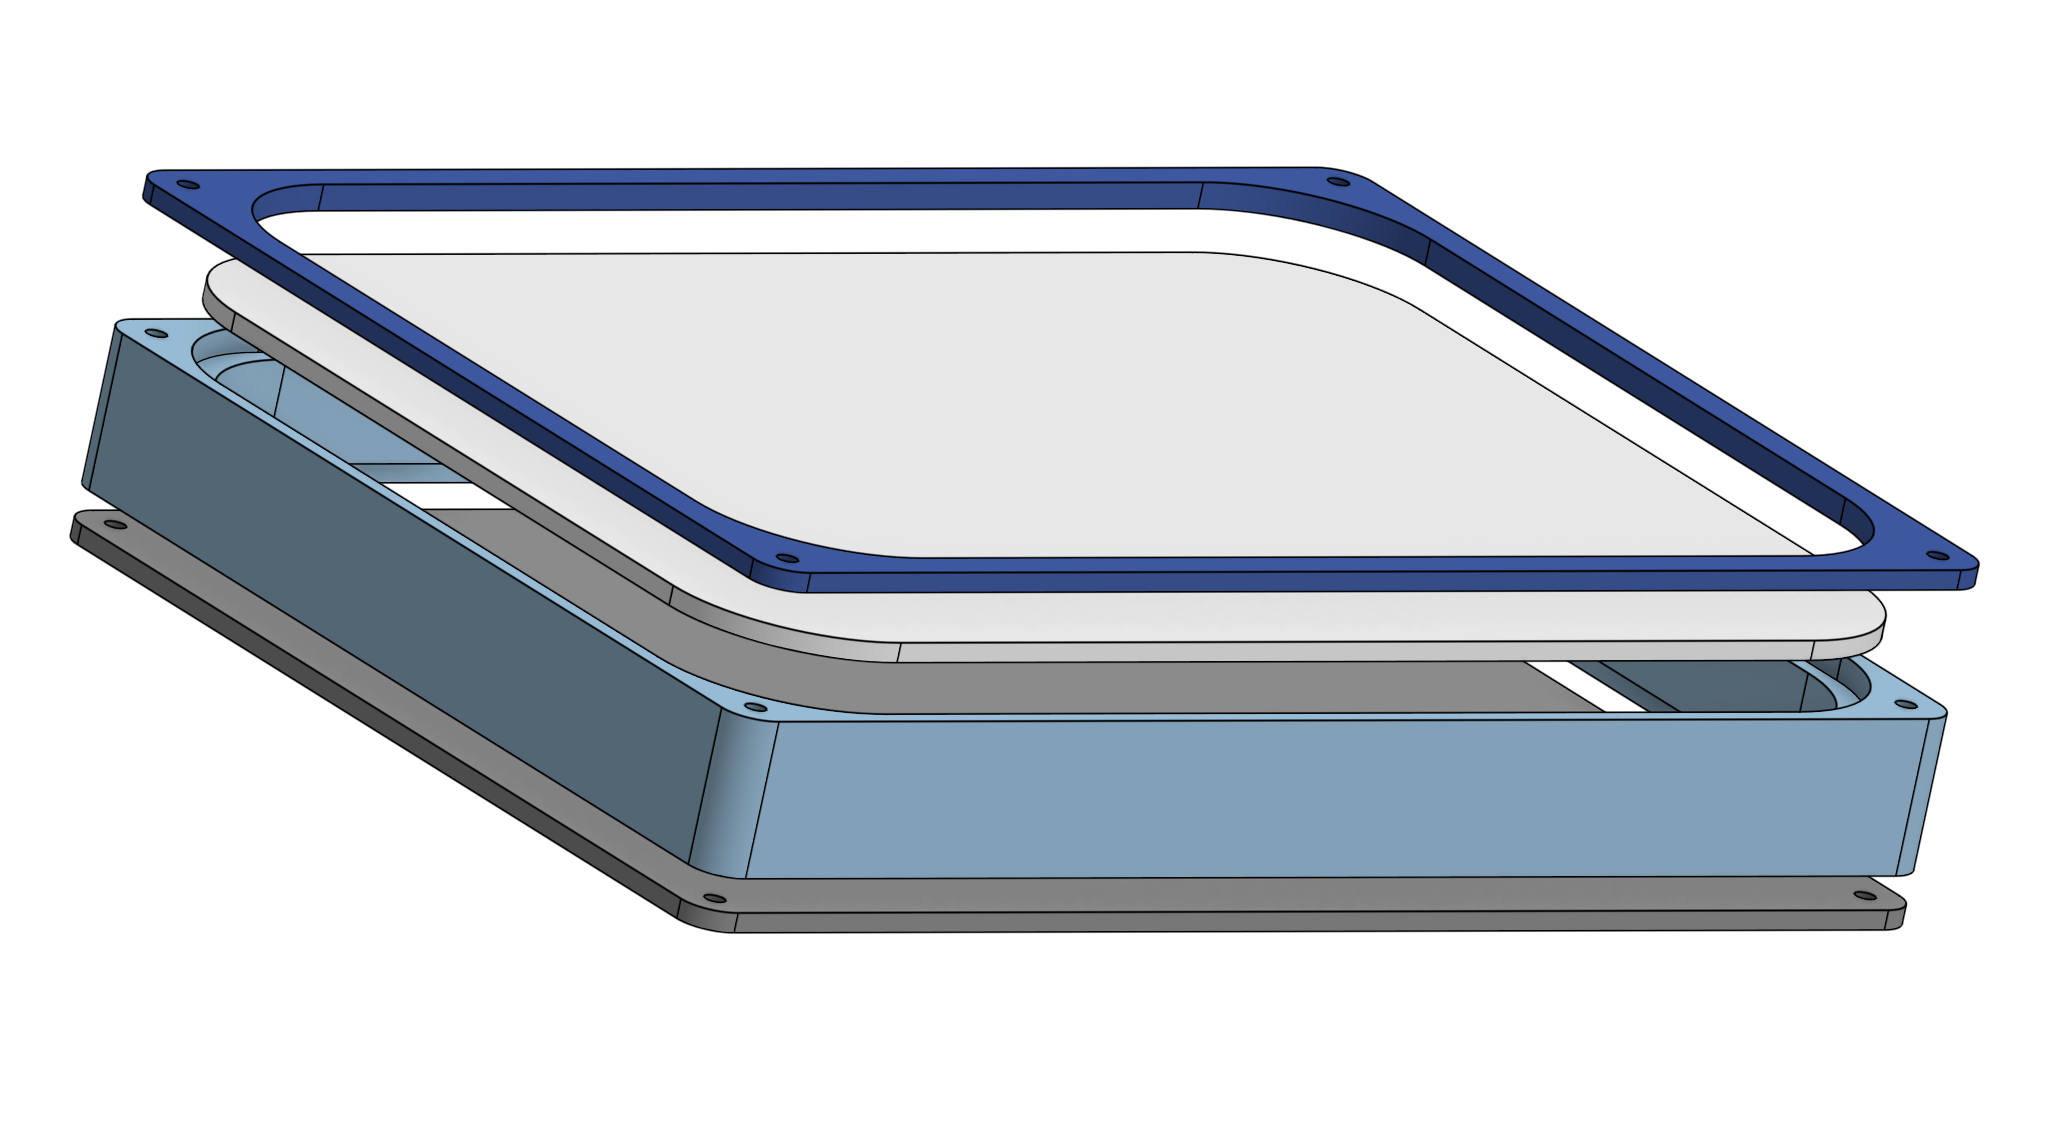
I'd love to continue this project at some point. But I've shelved it for now. I will probably revisit it when I learn some more about side-lighting panels. My testing didn't give me good enough light output through edge-lit acrylic.

  Are you sure? yes | no

Similar Projects

Does this project spark your interest?

Become a member to follow this project and never miss any updates