 Sir Michael II
How HUDs Work
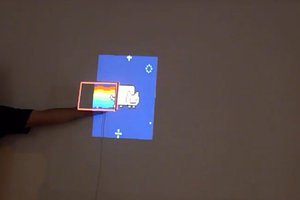
HUDs work by using a projector to project an image onto a calculated, curved glass surface, focusing the image projected onto it at infinity from the perspective of the viewer. This allows, for example, a pilot, to see speed, bank angle, altitude, heading, etc. seemingly projected onto the environment outside of the aircraft. Instead of having to shift his focus from outside the window to either an image projected onto the window or instruments on the dash, the information appears focused at the same distance as the environment, allowing simultaneous focus.
How This Projector Works
There are many different types of projectors, some types working wildly different from others. This one works by using a high-power LED to backlight a small, fair resolution color LCD. The bright image from this LCD is then shone through a convex lens, focusing the image. The trick here is having a high enough resolution LCD and a bright enough LED. As an image is magnified, it gets dimmer due to its photon density decreasing. If you have 100 cows on a one acre plot of land, the cows are tightly packed. One cow per 100th of an acre. Now, if you put those 100 cows on 1,000 acres of land, you have one cow per ten acres. The same applies here for photons. The image is magnified, therefore dimmer. This requires a much brighter image to begin with, to make up for the loss when magnified. To use a HUD in daylight, it must be incredibly bright. If our image is bright to begin with, and then the image is shrunk, it will be even brighter, like starting with the 1,000 acre plot of land with 100 cows. So, super bright image made brighter by shrinking. Long story short, Arduino Nano controls inputs and outputs to the LED and LCD. LED backlights the LCD, the image focusing through a convex lens, projecting onto a small piece of glass in this case, reflecting back into the user’s eye.
Why an LCD?
LCDs (Liquid Crystal Display) work by blocking light at different levels. If a given pixel is black, the LCD will block, to the best of its ability, all light passing through. If a given pixel is white, then it will allow all light to pass through. LCDs are fairly cheap nowadays, at least until one gets into the crazy-high resolution or large display area LCDs.
 alex
alex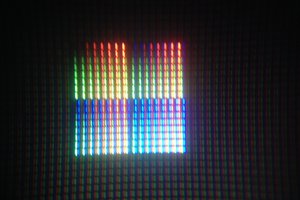
 alpha_ninja
 ashish_nr
 Cactus Robotics