 Christian
Framed Slides
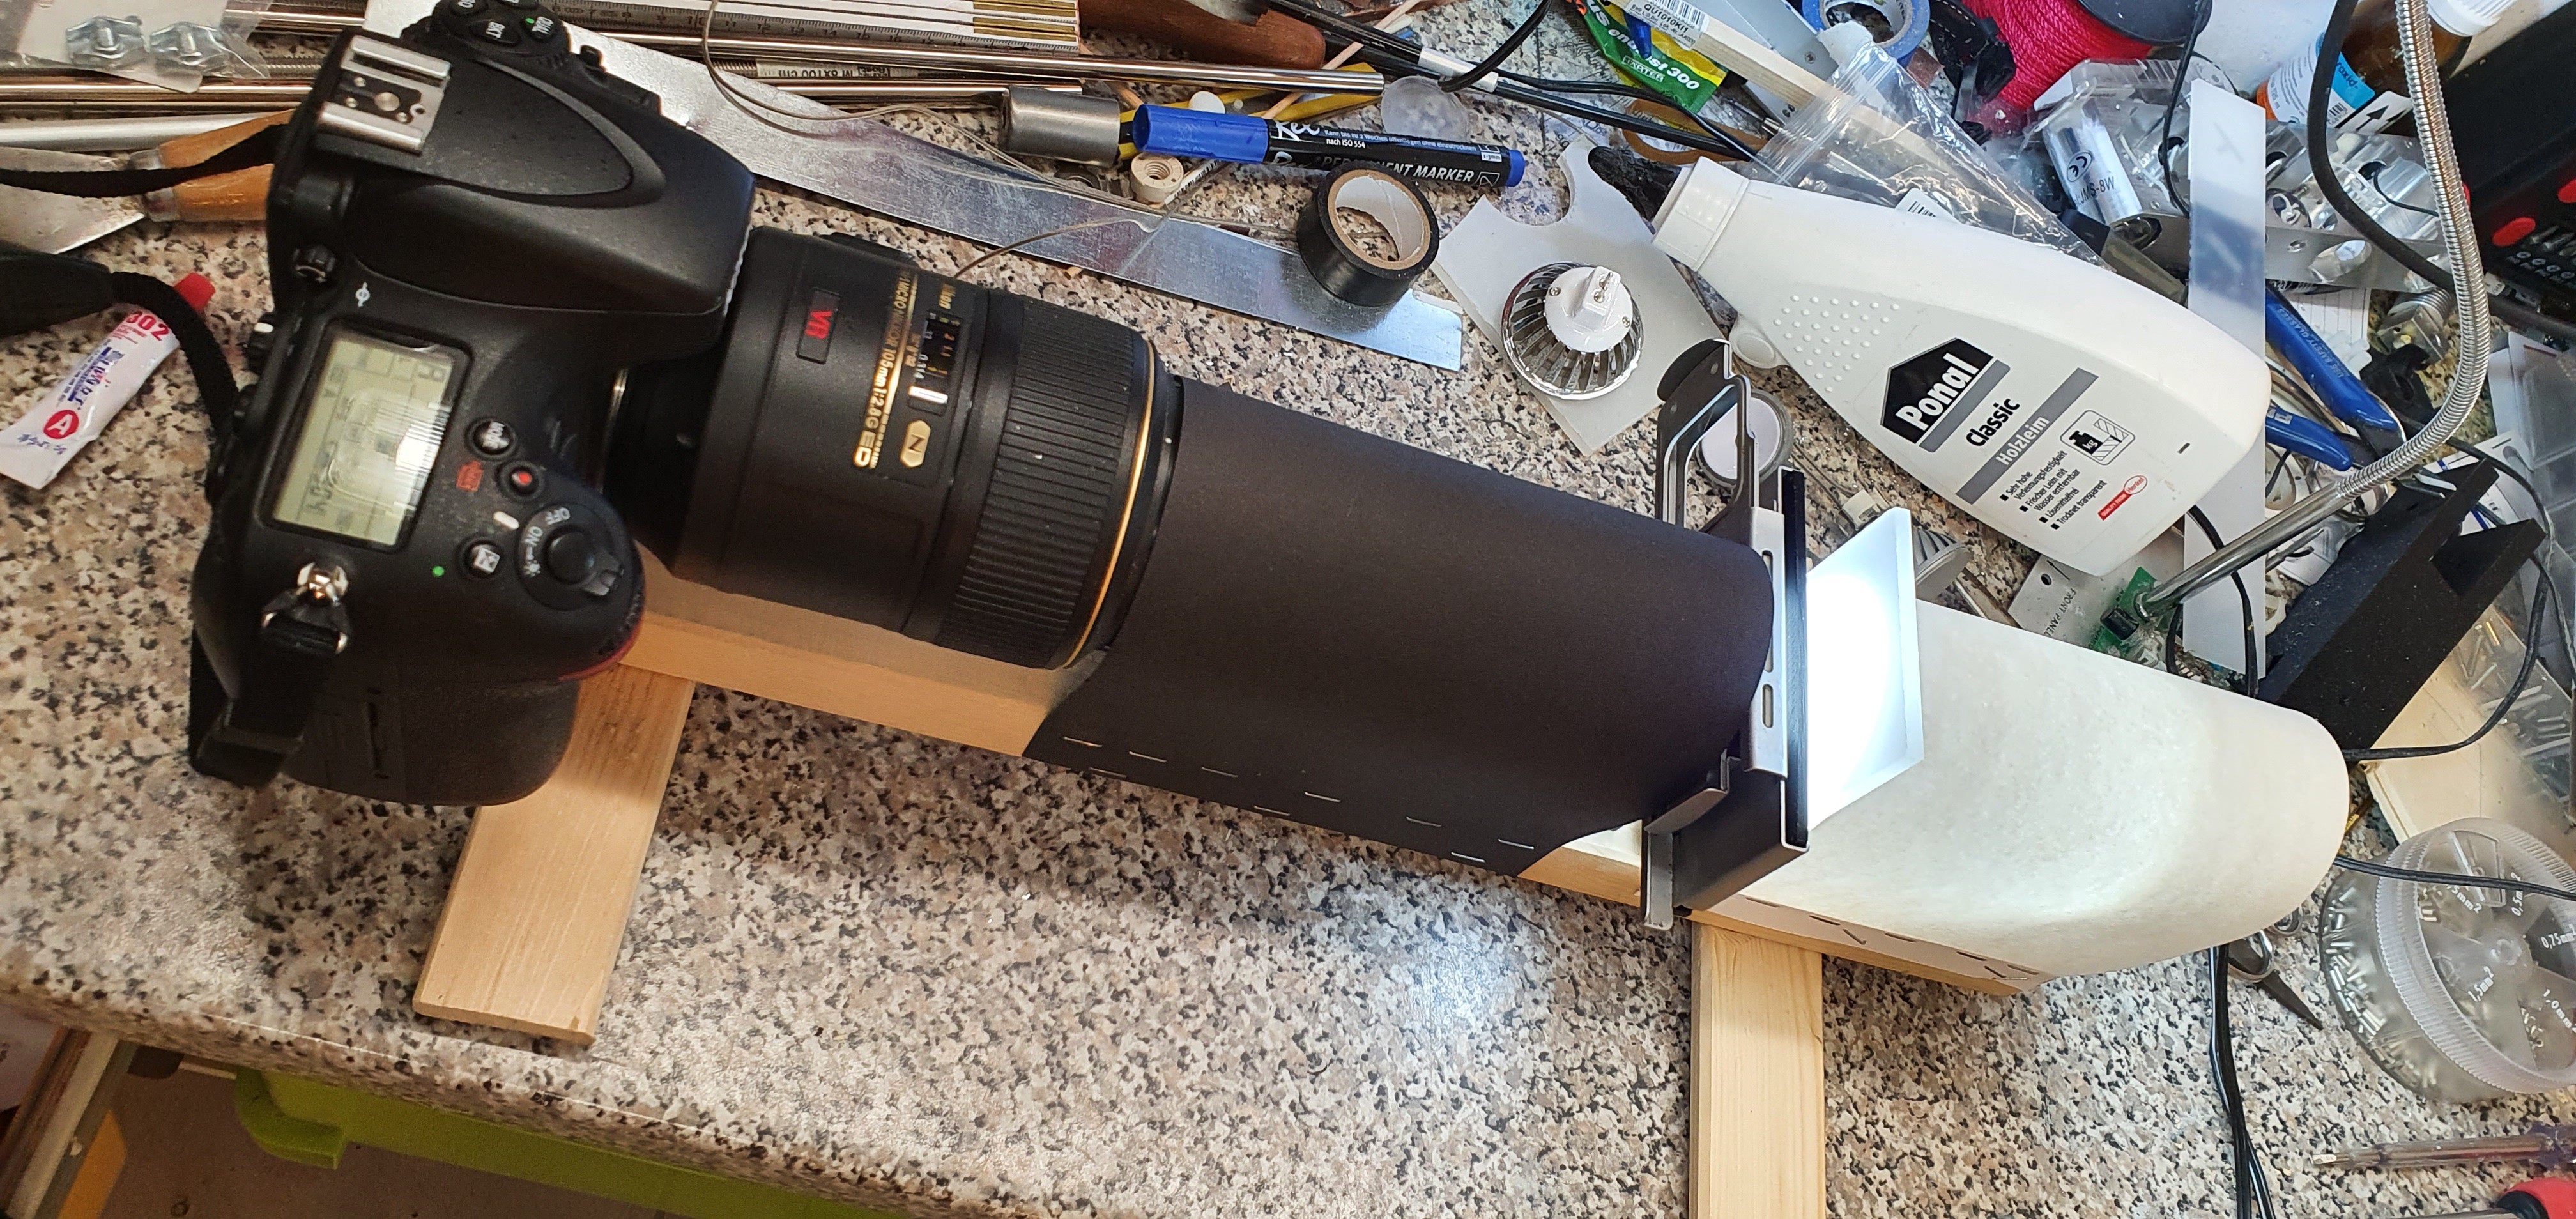
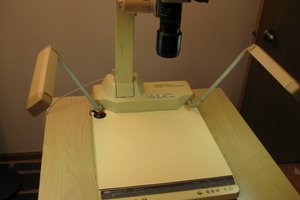
What should I write here? Hmm, it is a straight forward build. At first I thoght "Hey look a ebay for an optical bench" (perhaps I could use it for other things ... but then I saw how expensive these things are - and they have no hold for the camera or the slides.
So simple decision: look what is in the "used parts box" ;-)
- For mounting the DSLR: I have some spare quick-release adapters
- For the slides: The slide holder: I could simply use the one of the slide projector from my father
- Light source: There are some old ceiling lights I can disassemble
- From an old project I have some "optical plexiglas" left to get an even backlight for the slide
- The base: sawn of pieces of an IKEA Ivar shelve
- Shades: Black and white paper
The only new bought thing: The LED: 4W/6000K/CIR80/120°.
A test with slides >60 years old: Compared with the original slide, the result is nearly perfect :-D
35mm Film Negatives and Unframed Slides
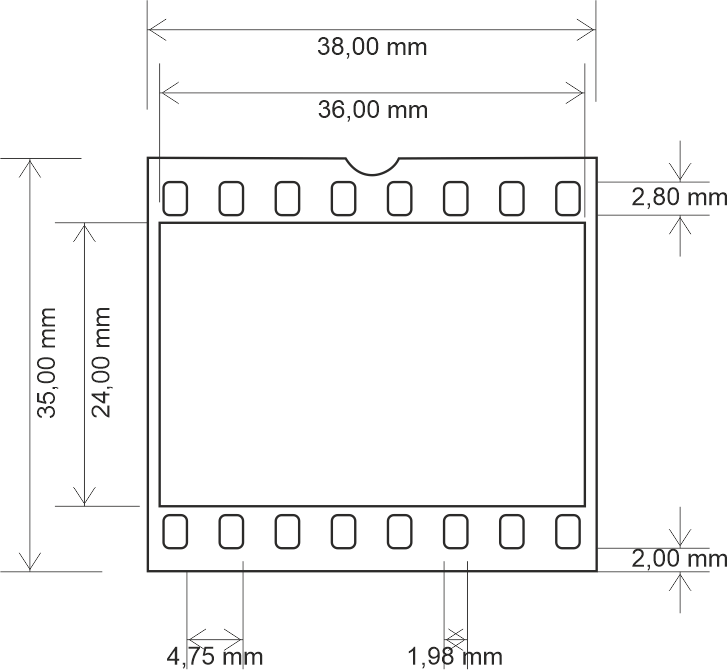
Without frames a holding must be build to hold the films in place, plain, waveless.
The first film holding was simply two Acryl glas pieces and tape. Worked - but hair and dust was "glued" to the Acryl ... next attempt was opening tinkercad and creating a simple holding including sprockets for the perforation. (measurement is shown below, STL attached). I did not add vertical separators for the images because the placement of the perforation (i.e. the sprockets in the camera) to the actual image is not defined and depends on the camera.
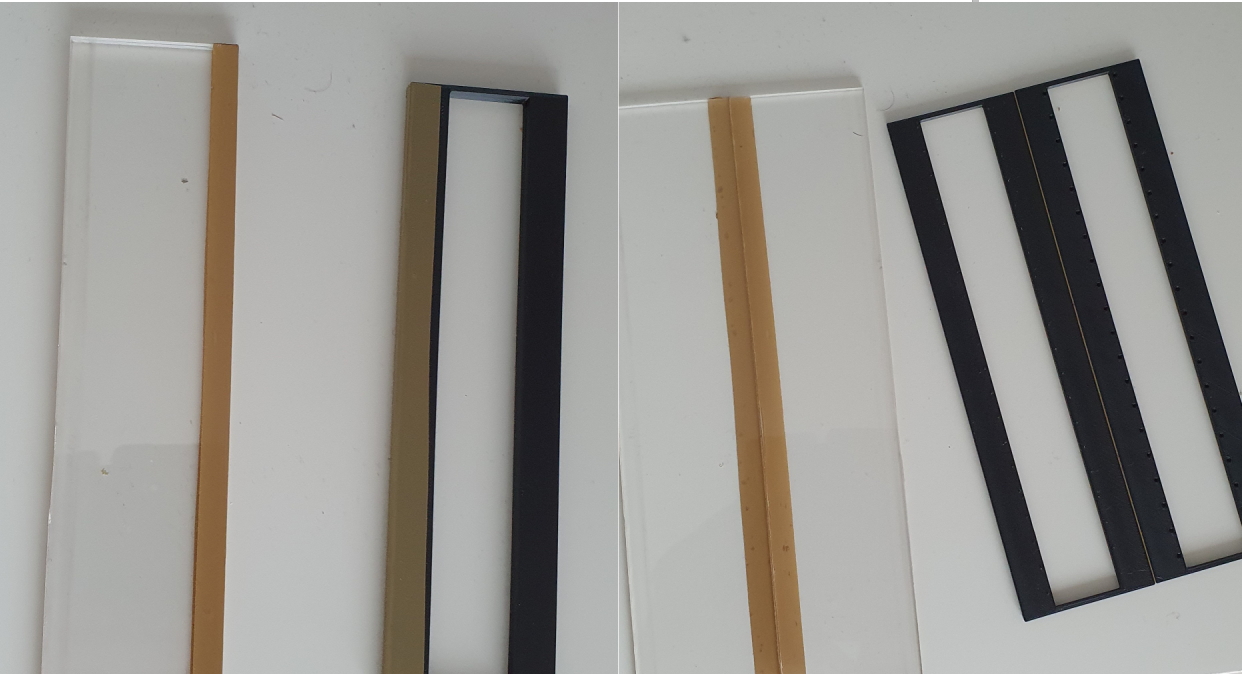
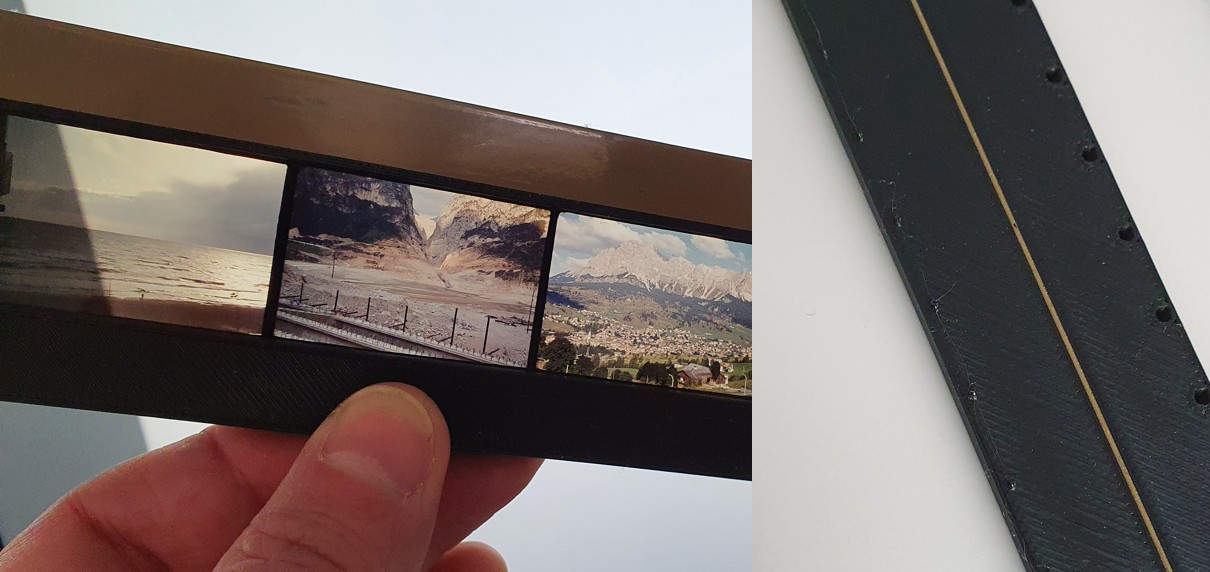
I removed the holding for the framed slides and clamped some metal stripes as flat springs to the base. This way the film holding is hold thight.
Converting the Negative Images to Positive Images
I found three different color film materials (and of course black and white):
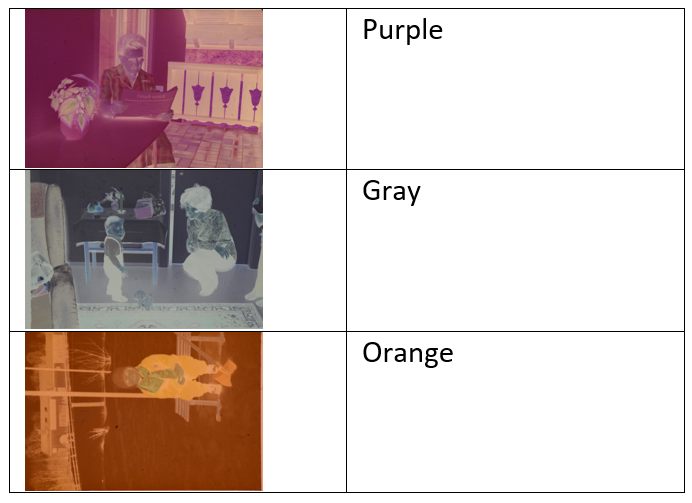
How do you convert these to positive images? imagemagick is your friend. Luckily someone already had figured out how to call convert to get the correct colored positive:
convert ${inputfile} \( -clone 0 -fill "rgb(${r},${g},${n})" -colorize 100% -negate \) -compose overlay -composite -negate -normalize ${outputfile}
The values for ${r},${g},${n} are fetched with your favorite drawing program (I use Corel PhotoPaint) with the pipette tool to measure the RGB values in a not exposed area of the film.
With a simple for loop all pictures of one film material can then be converted.
Side Note:
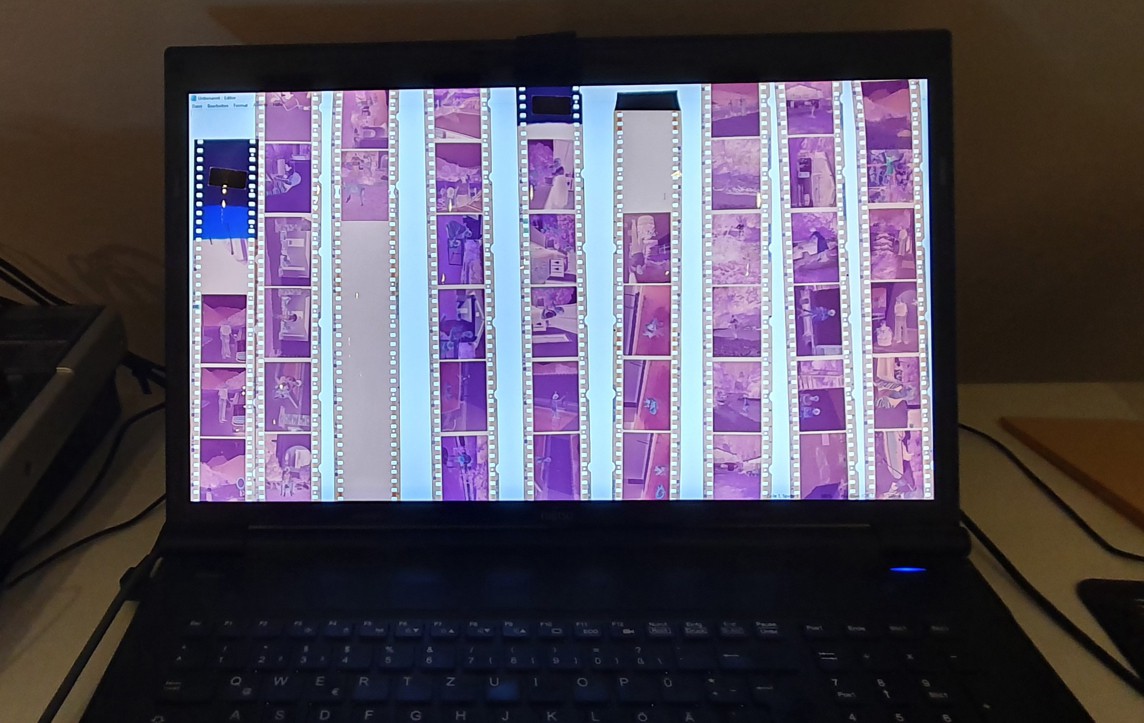
In my case it was not needed to digitize all negatives, to preselect the images, I simply use my notebook monitor as a "light table" (open a notepad with no content) and an app on my smartphone (Photo Negative Scanner by Appdictive).


 glebite
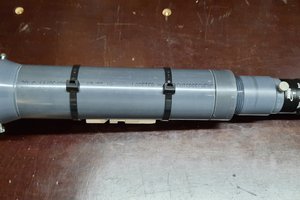
 Quinn
Quinn
 N. Christopher Perry
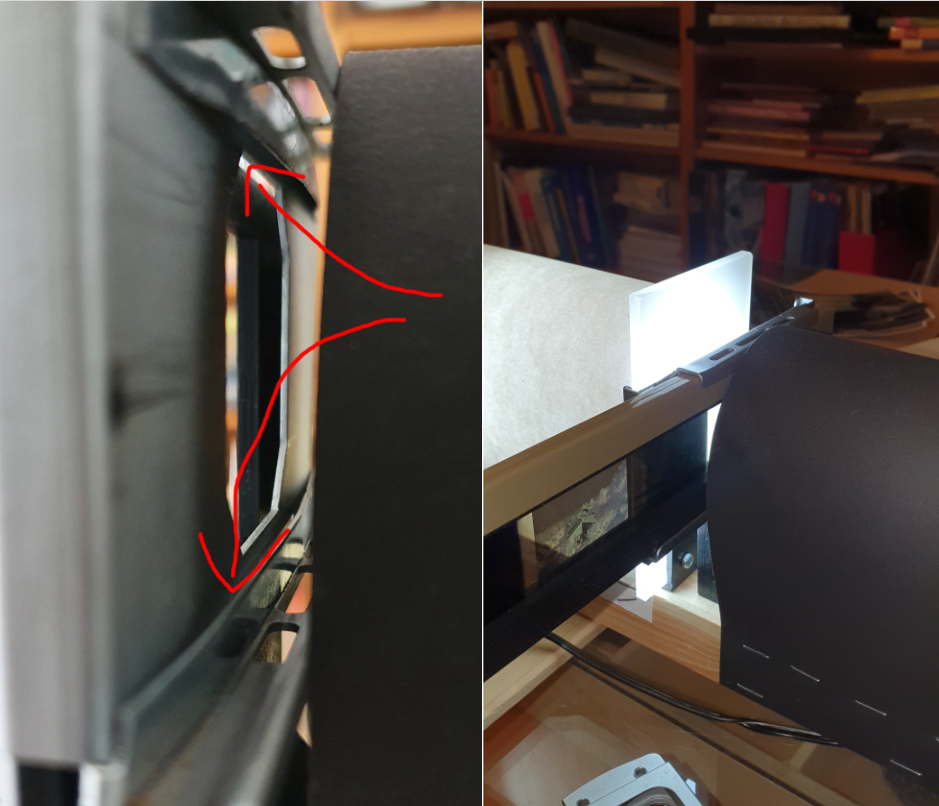
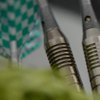
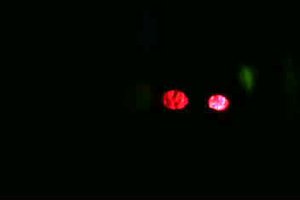
Slides are projected using a halogen light source - probably better than any LED. I did it a bit different: I used lighting light pipes to guide the internal flash of the camera around to the back of the slides. A 3d printed holder that slides into the hot shoe and holds two 5mm flexible fibres in front of the flash. (I had made this for macro photography illumination)