kutluhan_aktar
After fulfilling transferring information with the web application, if there is a new episode on release, I decided to use an Arduino Nano 33 IoT as the development board to collate data generated by the application. You can find more information below on how I sorted out the response transferred by the application by using a delimiter. And, to manage features and modes I implemented on the Nano 33 IoT, I designed a user interface (menu) with a Nokia 5110 Screen and pushbuttons.
Lastly, to get informed when a new episode of a show in my list on release with its opening song, I used a Serial MP3 Player Module (OPEN-SMART) due to its simple-to-use UART command list. Furthermore, it let me add the MP3 Player mode to play all opening songs, which turned the device into an intriguing accessory for my room :)
After completing my design on a breadboard and testing the code, I designed a PCB (TV Series / Anime Release Date Notifier) with a unique retro telephone shape to create a brand-new looking and easy-to-use device.
Huge thanks to JLCPCB for sponsoring this project.

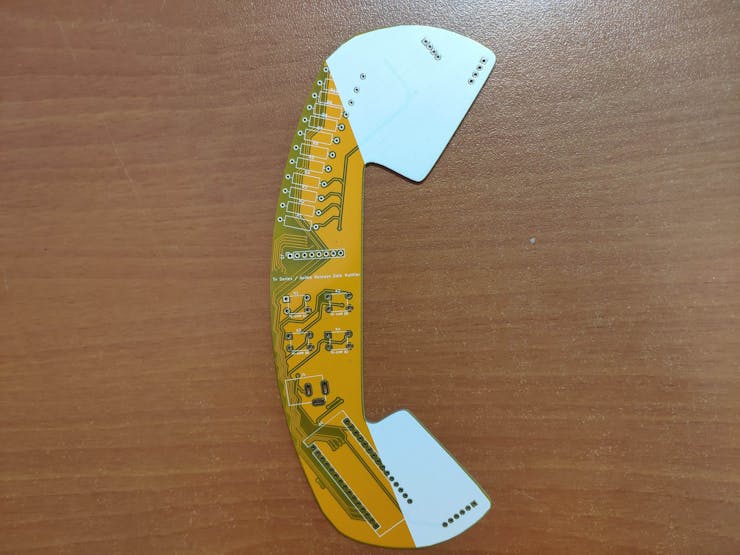
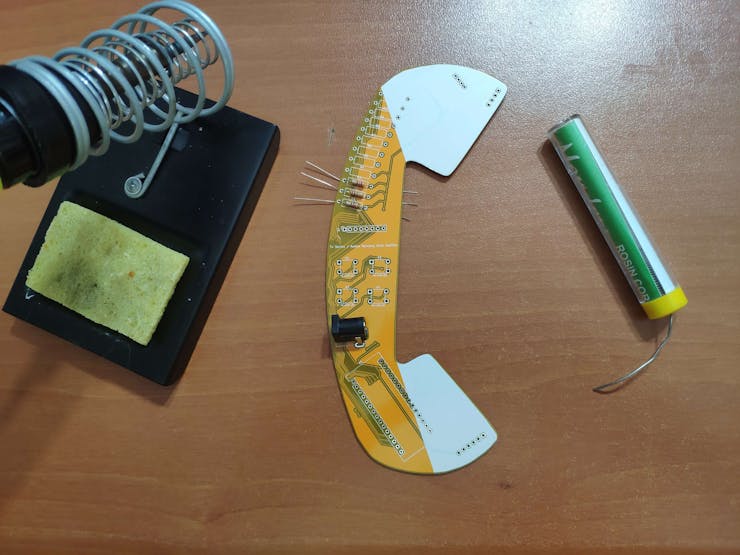
Step 1: Designing and Soldering the TV Series / Anime Release Date Notifier PCB
I designed the TV Series / Anime Release Date Notifier PCB by using KiCad. I attached the Gerber file of the PCB below, so if you want, you can order this PCB from JLCPCB to replicate this project to get notified when there are new episodes of your favorite shows on release :)
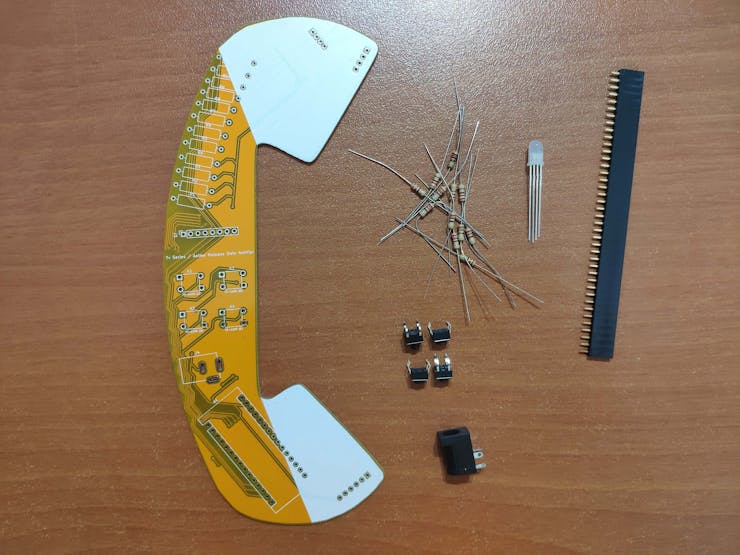
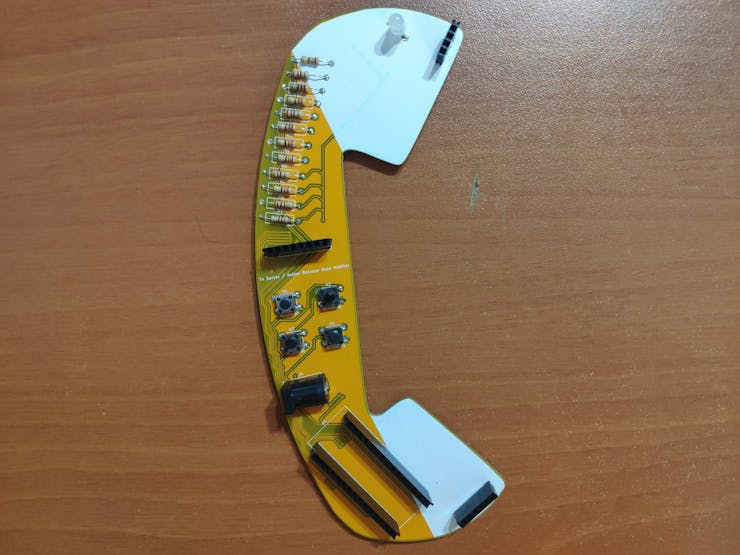
First of all, by using a soldering iron, I attached headers, pushbuttons, 220Ω resistors, the power jack, 5mm Anode RGB LED.
Component list on the PCB:
A1 (Headers for Arduino Nano 33 IoT)
J1 (Headers for Serial MP3 Player)
J2 (Headers for DS3231 - Not Required)
J3 (Headers for Nokia 5110 Screen)
J4 (Power Jack)
D1 (5mm Anode RGB LED)
K1, K2, K3, K4 (Pushbuttons)
R1, R2, R3, R4, R5, R6, R7, R8, R9, R10, R11, R12 (220Ω resistors)
Step 2: Setting up a LAMP web server with MariaDB on Raspberry Pi
If you are a novice in programming with Raspberry Pi, you can inspect well-explained instructions and tutorials on the official Raspberry Pi website.
To go to the official Raspberry Pi setting up tutorial, click here.
- Open a terminal window by selecting Accessories > Terminal from the menu.
- Install the apache2 package by typing the following command into the terminal and pressing Enter:
sudo apt-get install apache2 -y

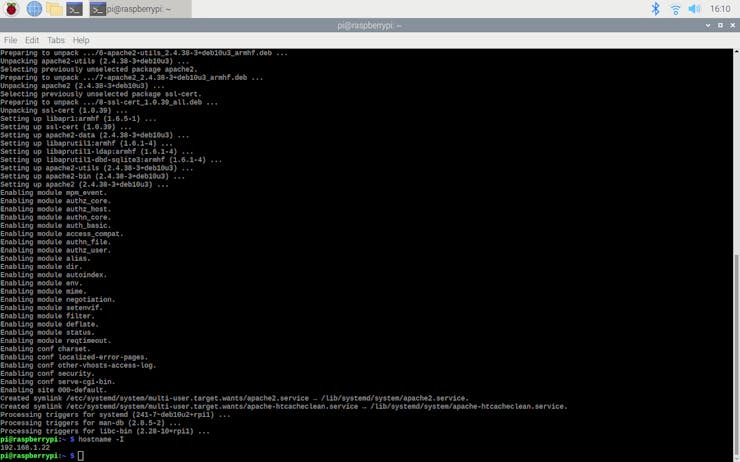
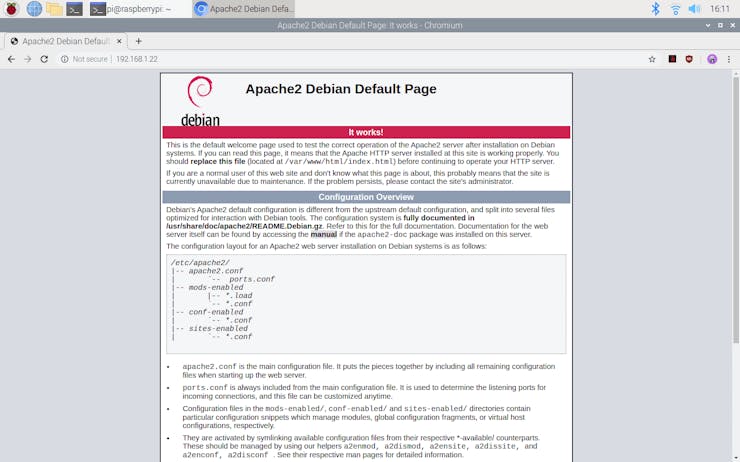
- To test the server, open Chromium by selecting Internet > Chromium Web Browser from the menu and enter http://localhost.
- If you want, you can use the IP address of your Raspberry Pi as well.
hostname -I
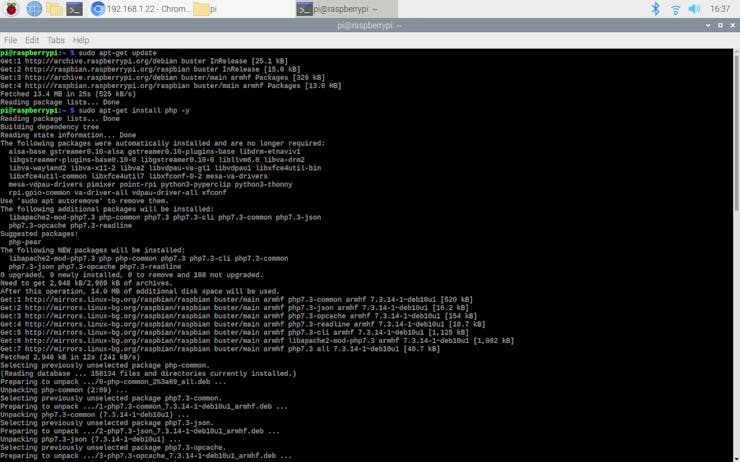
- Install the PHP package with the following command:
- Do not forget to update the Pi.
sudo apt-get update
sudo apt-get install php -y
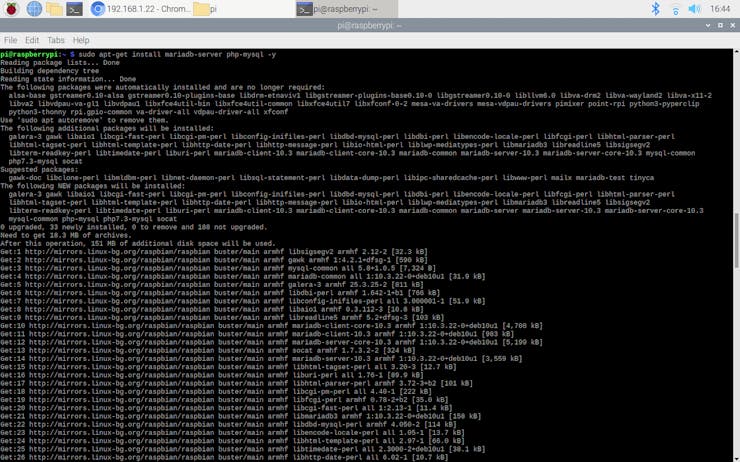
- Install the MySQL Server (MariaDB) and PHP-MySQL packages by entering the following command into the terminal window:
sudo apt-get install mariadb-server php-mysql -y
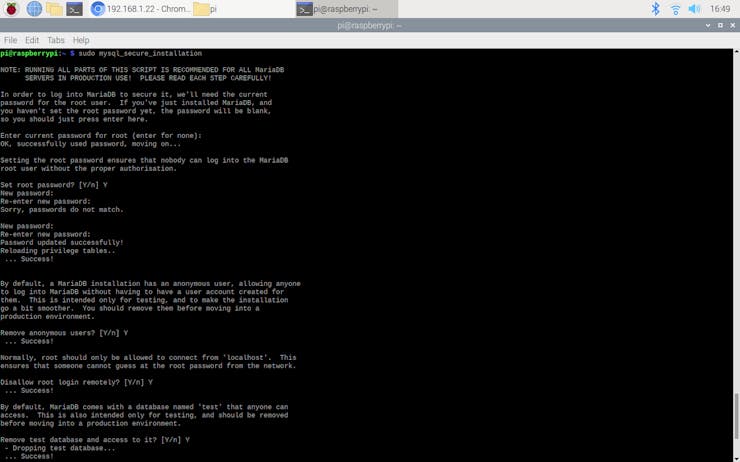
- To create a new user, run the MySQL secure installation command in the terminal window.
sudo mysql_secure_installation
- You will be asked Enter current password for root (enter for none): — press Enter.
- Type in Y and press Enter to Set root password.
- Type in bot at the New password: prompt, and press Enter.
- Type in Y to Remove anonymous users.
- Type in Y to Disallow root login remotely.
- Type in Y to Remove test database and access to it.
- Type in Y to Reload privilege tables now.
- When completed, you will see this message - All done! and Thanks for using MariaDB!
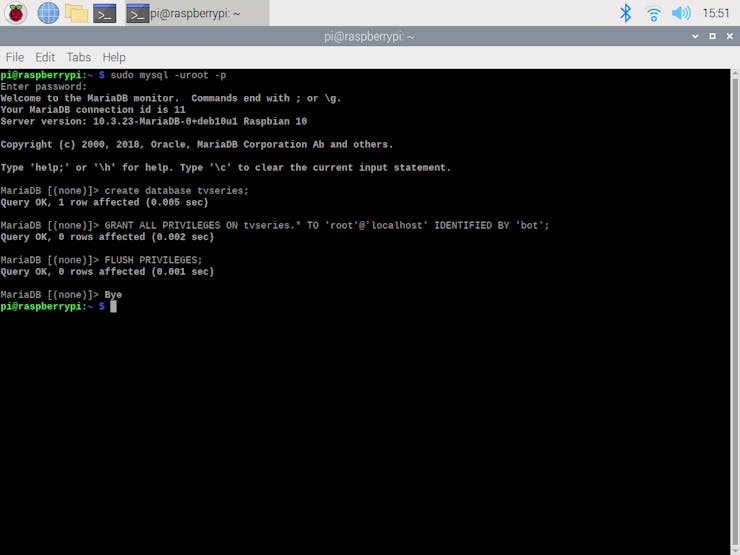
- To create a database (tvseries) to save variables generated by TVMAZE REST API, run this MySQL command in the terminal window:
sudo mysql -uroot -p
- Enter the root password - bot
- You will be greeted by the message Welcome to the MariaDB monitor.
- Follow the lines below after the MariaDB [(none)]>: prompt to create the tvseries database in MariaDB:
create database tvseries;
GRANT ALL PRIVILEGES ON tvseries.* TO 'root'@'localhost' IDENTIFIED BY 'bot';
FLUSH PRIVILEGES;
- Exit the MariaDB prompt with Ctrl + D.
- To obtain data from TVMAZE REST API by merely using the file_get_contents() function in PHP, install the php-curl package:
sudo apt-get install php-curl
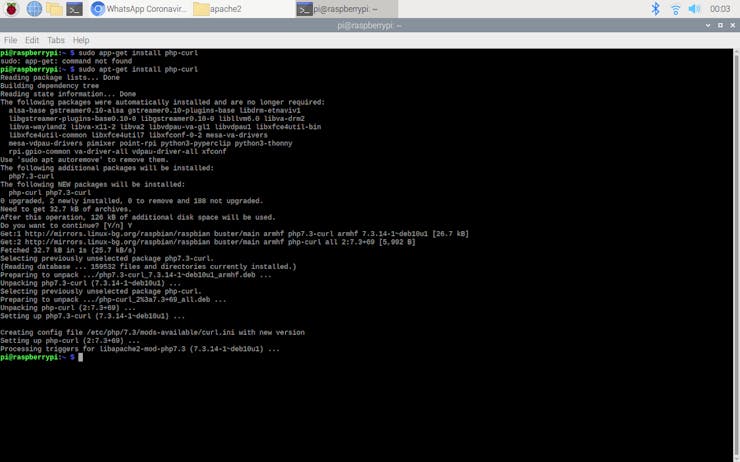
- Then, restart the apache server to be able to use the installed packages on the localhost:
sudo service apache2 restart
Step 3: Getting information from TVMAZE REST API on your favorite series/anime
TVMAZE provides a free and easy-to-use REST API, which allows users to search shows by name, date, episode number, etc. You can inspect the available endpoints and queries:
Go to TVMAZE REST API.

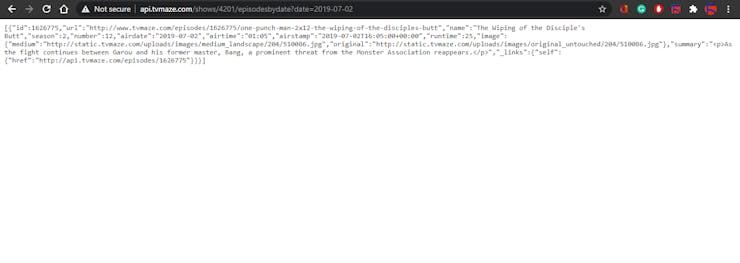
I used the Episode by Date option to retrieve all episodes from a given show that have aired on a specific date.
To be able to obtain information by release dates, you need to search your favorite shows on TVMAZE and use the TV ID indicated in their links.
- URL: /shows/:id/episodesbydate?date=:date
- Date: ISO 8601 format
- Example: http://api.tvmaze.com/shows/1/episodesbydate?date=2013-07-01

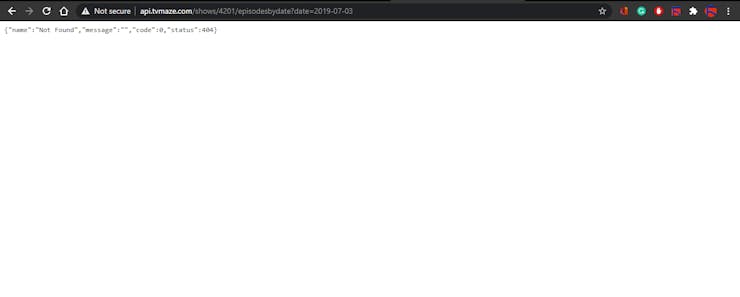
If there is an episode aired on the given date, the API returns an array of full episode info.
Otherwise, the API returns an HTTP 404.
Below, you can inspect my favorite series/anime list I created to track whether there is a new episode of one of them that is on release with my project.
I added The Late Late Show to test my code since it is a daily show.
<b>1) One Piece</b>
TV ID: 1505
https://www.tvmaze.com/shows/1505/one-piece

2) My Hero Academia
TV ID: 13615
https://www.tvmaze.com/shows/13615/boku-no-hero-academia

3) Westworld
TV ID: 1371
https://www.tvmaze.com/shows/1371/westworld

4) The Simpsons
TV ID: 83
https://www.tvmaze.com/shows/83/the-simpsons

5) The Late Late Show with James Corden
TV ID: 2831
https://www.tvmaze.com/shows/2831/the-late-late-show-with-james-corden

Step 4: Developing the TV Series / Anime Release Date Tracker (application) running on Raspberry Pi in PHP and creating the series table to insert data
I developed the TV Series / Anime Release Date Tracker in PHP and explained the source code of the application in the Code Explanation section below for those who are interested.
However, if you are not fond of web development with PHP, you can download the application in Downloads - named TV-Series-Anime-Episode-Tracker.zip - and upload it to Raspberry Pi without diving in PHP coding.
Upload:
By the following steps, install the TV Series / Anime Release Date Tracker on the localhost:
- Download the application - TV-Series-Anime-Episode-Tracker.zip - including index.php and query.php files.
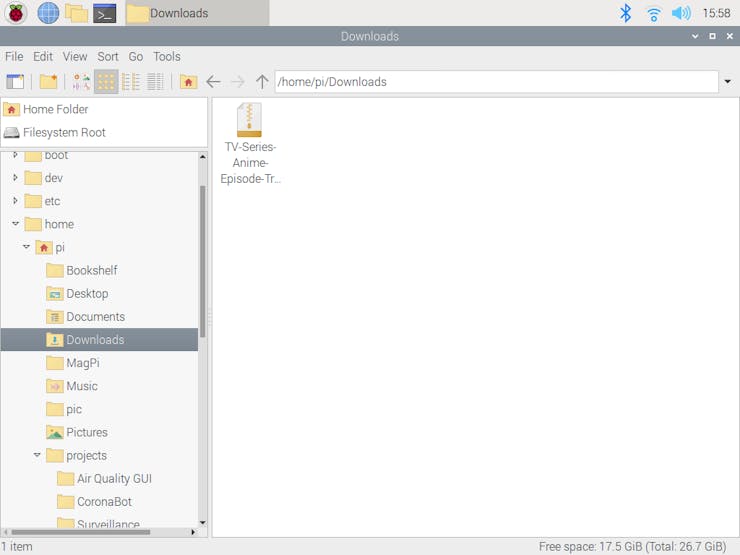
- Extract the TV-Series-Anime-Episode-Tracker.zip.

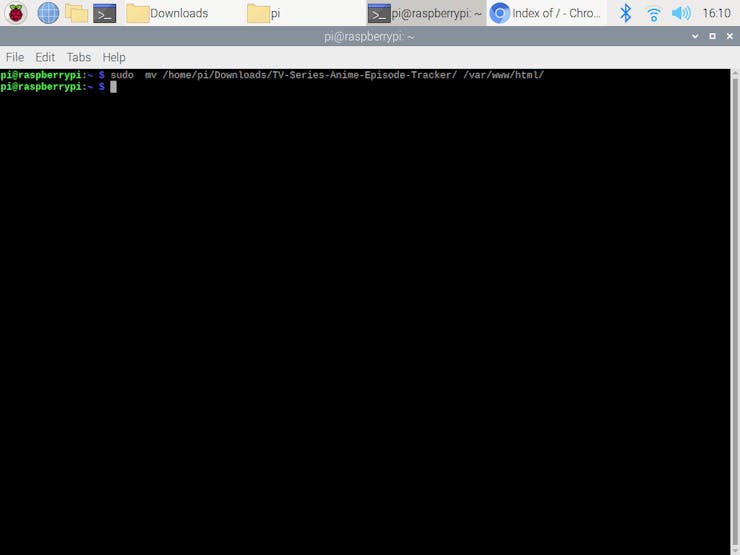
- Move the application folder (TV-Series-Anime-Episode-Tracker) from Downloads to the server (/var/www/html) by using the terminal since the apache server is a protected location.
sudo mv /home/pi/Downloads/TV-Series-Anime-Episode-Tracker/ /var/www/html/
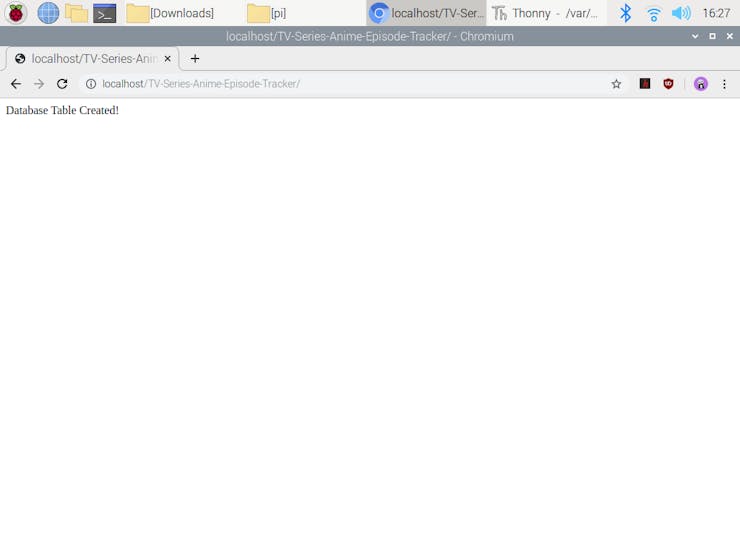
- Go to the TV Series / Anime Release Date Tracker:
http://localhost/TV-Series-Anime-Episode-Tracker/
Features:
1) After installation, open the application to create a table named series in the database (tvseries). When you first open the index.php file, the application creates the table named series automatically and informs the user - Database Table Created!
2) If the database table (series) is created successfully in the database, the application informs the user - Database Table Found!

3) After creating the database table (series), to insert variables required for TVMAZE REST API for each show in your list, take the following steps:
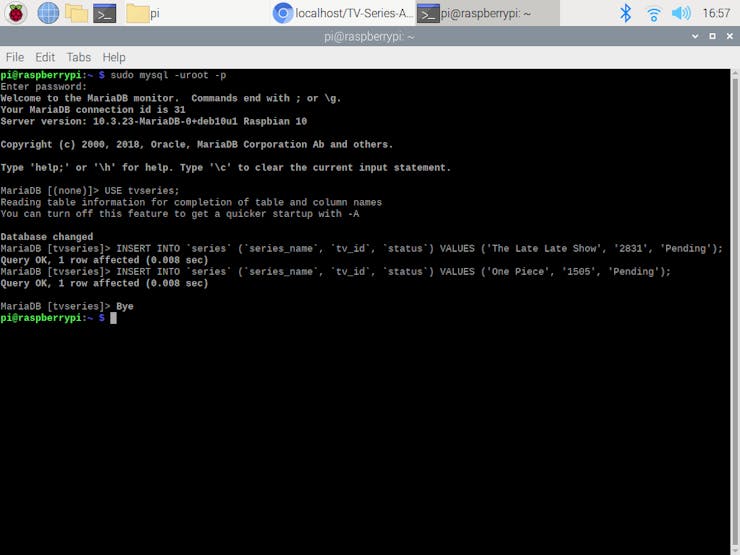
- Run this MySQL command in the terminal window:
sudo mysql -uroot -p
- Enter the root password - bot
- Select the tvseries database:
USE tvseries;
- Insert required variables - series name, TV ID, status - to the table for each show. The status variable is used by the application to notify the user without recurring when a new episode is on release on a given date.
INSERT INTO `series` (`series_name`, `tv_id`, `status`) VALUES ('One Piece', '1505', 'Pending');
5) On the query.php, the application makes requests to TVMAZE REST API to detect whether new episodes of shows in the database are on release. If TVMAZE REST API returns an array of full episode info of a released episode, the application prints information collatable by Arduino Nano 33 IoT for once to prevent a recurrence.
http://localhost/TV-Series-Anime-Episode-Tracker/query.php
%Series_Name%Season%Episode_Number%Episode_Name>#/em###
%The Late Late Show%2020%91%Jason Schwartzman, Alicia Key>#/em###

6) Otherwise, the application prints No Entry Found!
Code Explanation:
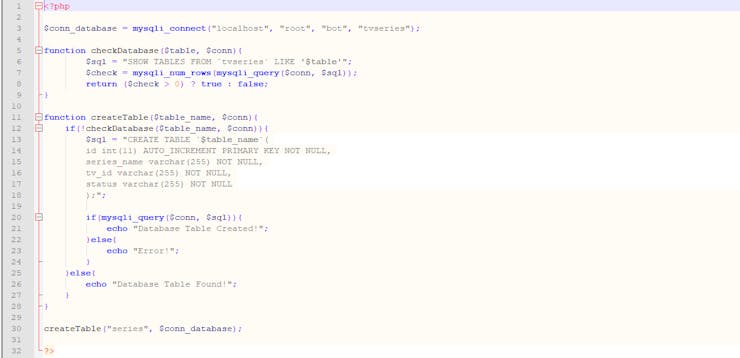
1) index.php
- Define the database connection settings - "localhost", "root", "bot", "tvseries".
- In the checkDatabase() function, detect whether there is a database table in the given name - series.
- In the createTable() function, create the series table if not found in the database and inform the user.

Code Explanation:
1) index.php
- Define the database connection settings - "localhost", "root", "bot", "tvseries".
- In the checkDatabase() function, detect whether there is a database table in the given name - series.
- In the createTable() function, create the series table if not found in the database and inform the user.
2) query.php
- In the query class, define the path to TVMAZE API to make requests.
- In the define_user() function, get connection settings and the table name.
- In the check_ep_release_date() function, using the file_get_contents() function, detect whether a new episode is on release for a given TV ID on the current date. Change the status variable in the database from Pending to Released if a new episode is on release to prevent a recurrence.
- In the track_db_entries() function, execute the check_ep_release_date() for each show registered in the database table - series.


Step 4.1: Executing web application without Raspberry Pi
For subscribers to my website (TheAmplituhedron), I developed a free version of the TV Series / Anime Release Date Tracker for those who do not have a Raspberry Pi nor want to use one as a host for this project.
It provides a user-friendly interface for managing the database. If you want to use this interface with your project instead of using the terminal on Raspberry Pi to insert data, please contact me.
Go to the application:
https://www.theamplituhedron.com/dashboard/TV-Series-Anime-Episode-Tracker/

Step 5: Setting up Arduino Nano 33 IoT
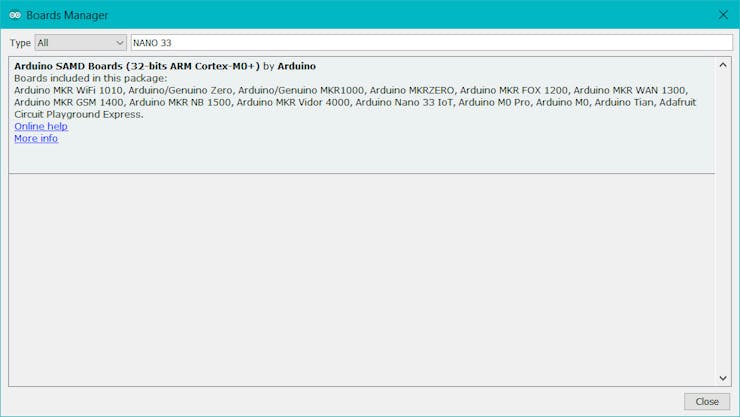
If you are a novice in programming with Arduino Nano 33 IoT: do not worry, it is simple to use with Arduino IDE. Just download the required drivers - Arduino SAMD Core - as well-explained here.
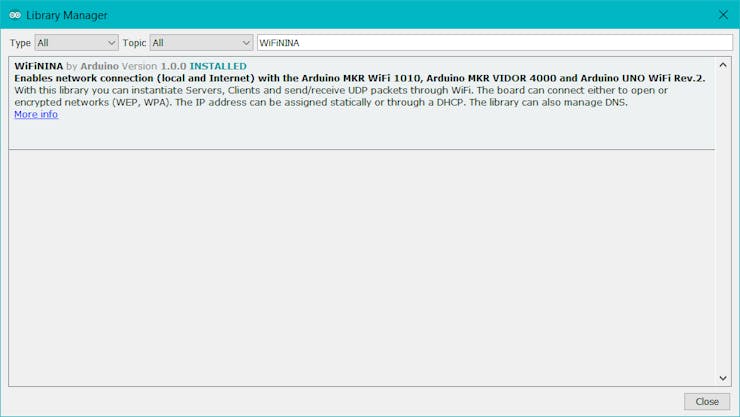
To be able to connect to the WiFi via Arduino Nano 33 IoT, download the WiFiNINA library from here.
To print text and draw graphics on the Nokia 5110 Screen, download the LCD5110_Basic library from here.
I used the second serial port (Serial1) on the Arduino Nano 33 IoT to communicate with the Serial MP3 Player.
Serial Ports on the Arduino Nano 33 IoT:
"The USB connector of the board is directly connected to the USB host pins of the SAMD21. This routing enables you to use the Arduino NANO 33 IoT as a client USB peripheral (acting as a mouse or a keyboard connected to the computer) or as a USB host device so that devices like a mouse, keyboard, or an Android phone can be connected to the Arduino NANO 33 IoT. This port can also be used as a virtual serial port using the Serial object in the Arduino programming language. The RX0 and TX1 pins are a second serial port available as Serial1."
Then, Arduino Nano 33 IoT is ready to execute the project code :)
Step 6: Sending commands to the Serial MP3 Player (OPEN-SMART)
I created a playlist consisting of opening songs of my favorite series/anime list in this project:
1) One Piece - Opening | Listen
2) My Hero Academia - Opening | Listen
3) Westworld - Opening | Listen
4) The Simpsons - Opening | Listen
5) The Late Late Show - Opening | Listen
If you want, you can download my playlist in a zipped folder - opening_songs.zip.
It is effortless to use a Serial MP3 Player with Arduino Nano 33 IoT as long as you know the UART commands required to trigger the right functions. I used a Serial MP3 Player module with Speaker by OPEN-SMART. So, if you have a Serial MP3 Player with a different brand name, these commands shown below will not work for you.
Follow the instructions from the guidance:
"The module is a kind of simple MP3 player device which is based on a high-quality MP3 audio chip. It can support 8k Hz ~ 48k Hz sampling frequency MP3 and WAV file formats. There is a TF card socket on board, so you can plug the micro SD card that stores audio files. MCU can control the MP3 playback state by sending commands to the module via UART port, such as switch songs, change the volume and play mode, and so on. You can also debug the module via USB to UART module. It is compatible with Arduino / AVR / ARM / PIC."
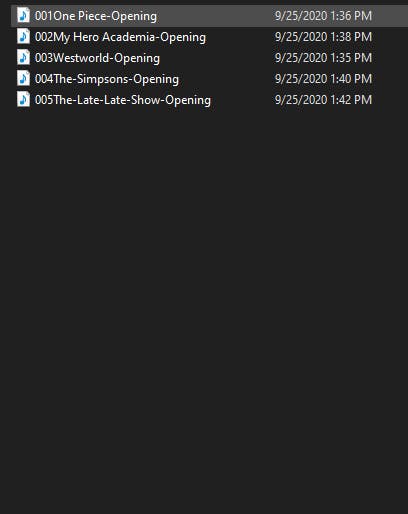
"Make sure your micro SD card is formatted as FAT16 or FAT32 and there are some songs in it. You should create folders “01” and “02”, and put some songs with the name 001xxx.mp3 / 002xxx.mp3 / 003xxx.mp3 in them."
In other words, to be able to execute commands accurately, save your songs in a folder named as '01' and add consecutive numbers to song names - 001One Piece-Opening.mp3, 002My Hero Academia-Opening.mp3, etc.
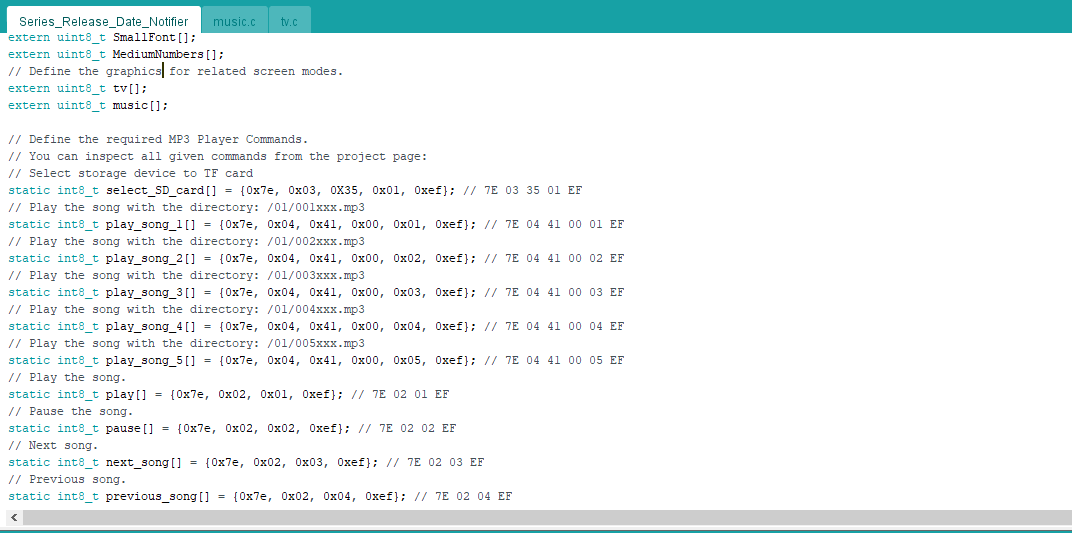
To send UART commands to the Serial MP3 Player with Arduino Nano 33 IoT, I created a function named as send_command_to_MP3_player. It transfers each byte in the requested command to the Serial MP3 Player via the second serial port on RX0 and TX1 pins - Serial1 - depending on the length of the requested command - 4, 5, or 6.
As shown below, separate the command you want to send to the Serial MP3 Player by bytes - 0x7e. All commands start with '7E' and end with 'EF'. The second byte is the number of the bytes in between - '02', '03', '04'. Below, download the Serial MP3 Player manual by OPEN-SMART to inspect all commands and get more detailed instructions.
// Define the required MP3 Player Commands.
// You can inspect all given commands from the project page: // Select storage device to TF card
static int8_t select_SD_card[] = {0x7e, 0x03, 0X35, 0x01, 0xef}; // 7E 03 35 01 EF
// Play the song with the directory: /01/001xxx.mp3
static int8_t play_song_1[] = {0x7e, 0x04, 0x41, 0x00, 0x01, 0xef}; // 7E 04 41 00 01 EF
// Play the song with the directory: /01/002xxx.mp3
static int8_t play_song_2[] = {0x7e, 0x04, 0x41, 0x00, 0x02, 0xef}; // 7E 04 41 00 02 EF
// Play the song with the directory: /01/003xxx.mp3
static int8_t play_song_3[] = {0x7e, 0x04, 0x41, 0x00, 0x03, 0xef}; // 7E 04 41 00 03 EF
// Play the song with the directory: /01/004xxx.mp3
static int8_t play_song_4[] = {0x7e, 0x04, 0x41, 0x00, 0x04, 0xef}; // 7E 04 41 00 04 EF
// Play the song with the directory: /01/005xxx.mp3
static int8_t play_song_5[] = {0x7e, 0x04, 0x41, 0x00, 0x05, 0xef}; // 7E 04 41 00 05 EF
// Play the song.
static int8_t play[] = {0x7e, 0x02, 0x01, 0xef}; // 7E 02 01 EF
// Pause the song.
static int8_t pause[] = {0x7e, 0x02, 0x02, 0xef}; // 7E 02 02 EF
// Next song.
static int8_t next_song[] = {0x7e, 0x02, 0x03, 0xef}; // 7E 02 03 EF
// Previous song.
static int8_t previous_song[] = {0x7e, 0x02, 0x04, 0xef}; // 7E 02 04 EF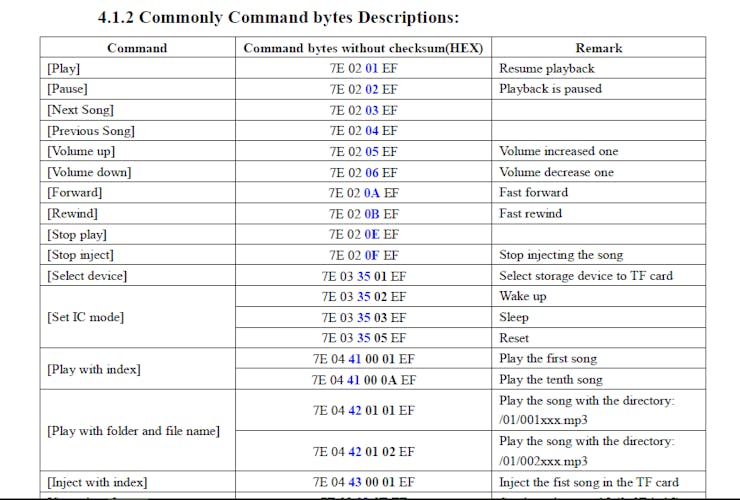
Step 7: Programming Arduino Nano 33 IoT
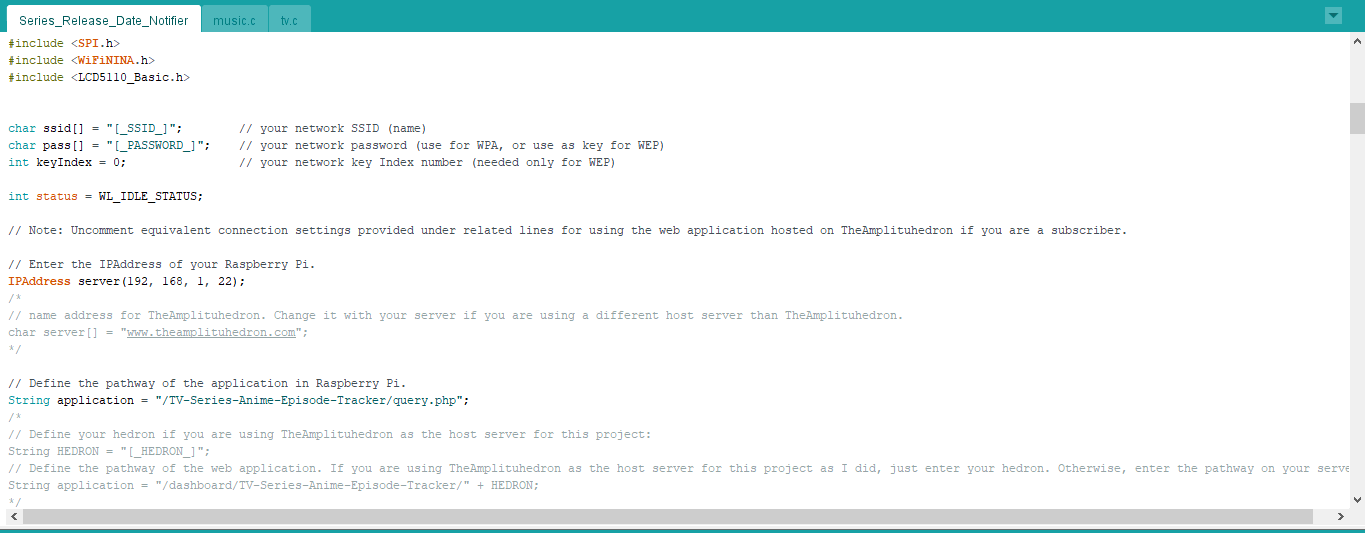
- Include the required libraries.
- Define your WiFi settings - SSID and password.
- Enter the IPAddress of your Raspberry Pi.
- Define the pathway of the application (query.php) in Raspberry Pi.
- Initialize the Ethernet client library.
- Define the Nokia 5110 screen settings.
- Define the graphics for related screen modes - tv and music.
- To create different graphics (monochrome images), go to Monochrome Image Converter.
- Define the required MP3 Player Commands.
- Define menu options and modes using volatile booleans.
- Define the control buttons and RGB LED pins.
- Initiate serial communication for the Serial MP3 Player Module on the second serial port - Serial1.
- Connect to the WiFi network.
- Verify connection on both the serial monitor and Nokia 5110 Screen.
- In the read_buttons() function, get data from the control buttons - Right, OK, Left, and Exit.
- In the change_menu_options(), increase or decrease the option number using the Right and Left buttons.
- In the interface() function, print the interface (menu).
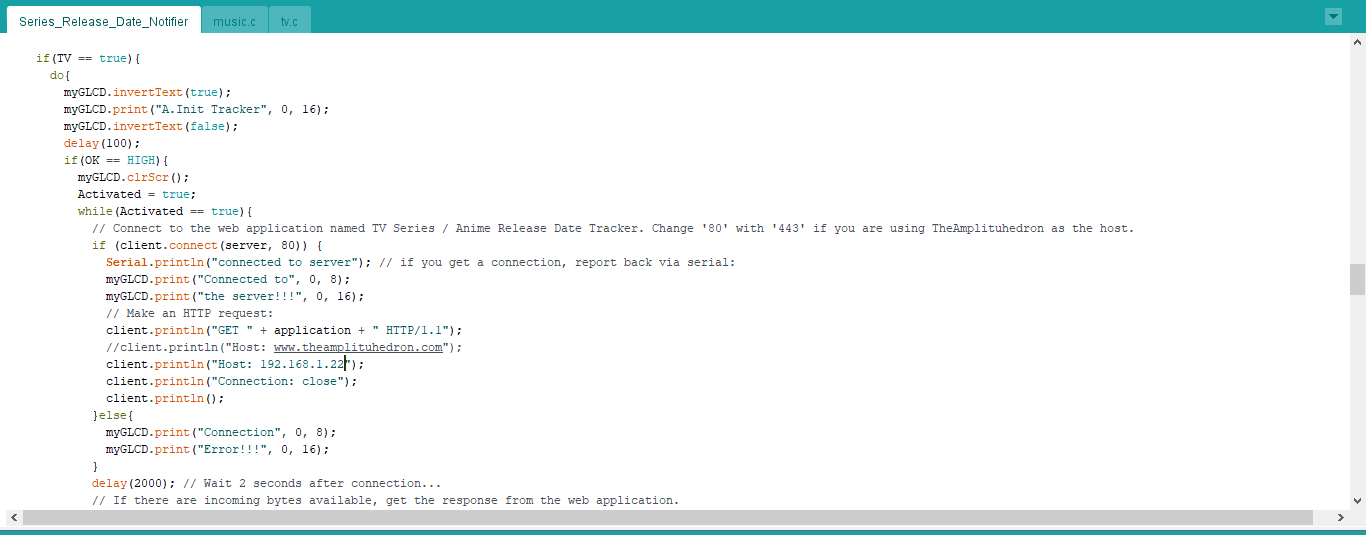
- If the Init Tracker mode is selected, connect to the web application named TV Series / Anime Release Date Tracker.
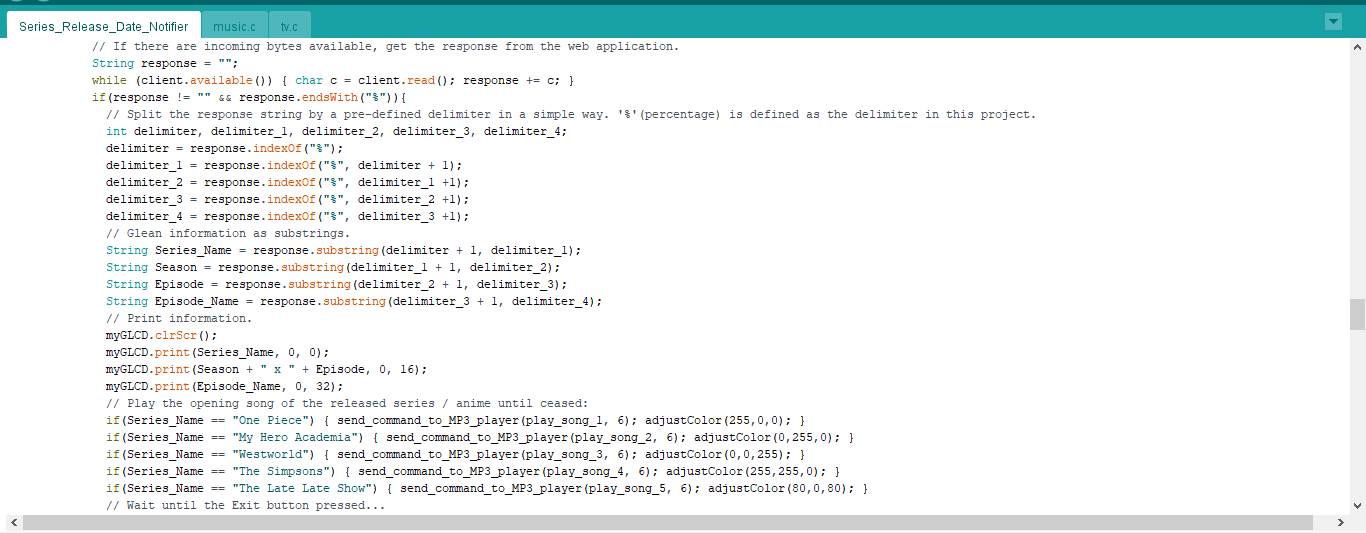
- If there are incoming bytes available, get the response from the web application.
- Using the endsWith() function, detect whether the response has the percentage symbol (delimiter) in it or not.
- If included, split the response string by a predefined delimiter in a simple way. '%'(percentage) is defined as the delimiter in this project.
- Glean information as substrings - Series_Name, Season, Episode, Episode_Name.
- Print information and play the opening song of the released series/anime until ceased.
- Wait until the Exit button is pressed.
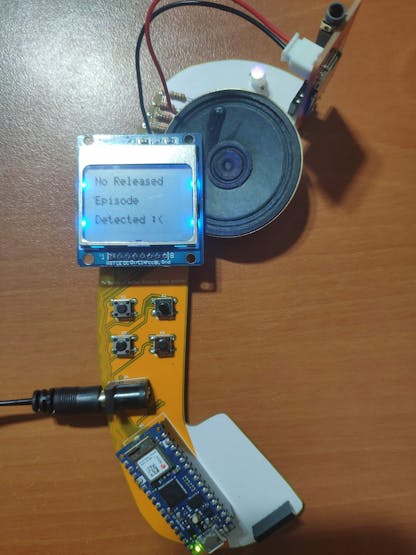
- If there is a blank response, print No Released Episode Detected :(
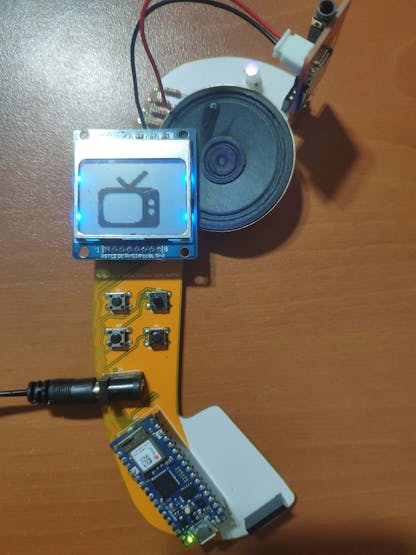
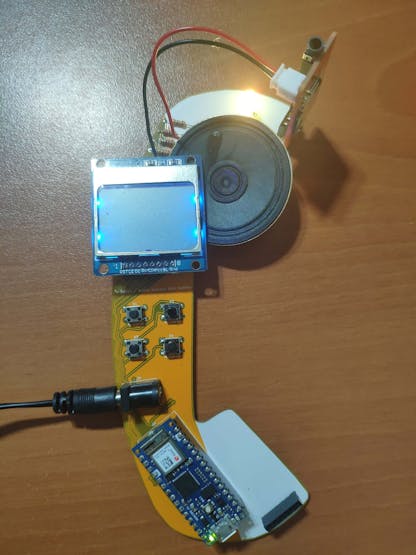
- Draw the TV icon while counting to the new request.
- Wait until the next request.
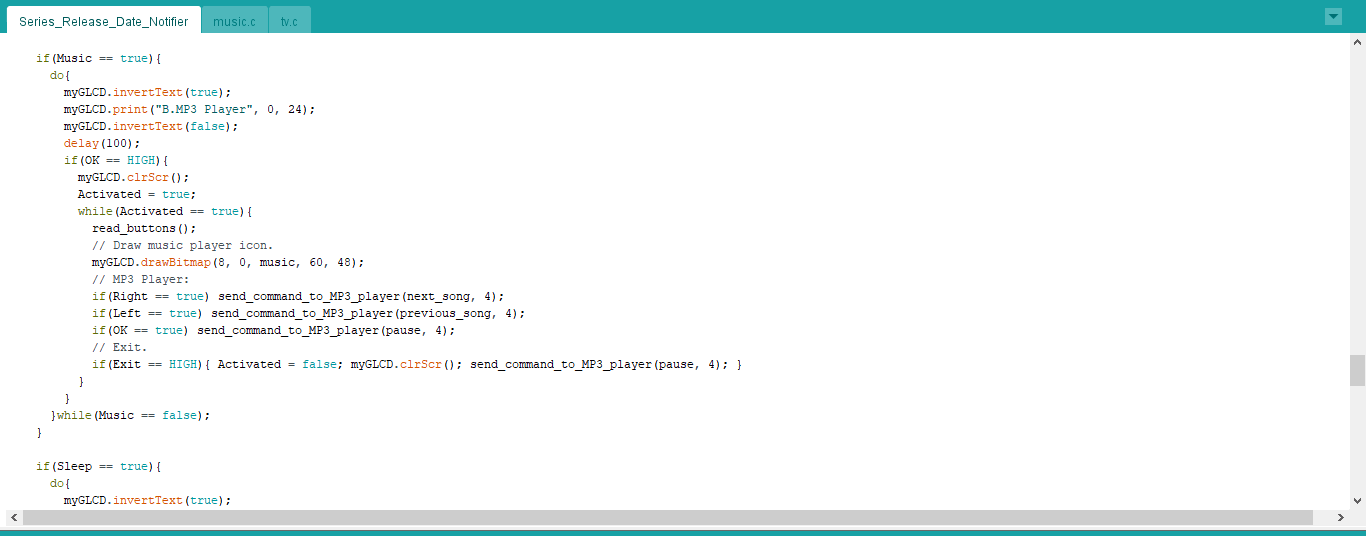
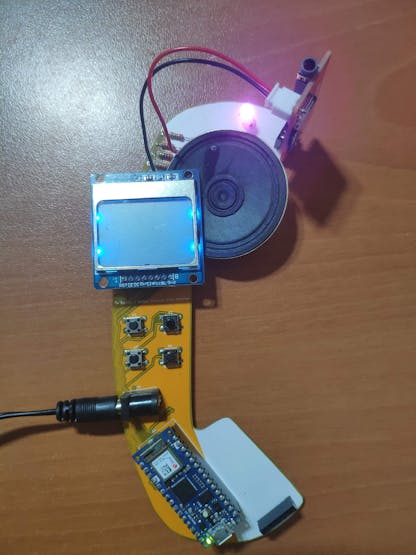
- If the MP3 Player mode is selected, draw the music player icon. Control the MP3 Player with the control buttons - Right, Left, OK.
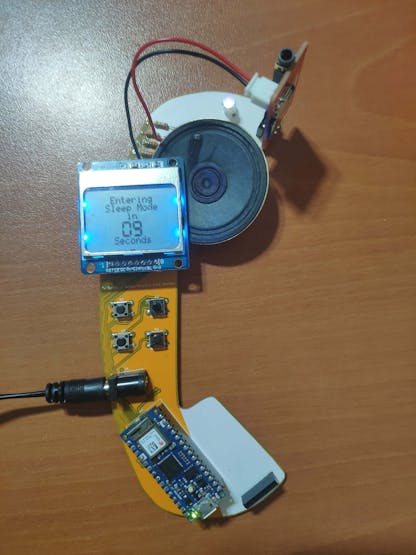
- If the Sleep mode is selected, activate the sleep mode in 10 seconds and print the remaining seconds.


Connections and Adjustments
// Connections
// Arduino Nano 33 IoT:           //                               Nokia 5110 Screen
// D2  -------------------------- SCK (Clk)
// D3  -------------------------- MOSI (Din) // D4  -------------------------- DC // D5  -------------------------- RST
// D6  -------------------------- CS (CE)
//                               RGB
// D9  -------------------------- R
// D10 -------------------------- G
// D11 -------------------------- B
//                               LEFT_BUTTON
// A0 --------------------------- S
//                               OK_BUTTON
// A1 --------------------------- S
//                               RIGHT_BUTTON
// A2 --------------------------- S
//                               EXIT_BUTTON
// A3 --------------------------- S
//                               DS3231 (Optional for Nano and Not Required for Nano 33 IoT)
// A4 --------------------------- SDA  // A5 --------------------------- SCL
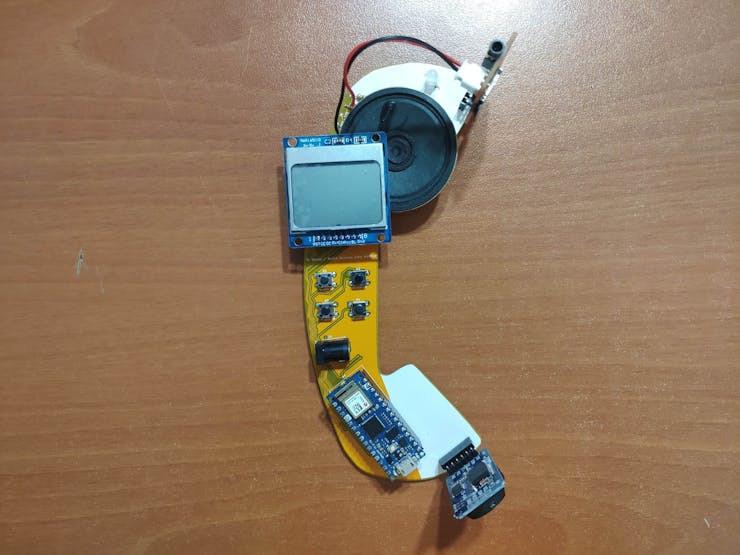
After finishing and uploading the code to the Arduino Nano 33 IoT, I attached all required components to the board via headers.
I also provided a connection slot for a DS3231 RTC Module for those who want to change the Arduino Nano 33 IoT with the Arduino Nano. But, you need to enter release dates manually for each show to the Arduino Nano without being able to obtain data from the web application to create a countdown timer with the RTC.
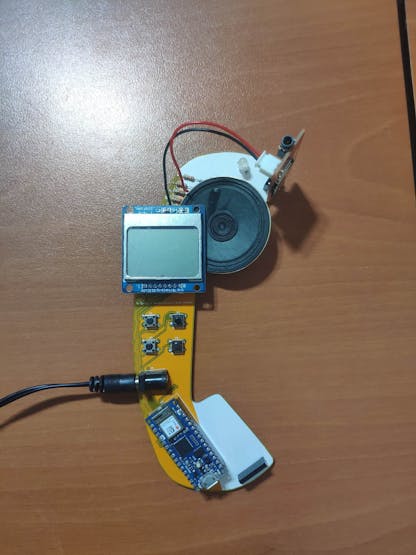
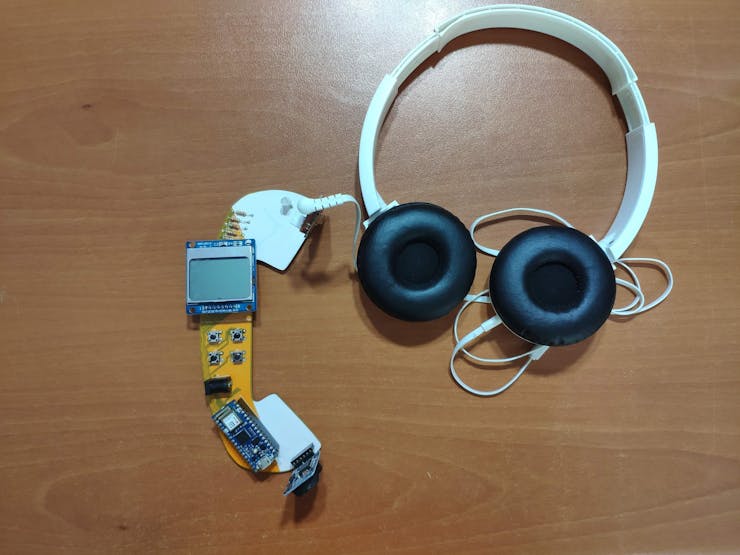
Note: You can connect either a speaker or headphones to the Serial MP3 Player to listen to soundtracks in the playlist. I connected the speaker delivered in addition to the Serial MP3 Player (OPEN-SMART).
Modes and Features
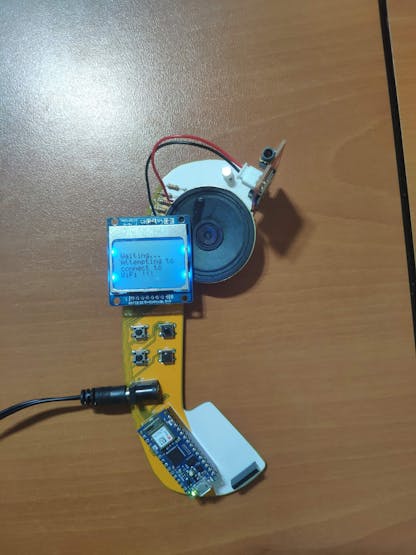
1) While the device tries to connect to the WiFi network, it displays Waiting... Attempting to connect to WiFi.
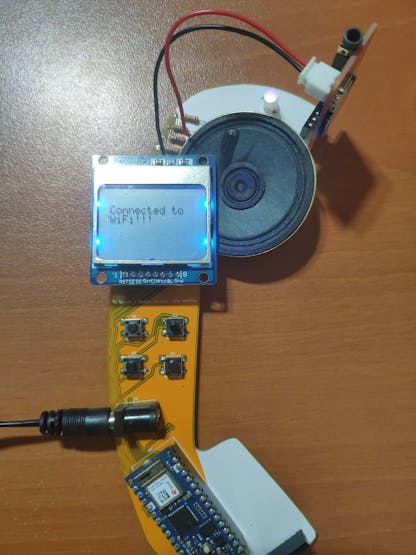
2) After establishing a successful connection, the device informs the user with this message - Connected to WiFi!!!
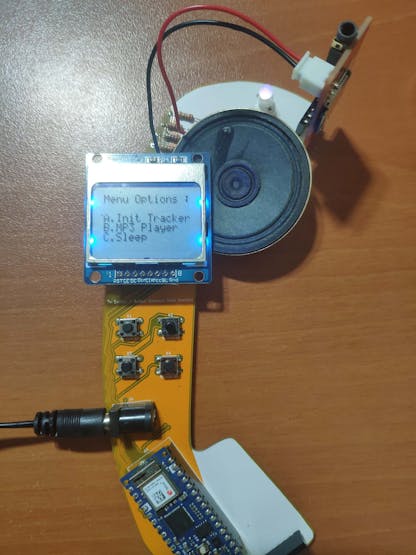
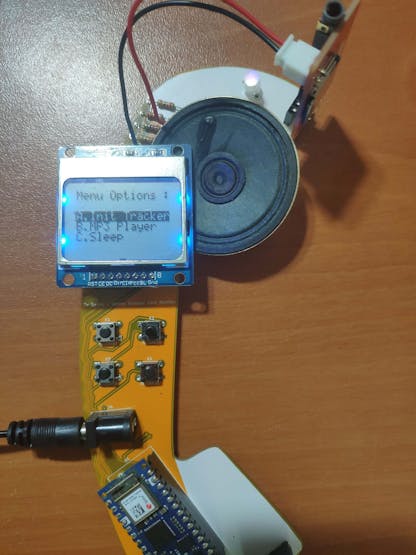
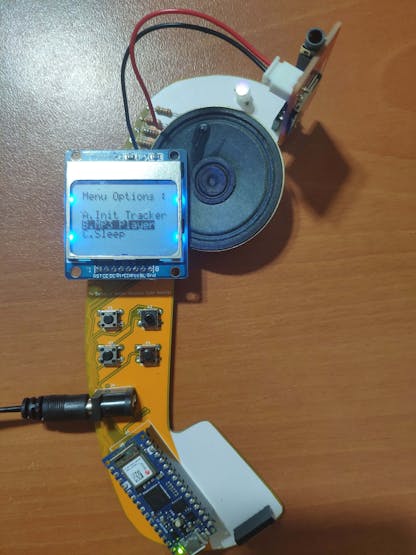
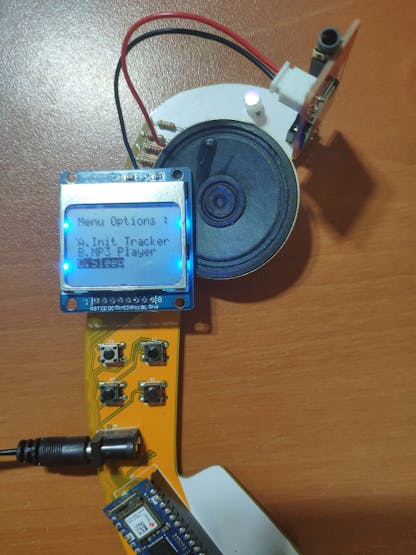
3) Then, the device prints the interface (menu) presenting available modes - A.Init Tracker, B.MP3 Player, and C.Sleep. To switch among modes, use the Right and Left buttons. Subsequently, press the OK button to select a mode.
A.Init Tracker
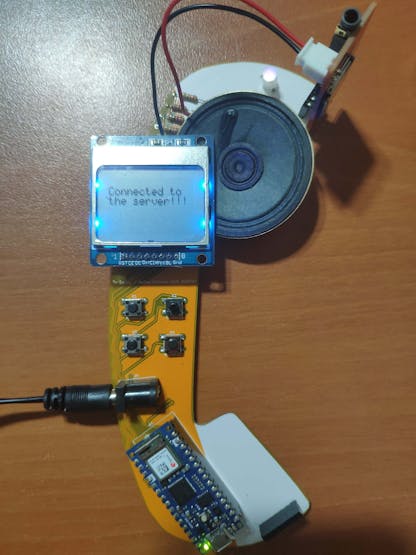
A.1) After selecting the A.Init Tracker mode, the device attempts to connect to the localhost hosted by the Raspberry Pi. If successful, it informs the user with this message - Connected to the server!!! Conversely, the device displays this message - Connection Error!!!
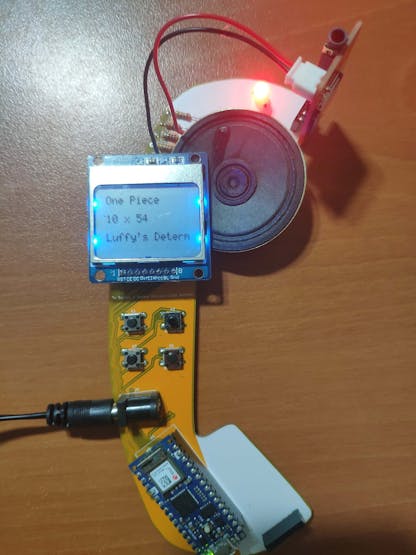
A.2) If the application (TV Series / Anime Release Date Tracker) sends a data string that of a released episode of a registered series/anime in the database, then the device:
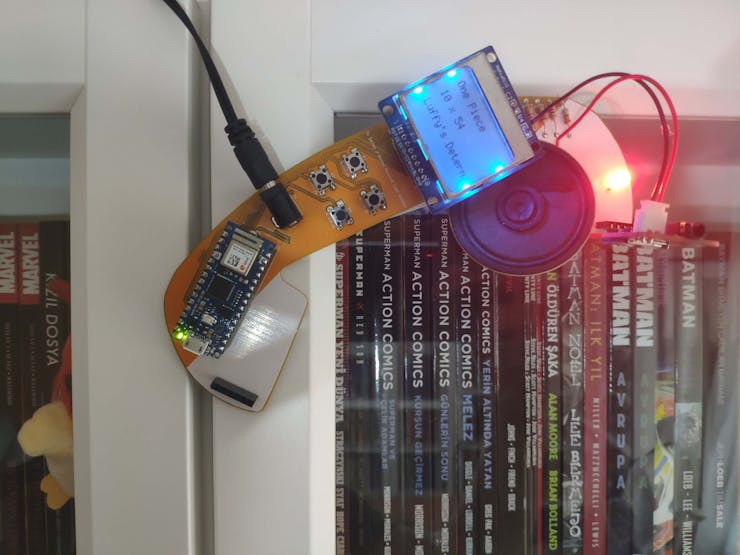
- Prints the episode information - Series Name, Season, Episode Number, and Episode Name:
One Piece, 10x54, Luffy's Determination
- Plays the opening song of the released series/anime,
- And, turns the RGB to the color assigned to the released series/anime.
For instance, I assigned these colors below for each show in my list:
- One Piece -> Red
- My Hero Academia -> Green
- Westworld -> Blue
- The Simpsons -> Yellow
- The Late Late Show -> Purple
Unless the Exit button is pressed, the device keeps displaying the episode information and showing the assigned color.
The device notifies the user for once for each released episode to prevent any recurrence.
A.3) After the Exit button is pressed, the device draws the television icon while waiting for the next request to the application.
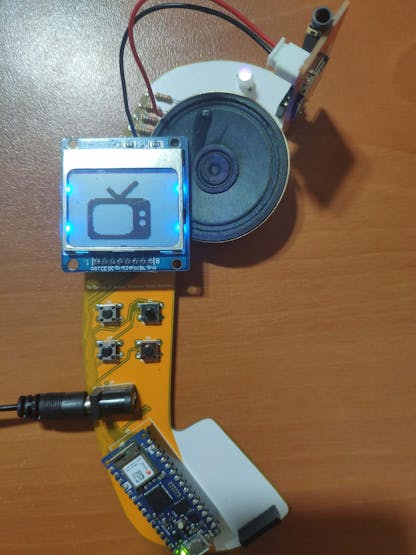
A.4) If there is no released episode of a registered series/anime in the database, the device displays this message - No Released Episode Detected :( - and then; draws the television icon until the next request to the application.
A.5) The device returns to the interface (menu) if the Exit button is pressed while displaying the television icon.
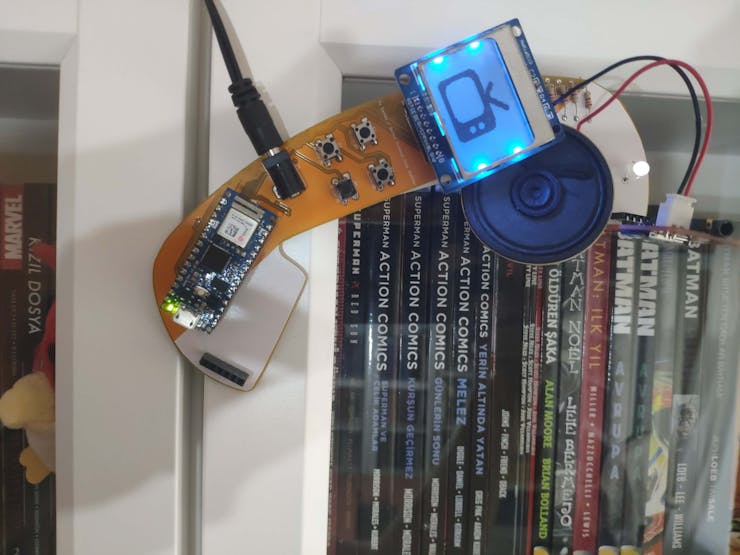
B. MP3 Player
I implemented this feature as a subsidiary and fun one to turn this device into an intriguing accessory for my room.
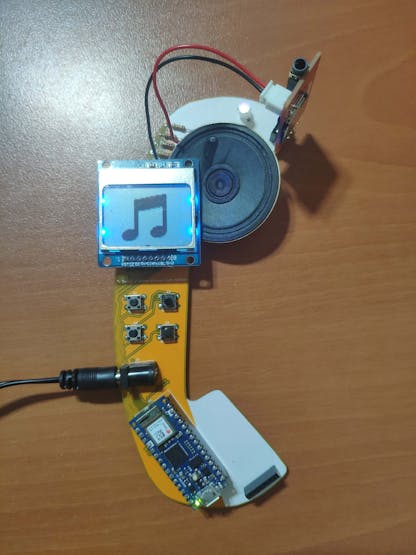
B.1) After selecting the B.MP3 Player mode, the device draws the music note icon and lets the user play all opening songs by using the control buttons:
- Right - Next Song
- Left - Previous Song
- OK - Pause
B.2) The device returns to the interface (menu) if the Exit button is pressed.
C.Sleep
C.1) After selecting the C.Sleep mode, the device enables the sleep mode in 10 seconds and prints the remaining seconds on the screen.
C.2) While maintaining the sleep mode, the device applies a given color pattern to the RGB as a nightlight.
C.3) The device returns to the interface (menu) if the Exit button is pressed.
Videos and Conclusion
After completing all steps above, I decided to fasten the device to my bookcase by using a hot glue gun. It works stupendously :)