Close
0%
0%

ESPHome on ESP-01 Windows Workflow

Workflow for creating and flashing ESPHome firmware to ESP-01/ESP8266 on Windows

Similar projects worth following
After not finding any great tutorials online I decided to document my process. While the firmware creation part of the project is taylored to ESPHome, the hardware part applies to all ESP-01. And theoretically to all ESP8266, though most will have an on-board USB-to-Serial Chip like FTDI or CH340/CH341. But if you fried that chip, this tutorial might also be useful to you.

What you will need:

  • ESP-01  (if you want OTA, you will need 1MB of Flash)
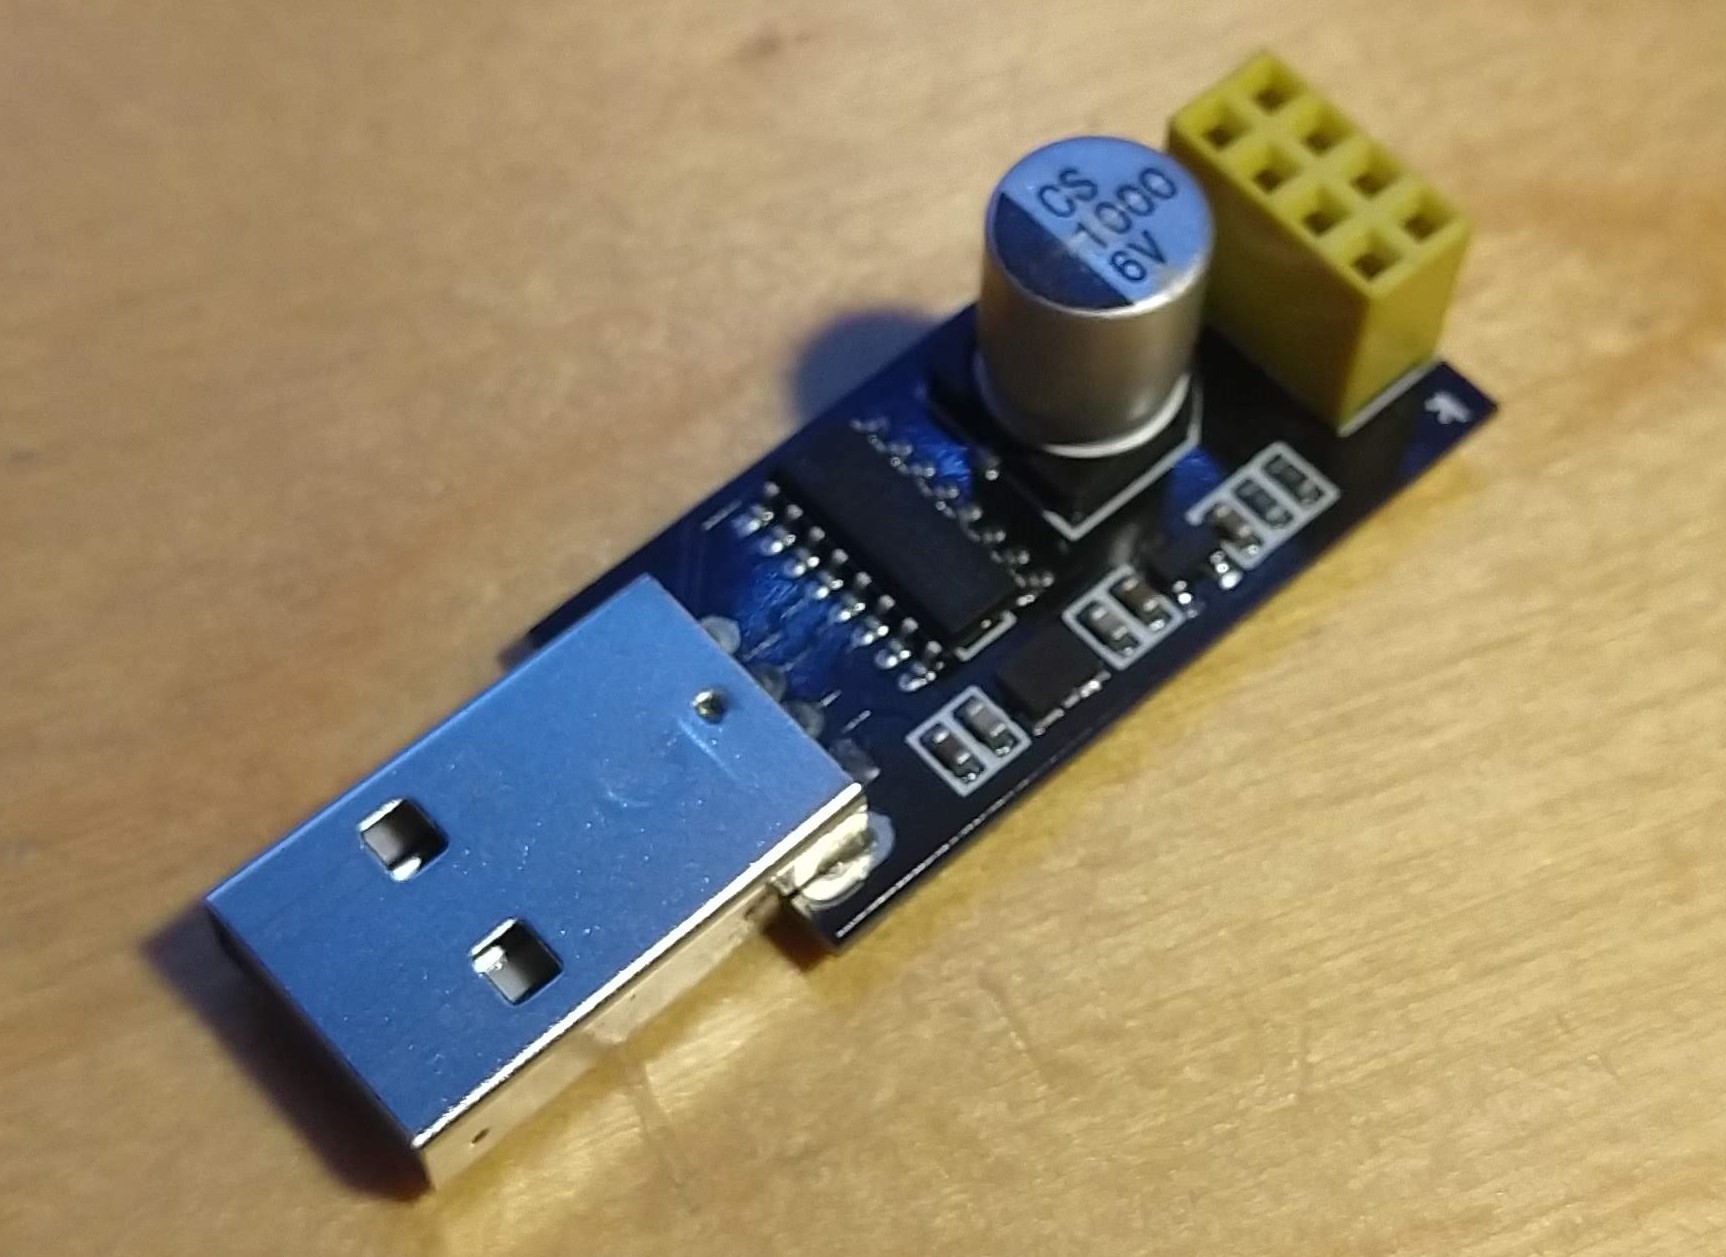
  • FTDI 3V UART to TTL with USB (make sure you are using a 3V model)
  • Breadboard
  • 2 x Pushbutton
  • 3 x 10k Ohm resistor
  • 1 x 470 Ohm resistor
  • optional 1 x 100µF capacitor
  • Wires
  • DuPont connectors

I was recently trying to upload esphome firmware to my ESP-01 Modules. I was using this cheap programmer from aliexpress and nothing was working.

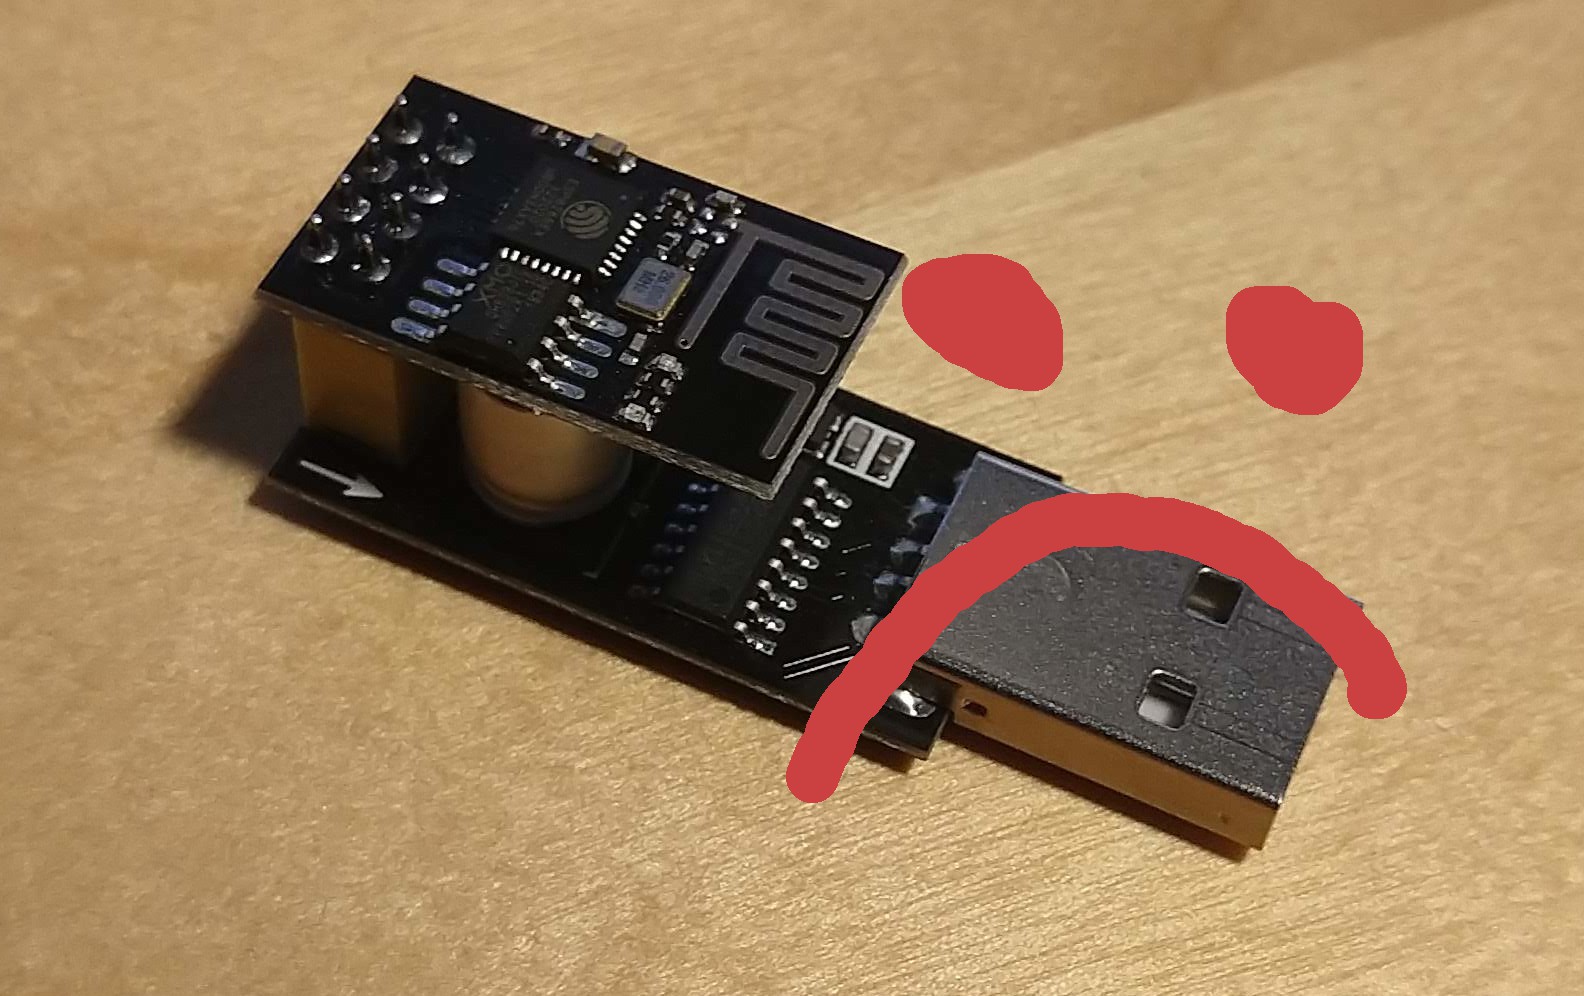
↑ this did not work (for me)

It turns out I needed some extra components to get this to work. Apparently your programmer usually handles all the pin pulling. But mine doesn't for whatever reason.  So these instructions are very general purpose.
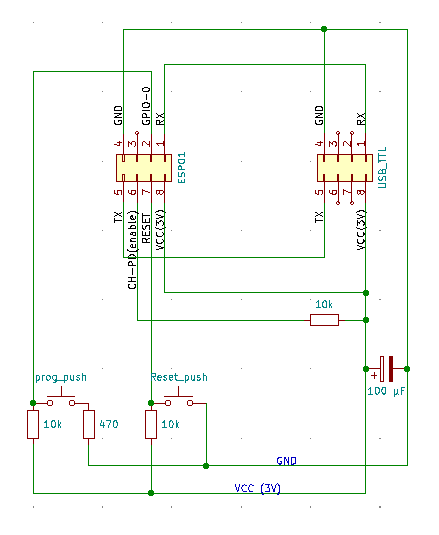
Wiring

Pieter's Pages has some amazing resources on this and ESP8266 in general.

Andreas Jacob's Guide also helped me a lot, go check it out!

This was somehow the most difficult part to find out. To enter flash mode, some pins need to be pulled low and some others high on startup. More precisely the GPIO-0 pin needs to be pulled low on chip startup. This can be easily facilitated with a push button.

If your TTL Programmer does not have a capacitor, you should probably add one to your circuit, sudden power surges from Wi-Fi activity might play tricks on you otherwise. Smaller capacitors are probably fine as well.

This is also the wiring you'll need later on to run the ESP-01 on its own!

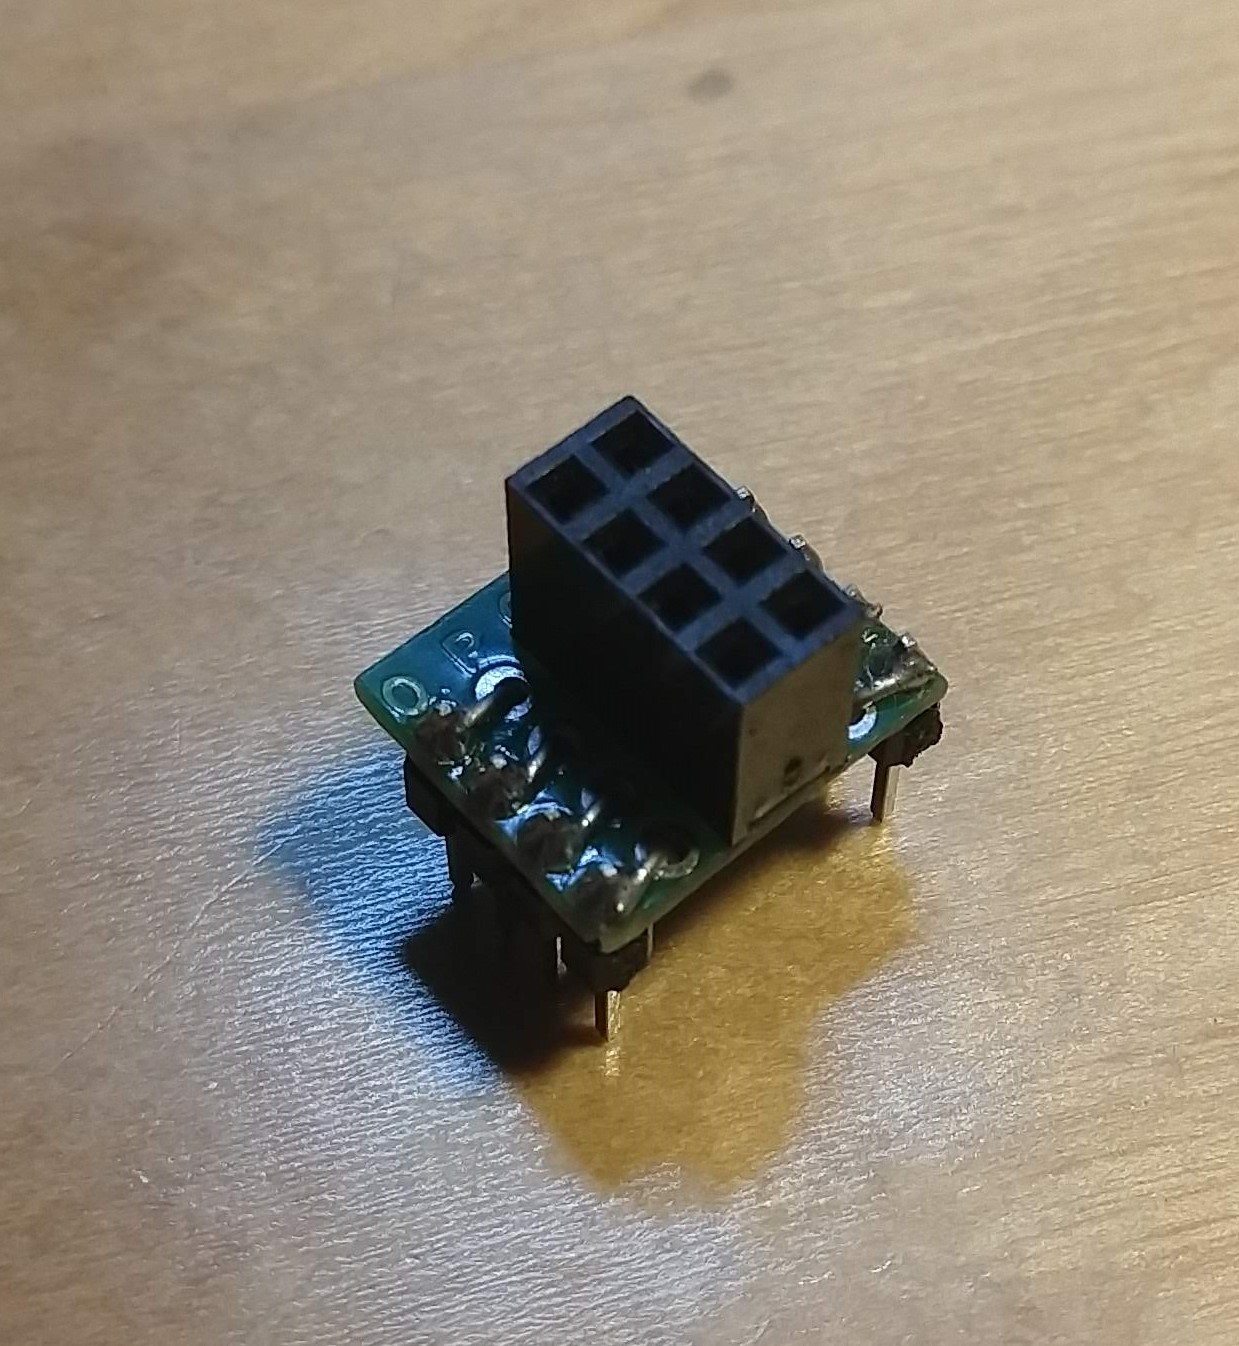
You could also combine all of this into a cozy board for your ESP-01 to sit in. I would at least recommend making a small break out board for your ESP to fit onto a breadboard, like so:

Installing ESPHome

My python installation is based on anaconda, but you can probably just use whatever python for windows you already have and get esphome with pip or pip3 respectively.

First I made a new anaconda environment for ESPHome

#make new env
conda create --name ESPHome
# activate env
conda activate ESPHome
#get esphome
pip install esphome

When using anaconda, you will have to re-activate the ESPHome environment every time you restart anaconda prompt.

Making a flashable firmware

If you're new to esphome it's not a bad idea to run the wizard!

mkdir ESPHome
cd ESPHome
esphome livingroom.yaml wizard

This will create a file called livingroom.yaml which contains all the information to make the firmware. It will ask you about the node name (how it will appear on the Wi-Fi), if you are using ESP32 or ESP8266 and about your board type. Here you should choose esp01_1m. If you choose esp01 OTA will not work, even if your board has 1 MB of flash.

Great you now have a recipe for a firmware file.

I recommend adding this code snippet to your .yaml to get debug messages:

logger:
  level: debug

Optional: to just build the firmware you could run

esphome livingroom.yaml compile

Flashing the ESP-01

Make sure your ESP-01 is in programming mode. Either hold the prog button (pulling it low) when connecting power to your ESP-01/plugging your programmer into the USB socket. Or hold the prog button and press reset. Release the prog button.

Now all that's left to do is run

esphome livingroom.yaml run


This will also compile any changes you made to your .yaml file.

If the esphome prompts you to use either your COM port or OTA, choose the COM port for now.

After flashing is complete, reset your ESP-01 with the reset button. You will now see the serial debug, if you have debug enabled.

Exiting logging mode

To leave the logs press Ctrl+C. This might take a while, but you can speed it up/force it by either resetting the ESP or unplugging the USB to Serial adapter.

Over the air updates (OTA)

Best case scenario, you connect your ESP to a power source, run esphome livingroom.yaml run and it just works

INFO Successfully compiled program.
INFO Resolving IP address of livingroom.local
INFO Address not available when adding xxx.xxx.xxx.xxx to multicast group, it is expected to happen on some systems
INFO Address...
Read more »

esp_flash_board.sch

KiCad Schema

sch - 4.46 kB - 12/02/2020 at 00:19

Download

  • Flashing Firmware with esptool

    schlion12/02/2020 at 12:26 0 comments

    Flashing the firmware file from windows

    Flashing the file using utilities like ESPEasy Flasher did not work for me. So instead esptool directly. I use anaconda, but you can probably just use the pip that came with your python. I made new environment for ESPHome

    #make new env
    conda create --name ESPHome
    # activate env
    conda activate ESPHome
    #get esptool
    conda install -c conda-forge esptool

    You should probably make an extra directory for all your esphome files. I made mine in Documents/ESPHome.

    Now connect the ESP01 to your USB-programmer be sure that the chip enters programming mode by keeping the programmin button pressed on power up. Or hold the programming button and press reset.

    Now navigate to the firmware file and flash with:

    esptool.py --before default_reset --after hard_reset --baud 460800 --chip esp8266 --port COM5 write_flash 0x0 --verify

     Be sure to change your COM port accordingly.

  • Old WSL instructions

    schlion12/01/2020 at 16:17 0 comments

    Apparently esphome works from windows :D

    So this is kind of obsoltete


    There is also a reddit post about getting WSL2 to work with USB but I would rather not use docker.

    I just used WSL2 ubuntu and installed esphome in there, then copied the files out of WSL2 and then flashed it from windows. After the first successful flash, you can just use the OTA update function directly from WSL2. For OTA to work it's important to get ESP-01 with 1MByte (8Mbit) of flash. Since otherwise there is not enough space to save the new firmware in parallel to the old one before flashing.

    Getting WSL

    I just followed this guide: https://docs.microsoft.com/en-us/windows/wsl/install-win10

    And then got ubuntu from the windows store.

    Installing ESPHome

    Again I just followed the official guide from inside WSL2: https://esphome.io/guides/getting_started_command_line.html

    basically its just:

    pip3 install esphome

    Making a flashable firmware

    If you're new to esphome it's not a bad idea to run the wizard!

    mkdir ESPHome
    cd ESPHome
    esphome livingroom.yaml wizard

     This will create a file called livingroom.yaml which contains all the information to make the firmware. While asking you about how your node will be named (how it will appear on the wifi). Later you will be asked what board you are using, here you should choose esp01_1m. If you choose esp01 OTA will not work, even if your board has 1MB of flash.

    Great you now have a recipe for a firmware file. To build the firmware

    esphome livingroom.yaml compile

    This will make a folder with the name of your node (that you entered into the wizard). In my example its livingroom_node. In a buch of subfolders you can find the actual firmware file.

    ./livingroom_node/.pioenv/livingroom_node/firmware.bin
    

    Now you can copy that to windows:

    mkdir /mnt/c/Users/<your Windows Username>/Documents/ESPHome
    cp ./livingroom_node/.pioenvs/livingroom_node/firmware.bin /mnt/c/Users/<your Windows Username>

    I just installed esphome on windows esphome in there. After the first successful flash, you can just use the OTA update function directly from Windows or WSL2. For OTA to work it's important to get ESP-01 with 1MByte (8Mbit) of flash. Since otherwise there is not enough space to save the new firmware in parallel to the old one before flashing.

    Flashing the file from windows

    Flashing the file using utilities like ESPEasy Flasher did not work for me. So instead I got esptool as a python package. I use anaconda, but you can probably just use the pip that came with your python. I made new environment for ESPHome

    #make new env
    conda create --name ESPHome
    # activate env
    conda activate ESPHome
    #get esphome
    pip install esphome

    You should probalbly make an extra directory for all your esphome files. I made mine in Documents/ESPHome.

    Now connect the ESP01 to your USB-programmer be sure that the chip enters programming mode by keeping the programmin button pressed on power up. Or hold the programming button and press reset.

    Now navigate to the firmware file and flash with:

    esptool.py --before default_reset --after hard_reset --baud 460800 --chip esp8266 --port COM5 write_flash 0x0 --verify

     Be sure to change your COM port accordingly.

  • Mosquitto commands

    schlion11/07/2020 at 00:54 0 comments

    Mosquitto commands:

    purge channel

    .\mosquitto_pub.exe -t livingroom/ota -r -n

    .\mosquitto_pub.exe -t <topic> -r -n

    post ON

    .\mosquitto_pub.exe -t livingroom/ota -m "ON"

    mosquitto server verbose

    .\mosquitto.exe -v

    mosquitto client/subscriber: get everything posted in this topic and dependent topics

    .\mosquitto_sub.exe -t livingroom/#

View all 3 project logs

Enjoy this project?

Share

Discussions

Similar Projects

Does this project spark your interest?

Become a member to follow this project and never miss any updates