 Peter Walsh
How it works
The "AppDaemon" runs your application (your product software) at system boot. If your application crashes or hangs, the daemon will automatically reboot the system.
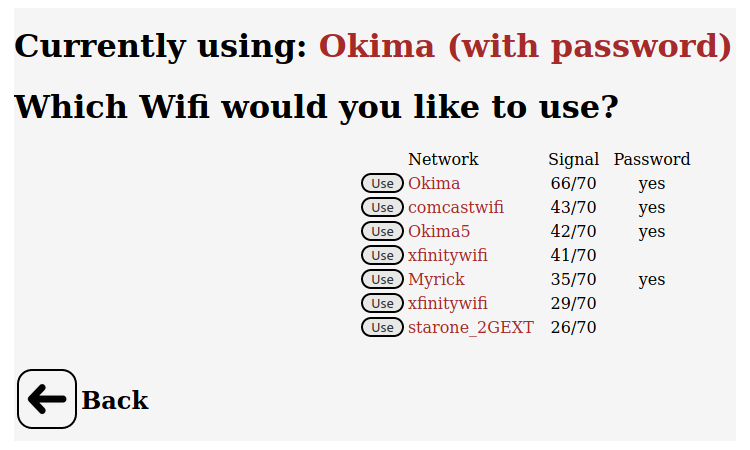
The AppDaemon also monitors a GPIO button. When pressed, the system will stop your application and switch to Access Point mode. It will broadcast an access point with the name of the system, in "captive portal" mode: any web access the user makes will be redirected to the local web server (the configuration pages). It's the mode used by public hotspots and airport WiFi to show a login page before allowing internet access.
When the user connects to the access point and opens a browser, they are presented with configuration panels to set system parameters such as the WiFi name and password.
When the user saves the configuration, the system will reboot and continue your product application.
Monitoring the product application
The AppDaemon is given an application to run, and will monitor that application for correct execution. If the application crashes, hangs, or exits the AppDaemon will reboot the system and rerun the application.
The intent is for a high-reliability system where one process is doing something which might hang, crash, or otherwise become a problem. When a problem with the application is detected, this daemon will reboot and presumably clear the error.
(This was originally for cell modem applications, because a cell modem can crash or hang for myriad reasons, and sometimes detecting that a problem exists is impossible.)
Integrating with your product application
The system is intended to be integrated into your application codebase.
After installing the project (using "git clone") and getting the sample application to run, simply replace the pathname of the sample application with the pathname of your application.
Comment out the configuration pages that don't apply to your system, and add a page that configures your application if you need one. Add some informative text to the "info" page that describes your application - there are instructions for doing this in the project.
Add your product branding to the configuration pages as needed: background color, fonts and styles, trademarks, and corporate logos.
This product is open source and free to use without attribution. Contact me through this site if you need a more definitive legal document. (See "private messages" at top of page.)
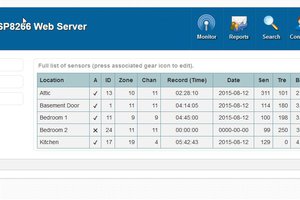
Built-in web page server
The AppDaemon has a built-in web page server for use by your application. Place "index.html" and whatever support pages you need (index.css, favicon.ico) in a separate directory and add the "WebDir=<that-directory>" to the AppDaemon line in rc.local.
When "WebDir" is supplied as an argument, a web server will be started in that directory while your application is running.
This is a *simple* web page server without sophisted processing or security. If you need more functionality, install and use Apache.
Bugs and errors
Please let me know about bugs and other issues so I can update the project.
 Michael O'Toole
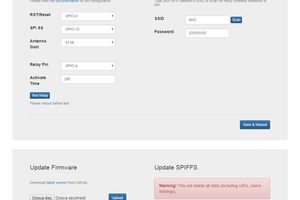
 omersiar
 zst123
 Danny
Danny