Close
0%
0%

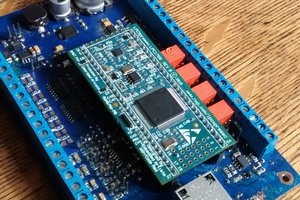
Minimal Raspberry Pi CM 4 Carrier

A very minimal design to break out some common peripherals of the CM4. More a quick demonstration than anything else.

Similar projects worth following
The goal was to show how little you have to do to do a fairly feature rich carrier board for the Compute Module 4. Also to demonstrate that you don't have to be scared by high-speed signals like HDMI and that they can still work fine in very bad conditions like a single layer PCB like this one without a reference plane underneath.

Please only use this as a starting point if at all and take a look at the open reference design by the Pi foundation for a more in-depth carrier design. This design skips several saftey features like load switches on the USB and HDMI, most of the time that's fine but you should make sure that you really don't care about that.

Also do please attempt to do some impedance matching. An online calculator to get the correct trace width is already an ok approximation for most use cases.
4 Layer PCBs are to be had for 5$ and less now a days.

This was milled on an Othermill Pro / Bantam PCB Mill.

Enjoy this project?

Share

Discussions

Jibon wrote 10/18/2021 at 04:36 point

Hi, May I ask which Milling Machine or technique did you use for this beautiful routing?

  Are you sure? yes | no

timonsku wrote 05/18/2022 at 21:10 point

An Othermill Pro

  Are you sure? yes | no

Biko wrote 12/03/2020 at 15:29 point

Very nice project😊!

I am a beginner in PCB designing. Would you list down the name of the used components in the board

Thanks in advance

  Are you sure? yes | no

Kris Jones wrote 11/20/2020 at 20:40 point

I love this project! What make/model PCB mill did you use? 

  Are you sure? yes | no

timonsku wrote 05/18/2022 at 21:10 point

Othermill Pro

  Are you sure? yes | no

hypervirtualx2 wrote 11/20/2020 at 19:14 point

It is just amazing how far we've come in terms of diy homemade engineering, thanks for sharing. I have a question about the usb connection: I see that you left the otg_id floating, does the raspberry pi acts as a host or a device in this case? I'm thinking of connecting the otg_id to a microusb id pin, but I saw in the documentation that the otg functionality is not fully implemented. My idea is to use a single microusb connection as a device and also as a host with an usb A adapter.

  Are you sure? yes | no

runescapehall wrote 11/16/2020 at 15:39 point

Thanks a lot. I might use this in the near future.

  Are you sure? yes | no

timonsku wrote 11/16/2020 at 13:39 point

Sure, this already linked in the resource section?

  Are you sure? yes | no

Elliot Williams wrote 11/13/2020 at 19:25 point

Damn, son!  :)

I take back everything bad I've ever said about milled PCBs.  This one is sweeeeet.

  Are you sure? yes | no

timonsku wrote 11/13/2020 at 22:22 point

haha, thanks Elliot :)

  Are you sure? yes | no

Similar Projects

Does this project spark your interest?

Become a member to follow this project and never miss any updates