 Mario Gianota
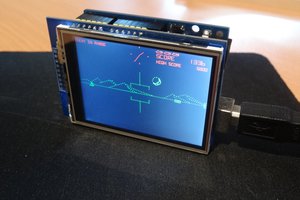
Building an accurate digital compass is a fairly straight-forward task, especially with the Arduino Uno which makes life easy with its excellent libraries. What distinguishes this compass from others is that it uses a 65,336 colour TFT LCD to display a nice image of a compass and a heading in degrees. I also spent some time investigating the phenomenon of polar wander which affects compass readings.
To ensure that the compass is accurate, one needs to take into account the user's magnetic declination. The molten rock churning and spinning below our feet causes the Earth's magnetic poles to slowly wobble. This wobble affects the compass' reading. The magnetic declination is the "wobble offset" that needs to be added to a heading.
Magnetic declination is an important concept for accurate navigation. A compass will always point along the lines of magnetic force (which converge on what are called the magnetic poles). The angle between the direction of force and the direction of the geographic north pole is called the declination. If a compass at your location is pointing to the right of true north, declination is positive or east, and if it points to the left of true north, declination is negative or west. As one moves across the surface of the globe, lines of constant magnetic declination are called isogonic lines.
The image shows level curves drawn on a declination map to denote the magnetic declination varying over the years since 1900. Each level curve is an isogonic line.
Fortunately, the magnetic declination for locations on Earth are tracked by various agencies. It is possible to measure it directly yourself, but the easiest way you can obtain this information is to visit the magnetic-declination.com web site and look it up for your location.
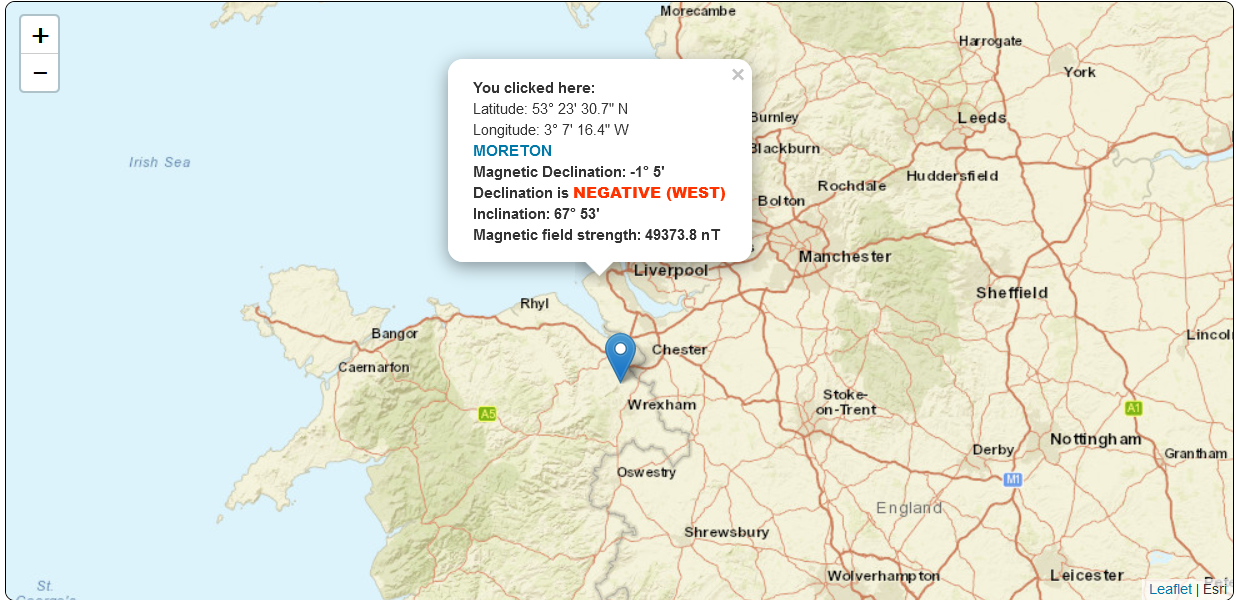
The image above shows the magnetic declination for my location in the UK. This value is added to the heading azimuth (the angular heading measurement) obtained from the compass module. In my case, the value is -1.5. A failure to add this value to the heading results in an inaccurate compass reading. Furthermore, since the magnetic declination varies with time, the compass needs to be updated with the new value on a periodic basis.
For those of you requiring a little more information, you can access the National Oceanic And Atmospheric Administration website's declination viewer . This viewer displays declination data stretching way back when and also provides predictions about where it may go next.
In addition to the viewer, the National Geospatial-Intelligence Agency (NGA) provides source code written in C that is free to download and includes a data file updated every five years to account for movement of the magnetic north pole.
To add to the implementation woes, since the magnetic declination also varies with location, a truly effective compass would obtain your GPS location and automatically lookup the declination. But this adds to the expense of the hardware. I make no attempt to do this with this compass: You simply edit the micro-controller source code and add your magnetic declination as a constant. Problem solved, albeit a little inelegantly.
In a nutshell, other than calibrating the compass before you use it (this entails rotating the compass 360 degrees and recording some offsets) that's pretty much the only detail you need to take care of with a digital compass. Connecting a compass module to an Arduino and an LCD is an easy task. The hard part is ensuring that the compass will produce an accurate reading.
See the Build Instructions section for instructions on building this compass.

 Mark Wilson
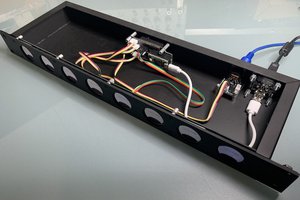
 Tom Dowad
 arunmagesh
 mircemk
Hello from Eric, How can I get the Nextion TFT file for this project?
Thanks in advance