 David Tucker
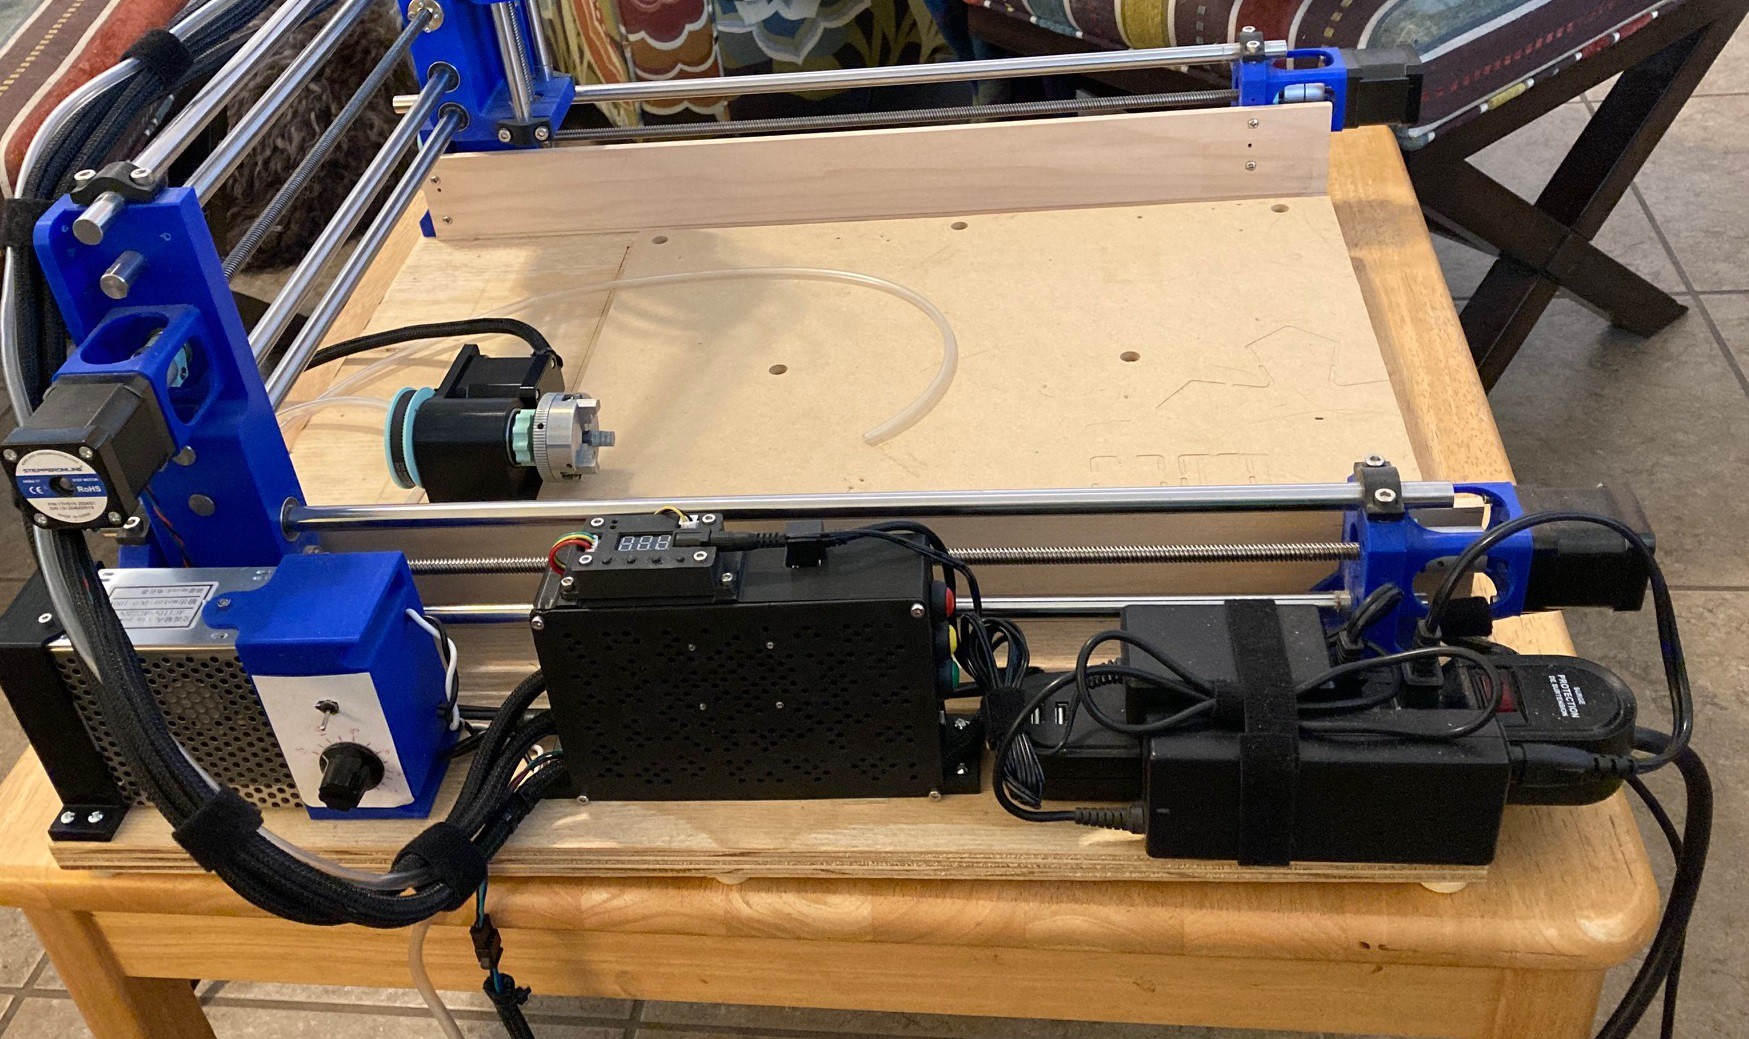
So after way too much time and effort I have successfully moved from a GRBL CNC Shield to a MKS Gen L V2.1 board. That allowed me to go from 4 drivers to 6, upgrade to a slightly stronger processor with twice the memory, and use an all in one board that is roomier and that uses locking connectors on most pins. All this just to add a 4th axis to my machine while still keeping support for auto squaring the y axis using two motors.
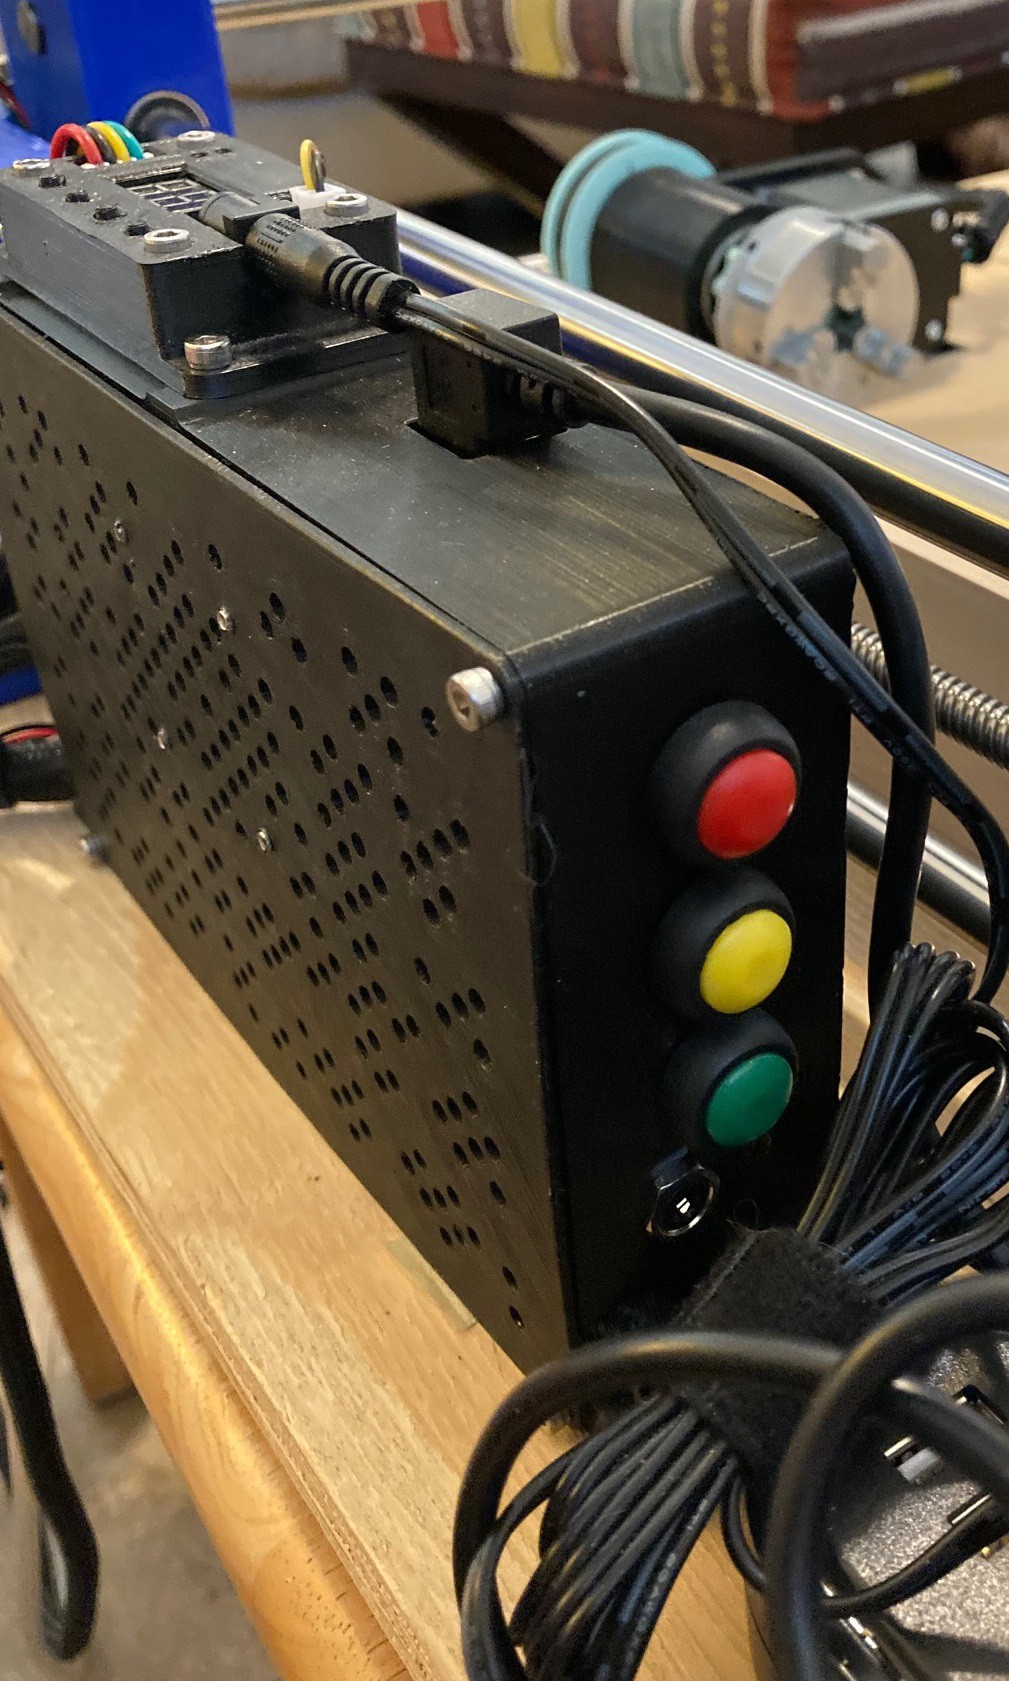
While I was at it I decided to add in the standard halt/pause/resume buttons for a GRBL machine, just to try them out. And I added in a headphone jack so I could wire up a touch probe to the machine as well.
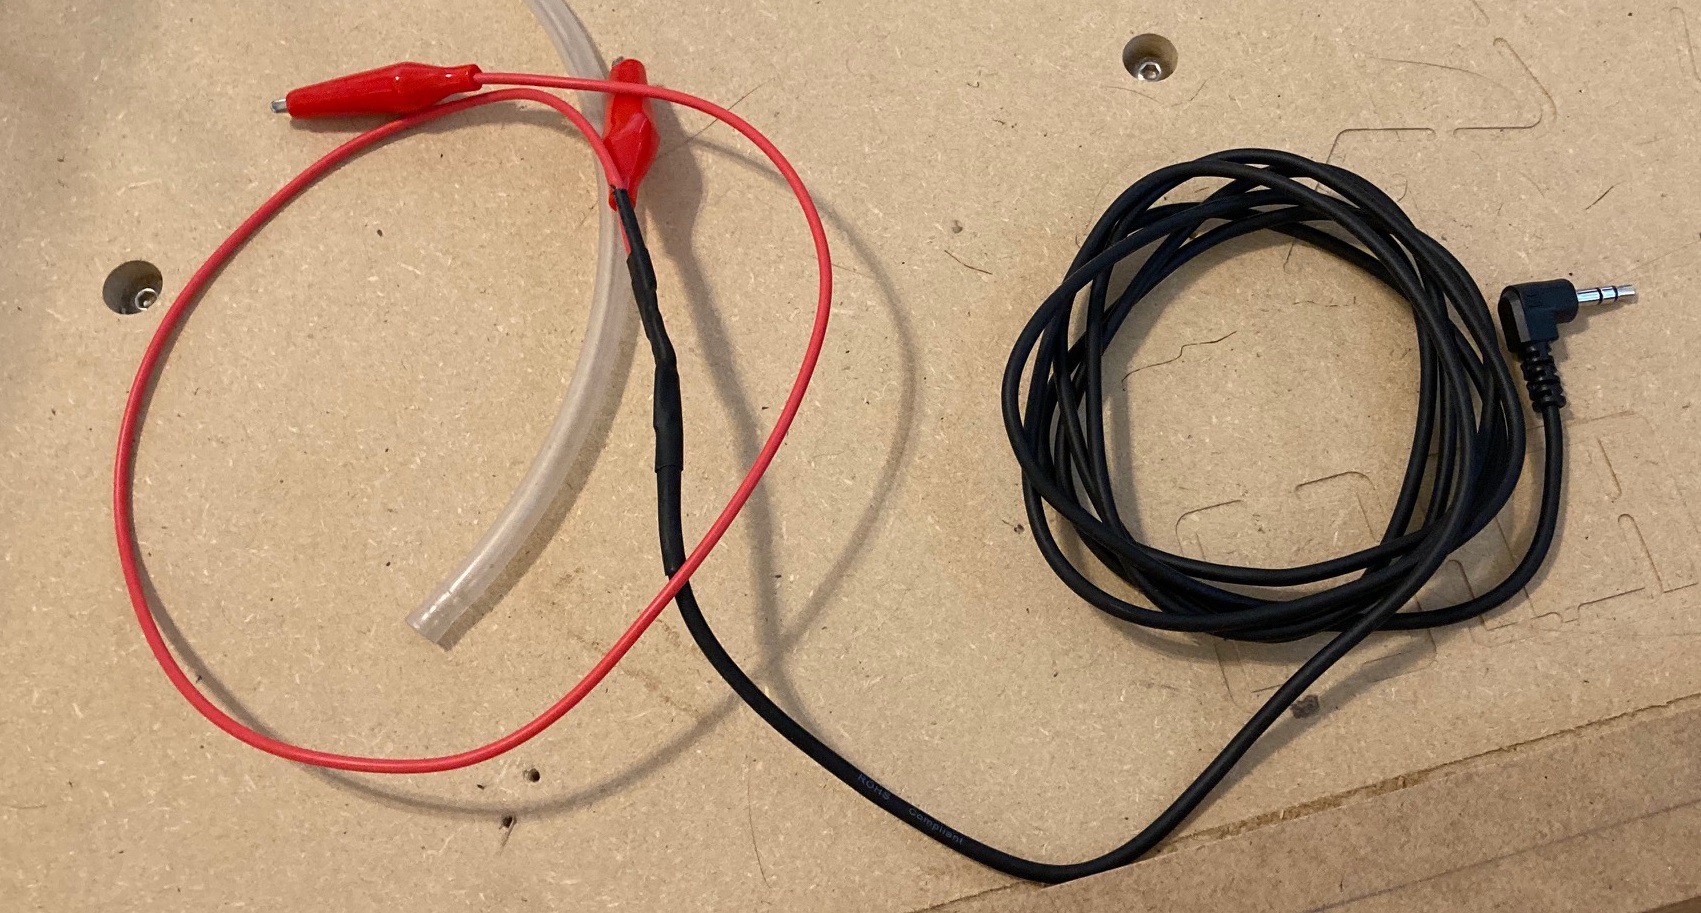
For now my touch probe is just a length of headphone cable with alligator clips on the end of it. When I find the time I plan on machining a proper aluminum block so I can find corners accurately. In the meantime I will probably clip this to a piece of steel or other scrap metal.
I had this wired up with power going to the tip of the headphone jack. My hope was to add a LED light to the end of the touch probe so it would be very obvious if this was working right. However when removing the jack there is a momentary short between all the pins and that causes the controller to reboot, so that had to go. It is a good idea still, but I need a different connector on the controller side. To make up for this I added an LED light at the controller side, it is not as visible but it does work.
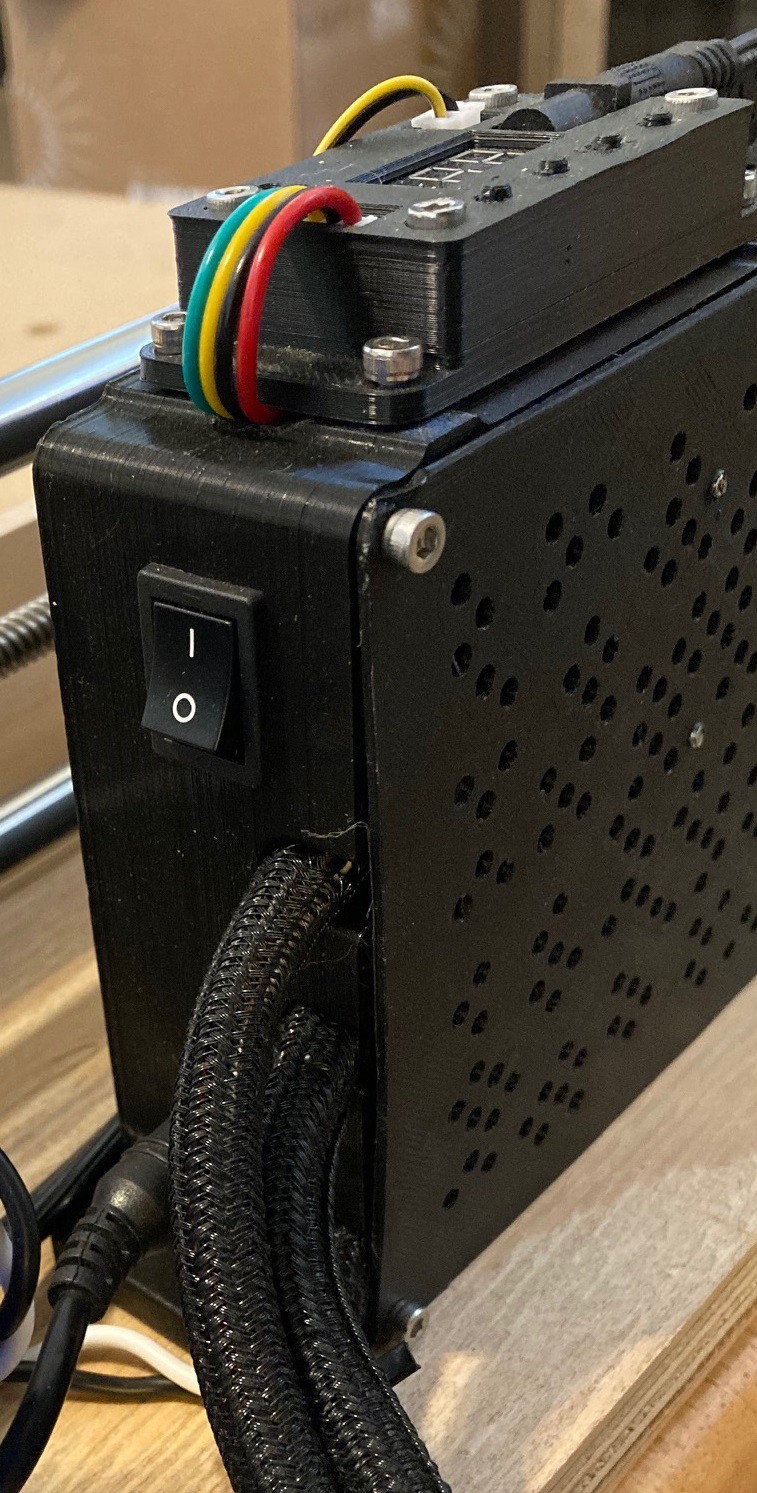
On the backside we have power and a power switch, and of course all the cables going to the gantry come out here.
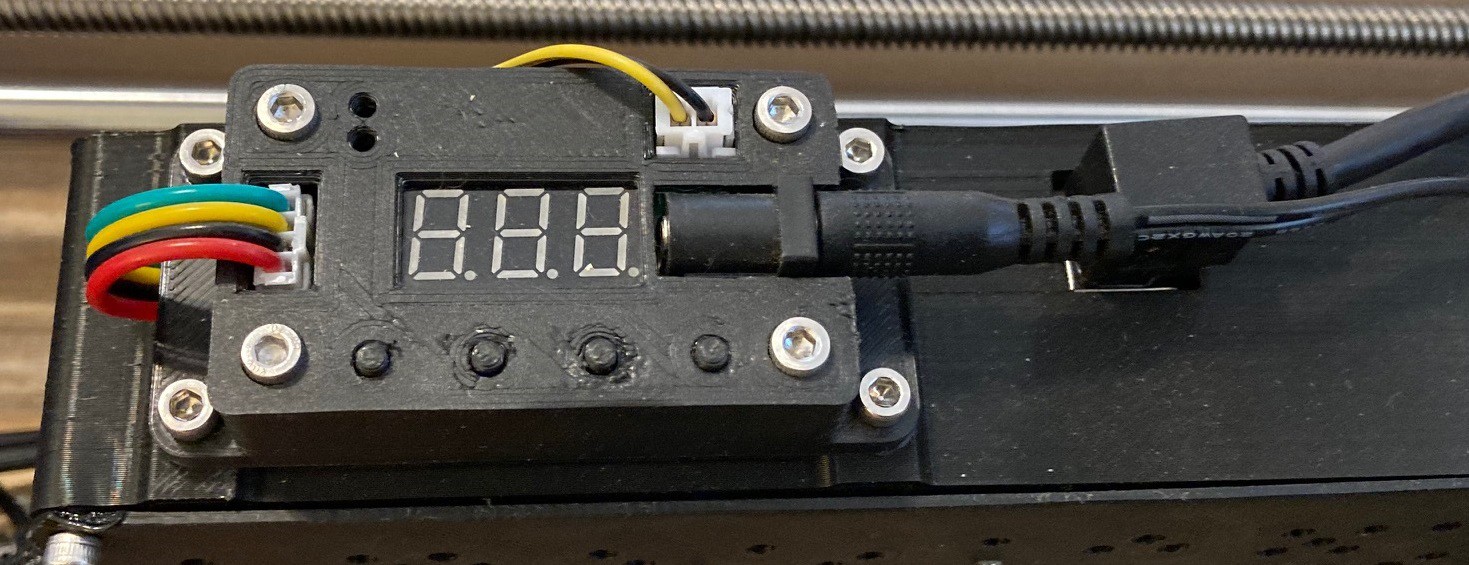
Up top I added my laser control board (which could use a reprint) and I ended up grabbing a right angle usb connector as well so that the cable would not stick up too high and interfere with the gantry.
I decided to stand the board up on its side so that I could have plenty of air flow on the front without much risk of chips flying into the control box. I have a 40 mm 24v fan mounted to the lid to help with air flow. I was unable to mount it close to the heatsinks on the drivers but my hope is that it will produce enough flow to help anyway. The lid is a weak spot, it is not very thick or sturdy, it could use another design pass, but for now it gets the job done.

Finally I added in a new 4 outlet power strip with a pair of 5v USB jacks at the end. I figured the usb jacks could be used to add lighting or some other accessory (raspberry pi, etc.) at some future time. This strip comes with convenient holes in the bottom so I could secure it to the base, and I located the on/off switch at the very front of the machine to act as an e-stop as well. It is amazing how much work wiring is, most of the last several weeks were spent on wiring, or avoiding wiring.
I'm going to go ahead and upload my plans for the controller box to thingiverse. I don't know how much value it has for others, it has very specific holes cut out for the power and buttons and they are not all from the same shop. And I will upload my modified GRBL code to github as well and talk about the modifications in a later post.
The big question is, was all of this worth it? Right now I'm feeling like it was not. We will see once the rotary is fully up and running. I say this because it is much more complicated all the way around to put together and it cost more than a $15 cnc shield and Uno from china. The GRBL-MEGA-5x install does not just work out of the box, the wiring must be changed to work with the board (and cheap crimp tools stink), and of course it cost more and takes up more space. It is just a lot more work, for only a few limited improvements.
On the up side it is better put together, and I would be very disappointed to see a CNC Shield in any machine that I paid money for. This is undoubtedly a more professional setup, and if you were in the business of making a machine then customizing the firmware and making a custom wiring loom would be expected. And of course it does what we wanted it to do and adds in an extra axis for us to use. In fact with a bit of work we can add a 6th axis now as well.
Discussions
Become a Hackaday.io Member
Create an account to leave a comment. Already have an account? Log In.