 Richard Myers
We describe how to create a mesh gateway device built with low-cost off-the-shelf parts that allows local off-grid mesh network users to exchange text messages with people on a traditional mobile phone network. This system can be used to extend global connectivity into off-grid locations or disaster areas.
In the article “How To Mesh The World” we describe how mesh networks can use gateways to traditional centralized networks to expand their usefulness. Data beamed from a satellite, for example, can be relayed through a gateway to off-grid users connected via a local mesh network, or connect users in different parts of the world via an Internet connected gateway.
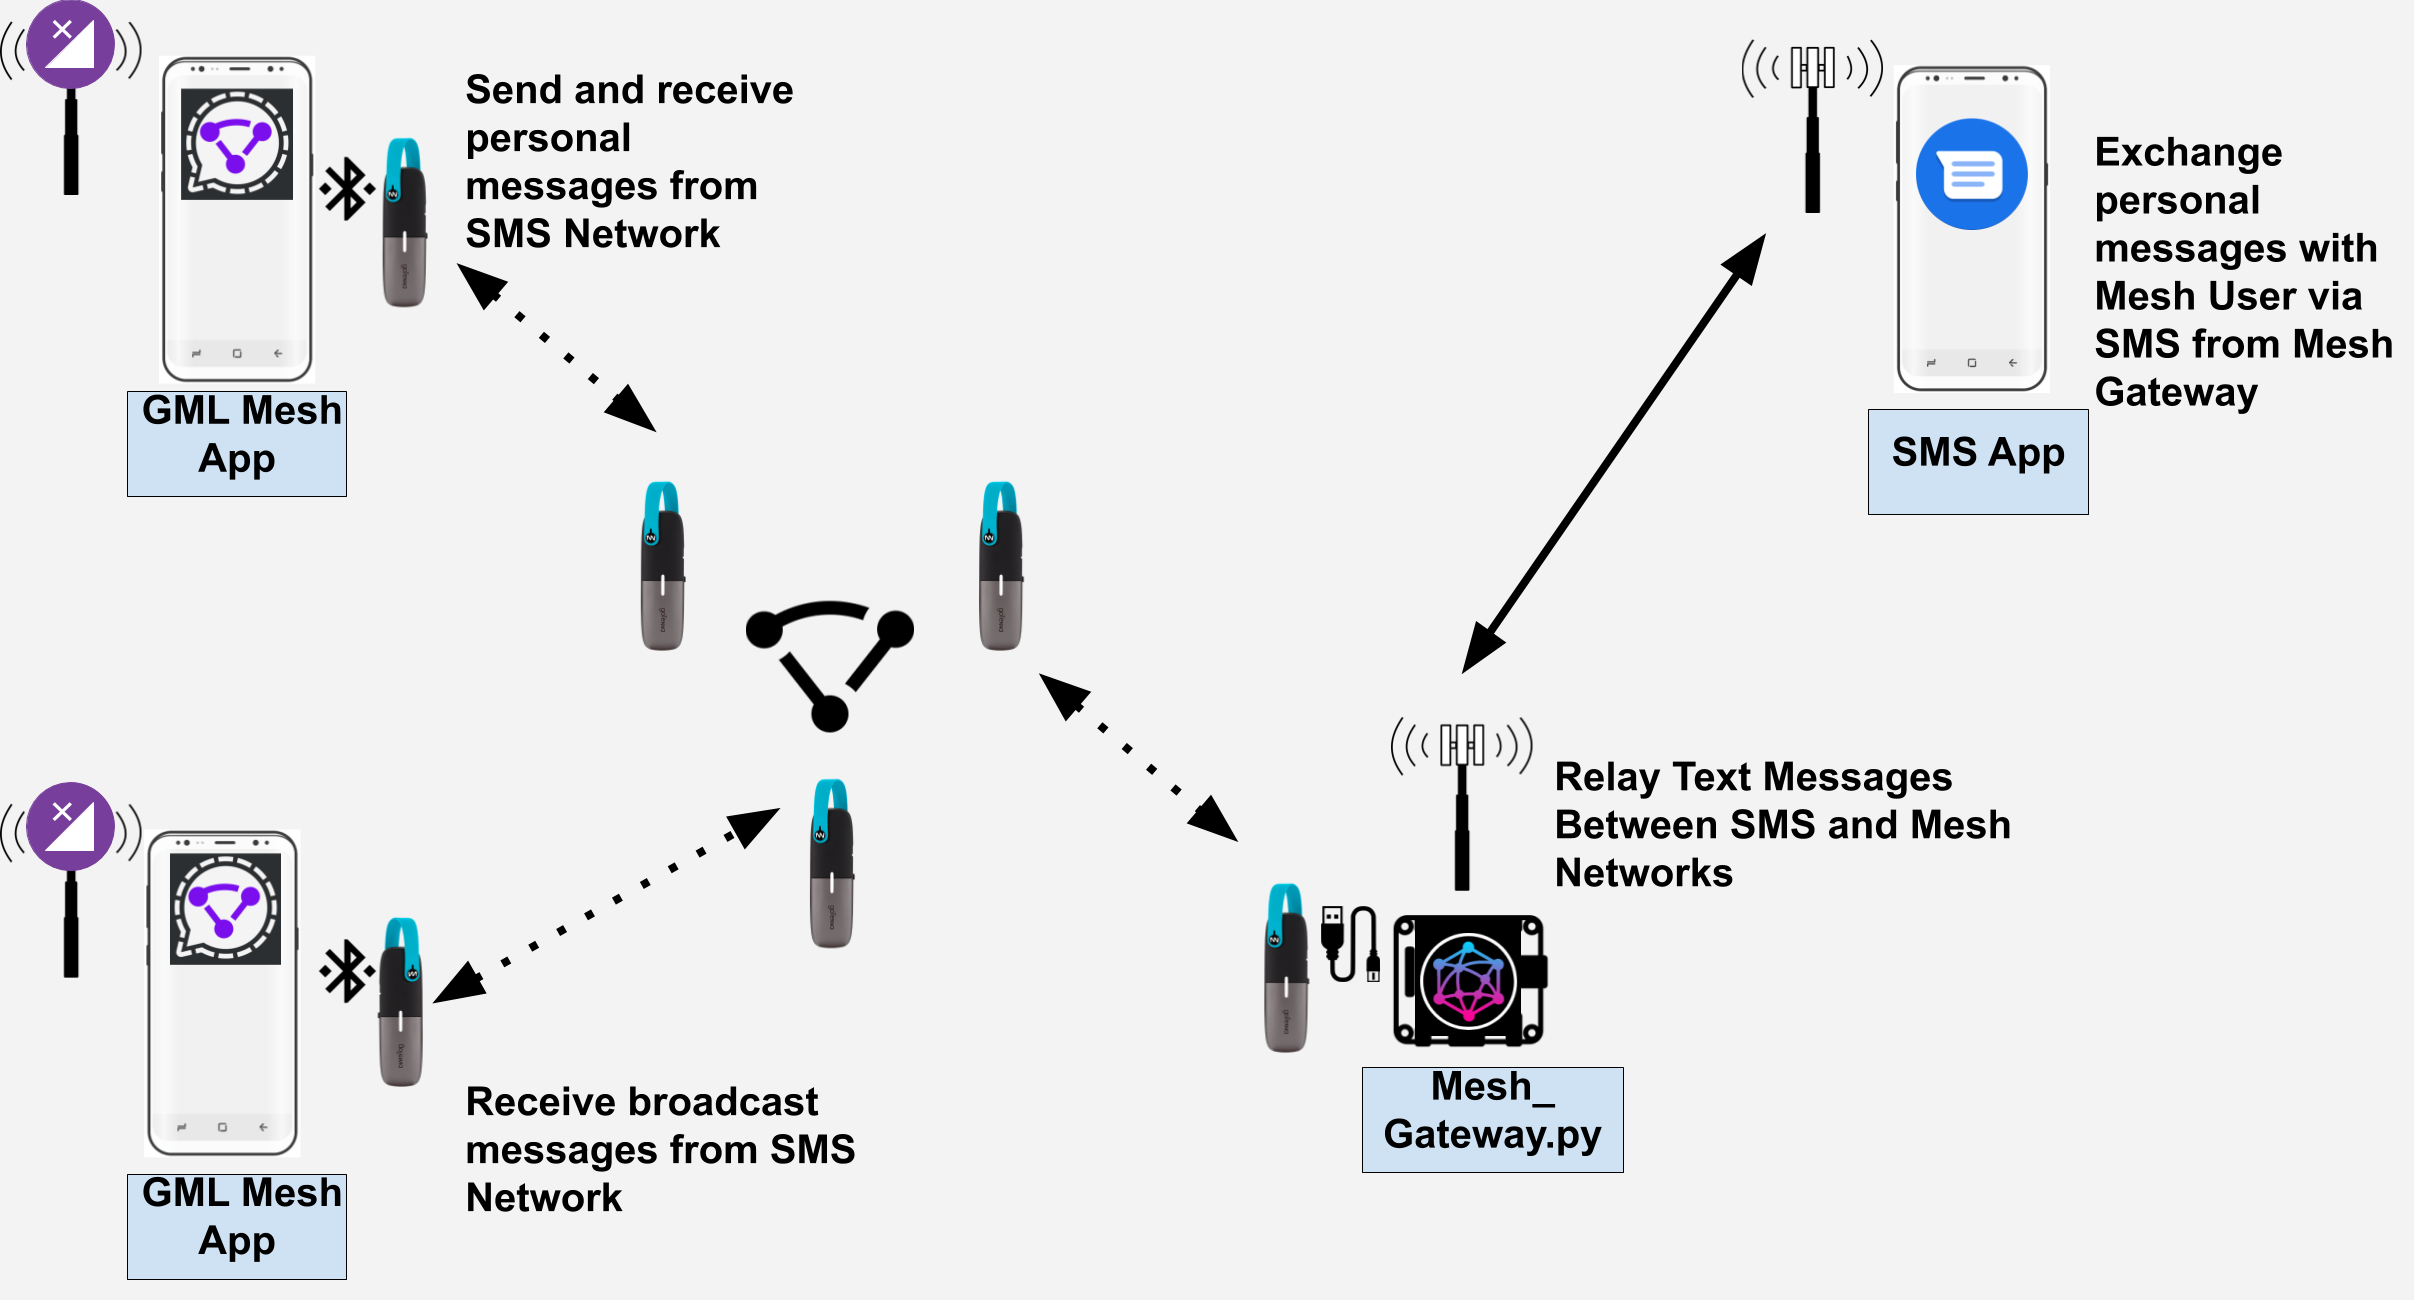
Our mesh gateway project uses a small board computer with both GSM and mesh radios that runs a Python script to bridge these two networks. Users on the mesh network use a simple Android messaging app to exchange messages with other local mesh users or to exchange SMS messages with anyone on a GSM mobile network.
History
This project was first proposed in a post in early 2019 and the initial software was posted in early 2020 with the addition of a reference hardware implementation by Tourmaline Wireless. The python script that runs on the gateway is derived from the example script provided by goTenna with their public SDK. The Android messaging app used to communicate over the mesh network through the gateway is a fork of the Signal App that adds support for mesh communication using code from the sample Android app. Our fork of the Signal App allowed us to rapidly create an an open-source prototype messaging app.
Mesh App
For simplicity we disable Signal's encrypted messaging functionality in our fork. This allowed us to rapidly prototype a messaging app with a familiar interface for our mesh gateway. We are currently working on our own open-source messaging app and would be happy to help integrate compatible mesh functionality into different open-source messaging apps.
Gateway Script
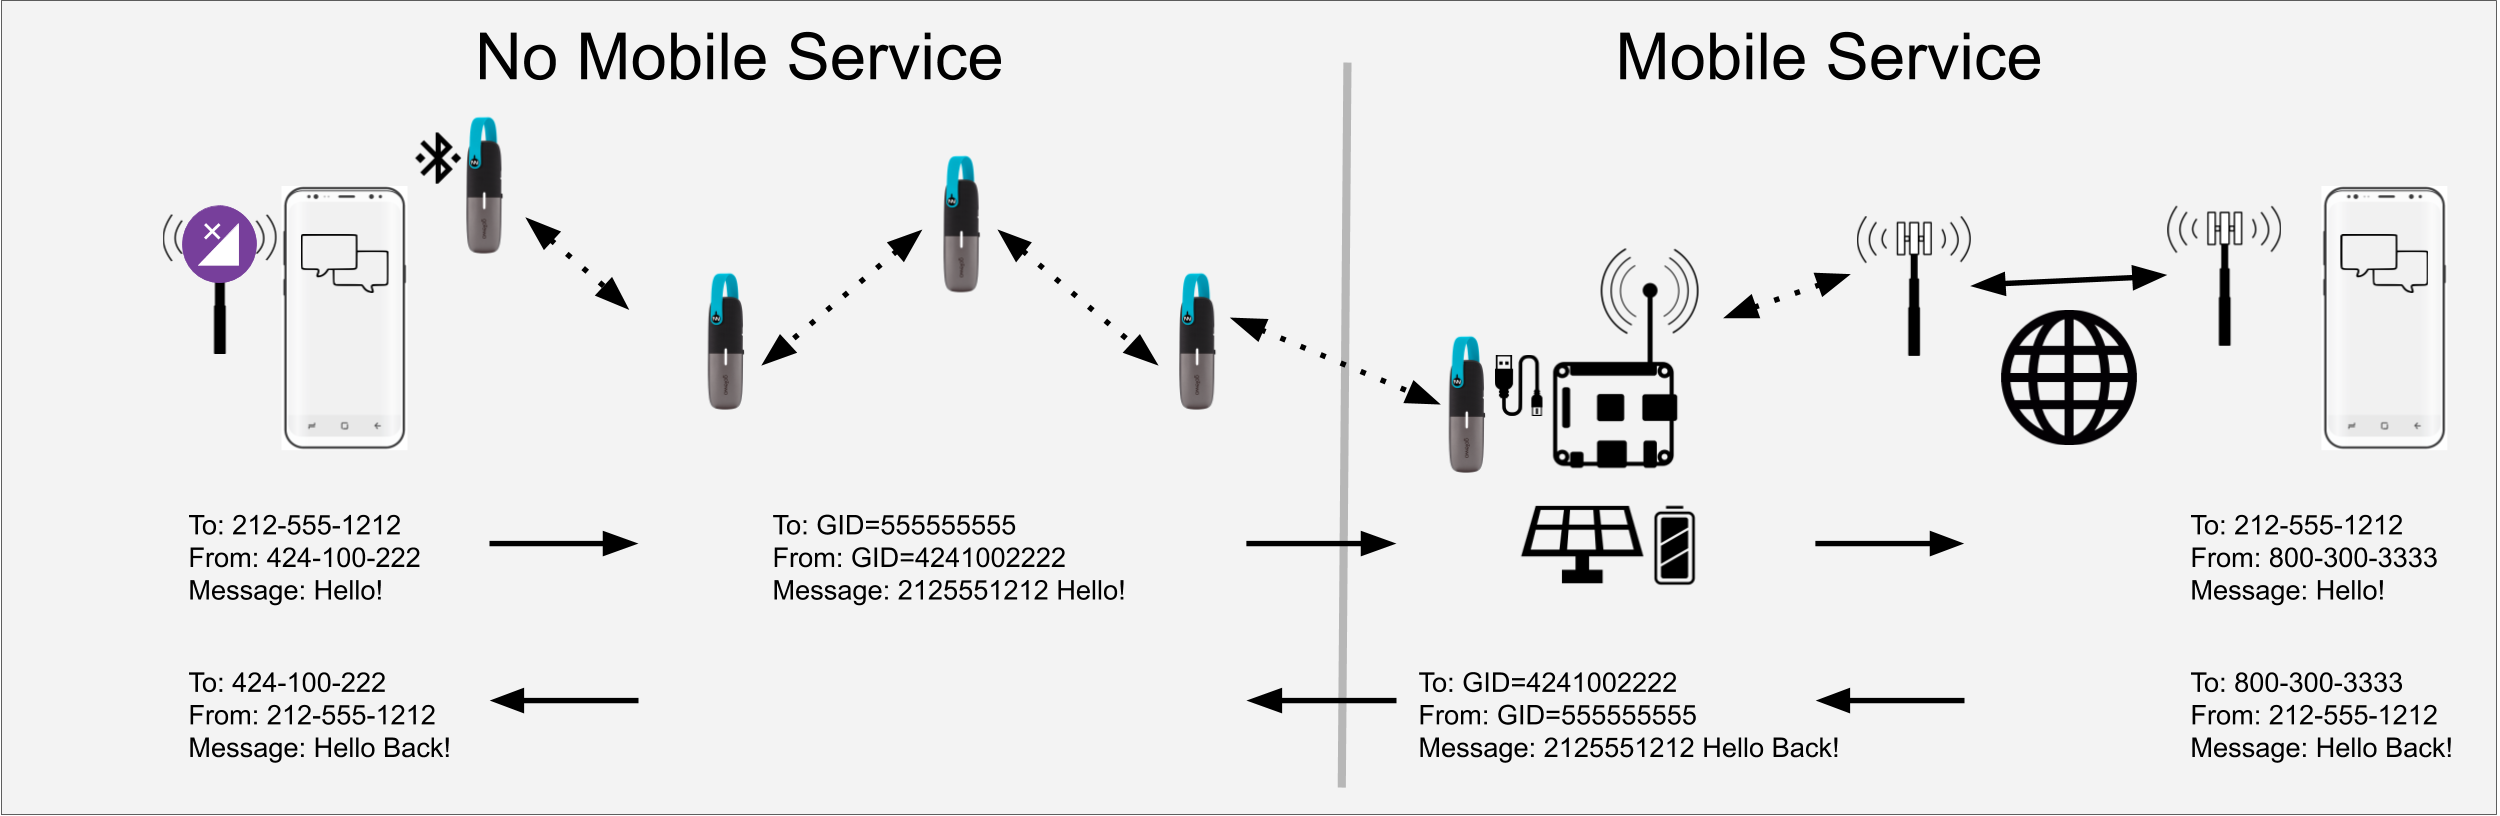
The Mesh Gateway script runs on a Raspberry Pi4 and forwards messages between the Mesh App via mesh radio and the GSM network. Messages from the Mesh App include the mesh cender's device ID and the phone number of the GSM network recipient. When a GSM recipient responds, their reply is forwarded over the mesh network to the corresponding mesh sender's device ID.
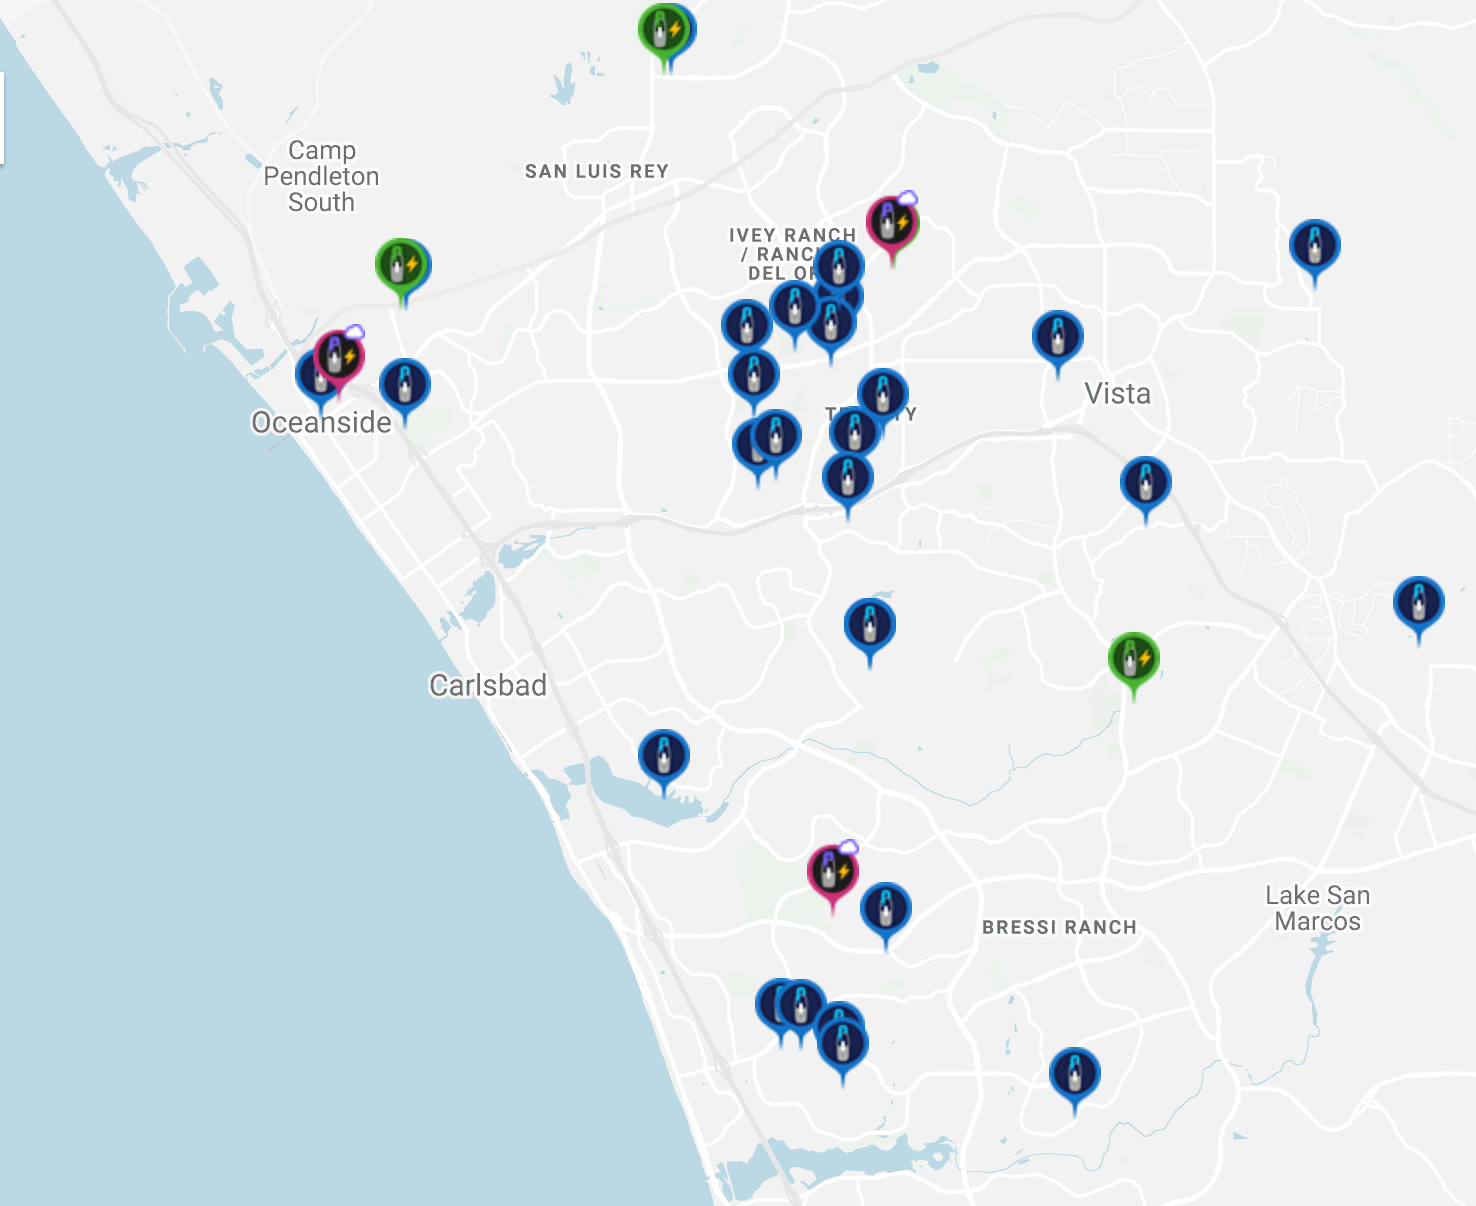
The Mesh Gateway script also registers a user provided position and radio range for the gateway device on a web based map and posts periodic updates. The map will also indicate if a gateway has recently been updated or if it is offline.
Mesh Device
The Mesh Gateway script runs on a RaspberryPi 4B with a 3G/4G & LTE Base HAT from Sixfab to connect to the GSM network and a goTenna Mesh radio for mesh network communication connected via a USB cable.

Setup
- Install and run the GML Mesh App with a goTenna Mesh attached (instructions)
- Install a Mesh Gateway device with a GSM modem and goTenna Mesh attached (instructions)
SMS Gateway Messaging
- Select a phone contact using the GML Mesh App on your mobile device.
- Compose a message and select to send it using the goTenna Mesh radio to a Mesh Gateway device.
- The Mesh Gateway will receive the message and forward it to the SMS contact via the GSM network.
- The SMS recipient will receive the message as an SMS message from the Mesh Gateway.
- The SMS recipient can reply to the message using any SMS messaging app.
- When the Mesh Gateway receives an SMS message, it looks up the mesh ID of the device that last sent an SMS to the phone number of the incoming SMS.
- If a corresponding mesh sender is found, the gateway forwards the reply to the corresponding mesh device.
- If no corresponding mesh sender is found, the gateway broadcasts the message to mesh devices near the gateway.
- Mesh users receive SMS messages sent as direct replies and broadcasts via the GML Mesh App.
Operation Details
- Messages are sent over the goTenna network to the nearest...


 David Chatting
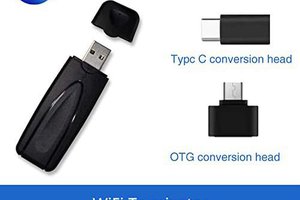
 Wei Wang
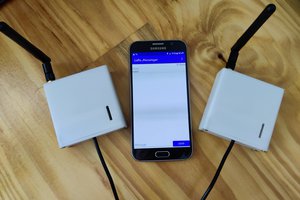
 Keegan
 Roman V
meybe add https://reticulum.network/index_pl.html nodes to network?