 Yohan Hadji
So this is R2Home: a fully autonomous, and flight proven GPS guided recovery system. But how do we get there, and what is important to get a working R2Home?
 The general idea we want to reach.
 Main details :
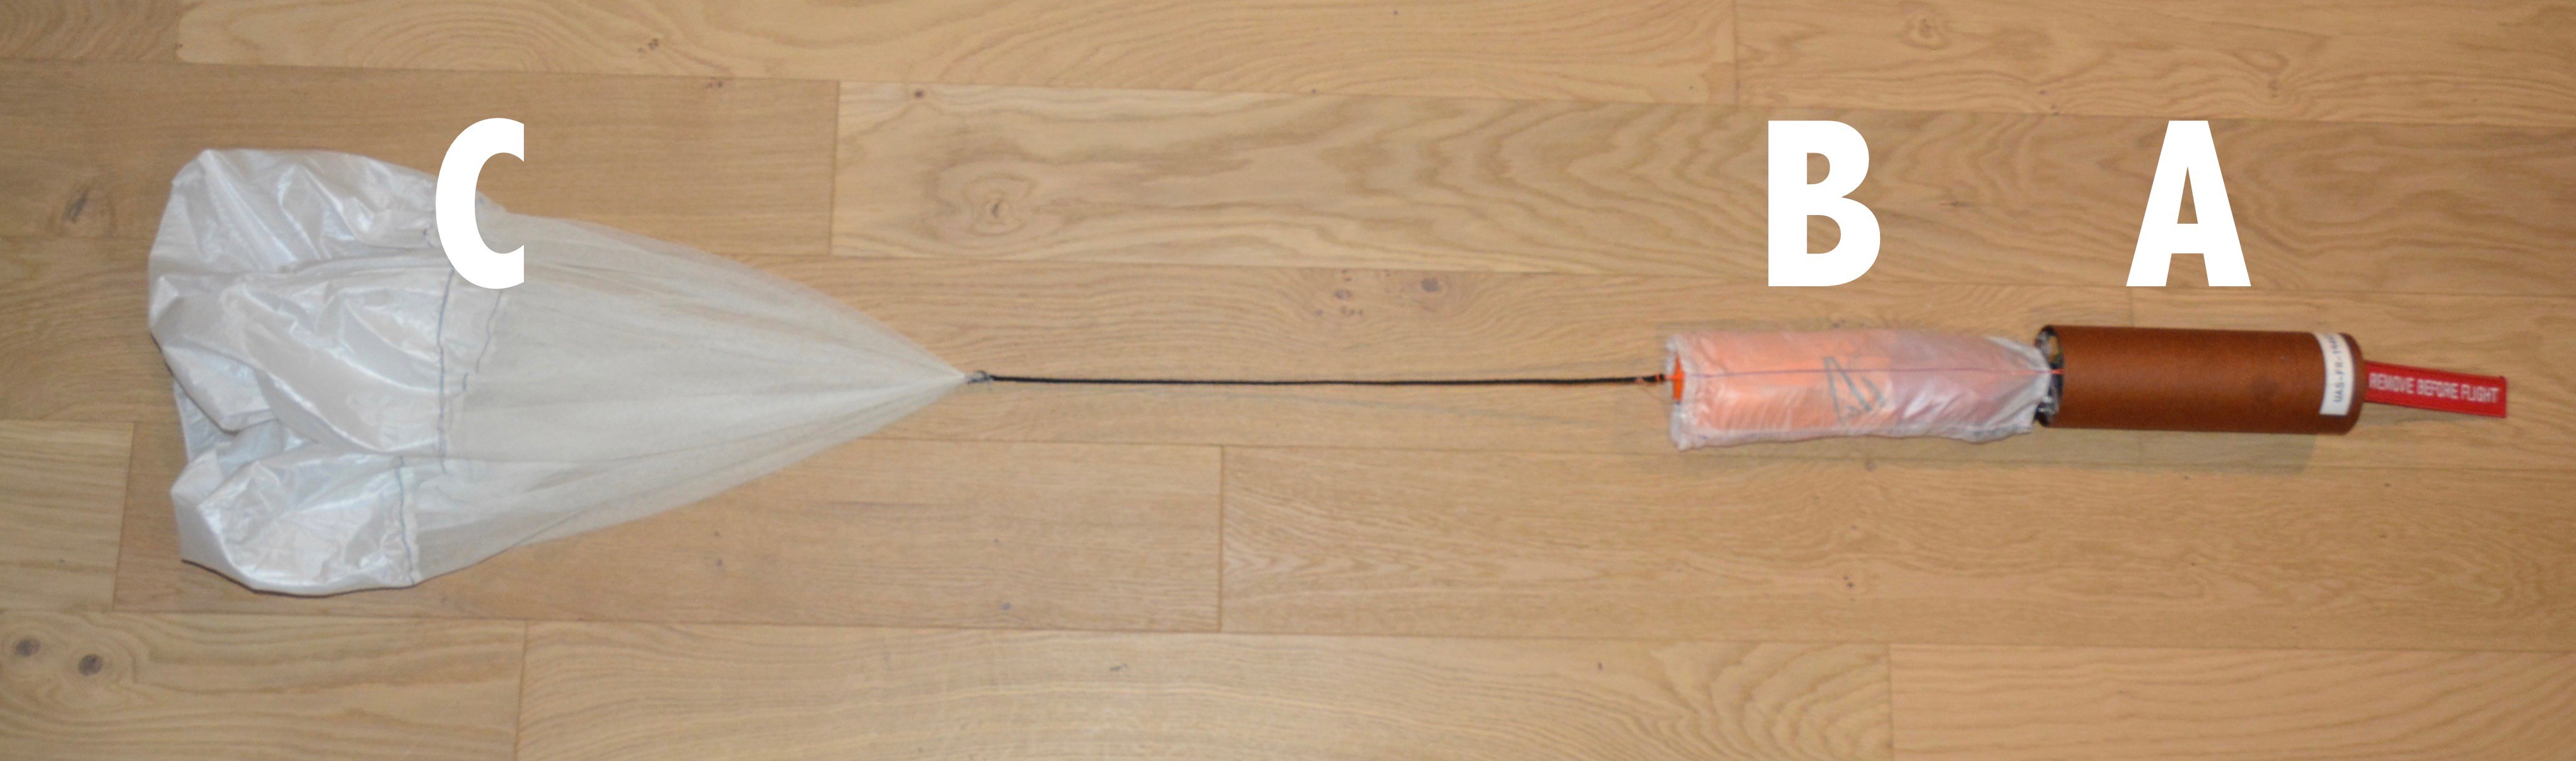
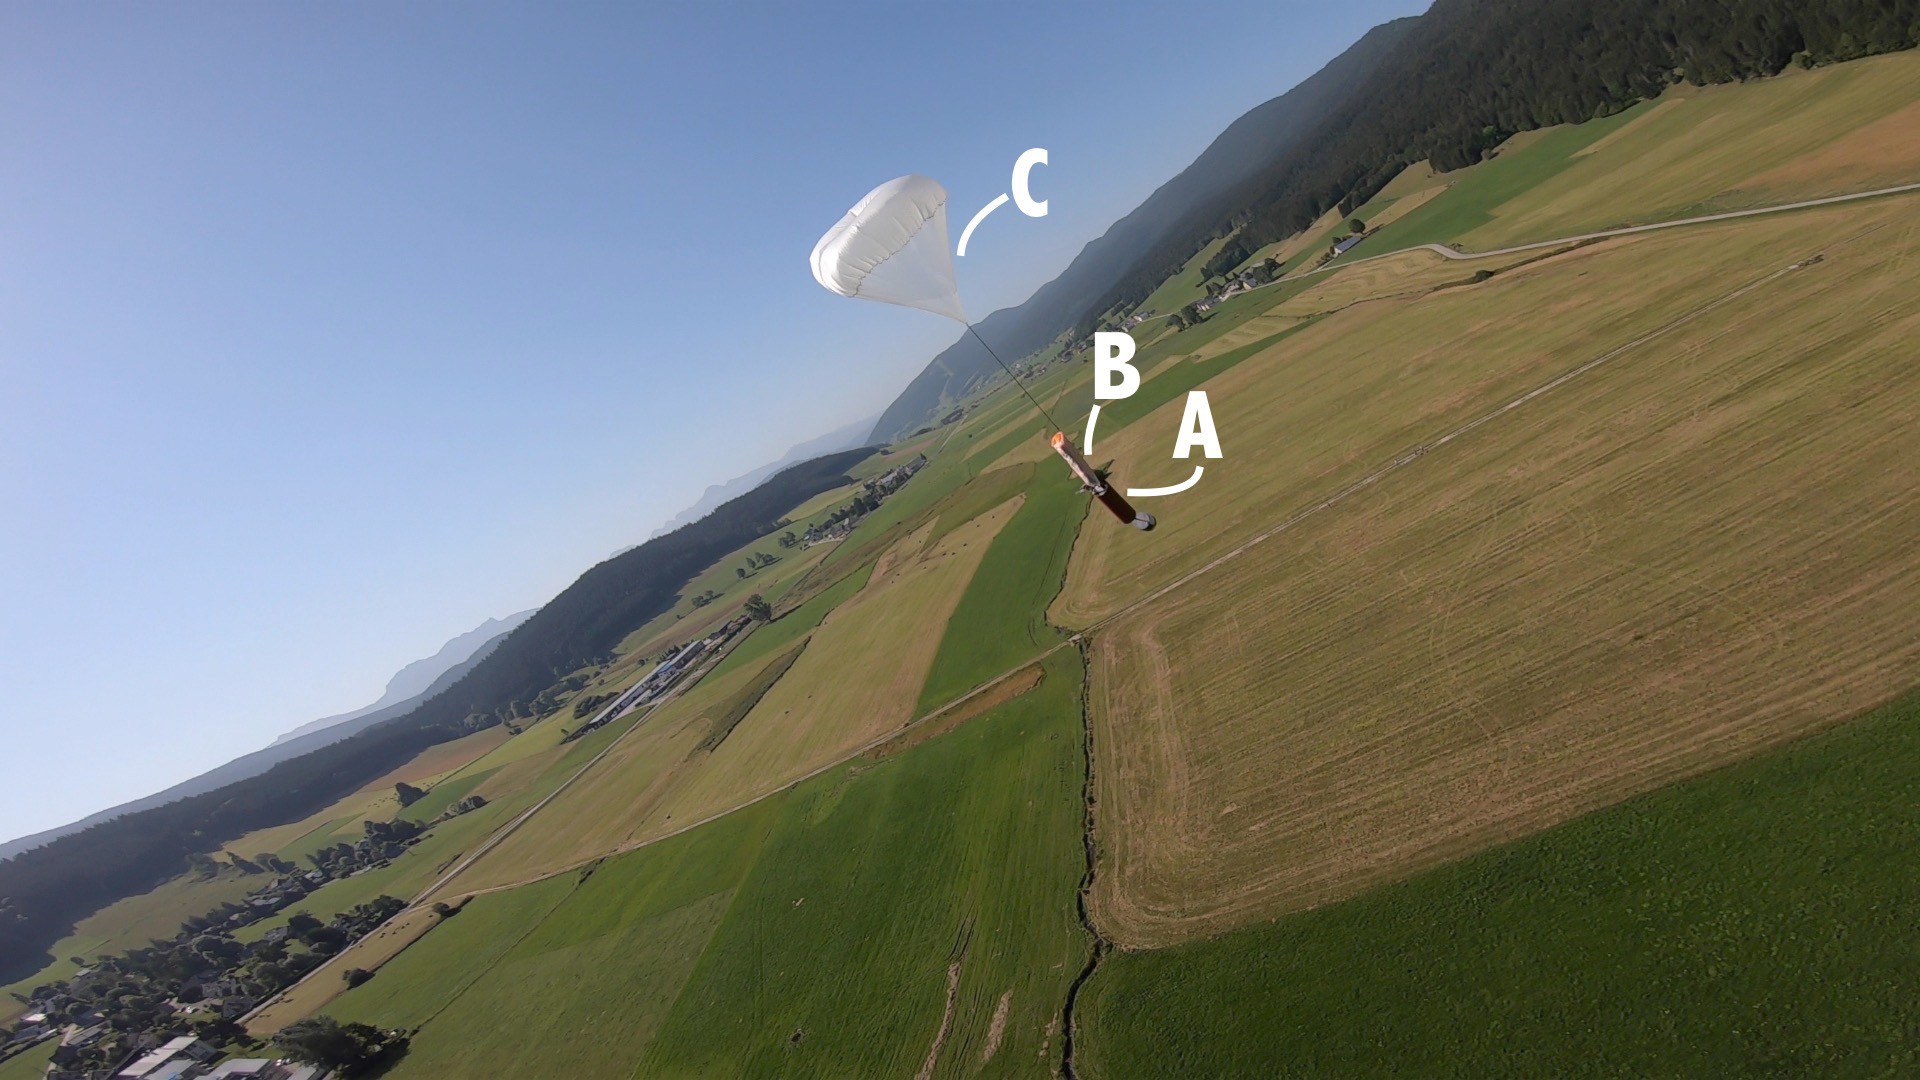
R2Home is composed of few main elements : The tube containing the system (A), the wing in its deployment bag (B), the extraction parachute or "drogchute" (C)
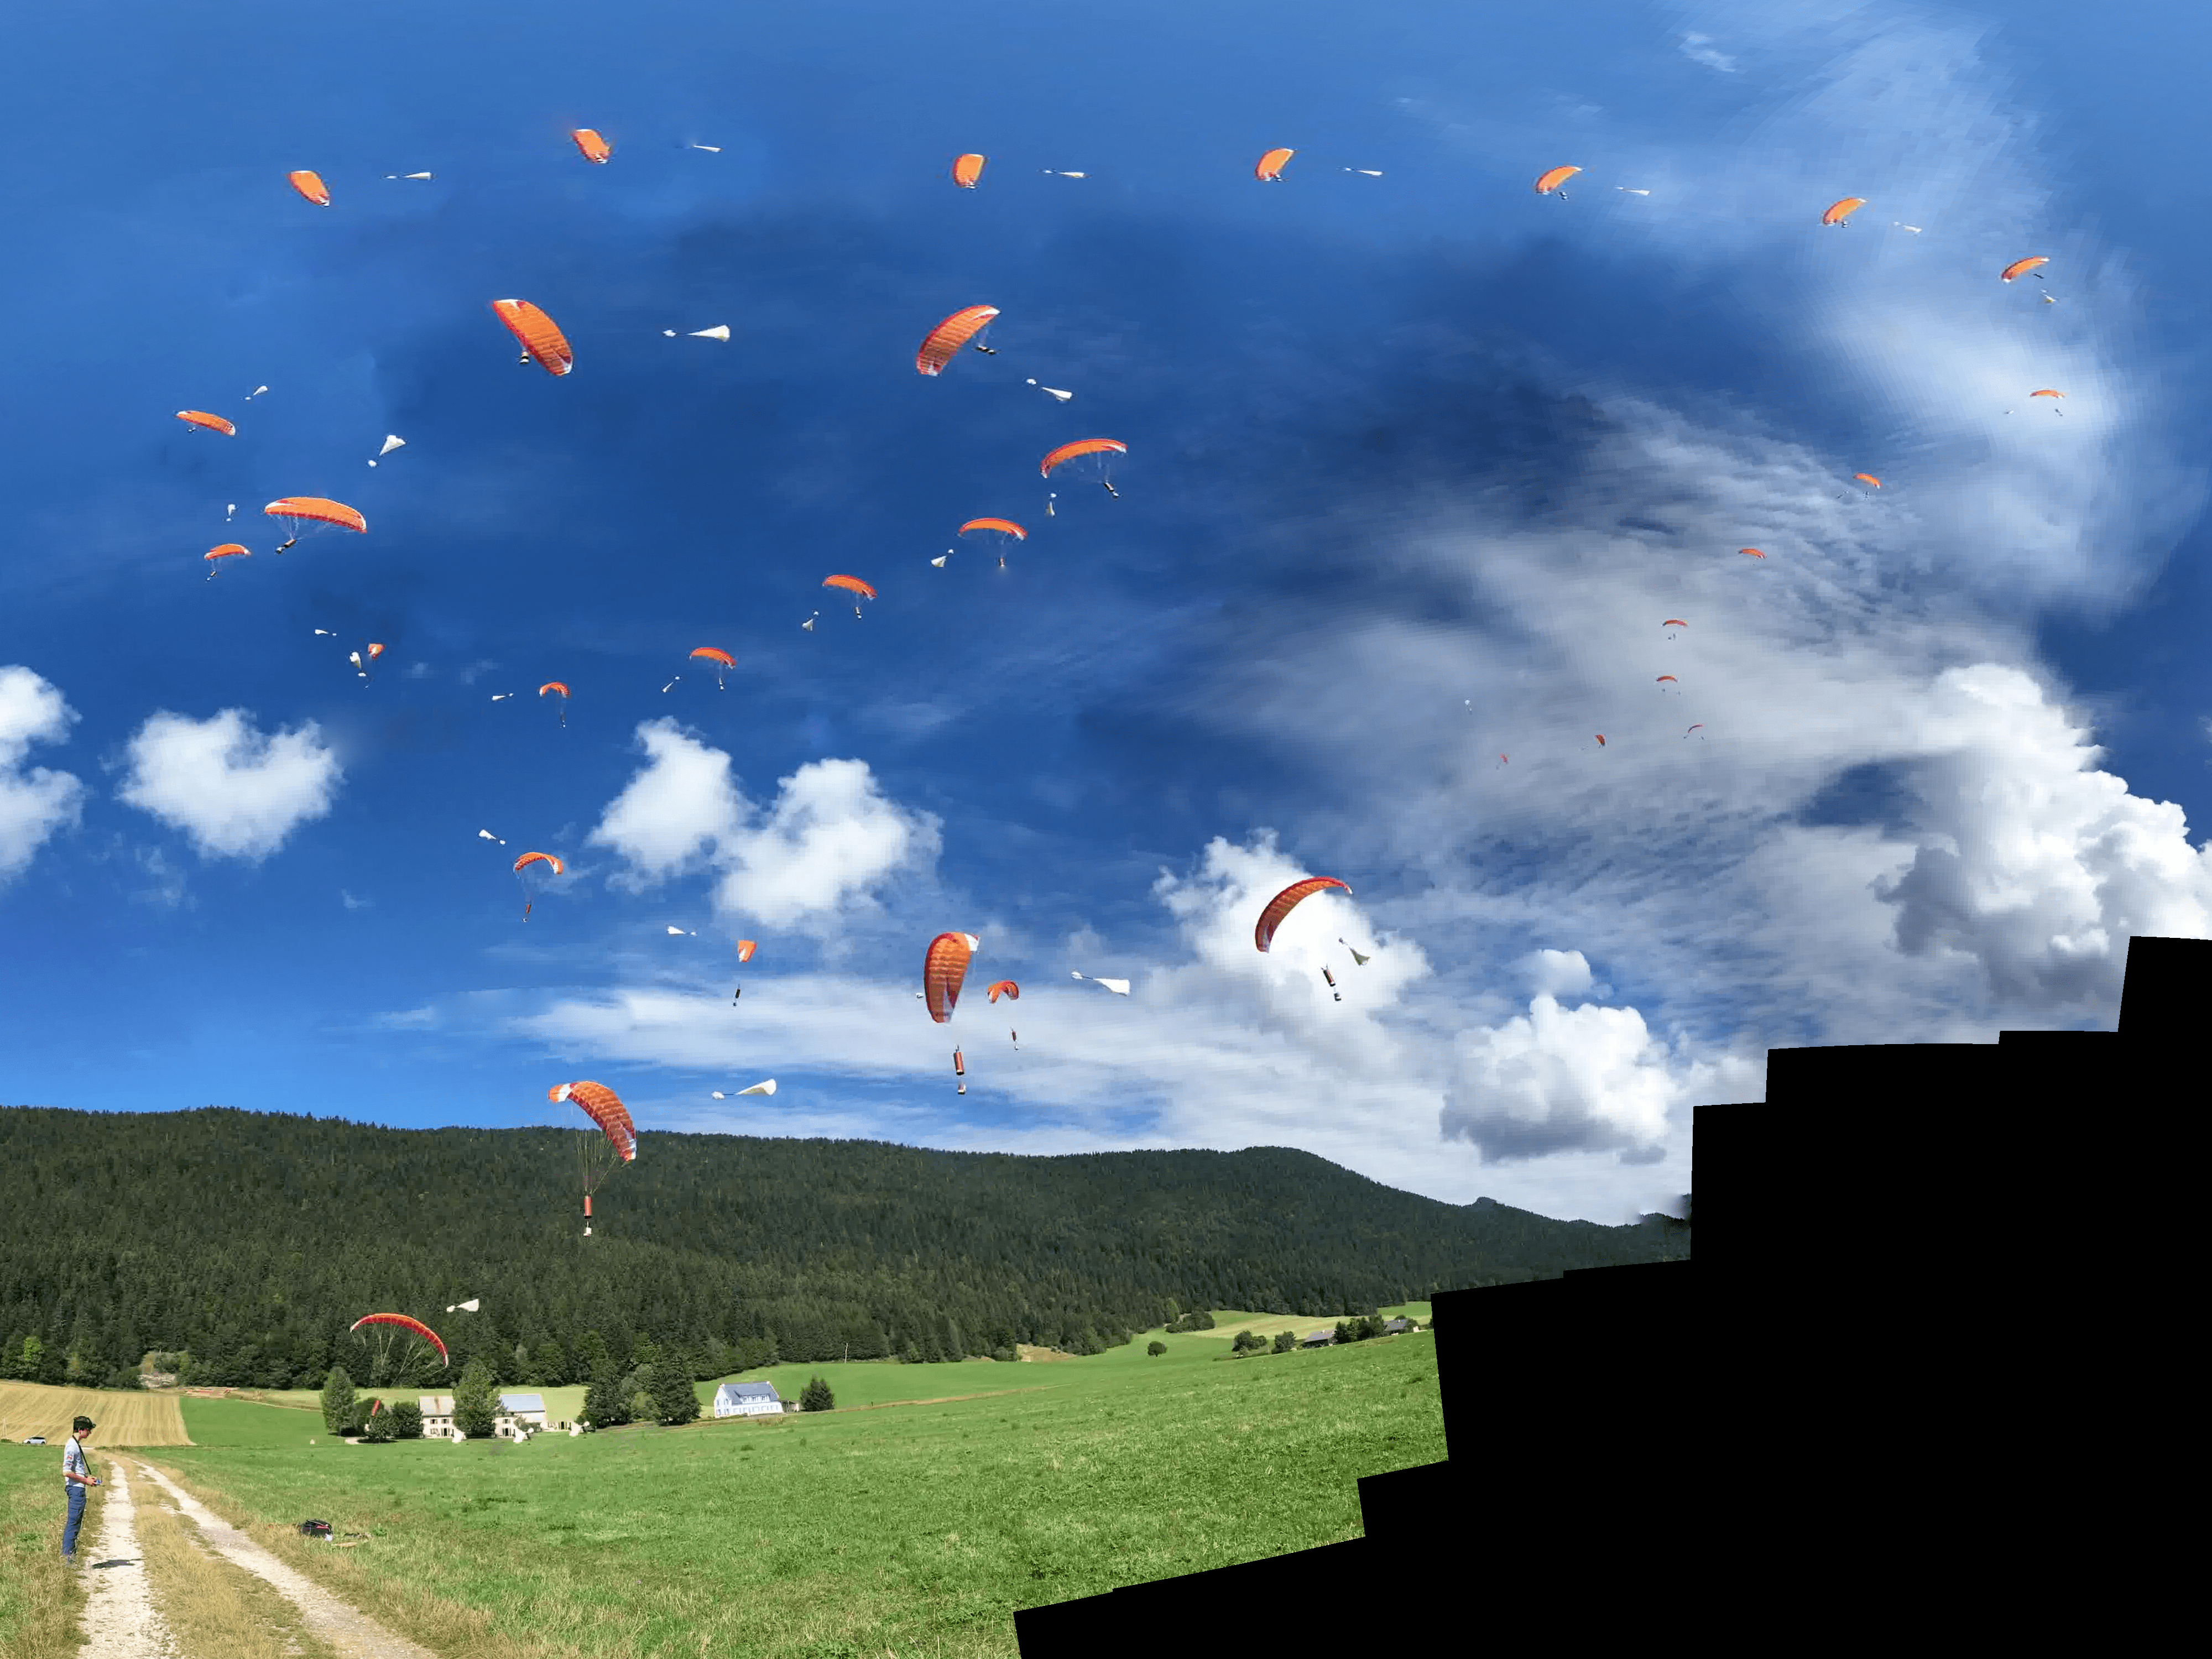
R2Home has two main objectives, the first one is to automatically deploy at the right altitude a parachute or a paraglider canopy. The second is to automatically pilot this canopy to the desired GPS landing point.
A - The deployment of the wing
The canopy is folded in the Dbag following a precise folding pattern to avoid tangles during deployment. Then we need a way to get the canopy out of the Dbag at the right time. The drogchute is used as an extraction force. The deployment mechanism allows to use this force at the right time.
Thus, once the system + drogchute has reached its terminal velocity, i.e. about 7 m/s, the force exerted by the drogchute on the DBag is almost directly the weight of the system. It is interesting that this drogchute is also as big as possible, since it allows in case of non-triggering of the canopy opening, to have a system which is not too dangerous.
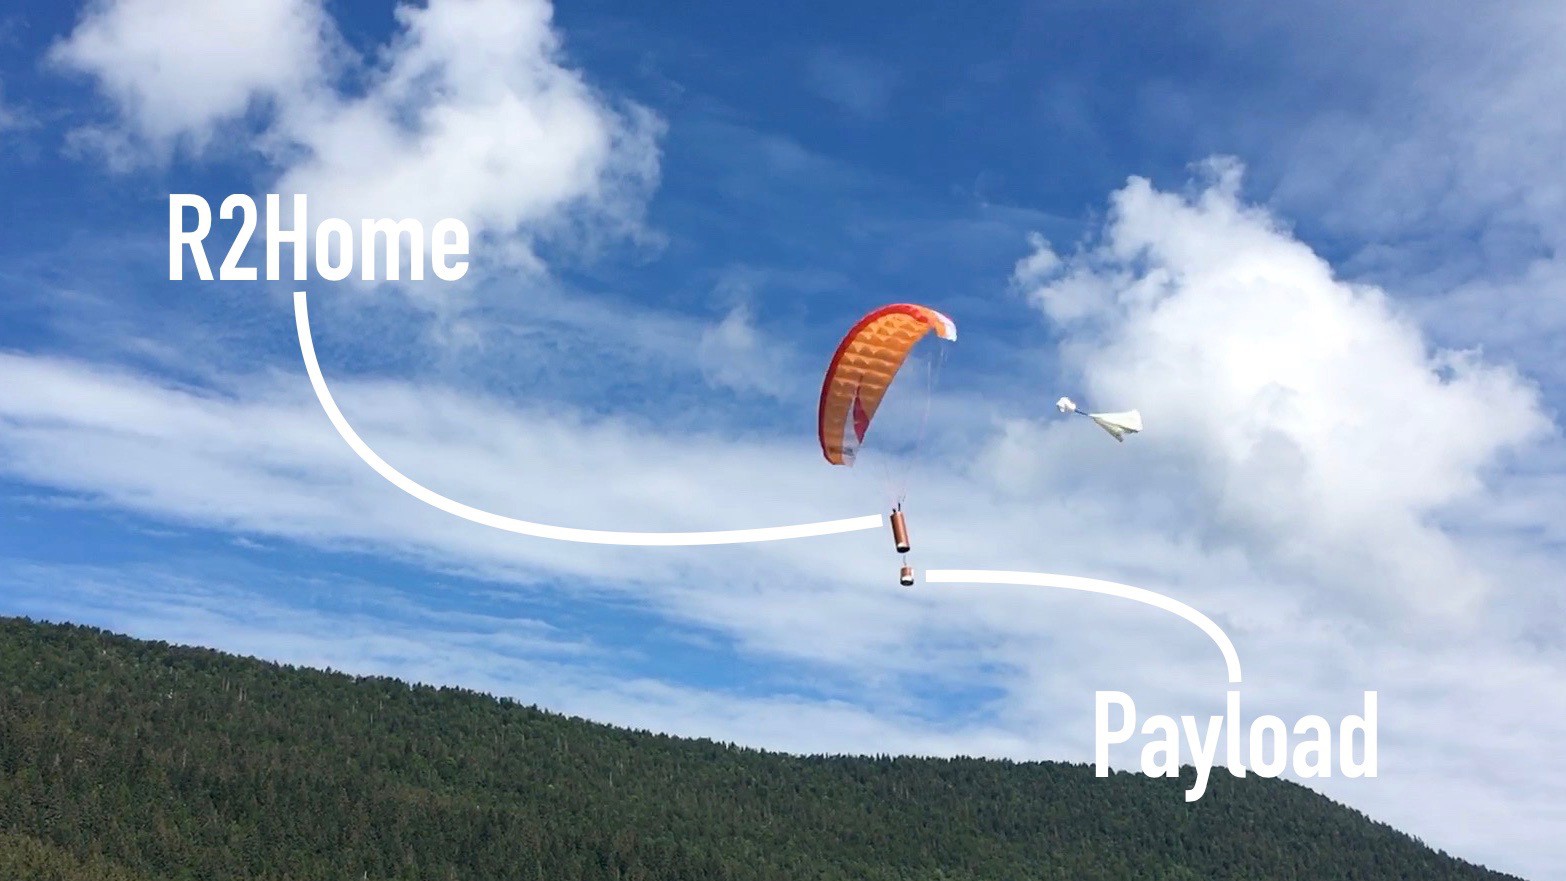
However, after the deployment of the canopy, the drogchute remains attached to the canopy, and therefore if it is too big, it will completely prevent the canopy from flying properly. The solution to this problem is to use a "magic" drogchute, which can be both large before deployment, and small afterwards.
The automatic deployment of the canopy is realized with a condition of vertical speed deduced from the barometer and altitude merged between the GPS and the barometer. For example if we want to deploy the canopy at 100m. We look if the vertical speed is lower than -3m/s and the altitude lower than 100m, and in this case the deployment is triggered
B - The autonomous flight
Once the canopy is open, it must now be flown to the desired landing point. The first question is how to steer the canopy?

At the beginning of the project, a "square" ram-air parachute canopy (easier to deploy) was used. Now the wing used is a single skin RC paraglider. This second wing type has better flight performances.
Both types of wings are steered the same way, using two control lines, each connected to either the right or left trailing edge of the wing.
When the right control line is pulled, the right side of the canopy is braked, and the canopy turns right. And vice versa for the left line. To turn, you have to pull one line, and release another. In a very precise way, over a distance of about 8cm.

A special, modified servo is used for this purpose
A normal servomotor often has a stroke of between 90° and 180° (110° on average), as they are designed to be used for linear motion, so there is no need to turn more than 180°. However, a movement of ~110° on a spool small enough to fit in the tube volume would only lead to a movement of about 2.5cm.
The solution is to use a continuously rotating servo motor with a feedback sensor, which gives us the 360° position. A micro controller has then been integrated inside the servo housing (we see its USB-C plug) to control the rotation speed of the servo to reach the desired position with a PID controller. Thus it is possible to control this servo motor like a normal servo motor, but on 360° instead of lest than 120°. It is therefore possible to pull a line over 8cm.
A 3D printed part is then used as a drum for the spool, to prevent the thread from getting out of the spool.
A left turn and a right turn
Now that we are able to steer the wing, we have to fly it to the right landing point, with an autopilot, so that everything is autonomous.
While developing this autopilot, R2Home has been slightly transformed in its shape to be able to make flights much more often. This other version includes a motor and allows to fly directly from the ground, but inside, exactly the same components are used.

A : Motor B : LiPo battery C : Steering servos D : Onboard computer
The main component of the on-board computer (C) is a Teensy 4.1

PCB and schematics files are available on the GitHub and in the "files" tab!
The purpose of this on-board computer is to manage the entire system autonomously, so it takes care of the automatic deployment of the canopy at the right altitude, but also the autonomous steering of the canopy.
It also takes care of recording all the flight data at a different frequency depending on the flight mode (climb, descent, canopy flight etc.) as well as sending them at a lower frequency by telemetry (to save power) to the ground. It also contains several different power supply circuits, to avoid problems of conflict between the motors and the control electronics.
The autopilot is working as following: we try to move in the direction given by our position, and the desired landing position. To finally move in this direction we want to correct our current direction, given by the GPS as "course over ground".
Once the direction error is calculated, a command can be deduced: turn left or right, with a "PD" (Proportional-Derivative) controller. The larger the error, the larger the command, but if the error decreases very quickly, the command is also decreased to avoid overshooting the desired direction.
Here is an example of the autopilot's work with real flight data:
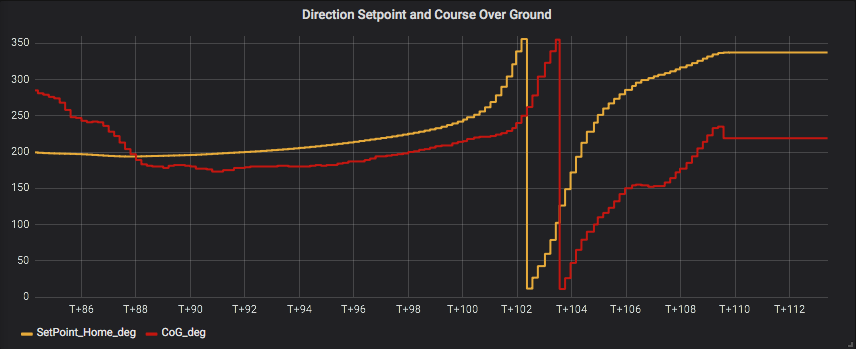
The yellow curve is the desired direction, the red curve is the measured direction. The autopilot is engaged at the very beginning of the graph. The variation around T+102s represents the moment when the system flies exactly over the desired position, and thus the desired direction changes by 180° very quickly.
We can see that the error is corrected without oscillations, but also that the wing has a slight delay on the command given to it. This is a delay that is almost impossible to remove. A paraglider or parachute canopy takes some time to turn.
C - Flight demonstration
Once the autopilot is working on the motorized version of R2Home, simply transfer the code and the on-board computer to the normal version for a full test. We are dropping R2Home from a DJI S800 hexacopter, modified to be able to remotely trigger the deployment of R2Home from the drone
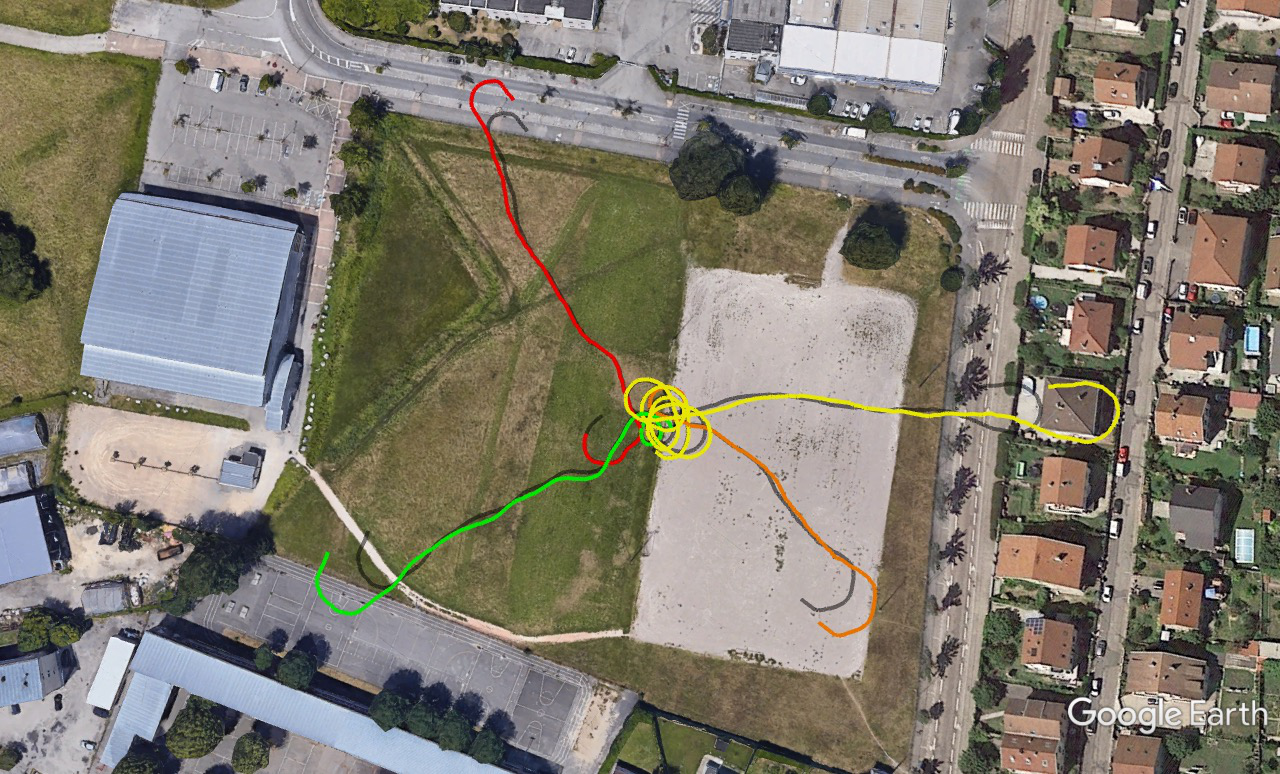
This is the GPS trace of two different flight tests on the same day and from a similar drop location. On that day, the wing was coming from the left of this image, so R2Home had to fly upwind to reach the landing point. The yellow line is the straight line between drop and landing, and it is about 125 m long.
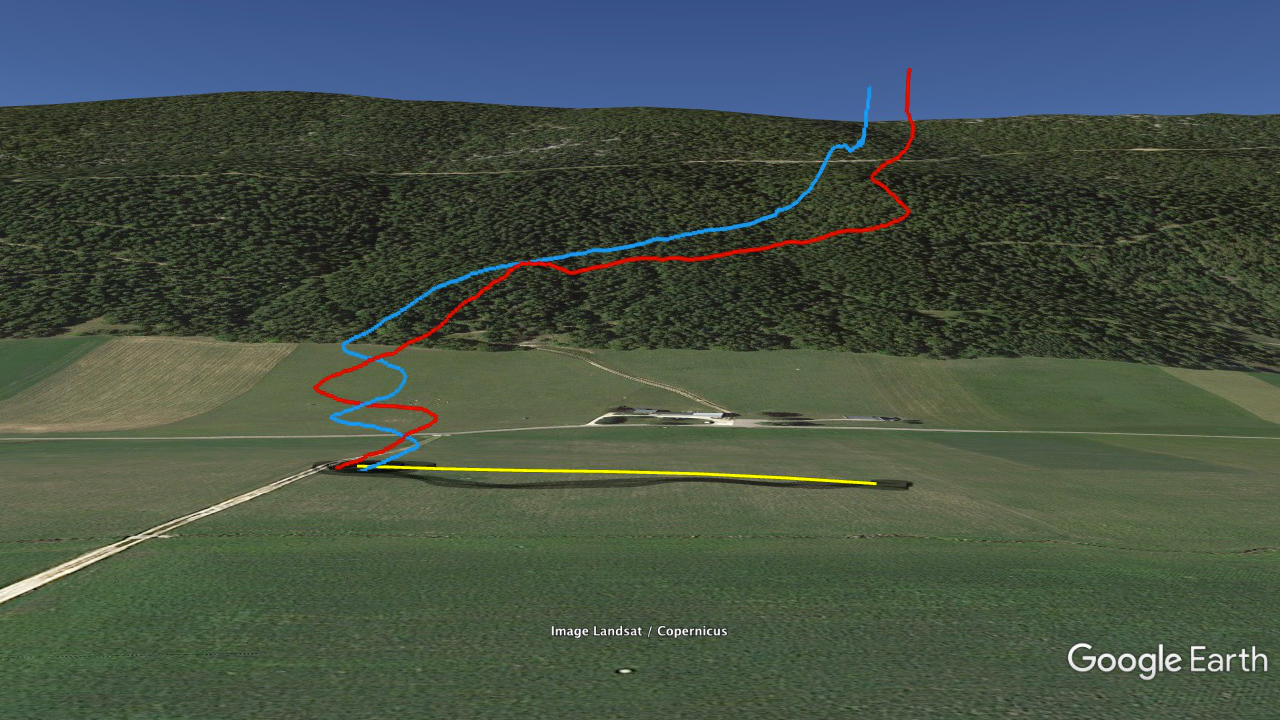 The system first flies in a straight line towards the desired landing point. Once this point is reached, it will rotate around it until it touches the ground.
 And here we go R2Home is back home! After having deployed its canopy at the right altitude and having flown it all by itself until reaching the desired landing point with precision!
D - More details about the system

All the magic of R2Home is hidden inside the tube
A : GPS module (SAM-M8Q) B : Steering servo
C : Onboard computer D : RGB Led
E : "Remove Before Flight" Switch F : Wing attachement point
G : Deployment servo H : Telemetry transmitter
I : LiPo battery J : Runcam Split 4
K : Deployment mechanism L : BMP280 Barometer
E - Next steps:
The system is now proven to work on a low altitude flight. It took more than a year of flight tests, failures (and learning!) with several prototypes to get there!
Next step: making from R2Home, with your help, a useful and used system making science easier, and helping us explore the world!
Stay tuned!
I want to thanks Mike Vergalla for his support and mentoring on this project, he's been working on a similar project that I discovered on the way: https://hackaday.io/project/176736-project-bird-fish-free-flight-robotics. Mike kindly offered me to share his experience, and I can now say that it was really helpful!
If you want to support this project, take a look at its gofundme page : https://gofund.me/c0ae8d1f
For more frequent updates you can also follow the project on social media :
Youtube : https://www.youtube.com/channel/UC-4en6AdUpKlkfxHZ0yEVrw
Twitter : https://twitter.com/YohanHadji
Instagram : https://www.instagram.com/r.2.home/