 Mile
MileThe goal of this project is to create a universal enclosure that can be used as a lab power supply, soldering station or combination of two.
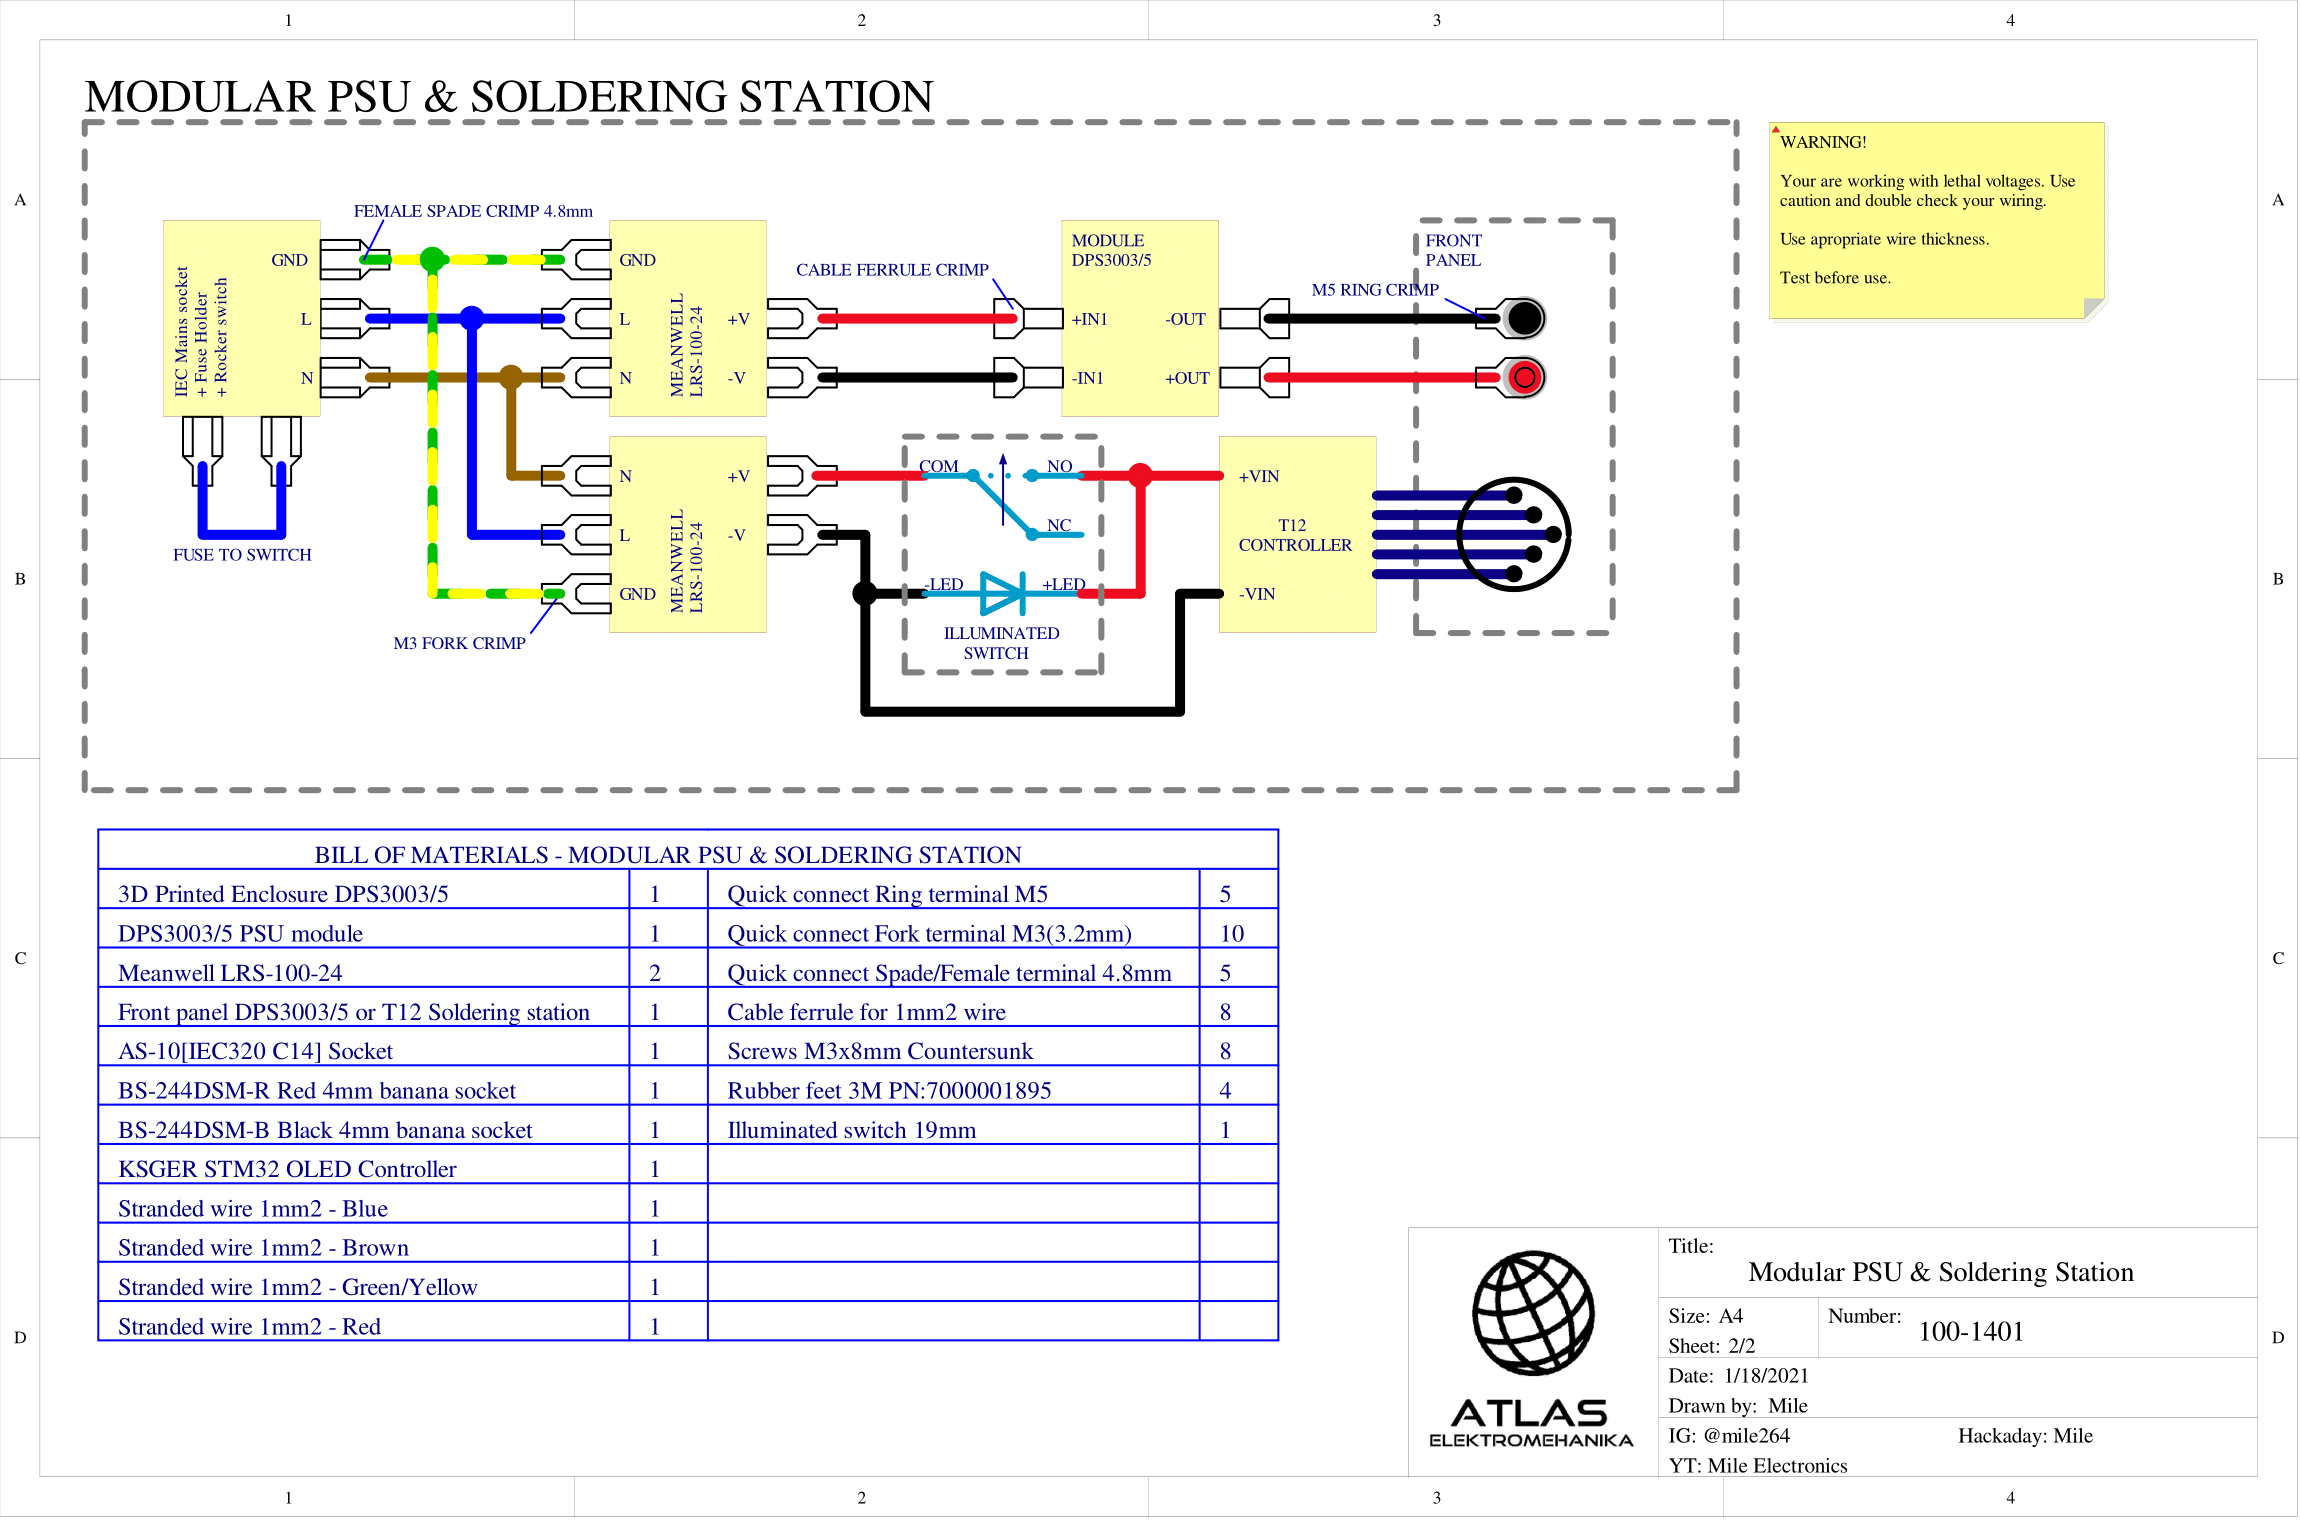
Enclosure consists out of main body and front panel.
Main body is designed to be easily 3D printed in one piece without any supports.
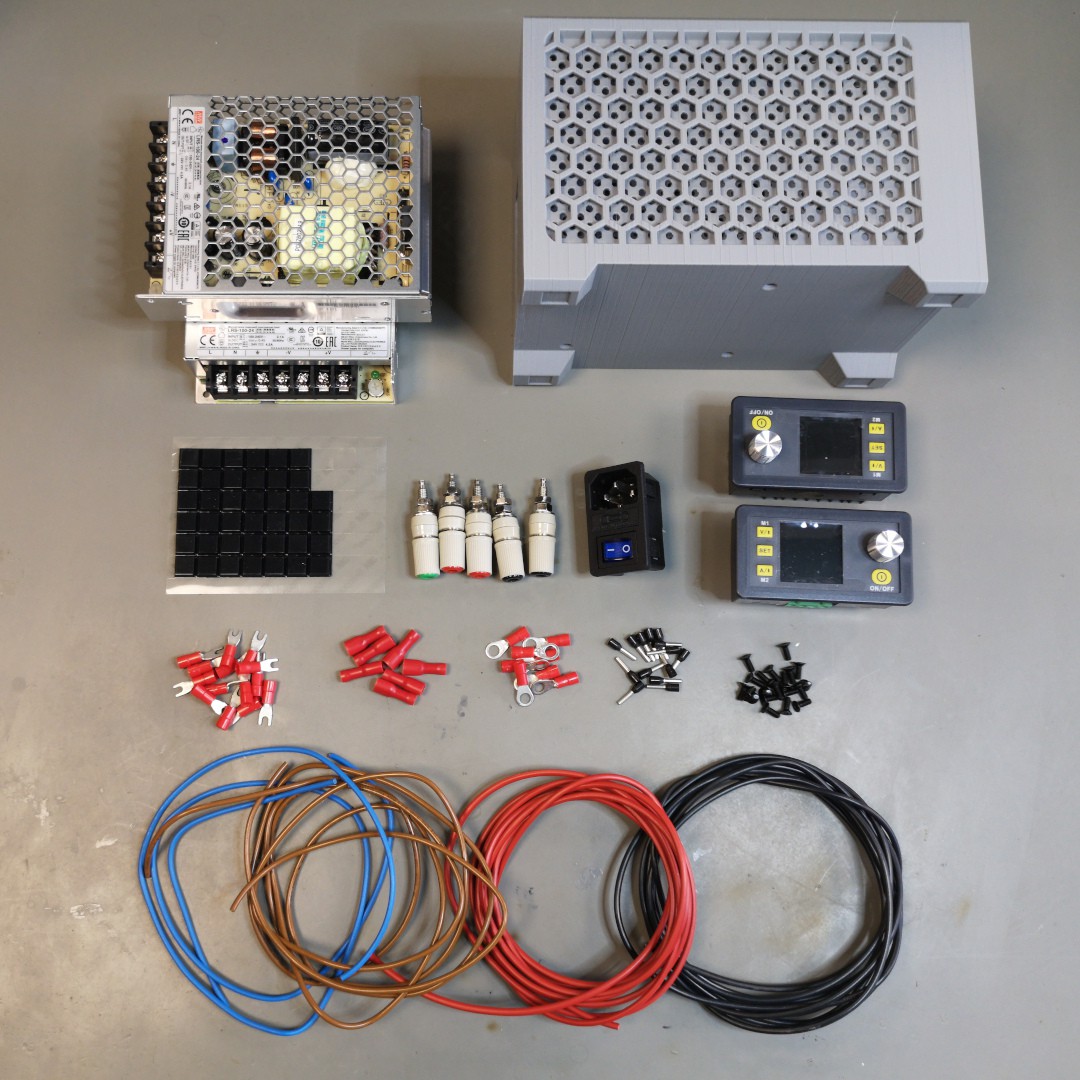
Front panel is designed to be cut from 3mm thick tinted plexiglass sheet or 3D printed. On the front panel there are mounting holes for Ruideng DPS3003/5 power supply modules and/or Ksger T12 soldering iron controller. In general, a front panel for any combination or type of modules can be made, since outline dimensions are provided.
To power everything there is space for two Meanwell LRS-100-24 power supplies in the main body part. They each can provide 24 volts @ 4.5A. 100 watts of power per channel is enough for any soldering iron or lab power supply hobbyist may use. They each have a small voltage adjusting potentiometer that can be used to increase output voltage by few volts.
Use of quick connect terminals is not a must. Soldering will do just fine. Just make sure to insulate solder joints.
IMPORTANT:
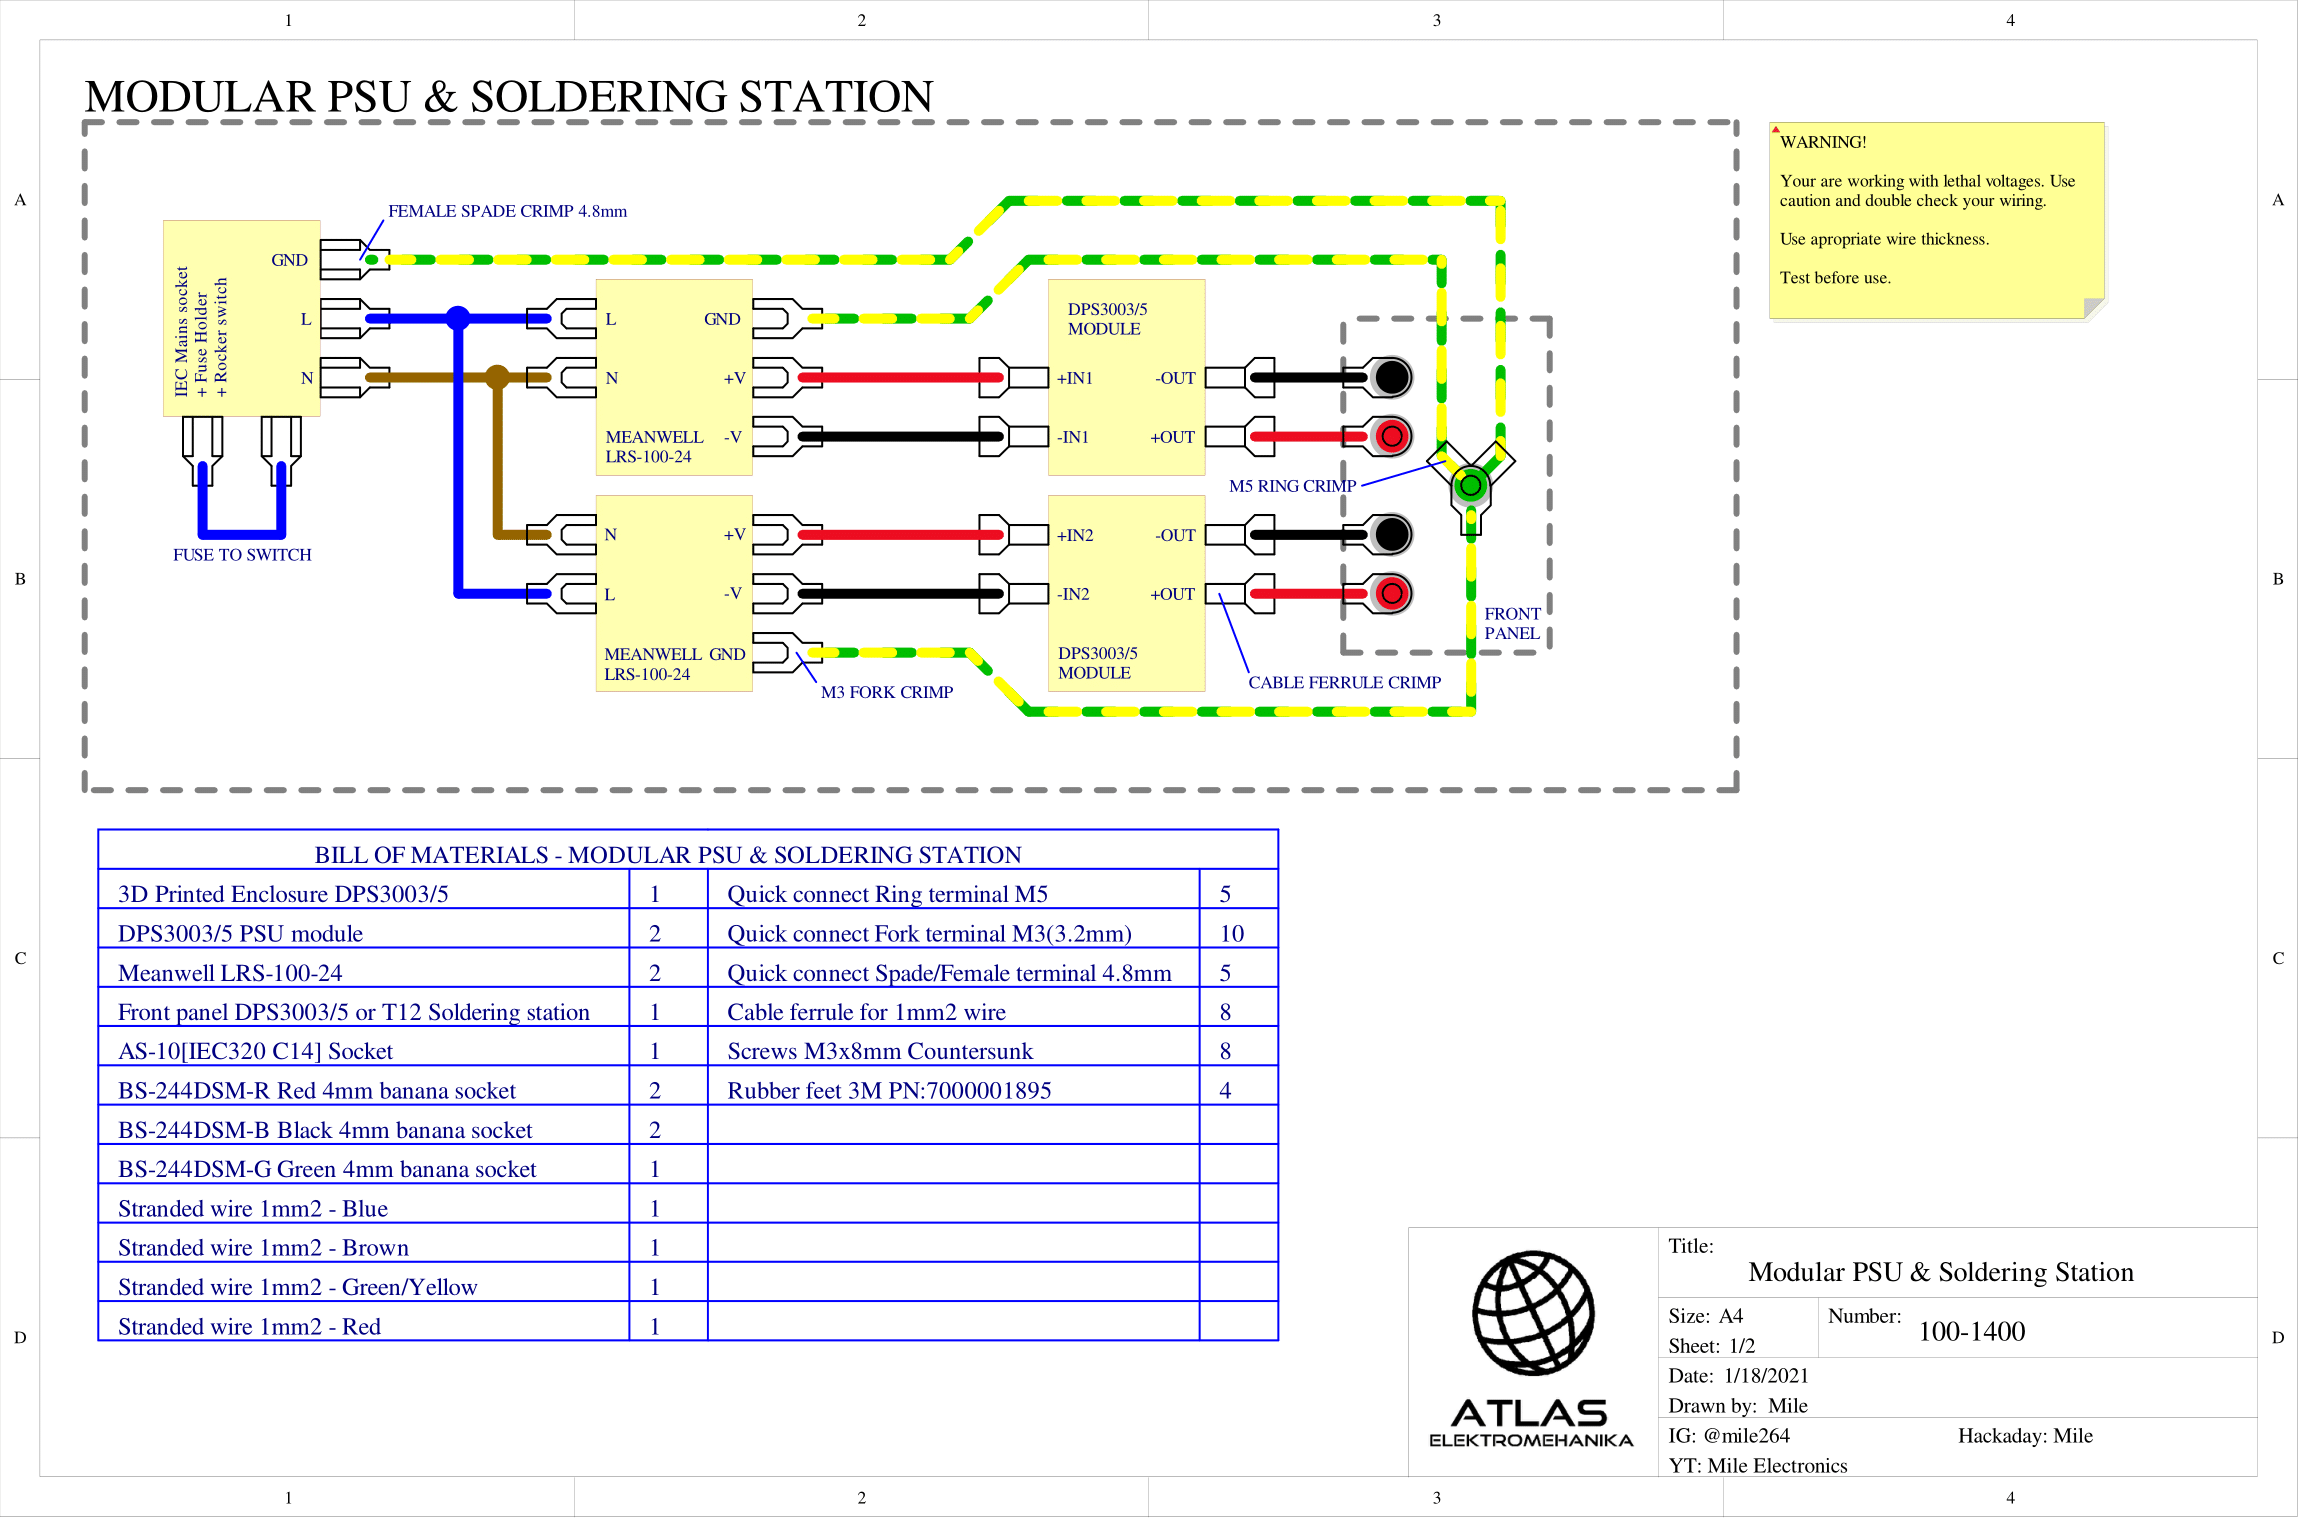
This project uses main voltages that are deadly. Please use proper safety and follow wiring schematics and instructions outlined in video.
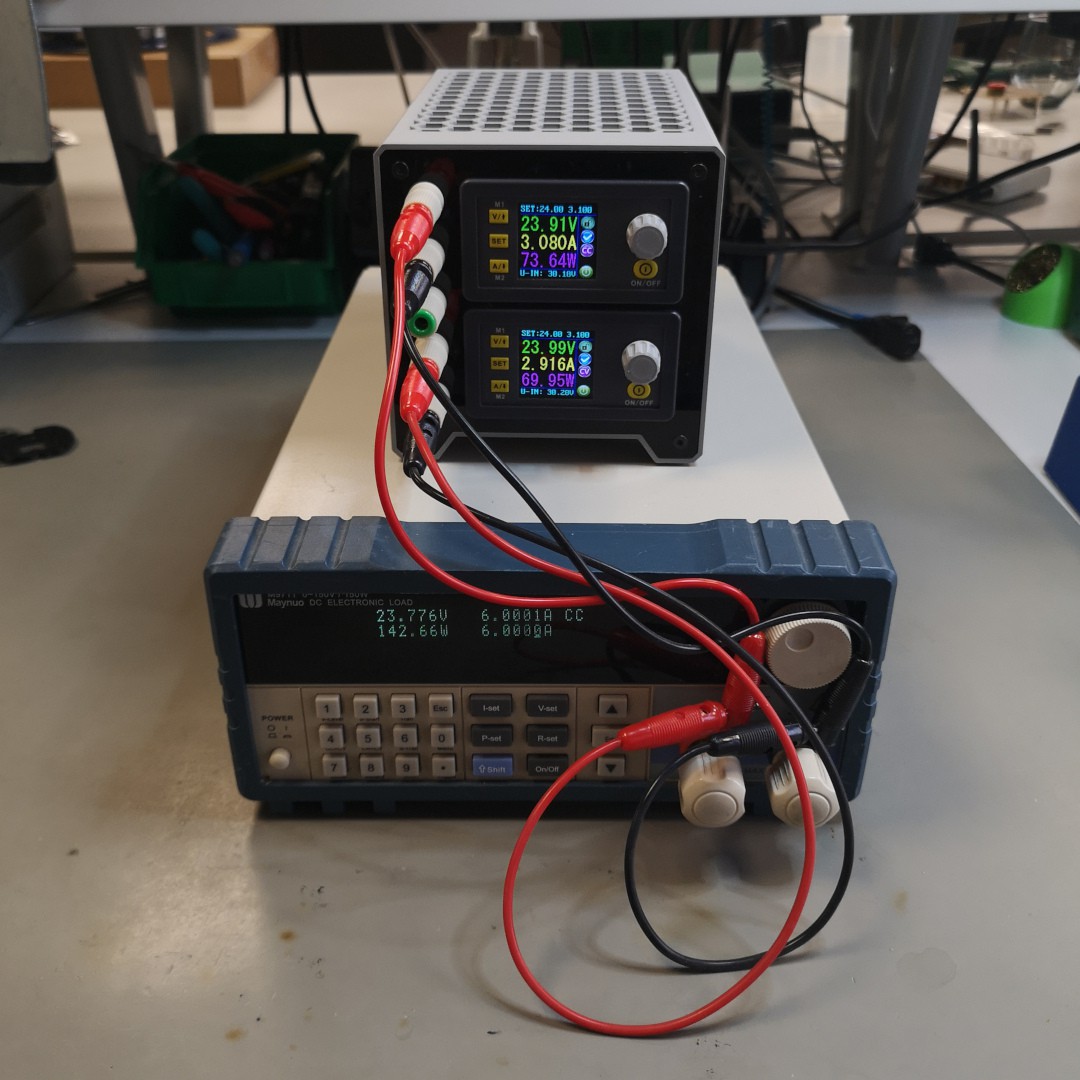
Before powering double check your wiring and before first use test output voltages(polarity and values).


 euchcat
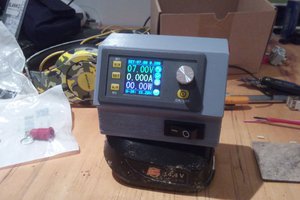
 weingaunity
 bjorn
bjorn
How difficult would it be to make the panels hot swappable? What concerns would have about attempting something like that?