 Guy Dupont
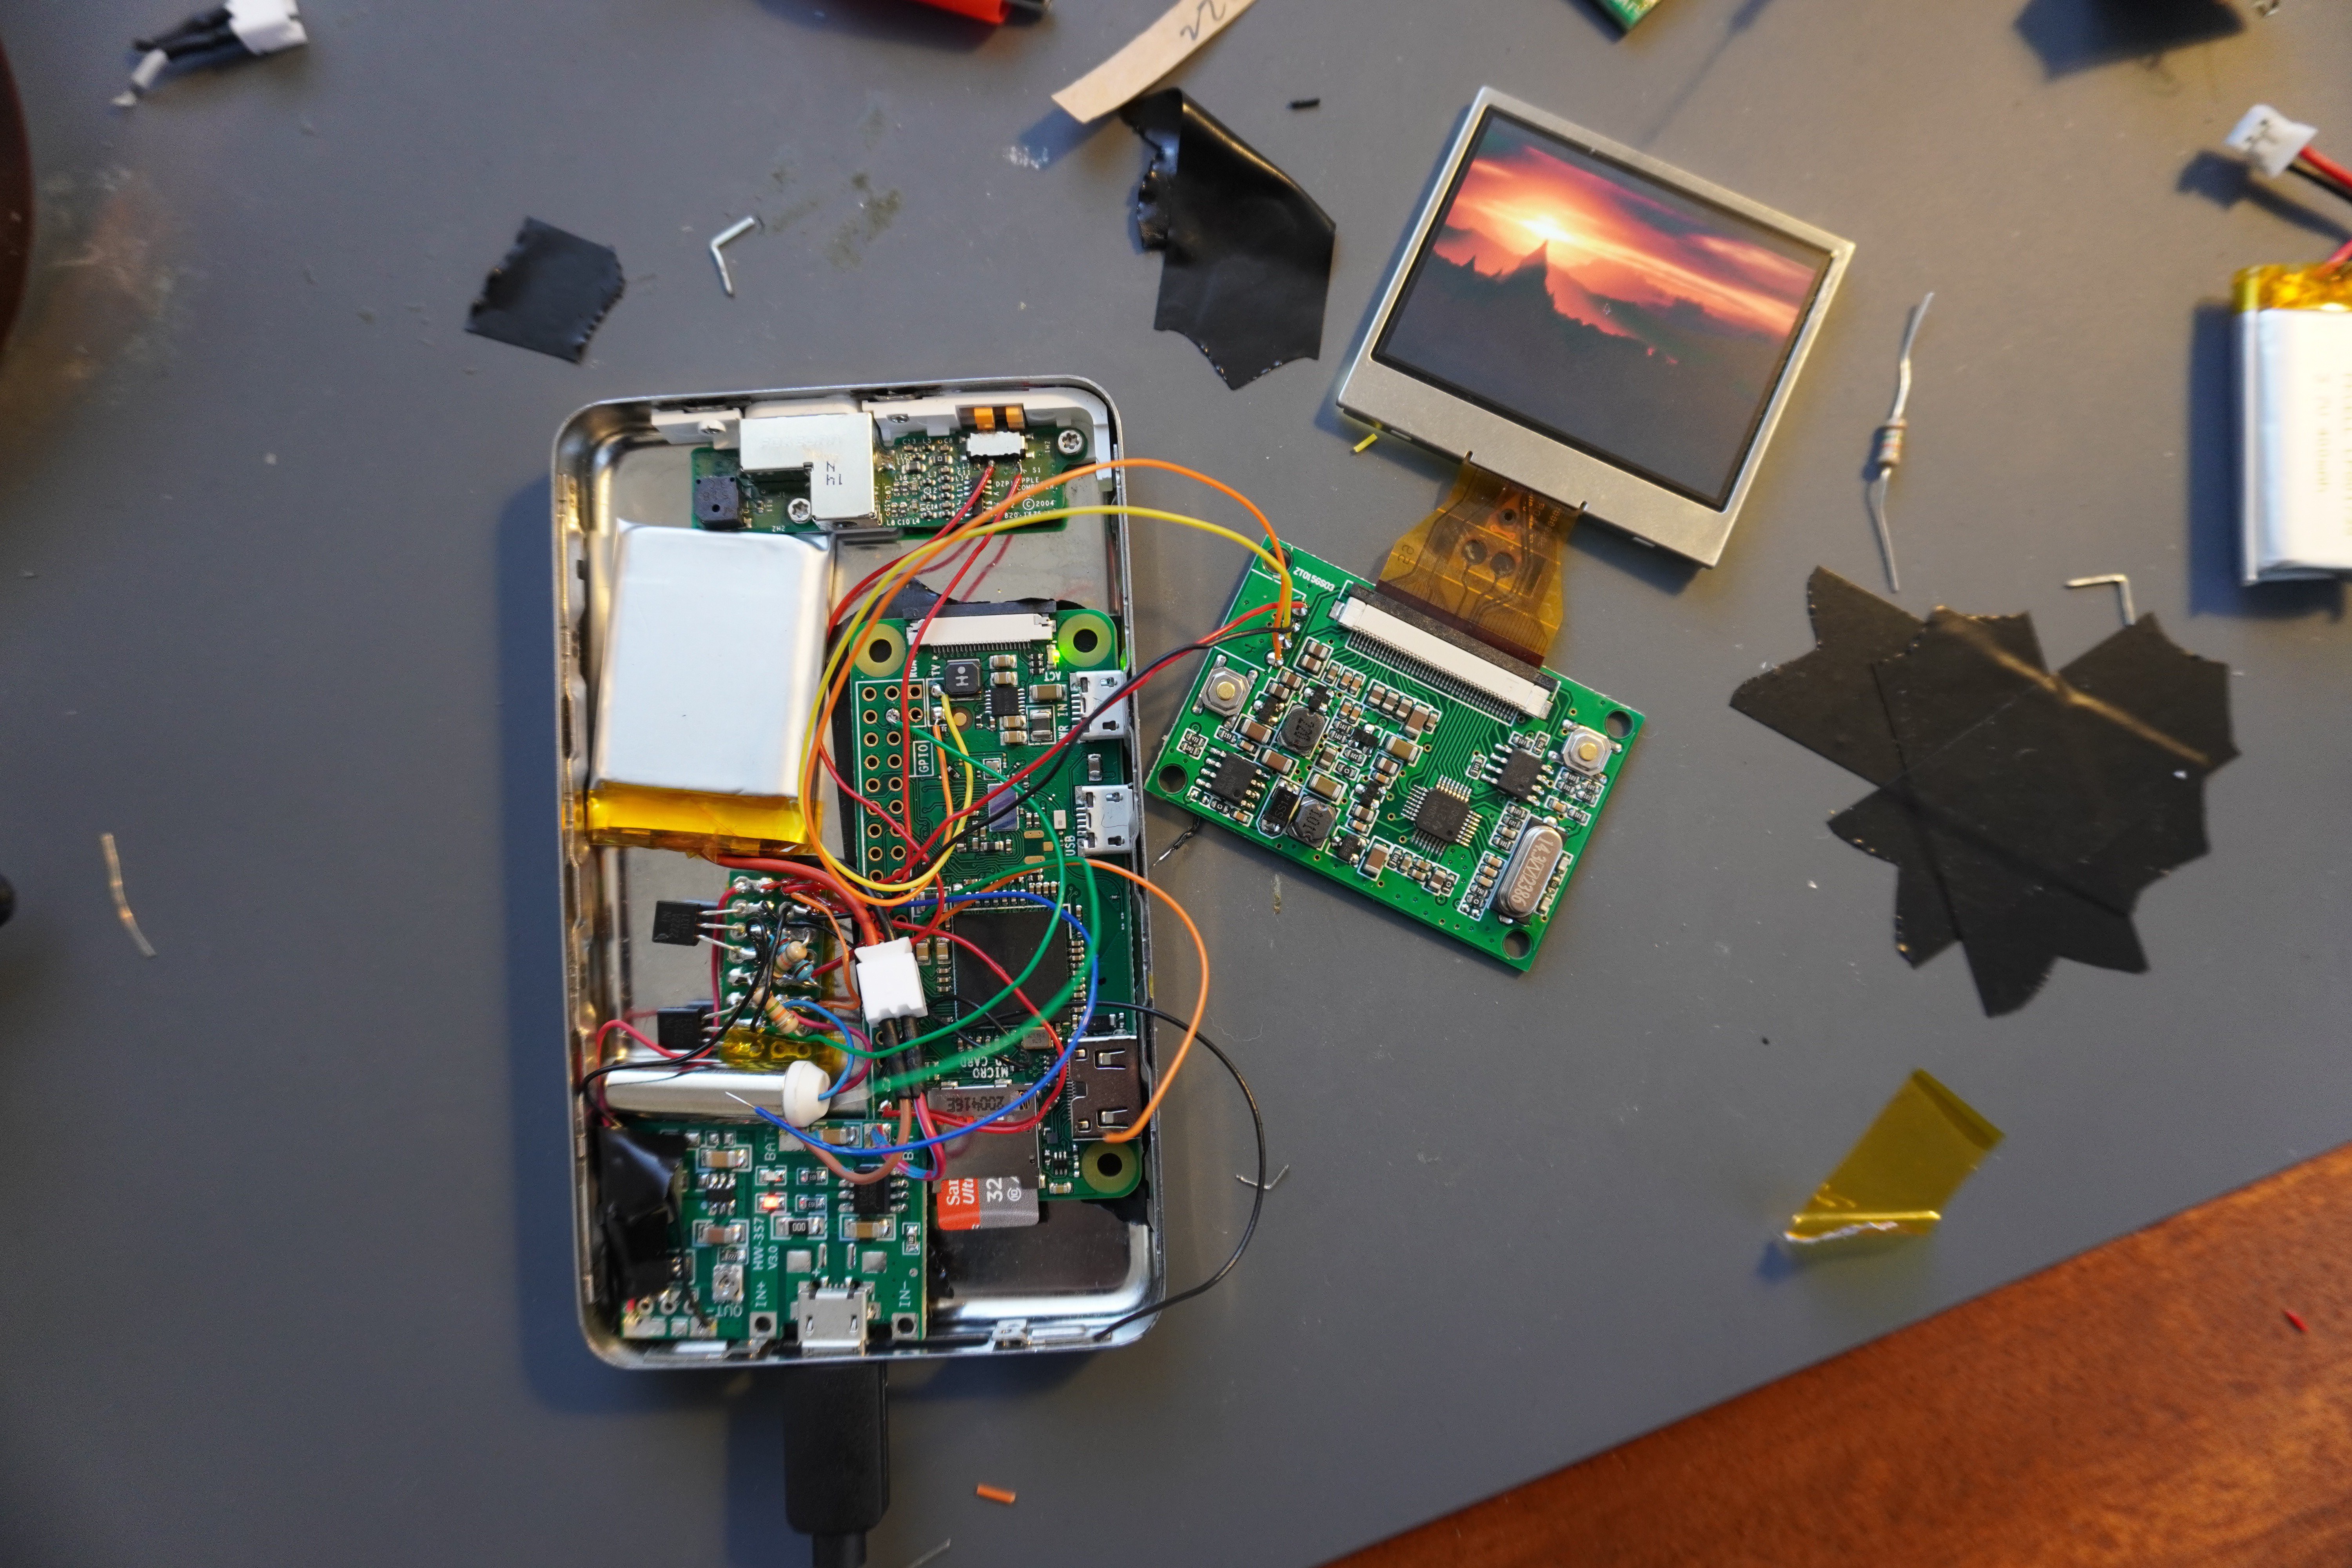
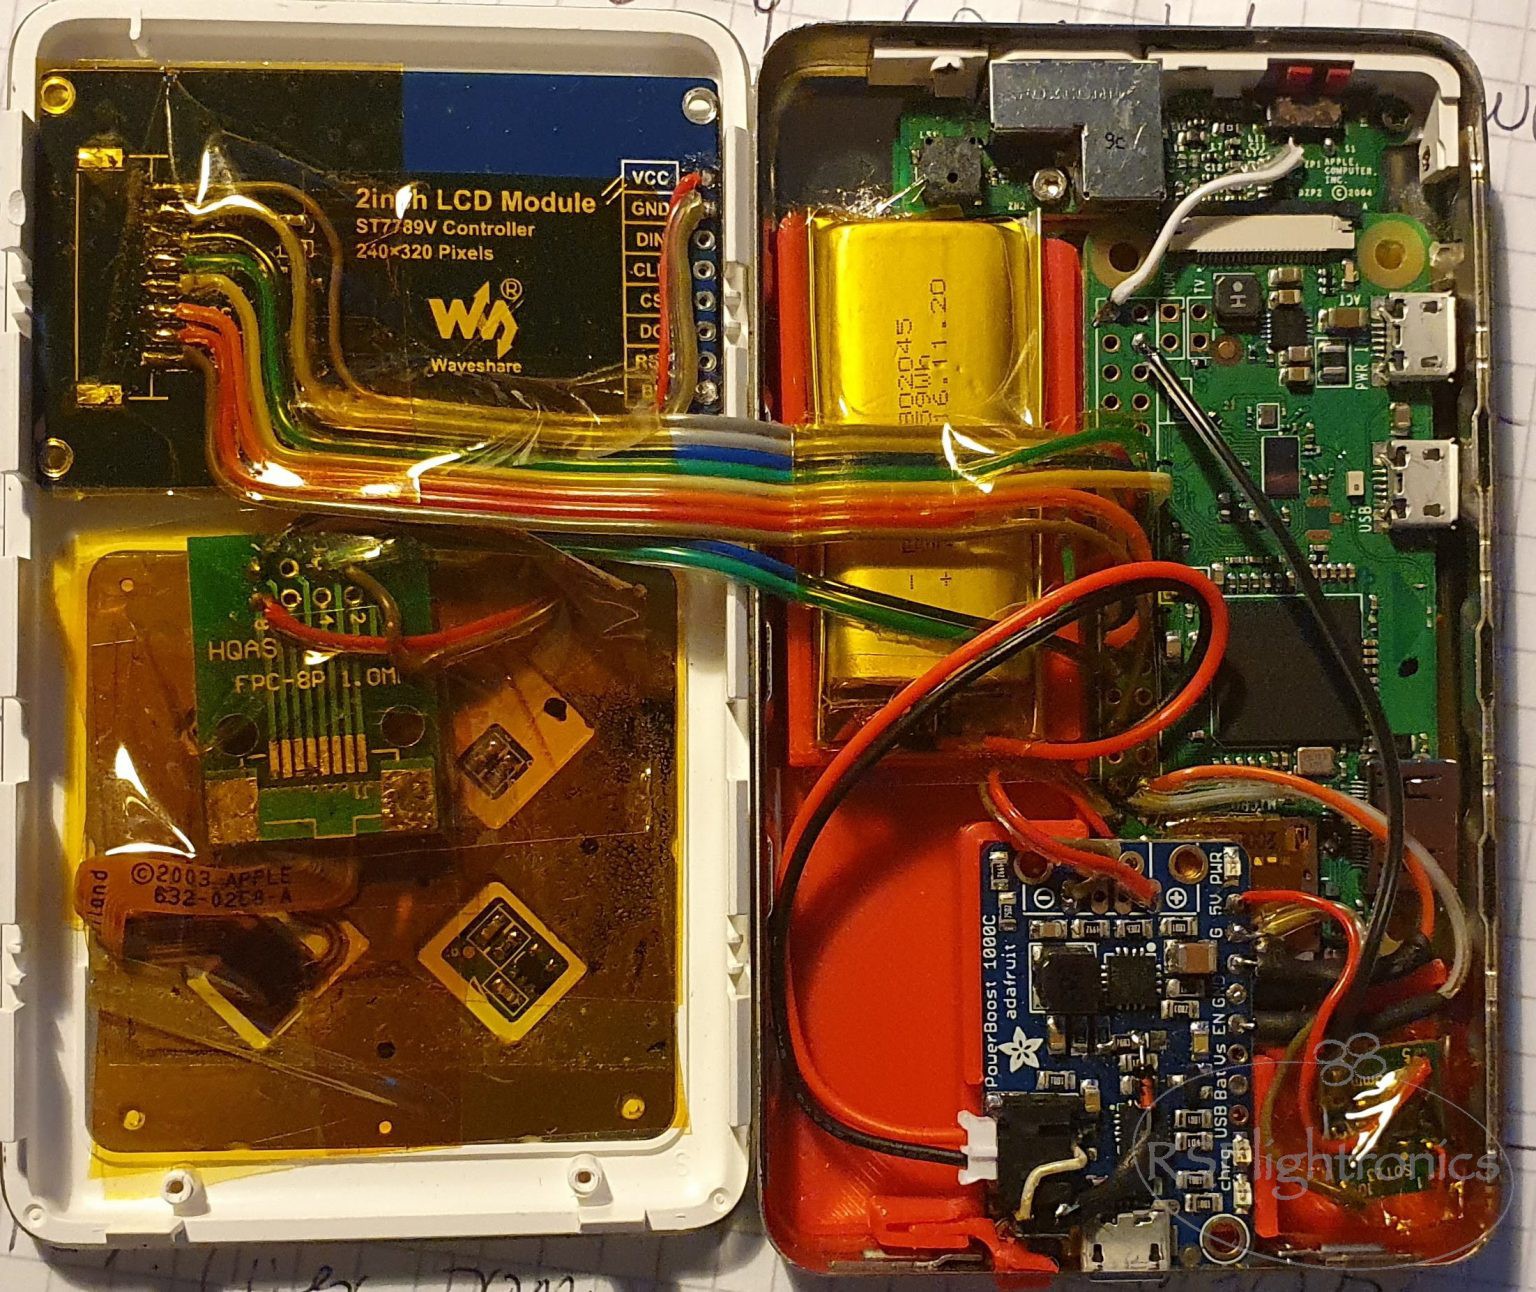
Hardware overview:
* Power is provided by a standard rechargeable li-ion battery. It's charged through a 500 ma Adafruit USB charger, and boosted to 5V using the Adafruit PowerBoost Basic. Both the Raspberry Pi and the display run on 5V.
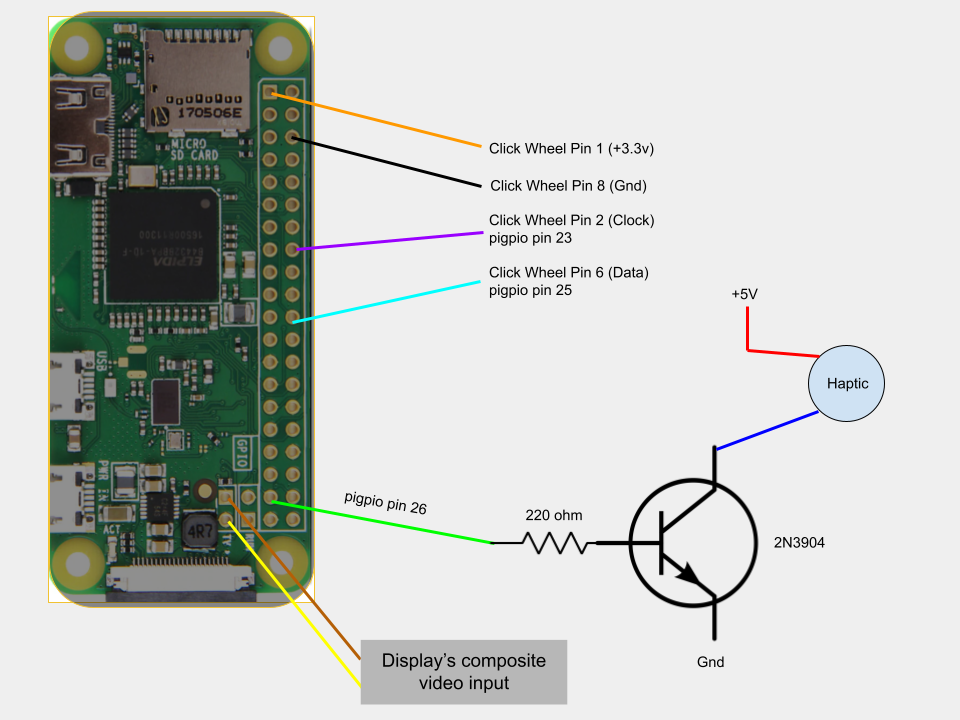
* The click wheel connected to the original iPod motherboard via an 8 pin FPC cable. Thanks to this 10-year-old Hackaday article (and accompanying blog post by Jason Garr , I was able to find the pinout. Using an FPC breakout board, I easily connected the click wheel controller's 3.3V, GND, Data, and Clock lines directly to the Raspberry Pi. (More on this in the software overview).
* I used one of the Raspberry Pi's GPIO pins to drive a small DC motor (through a transistor, of course) for haptic feedback. I use quick haptic pulses in place of the iPod's original click sound, which triggers as your finger crosses each of the click wheel's virtual "steps".
* Repurposed the iPod's original lock switch to control the device's power. Conveniently, the PowerBoost module has an "enable" pin that can simply be pulled low to cut all power.
* Connected the display directly to 5V and the Pi's composite video output!
Software:
* I installed Raspberry Pi OS Lite as my OS. I figured I'd be conservative by not installing a full desktop environment, not sure if that was actually necessary in retrospect. The Pi Zero is more capable than I originally figured.
* Streaming from Spotify was surprisingly simple. I installed Raspotify, which just runs as a daemon and handles everything once you've authenticated. When it's running, the Pi appears as a "Spotify Connect" device on your account, and you can instruct it to takeover playback via an HTTP request (or using the UI of another authenticated Spotify client!).
* I used the Spotipy Python library to authenticate, search Spotify's catalog, fetch my saved artists/albums/playlists, and send playback commands to Spotify's servers.
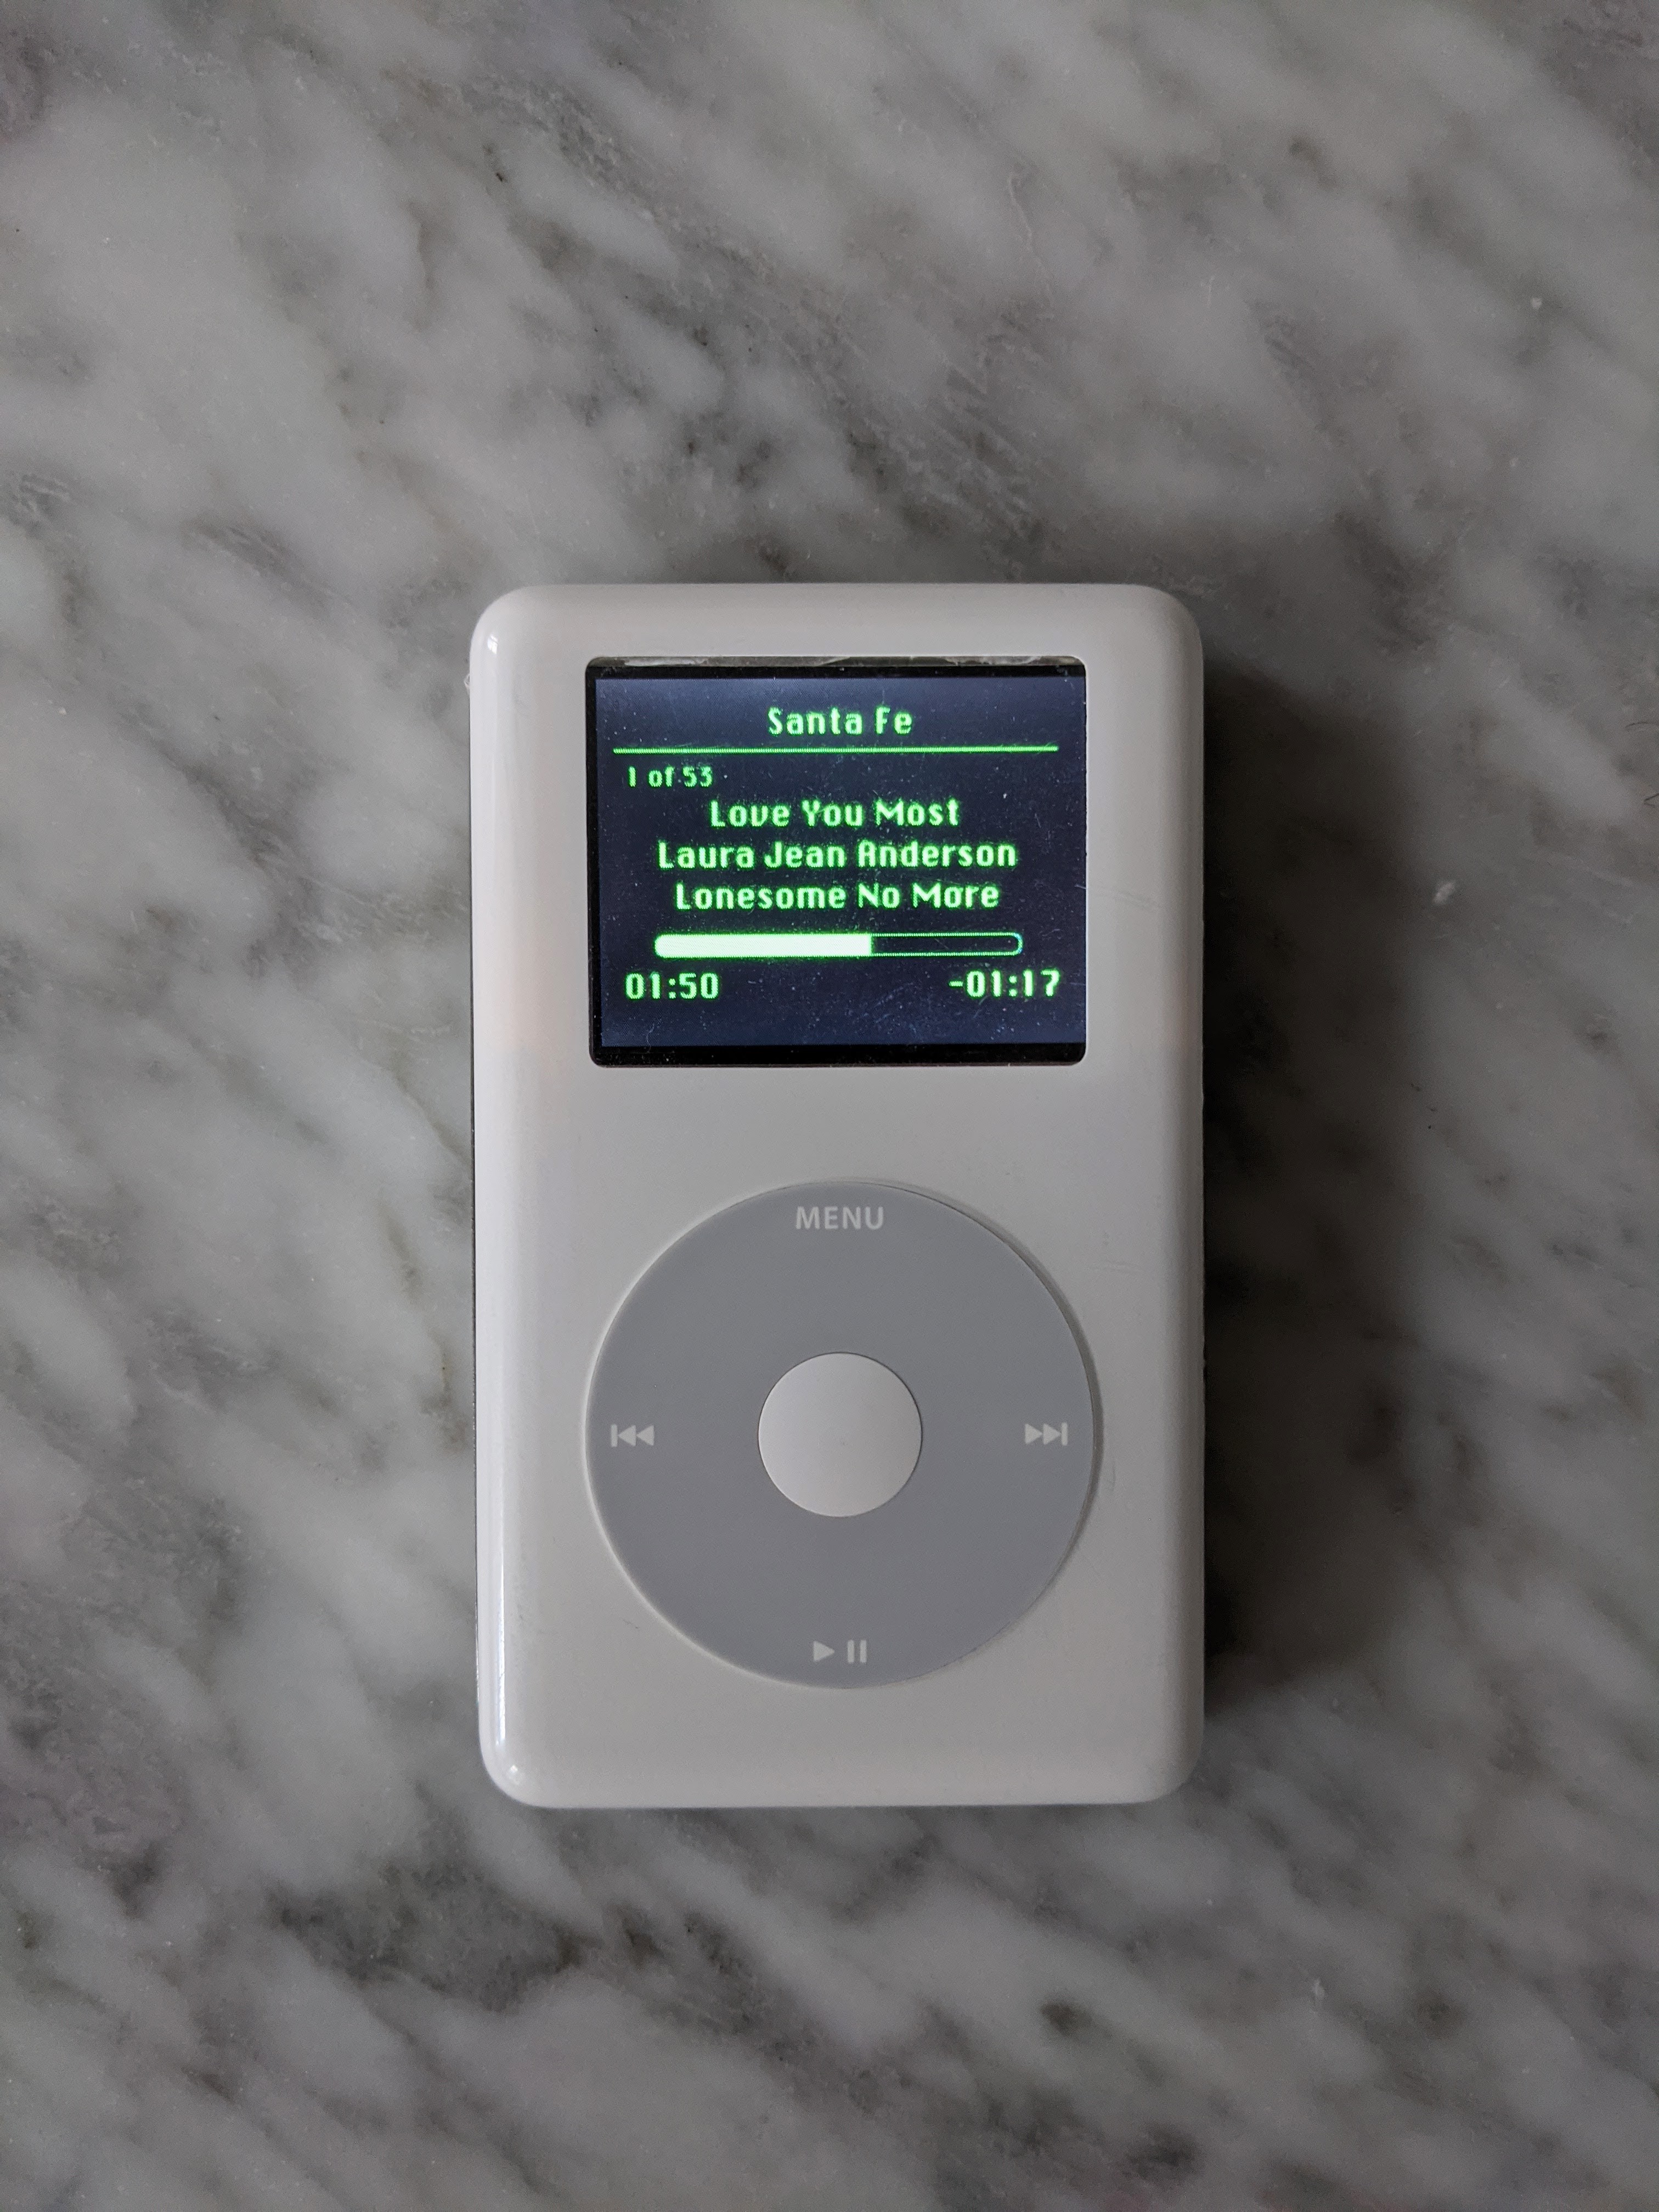
* I wrote the UI as a Python application using tkinter. It was honestly pretty great to work with - front-end frameworks are hard to pick up! And this project was the first time I put any real effort into learning (and trying to love) Python. Forgive me, I spend most of my time in JVM-land.
* Referencing Jason Garr's blog post, I wrote a C program to the bitbang the click wheel's serial data into the Pi. I used pigpio to control the GPIO pins. Once I parse out the button presses and finger position, I send the data to the UI application via UDP. Jason - THANK you, wherever you are. This project would have been nothing without the original click wheel, and I would not have been brave enough to try to figure out the pinout myself. I will - hopefully - on future projects.
* ^ I snuck the haptic control into the C program that reads the click wheel. When the user's finger position changes, I quickly pulse the GPIO pin that's hooked up to the haptic motor. This was super easy, but the downside is that the haptics don't sync perfectly with the UI. For example, if you reach the bottom of a list, the haptics will continue even when the scrolling stops. It syncs perfectly while actively scrolling, so I didn't think it was worth changing.
* I use Redis (via Python library) to persist/cache user's Spotify data.
* I use Openbox to host the UI Application, which starts automatically once the PI boots up.
* I use pi-btaudio to get Bluetooth audio out of the Pi.
All of my source code will eventually be available here.


Issues / TODOs:
* At some point the Pi started emitting a high-pitch whine. Big spike at 16khz and a little something at 8khz. What could this be? Doesn't bother me too much...


 Idrees Hassan
 Jdaie
Jdaie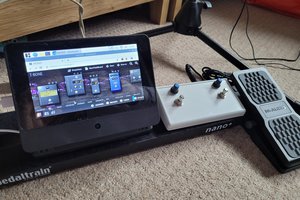
 Craig Hissett
Hello, very nice project!! I am trying to reverse-engineer a click wheel from a 7th gen iPod, anyone knows what kind of connector this is? https://imgur.com/a/FA7DwLS
Is it proprietary or no like the one from the 4th gen?