Close
0%
0%

Timed night light button – 20 Minute build

A simple IoT button which can run for years on batteries and requires zero coding.

Public Chat
Similar projects worth following
0 followers
My little boy became scared of the dark recently. So I wanted a low voltage big button switch (safe and easy to find in the dark), to turn on something a bit brighter than a standard night light, but importantly, didn't stay on for too long (he struggles to get a good nights sleep when the room is too bright).

I came across the Cricket from ThingsOnEdge, an IoT module that draws 0A in sleep mode. It can handle around 15k activations on two AAA's which should last about 5 years. It works by sending a webhook to IFTTT which in turn asks SmartThings to switch on the WiFi plug. SmartThings then switches off the plug after the assigned time. Most importantly it requires no coding, just a tiny bit of soldering.

Total project cost £38.52

Image showing wiring relates to the following:

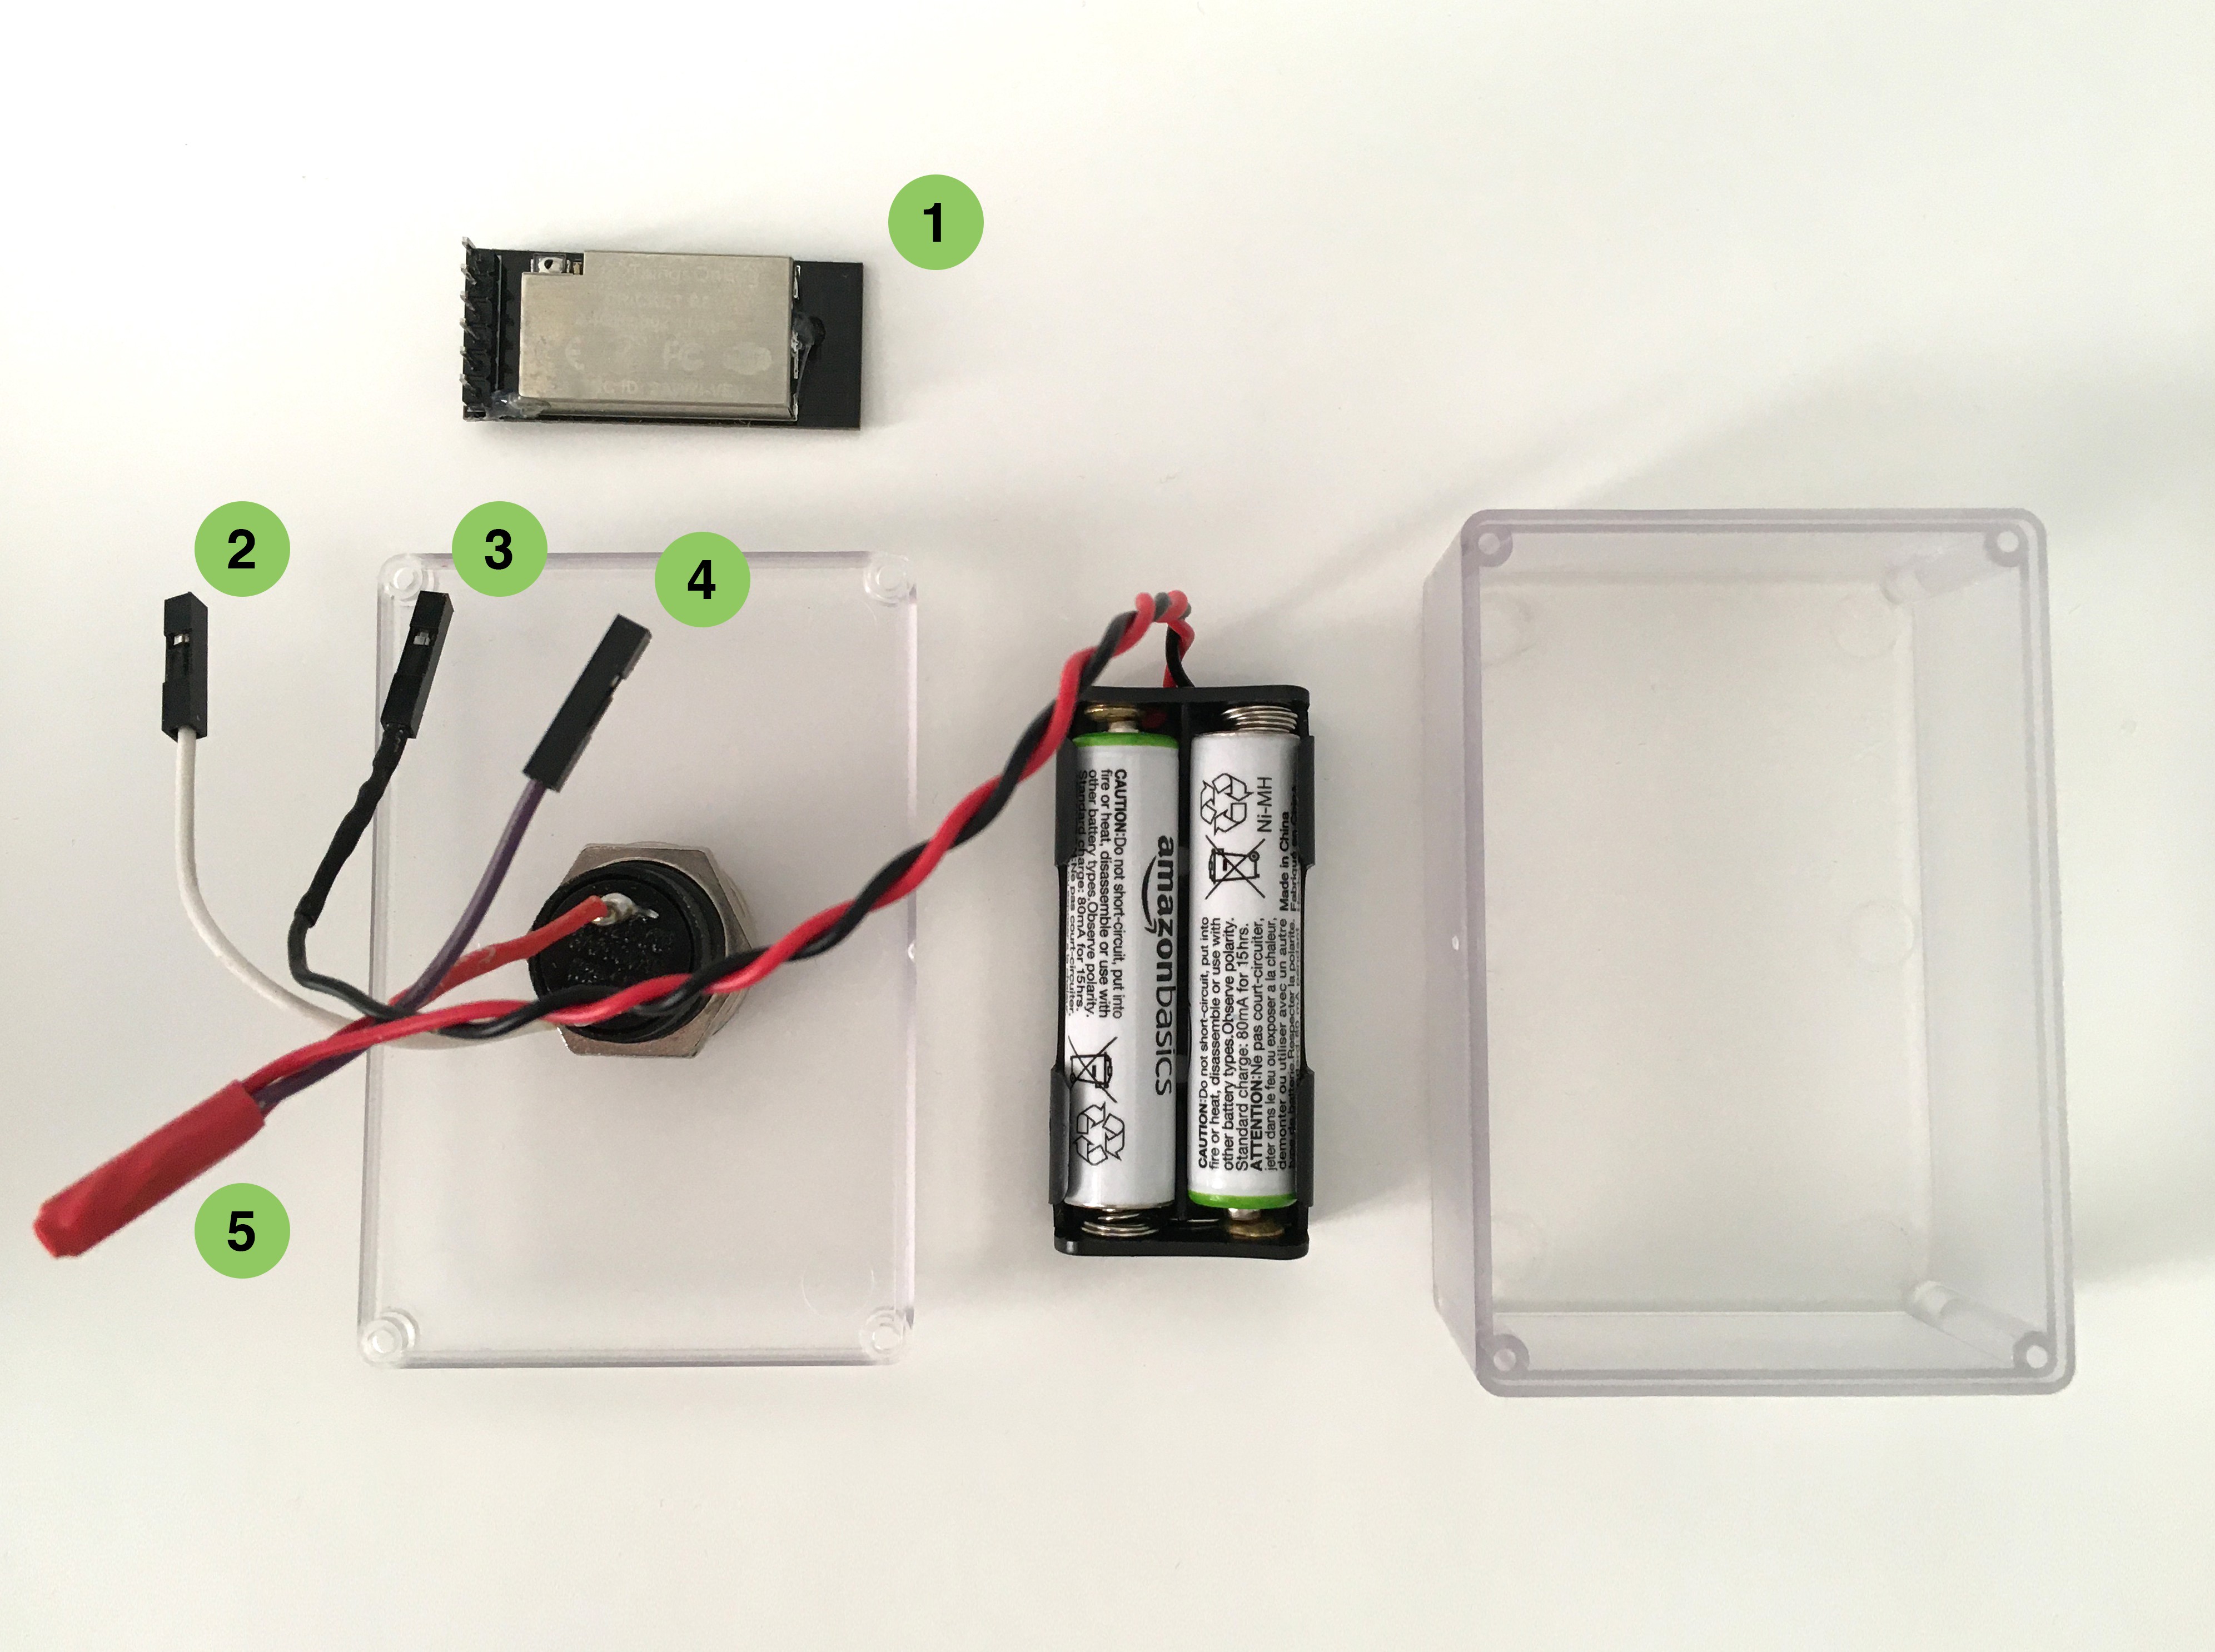
1. Cricket WiFi module

2. Wakeup trigger from button

3. GND to Cricket

4. VCC to Cricket

5. VCC from battery to button and Cricket(4). I solder the three cables to a thin cut strip of veroboard and heat shrink it, i've got no idea if this is even a good way to do it, it works anyway. I've also used Dupont connectors and headers so I can easily repurpose the module in the future.

  • 1 × IOT Cricket - Wi-Fi module £16 ThingsOnEdge.com
  • 1 × AAA Battery holder £1.59 eBay
  • 1 × 16mm Button £1.25 eBay
  • 1 × Mini enclosure 74 x 50 x 28mm £4.25 eBay
  • 1 × Teckin WiFi plug £8.50 (cost broken down from a bigger pack) Amazon

View all 9 components

  • 1
    Button build

    Find the centre of the lid and drill through with a 16mm bit. Insert the button and screw the backing nut on. 

    I've used jumper connectors and header pins so i can easily repurpose the module in the future.

    ( 1 )  Solder the 6 header pins to the Cricket. You only need 3 pins but for future proofing i put them all on.

    ( 2 ) Attach a jumper to the WAKE_UP pin on the Cricket and solder the other end to one side of the button.

    ( 3 ) Solder an insulate a jumper wire to the ground of the battery and attach it to GND pin on the Cricket

    ( 4 and 5 ) Positive from battery to the other side of the switch and also to the Cricket. I've soldered the connections to a scrap of veroboard and wrapped it in heat shrink. I'm not sure if this is best practice but it worked. I guess Wagos would also be good, but i didn't have any.

  • 2
    Setup

    TBC

View all instructions

Enjoy this project?

Share

Discussions

Similar Projects

Does this project spark your interest?

Become a member to follow this project and never miss any updates