Close
0%
0%

Edog - Mini 3D printed Quadruped Robot ✨

Hi, I'm edog, a 3D-printable quadruped robot

Public Chat
Similar projects worth following
🧠Build your own Printable robot with edog.io 🥳


Ever dreamed of building your own four-legged robot buddy? Let's get started together! This guide will walk you through crafting an Edog robot from scratch.

https://medium.com/p/e5e2f3a08729

Edog is a fully 3D-printable robot that's not only straightforward to assemble but also budget-friendly. Powered by the compact Raspberry Pi Zero, it's versatile enough to support a variety of Linux distributions. Remarkably, Edog can command up to 16 servo motors at once, all while leaving the entire GPIO board free for any additional components you wish to integrate

Do It Yourself

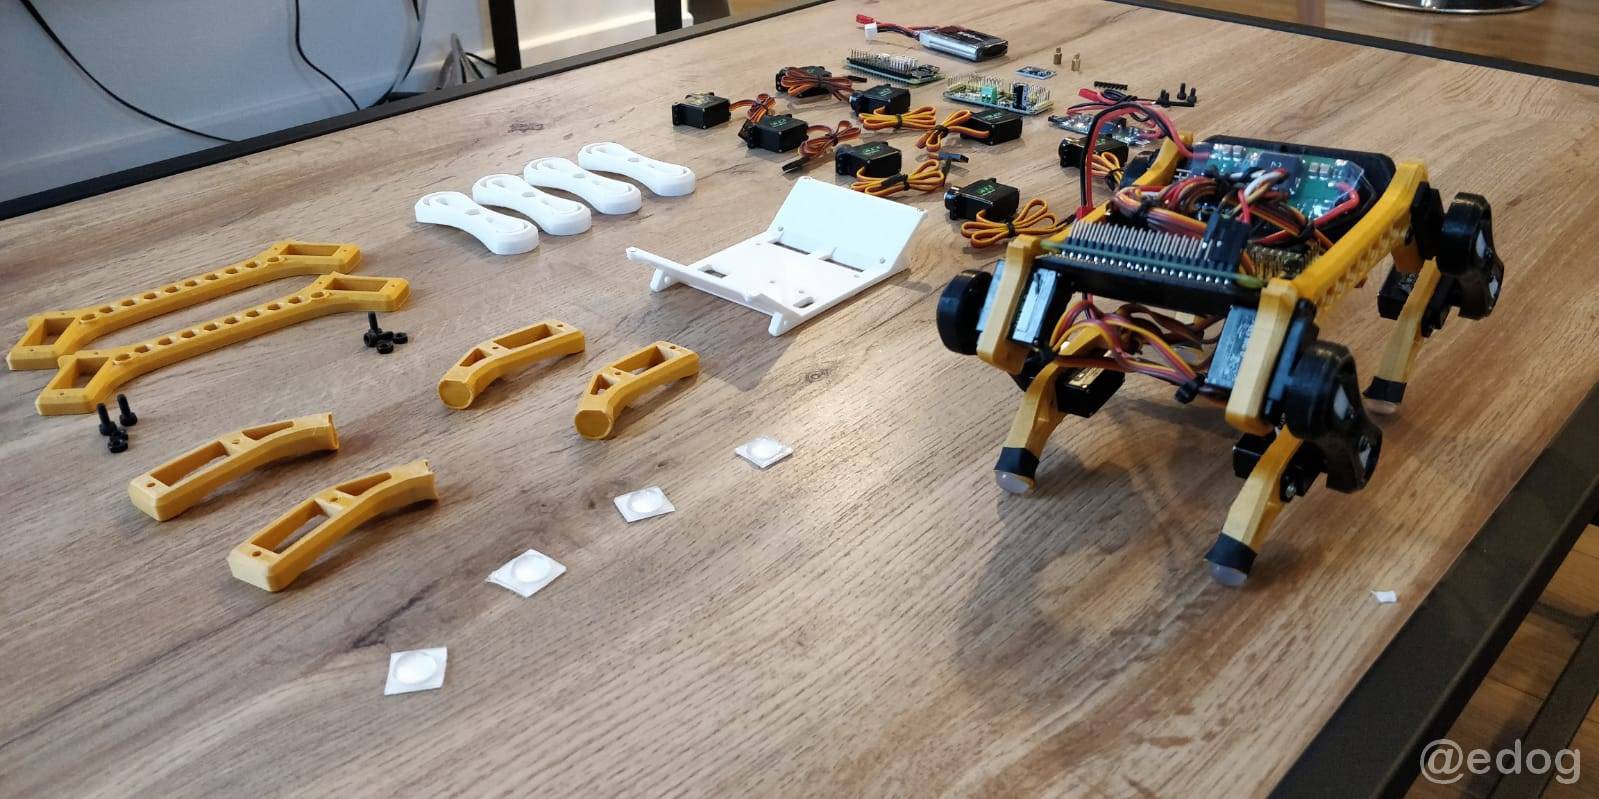
Whether you're a student, a maker or just curious, choose the kit that suits you and Build your Edog now !

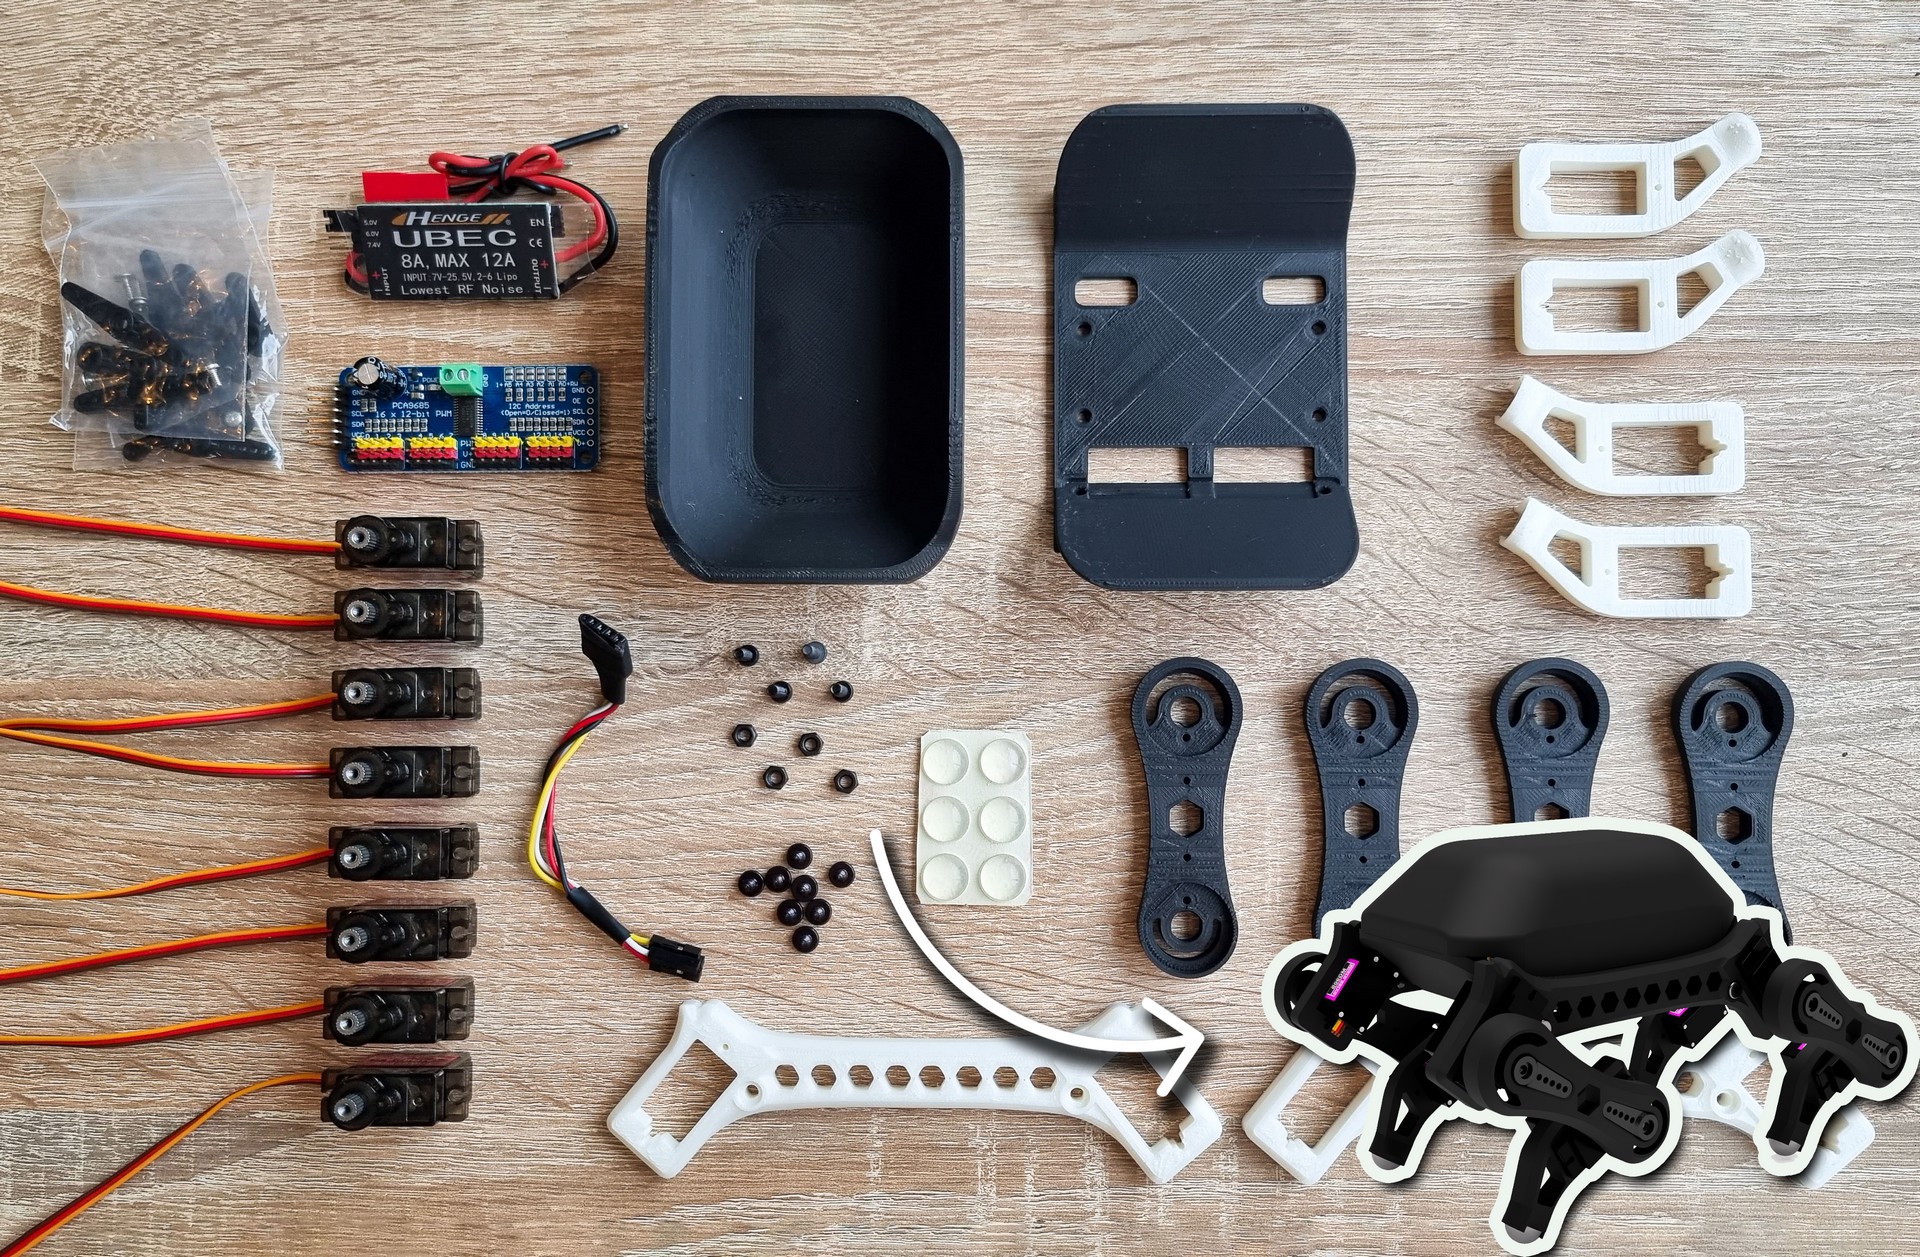
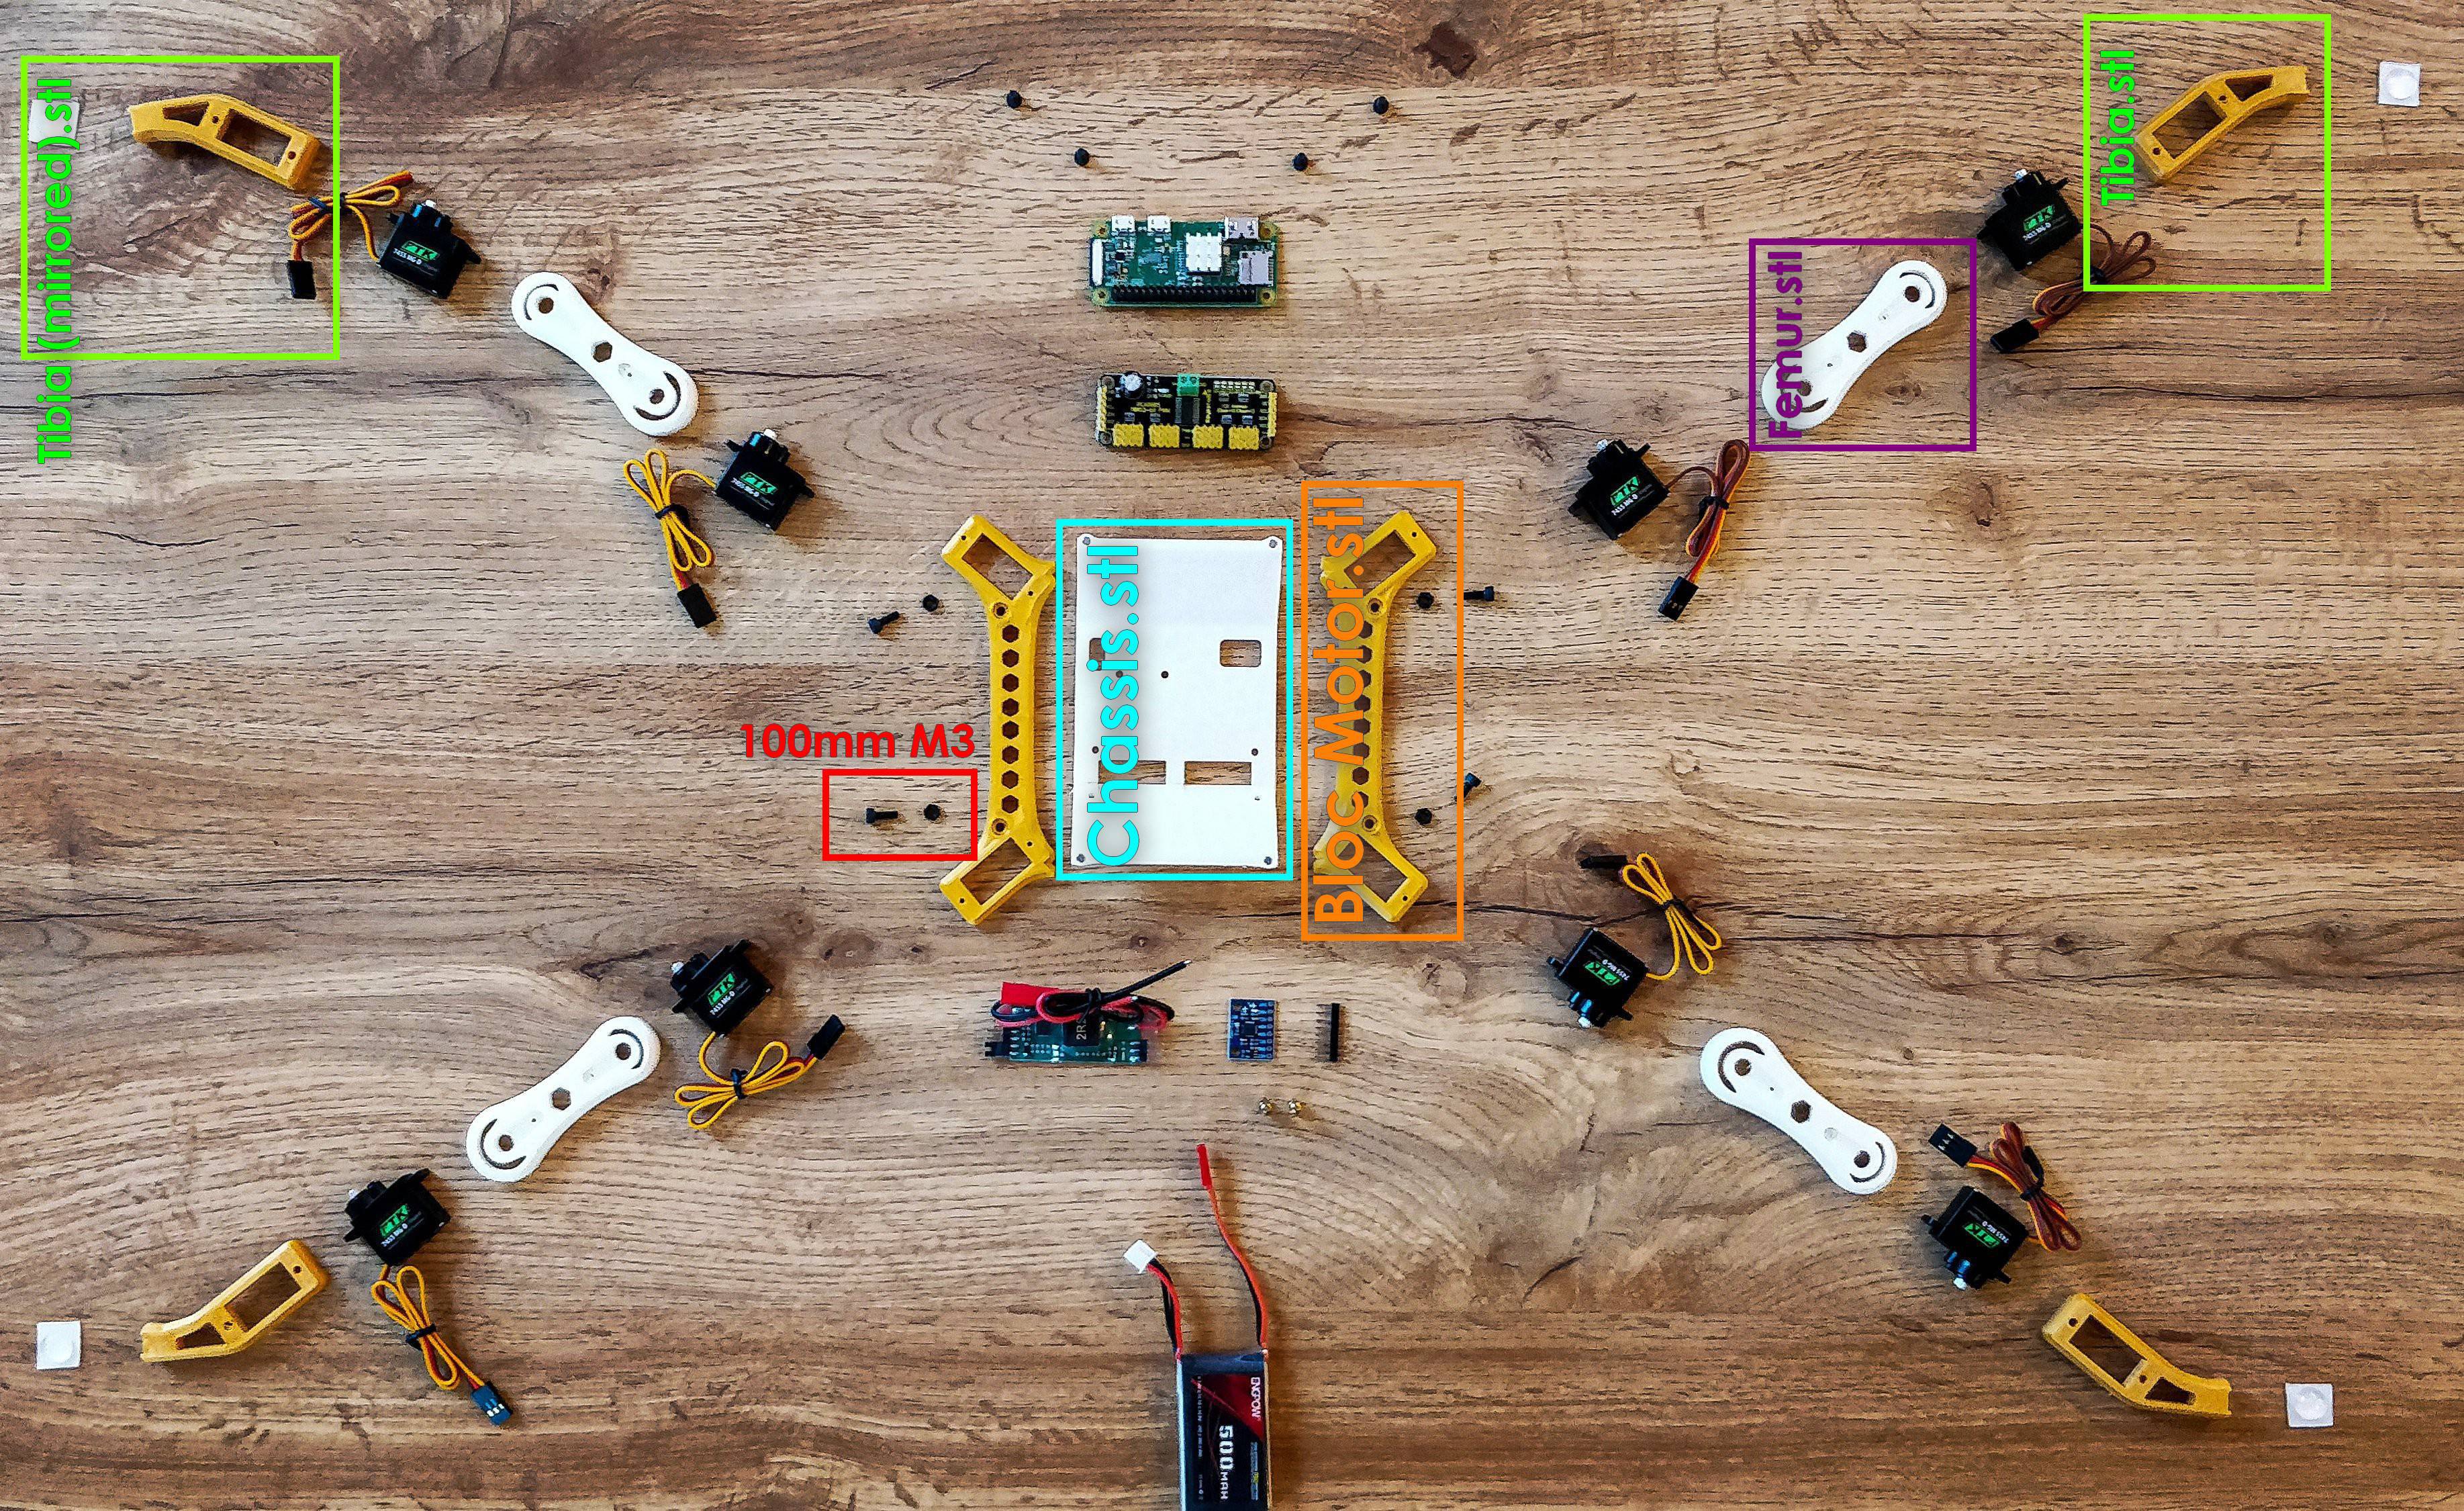
Fully 3D-printable Quadruped Robot that’s not only straightforward to assemble but also budget-friendly


Visite our shop: edog.io

Features:

  • 100% 3D printable (without support)✔️
  • Under 300gr weigh✔️
  • Under 100$ budget ✔️
  • Easy to build ✔️
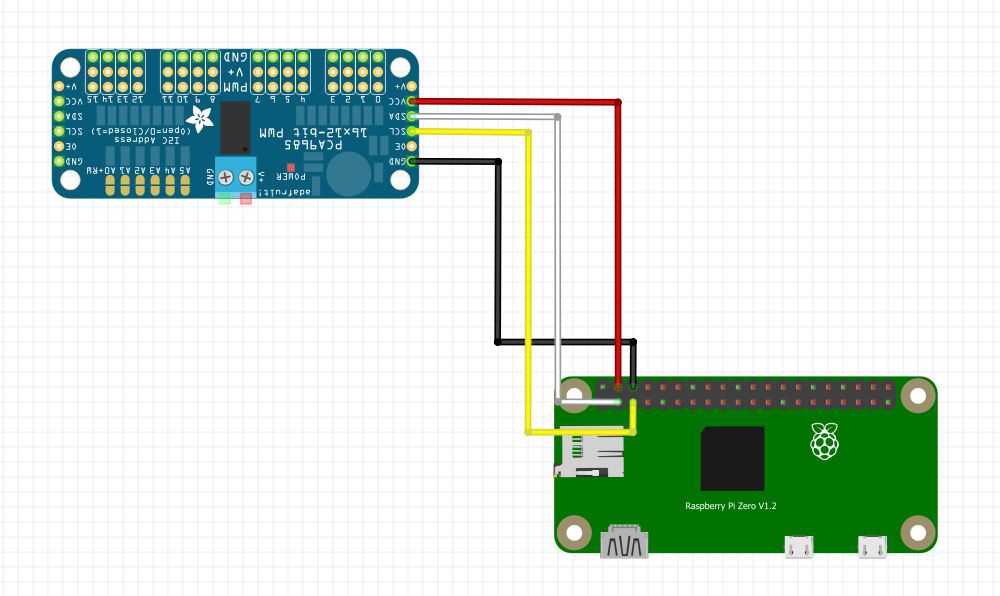
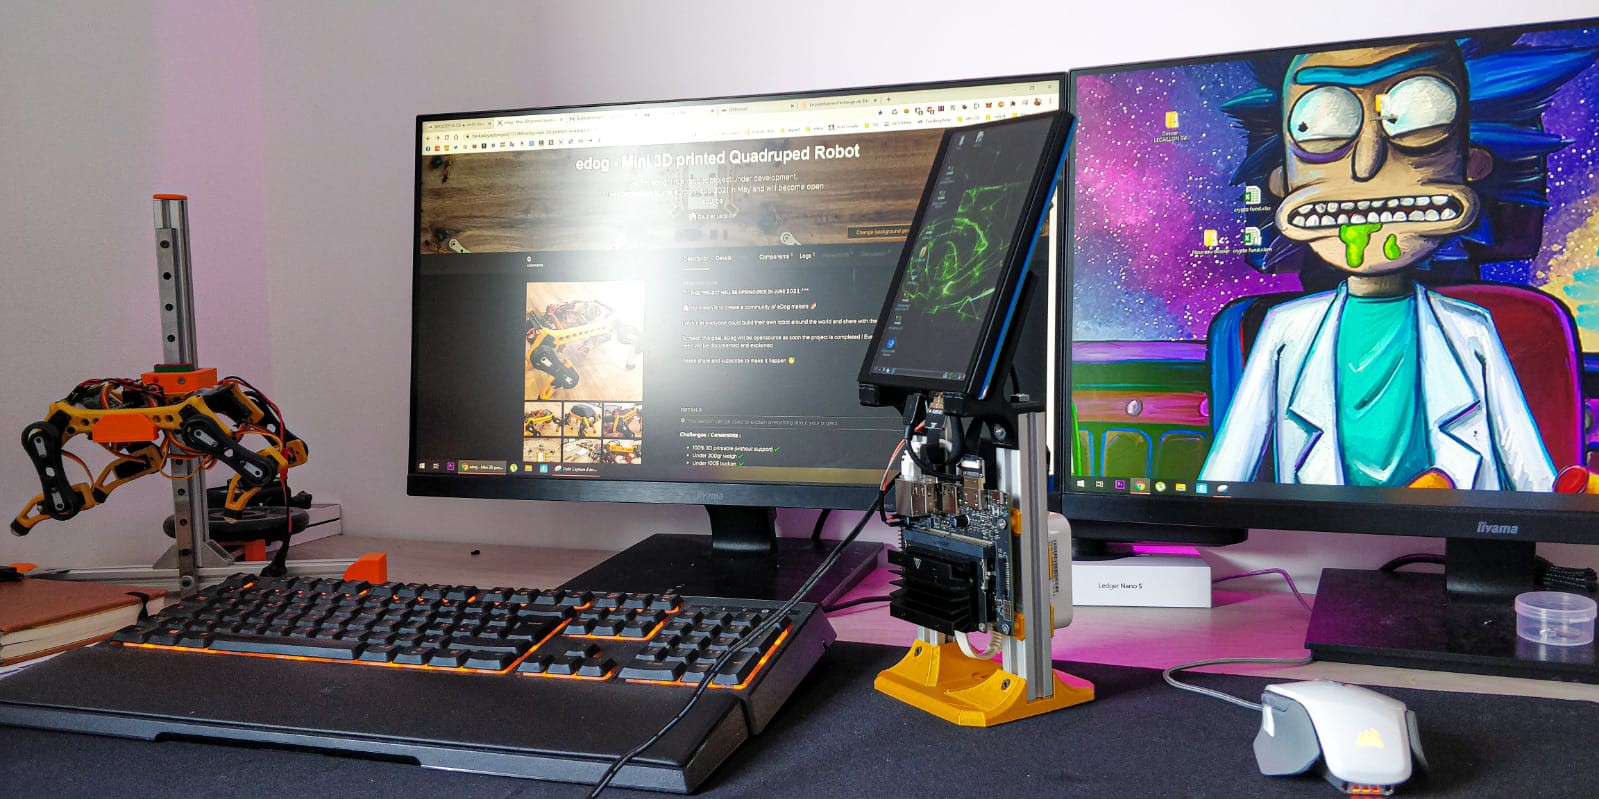
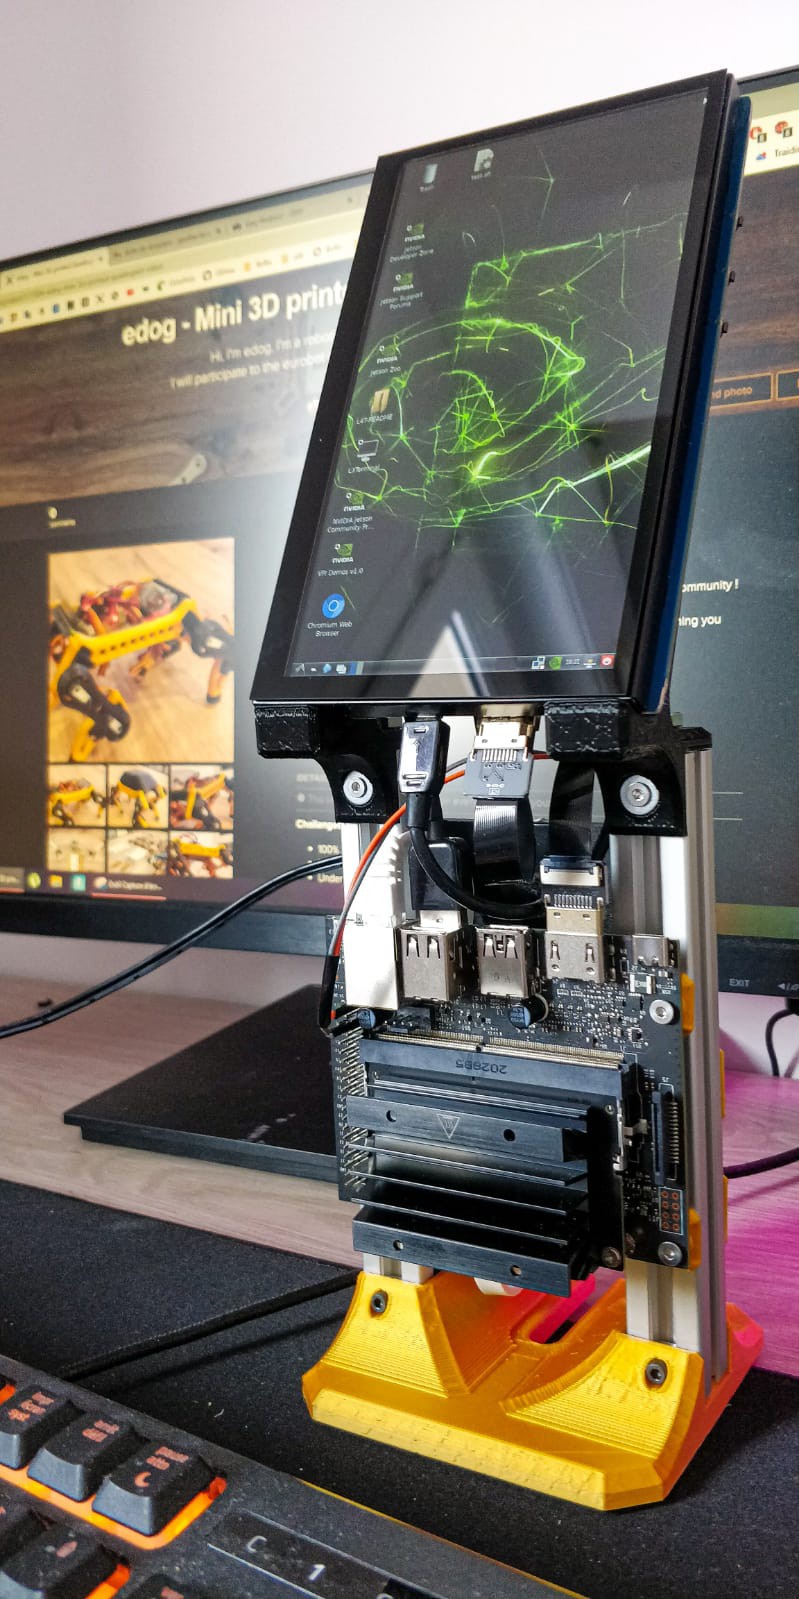
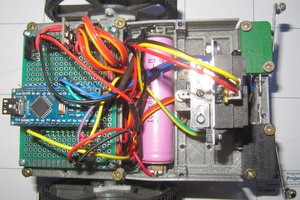
  • Linux embedded (Raspberry Pi Zero)✔️
  • Modular design / components ✔️
  • Starter kit sell ✔️

Visite our shop: edog.io

  • 1 × Raspberry pi Zero WH
  • 1 × Driver Servo - PCA9685 16' canaux 12-bit pwm- I2C
  • 1 × Power supply - HENGE 8A UBEC 5v / 6v / 7.4v 7V-25.5V Input for 2-6 Lipo
  • 8 × Servo Motors - MG90S
  • 1 × Lipo 2/3s

  • Some Pics

    Gaultier Lecaillon11/11/2023 at 09:22 0 comments

  • Demo Servo Controller python

    Gaultier Lecaillon07/16/2021 at 20:48 0 comments

    Please find below the wiring diagram in order to correctly use the Driver Servo - PCA9685 16' with the I2C. You also need to power up the board and raspberry with a 5v and at least 3A (They can share the same input voltage)

    Simple code example to set all 8 servo to the angle 50° (note that the angle need to be: 0 < angle < 180)

    from adafruit_servokit import ServoKit
    
    kit = ServoKit(channels=16)
    
    for i in range(0, 7):
            kit.servo[i].angle = 50

  • STL Files released 16/01/2021

    Gaultier Lecaillon07/16/2021 at 20:25 0 comments

    I finally uploaded stl parts online for Edog ! 

    Prints are extremely simple, you don't need any support if you set the "support overhang angles" to 51°. The only trick is to print two "tibia" mirrored in order to print left and right tibia, the femur is already symmetrical and can be printed 4 times.

    Download link: https://www.thingiverse.com/thing:4910279


    PS: I didn't publish the shell, I'm not satified by the shape, I will uplaod it later :)

  • Next Tuesday, Eurobot 2021 Cup will begin !

    Gaultier Lecaillon07/02/2021 at 13:44 0 comments

    I am very excited about my third participation in the competition, I have no doubt that my robot will be the smallest of all team and maybe the only quadruped 🙃

    Here is the video I made with my former team Evolutek in 2019:


    My goal is obviously not making many points but challenge the edog design to see if he can adapt in different environment and have feedback from other roboticist and engineer 


  • Beacon Controller

    Gaultier Lecaillon02/14/2021 at 11:53 0 comments

    As explain, edog will participate in the Eurobot cup. 

    To do so, I need to know the robot position in (x, y) on the table. But I can't use embedded lidar or using triangulation due to its small size and its limited capacity to carry heavy components. 

    So What I will attempt to do is using a beacon with a camera and estimate the position giving a video flux.

    This beacon is composed with an NVIDIA Jetson Nano 2gb board, a TPLink Nano Router, a 7inch touchscreen and a DC converter to 5v and 5A. that allow to used 3s to 6s lipo to power up the sytem.


    Here an exemple of the team ARIG Robotique (more infos here)

    Step #1: original video

    Step #2: Optical distortion usgin OpenCv in python

    Step #3: projection in an orthonormal coordinate system

  • Exploded view of all edog components

    Gaultier Lecaillon01/31/2021 at 00:00 0 comments

    All the stl files will be drop after the French Eurobot cup, the 1st June 2021.

    here you can see all the part involves, Everything has been design for an easy build and easy printed without support needed.

    Only 4 * M3 screw are needed for the frame ! 🔩
    It makes edog very simple to build, so everyone can build his own easely

  • eDog Walking demo 31/01/2021

    Gaultier Lecaillon01/30/2021 at 23:40 0 comments

    All legs are controlled by an inverse kinematics algorithm. ROS2 will be implement soon !

View all 7 project logs

View all instructions

Enjoy this project?

Share

Discussions

Natelolzzz wrote 02/12/2023 at 18:53 point

Building this with a raspberry pi 4 instead!

  Are you sure? yes | no

cmarinv2005 wrote 09/05/2021 at 14:59 point

Buenas, quiero unirme al proyecto, soy diseñador y también programo, me gustaría saber en que software se realizo el diseño y como hago para participar activamente, lo único que le cambiaria al proyecto es una cubierta en la parte superior para que sea mas amigable, un perro con orejas y boca ... 

  Are you sure? yes | no

Dejan Ristic wrote 07/13/2021 at 15:40 point

Neat design!
In the video it was only walking a straight line. Do you have code to make it turn corners as well? 

  Are you sure? yes | no

Gaultier Lecaillon wrote 07/17/2021 at 15:45 point

I can make it turn with little jumps ^^ see: https://youtu.be/g4vvNWdrd0w?t=131

  Are you sure? yes | no

Dejan Ristic wrote 07/21/2021 at 07:05 point

Watched it. Cute!
French robot cup 2021 huh? Looks like loads of fun. Wish we had contests like that in my country.

  Are you sure? yes | no

Similar Projects

Does this project spark your interest?

Become a member to follow this project and never miss any updates