 Maarten Janssen
It has been a very exciting week for the OPL Studio project wherer thing are really starting to take shape.
A New Home For The Project
This week the first prototype PCBs for the project arrived! They turned out really nice and I immediately started building them up. The OPL Studio will have 3 layers. I'm extremely happy with my current design. It feels sturdy, has some nice weight to it and most of all, gone are all the headaches due to breadboard wiring! :)
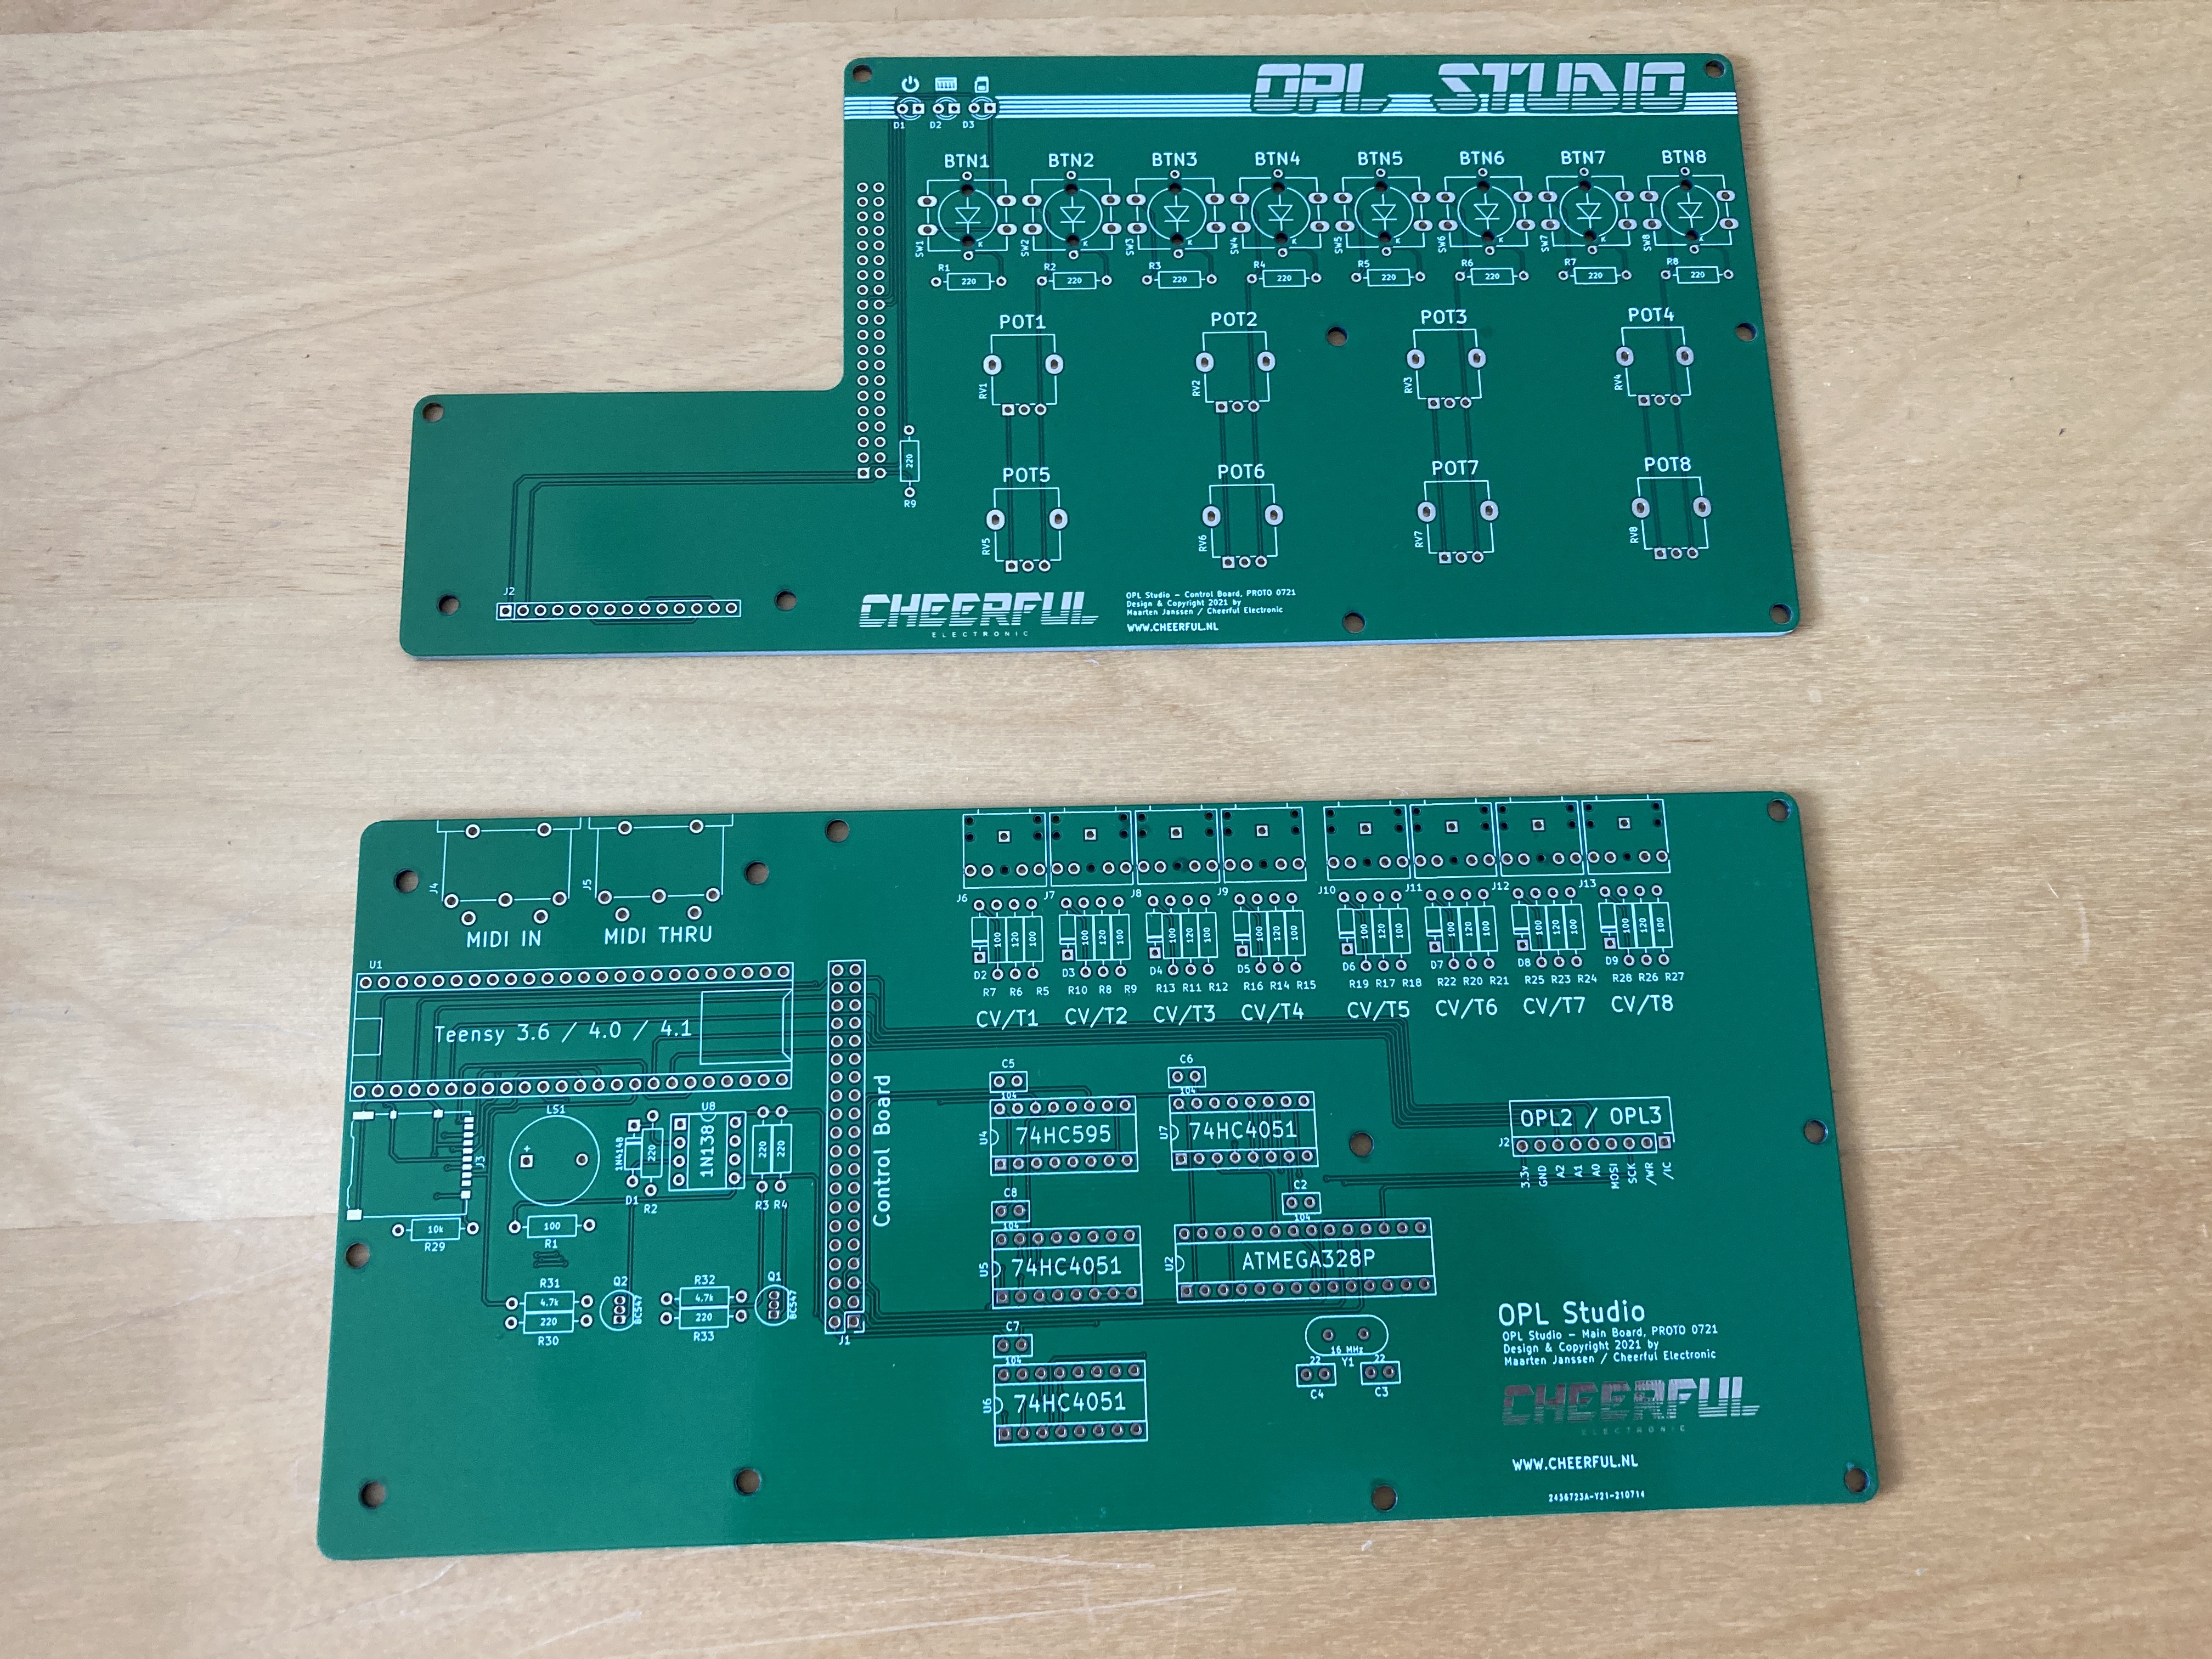
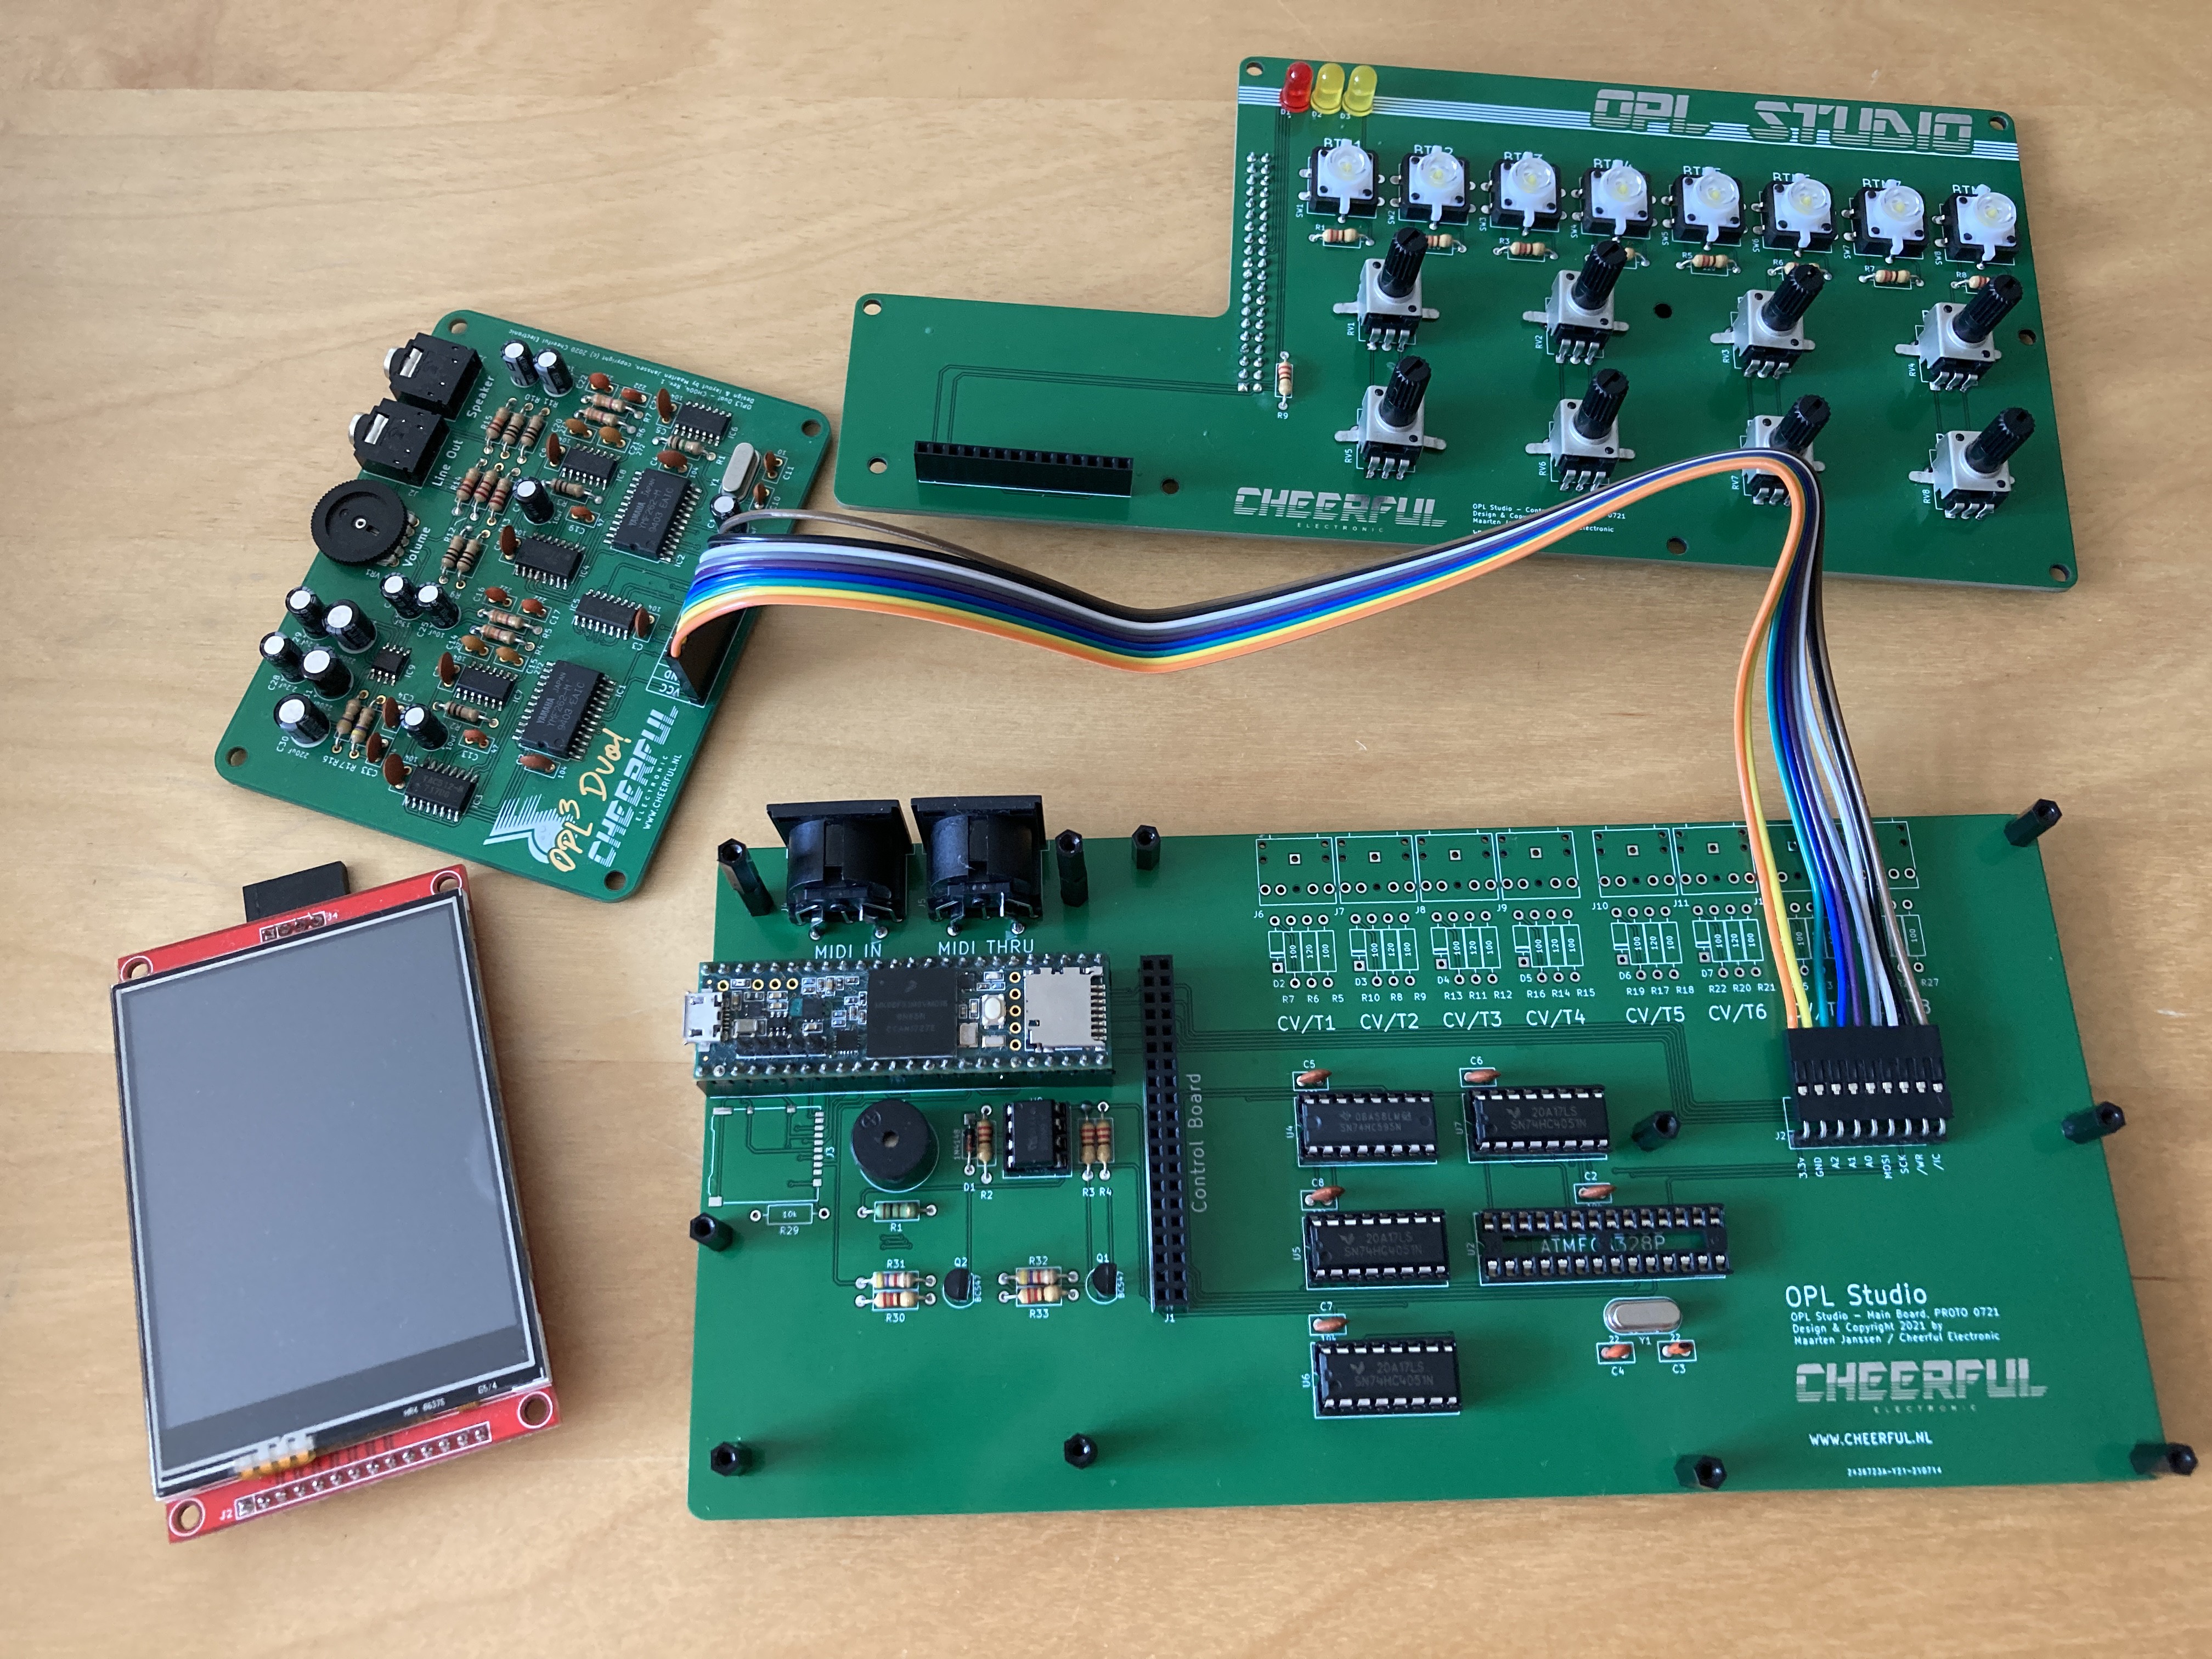
On the bottom is the main board wher the Teensy is plugged in and where the OPL3 Duo!, SD card, MIDI and Eurorack interface are found. There are some logic chips on the board to help interfacing with the buttons, pots, lights etc. I thought it would be a good idea to not let the Teensy poll the controls, but let a separate controller take care of this task. I'll call it the Arduino part since it will be using an Atmel 328p. I have not yet fully assembled and tested the main board. So far only the Teensy, SD card, speaker and interface to the button lights and LCD have been tested. Bodge wire count so far: 1.
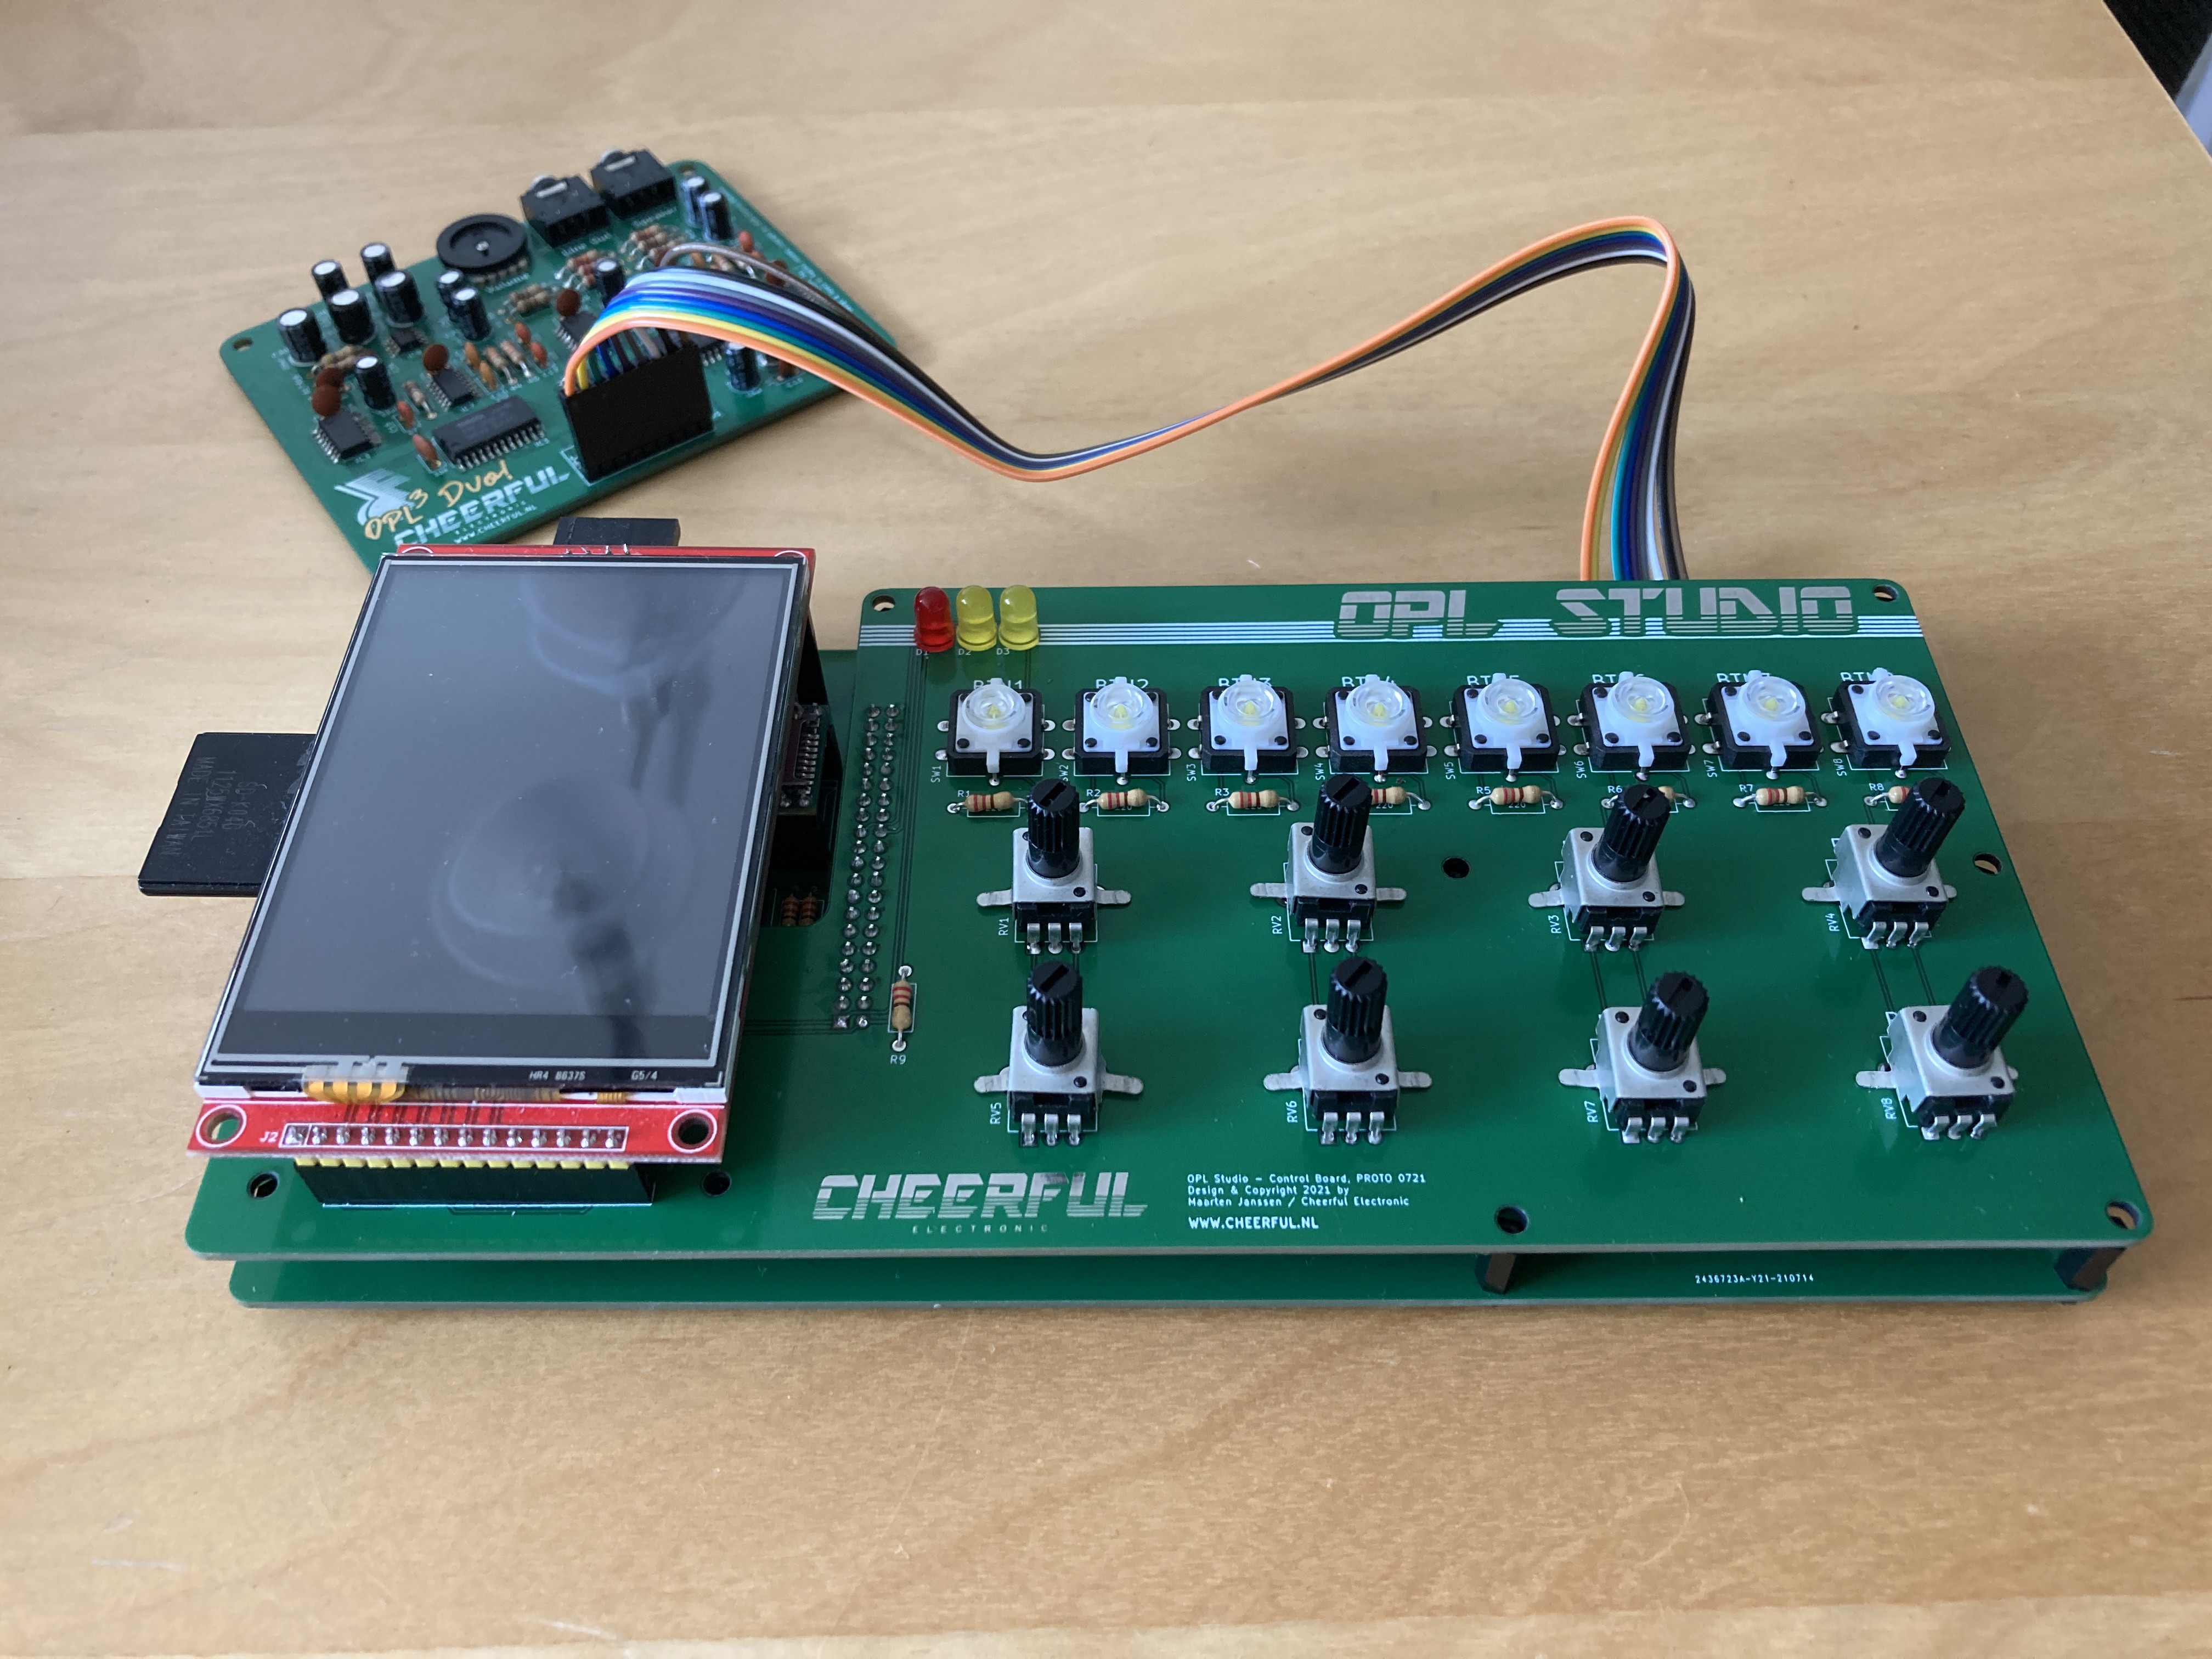
The 2nd layer is the PCB that contains the push buttons with LEDs, potentiometers and 3 status LEDs. This is also where the 3rd layer, the LCD plugs in. On this board the button LEDs and the power and SD status LEDs are already working.
I still have plenty ideas of what I want to change and add to the boards, but for now I couldn't be happier with it!
Compound Instruments!
This is a new feature that I've been thinking about since the beginning of the project and I'm very excited about. Compound instruments allow me to trigger multiple patches when a single note is played. For example you can play a piano, an organ and a bass drum patch at the same time on 1 MIDI channel. It also allows creating more complex sounds because you will be layering different patches on top of each other.
A compound instrument can be constructed from 4 instrument patches. The first patch, the base instrument, will trigger the 3 sub instruments whenever it's played. To make things more interesting each sub instrument has a few parameters to influence it. The first parameter is of course the patch for the sub instrument. Next to that you can change the volume, panning (in the future), transpose (not in case of drum patches) and a set a delay before the sub instrument starts playing after the main instrument is triggered.
This is a lot of fun to play around with and it can give some very interesting sounds! Besides assembling the first prototype PCB this has taken all my time this week to nicely integrate the code, make the UI, test it and play around :)

UI Improvements
Spinners would already keep incrementing and decrementing their value when you hold the + or - button, but still spinners with a big value range, such as those for instrument patches or tempo, it could take a long time to find the value you want. In this update spinners with a big range will start to make bigger value changes when you hold their buttons longer.
Blinkenlights
While I was trying out the lights for the buttons I added a little bit of code to the MIDI controller that can blink the lights when it receives note on events on certain channels. It will blink the buttons for the first 7 channels and the drum channel on the 8th button. I thought that it would look really gimmicky, but I must say that I ended up quite liking it, though the LEDs are way too bright currently and it get annoying fast if the thing is flashing its lights from the corner of your eyes. This will be fixed by some higher value resistors. I'll also add a setting to enable / disable the blinking, because I thiink it's not something I want all the time and the lights may end up getting some more serious function later.

Discussions
Become a Hackaday.io Member
Create an account to leave a comment. Already have an account? Log In.