Close
0%
0%

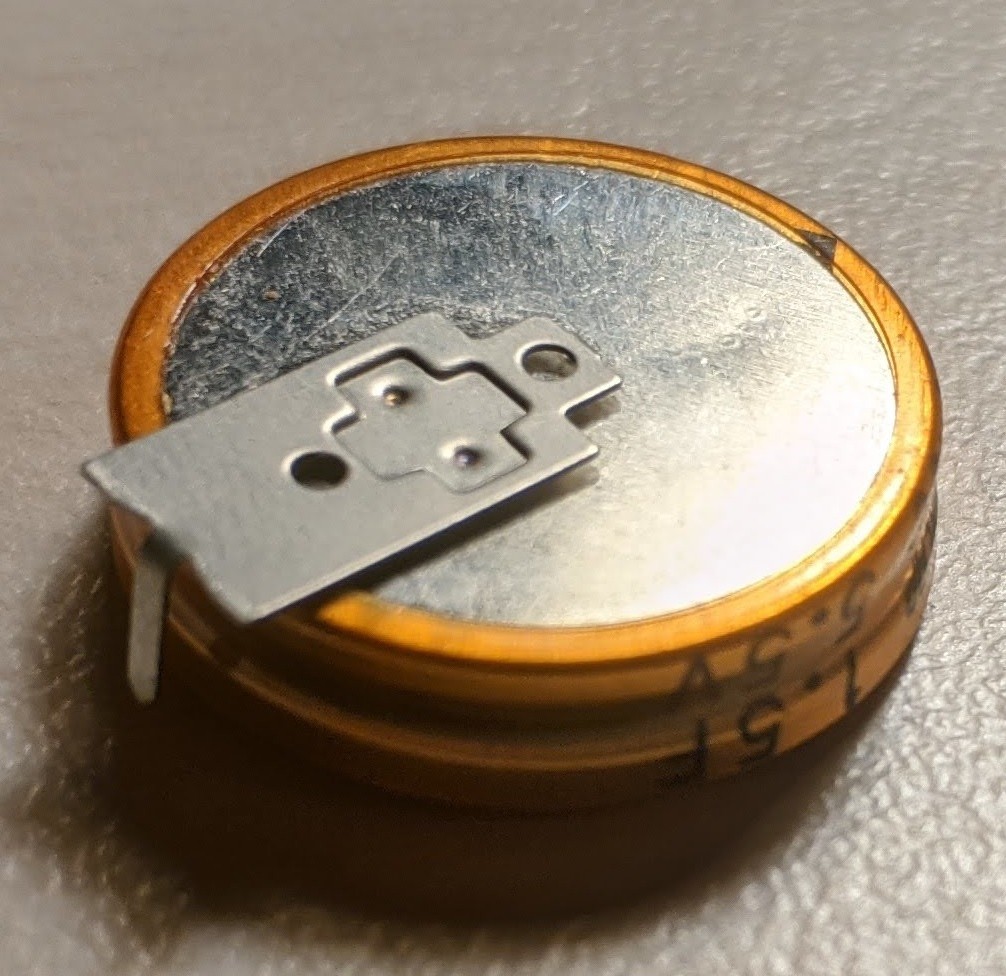
Solar powered Bluetooth Thermometer with Supercap

Run Xiaomi Thermometer LYWSD03MMC with a supercapacitor and mini solarpanel.

Public Chat
Similar projects worth following
I liked the idea to monitor room temperature and humidity via bluetooth low energy. Therefore i used the XIAOMI Mijia Bluetooth Thermometer LYWSD03MMC. A really nice tiny device, unfortunatly powered by a single CR2032 coin cell.

Although batteries last for months or even years, I'm not a big fan of powering small devices with such polluting equipment. I had the idea to power the thermometer with a mini solar panel (and a supercap as backup for night / cloudy times).

I wanted to keep the hardware modifications as simple as possible, so there are basically only 3 components needed:
a solarcell, a supercap and diode to prevent discharge at night.

Also i wanted to provide a wider voltage range and a accurate power display of the actual charge of the supercap. Therefore i modified the open source custom software (links below) and added a power display which takes the non-linearity of the supercap into account.

Software sources can be found on GitHub: ATC_MiThermometer

  • 1 × Xiaomi Mijia Bluetooth Thermometer LYWSD03MMC the main part
  • 1 × Coin Cell Supercapacitor 1.5F 5.5V (e.g. Korchip DCL5R5155VF EDLC)
  • 1 × Germanium Diode should be prefered over Silicon Diode due to less voltage drop
  • 1 × Solar Panel for ambient light conditions a amorphous solar panel works best (up to 5 Voc )

  • Supercap vs. battery

    MartMet04/16/2022 at 18:58 0 comments

    One year runtime of two devices. Blue = with supercap, Orange = with CR2032 battery

    The blue curve shows the daily charge / discharge of the supercapacitor.

    The battery lasts approx. one year. and needs to be replaced by april 2022.


  • Small solar panel charging curve on 2 sunny days

    MartMet02/25/2021 at 20:52 2 comments

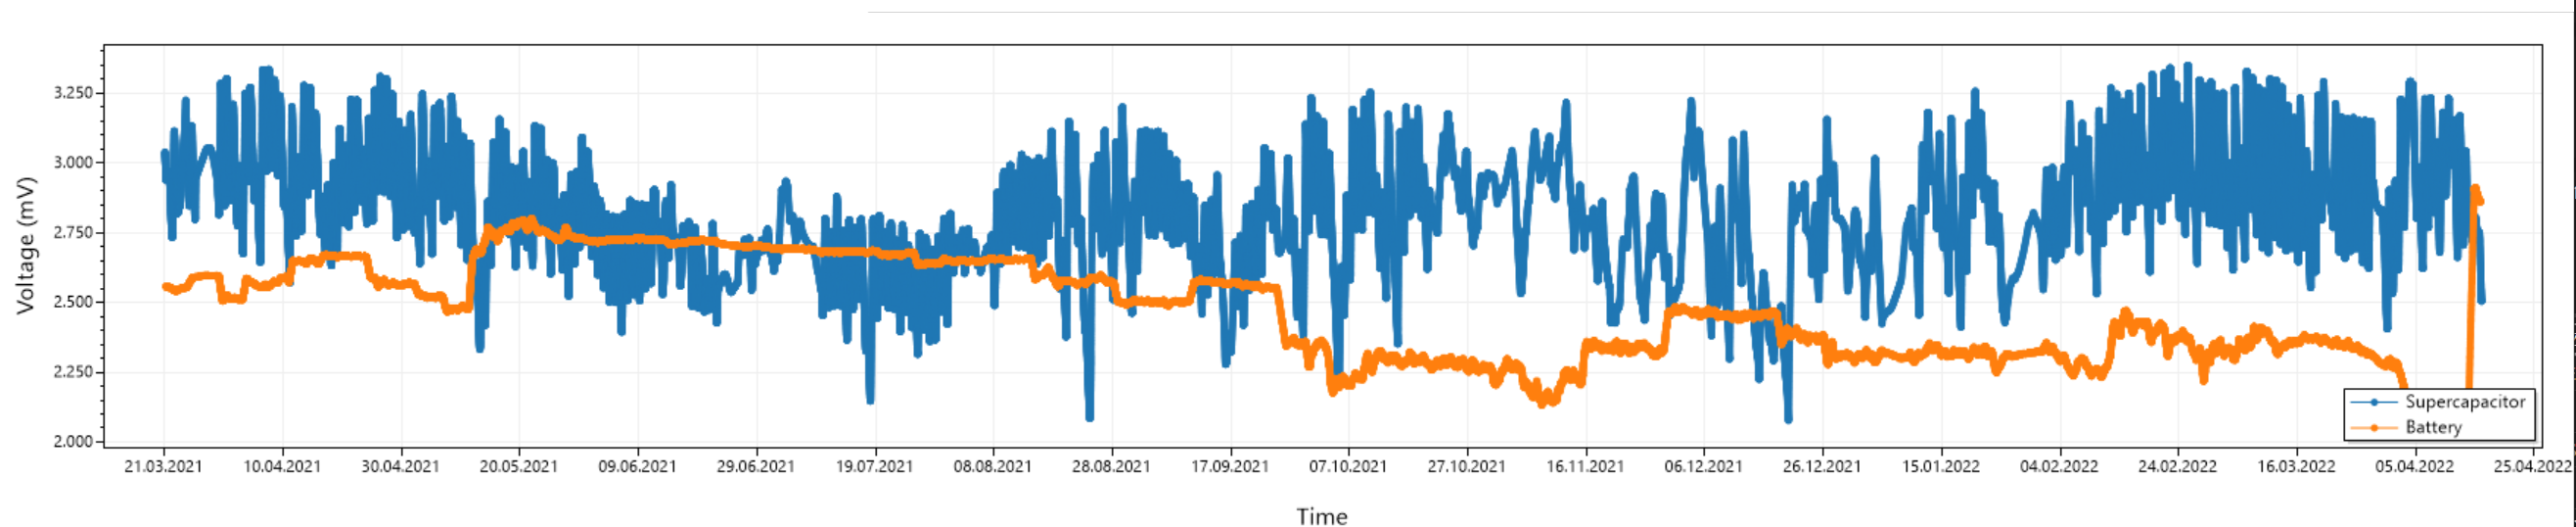
    The devices is placed on the balcony and charged with a small solar panel BR-243318C.


    In direct sunlight the small version of the solar panel gives max. ~3.45V (- 0.3V of the Ge-Diode)


    In ambient light the voltage is about 2.5V so the supercapacitor is not fully used .... this solution is suboptimal for indoor use.

  • 24 MHz vs 48 MHz

    MartMet02/25/2021 at 20:30 0 comments


    I was curious what the impact would be on the overall power consumption. I plotted a comparsion between the voltage drop via 24 MHz & 48 MHz.

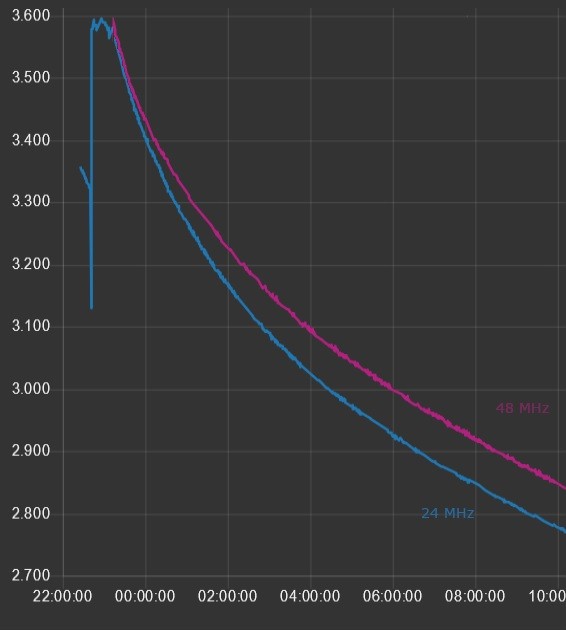
    Seems that the 48MHz consumes less power as the device spends a larger part of the time in sleep mode.

  • Runtime test with 1.5F Supercapacitor

    MartMet02/25/2021 at 20:12 0 comments


    Voltage drop over time  (mV / hours of day)

    Charged 1.5F to 3.6V and let the thermometer run with 48MHz. Advertising interval 10s, measurement is done via plotting internal ADC values.

    Below 2.0 V, the LCD is barely readable, but the Bluetooth transmission still works. This small voltage gap at around 2380mV seems to occure everytime, so something must drain power at this voltage.

View all 4 project logs

  • 1
    Case Modifications

    The case needs minor modifications to be able to connect the solar panel with wires.

    Note: When viewing the LCD the wires should be exit the case on the left side. The BLE antenna is on the right and i expierenced a worse RSSI while the first attempt to exit the wires on the right side.


  • 2
    Soldering

    Just solder GND and Voltage wires a shown. Dont forget to place in a diode, this is necessary that the solar panel does not discharge the Supercap overnight.

  • 3
    Supercapacitor

    Remove the "-" pin from the supercapacitor. And carefully bend the "+" pin down. The capacitor fits into the slot of the CR2032.

View all 4 instructions

Enjoy this project?

Share

Discussions

jpelmar107 wrote 11/10/2023 at 16:18 point

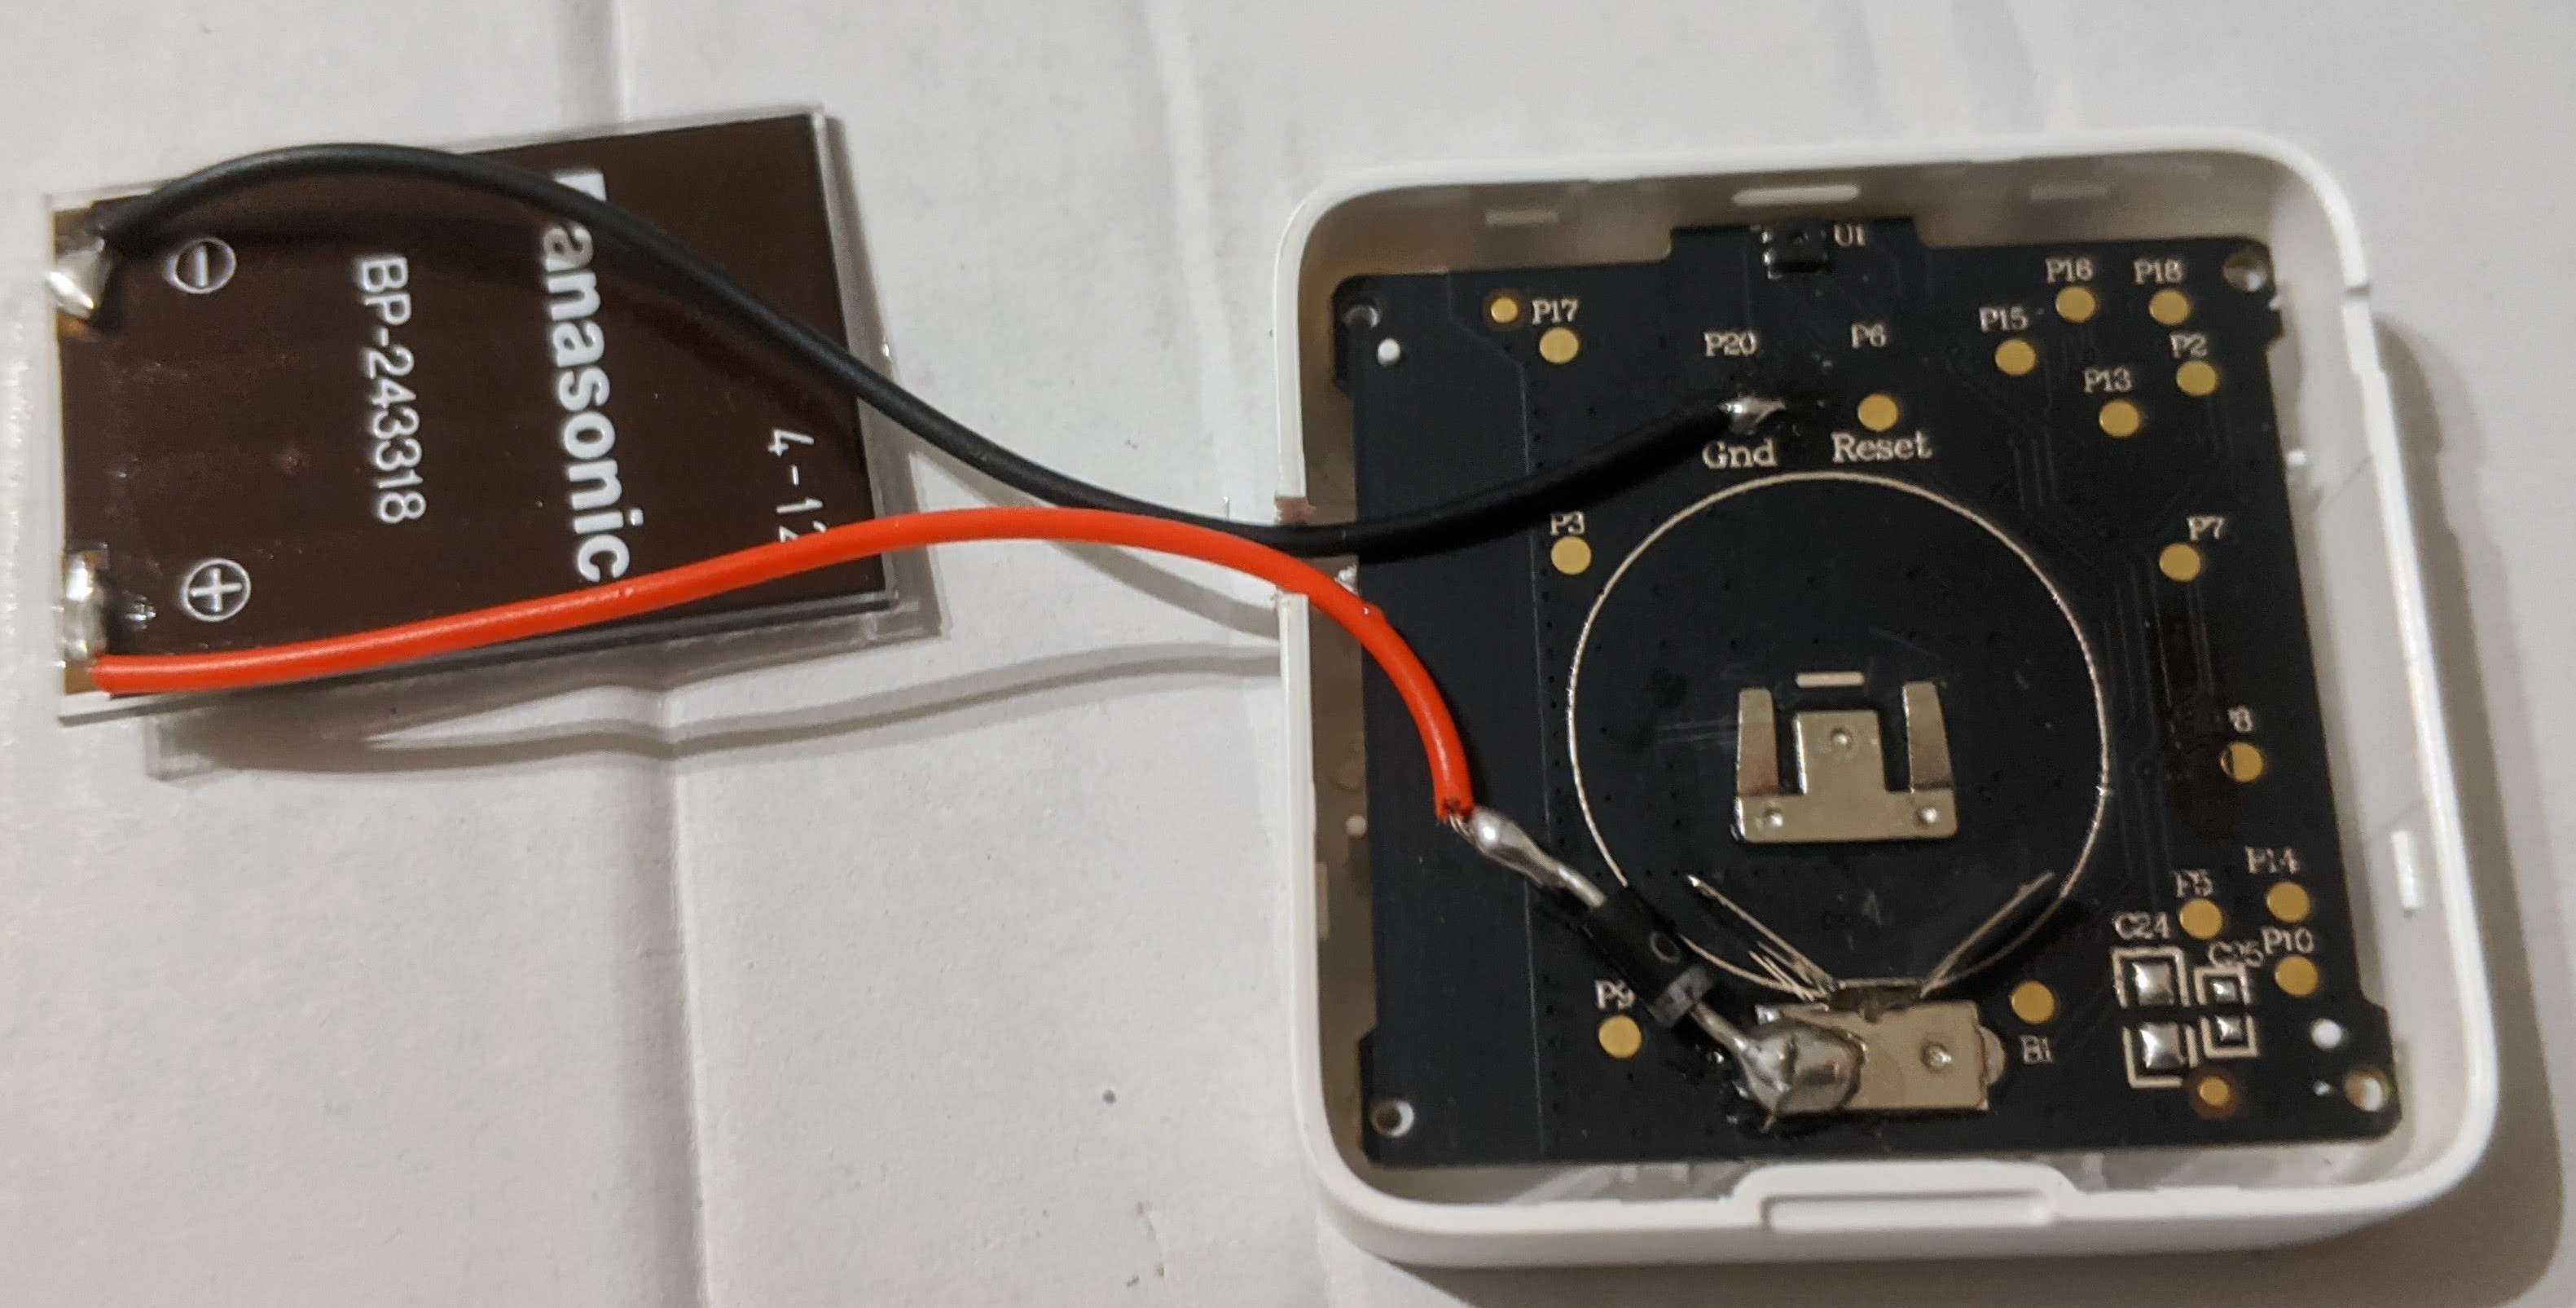
Amazing project, nice work. I will suggest a Silicon Shottky diode which has a low drop voltage (as Germanium ones), but it impoves Germanium solution with high forward voltage and high-temperature stability.

  Are you sure? yes | no

Gos wrote 02/08/2023 at 07:20 point

Hello, nice project.  I did something similar regarding the supercapacitor.  I think that you can easily almost double the autonomy of your system.

You could place a cheap boost converter to 5V between the panel and the cap. This way even with weak sun it will charge the cap always to 5V.

And a LDO converter after the cap to bring the voltage down to 3.3V. Then you supercapacitor will store charge between 5V down to 2V or the minimum of the clock to work.  This is almost double than now. 

This is amazing what can be done with a very small solar panel and supercapacitor.  And parts are now very cheap.

Regards!

  Are you sure? yes | no

Does this project spark your interest?

Become a member to follow this project and never miss any updates