 Darian Johnson
1/2/2020 Update:
Newt is available for sale on Crowd Supply. We're 2 weeks into the campaign, at already at 197% of funding target. Read more on the Campaign Page.
---------------------------------------------------------------
10/1/2021 Update:
The Newt was selected for Crowd Supply! So soon, you'll be able to have your very own! Check out the Pre-Launch page for more details!
---------------------------------------------------------------
9/8/2021 Update:
Last revision of the PCB works as expected! I uploaded my sample code and made a video overview of what the Newt can do!
-----------------------------------------------------------------
Running Summary below:
(as of 3/19/2021)
I'm in the process of building a low-power, always on smart display. I wanted something that I could easily affix to a wall or mirror, or put on a nightstand (which means it has to be battery powered).
An "always on" display was important because I wanted to get key information (weather, time, remaining time on a timer, upcoming meetings) at a glance, with minimal "clicks".
Finally, I wanted to make sure my project was (a) manufacturable (b) easily hackable and (c) open-source.
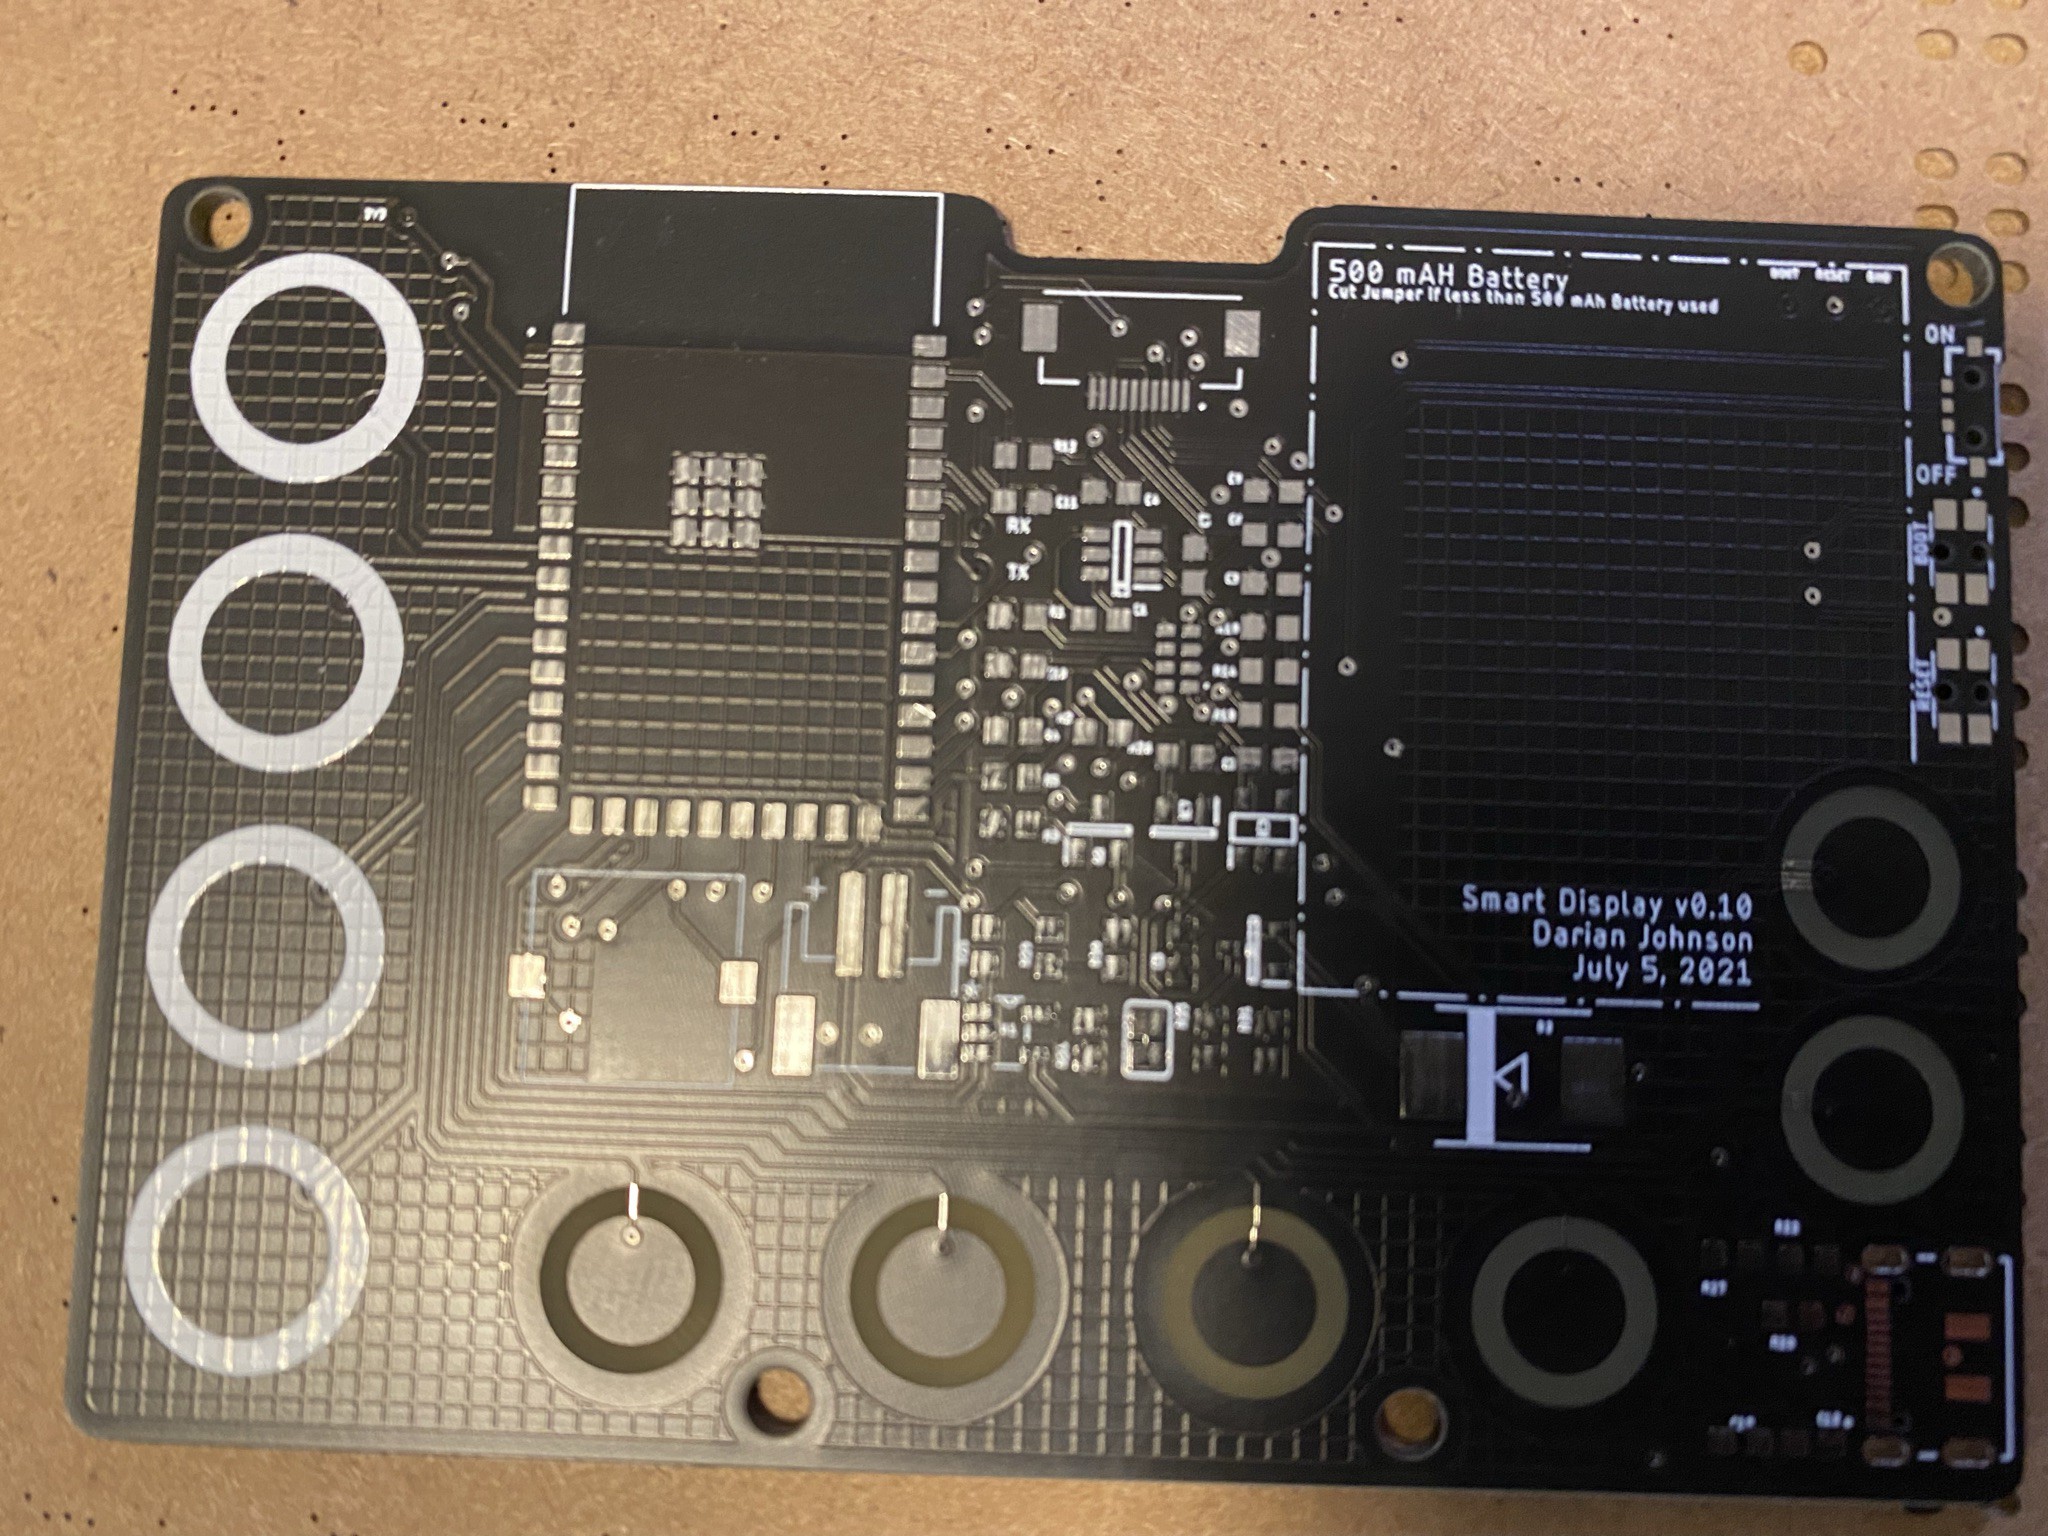
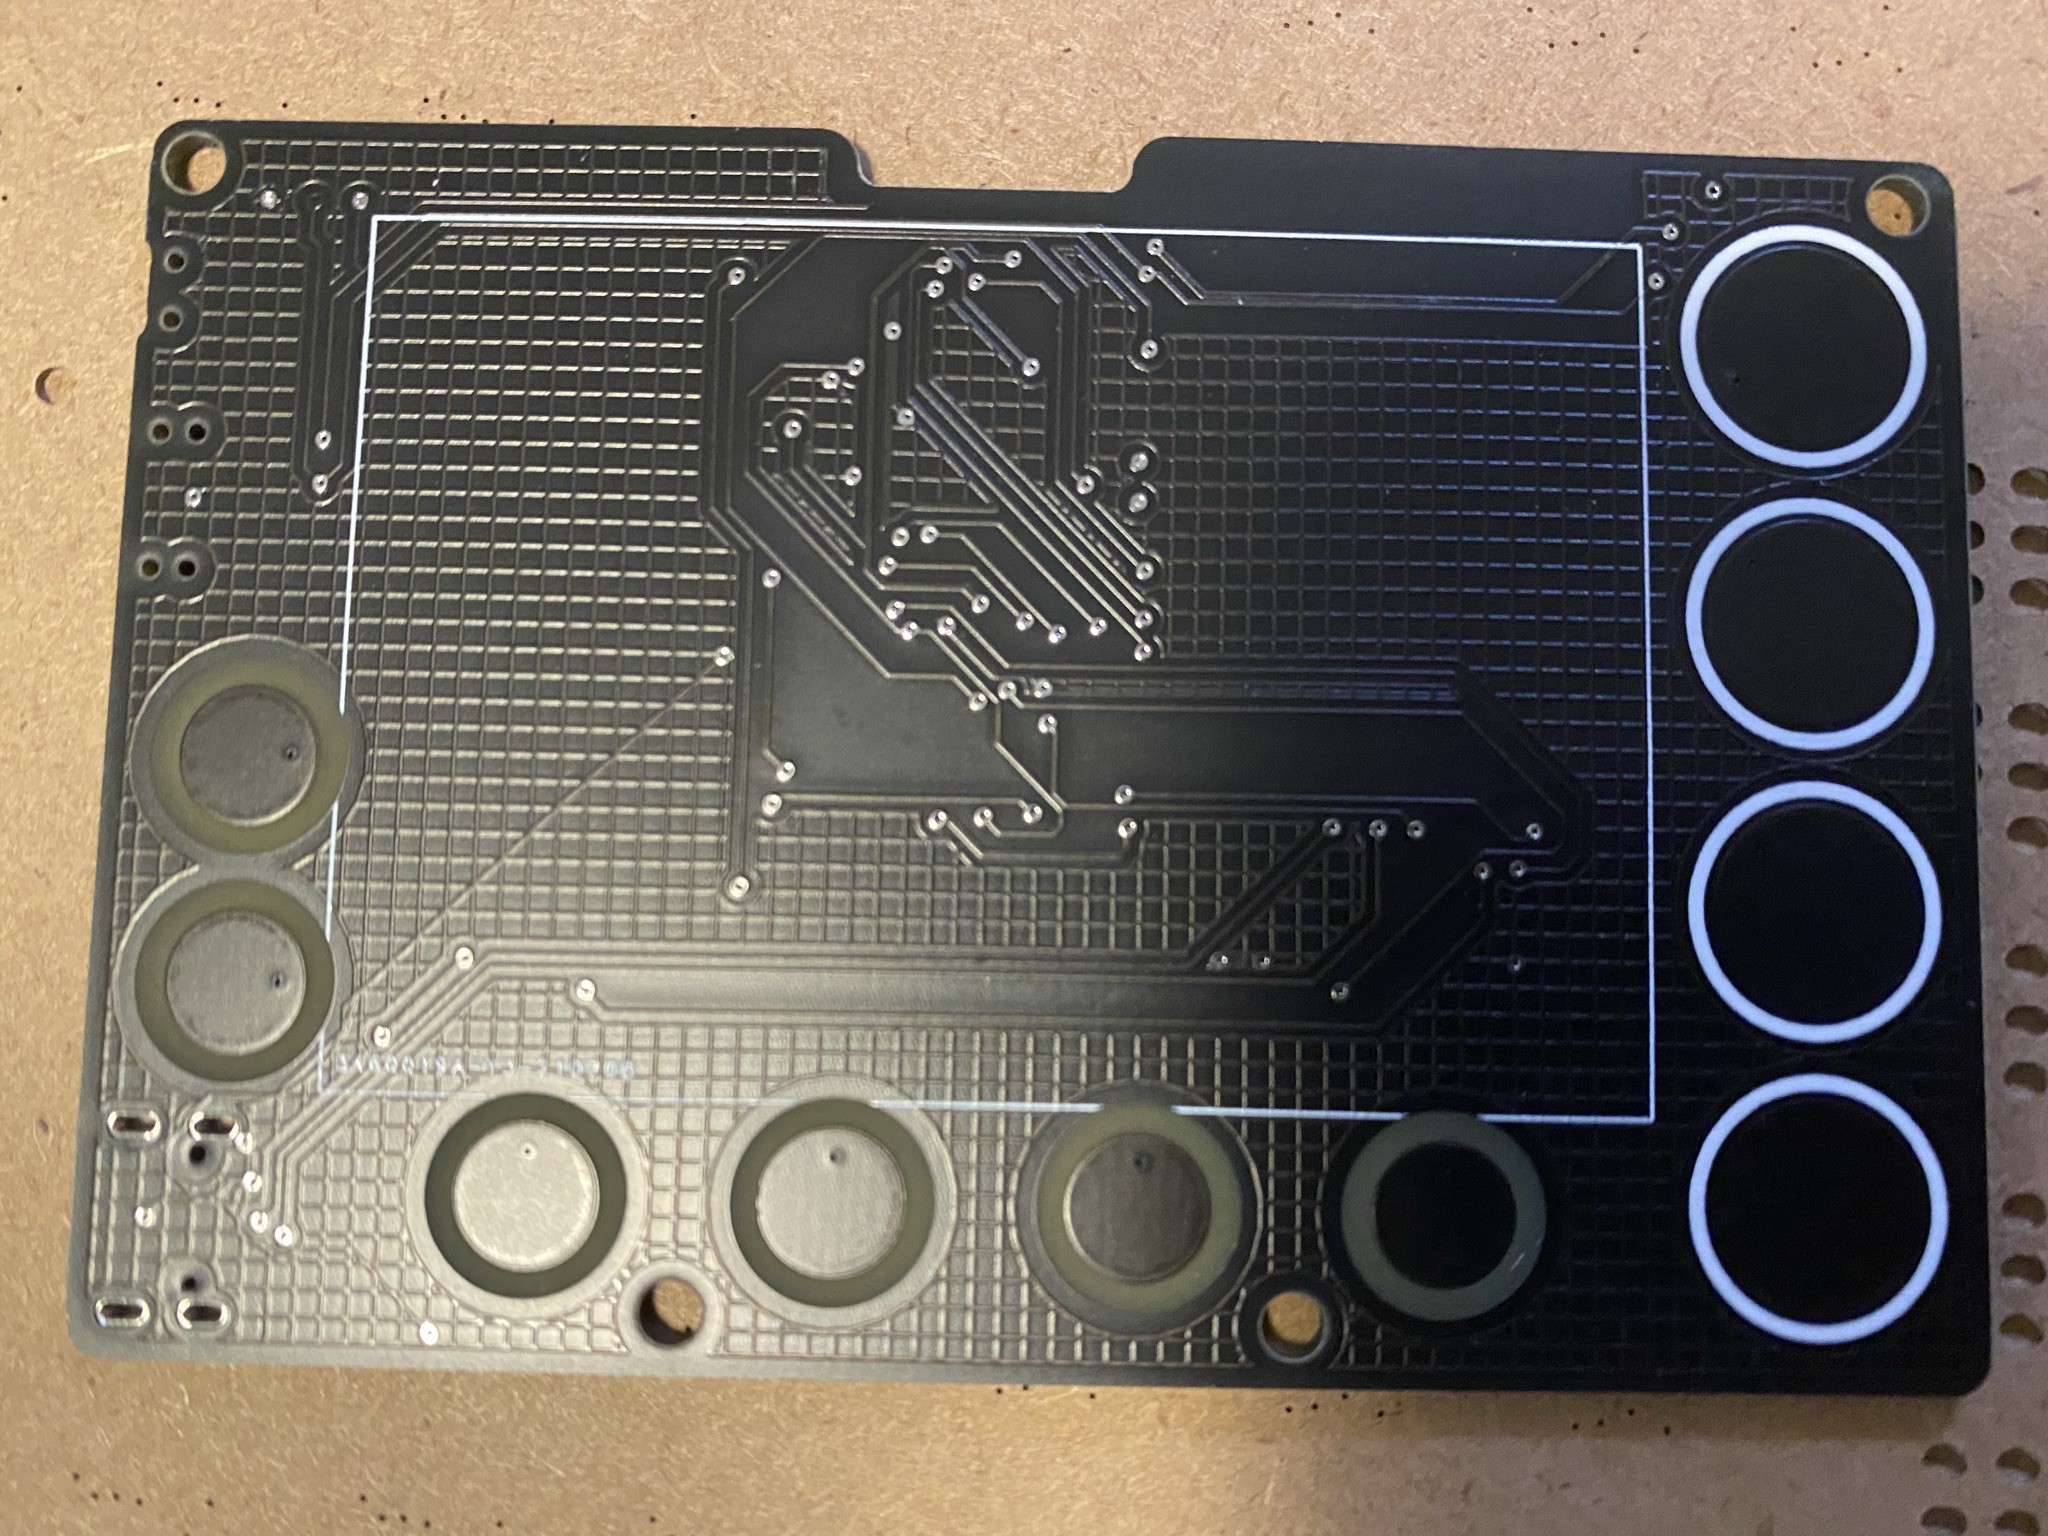
I'm just finishing the breadboarding phase, and am moving to a "looks like" and "acts like" prototype: I've got 3 boards from OshPark waiting for assembly, and I've got a GlowForge and Prusa Printer waiting for designs.
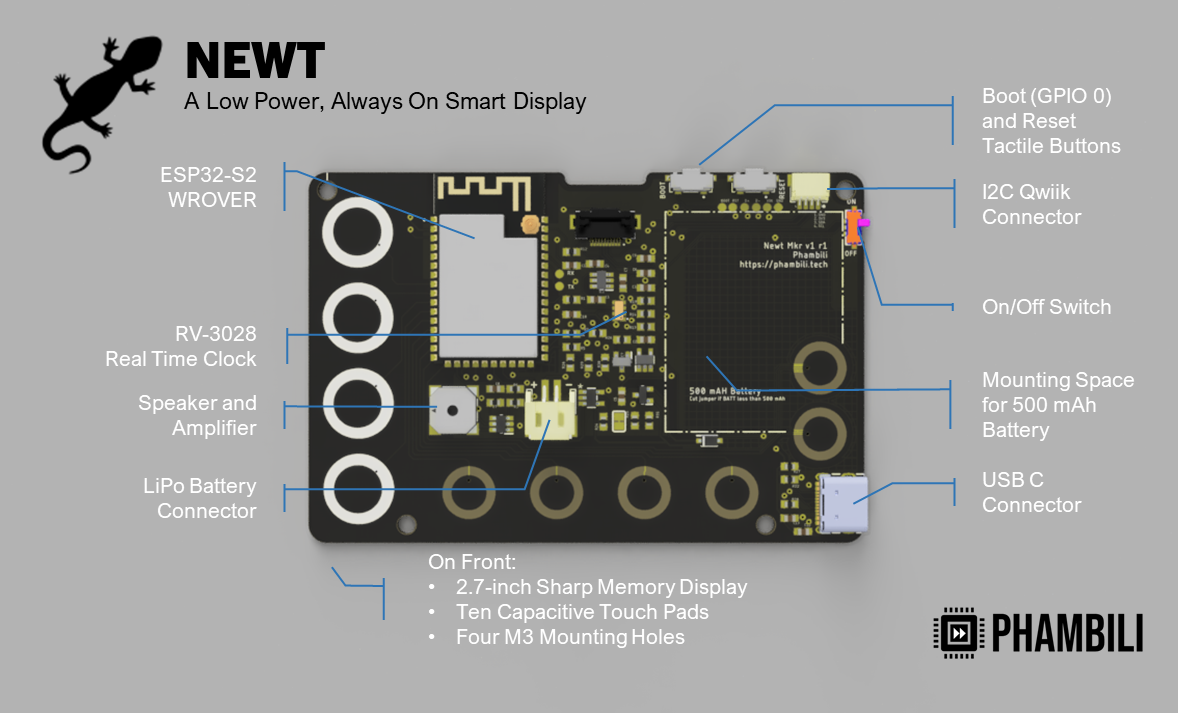
So far, the major components in my BOM include:
- ESP32s2 W-Rover (Espressif)
- 2.7 in Memory Display (Sharp)
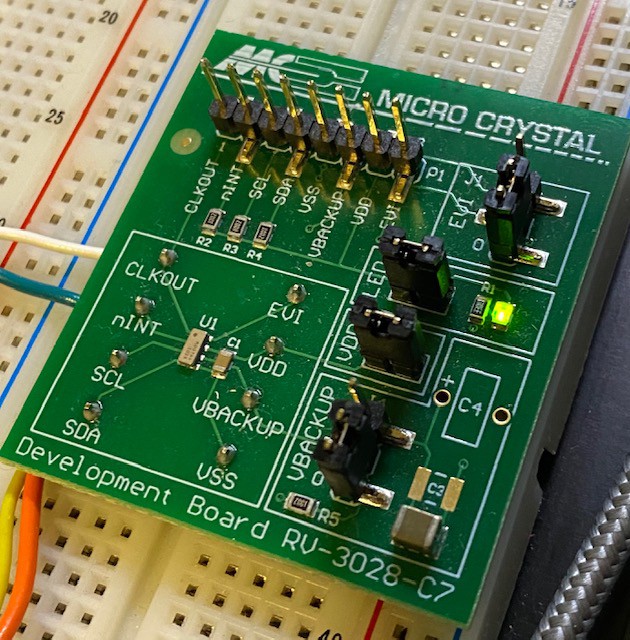
- RV-3028 Real Time Clock (Micro Crystal)
- AP3602AKTR Charge Pump (Diodes Inc) - for the Memory Display
- LDL212PV33R Linear Voltage Regulator (STMicroelectrinics)
- CMI-1295IC-0385T Surface Mount Buzzer (CUI)
I've yet to test the actual deep sleep current - the goal is to get under 50uA on deep sleep.
I'm using Arduino code for development. So far, I've coded the following functions:
- Alarm
- Timer
- Weather (Current, Daily, Hourly)
- Habit Tracker/Calendar
Here's a quick video of the alarm functionality:
----------
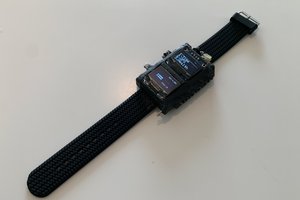
Update as of 7/23
I've made quite a bit of progress over the last month, and finally have an assembled and working PCB. There are still problems.... but it's close to being ready for "primetime"!


 David Truong
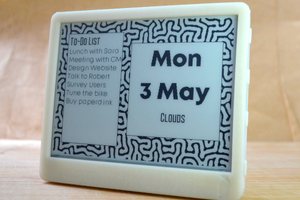
 Rohit Gujarathi
 makufelis-xyz
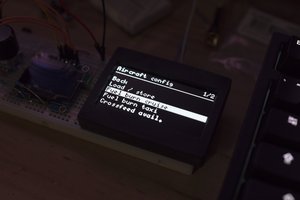
 Stephen Holdaway
Really nice project! It shows that a lot of effort went into the UI and features. Have you though different input methods? Those buttons take up a lot of space :D
If you want to measure the standby current I can recommend using a regular multimeter and a diode like this: https://electronics.stackexchange.com/questions/340330/measure-wide-range-of-current-800-%c2%b5a-1-5-a/340353#340353