Close
0%
0%

Mr. Miffy RGB LED Module

A battery-powered LED module that communicates over zigbee

Similar projects worth following
The Mr. Miffy RBG LED Module replaces the default white LED device that ships with the Mr. Miffy silicone lamp. This module communicates via zigbee with Zigbee2MQTT and charges wirelessly.

When my son was born, I wanted to get him a soft LED lamp or toy that would change color when he interacted with it and that I could control remotely (ideally through Home Assistant).  After hours searching, I couldn't find anything that I liked, so I settled on a Mr. Miffy lamp (that only comes with a white LED module) that I would modify myself. 

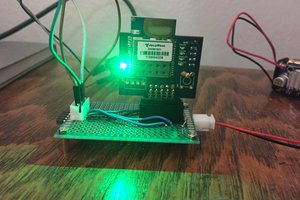
This module hosts an arduino microcontroller that runs a neopixel ring, gyroscope, and battery monitor, as well as communicates with an XBee3 module that uses zigbee to talk to zigbee2mqtt.  I have z2m running in Home Assistant, which is how I remotely control the lamp.  It is charged wirelessly via a Qi receiver. 

A large percentage of my time was spent learning (read: fumbling through) the zigbee protocol to communicate with z2m.  Since the XBee module is not natively supported as an end device in z2m, I had to add a device handler to the server, as well as manually alter the z2m database so that z2m knew to link the device with my new device handler.

When the gyro detects motion, the arduino overrides the current neopixel state and displays a colorful, pulsing loop for a short period, then it returns to the previous state.  The 3D-printed case allows access to all of the internal components, and it has heat-set inserts to mount components.  It fits perfectly into the Mr. Miffy silicone shell.

Here is a list of things I'd still like to implement:

  • Add "device response" so that the module can confirm it received a command
  • Add battery state reporting to z2m
  • Properly incorporate XBee module as end device in z2m
  • Modify the case to properly hold the Qi receiver and battery
  • Modify the case to hold the neopixel ring with a press fit

xbee.js

Custom device handler for zigbee2mqtt

javascript - 1.20 kB - 03/25/2021 at 19:18

Download

main.py

XBee firmware

x-python - 4.80 kB - 03/25/2021 at 19:16

Download

x-arduino - 11.49 kB - 03/25/2021 at 19:15

Download

  • Communicating with Zigbee2MQTT

    Andrew Byrley03/25/2021 at 17:43 0 comments

    As I mentioned in the project details, I spent a lot of time trying to get my XBee to communicate with Zigbee2MQTT, so I'm going to discuss that a bit here.

    To get this to work, I had to manually configure the XBee to initiate itself with z2m.  Specifically, I used XCTU to configure the XBee module.  This guide that I stumbled upon was immensely helpful in helping me understand the data frames that I needed to send to z2m to add my device.  If you follow that guide exactly, you will add your device as a simple on/off switch (0x0002). I wanted to add my xbee as a color light, so I used a device ID of 0x0102.  This PDF, although not about the XBee, was very helpful for me to figure out the device IDs and clusters.

    Once I finally had my XBee added to z2m, it showed up as an unsupported device. To fix this, I had to do two things in z2m: add an external converter and modify the database.db file.  To add an external converter, I followed the guidance here and here.

    Finally, even with an external converter, z2m doesn't know to use that external converter because z2m does not add a modelID to the database file. I simply edited my database.db file to add "modelId":"XBEE3" to the entry for my xbee device. You need to make sure that whatever you add for modelId is the same as what you used for zigbeeModel: ['XBEE3'] in your external converter.

    I tried to add a "device response" handler to my external converter, but I could never figure out what data z2m was expecting to receive back from the device.  Ultimately, I removed the device response code.  I would definitely appreciate some help here if anyone has ideas.

    In the future, I would incorporate these steps into the power-on sequence for the arduino.  Right now if you wanted to implement this project, you would need to manually add your XBee first before running this code, which is less than ideal.

View project log

Enjoy this project?

Share

Discussions

Similar Projects

Does this project spark your interest?

Become a member to follow this project and never miss any updates