Close
0%
0%

Connect RPi Pico to WiFi and send phone alerts

We show how to connect Pico to WiFi while maintaining low power and running it directly on AAA batteries

Public Chat
Similar projects worth following
In this project we show how to connect Raspberry Pi Pico to WiFi and send alert to a phone. We also explain why using Cricket will make the WiFi connectivity so power efficient that our device can last on single batteries for months or even years.

This project can be realised by everyone who has some basic IT skills. We demonstrate step by step what needs to be done to put together a complete device.

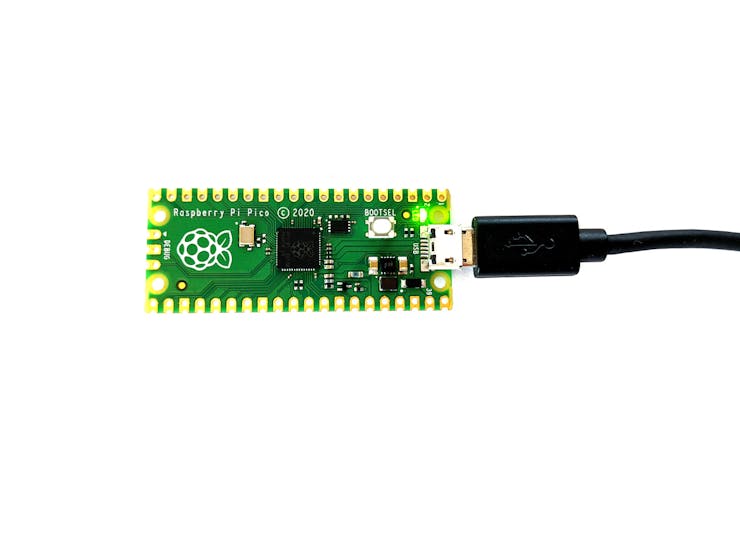
In this project we connect Raspberry Pi Pico to WiFi by using the Cricket WiFi module and send an alert to our phone. We also explain why using Cricket will make the WiFi connectivity so power efficient that our device can last on single batteries for months or even years.

To keep it easy we write a simple Python program which flashes LED light every 5 minutes on the Pico board. When the LED flashes it also instructs Cricket to send a notification to our phone.

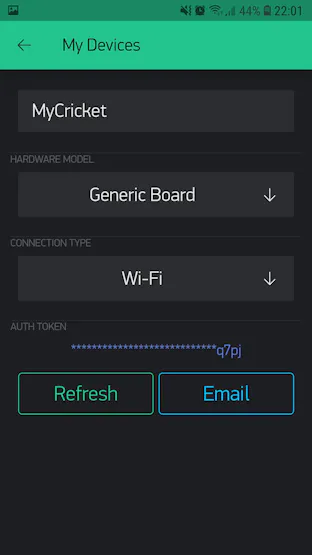
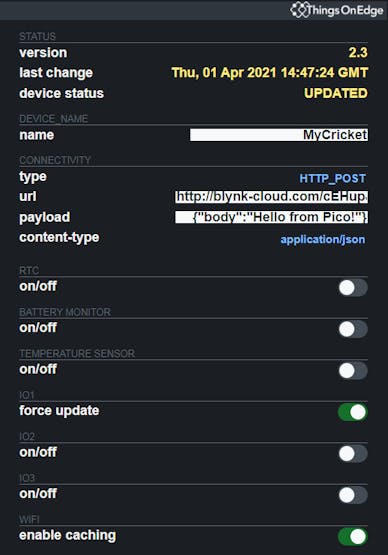
We chose Blynk to send notifications as it is a very user friendly and reliable multi-platform mobile app. However, it can be any other internet service or local network system of your preference. Cricket allows us to integrate our device to almost any software via either MQTT or HTTP(S) protocols without any programming. Please checkout Cricket's documentation or other projects to learn more. The possibilities are endless!

We aim with this project to provide a reference for anyone wanting to build various IoT devices with all types of sensors including cameras and even more advanced peripherals. Instead of flashing LED we might want to do more advanced local compute processing and logic e.g. machine learning inference on images or audio.

By doing this we can build sophisticated devices and systems such as a security alarm system for our home, as one of the examples.

Also moving forward you might want to consider other microcontrollers than Pico, if you are looking for more specialised and more power efficiency. However Pico is great for rapid prototyping and getting things done almost instantaneously.

Let's get started!

main.py

A complete program for Raspberry Pi

plain - 336.00 bytes - 04/05/2021 at 12:36

Download

  • 1
    Step 1) Program Raspberry Pi Pico

    Raspberry Pi Pico is a tiny, low-cost computer that you can use to build various devices by attaching peripherals. It is a versatile microcontroller with flexible digital interfaces and great support of software making it super easy to code and program those little boards. However, it doesn't come with a WiFi connectivity feature. The good news is it is fairly easy to extend it with WiFi without losing its power efficiency, which we demonstrate in this project. (For more information visit Raspberry Pi Pico official website)

    We strongly recommend, if you are not familiar with Pico, to follow this awesome Getting started with Raspberry Pi Pico tutorial.

    Now we are going to write a Python program to flash LED light on the Pico board and raise a signal for Cricket to connect over WiFi to the internet and send notification to our phone.

    We write a "foo" function to do that and the function is called with a 5 minute interval by using Timer. The "foo" function does the following:

    • blinks the built-in LED (Pin25) for 0.8 second
    • sets Pin15 as an OUT for 0.8 second with the value = 1

    The Pin15 is used to raise a signal for the Cricket WiFi module. When the pin is set to 1, it wakes up Cricket to send a request to Blynk. We will show later how to configure it. When the Pin15 is 0, Cricket is completely powered off. While Pico runs its program the WiFi connectivity is OFF and doesn't consume any energy. It is only powered up when it is needed.

    Below is a complete program (see also the attached file):

    main.py

    from machine import Pin, Timer
    import time
    
    led = Pin(25, Pin.OUT)
    cricket = Pin(15, Pin.OUT)
    timer = Timer()
    
    def foo(timer):
        led.value(1)
        cricket.value(1)
        time.sleep(0.8)
        led.value(0)
        cricket.value(0)
    
    # The freq = 0.00333 represents 5 minutes interval
    timer.init(freq=0.00333, mode=Timer.PERIODIC, callback=foo)
    

    Please note we save the above program to the main.py file on Pico. It must be main.py because we want Pico to run it when powered directly on batteries (instead of USB).

    Now we can test our program. We disconnect USB and attach the battery to see if the LED blinks every 5 minutes. If it does let's move on to the next step.

  • 2
    Step 2) Install Blynk app

    What is BlynkBlynk is a multi-platform mobile app for iOS and Android phones to receive data and control microcontrollers over the Internet. It comes with a digital dashboard where we can build a graphic interface for any project by simply dragging and dropping widgets. (See Blynk official website for more information)

    To get started we need to install the Blynk app on our phone first. Let's pick the right one for our phone:

    Once installed we need to configure it. Open Dashboard settings and add the "Generic Board" device with the connection type: "Wi-Fi". Once it is created press the Email button to send an email with a unique authentication token. We will need this token to configure Cricket to send notifications to our phone.

    Now let's add a Notification widget to our Dashboard and press the Play button in the upper right corner.

    This is it! Our app is ready to receive notifications.

    Before we move to the next step we can test if it works by executing the following "curl" command line:

    curl -X POST "http://blynk-cloud.com/YOUR_KEY/notify" -H "Content-Type: application/json" -d '{"body":"Hello from Curl!"}'

    NOTE: replace YOUR_KEY with the key which was sent to you via email.

  • 3
    Step 3) Configuring Cricket

    IOT Cricket is an easy to use ultra-low power WiFi module, which can operate directly on batteries for a very long time (for years in many use cases). We can simply attach a sensor & battery and the device is ready to transmit data instantaneously via WiFi networks.

    Let's first connect Cricket to our WiFi network:

    • Press the built-in Cricket's button for 5 seconds (it opens toe_device hotspot)
    • Connect to the "toe_device" hotspot from a phone or laptop
    • Pass your WiFi credentials: SSID and Password; and press CONNECT button

    For more information please see Cricket's documentation here

    In this project we use Cricket to make Pico sending notifications to our phone. We configure Cricket in such a way that on every wake up it connects to WiFi and sends a request to Blynk via HTTP POST method. Then Blynk sends the notification to our phone.

    Cricket wakes up when a voltage appears on the WAKE_UP pin. As our Pico's Pin15 is wired with Cricket's WAKE_UP pin, so when it is set to "1" it raises the voltage and wakes Cricket up.

    Let's configure Cricket with the following settings:

    • CONNECTIVITY > type: HTTP_POST
    • CONNECTIVITY > url: http://blynk-cloud.com/YOUR_KEY/notify
    • CONNECTIVITY > payload: {"body":"Hello from Pico!"}
    • CONNECTIVITY > content-type: application/json
    • IO1 > force update: On

    An example configuration may look like this:

    This is it. We can press the switch off button in the top right corner to exit from the configuration and our device is ready to go!

    It's time to put all the components together!

View all 5 instructions

Enjoy this project?

Share

Discussions

Similar Projects

Does this project spark your interest?

Become a member to follow this project and never miss any updates