 kutluhan_aktar
- current follower count,
- current account name and ID,
- three preceding follower counts.
First of all, to manage to glean information from Twitter by avoiding any authentification process pertaining to the Twitter API, I chose to use a content delivery network (CDN) - cdn.syndication.twimg - to obtain the number of followers of a selected Twitter account by its screen name. When I managed to get information from Twitter, I programmed a web application in PHP, named Twitter Follower Tracker, running on Raspberry Pi to print a data packet containing:
- the follower count,
- the account name,
- and the account ID.
Then, I used an Arduino Nano 33 IoT to get my Twitter account information and follower count transferred by the PHP web application and display them with a Nokia 5110 Screen.
Finally, I added a COM-09032 analog joystick and two buttons to control the menu options and scroll text.
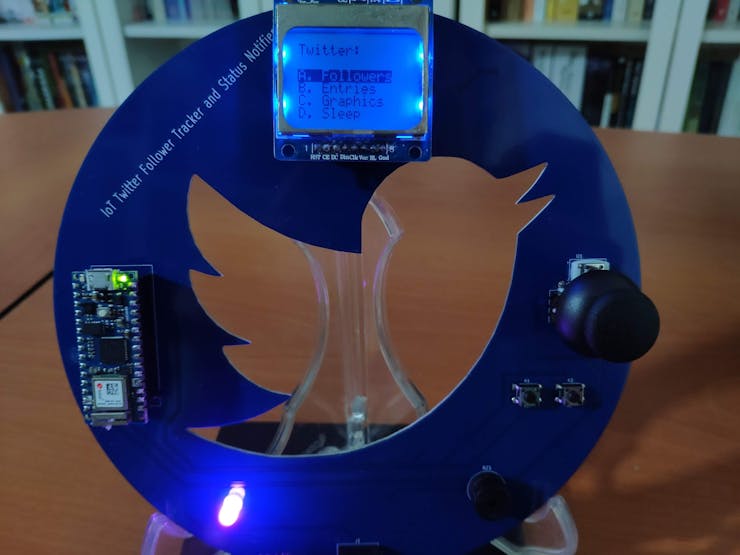
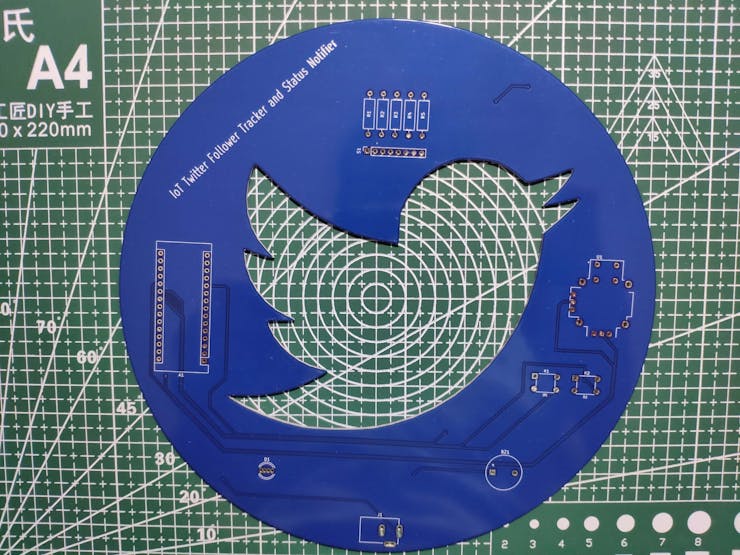
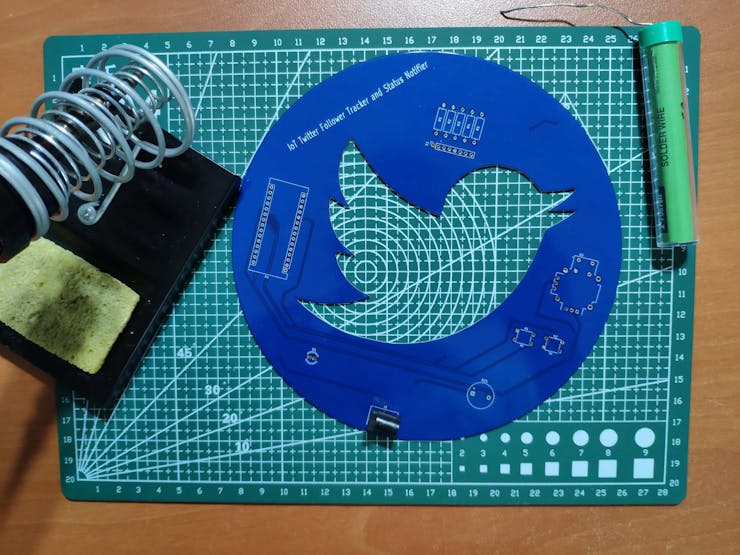
After completing wiring on a breadboard and testing the code, I designed a PCB (Twitter Follower Tracker) having the Twitter logo carved at its center. It became a stylish and fitting addition to my desk as an efficient apparatus to track the follower count of my account :)
In addition to displaying information, the device:
- Notifies the user when there is a change in the follower count - INC or DEC.
- Shows monochrome images as a screensaver if selected.
Huge thanks to PCBWay for sponsoring this project.
Step 1: Designing and soldering the Twitter Follower Tracker PCB
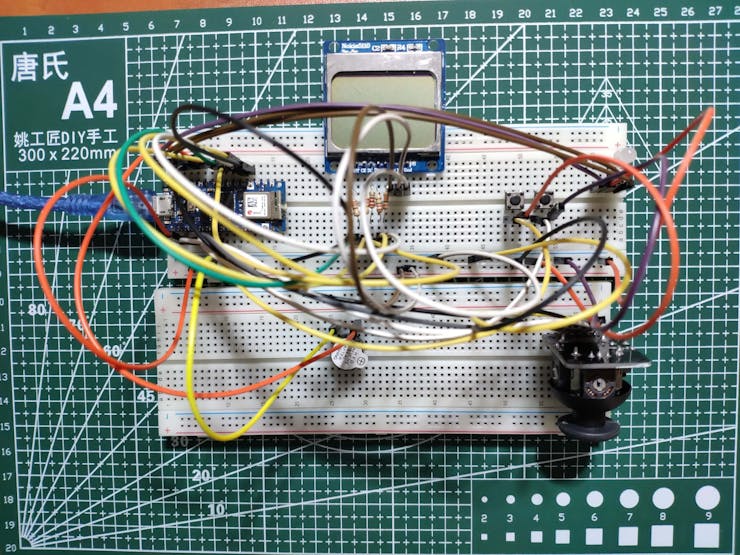
Before prototyping my PCB design, I tested all connections and wiring with the Arduino Nano 33 IoT on the breadboard.
Then, I designed the Twitter Follower Tracker and Status Notifier PCB by using KiCad. I attached the Gerber file of the PCB below, so if you want, you can order this PCB from PCBWay to create a stylish and fitting apparatus to display the follower count of a selected account and get notified when there is a change, inspired by the Twitter logo :)
Click here to inspect and order this PCB directly on PCBWay.
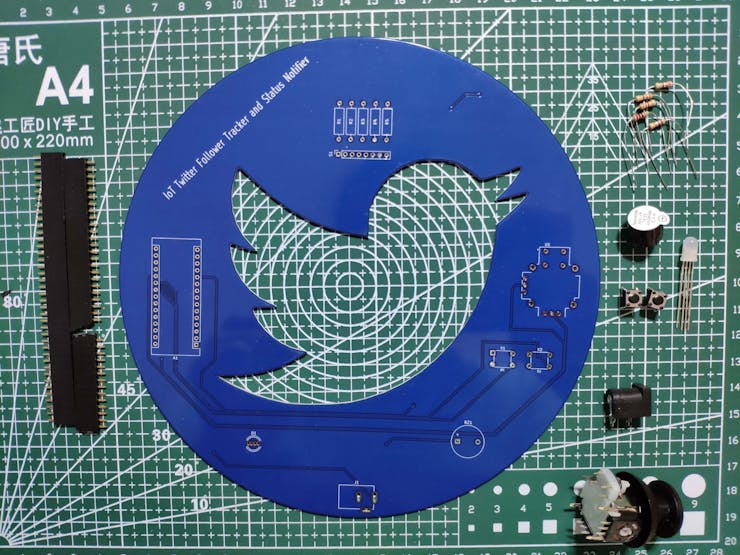
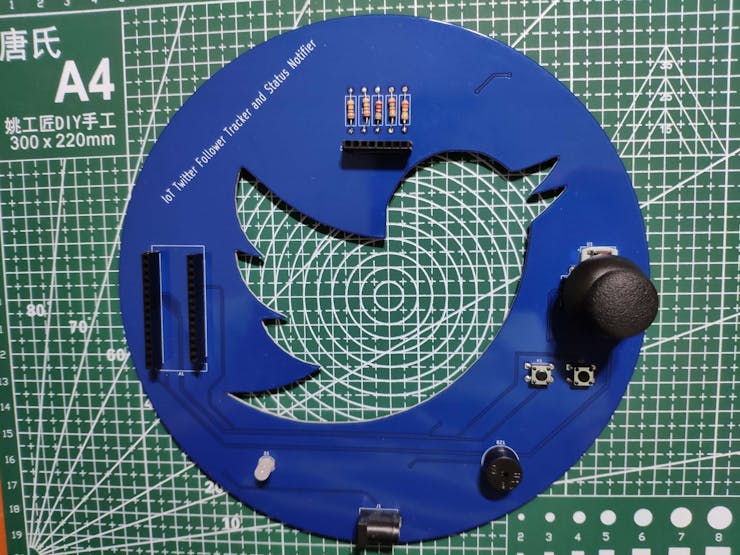
First of all, by using a soldering iron, I attached headers (female), COM-09032 analog joystick, buzzer, 5mm common cathode RGB LED, 6x6 pushbuttons, 1K resistors, and the power jack.
Component list on the PCB:
A1 (Headers for Arduino Nano 33 IoT)
S1 (Headers for Nokia 5110 Screen)
U1 (COM-09032 Analog Joystick)
BZ1 (Buzzer)
D1 (5mm Common Cathode RGB LED)
K1, K2 (6x6 Pushbutton)
R1, R2, R3, R4, R5 (1K Resistor)
J1 (Power Jack)
Step 2: Setting up a LAMP web server on Raspberry Pi
If you are a novice in programming with Raspberry Pi, you can inspect well-explained instructions and tutorials on the official Raspberry Pi website.
To go to the official Raspberry Pi setting up tutorial, click here.
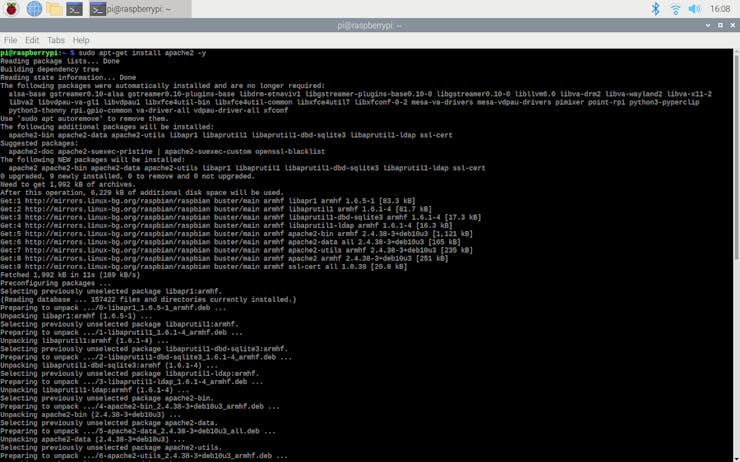
⭐ Open a terminal window by selecting Accessories > Terminal from the menu.
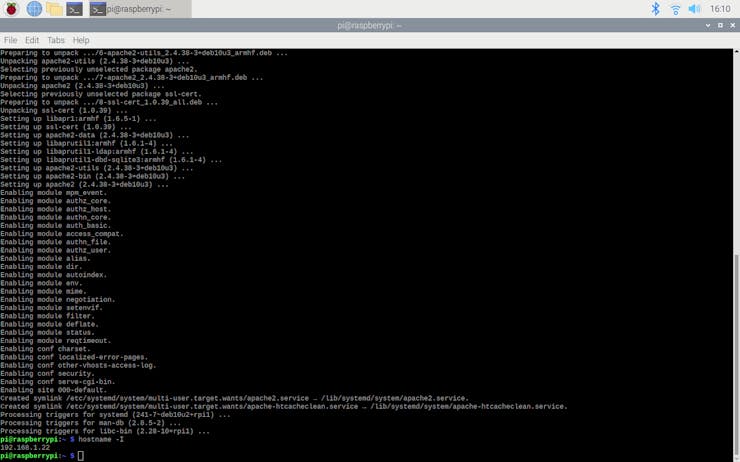
⭐ Install the apache2 package by typing the following command into the terminal and pressing Enter:
sudo apt-get install apache2 -y
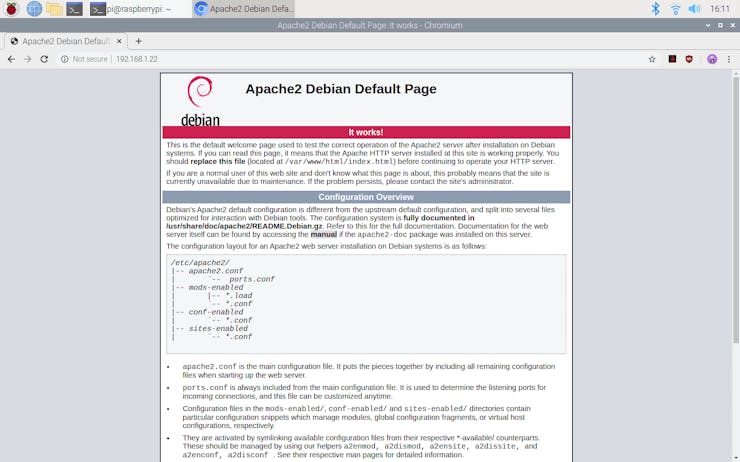
⭐ To test the server, open Chromium by selecting Internet > Chromium Web Browser from the menu and enter http://localhost.
⭐ If you want, you can use the IP address of your Raspberry Pi as well.
hostname -I
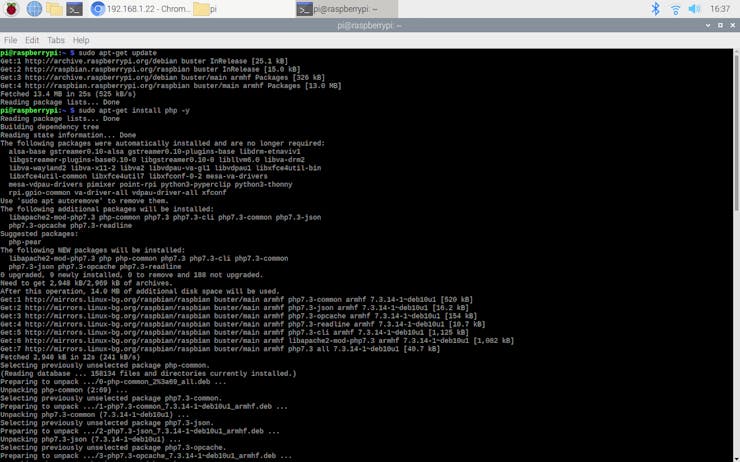
⭐ Install the PHP package with the following command:
⭐ Do not forget to update the Pi.
sudo apt-get update
sudo apt-get install php -y
⭐ To be able to obtain information from the cdn.syndication.twimg (CDN), install the php-curl package:
sudo apt-get install php-curl
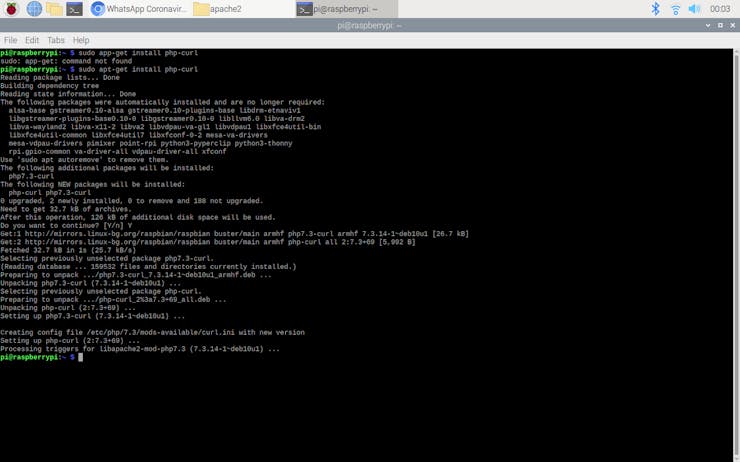
⭐ Then, restart the apache server to be able to use the installed packages on the localhost:
sudo service apache2 restart
Step 3: Developing the Twitter Follower Tracker web application in PHP to elicit information from the CDN
Although Twitter provides an API to collate information on Twitter accounts, tweets, replies, etc., I decided to use a content delivery network (CDN) in this project since the Twitter API requires an authentification process and key.
CDN: cdn.syndication.twimg
⭐ CDN uses screen names of Twitter accounts to collect and return this information in JSON:
https://cdn.syndication.twimg.com/widgets/followbutton/info.json?screen_names=

The web application consists of one file - index.php. You can download the web application below to install it on your Raspberry Pi - Twitter_Follower_Tracker.zip.
💻 index.php
⭐ Define the twitter_follower_tracker class and its functions.
⭐ In the __init__ function, define the screen name of the Twitter account, such as ThAmplituhedron.
⭐ In the get_followers function, print information of the given Twitter account.
- Follower Count
- Account Name
- Account ID
⭐ Syntax:
#/em>
#/em>
⭐ Define the twitter class object.
// Define the twitter_follower_tracker class and its functions:class twitter_follower_tracker{ public $account; public function __init__($account){ $this->account = $account; } public function get_followers(){ $url = "https://cdn.syndication.twimg.com/widgets/followbutton/info.json?screen_names=".$this->account; $data = json_decode(file_get_contents($url, true)); echo "%".$data[0]->followers_count."%".$data[0]->name."%".$data[0]->id."%"; }}// Define the new 'twitter' class object:$twitter = new twitter_follower_tracker();$twitter->__init__("ThAmplituhedron");// Print information that of the given Twitter account.$twitter->get_followers();

Step 3.1: Setting up the web application on Raspberry Pi
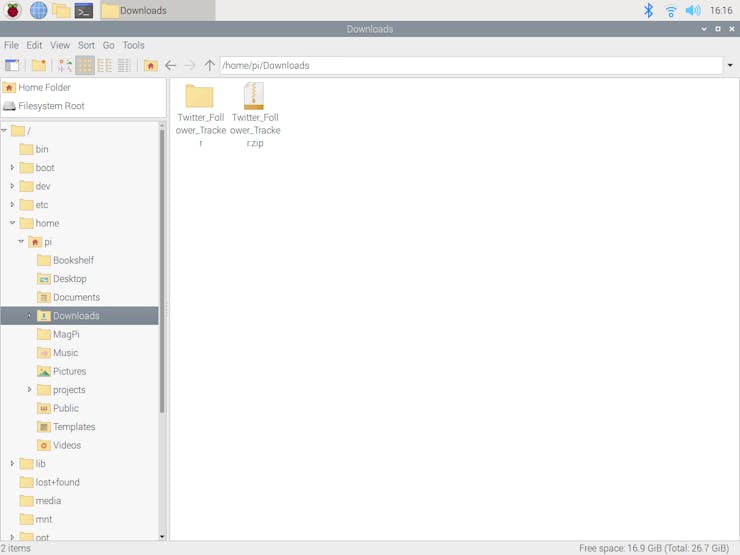
⭐ First of all, extract the Twitter_Follower_Tracker.zip folder and move the application folder (Twitter_Follower_Tracker) to the apache server (/var/www/html) by using the terminal since the apache server is a protected location.
sudo mv /home/pi/Downloads/Twitter_Follower_Tracker /var/www/html/

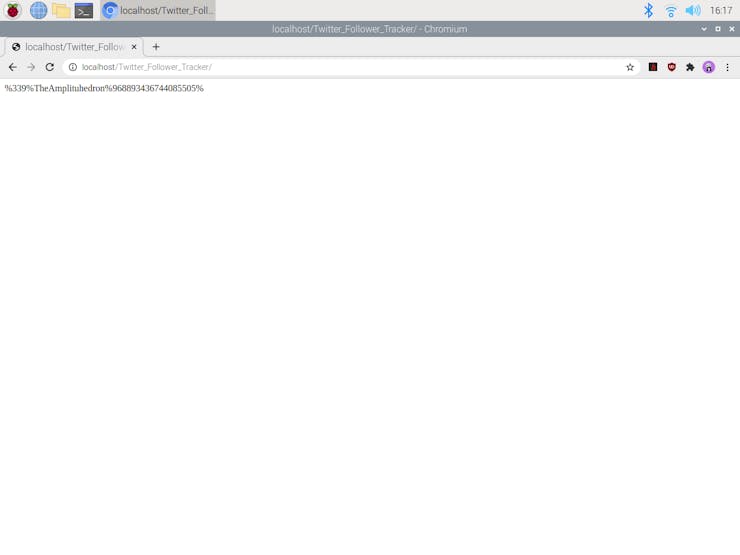
⭐ Go to the web application:
http://localhost/Twitter_Follower_Tracker/
Step 4: Setting up the Arduino Nano 33 IoT
If you are a novice in programming with the Arduino Nano 33 IoT, follow the steps below to program it with the Arduino IDE.
⭐ Download the required drivers - Arduino SAMD Core - as explained here

⭐ To be able to connect to the WiFi, download the WiFiNINA library from here.

Step 5: Programming the Arduino Nano 33 IoT
Download the required libraries to be able to control the modules:
Nokia 5110 Screen | Library
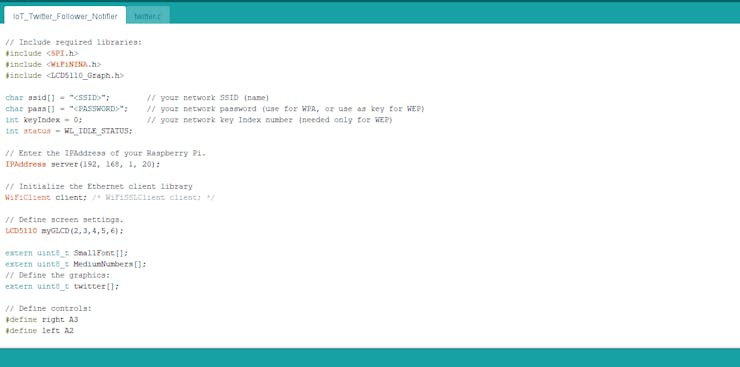
⭐ Include required libraries and define the WiFi settings.
// Include required libraries:#include <SPI.h>#include <WiFiNINA.h>#include <LCD5110_Graph.h>char ssid[] = "<SSID>"; // your network SSID (name)char pass[] = "<PASSWORD>"; // your network password (use for WPA, or use as key for WEP)int keyIndex = 0; // your network key Index number (needed only for WEP)int status = WL_IDLE_STATUS;// Enter the IPAddress of your Raspberry Pi.IPAddress server(192, 168, 1, 20);// Initialize the Ethernet client libraryWiFiClient client; /* WiFiSSLClient client; */
⭐ Define the Nokia 5110 screen settings and the graphics (monochrome images).
⭐ To create different graphics (monochrome images), go to Monochrome Image Converter.
// Define screen settings.LCD5110 myGLCD(2,3,4,5,6);extern uint8_t SmallFont[];extern uint8_t MediumNumbers[];// Define the graphics:extern uint8_t twitter[];
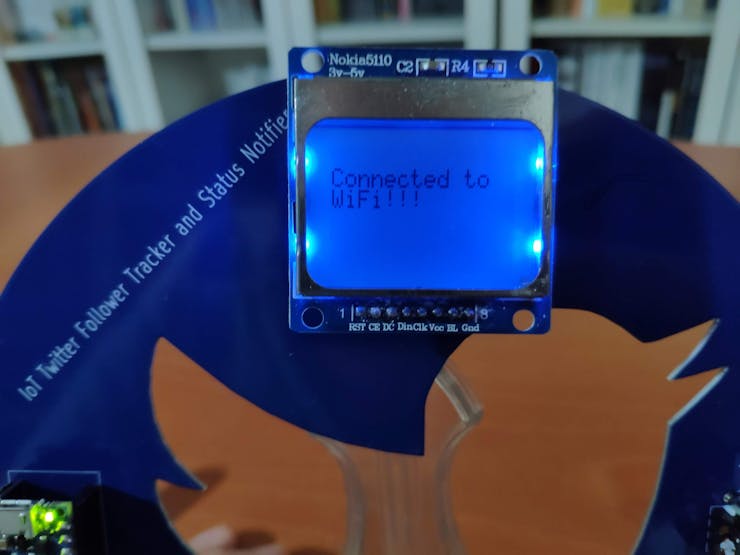
⭐ Initiate the screen and check for the WiFi module to verify the connection.
// Initiate screen. myGLCD.InitLCD(); myGLCD.setFont(SmallFont); // Check for the WiFi module: if (WiFi.status() == WL_NO_MODULE) { myGLCD.print("Connection Failed!", 0, 8); myGLCD.update(); while (true); } // Attempt to connect to the WiFi network: while (status != WL_CONNECTED) { myGLCD.print("Waiting...", 0, 8); myGLCD.print("Attempting to", 0, 16); myGLCD.print("connect to", 0, 24); myGLCD.print("WiFi !!!", 0, 32); myGLCD.update(); // Connect to WPA/WPA2 network. Change this line if using open or WEP network: status = WiFi.begin(ssid, pass); // Wait 10 seconds for connection: delay(10000); }
⭐ In the read_controls function, read joystick and control button values.
void read_controls(){ // Joystick: joystick_x = analogRead(VRX); joystick_y = analogRead(VRY); joystick_sw = digitalRead(SW); // Buttons: _right = digitalRead(right); _left = digitalRead(left);}
⭐ In the change_menu_options function:
⭐ Increase or decrease the menu option number (selected) using the Y-axis of the analog joystick.
⭐ Depending on the menu option number (selected), change the boolean status.
void change_menu_options(){ // Increase or decrease the option number using the joystick (VRY). if(joystick_y >= 900) selected--; if(joystick_y <= 45) selected++; if(selected < 0) selected = 4; if(selected > 4) selected = 1; delay(100); // Depending on the selected option number, change the boolean status. switch(selected){ case 1: followers = true; entries = false; graphics = false; _sleep = false; break; case 2: followers = false; entries = true; graphics = false; _sleep = false; break; case 3: followers = false; entries = false; graphics = true; _sleep = false; break; case 4: followers = false; entries = false; graphics = false; _sleep = true; break; }}
⭐ After being selected, if the followers menu option is activated by pressing the joystick button (SW):
⭐ Get the Twitter account information from the REST API (CDN).
⭐ Check the current follower status using registered status variables:
- STABLE
- INC
- DEC
⭐ If there is an increase or decrease in the follower count, notify the user.
⭐ Update the last entries (follower counts) list.
⭐ Print the Twitter account information and status.
⭐ Scroll the fetched information by using the X-axis of the analog joystick.
⭐ If the Left button is pressed, halt notification (buzzer).
⭐ If the Right button is pressed, return to the interface.
if(followers == true){ do{ myGLCD.invertText(true); myGLCD.print("A. Followers", 0, 16); myGLCD.invertText(false); myGLCD.update(); adjustColor(255, 0, 255); delay(100); if(joystick_sw == false){ myGLCD.clrScr(); myGLCD.update(); activated = true; // Get the Twitter Account Information from the REST API (CDN): make_a_get_request("/Twitter_Follower_Tracker/"); // Check the follower status using registered status variables: int _followers = follower_count.toInt(); if(_followers != previous_count){ // If there is an increase or decrease in the follower number, notify the user: if(_followers > previous_count){ _status = "INC"; adjustColor(0, 255, 0); tone(buzzer, 500); } if(_followers < previous_count){ _status = "DEC"; adjustColor(255, 0, 0); tone(buzzer, 500); } // Change the last entries list: previous_count = _followers; entry_3 = entry_2; entry_2 = entry_1; entry_1 = _followers; }else{ _status = "STABLE"; adjustColor(0, 0, 255); } myGLCD.clrScr(); myGLCD.update(); while(activated == true){ read_controls(); myGLCD.print("Status: " + _status, 0, 0); myGLCD.print(follower_count, CENTER, 16); scrolling_text(" Name: " + account_name + " ", 32); scrolling_text(" ID:" + account_id + " ", 40); // Halt notification. if(_left == false) noTone(buzzer); // Exit. if(_right == false){ activated = false; x = 0; myGLCD.clrScr(); myGLCD.update(); noTone(buzzer); } } } }while(followers == false); }
⭐ After being selected, if the entries menu option is activated by pressing the joystick button (SW):
⭐ Print the registered entries list - last three follower counts.
⭐ If the Left button is pressed, reset the entries list.
⭐ If the Right button is pressed, return to the interface.
if(entries == true){ do{ myGLCD.invertText(true); myGLCD.print("B. Entries", 0, 24); myGLCD.invertText(false); myGLCD.update(); adjustColor(0, 255, 255); delay(100); if(joystick_sw == false){ myGLCD.clrScr(); myGLCD.update(); activated = true; while(activated == true){ read_controls(); // Print the entries list: myGLCD.print("Entries: ", 0, 0); myGLCD.print("1 => : " + String(entry_1), 0, 16); myGLCD.print("2 => : " + String(entry_2), 0, 24); myGLCD.print("3 => : " + String(entry_3), 0, 32); myGLCD.update(); // RESET THE ENTRIES LIST: if(_left == false){ entry_1 = 0; entry_2 = 0; entry_3 = 0; myGLCD.clrScr(); myGLCD.update(); } // Exit. if(_right == false){ activated = false; myGLCD.clrScr(); myGLCD.update(); } } } }while(entries == false); }
⭐ After being selected, if the graphics menu option is activated by pressing the joystick button (SW):
⭐ Display the monochrome image (twitter) as the screensaver.
⭐ If the Right button is pressed, return to the interface.
if(graphics == true){ do{ myGLCD.invertText(true); myGLCD.print("C. Graphics", 0, 32); myGLCD.invertText(false); myGLCD.update(); adjustColor(255, 255, 0); delay(100); if(joystick_sw == false){ myGLCD.clrScr(); myGLCD.update(); activated = true; while(activated == true){ read_controls(); // Define and print monochrome images: myGLCD.drawBitmap(20,0,twitter,45,45); myGLCD.update(); // Exit. if(_right == false){ activated = false; myGLCD.clrScr(); myGLCD.update(); } } } }while(graphics == false); }
⭐ After being selected, if the sleep menu option is activated by pressing the joystick button (SW):
⭐ Activate the sleep mode in 10 seconds.
⭐ Print the remaining seconds.
⭐ Display the color pattern while sleeping - red, green, blue, purple, white.
⭐ If the Right button is pressed, return to the interface.
if(_sleep == true){ do{ myGLCD.invertText(true); myGLCD.print("D. Sleep", 0, 40); myGLCD.invertText(false); myGLCD.update(); adjustColor(255, 69, 0); delay(100); if(joystick_sw == false){ // Activate the sleep mode in 10 seconds. myGLCD.clrScr(); myGLCD.print("Entering", CENTER, 0); myGLCD.print("Sleep Mode", CENTER, 8); myGLCD.print("in", CENTER, 16); myGLCD.print("Seconds", CENTER, 40); myGLCD.update(); // Print remaining seconds. myGLCD.setFont(MediumNumbers); for (int s=10; s>=0; s--){ myGLCD.printNumI(s, CENTER, 24, 2, '0'); myGLCD.update(); delay(1000); } myGLCD.enableSleep(); activated = true; while(activated == true){ // Color Pattern: adjustColor(255,0,0); delay(500); adjustColor(0,255,0); delay(500); adjustColor(0,0,255); delay(500); adjustColor(255,0,255); delay(500); adjustColor(255,255,255); delay(500); // Exit. read_controls(); if(_right == false){ activated = false; myGLCD.clrScr(); myGLCD.disableSleep(); myGLCD.setFont(SmallFont); adjustColor(0,0,0); } } } }while(_sleep == false); }


Step 5.1: Getting information from the web application and using the analog joystick to scroll text
⭐ In the make_a_get_request function:
⭐ Connect to the web application named Twitter Follower Tracker.
⭐ If the connection is successful, make a Get request to obtain the Twitter account information:
- Follower Count
- Account Name
- Account ID
⭐ If there are incoming bytes available, get the response from the web application.
⭐ Split the response string by the predefined delimiter (%) to glean information as substrings - follower_count, account_name, and account_id.
void make_a_get_request(String application){ // Connect to the web application named Twitter_Follower_Tracker. Change '80' with '443' if you are using SSL connection. if(client.connect(server, 80)){ // If successful: myGLCD.print("Connected to", 0, 8); myGLCD.print("the server!!!", 0, 16); myGLCD.update(); // Make an HTTP Get request: client.println("GET " + application + " HTTP/1.1"); client.println("Host: 192.168.1.20"); client.println("Connection: close"); client.println(); }else{ myGLCD.print("Connection", 0, 8); myGLCD.print("Error!!!", 0, 16); myGLCD.update(); } delay(2000); // Wait 2 seconds after connection... // If there are incoming bytes available, get the response from the web application. String response = ""; while (client.available()) { char c = client.read(); response += c; } if(response != "" && response.endsWith("%")){ // Split the response string by a pre-defined delimiter in a simple way. '%'(percentage) is defined as the delimiter in this project. int delimiter_1, delimiter_2, delimiter_3, delimiter_4; delimiter_1 = response.indexOf("%"); delimiter_2 = response.indexOf("%", delimiter_1 + 1); delimiter_3 = response.indexOf("%", delimiter_2 + 1); delimiter_4 = response.indexOf("%", delimiter_3 + 1); // Glean information as substrings. follower_count = response.substring(delimiter_1 + 1, delimiter_2); account_name = response.substring(delimiter_2 + 1, delimiter_3); account_id = response.substring(delimiter_3 + 1, delimiter_4); }}
⭐ In the scrolling_text function:
⭐ Scroll a given string using the X-axis of the analog joystick on a given y coordinate (row).
void scrolling_text(String text, int y){ int len = text.length(); // Scroll text using the joystick (VRX). if(joystick_x <= 45) x--; if(joystick_x >= 900) x++; if(x>84) x = 84; if(x<=-(len*6)) x = -(len*6); // Print. myGLCD.print(text, x, y); myGLCD.update(); delay(25);}

Connections and Adjustments
// Connections
// Arduino Nano 33 IoT :
//                                Nokia 5110 Screen
// D2  --------------------------- SCK (Clk)
// D3  --------------------------- MOSI (Din)
// D4  --------------------------- DC
// D5  --------------------------- RST
// D6  --------------------------- CS (CE)
//                                JoyStick
// A0  --------------------------- VRY
// A1  --------------------------- VRX
// D9  --------------------------- SW
// 5V  --------------------------- 5V
// GND --------------------------- GND
//                                Button (Right)
// A3  --------------------------- S
//                                Button (Left)
// A2  --------------------------- S
//                                RGB LEB (RCGB)
// D12 --------------------------- R
// D11 --------------------------- G
// D10 --------------------------- B
//                                Buzzer
// D8  --------------------------- +
After completing and uploading the code, I attached all required components to the board via headers - the Arduino Nano 33 IoT and the Nokia 5110 Screen.

Modes and Features
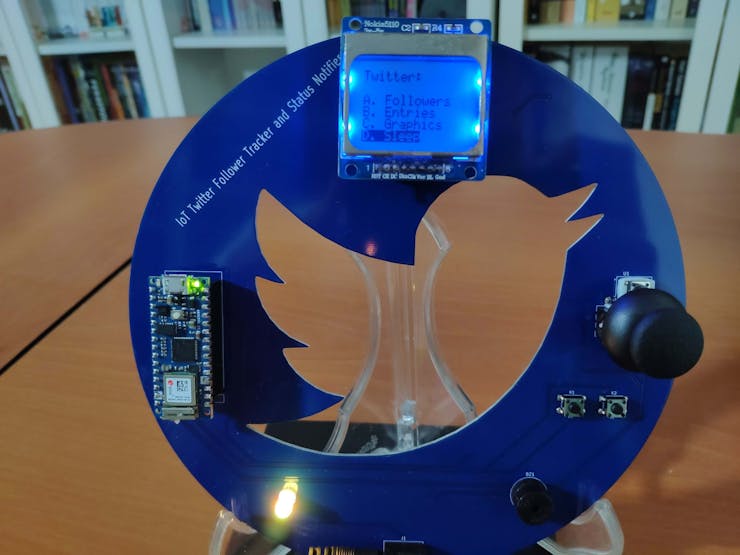
📊🔄 First of all, the device checks for a successful WiFi connection. Then, if connected, it displays the interface (menu).

📊🔄 The device shows four different modes on the interface:
- A. Followers
- B. Entries
- C. Graphics
- D. Sleep
📊🔄 The device allows the user to select a mode (option) on the interface via the analog joystick:
- Y-axis (>= 900) ➡ Go Up
- Y-axis (<= 45) ➡ Go Down
- SW ➡ Activate
📊🔄 While selecting a mode on the interface with the Y-axis of the analog joystick, the device turns the RGB LED to a different color for each mode:
- Followers ➡ Purple
- Entries ➡ Cyan
- Graphics ➡ Yellow
- Sleep ➡ Orange
📊🔄 After activating any modes, the device lets the user return to the interface by pressing the Right button.
📌 A. Followers

📊🔄 The device connects to the web application (Twitter Follower Tracker) to obtain the Twitter account information:
- Follower Count
- Account Name
- Account ID

📊🔄 The device checks the current follower status in comparison to the previously registered follower count:
- STABLE
- INC
- DEC
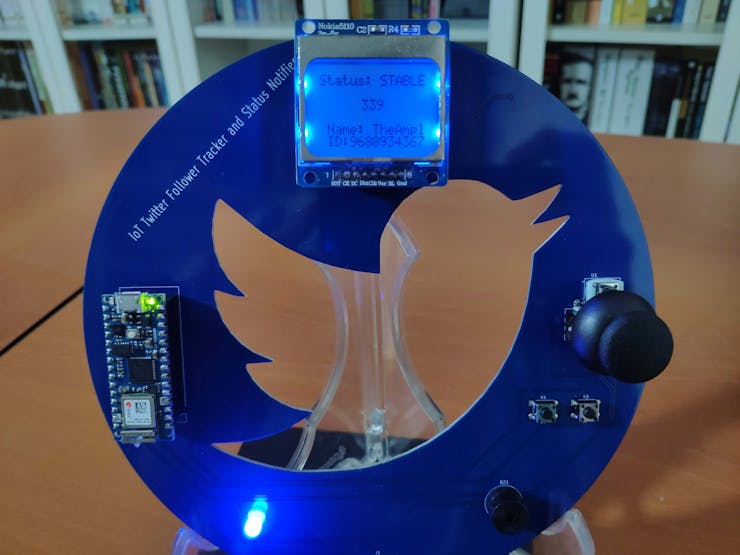
📊🔄 Then, the device displays the current follower status, the current follower count, the account name, and the account ID.

📊🔄 If the current follower status is STABLE, which means no change in the follower count, the device turns the RGB LED to blue.
📊🔄 If the current follower status is INC, which means an increase in the follower count, the device turns the RGB LED to green and notifies the user via the buzzer.

📊🔄 If the current follower status is DEC, which means a decrease in the follower count, the device turns the RGB LED to red and notifies the user via the buzzer.

📊🔄 If the Left button is pressed, the device halts the buzzer (notification) and keeps displaying the account information.
📊🔄 The device allows the user to scroll the fetched account information with the X-axis of the analog joystick.
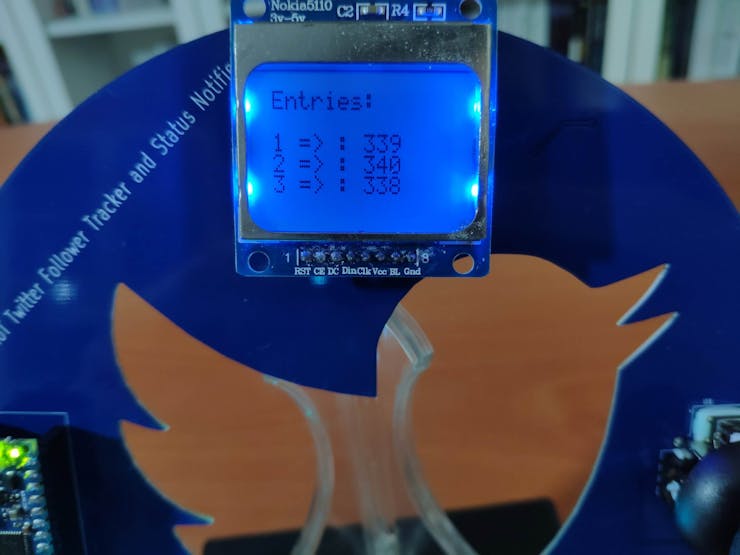
📌 B. Entries

📊🔄 The device displays the last three registered follower counts (entries) chronologically.
📊🔄 If the Left button is pressed, the device resets the entries (follower counts) list.

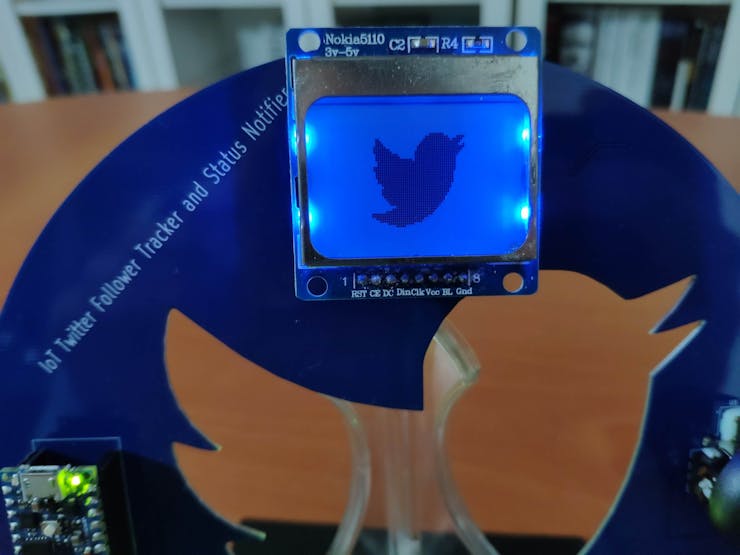
📌 C. Graphics

📊🔄 The device shows the Twitter logo (monochrome image) as the screensaver.
📌 D. Sleep
📊🔄 The device activates the sleep mode in 10 seconds while printing the remaining seconds.

📊🔄 The device displays the color pattern - red, green, blue, purple, white - during the sleep mode.

Videos and Conclusion
After completing all steps above, I placed the device on my desk by utilizing a plastic easel as a fitting and stylish decoration for my room. It works stupendously :)