Close
0%
0%

Raspberry Pi Pico Matrix Touchscreen Keyboard

using a Raspberry Pi Pico and a 3.5" Touchscreen

Similar projects worth following
Matrix Keyboards are awesome when it comes to controlling your PC (or even phone and tablet). One push of a button can start a macro, speeding up your workflow. And those keyboards are widely available. But what if you could build one yourself? And you want a touchscreen? Well... that is simple! And also cheap ;)

Why?

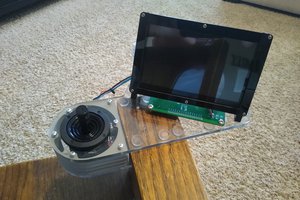
The "Why?" for this project is simple. I have been working a lot with the ILI9488 touchscreen, both resistive (original FreeTouchDeck) and capacitive (ESP32 TouchDown). When I got my Raspberry Pi Pico, the first thing I tried is to get some output on the screen. Turns out, Bodmer who gave us the TFT_eSPI library already had support for this. It needed a few minor changes to get working with the ILI9488 screen I use, but I got it up and running pretty quickly.

After that, the next thing was a simple port of an example that is included in the ESP32 TouchDown repository to use the native USB HID support of the Pico instead of BLE. The libraries work in pretty much the same way, so just instantiating an instance of the USB Keyboard class instead of bleKeyboard was sufficient.

The `ardiuno-pico` core by Earle Philhower comes with LittleFS. A small filesystem is needed to store a calibration file for the touchscreen. Instead of using SPIFFS as I do on the ESP32, I'm making use of LittleFS. The file is pretty small, so 64KB FS is enough.

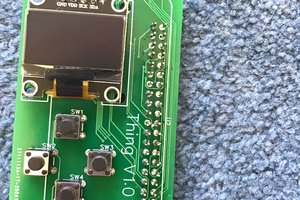
To make it simple to connect the screen and Pico together I also designed a simple PCB. It has the same dimensions as the ESP32 + TFT Combiner board, so it will fit the FreeTouchDeck case.

  • 1 × Raspberry Pi Pico
  • 1 × ILI9448 TFT + XPT2046 Touchscreen

  • 1
    Watch the Video

    Before you start this project it might be a good idea to watch the video I made.

    Watched the video? Let's get the parts you'll need!

  • 2
    Get the Parts You'll Need

    This project contains two main parts, a Raspberry Pi Pico and an ILI9488 TFT with touchscreen. You can buy these from various resellers. I have provided some links where you can get them. You will also need a way to connect the screen to the Pico. You can use a breadboard and breadboard wires, use a prototype board and solder everything together, or you can use a combiner PCB I designed.

    Raspberry Pi Pico: Buy from the PiHut

    ILI9488 TFT with Touch: Buy on AliExpress *


    You can order the PCB directly from PCBWay, or download the Gerber files and use your favorite PCB manufacturer.

    Order from PCBWay: Pico + TFT Combiner *

    Download Gerbers: Download from Github

    Not all ILI9488 TFT screens are created equally. It is important to make sure you have selected a screen with touch! *Full disclosure: these are affiliate links

  • 3
    Hardware: Connect the TFT Screen to the Pico

    The wiring may seem a bit daunting at first. But don't let all the wires scare you. It is pretty straight forward. The images above will help you when you wire your TFT + Touchscreen to your Pi Pico.

    This is also decision making time. There are few options when it comes to connecting the two together. You can use a breadboard, you can use prototyping board or you can order a PCB specifically to connect the ILI9488 + touch to the Pi Pico. I'd like to point out that the breadboard option is only an option for testing your connections and screen. It is not very practical to have on your desk and loose connections can cause problems.

    It is important to know that these screens run at 3.3V. Connecting them to 5V can cause damage!

    These are the connection from the Pi Pico to the TFT:

    3.3V -> VCC and LED

    GND -> GND

    GP20 -> CS

    GP21 -> RESET

    GP22 - > DC/RS

    GP3 -> SDI(MOSI) and T_DIN

    GP2 -> SCK and T_CLK

    GP14 -> T_CS

    GP0 -> T_DO

    GP15 -> T_IRQ

    SDO(MISO) is not used for the TFT screen, so you are left with one unconnected pin on the TFT module. That's ok!

    If you are using the Pico + TFT Combiner, there is only one way it will fit. My advise it to use header pins so you can unplug your Pico and screen to use it in a different project, or if for some reason the screen or Pico do not work you can replace them.

    If you decide to solder the Pico and screen directly to the combiner board, It is important to solder the Pico to the board first! Because if you solder the TFT first, you won't be able to solder the Pico to the board anymore!

View all 8 instructions

Enjoy this project?

Share

Discussions

Similar Projects

Does this project spark your interest?

Become a member to follow this project and never miss any updates