Close
0%
0%

Lor's matrix glasses

DIY (NO PCB) LED matrix glasses using 3mm LEDs!

Similar projects worth following
LED Matrix glasses made with discrete 3mm LEDs using their leads as the matrix frame.

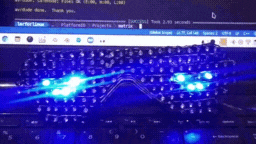
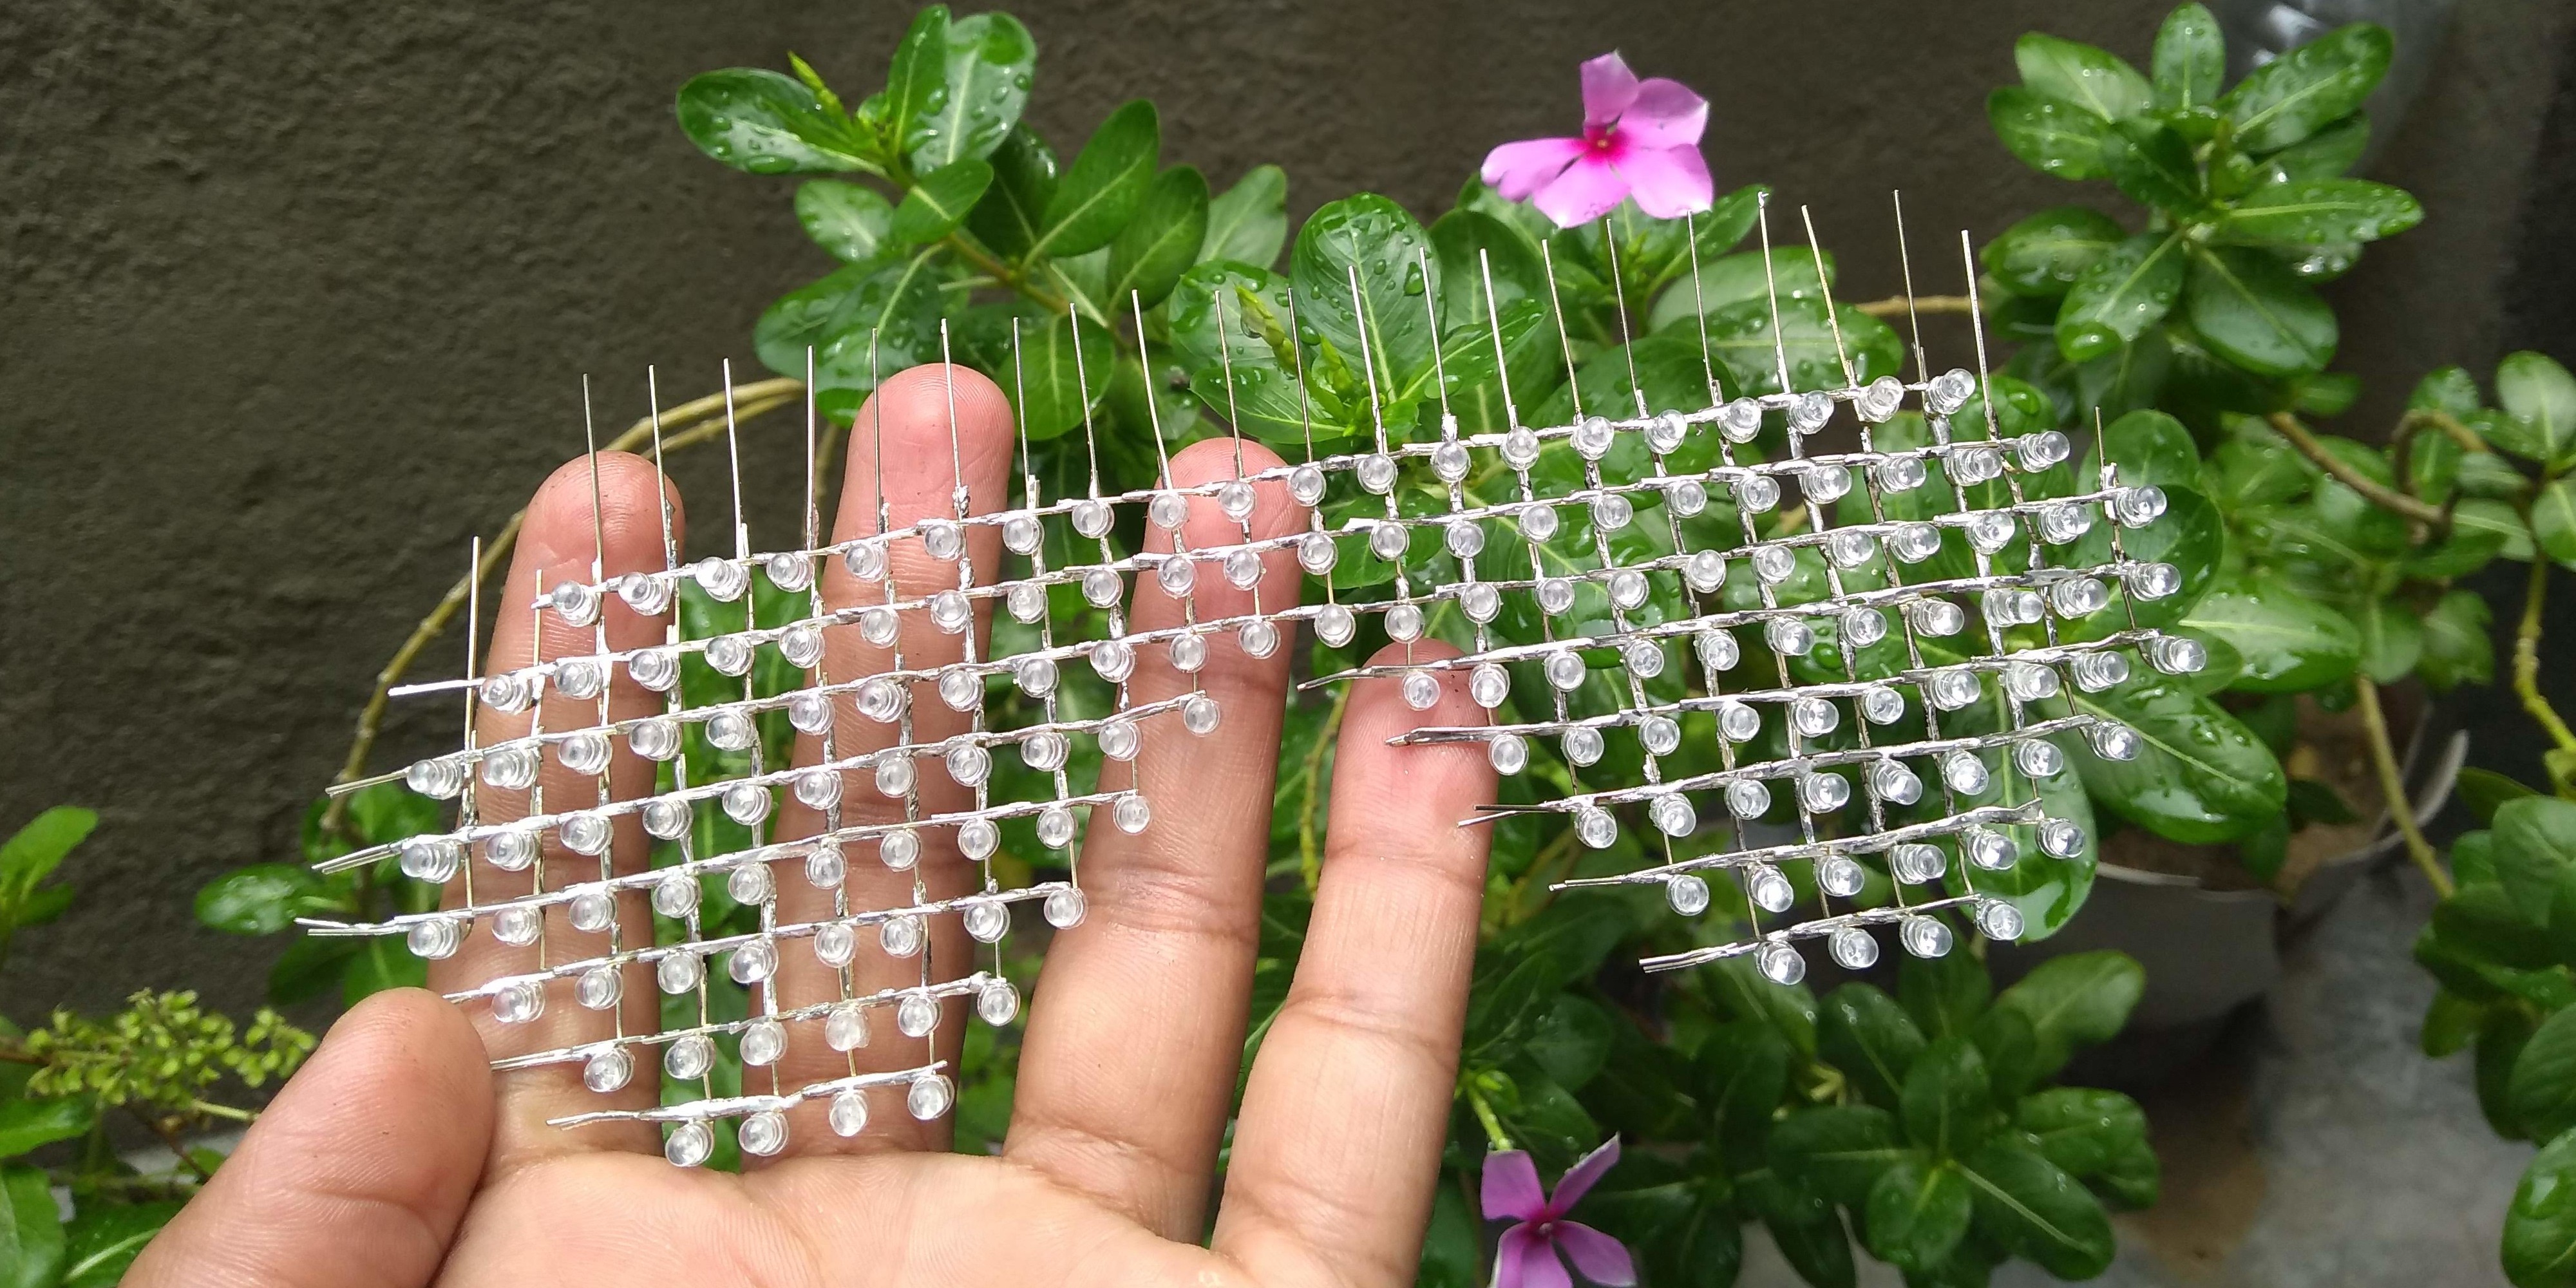
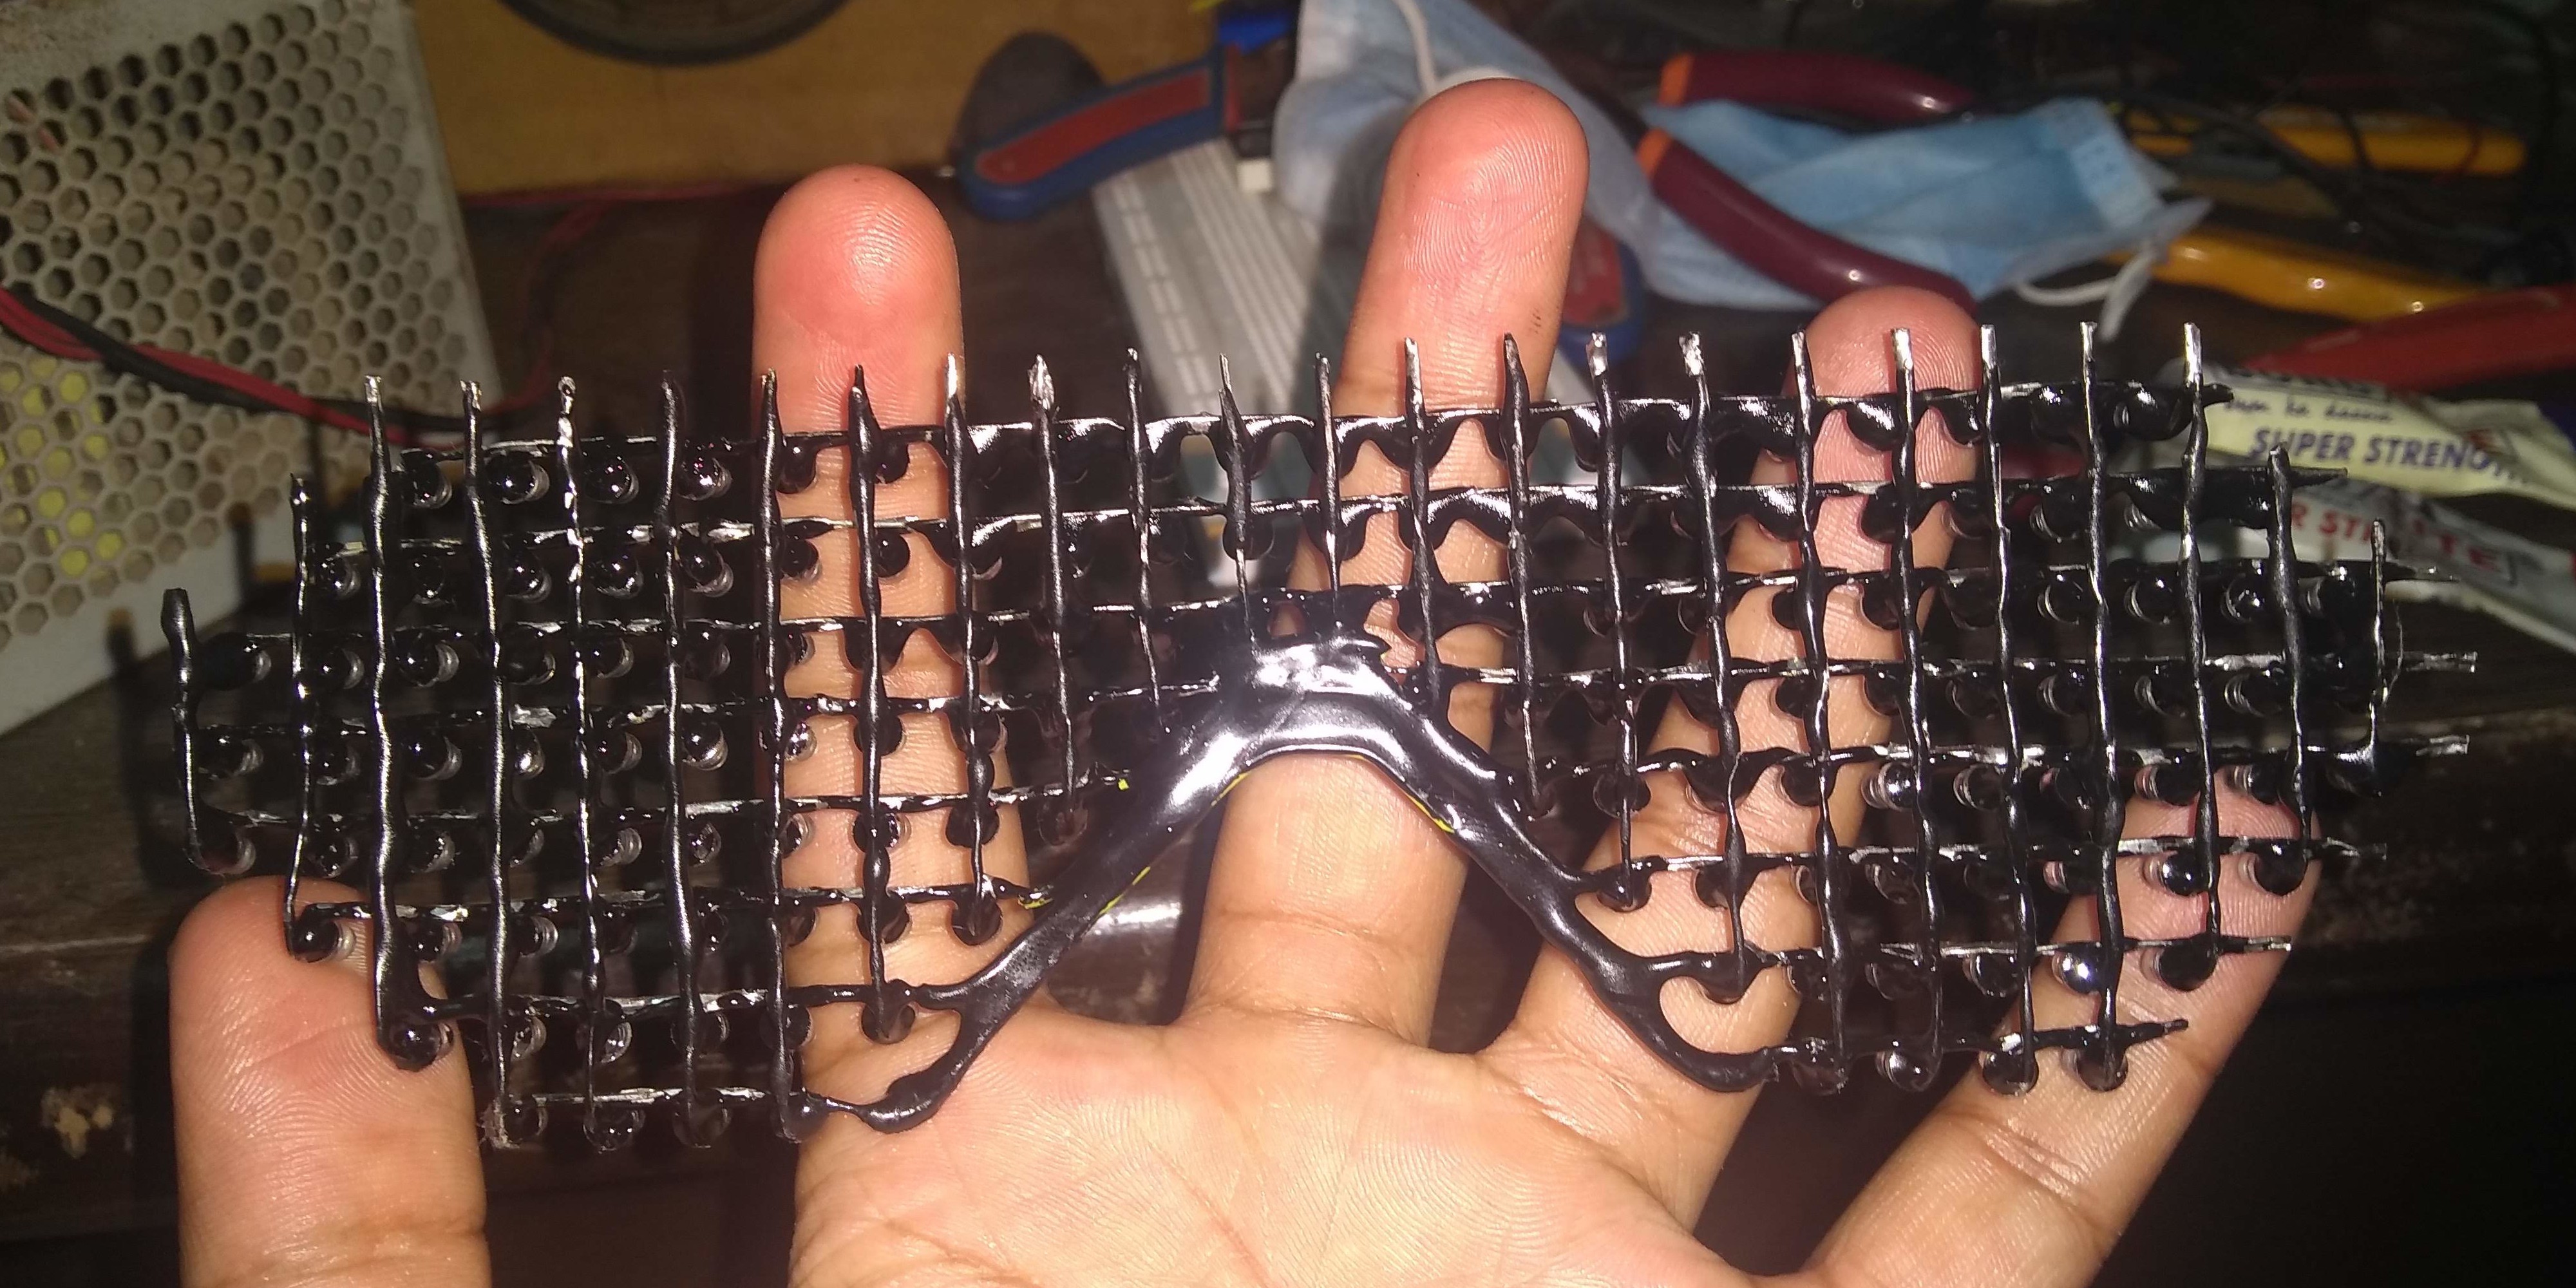
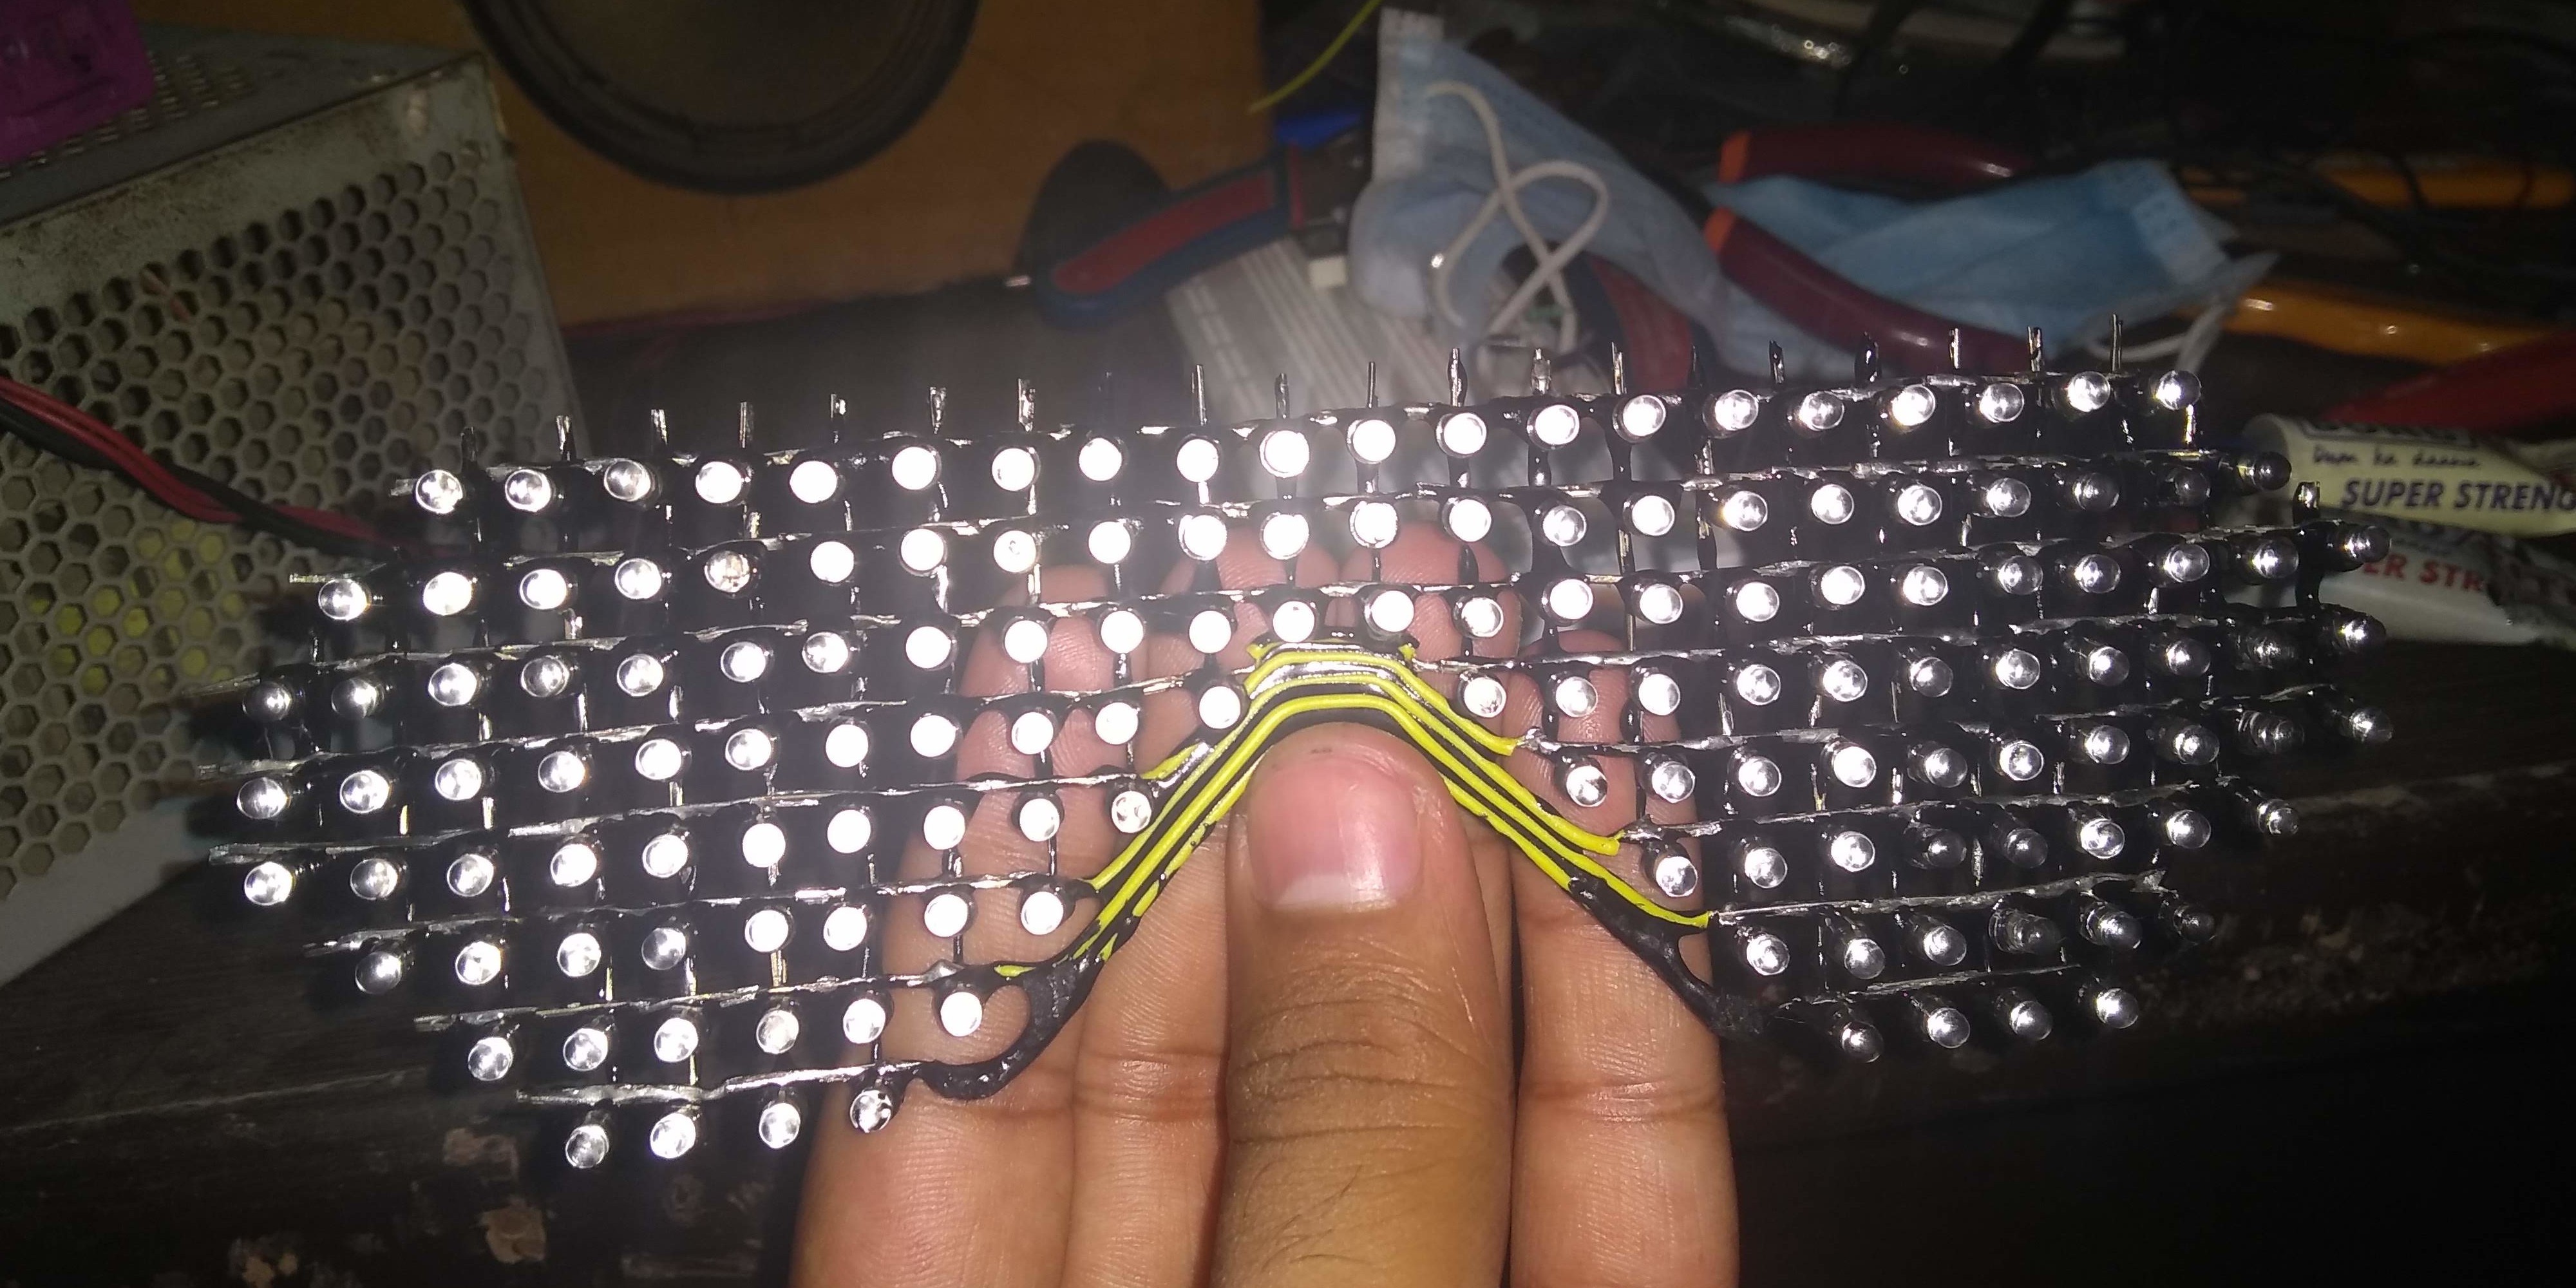
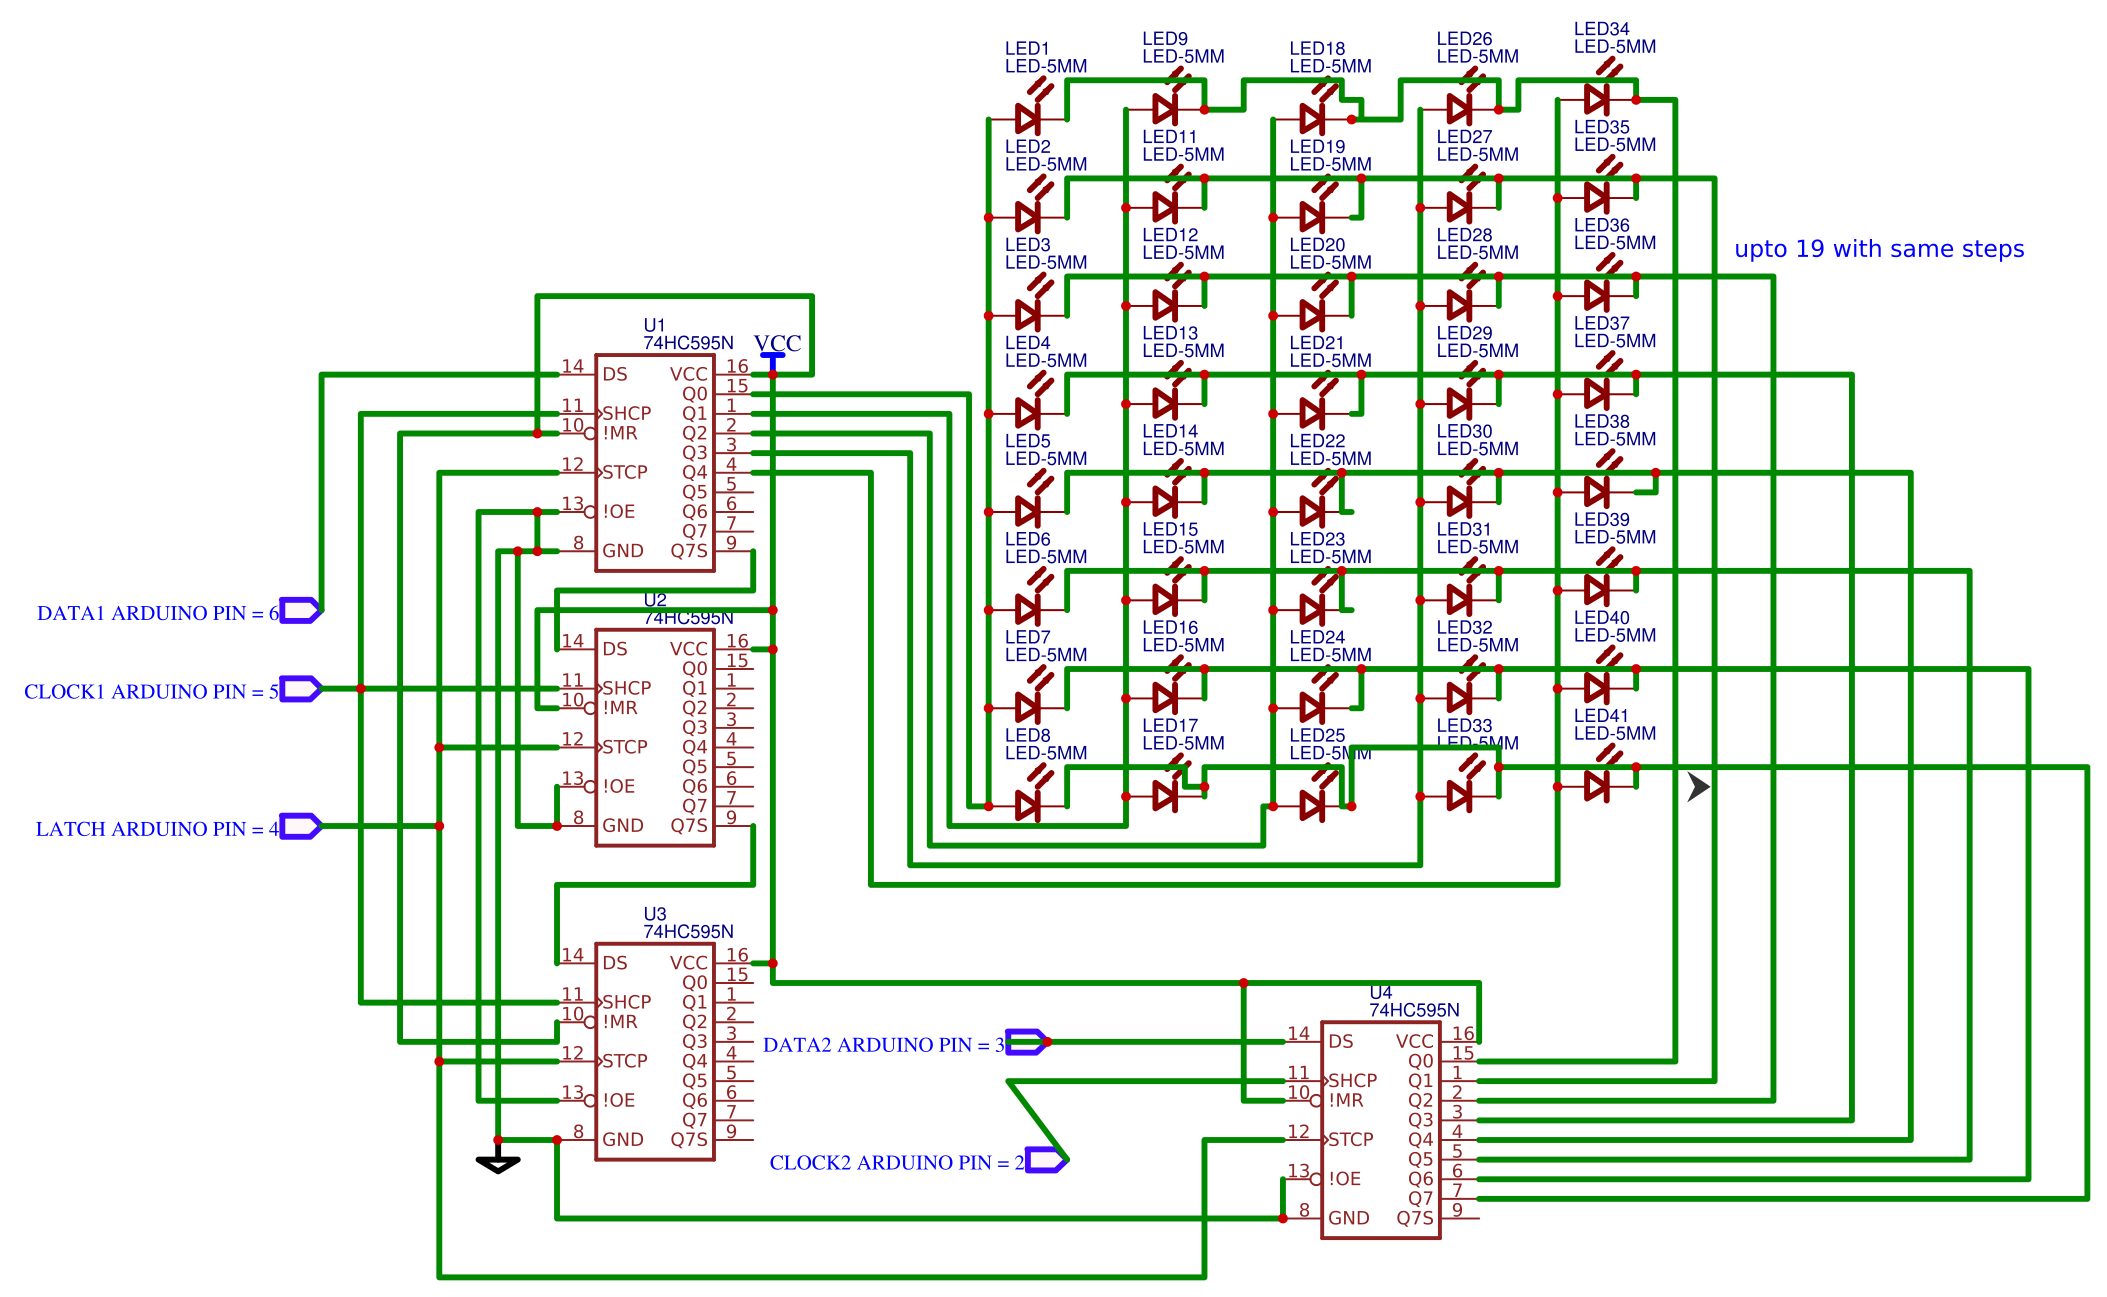
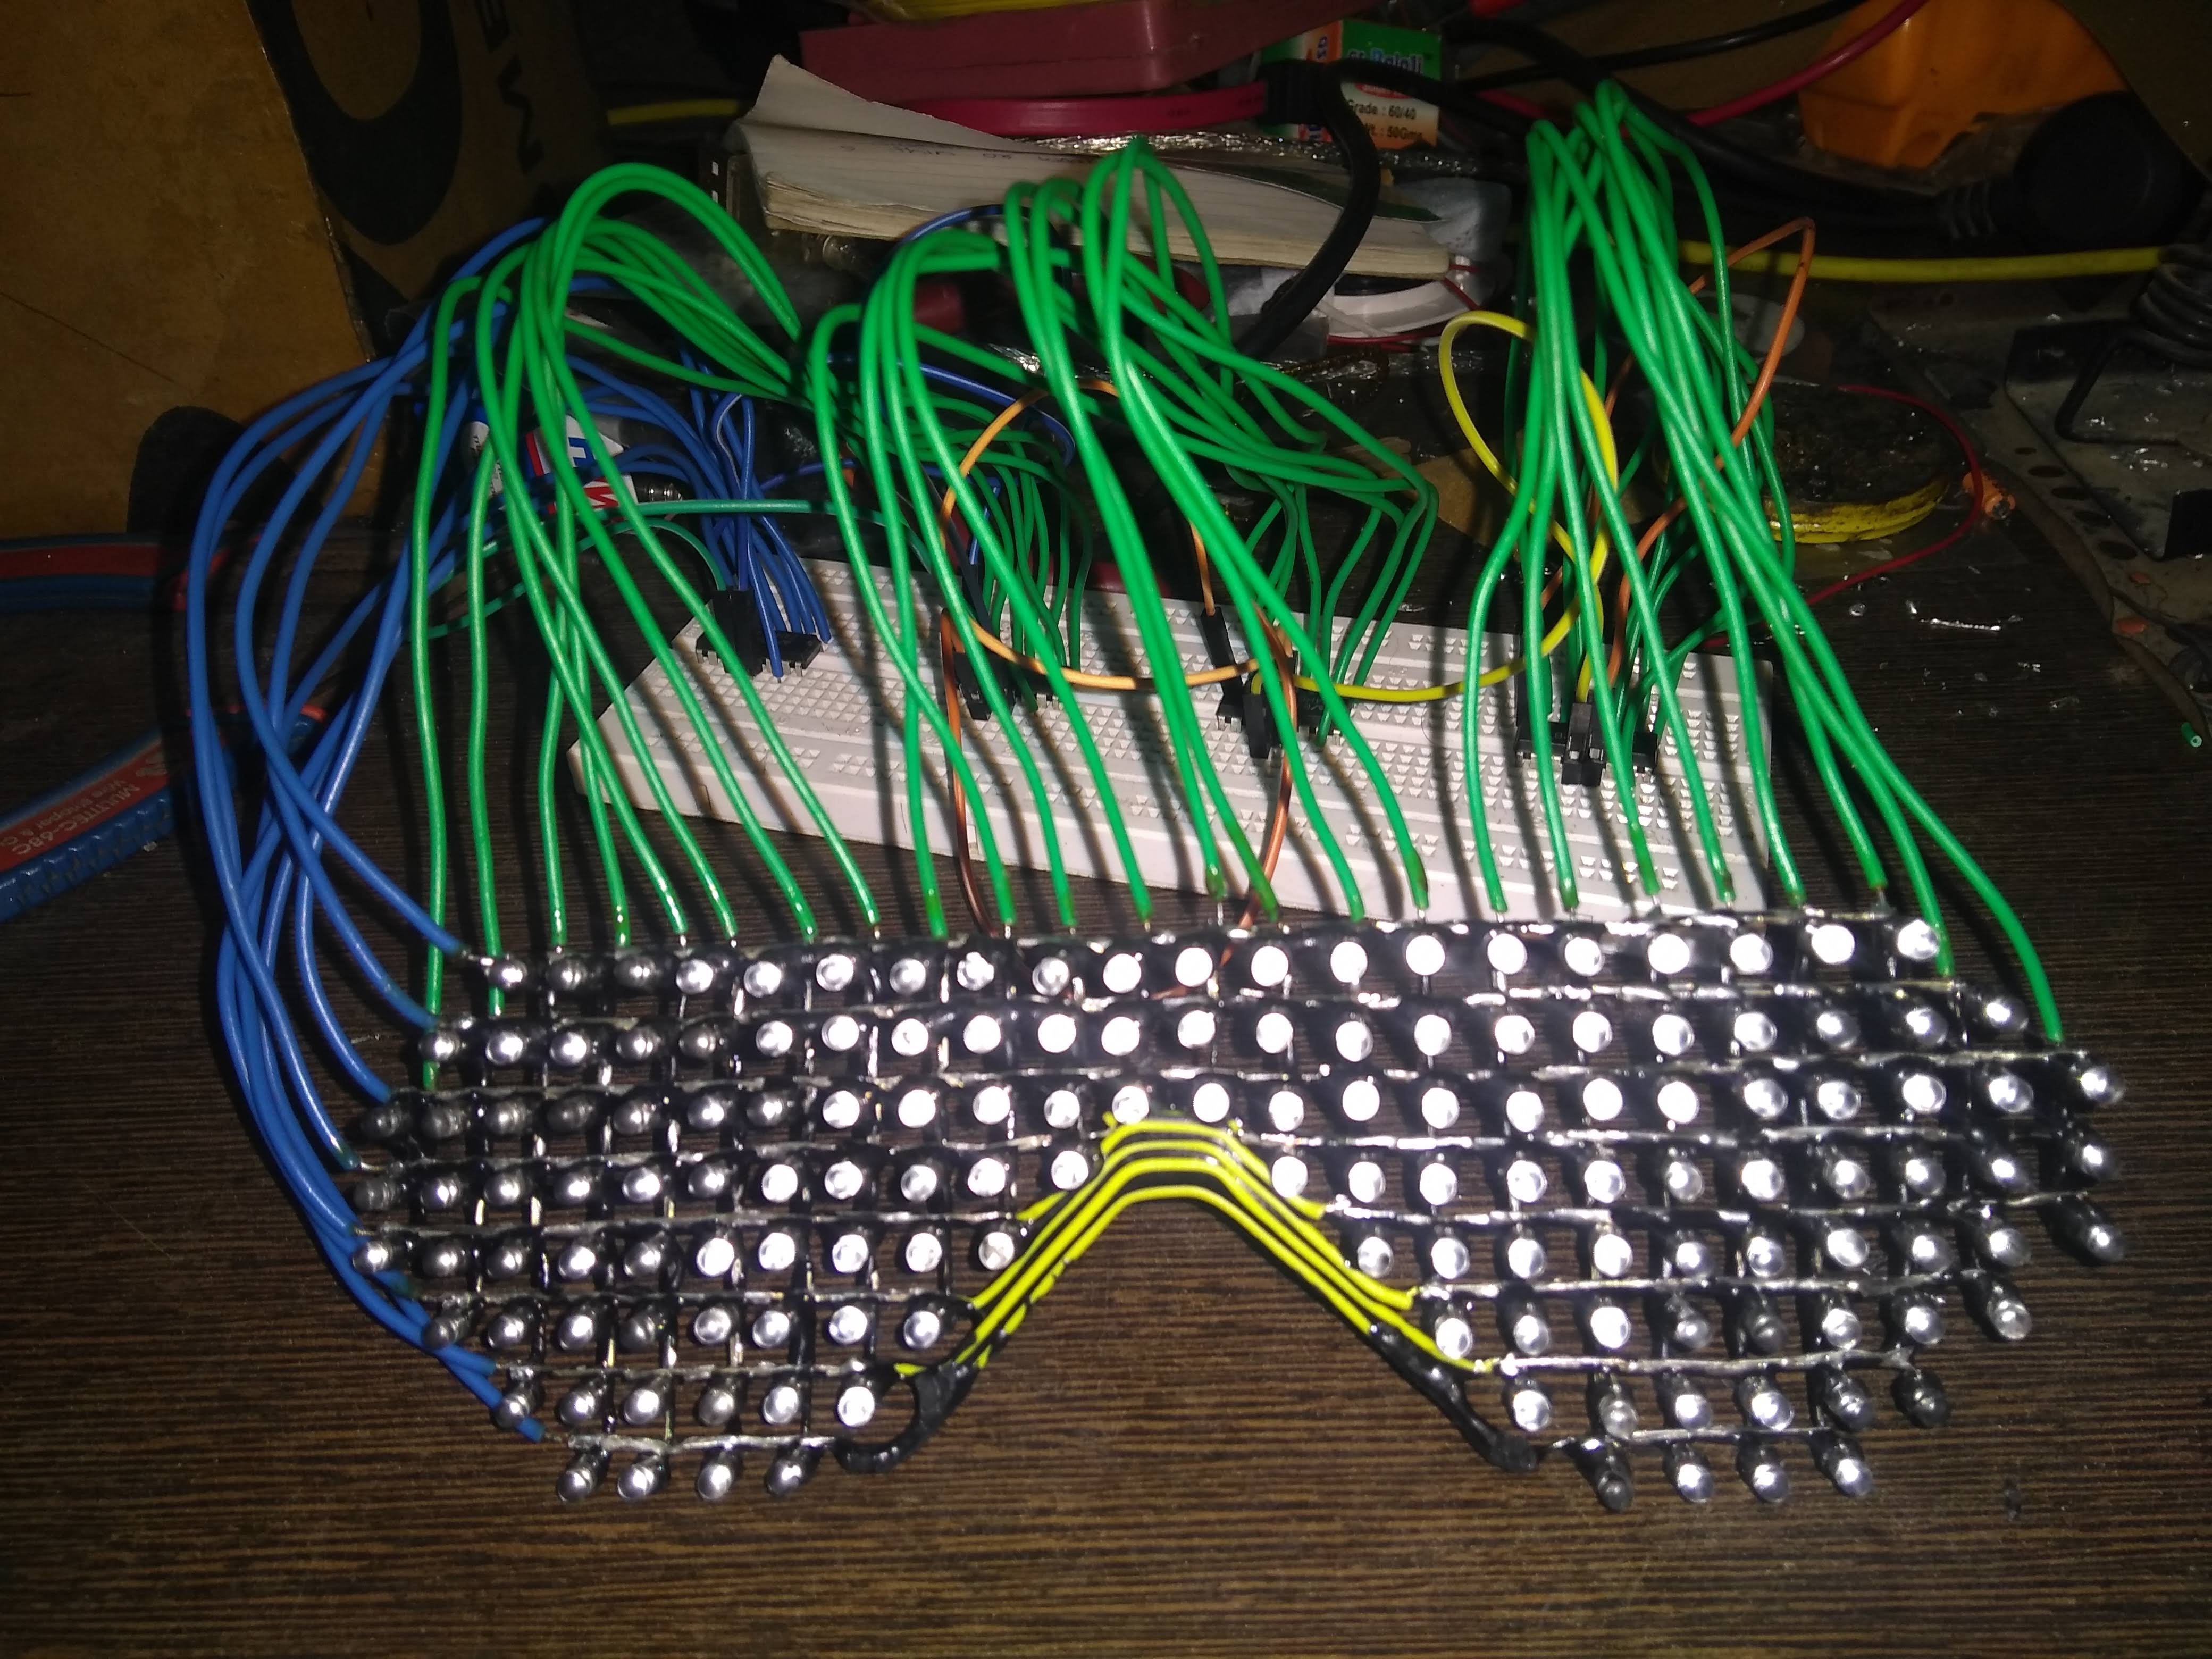
I started working on this project out of nowhere and a little over 2 days later I had my own LED matrix glasses. It took a whole night to dry the epoxy glue mixed with black fabric color but, if I had some quick black epoxy the project was just a one-night project. If I go back and redo this project I will not use magnet wire for connections 😢 very bad decision!


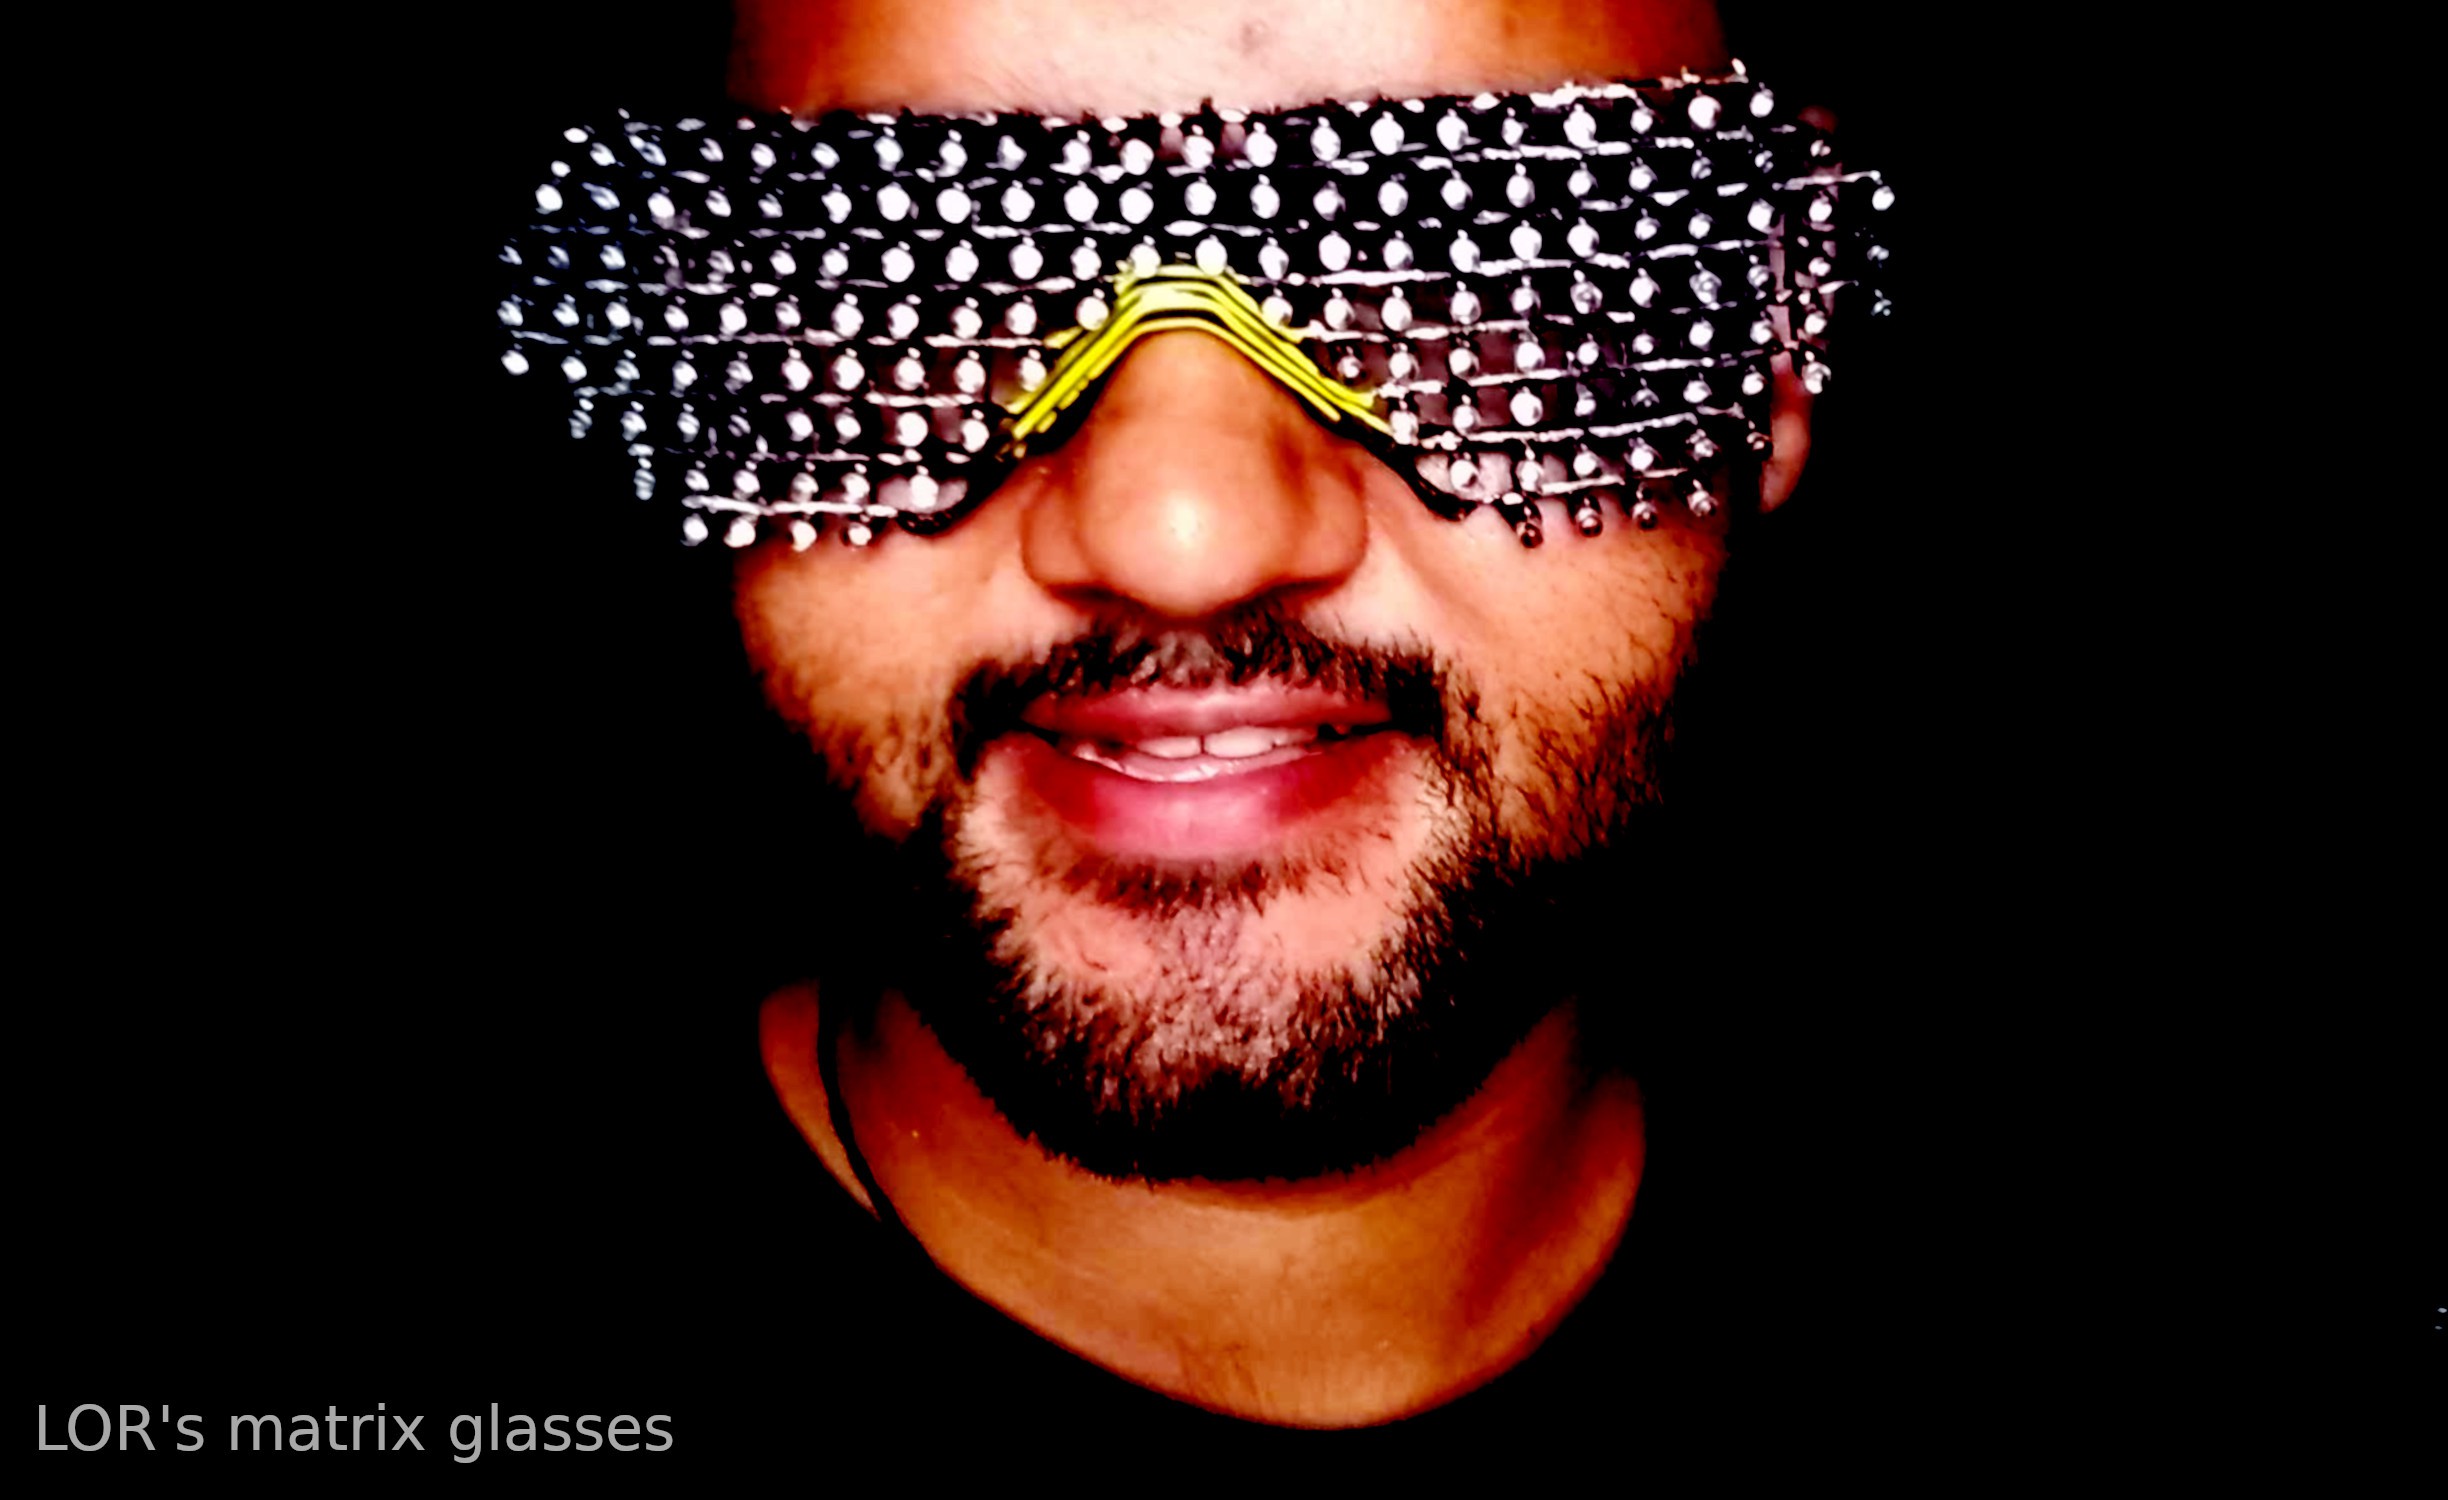
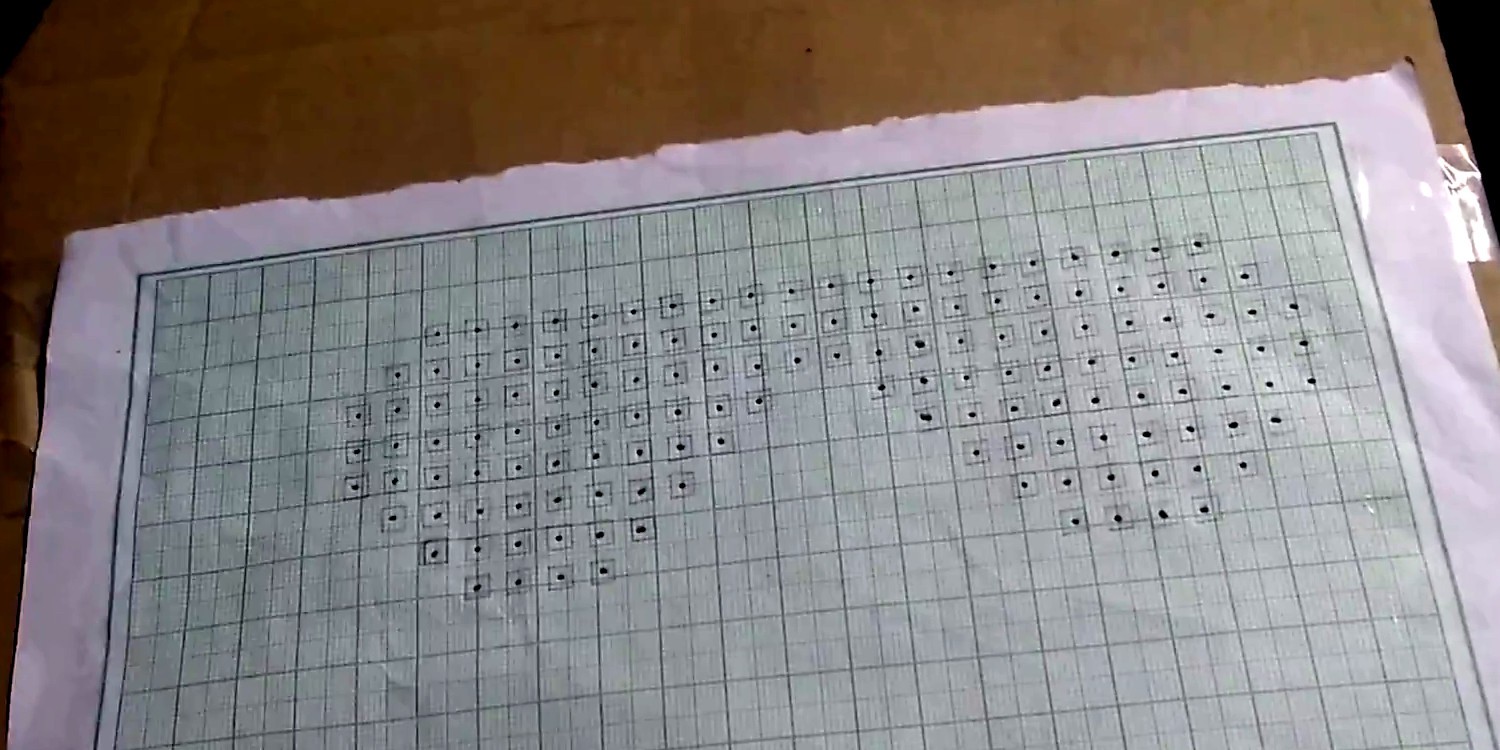
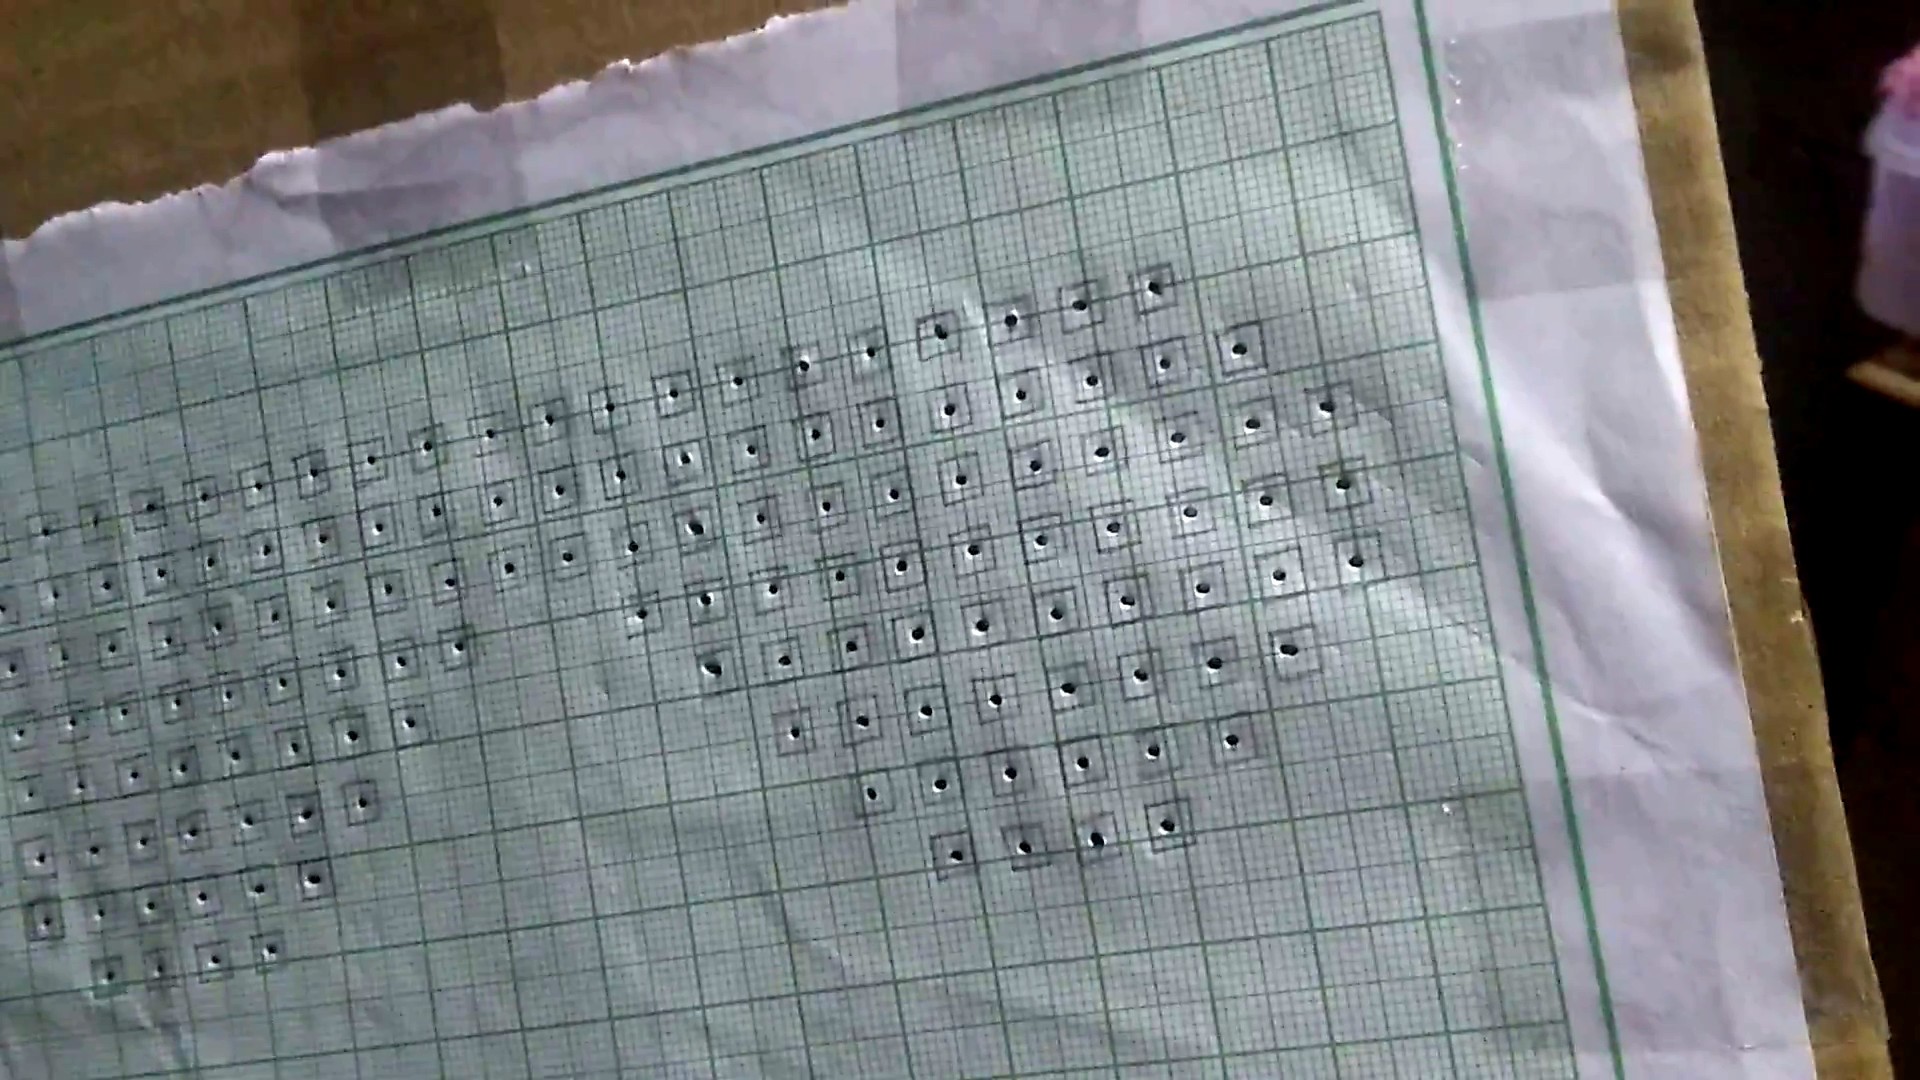
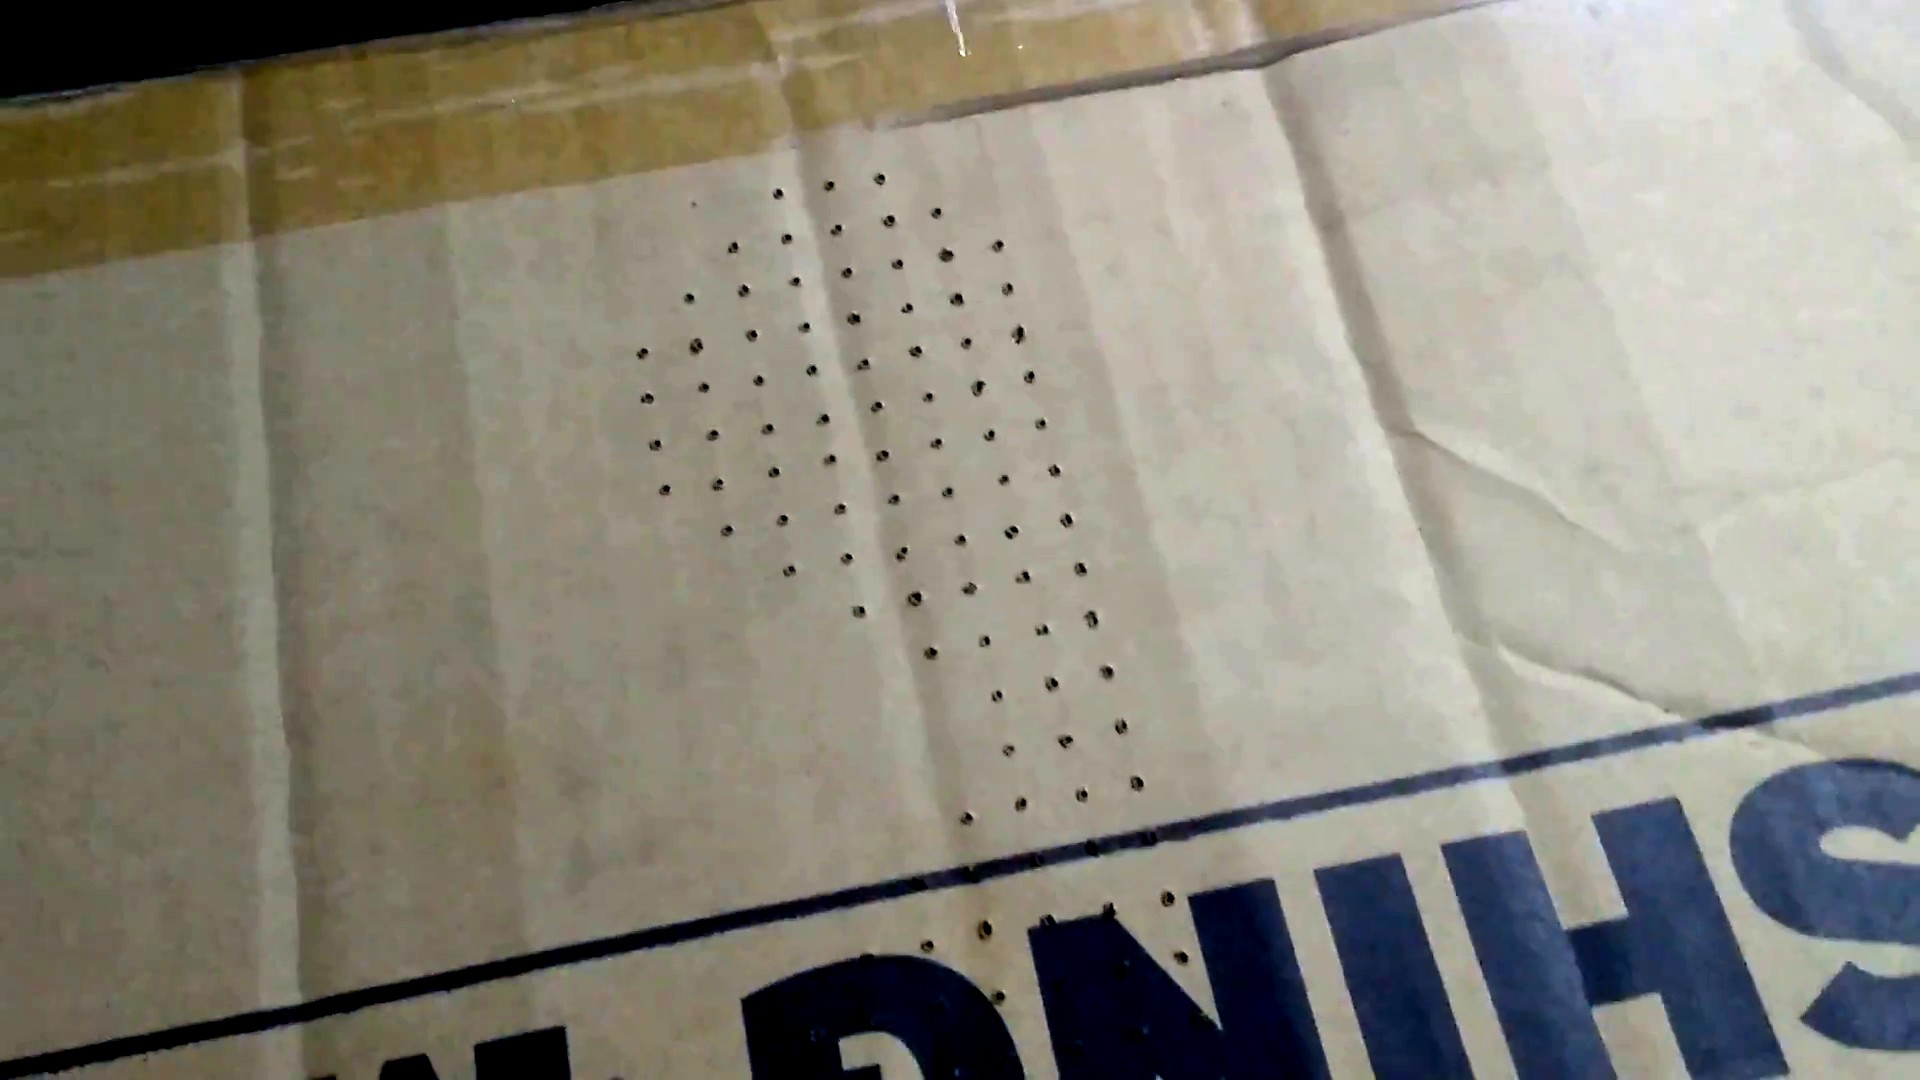
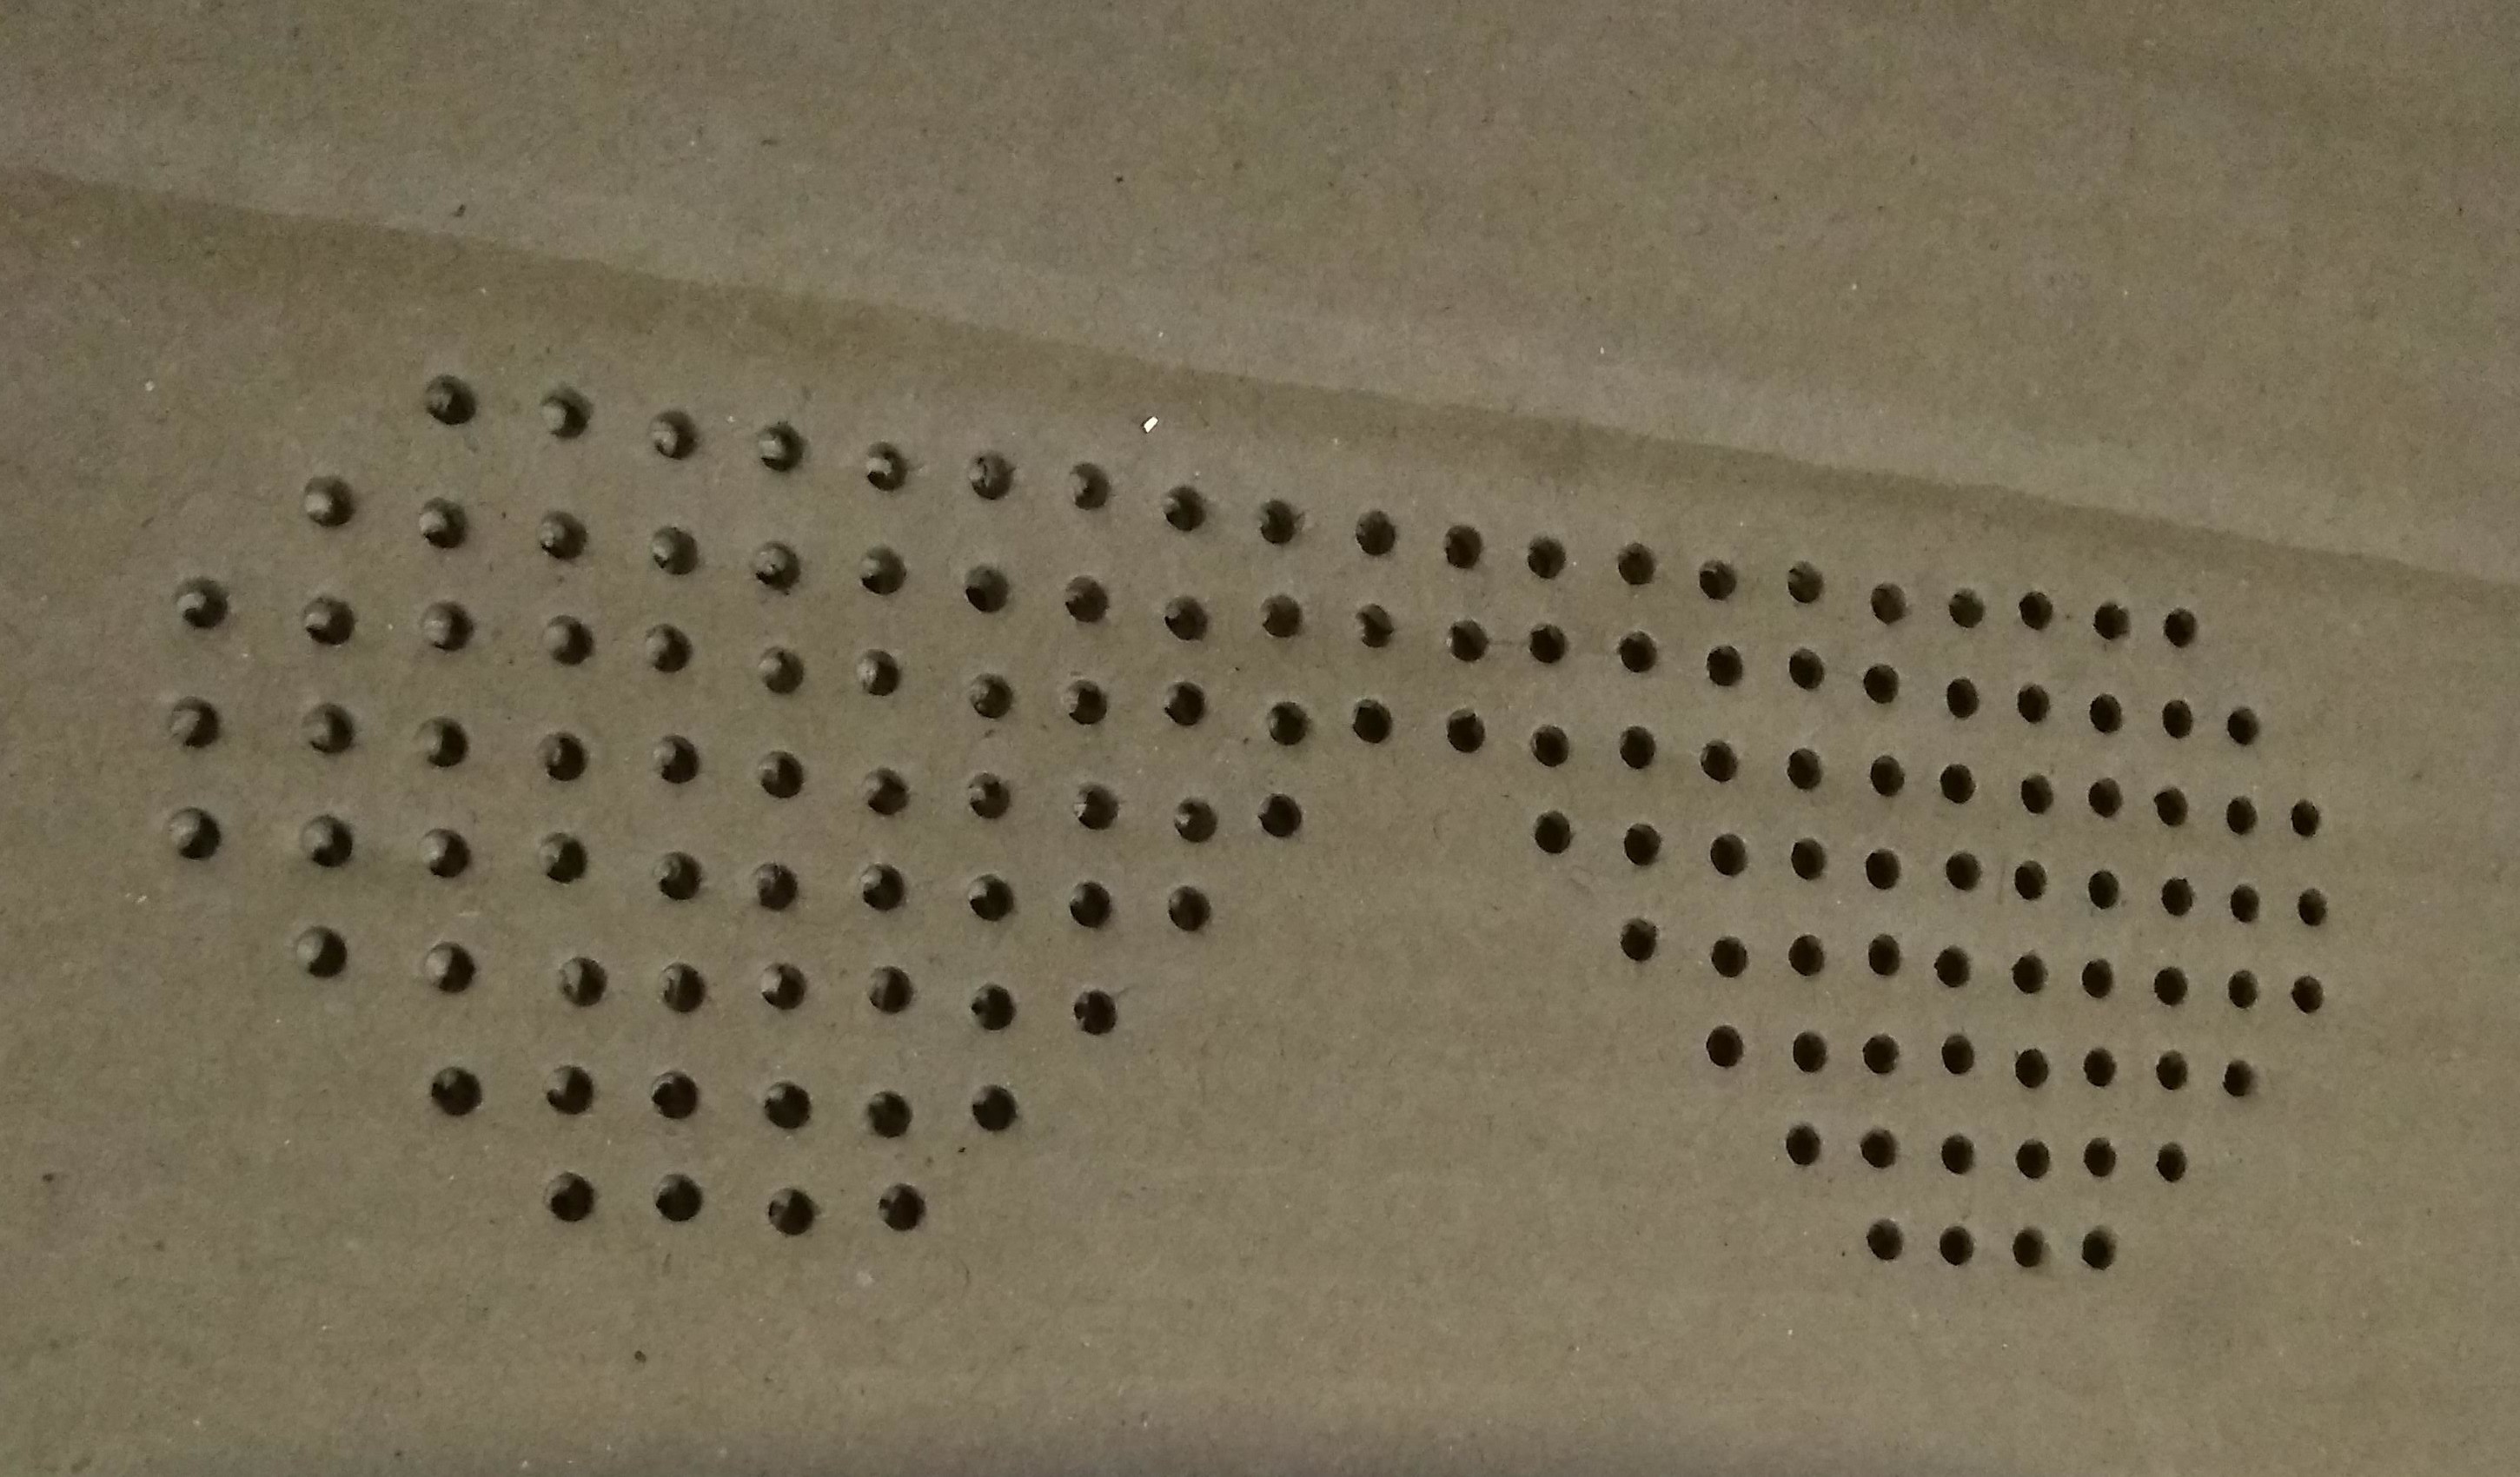
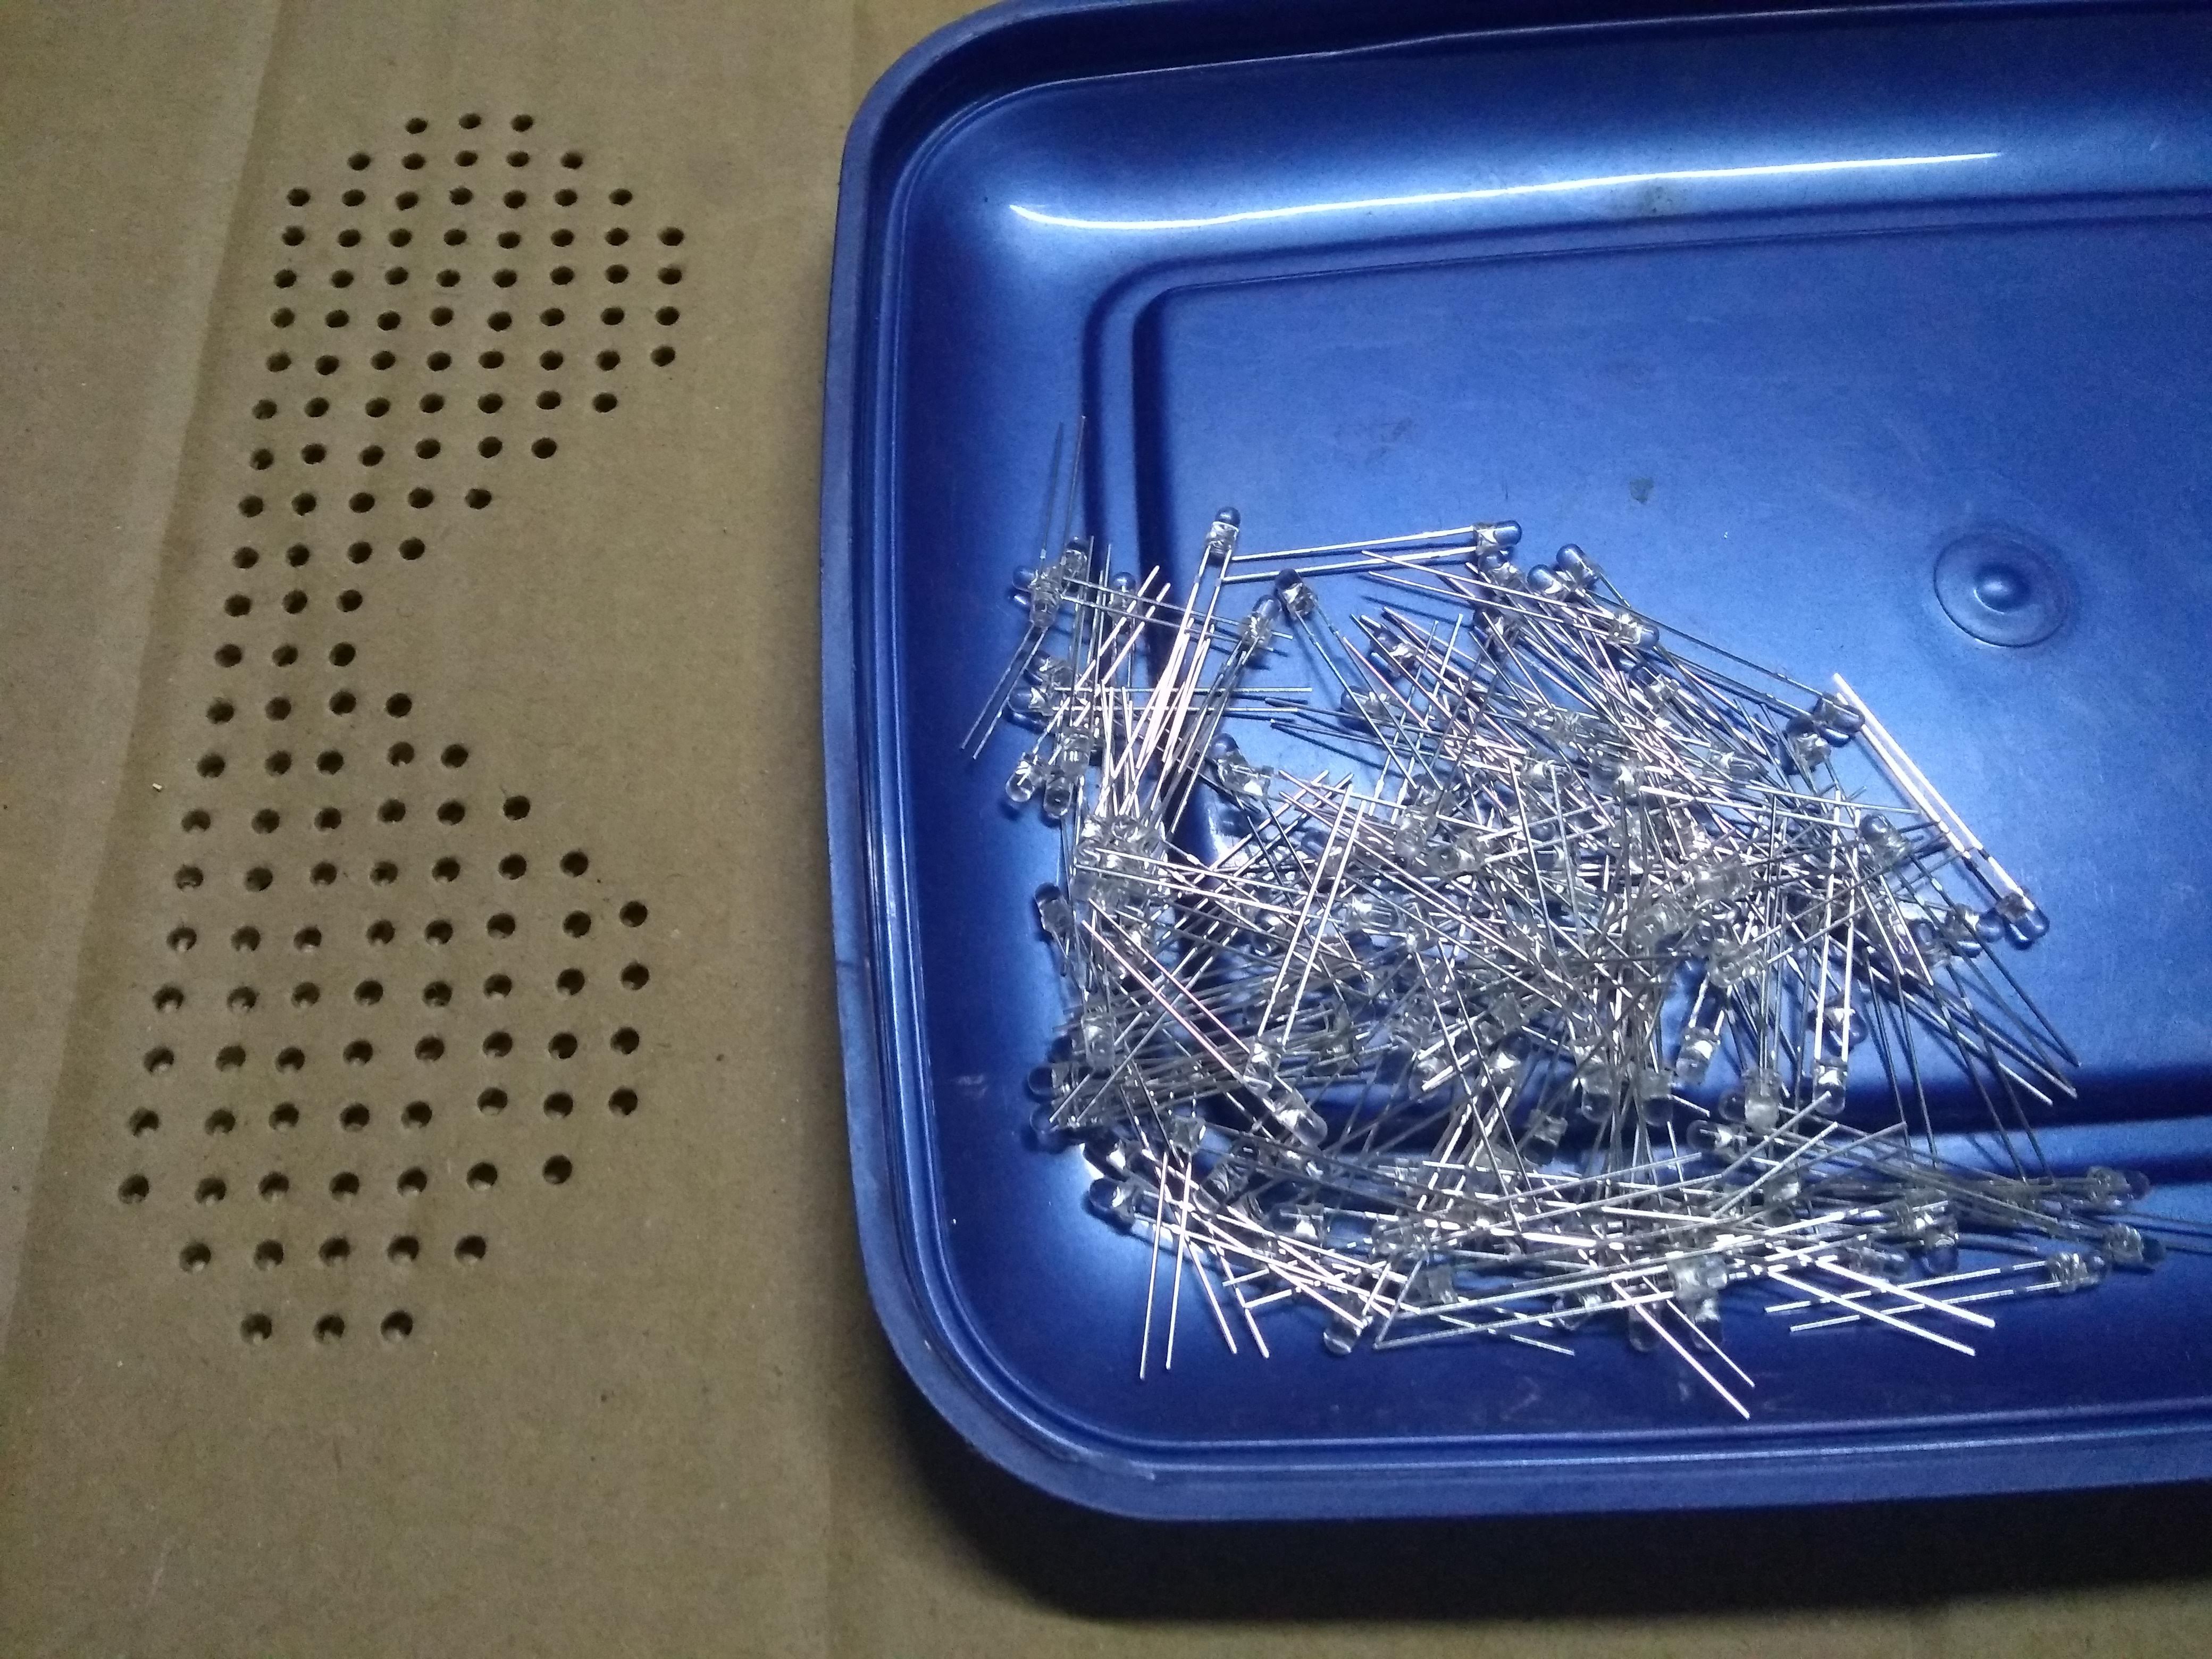
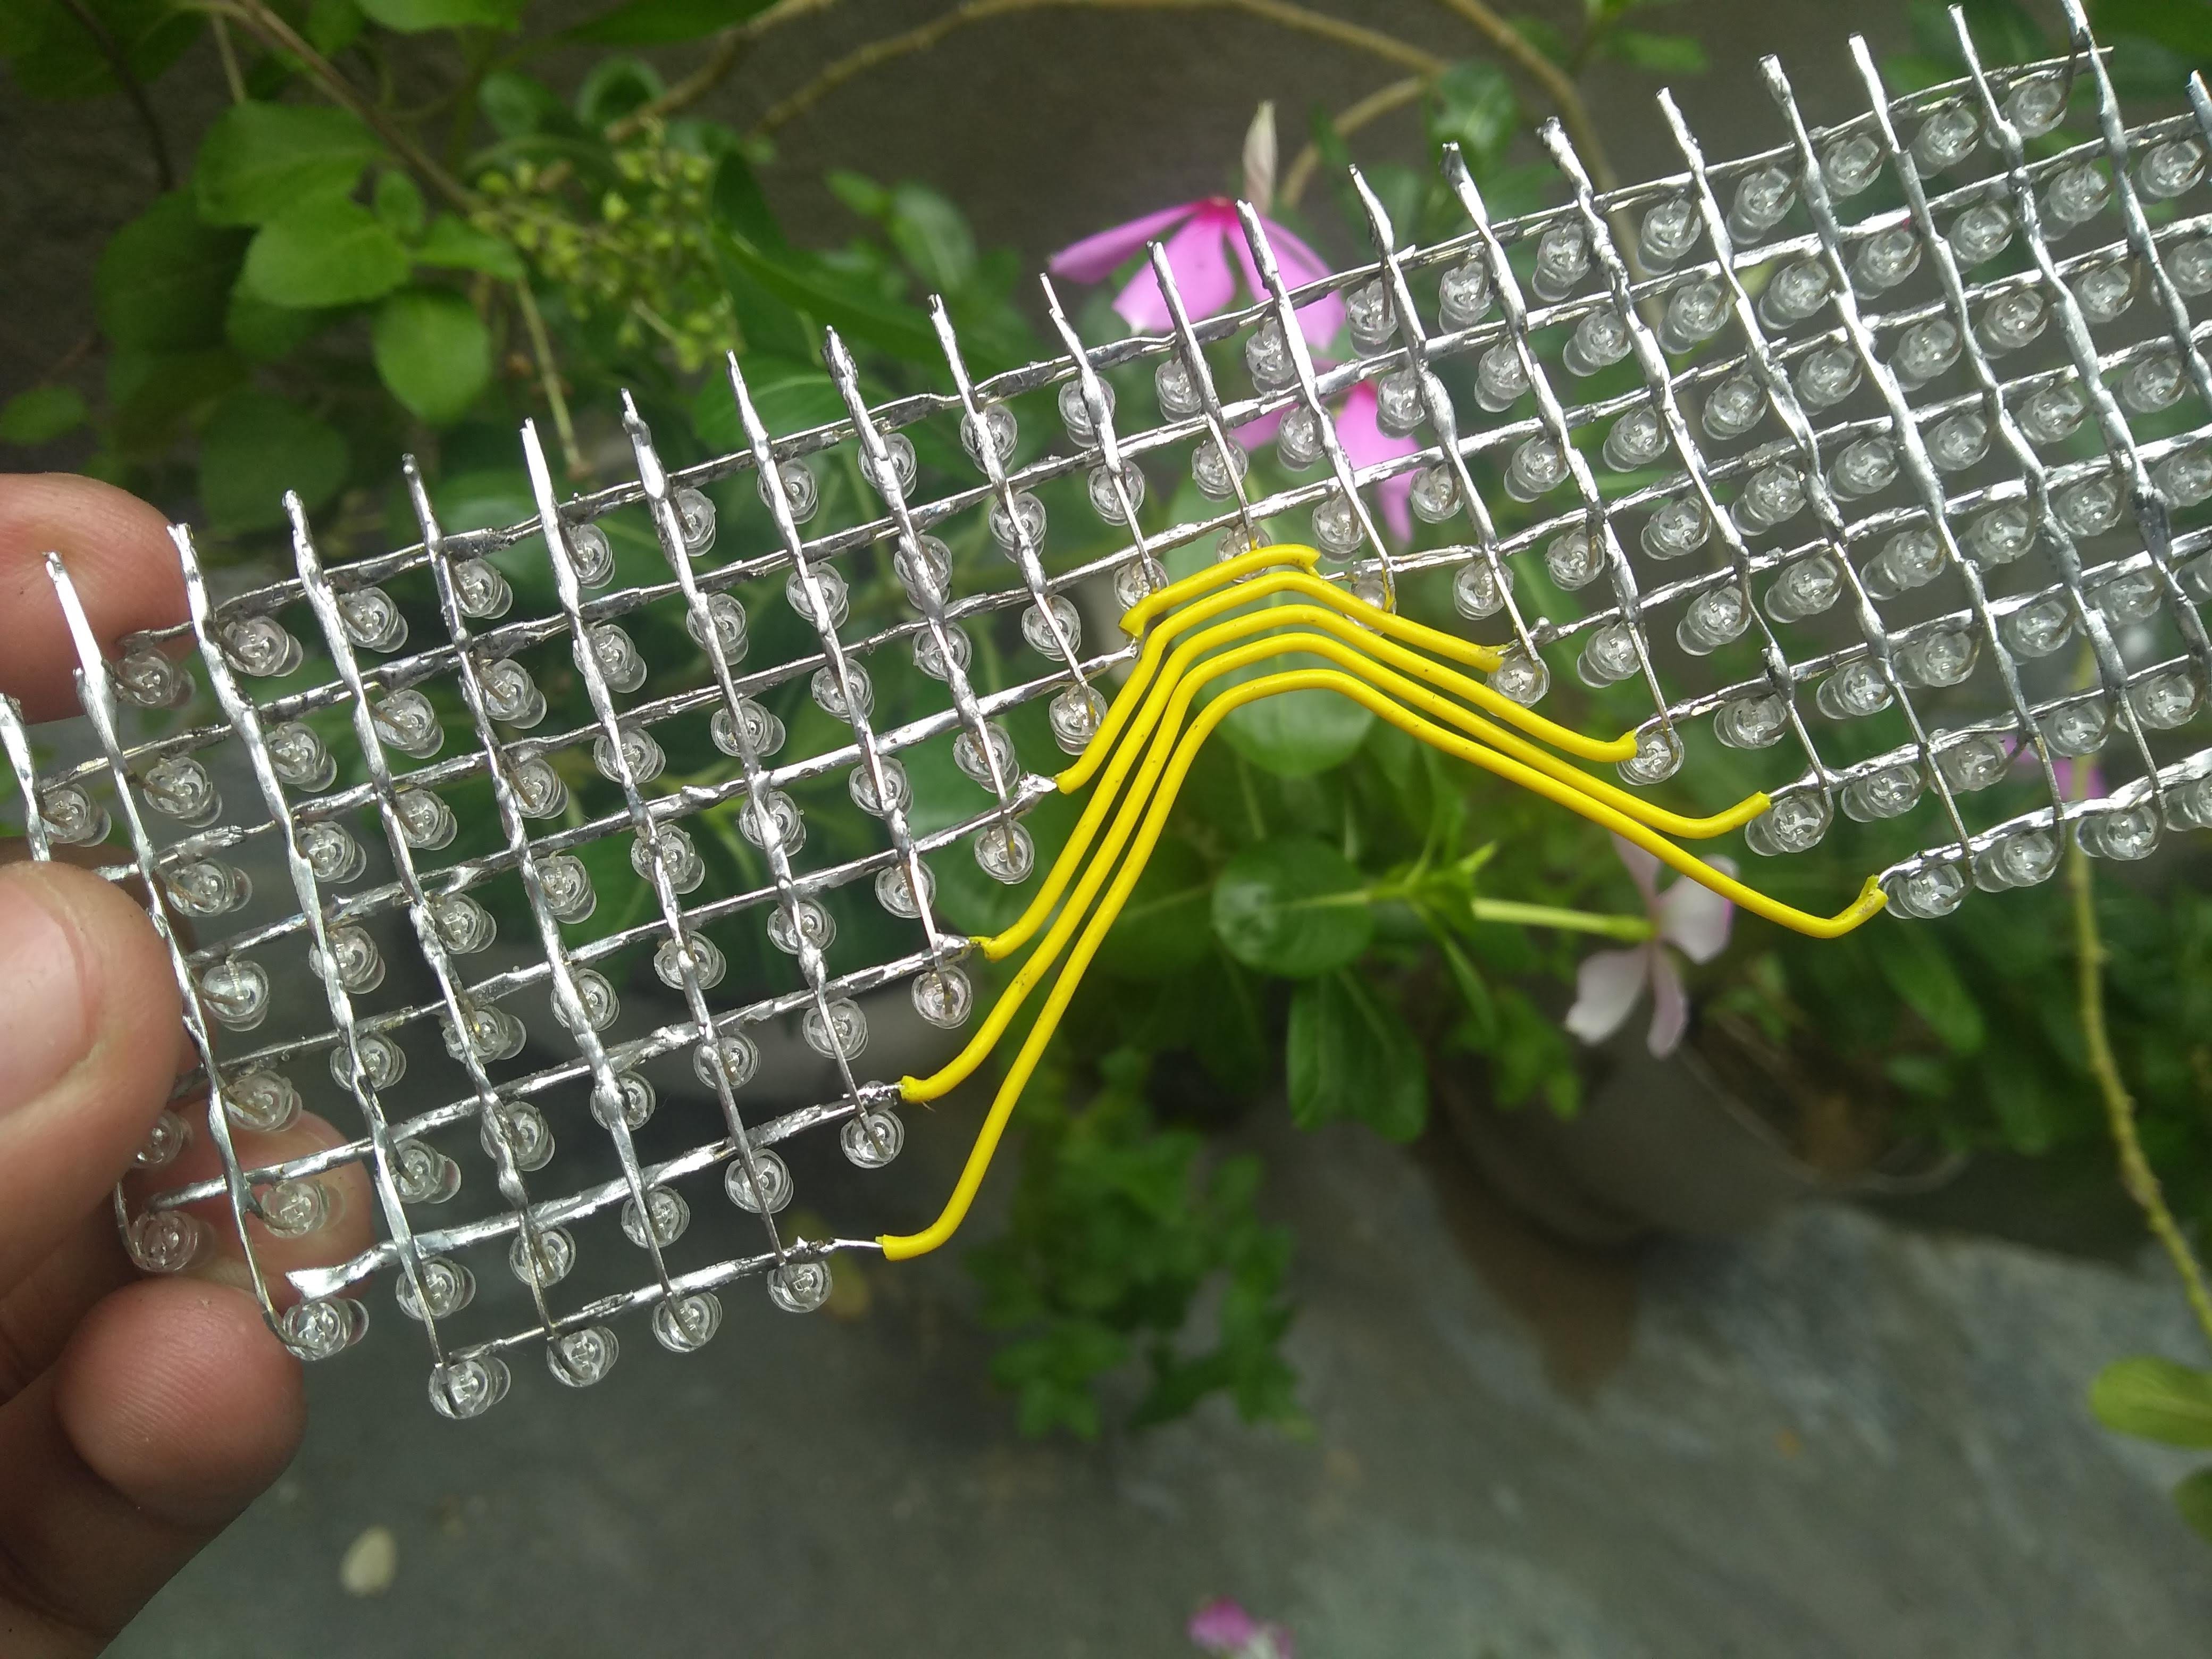
This is one of the projects that I am very proud of because it required a lot of engineering and creativity at the same time. The first task was to devise a way to hold the LEDs in place at a specific distance (matrix) and the engineer inside kicked in to use graph paper and a piece of cardboard to create a perfect LED matrix. Then I used old spectacles frame and created these beautiful matrix glasses around them.

  • 144 × 3mm LED 3mm LED of any color.
  • 4 × 74HC595 Shift register.
  • 1 × MCU of choice Any 3.3v or 5v MCU will work.
  • 1 × Battery LiPo battery of 500mA or more.
  • 1 × TP4056 Charging module.

View all 10 components

  • 1
    Create matrix mould

    To create the LED matrix we need a mould to hold all the LEDs in-place while we solder all the LEDs. I have created this very simple method to do the task. You need a graph paper and cardboard to create the mould. To make it easier for you I have created a printable version of the graph paper, you can get it here.

    After you create small holes with the reference graph sheet remove it and widen the holes so that LEDs can (tightly) fit in the hole. See the final frame below.

  • 2
    Create LED matrix

    You'll need 144 LEDs to create the LED matrix, a reference is shown below.

    Gather all the LEDs in tray and use the matrix mould to create your LED matrix.

    Solder one column at a time and then remo it from frame to create the next one. Make sure all the LEDs are working before doing any soldering.

    After soldering each column, bend the long leads to the height of cardboard (use the cardboard). Then solder the matrix together to create something like this,

    Now use single core wire to bridge the remaining connections of the LED matrix.

    Now mix two compound adhesive (epoxy blue) with black fabric color to coat the back of LED matrix. this step is crucial otherwise light will bleed from the back of LEDs and you'll not be able to anything. You can use anything see if you want to cover the back.

    With this, your LED Matrix is finally complete now.

  • 3
    Test your LED matrix

    Before attaching the LED matrix to the spectacle frame test the circuit. I am attching the circuit i used from my fried Abhishek's 8x24 LED matrix video. The circuit is not perfect for LED glasses though and I would prefer to remake if for the next version.

    Now create this circuit on breadboard and test the LED matrix.

    Congratulations if you made it in the first try, I wasn't able to do that :)

View all 4 instructions

Enjoy this project?

Share

Discussions

Ahron Wayne wrote 09/11/2023 at 02:12 point

You're sexy and I know it too. Anyone who would make these is to me.

  Are you sure? yes | no

Similar Projects

Does this project spark your interest?

Become a member to follow this project and never miss any updates