Close
0%
0%

Solar Display Case

Three portable low-power 17 inch monitors stored in a rolling briefcase with five 20 watt solar panels for power anywhere

Similar projects worth following
The Solar Display Case makes a multiple display setup portable, energy efficient, and accessible. Multiple displays help increase productivity and multitasking by giving the user more room to organize their workspace, however, traditional multiple display setups are bulky, energy inefficient, and nowhere near portable. The Solar Display Case solves this issue by mounting three 17 inch low-voltage portable monitors inside of a rolling briefcase with a hinged design for easy storage and transportation. The Solar Display Case gets it's name from the solar panels fixed to the exterior of the case and on the three monitors so it continues to store power regardless of whether it is in use or being transported. The briefcase used for this project also has the ability to roll making it accessible to everyone. Re-purposing old materials and using a clean energy source makes the Solar Display Case a green technology for anyone looking for additional productivity without sacrificing portabil

2021 HACKADAY PRIZE CHALLENGE ONE: RETHINK DISPLAYS

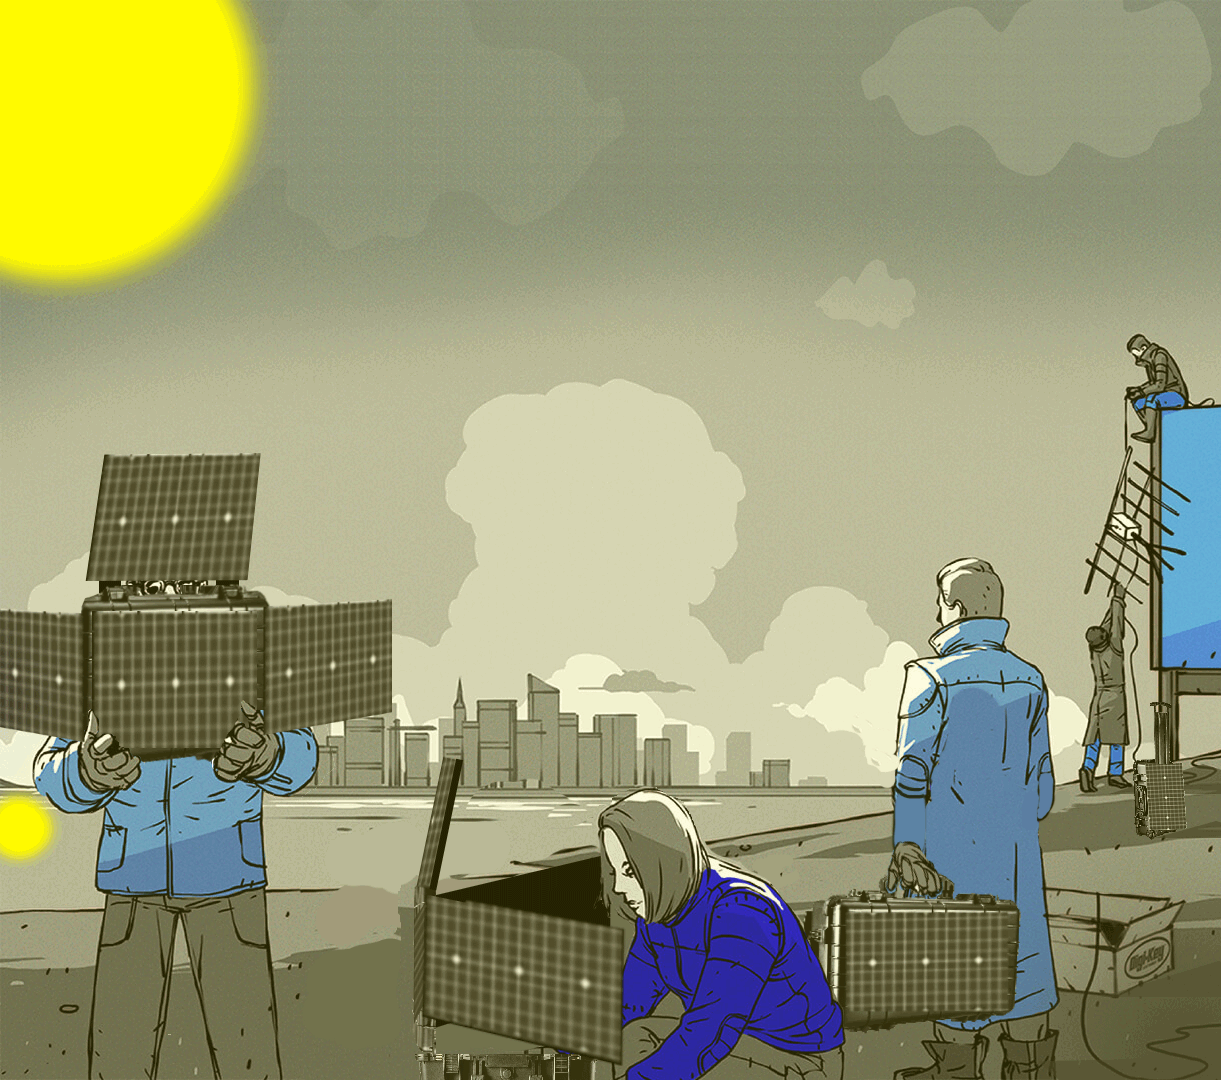
In a situation where we need to rebuild our society, we are going to need a solution for low-power portable displays that can function in situations with limited power using renewable energy, durable enough to be protected from the elements, and in a form factor that is easily transportable. They will need to be intuitive and easy to use, and universal enough to be compatible with whatever devices we are able to scavenge.

Inspiration

This project was inspired by the COVID-19 pandemic and my childhood. When the pandemic first hit, many employers and employees in tech and other industries had to transition to working remotely, and experienced difficulties moving their multi screen setups home due to complex wiring and bulky monitors. Many businesses just decided to provide employees with a stipend to purchase new equipment for their home office to solve this problem. As an IT Director I understand how much a multi-monitor setup impacts productivity, so I sought out a better solution that could save companies money in case another disruptive event such as a pandemic forces employees to relocate their display setups. What I created ended up being so much more than a way to trim the budget, my creation gives the user the freedom to work wherever they please.

Growing up as a child with divorced parents with joint custody was challenging for me for many reasons, one of which was keeping track of what I had at each parent's house and what I had to pack. My parents couldn't afford to have two of everything so I often had to pack up what I needed for the week. Every single time no matter how hard I tried or double checked, I would forget something. This would happen so often that I started keeping everything I owned in specialized bags containing everything I needed for a specific occasion or activity. Every week I would go to the thrift store and search for bags, and one day I came across a briefcase. I purchased it to keep track of my homework when going between houses and pretty soon I started taking it with me everywhere. Naturally I started getting bullied at school for carrying it because it was considered "nerdy" (it was) and "old-fashioned" (I am). The bullying escalated to the point where my briefcase was being dumped out every day and was making it more difficult to function than it was worth so unfortunately, I had to go back to a traditional bag. 

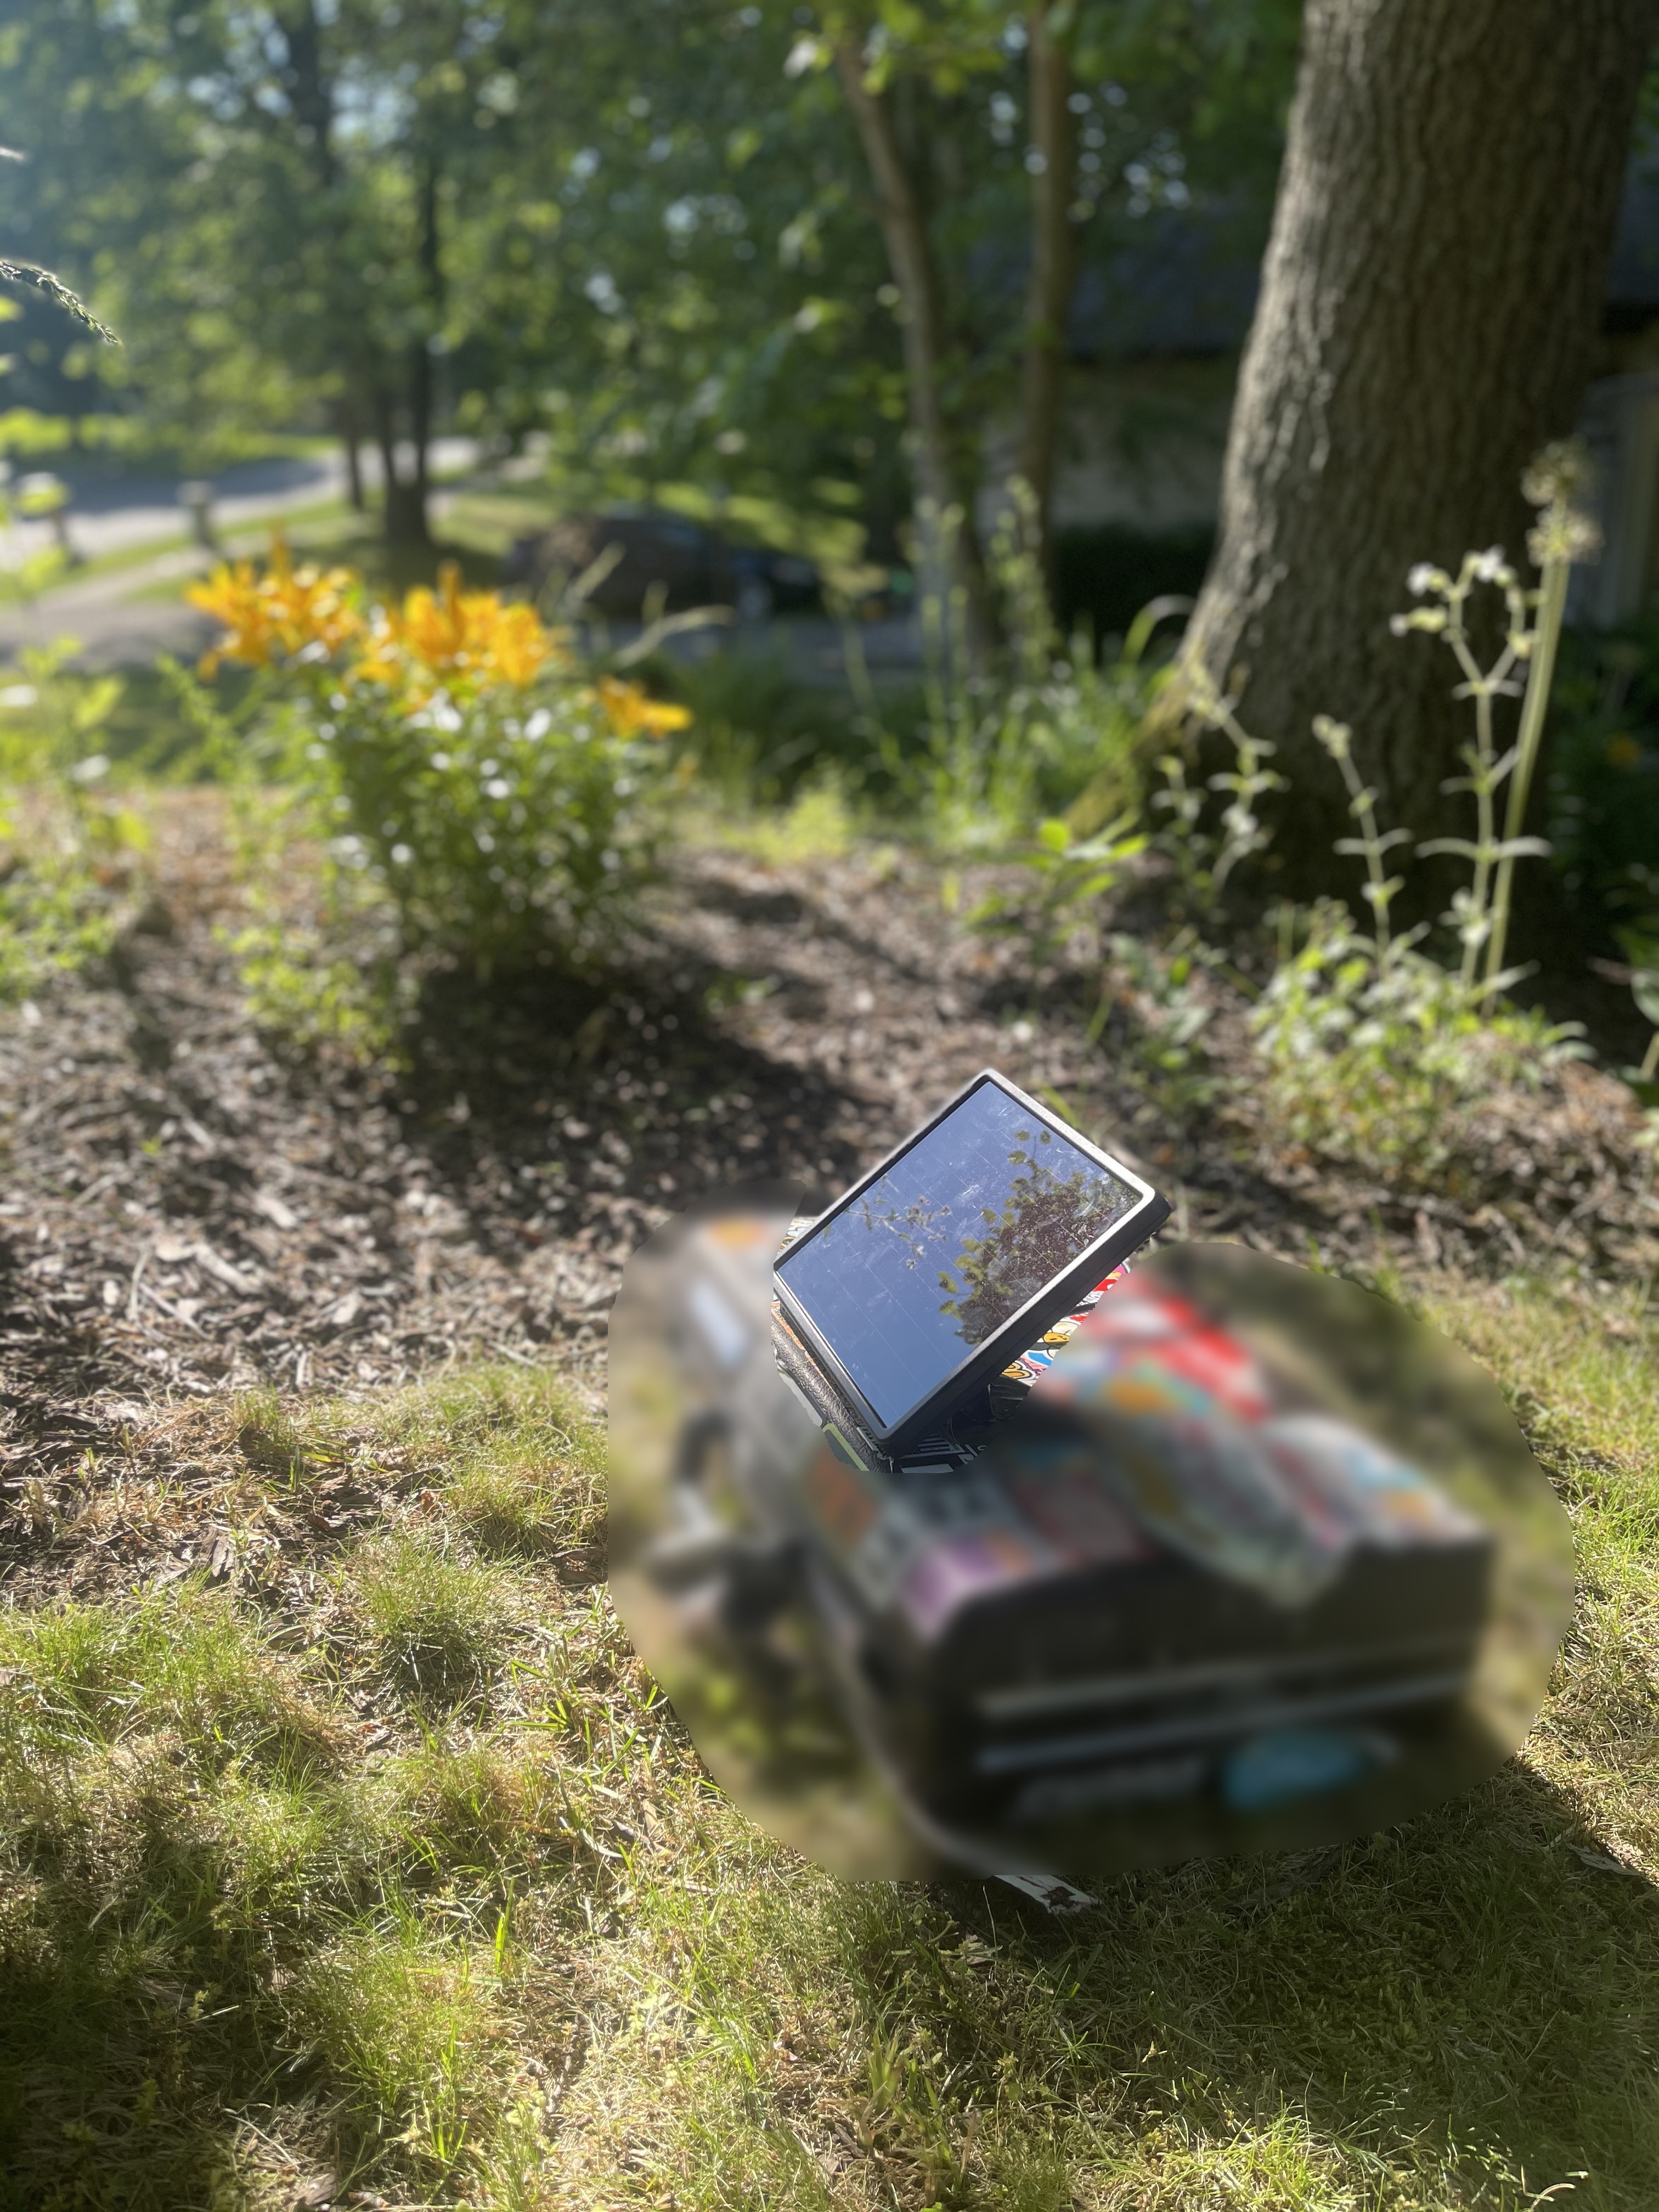
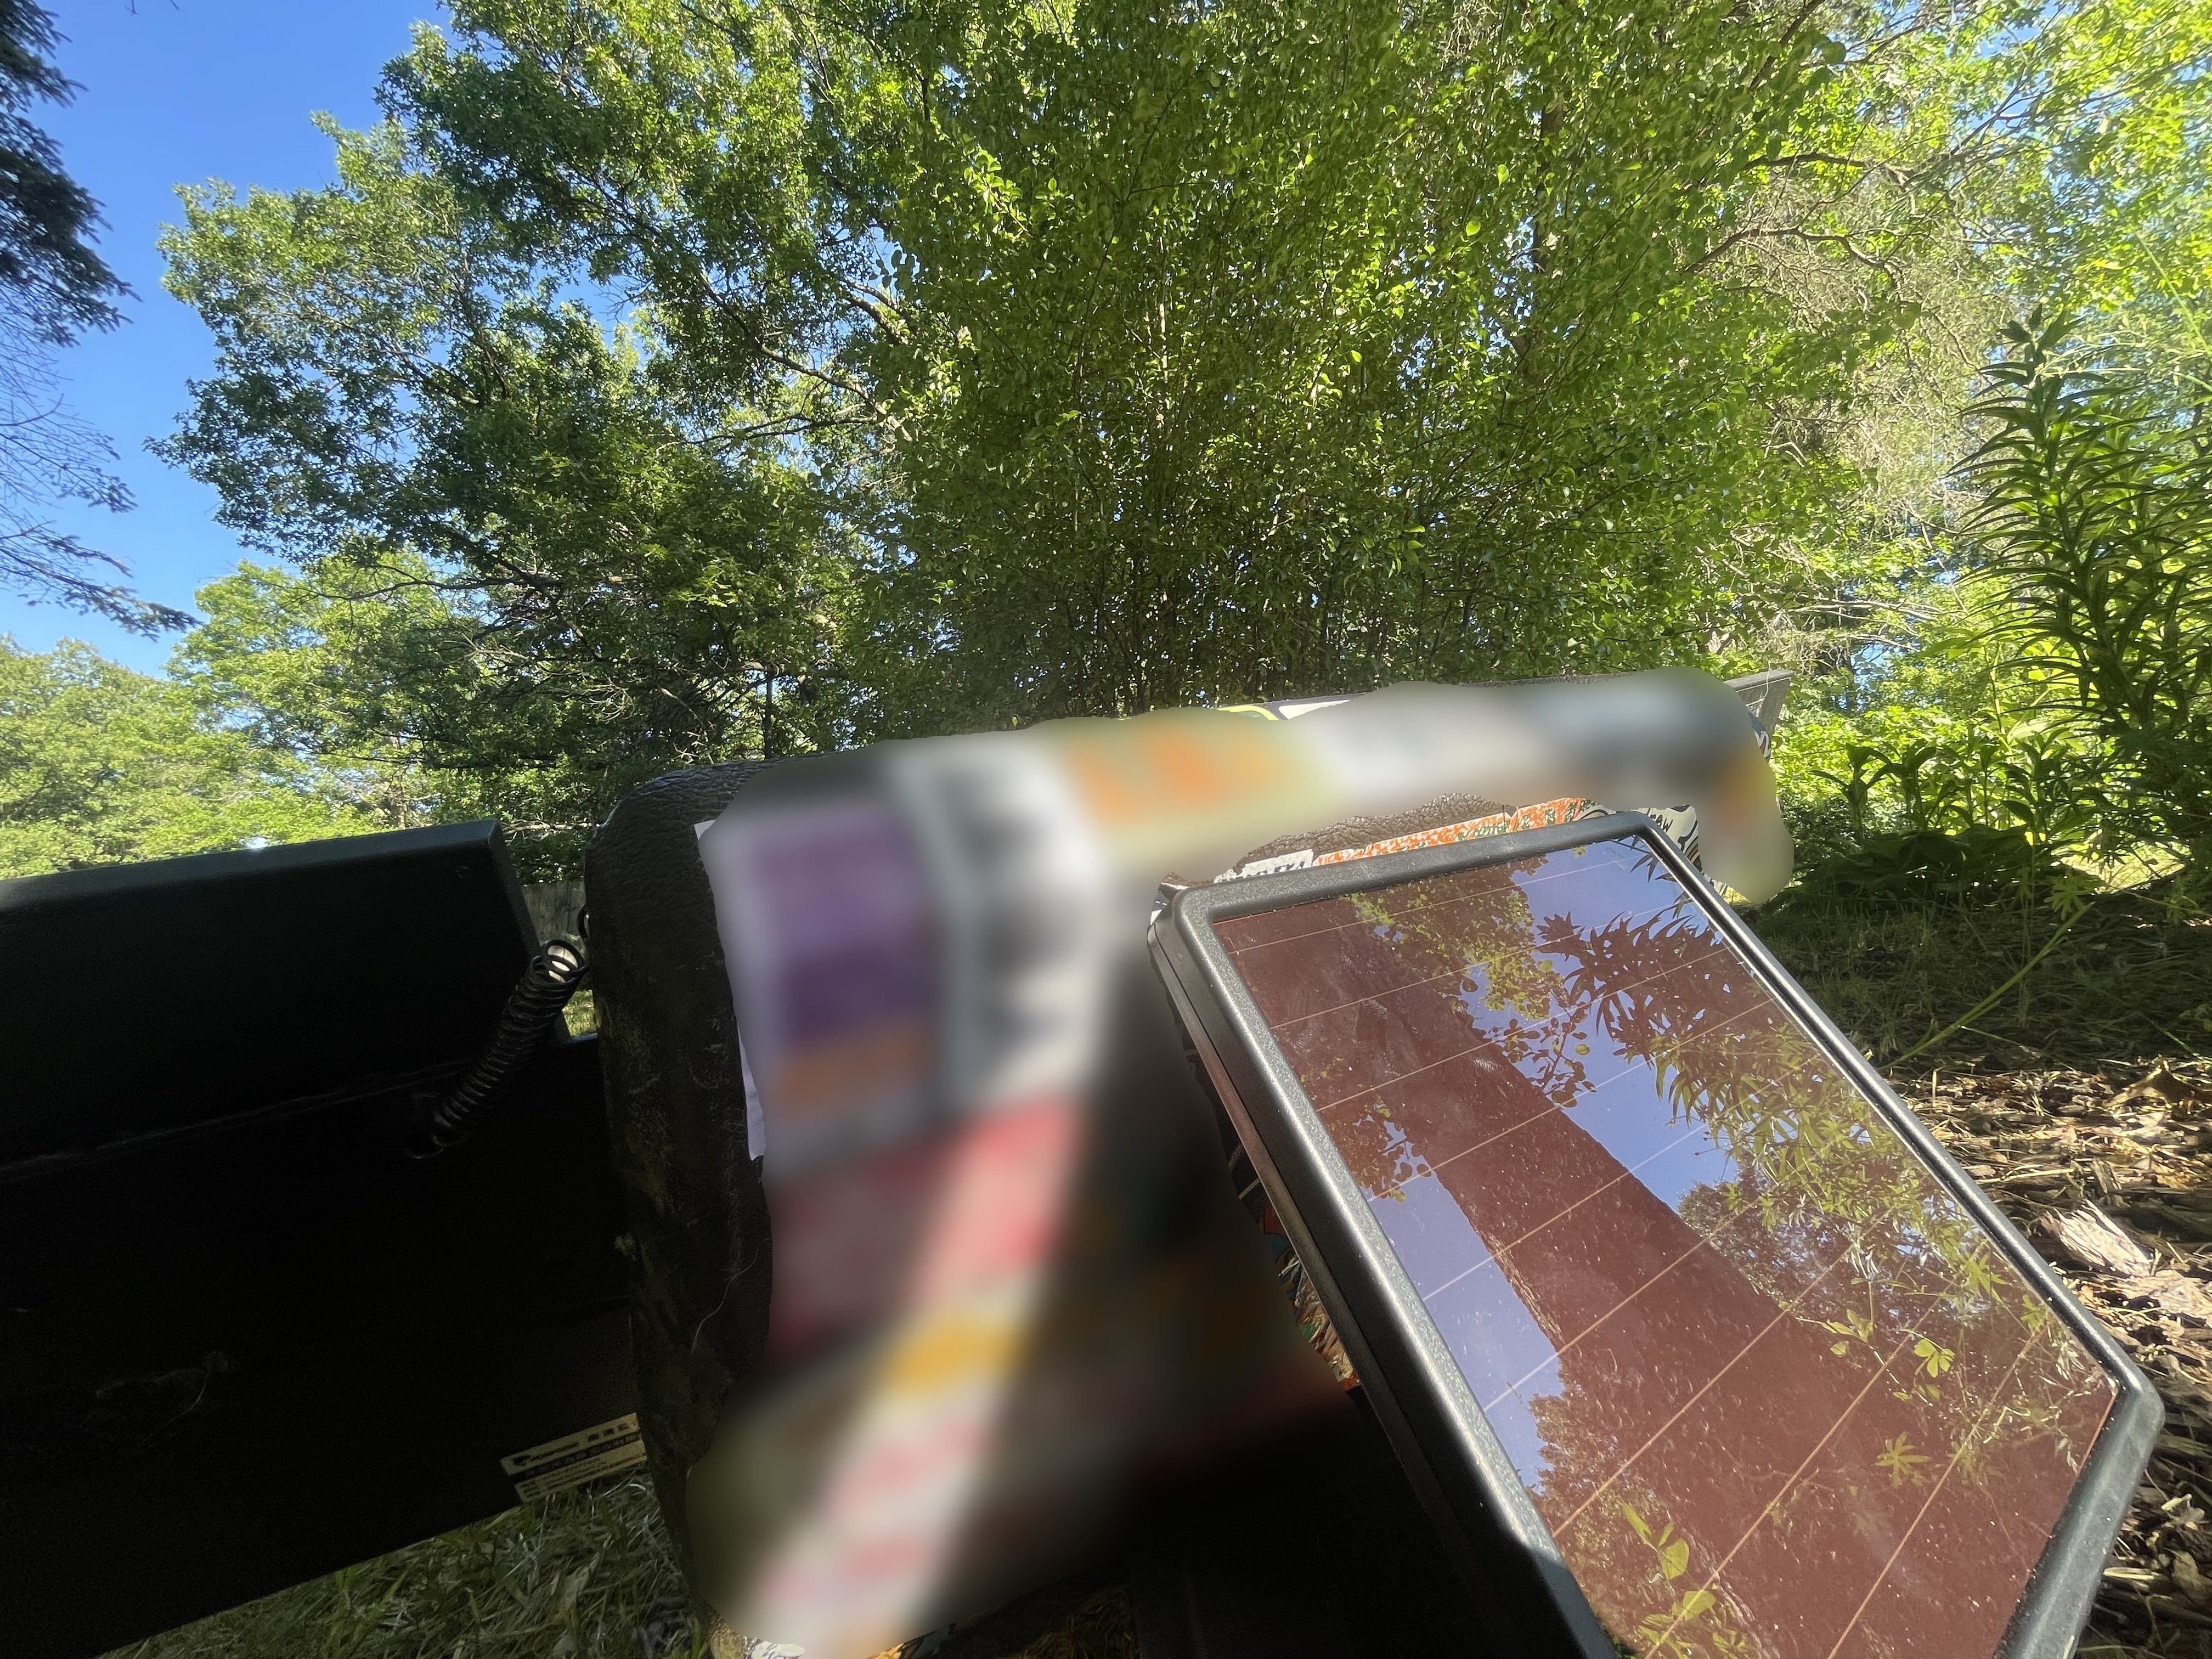
Years later at my first IT job after high school, I decided to break out the old briefcase to carry my tools around and instead of getting tormented, I got compliments. I started taking the case with me everywhere I went for my freelance jobs, putting stickers on it that I would get from gas stations along the way that would act as mementos that represented the adventures my work has taken me on. I still use the case to this very day, and decided to use it at the base for this project since it represented the challenges I have overcome in my life and the triumphs I have made in my career.

Specifics

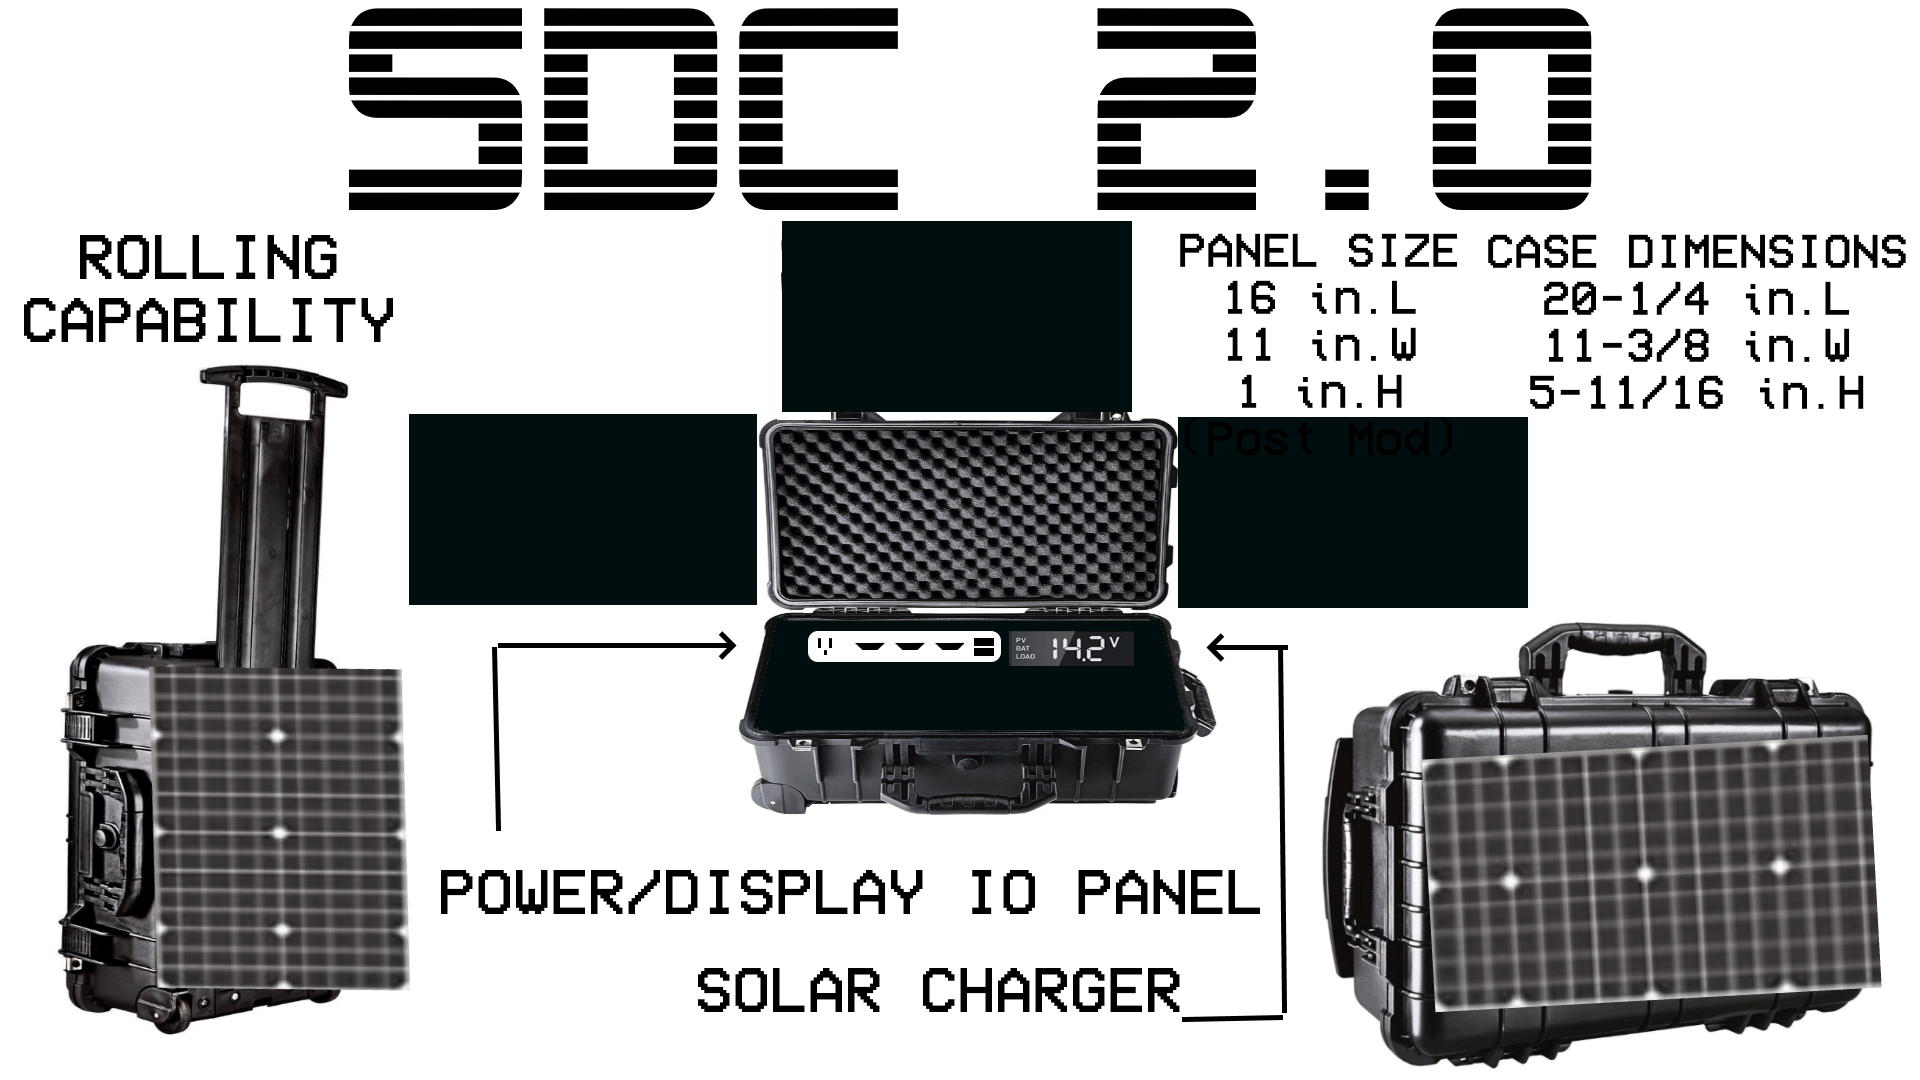
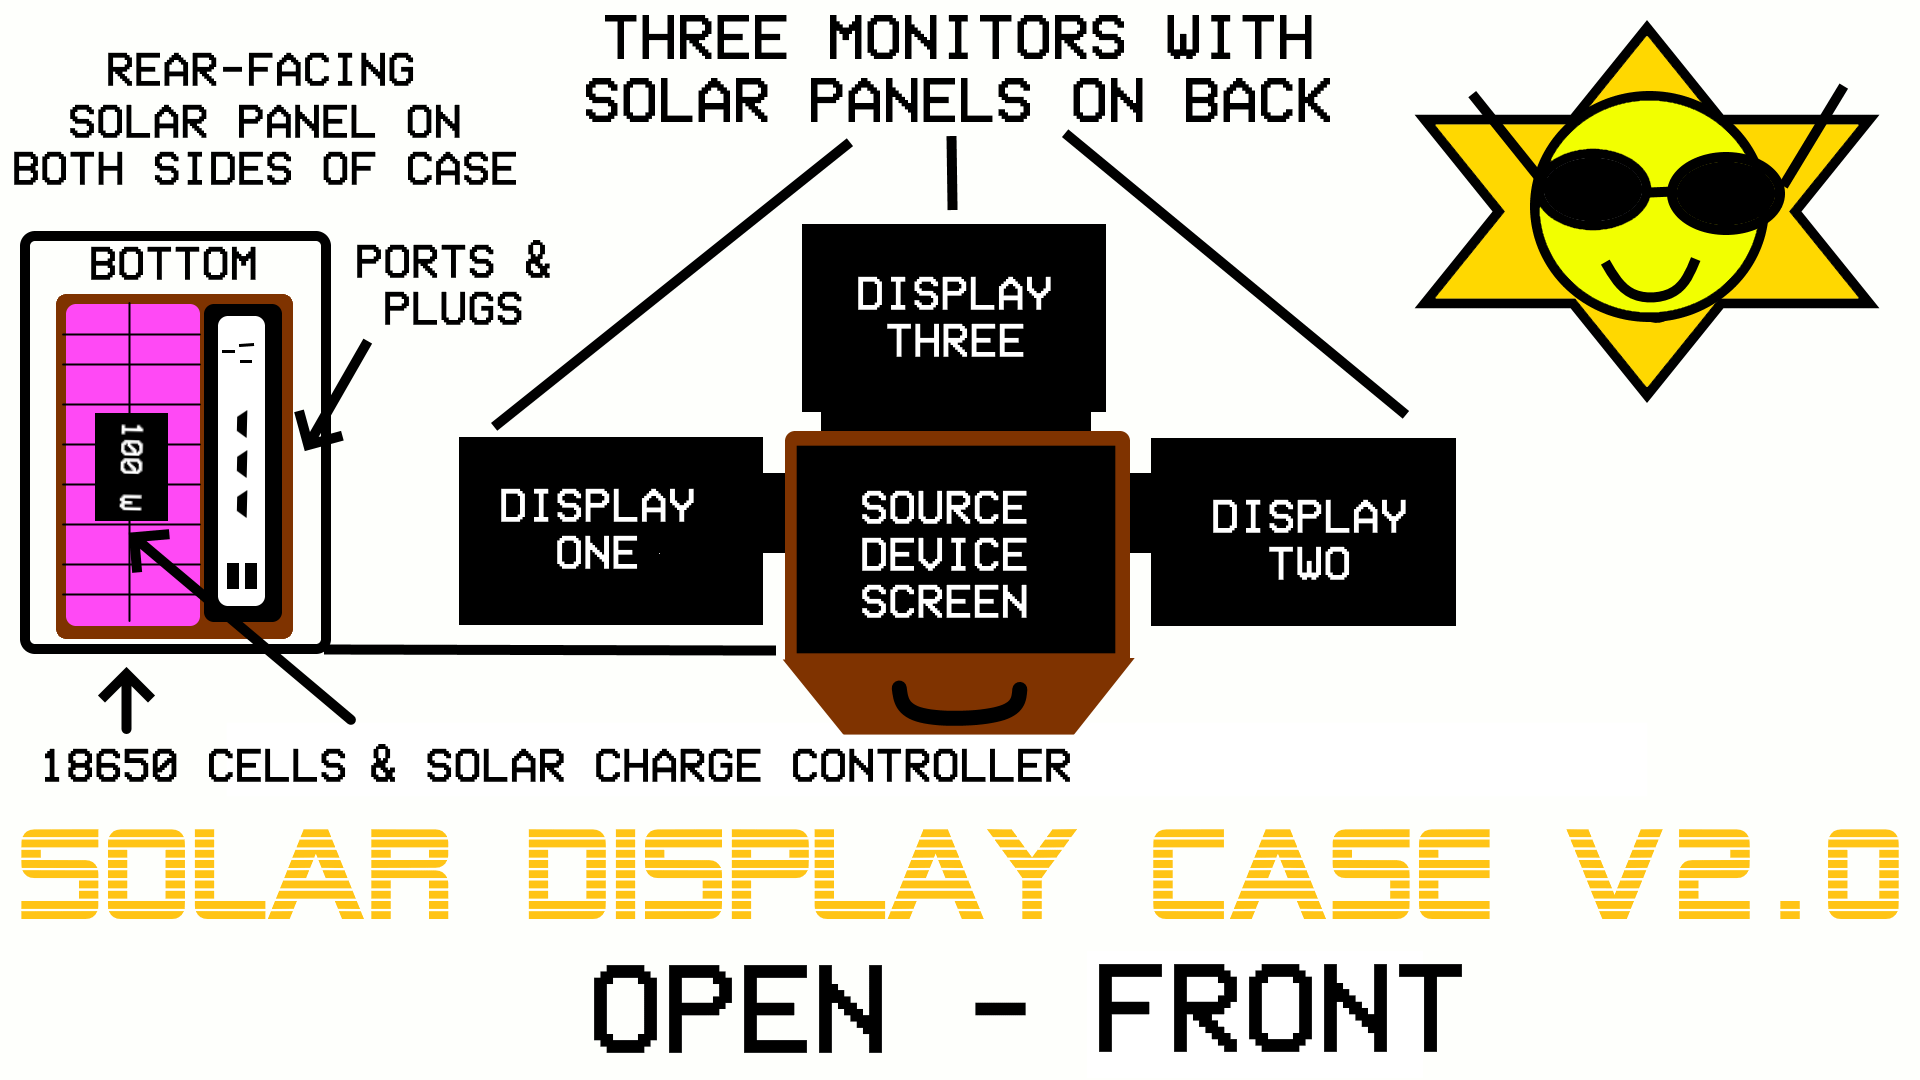
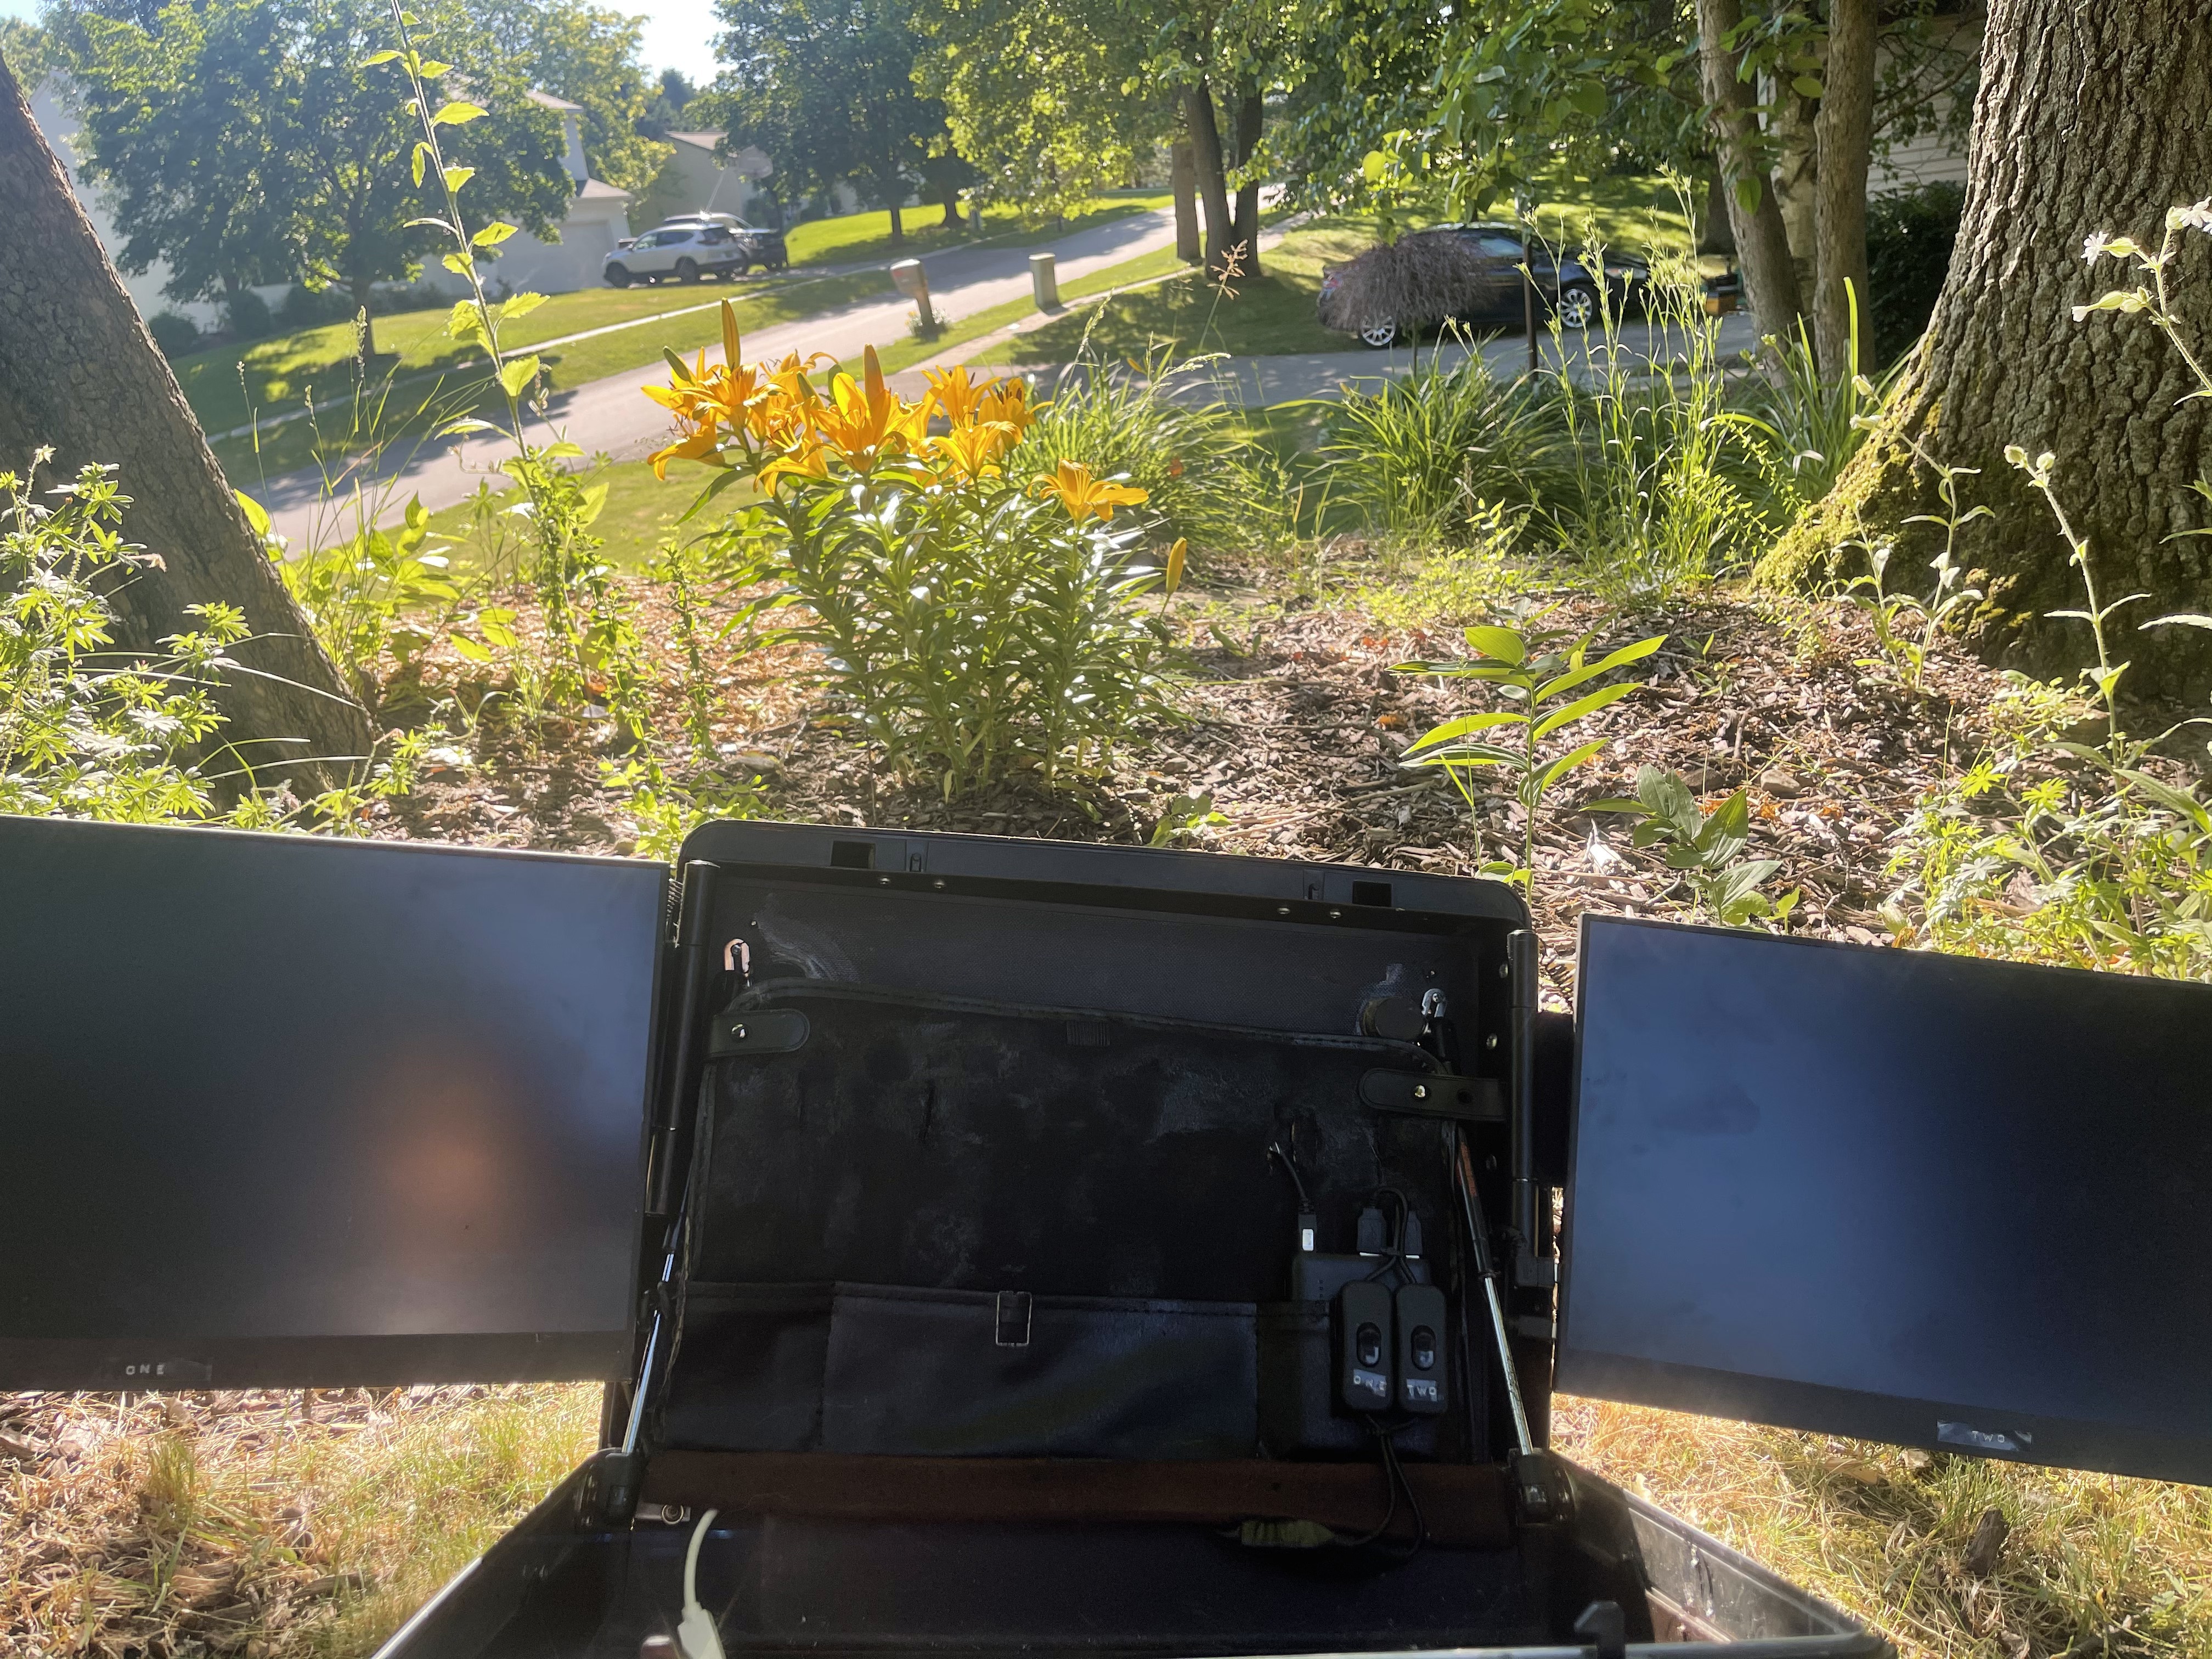
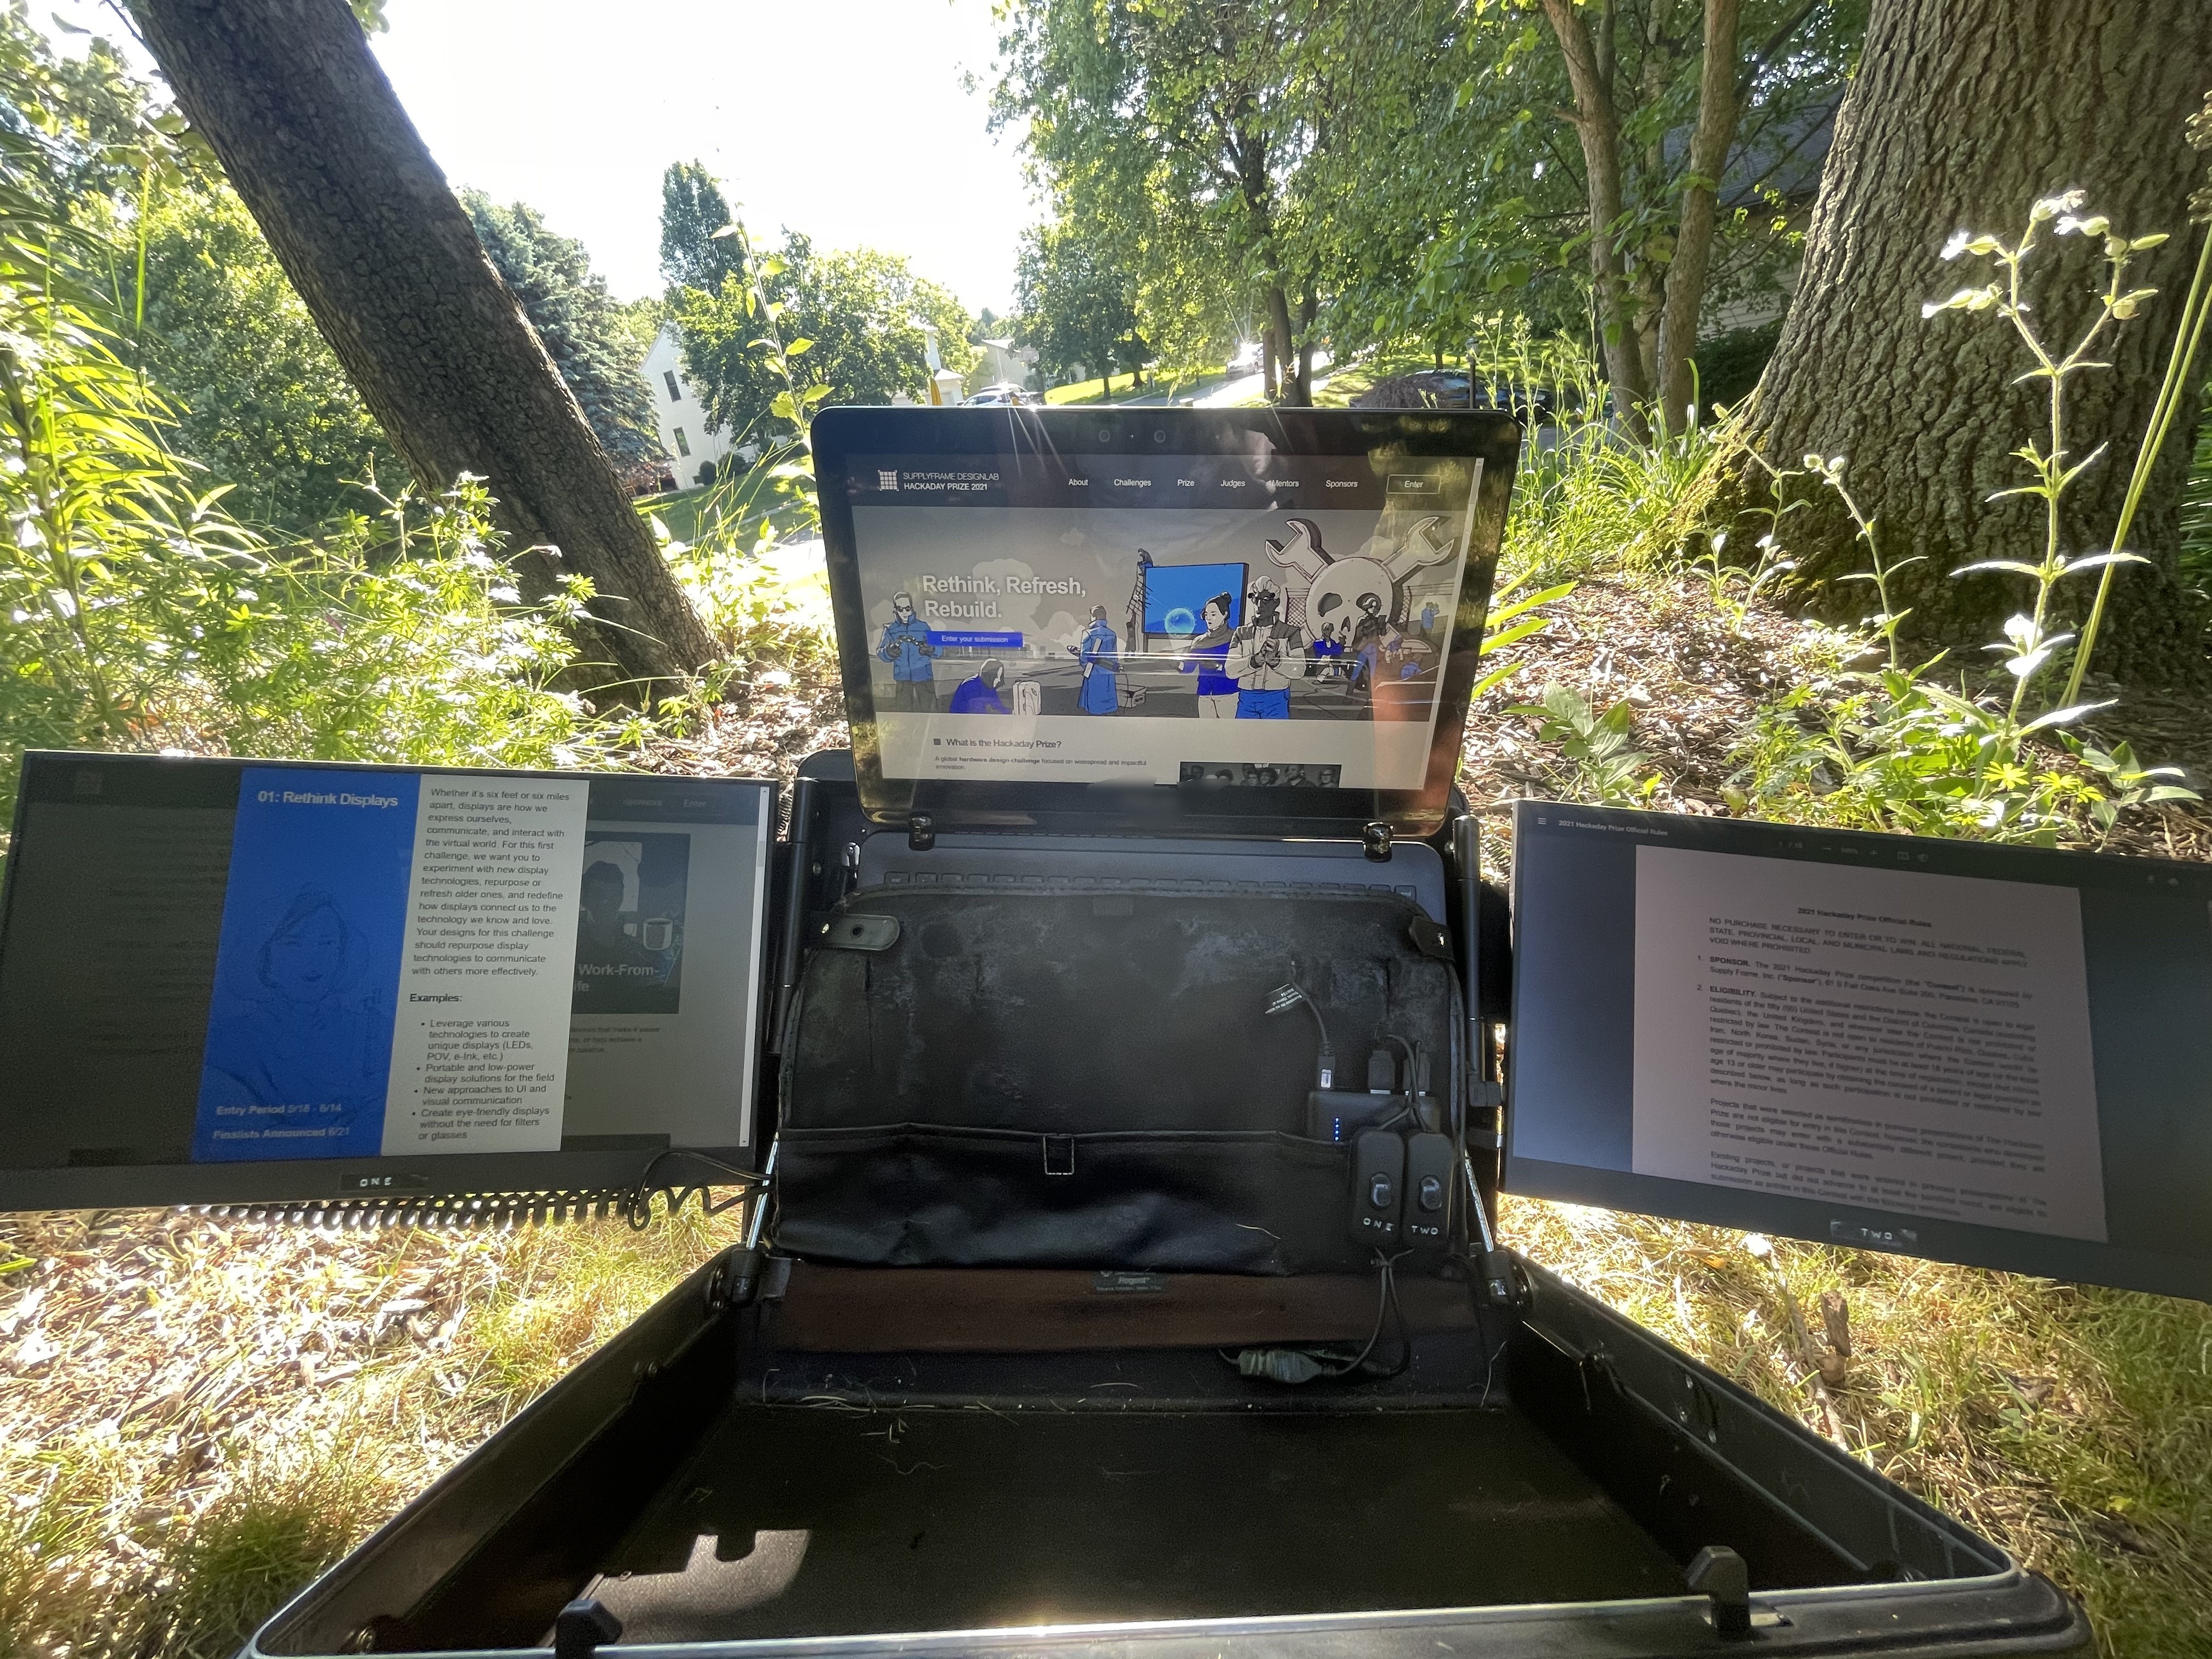
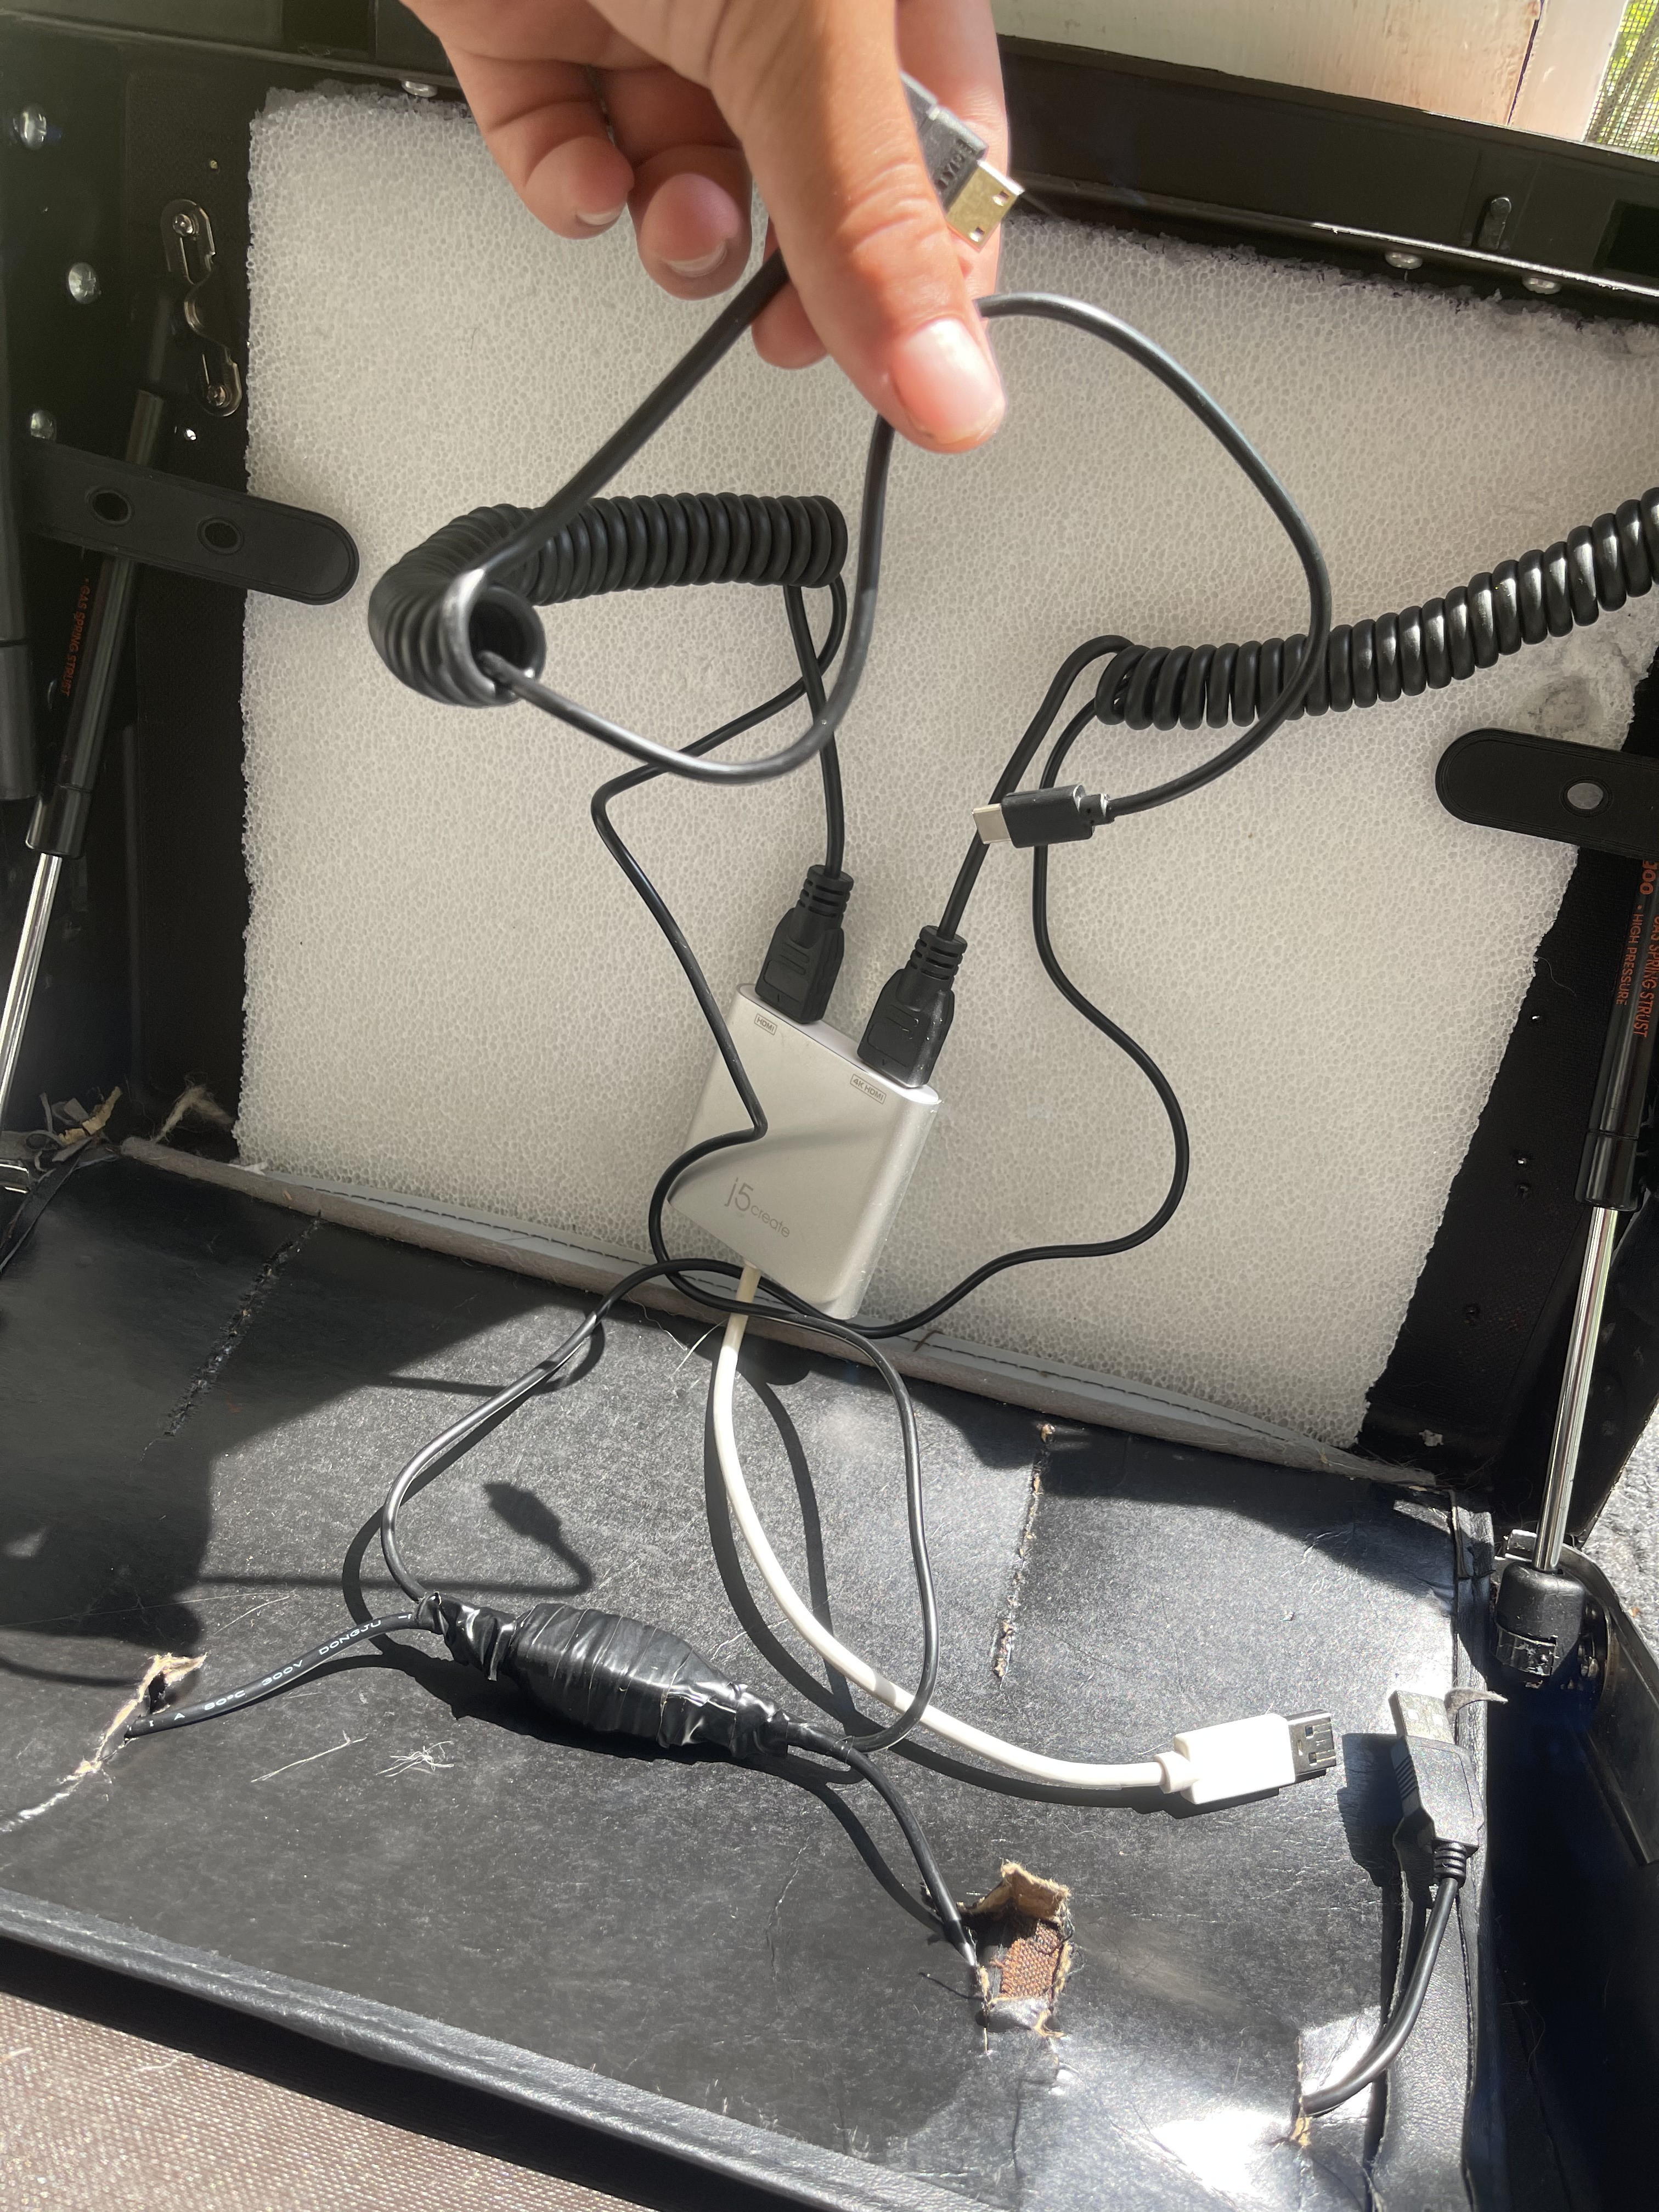
My first prototype of the Solar Display Case consists of:

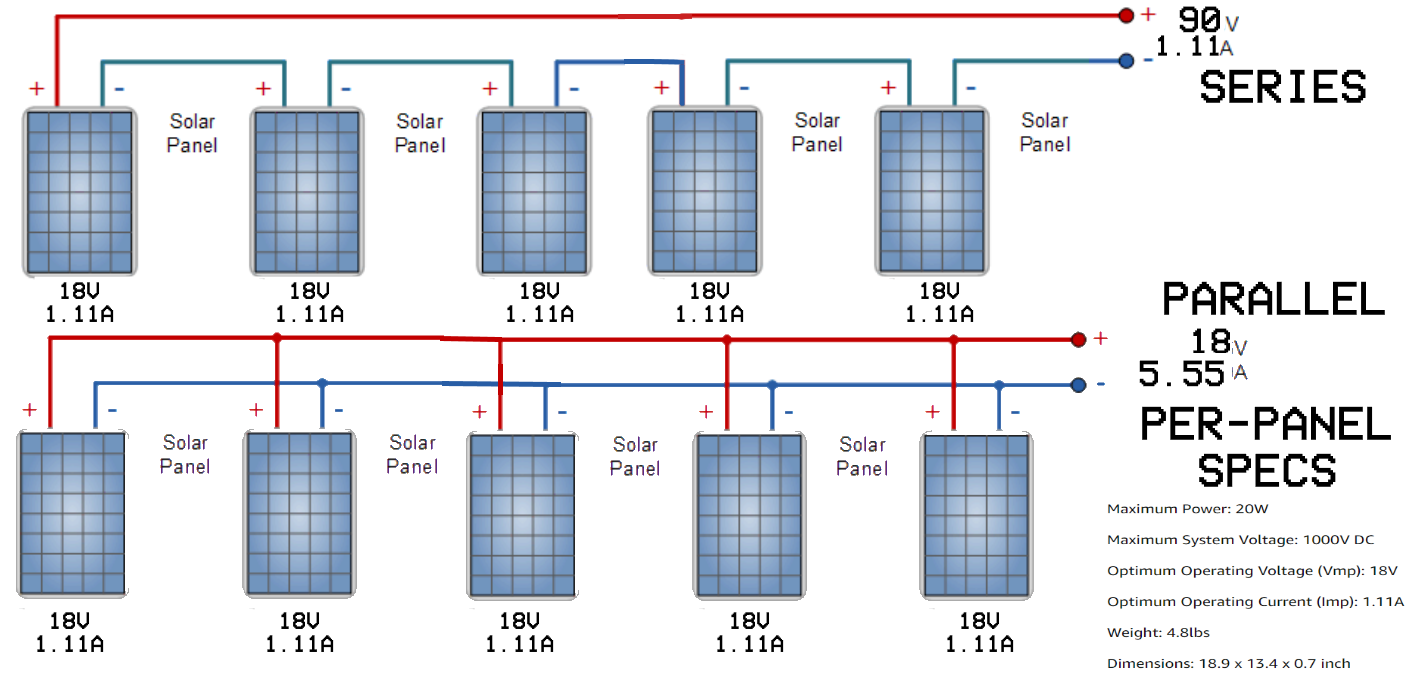
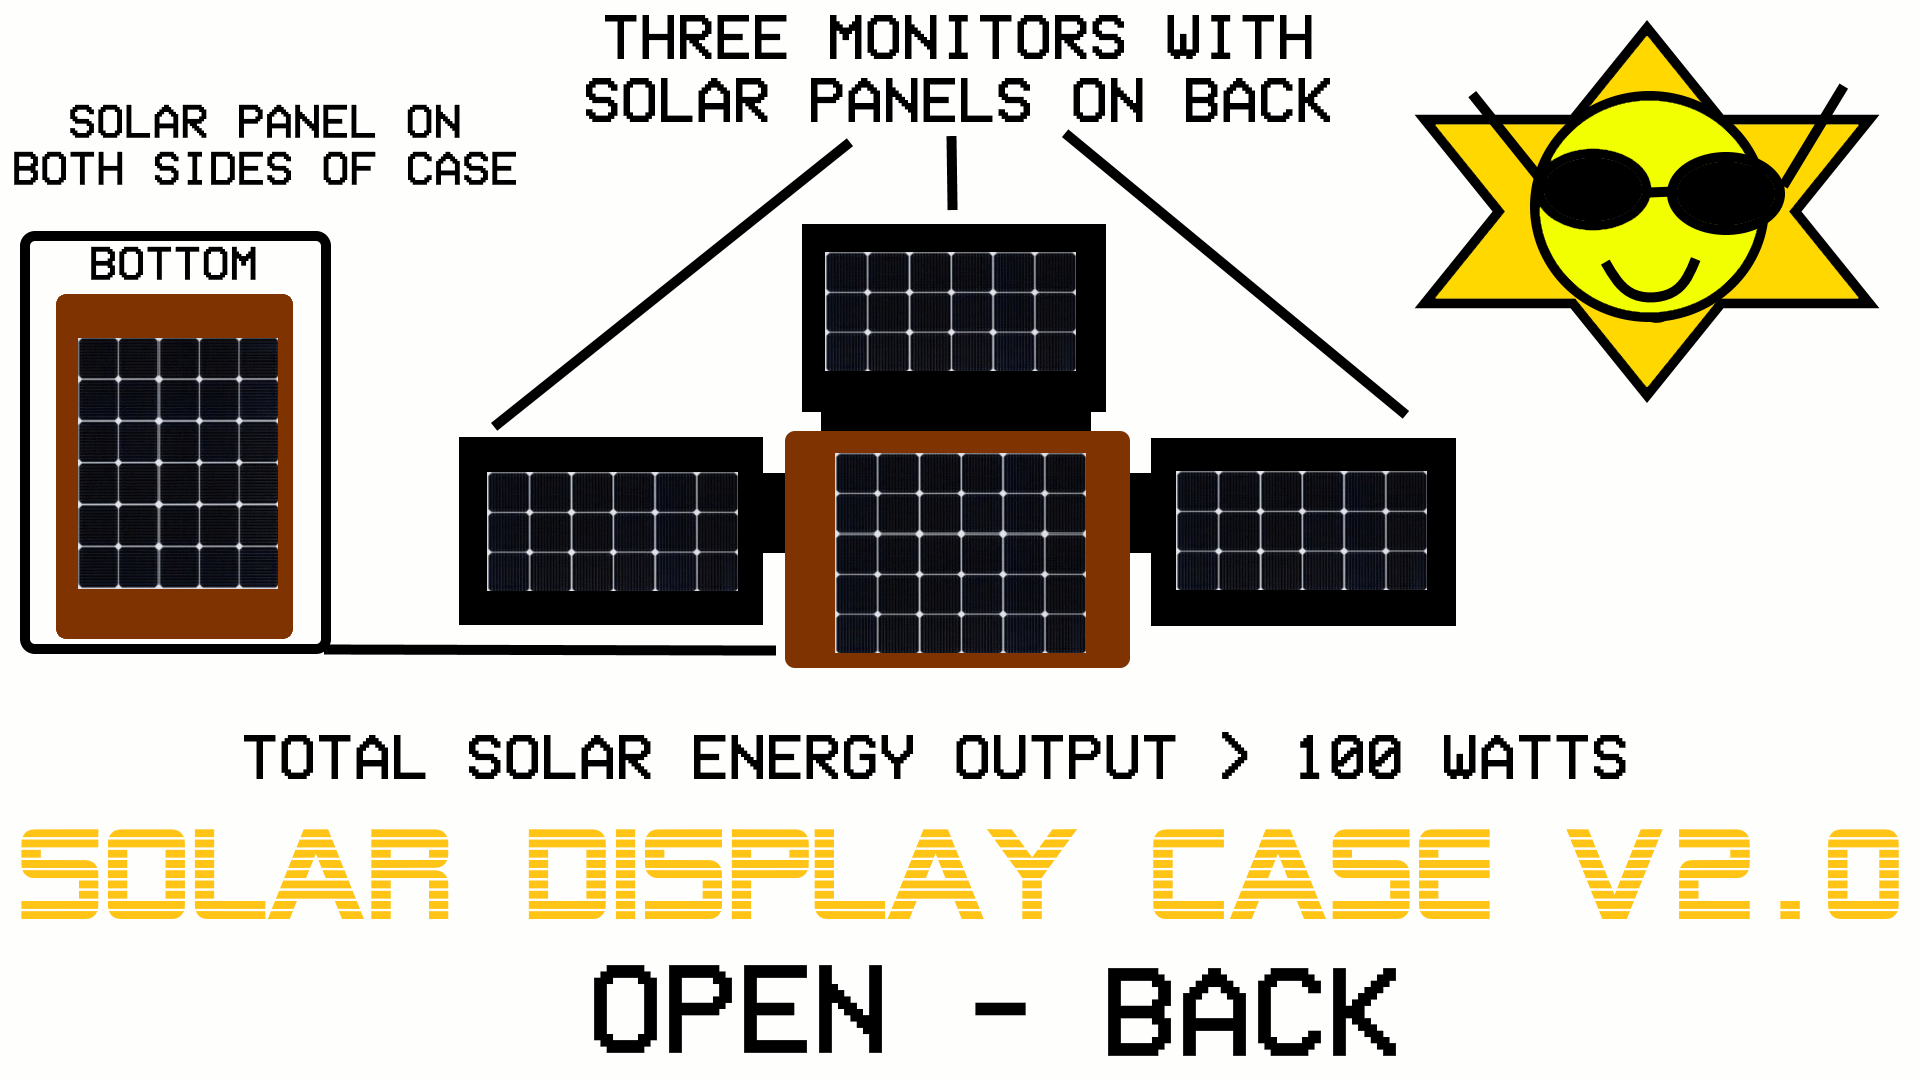
  1. Two 17 inch portable monitors with -
  2. Two on/off switches that control the USB-A to USB-C power cables leading from the monitors to the power bank to give the user more control over power usage. This is useful on cloudy days if the power bank is not recovering power as efficiently. 
  3. A power bank that is also connected to -
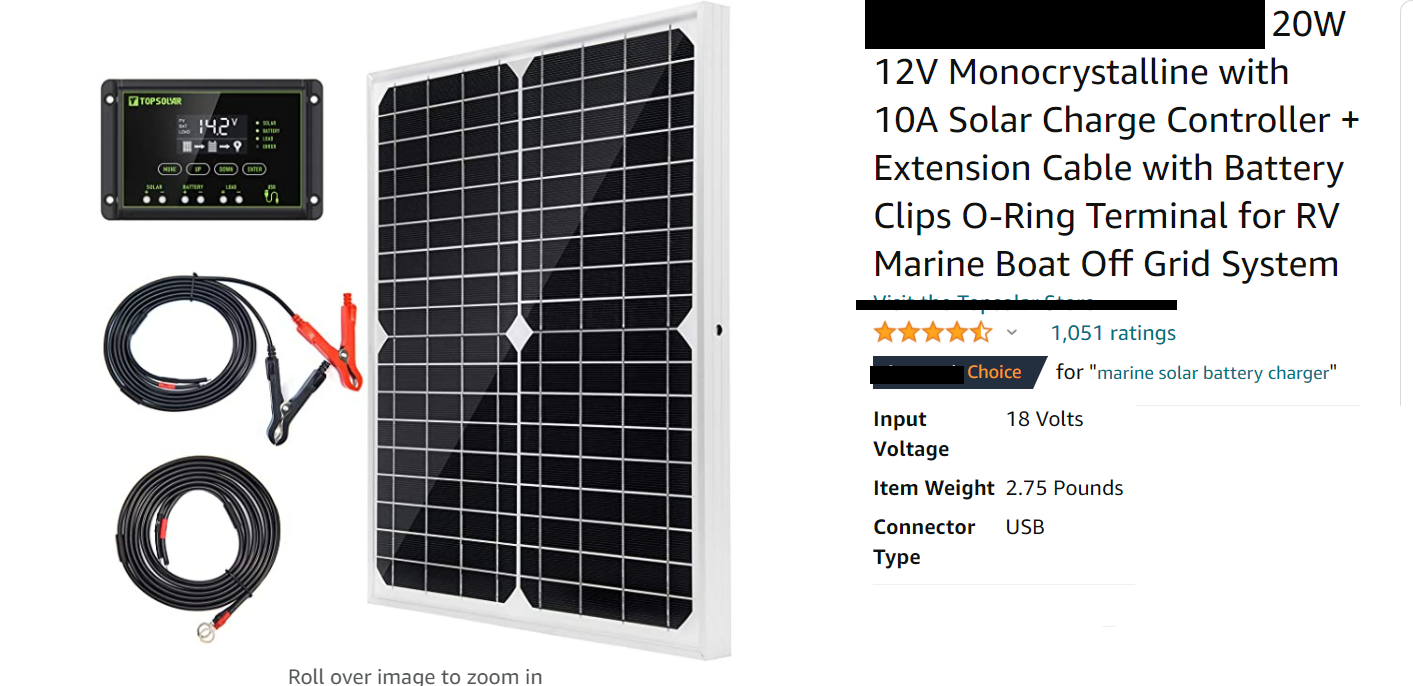
  4. A solar panel on the exterior of the case to allow for charging even when the displays are not in use. 
  5. The screens are mounted on two 12 inch industrial strength hinges so they can easily be folded and stored for transportation or environmental protection. 
  6. The hinges are also spring loaded so the displays will move themselves to the fully extended position once the case is opened. 
  7. The case itself is supported with two gas struts, which prevent the case from closing during use and help make the case easier...
Read more »

hackaday-sdc-use-example.pdn

Use example on the hackaday prize banner. Paint.net file with layers for easy modification.

pdn - 3.23 MB - 06/25/2021 at 23:59

Download

hackaday-sdc-use-example.png

Use example on the hackaday prize banner.

Portable Network Graphics (PNG) - 510.66 kB - 06/25/2021 at 23:59

Preview
Download

SDC-2.0-New-Case.pdn

Schematics and diagram with new case measurements. Paint.net file with layers for easy modification.

pdn - 1.34 MB - 06/25/2021 at 14:29

Download

SDC-2.0-New-Case.png

Schematics and diagram with new case measurements.

Portable Network Graphics (PNG) - 342.94 kB - 06/25/2021 at 14:29

Preview
Download

sdc-schematics-update-front.pdn

Schematics and design for case with front facing view. Paint.net file with layers for easy modification.

pdn - 187.80 kB - 06/22/2021 at 12:33

Download

View all 13 files

  • 1 × v1.0 Components Below are the components used in v1.0
  • 2 × 17 Inch Portable Displays For your viewing pleasure.
  • 1 × Portable Power Bank Stores the power from our sun.
  • 1 × Thrift Store Briefcase The main inspiration and heart and soul of the project. Keeps components protected from the environment, and charged regardless if the screens are in use or in transport.
  • 1 × Solar Panel Captures solar energy for later use.

View all 20 components

  • **Project On Hold**

    Brian Whitsett07/04/2021 at 13:49 0 comments

    This project is being put on hold while I work through challenge two of the Hackaday prize, but mark my words! You haven't seen the last of the Solar Display Case!

  • SDC Use Example

    Brian Whitsett06/26/2021 at 00:01 0 comments

    It seems to fit right in, doesn't it?

  • New Case With Rolling Support

    Brian Whitsett06/25/2021 at 14:41 0 comments

    I have found an answer to the weight issues! In the last log, I was contemplating using a new case to house the components. Since then, I have been scouring online retailers looking for a case that:

    1. Had the right dimensions to fit the three solar panels inside of it, and had enough surface area on the exterior to hold the two on the outside.
    2. Could have enough room left over after storing the monitors and panels to house the 18650 battery cell array, solar charger, and IO panel.
    3. Ideally be weather resistant, at least IP67.
    4. Had a feature that could address the weight issue.
    5. Could be purchased in bulk at a low price to ensure production capability.

    I believe I found the perfect candidate. The Solar Display Case design has evolved to support rolling much like a suitcase. This makes the SDC more accessible to various users who cannot lift as much weight with just their wrist. My favorite part about this new case is that it satisfies all of the above qualities I was searching for, and it can still be used as a briefcase in situations where rolling isn't possible. Now that I have a clearly defined plan, I am going to put together a component list with pricing and start assembling v2.0. More updates to come!

  • Weight Considerations

    Brian Whitsett06/22/2021 at 14:27 0 comments

    One of the obstacles in this project is providing added functionality in a portable package. Weight is an aspect of portability, and with v2.0 we are adding more features, which in turn adds more weight. The increased battery capacity is going to account for most of the weight in the project, coupled with the weight of the displays and solar panels it is going to be very heavy without additional modification. Once I have all of the raw materials, I will have to hack the existing frames and remove as much weight as possible. Constructing a new screen frame for each monitor with the solar panel actually built in is most likely going to be my best bet as far as reducing the physical size and weight. These frames can be 3D printed or crafted from carbon fiber as well. v2.0 might even find itself in an entirely new case, possibly a waterproof one like below or a custom fabrication that uses the solar panels as the case structure itself! I'm exploring all my options!

    Overcoming challenges is always a part in every project, and in life. You can let yourself get frustrated, or you can have fun solving the problems as they come. The latter solution is by far the more productive option, and will lead to a much better experience building your project, and a much better end product.

  • Source Display Connection Update and Front-Facing Schematics

    Brian Whitsett06/22/2021 at 12:31 0 comments

    For now I have decided the most open solution to the source display issue is to wire the displays to three female HDMI ports located in the bottom of the case. I want to keep searching for a one-cable solution but to be safe I want this to be the main design until my research provides a better one. I have also included the standard wall outlet for charging a laptop or powering a device.  This will allow the user to use their own dock or connect other devices with ease. I also am going to use an assortment of 18650 batteries in the bottom of the case connected to the solar charge controller. The location of the solar charge controller is not final, but is just to illustrate it's presence in the project. A panel will be laid over the 18650 batteries with fans on the top to keep them at a safe operating temperature.

  • Connecting The Displays With One Cable

    Brian Whitsett06/21/2021 at 23:05 0 comments

    The addition of a third monitor now renders the HDMI to USB adapter unusable since it only supports two monitors but I look at this as an opportunity to make my project even better by making the hardware even more open. I’m considering options so far that will allow the production of the case to be scaled effectively. I’ll keep everyone updated on my progress!

  • The Third Monitor

    Brian Whitsett06/20/2021 at 12:36 0 comments

    For the third monitor in my project, I am going to use a screen from an old laptop with a bad motherboard to continue illustrating the importance of re-use and green technologies. For the sake of time, I will be ordering a driver board for the screen online, but Arsenijs has a really cool and comprehensive project all about laptop display reuse that you can checkout for making your own driver board and understanding more about the art of bringing new life to any laptop screen. My plan is to have the display be facing the user (obviously) with the solar panel being the rear of the screen assembly facing the sun to provide power to the battery. The driver board for the laptop display will be sandwiched between the two in order to hide the cables. I will likely need to build a frame to hold everything in place. Here are some new design schematics!

  • Solar Panel Planning and Wiring for v2.0

    Brian Whitsett06/19/2021 at 21:25 0 comments

    I found this 20 watt solar panel with dimensions that will fit perfectly inside and outside of the case:

    This wiring diagram that I made based on examples from alternative-energy-tutorials.com (link) shows how to increase the total wattage of solar output by wiring the panels together in parallel or series. 

    Basically by changing how I wire the panels together, I can control the voltage and amperage of the solar output which will increase the overall wattage too. My current portable battery is only rated for 5 volts and 2 amps of input so I will need to change my power source. This is a good opportunity to increase the battery capacity of the system which will increase the amount of time it can be used, and also the power delivery options available to me. With this change I have decided to commit to configuring the system to allow charging of a laptop as well. Stay tuned for more updates!

  • PLANS FOR v2.0

    Brian Whitsett06/18/2021 at 21:28 0 comments

    I have the base schematics for the second version completed, upon testing the prototype I found that the single solar panel is not sufficient for keeping the monitors charged. v2.0 Strives for 100 watts of solar energy output by affixing solar panels to the backs of all of the monitors (including an additional third monitor that will be in the second version) and to both sides of the briefcase itself. This should be more than enough power to keep the case operational much longer, and maybe even enough power to provide a charge to a small laptop as well. Enough talk! It's time to get to work.

  • FINISHED! For Now...

    Brian Whitsett06/14/2021 at 15:03 0 comments

    PHEW! Just in time, I was able to pull the project together and make something that could really impact the way that people work. The finished product is even more impressive then I could've hoped for. I experimented with different source device configurations and found a whole new level of flexibility within my project. Through my experimentation, I realized (and later confirmed with testing) that you can expand the device to run up to three ADDITIONAL monitors for a total of four displays in a portable form factor with minimal changes so long as you have the hardware available. Enjoy the beautiful pictures below!


View all 13 project logs

  • 1
    Wiring Instructions

    After mounting the monitors and hinges in the desired location (which will vary on your personal preference and case), the next step is wiring. Wiring is relatively simple, but wiring in a manner that is neat and organized is difficult.

  • 2
    Planning

    The first step to wiring this project is planning. Plan where your monitors and source devices are located and measure the length of cable needed to make the runs. Leave a little extra to reduce strain on the cables and to account to discrepancies in measurement. Be sure to take note of any obstacles in the way of the cable run, this includes the hinges or the supports used in the build or in some cases, the case itself.

  • 3
    Choosing Your Materials

    The next step is choosing your cables. Some important questions to consider is if you need straight or coiled cable, what connectors you need, if you need any converters or switches for your displays or source(s), what type of metal is used for the connectors and wires etc. I decided to use straight cables for power and a coiled display cable. I then ran the power cable through the middle or the coiled display cable to keep the wiring neat. At this low of voltage, I am not worried about the power interfering with the display cable, but for higher voltage applications that is an issue to consider as well and may require the use of a conduit. I also decided to use a dual HDMI to USB converter to make the design as universal as possible since not all laptops have two HDMI ports but most will have at least one USB port.

View all 4 instructions

Enjoy this project?

Share

Discussions

Brian Whitsett wrote 06/22/2021 at 12:42 point

Constructive criticism and feedback are welcome and appreciated! Revising the first draft is part of the design process and different perspectives bring unique and meaningful changes to the final product.

  Are you sure? yes | no

Similar Projects

Does this project spark your interest?

Become a member to follow this project and never miss any updates