 Jacob Daniels
Video Tutorial
The Plan
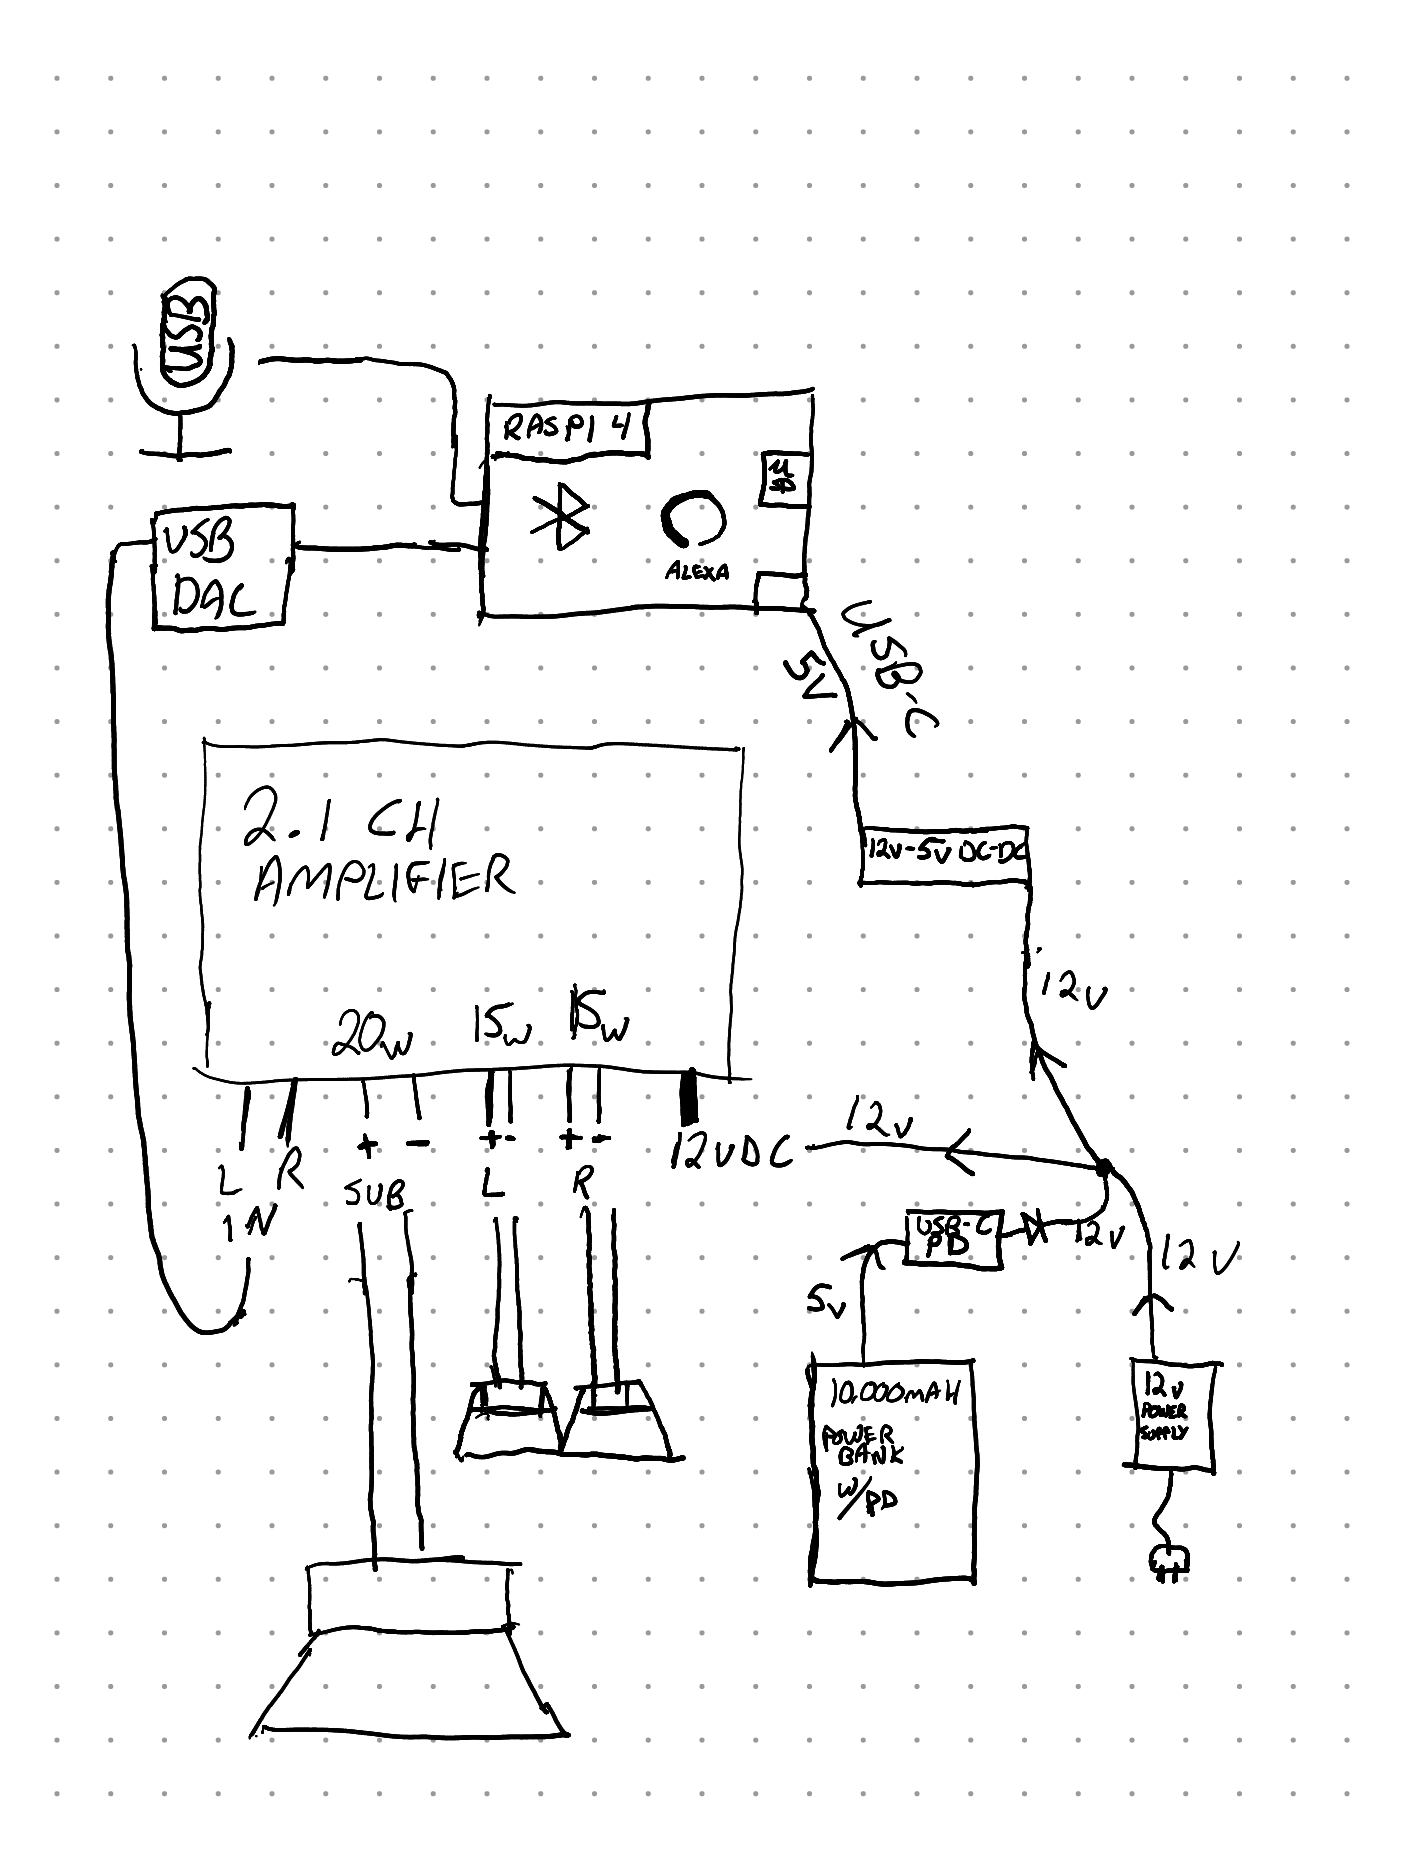
I planned out this build several times with different equipment each time. I came to the best combination of components that maximizes the available space, and the performance of the audio system and smart features.
The diagram I've drawn will hopefully help you understand how all of these components interact.
- The speakers will be driven by the amplifier
- The audio input will come from the Raspberry Pi via the USB DAC
- The voice control will come into the Raspberry Pi via the USB Microphone
- The Raspberry Pi itself will driven by Alexa and Bluetooth
- The power system will feature two options for either plug-in or portable operation
- The Power Supply will provide 12V
- The Powerbank which will have its 5V output converted to 12V via the USB-C Power Delivery board
- A diode will ensure the current flows the right way given the two 12V sources
- The amp will receive 12V directly
- The Raspberry Pi will receive 5V via the 12V-5V USB-C stepdown converter
Out With The Old
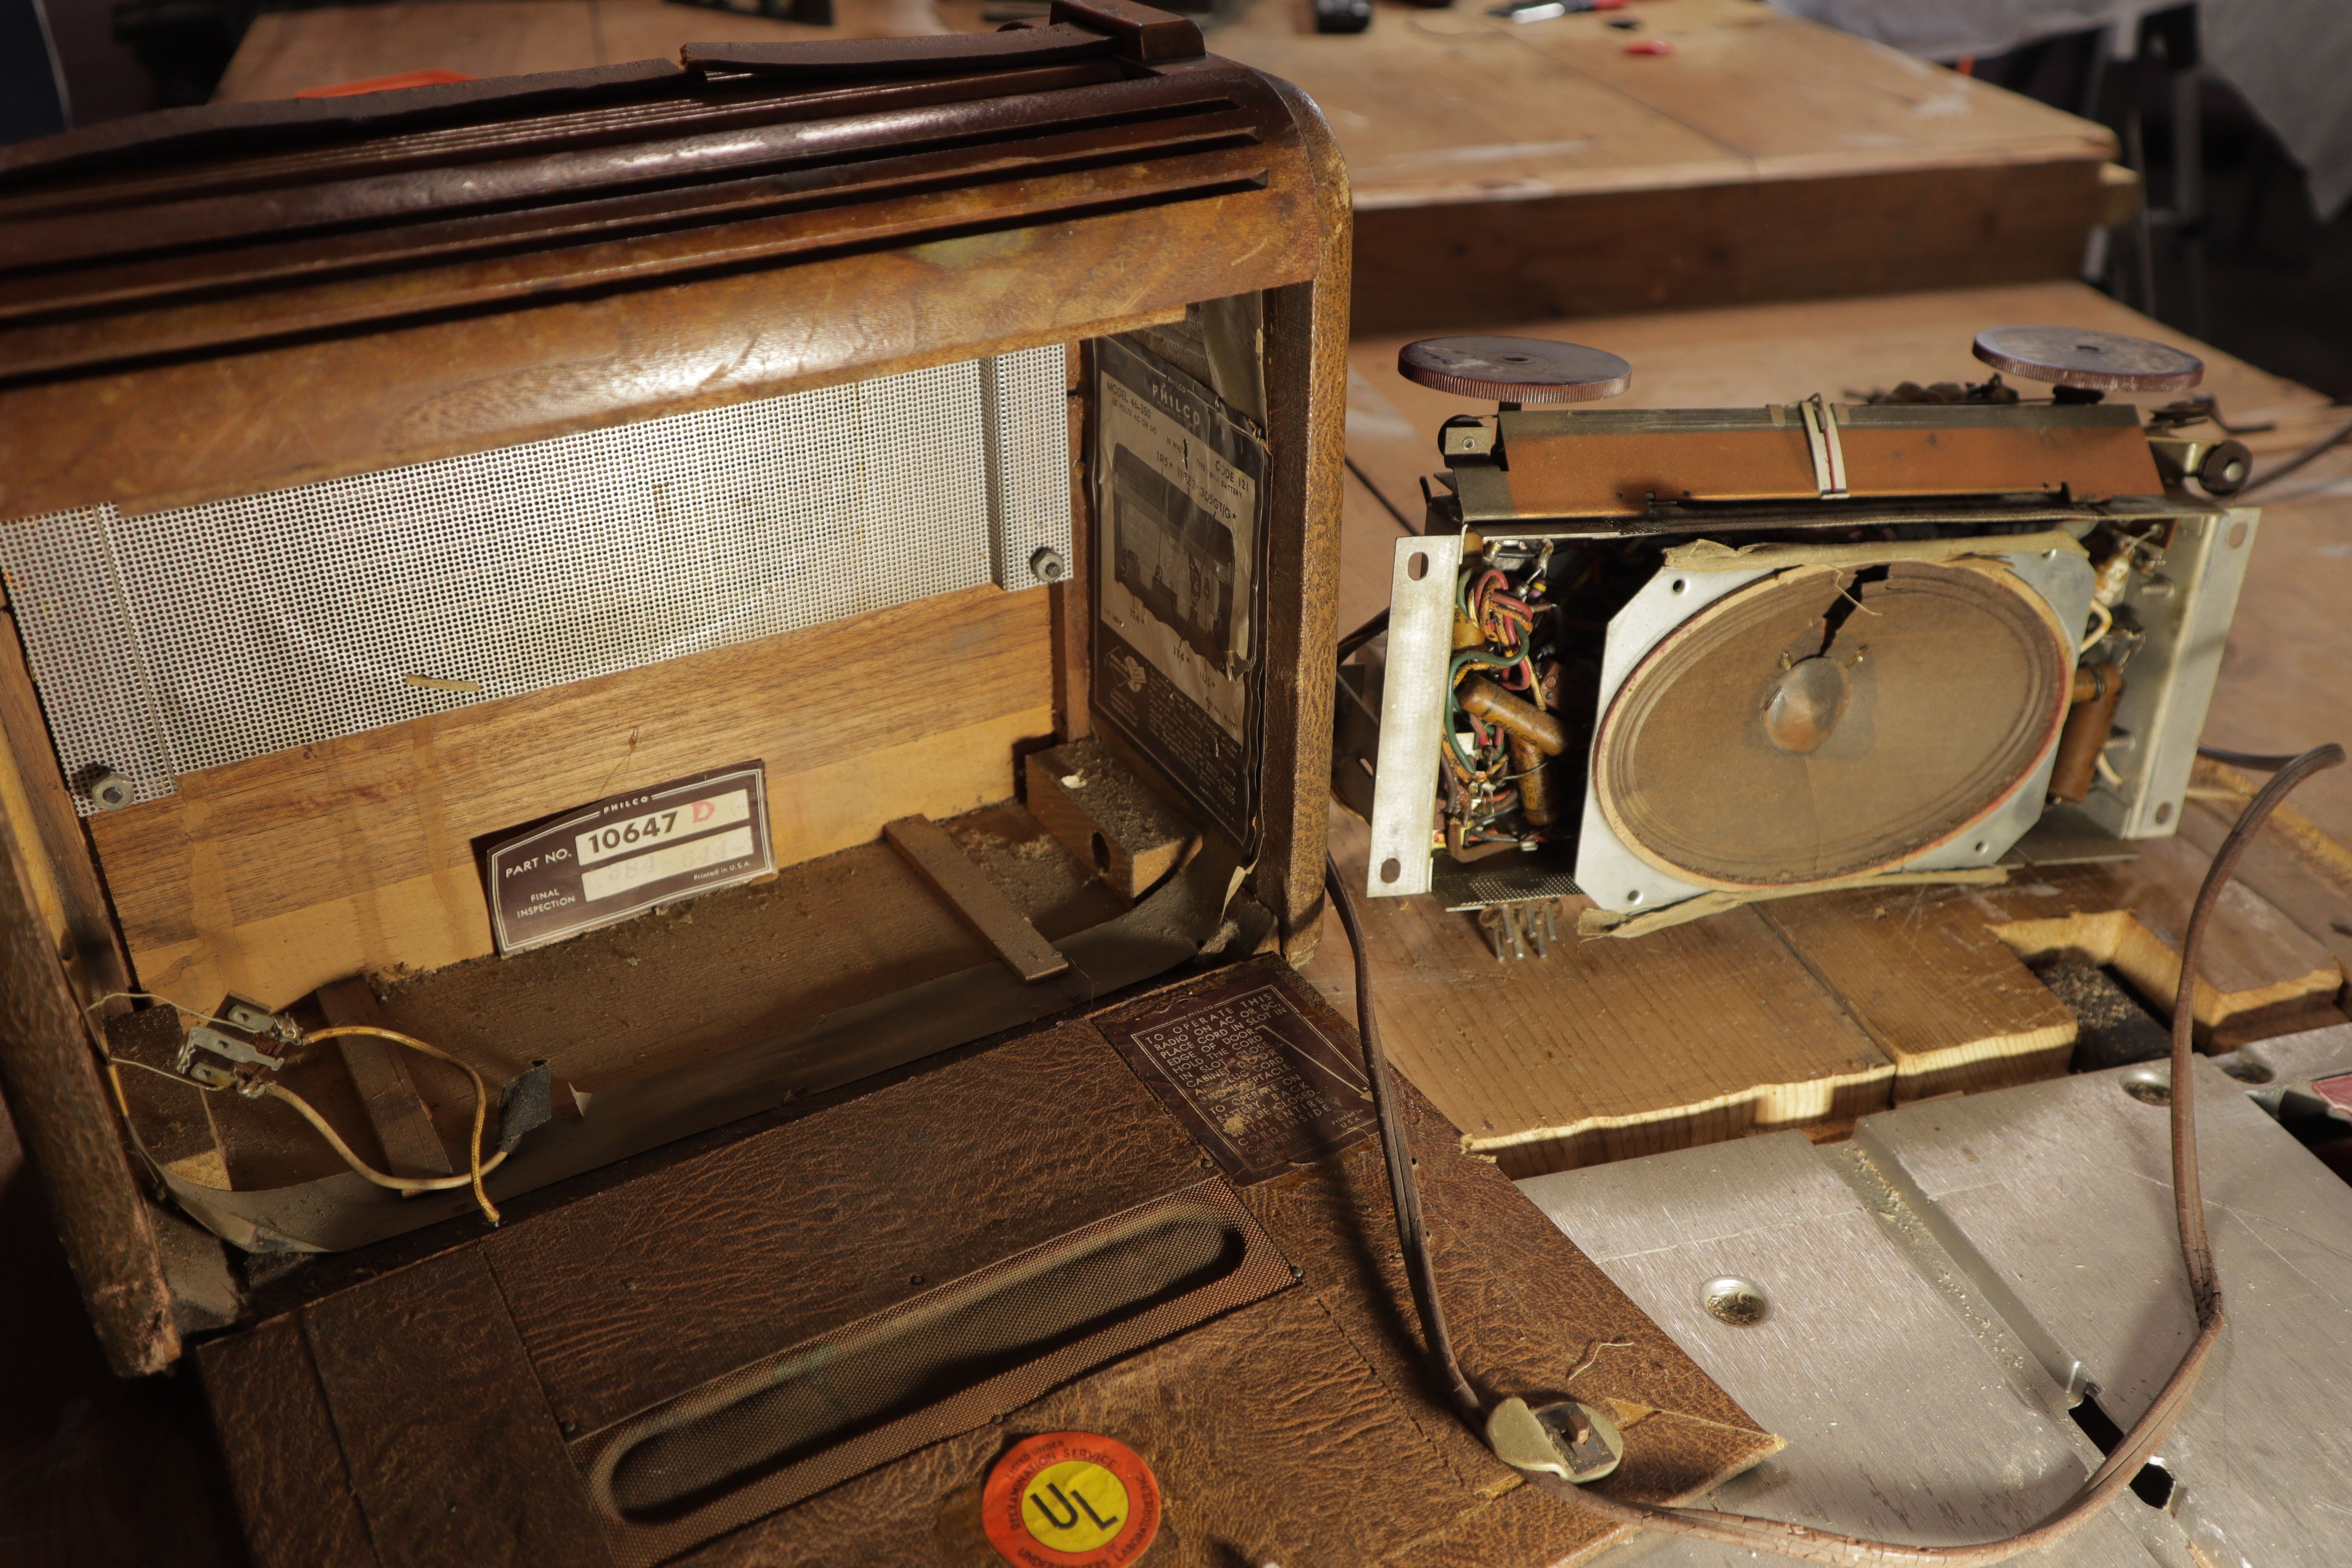

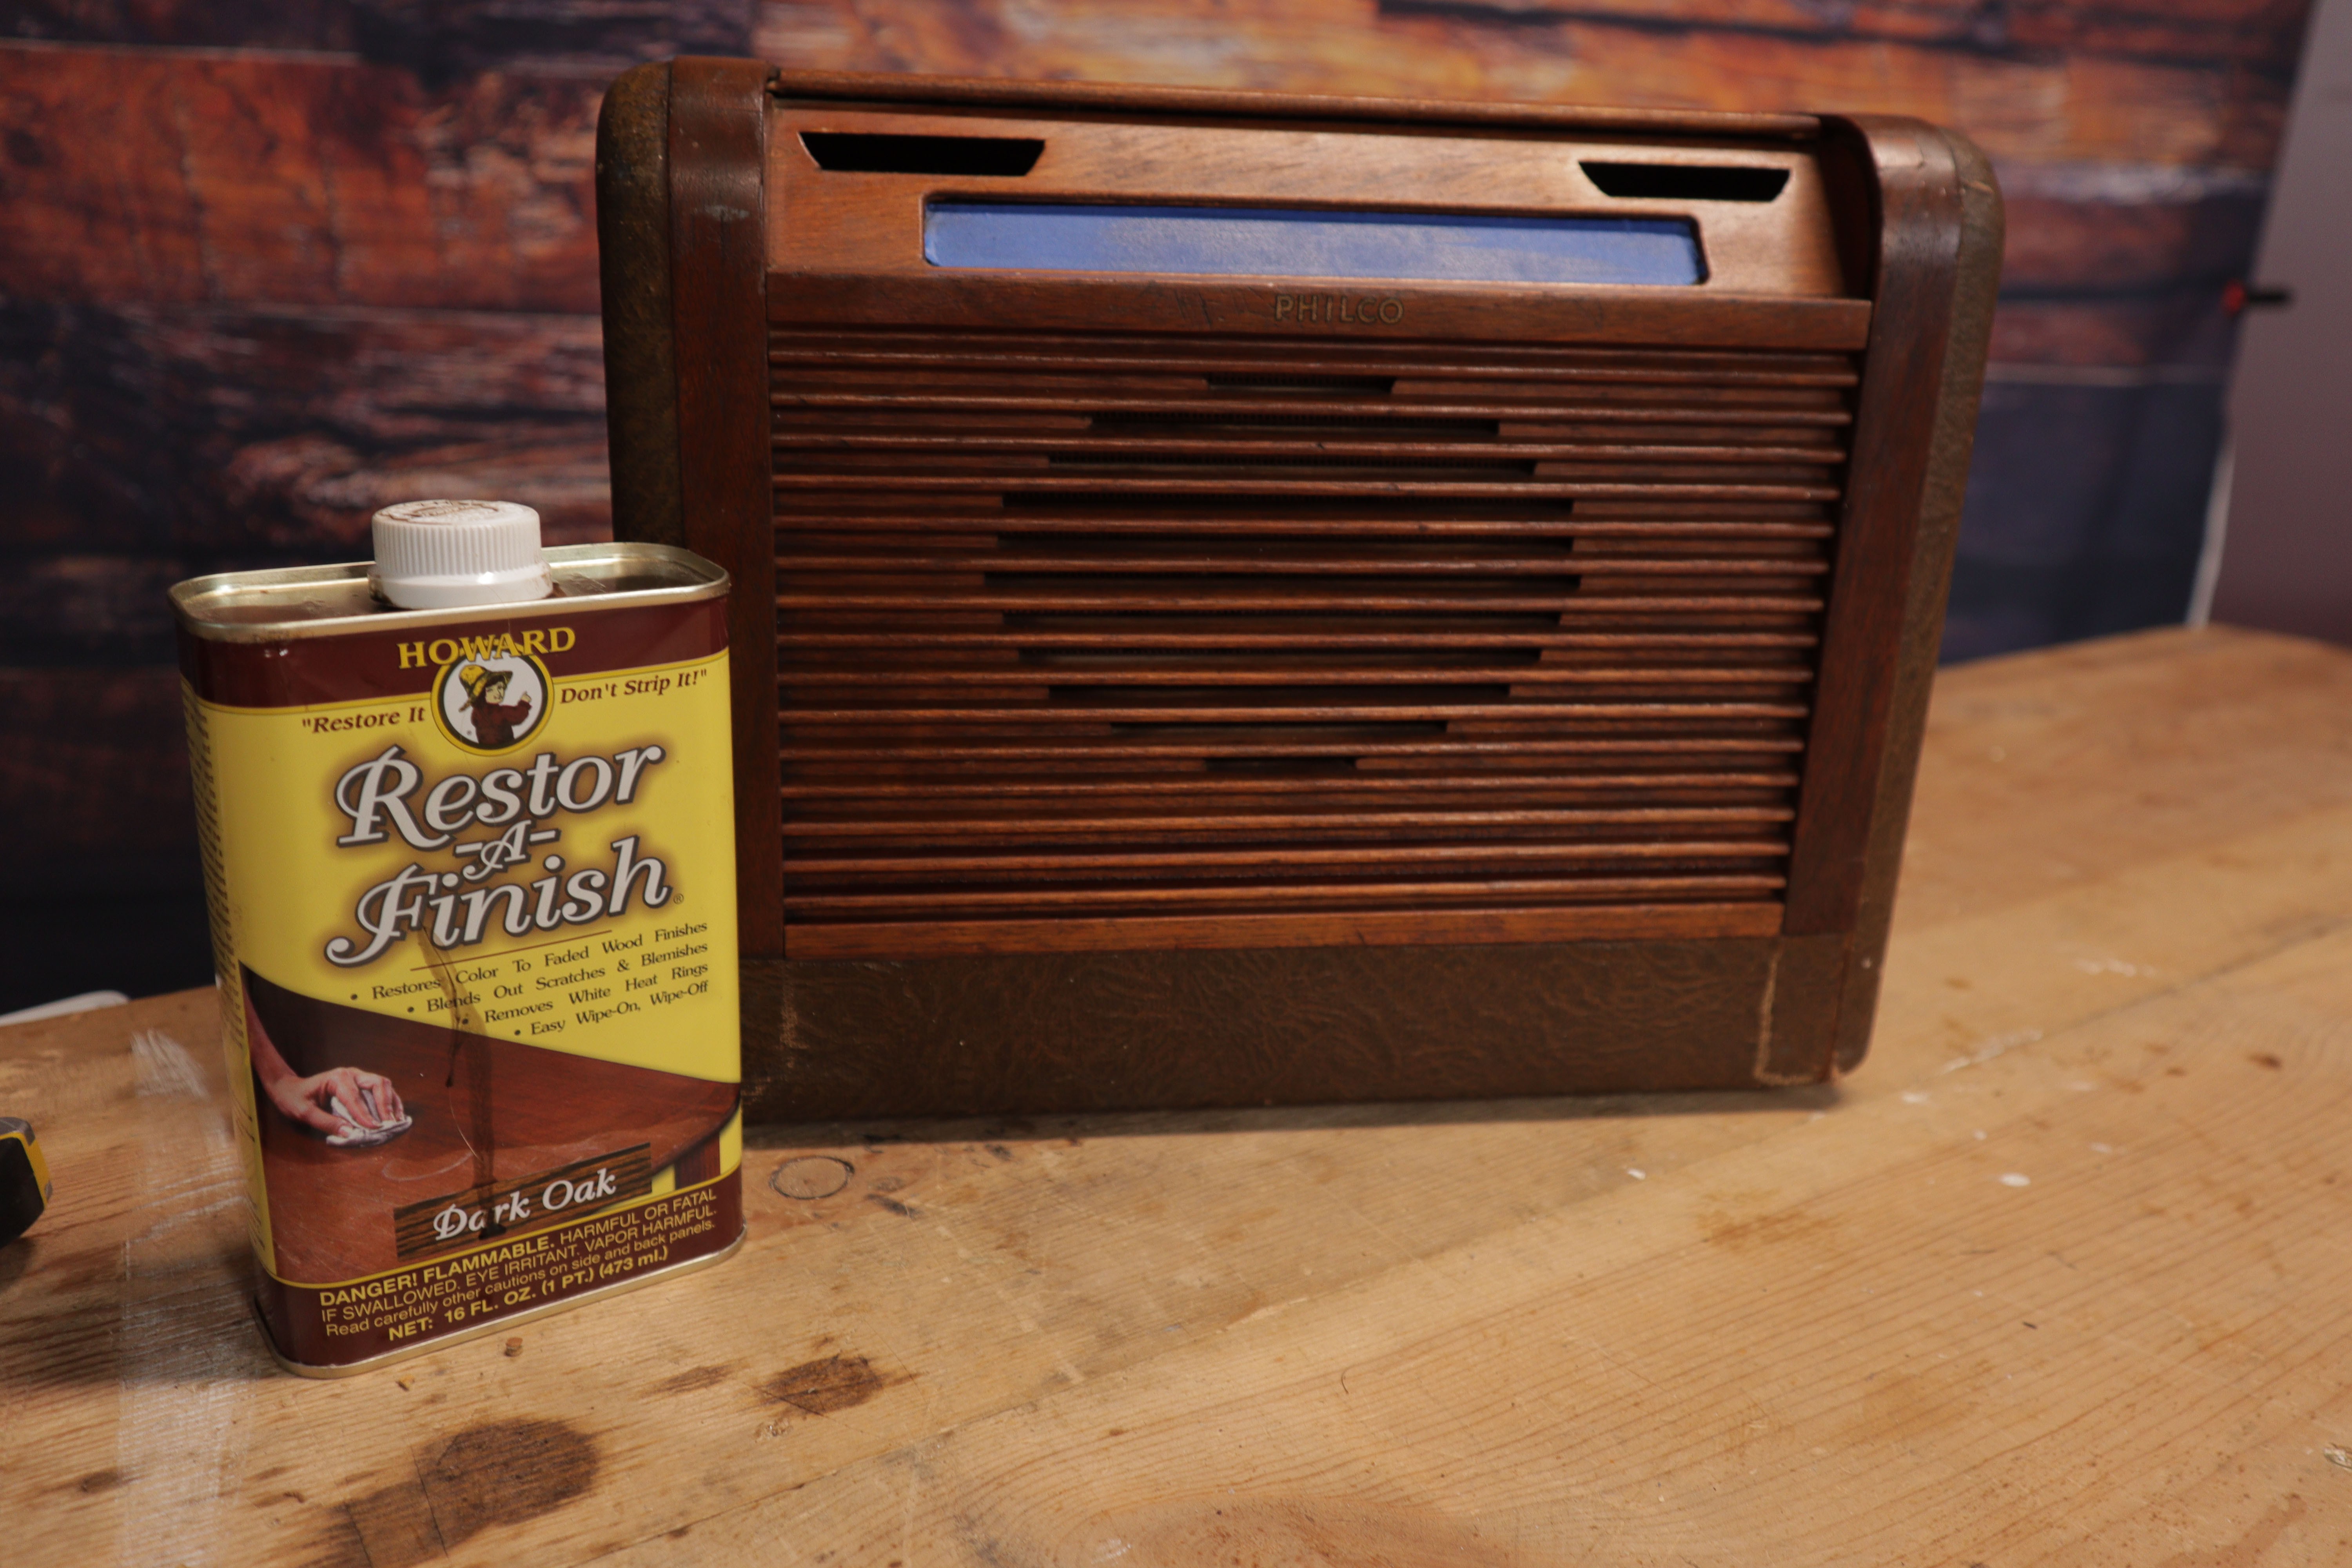
I started by removing the old radio's internal chassis which came out fairly easily. I gave the wood cabinet a simple restoration using a simple "wipe-on" restoring compound, Restor-A-Finish. This made the restoration really fast and easy and did a great job of removing decades of residue and blemishes.
I removed the broken leather strap and replaced it with faux-leather purse strap, reusing the same brass footings and a leather punch for the mounting holes.
I decided I wanted to reuse the original dials, and then decided it would be a good idea to keep the original dial mounts on the chassis, so I used a cut-off wheel on a rotary tool to remove the top rail of the steel case after removing all the components. I could also use this rail to mount other components onto later, so I screwed a small wood block onto it to allow for easier installation later.

Software Stuff

The Alexa Voice Service (AVS) has been built into a script for Raspberry Pi by Amazon developers, their documentation can be found here
To get Alexa up and running on the Raspberry Pi, I used the following rough steps. For more detailed steps with the actual code and pictures, please reference this article by Emmet at PiMyLifeUp.
- Create an Amazon Developer account
- Create a device profile
- Create a security profile for the device
- Export config.json
- Set up the Raspberry Pi with Raspian - flash to microSD
- Use a Monitor+Keyboard+Mouse to interface with the Pi
- Run the initial set up (updates, clock, wifi)
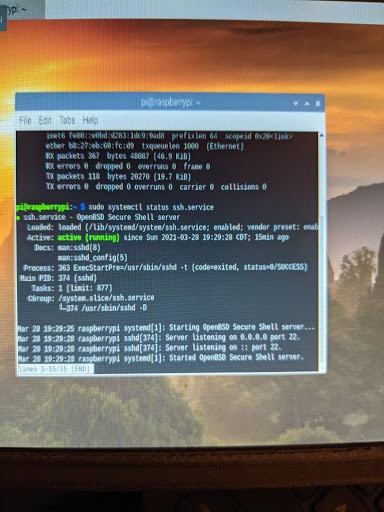
- Enable SSH
- configure .asoundrc with sound cards
- SSH into the Pi from Command Line Interface (CLI) on desktop
- ssh pi@"yourIPaddress"
- Copy config.json into /home/pi (I just used and FTP program)
- Run the AVS setup script
- bash setup.sh config.json
- Start up Alexa
- bash startsample.sh
- Authenticate Alexa at amazon.com/us/code using the code provided
- Create Alexa.service as a systemd service to start up Alexa with power and wifi
- Set up Bluetooth
Alexa on a Raspberry Pi has been done by many others before, and as I'm not very familiar with Linux, I couldn't have done this without their legwork. I also need to thank my friend Mike for helping me work through all the problems I faced along the way. Here are some things I learned that may get you unstuck if you attempt to do this yourself.
Tips and Tricks:
- Do not attempt to use a Raspberry Pi Zero W. I initially started off with one but there just isn't enough processing power to run the script and the AVS development team does not support it.
- To get the Bluetooth service on the Raspberry Pi set up as an audio sink for playing music from another device, use the following tutorial
- Change swapfile memory as needed to get the setup script to run uninterrupted (I added 2GB of swap memory)
- Make sure curl is installed prior to running the setup script (sudo apt install -y curl)
- Alexa.service may need a "-c" in the execstart line (ExecStart=/bin/bash -c /home/pi/startsample.sh)
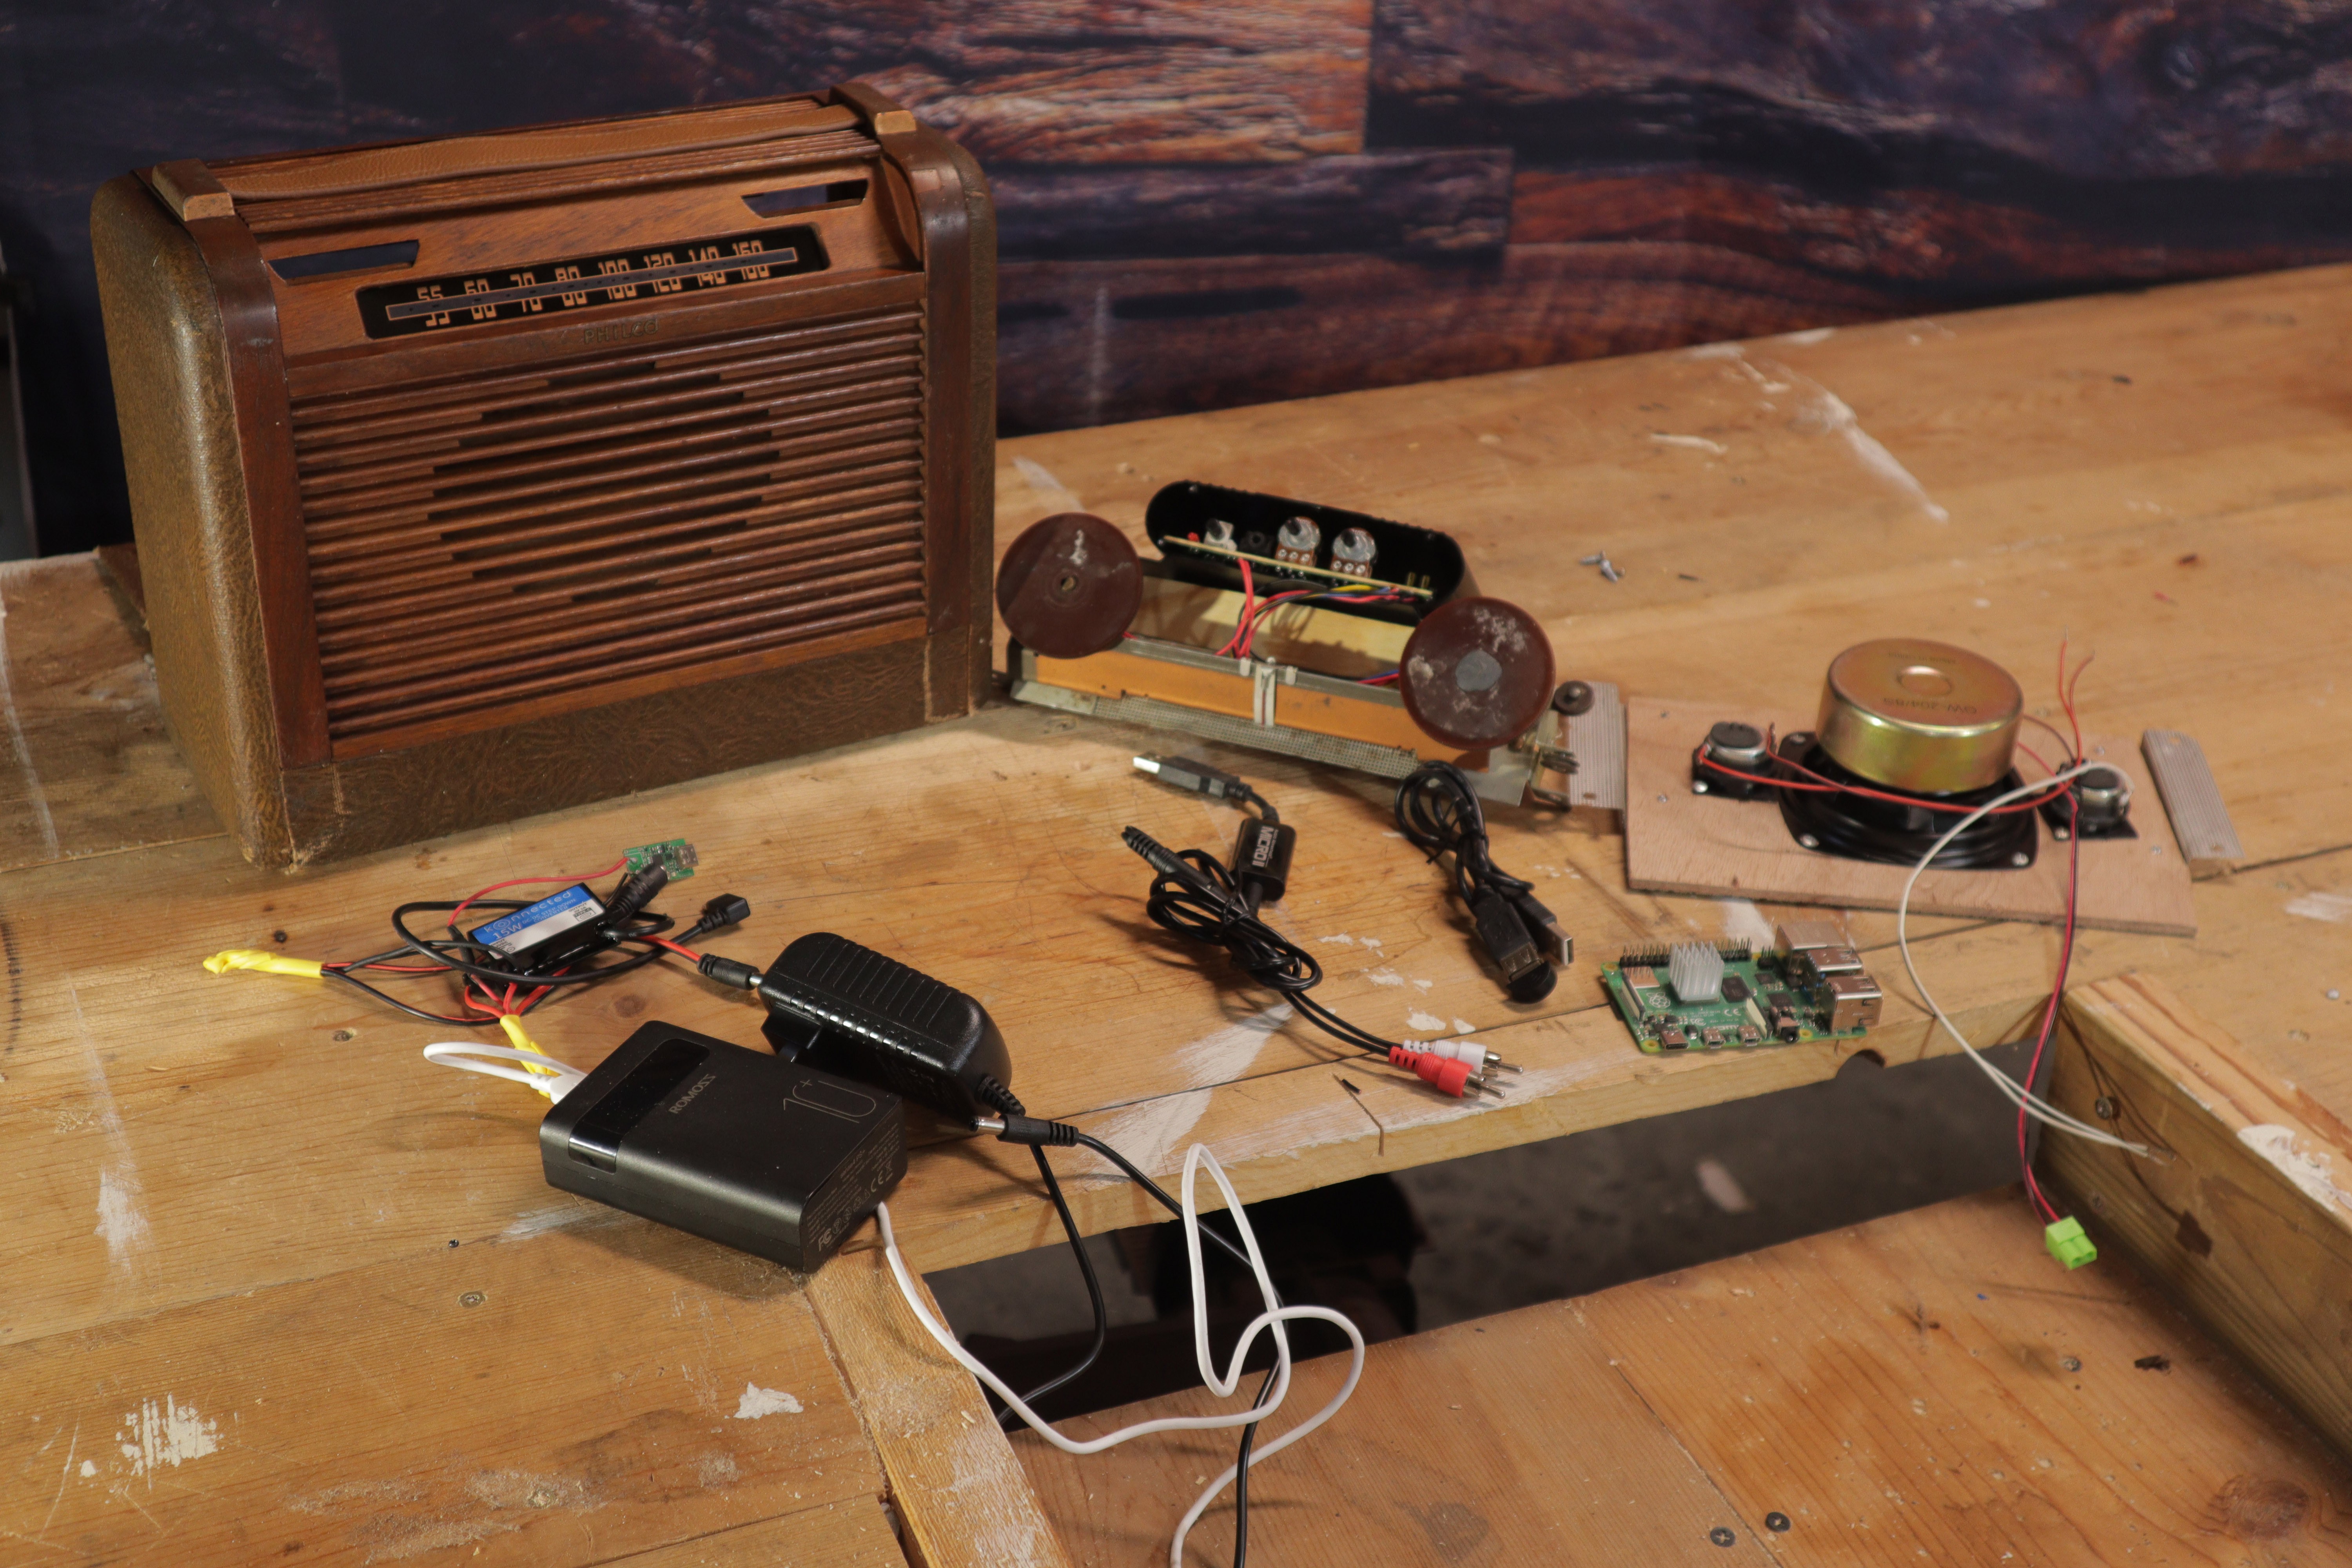
Hardware Mode
- Speakers
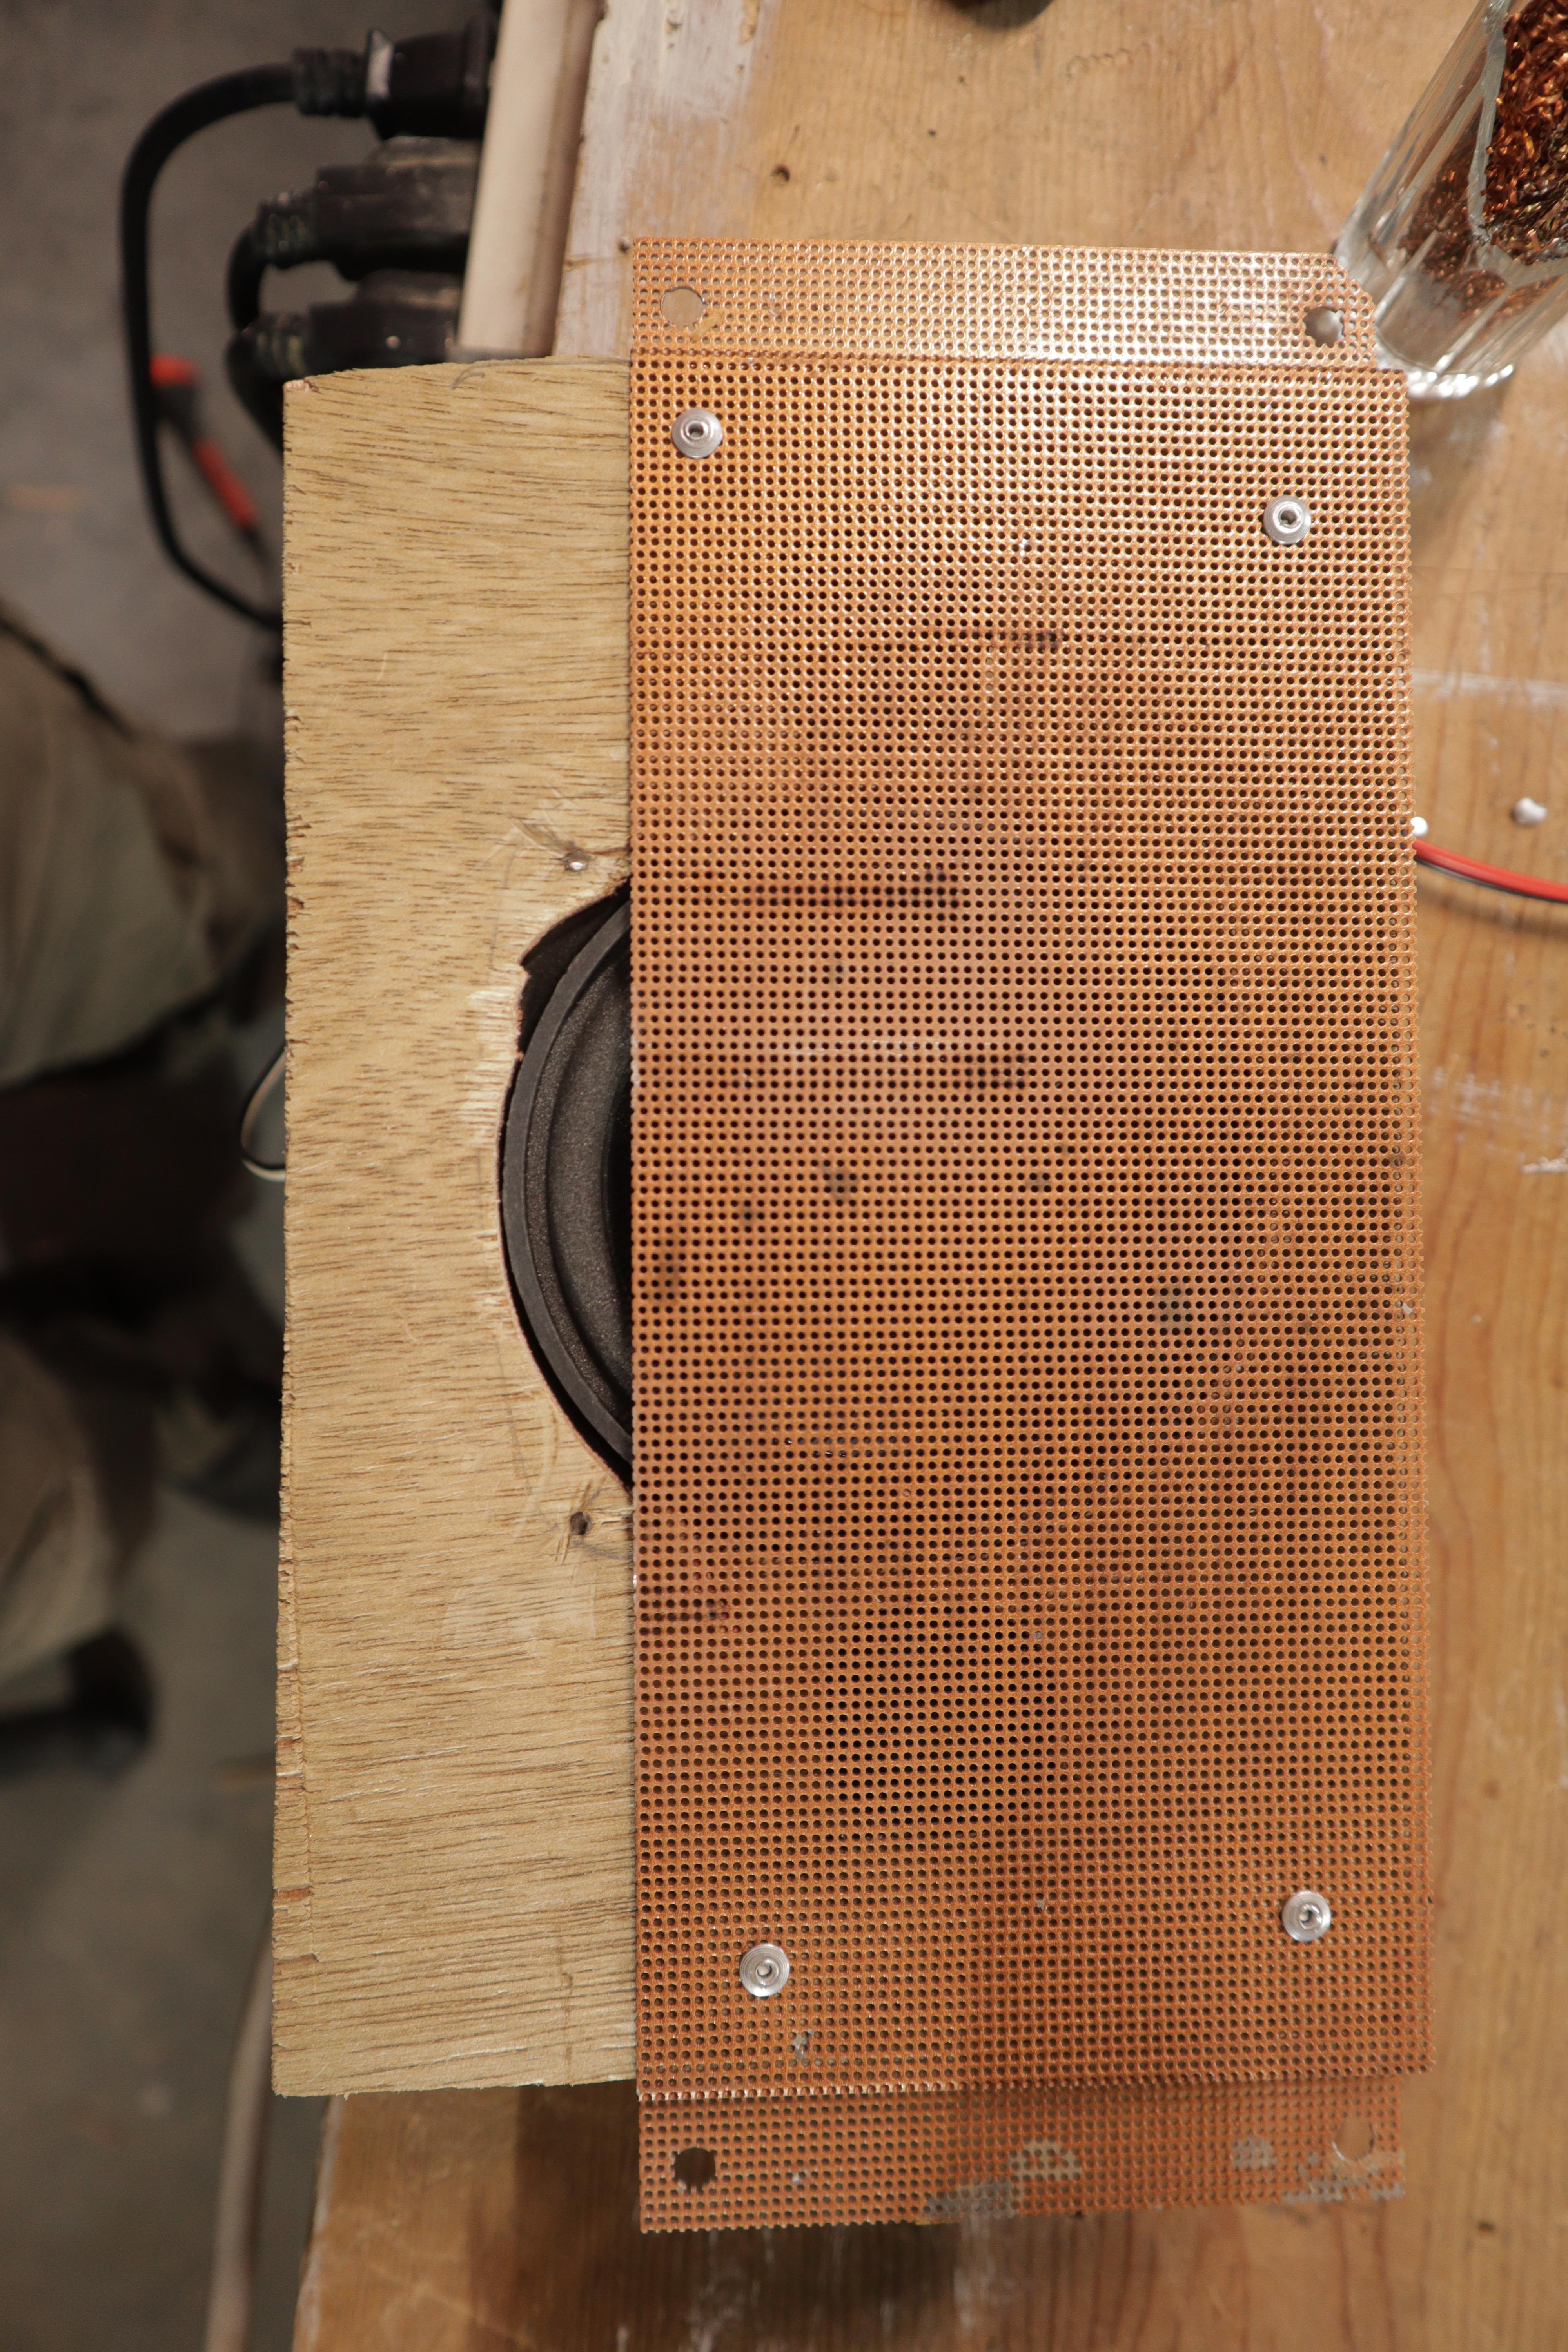
I mounted the speakers to some thin plywood that I had cut speaker-sized holes into, which I then riveted onto the original speaker mesh that utilized the mounting posts in the cabinet. This gave the speakers enough clearance so they weren't vibrating against that metal mesh.

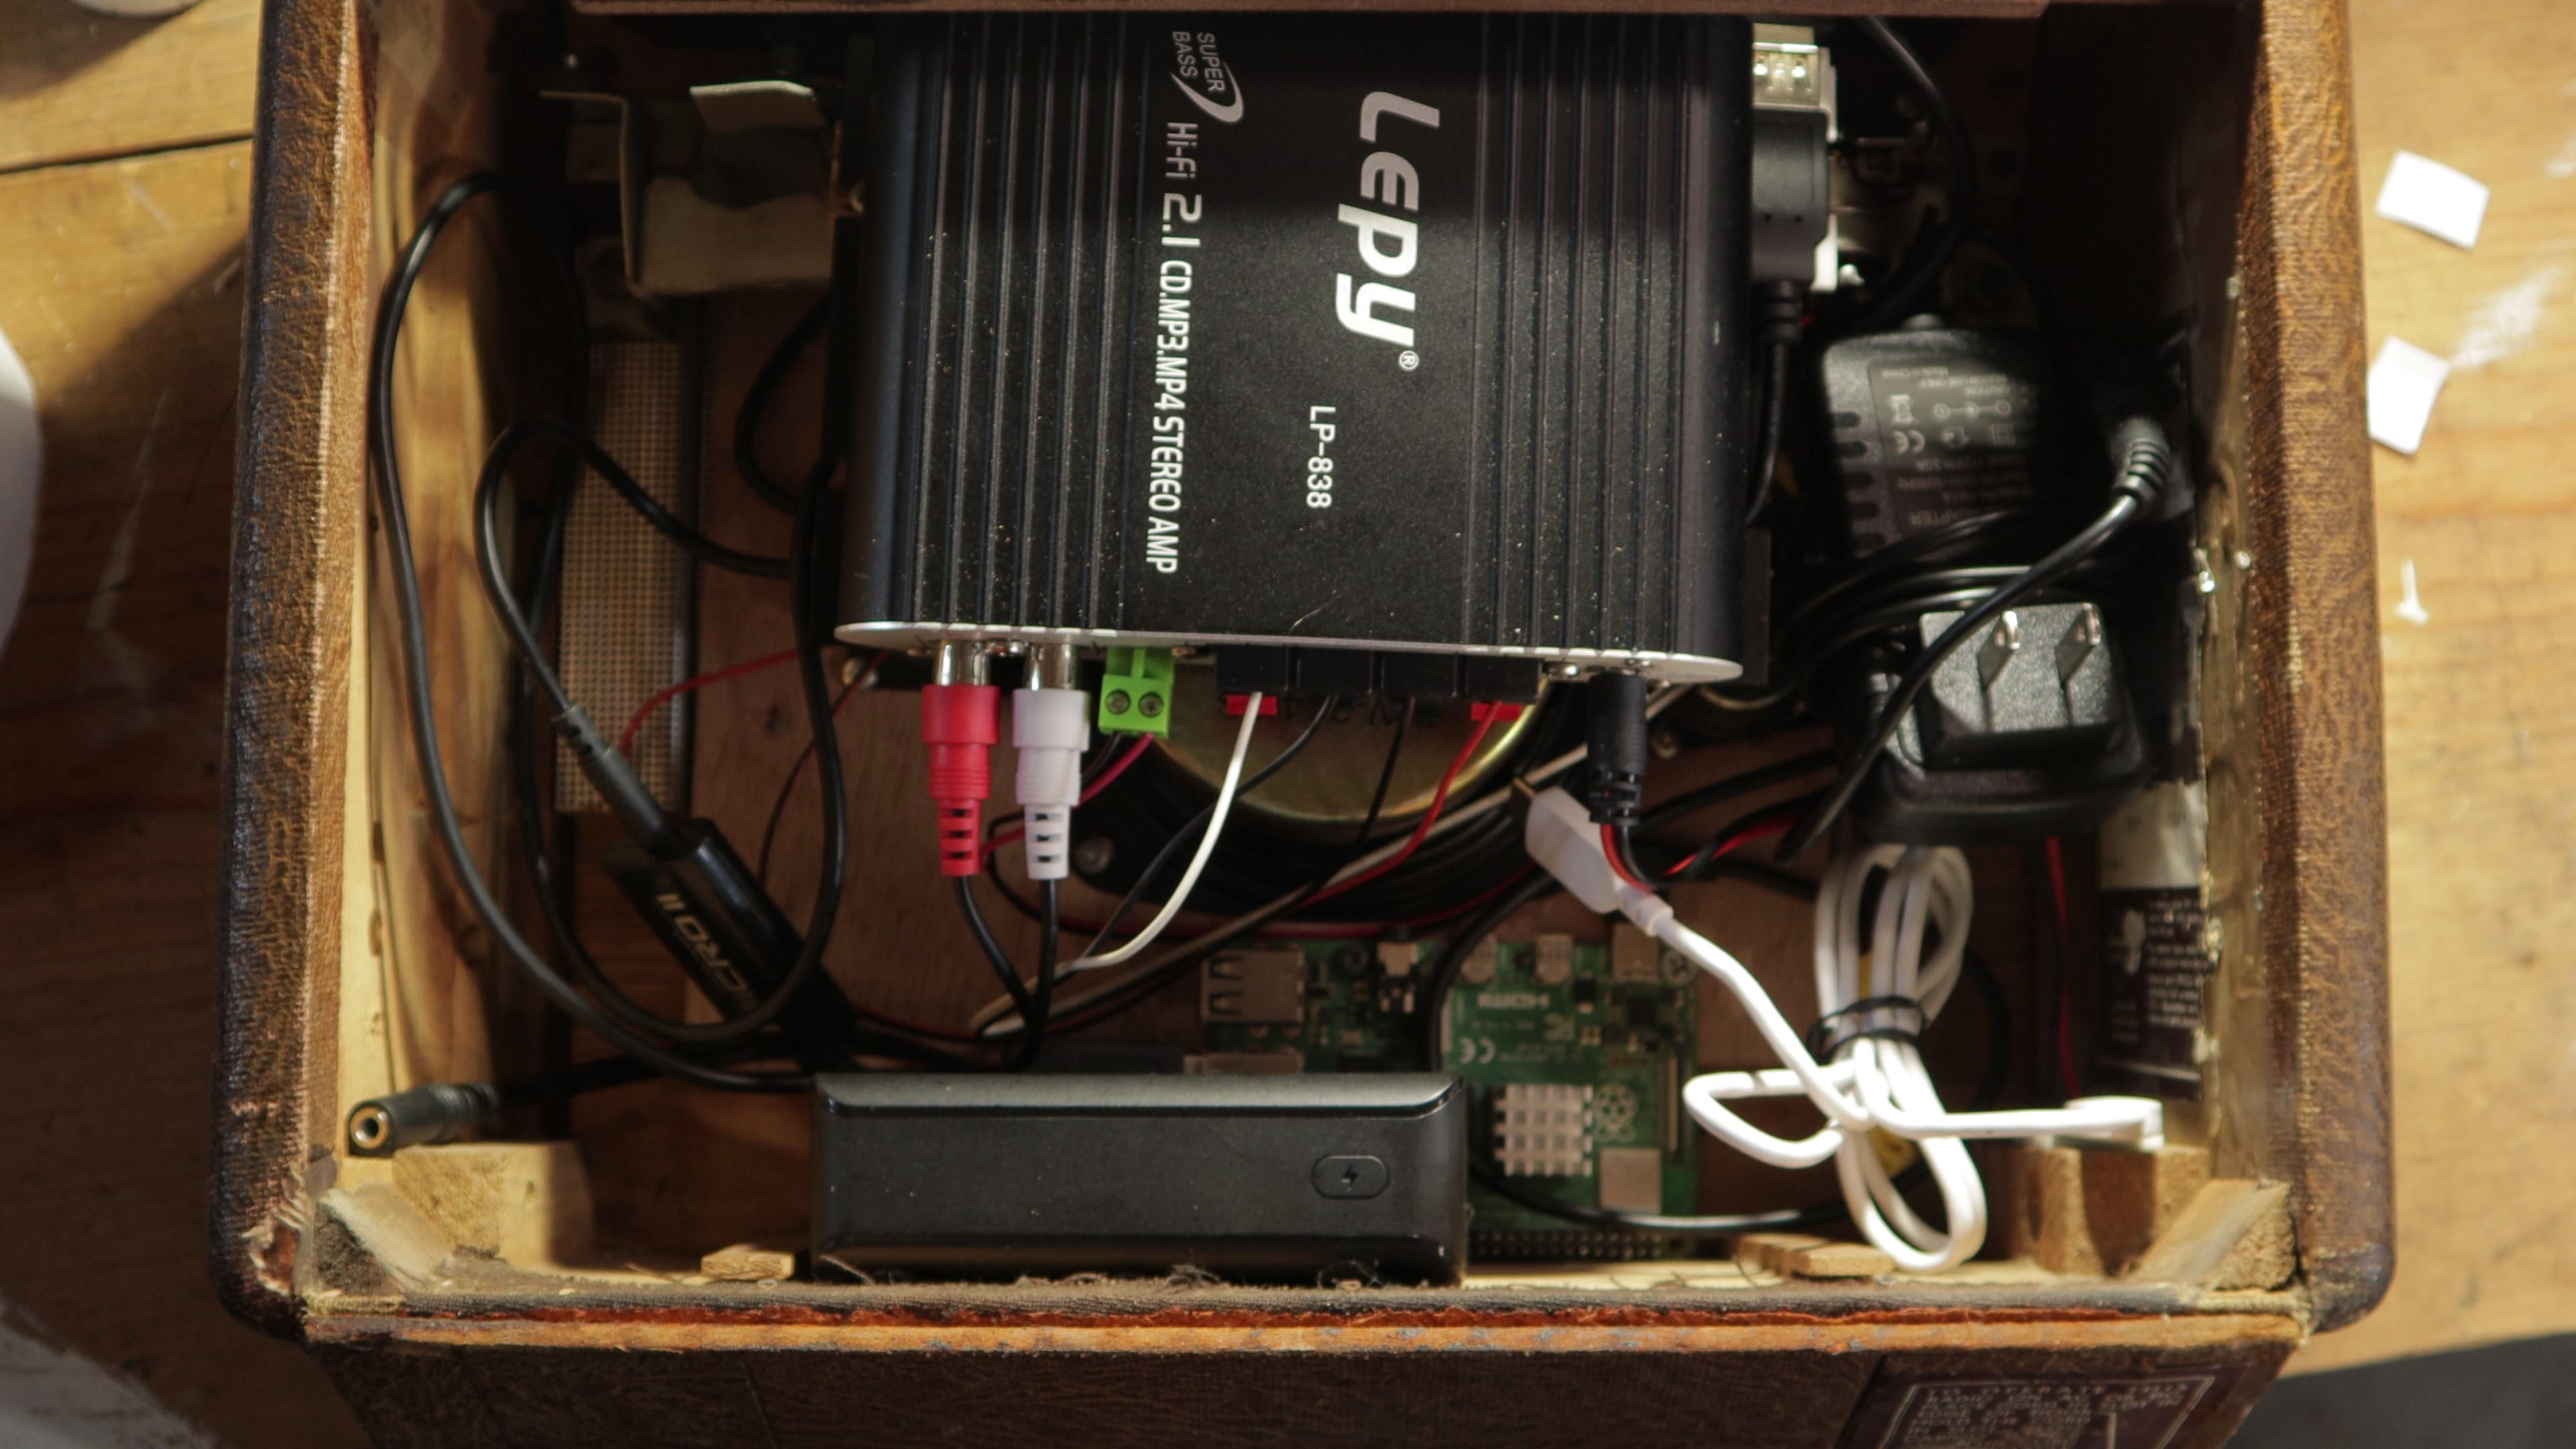
- Amplifier
I then mounted the amplifier's case to the chassis rail I had cut off earlier. This provided the perfect dimensions to fit inside the case and not obstruct anything else.
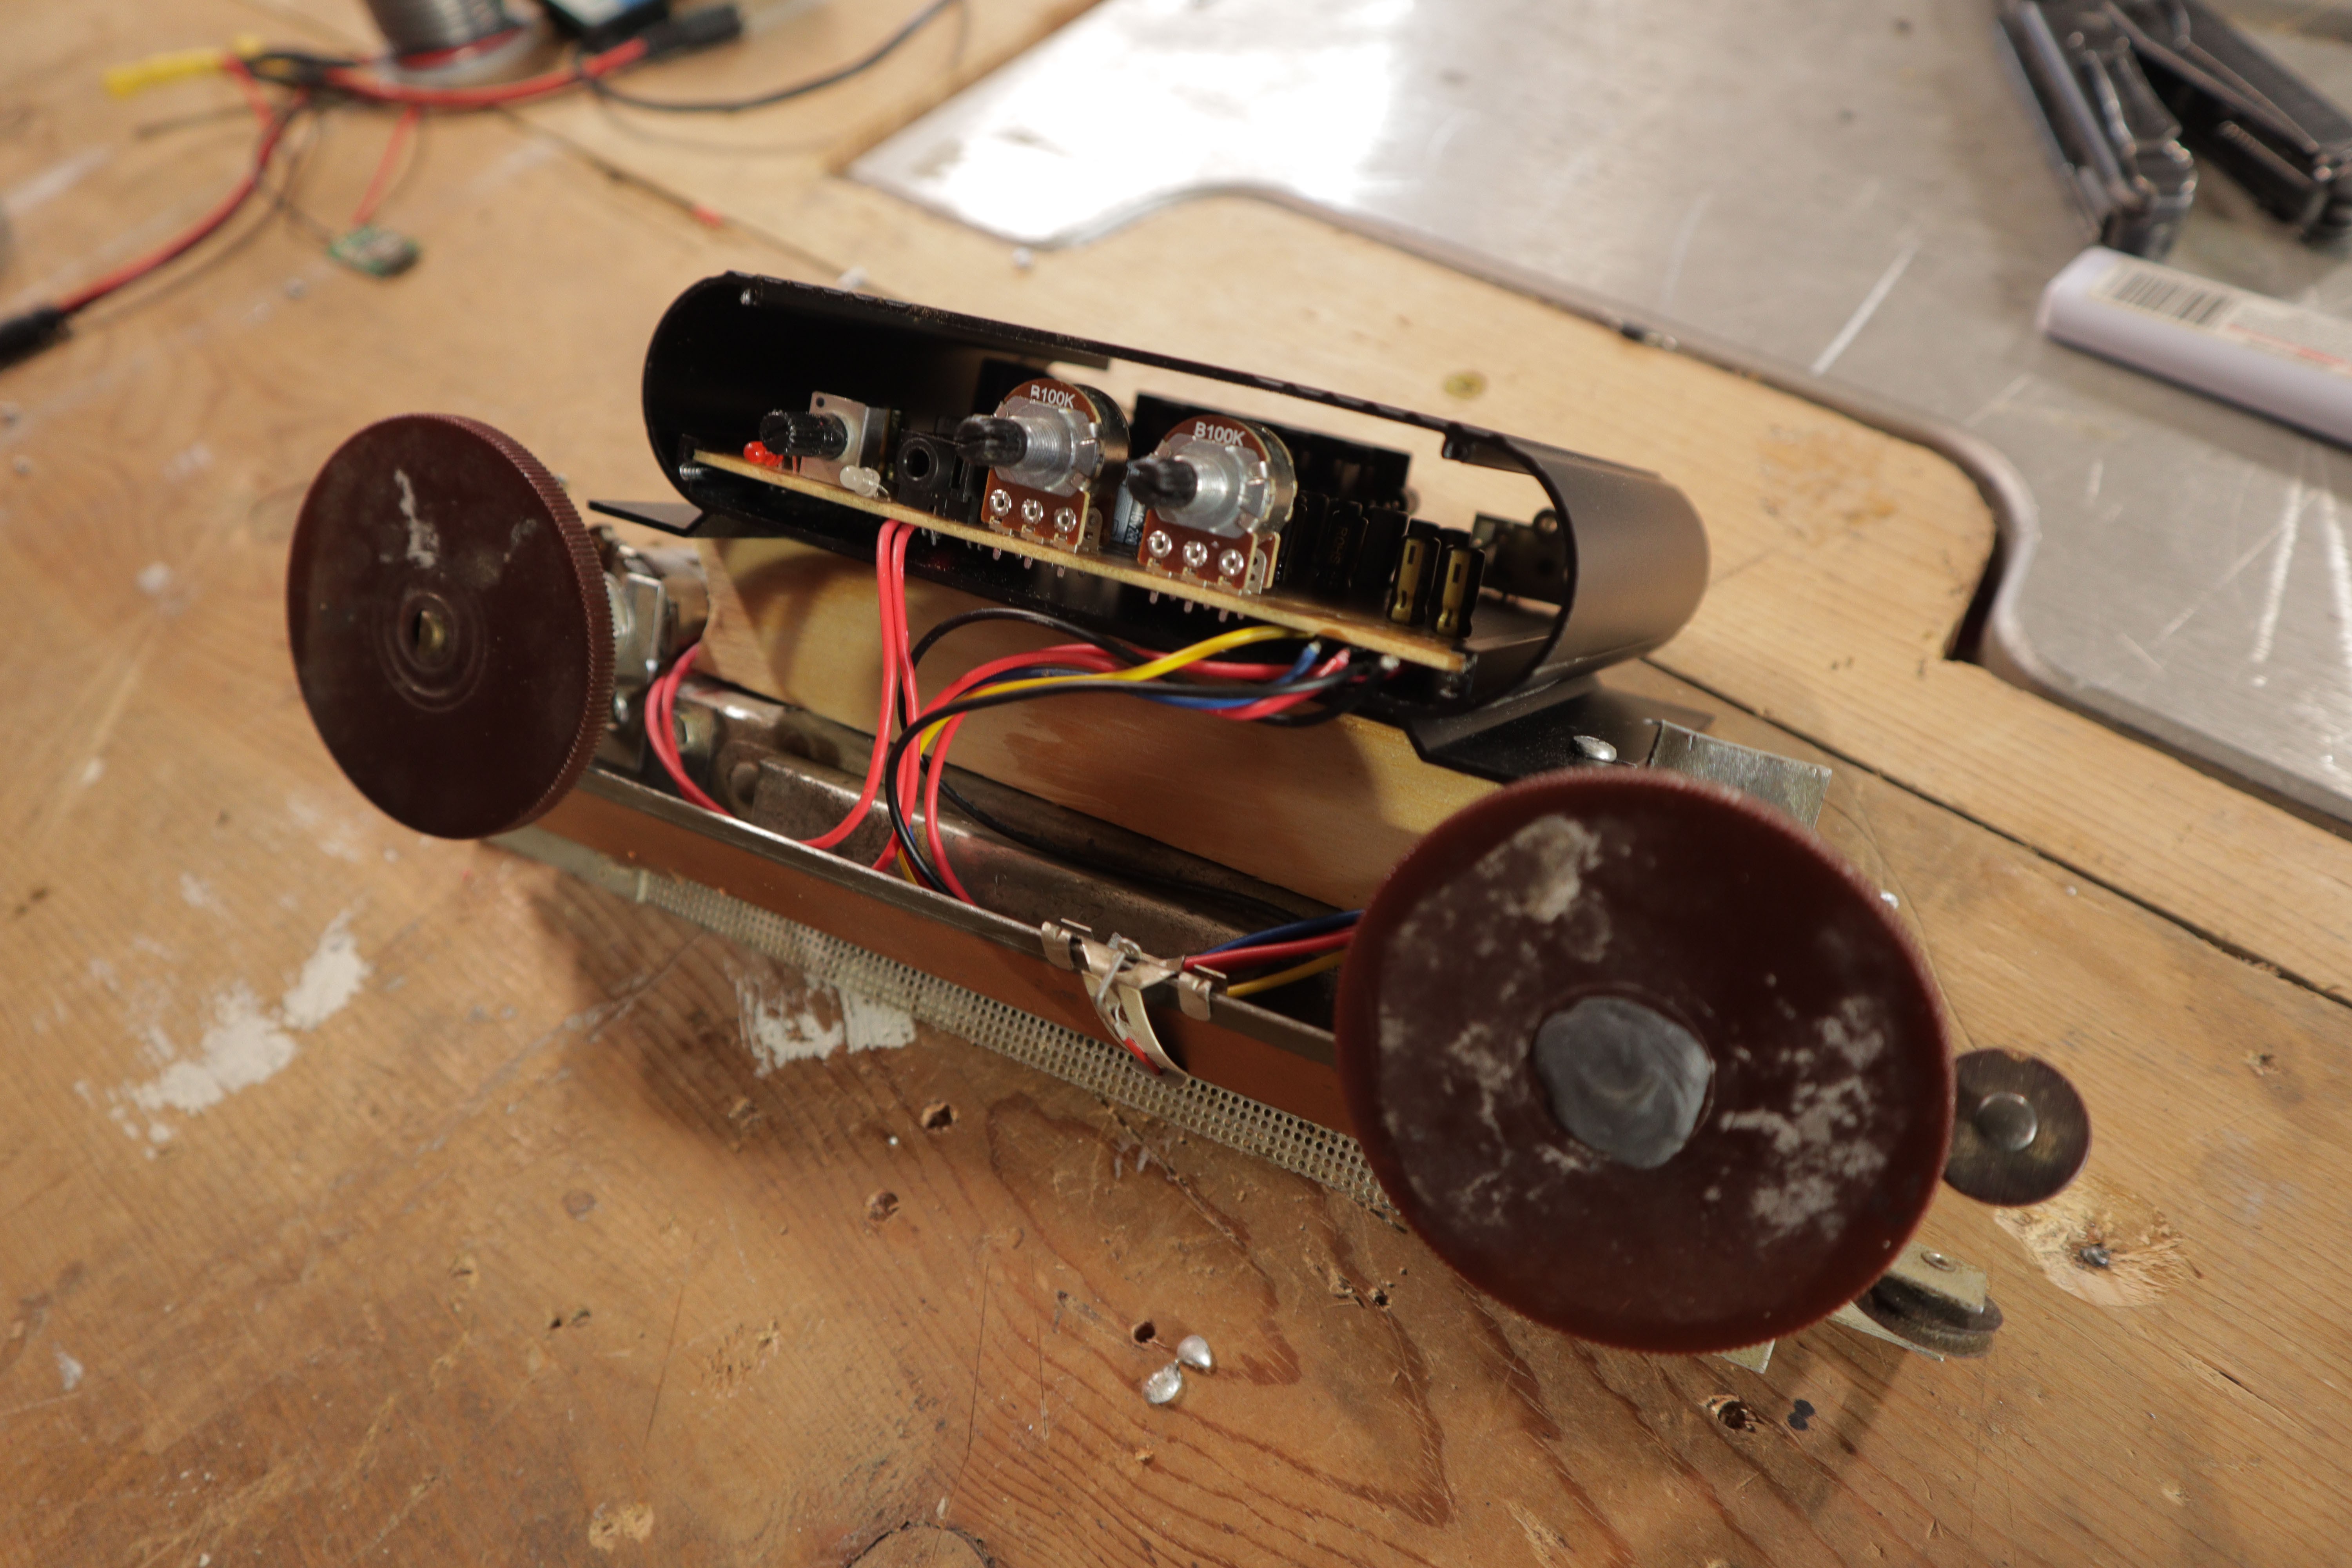
I desoldered the power switch and volume knob of the amp. I soldered the power switch wires onto the original rotary switch mechanism on the left dial. This rotary switch was also the original volume control potentiometer, but I decided to use the "tuner" dial as a volume knob to give it a purpose. I soldered wires to the volume knob and the knob's contacts on the amp circuit board. The goal was just to extend that knob away from the amp. I secured the volume knob with some epoxy putty on the chassis rail where the original tuning knob used to mount. I also epoxied the original tuning dial (just a plastic circle) onto the volume knob. I made sure to pay attention to the height of the dial so that it would still fit through the cutout in the wood cabinet. With the power switch dial mounted and the vol
ume knob set in epoxy, I could install the chassis rail and amp behind the speakers and secure it to the cabinet mounting posts.

- Power
I soldered a little wiring harness that connected the USB-C Power delivery board (with the diode), the male barrel connector for the amplifier, the female barrel connector for the 12V wall power supply, and the 12V-5V USB-C buck converter. I used some sticky-back Velcro on the bottom of the cabinet and power bank to allow for easy removal for charging. I used some more foam mounting tape to mount the USB-C PD board and 12V-5V buck converter to the inside of the cabinet. I plugged a USB-C cable into the PD board. and I plugged the 12V power adapter to the barrel connector of the harness and tucked it into the cabinet.
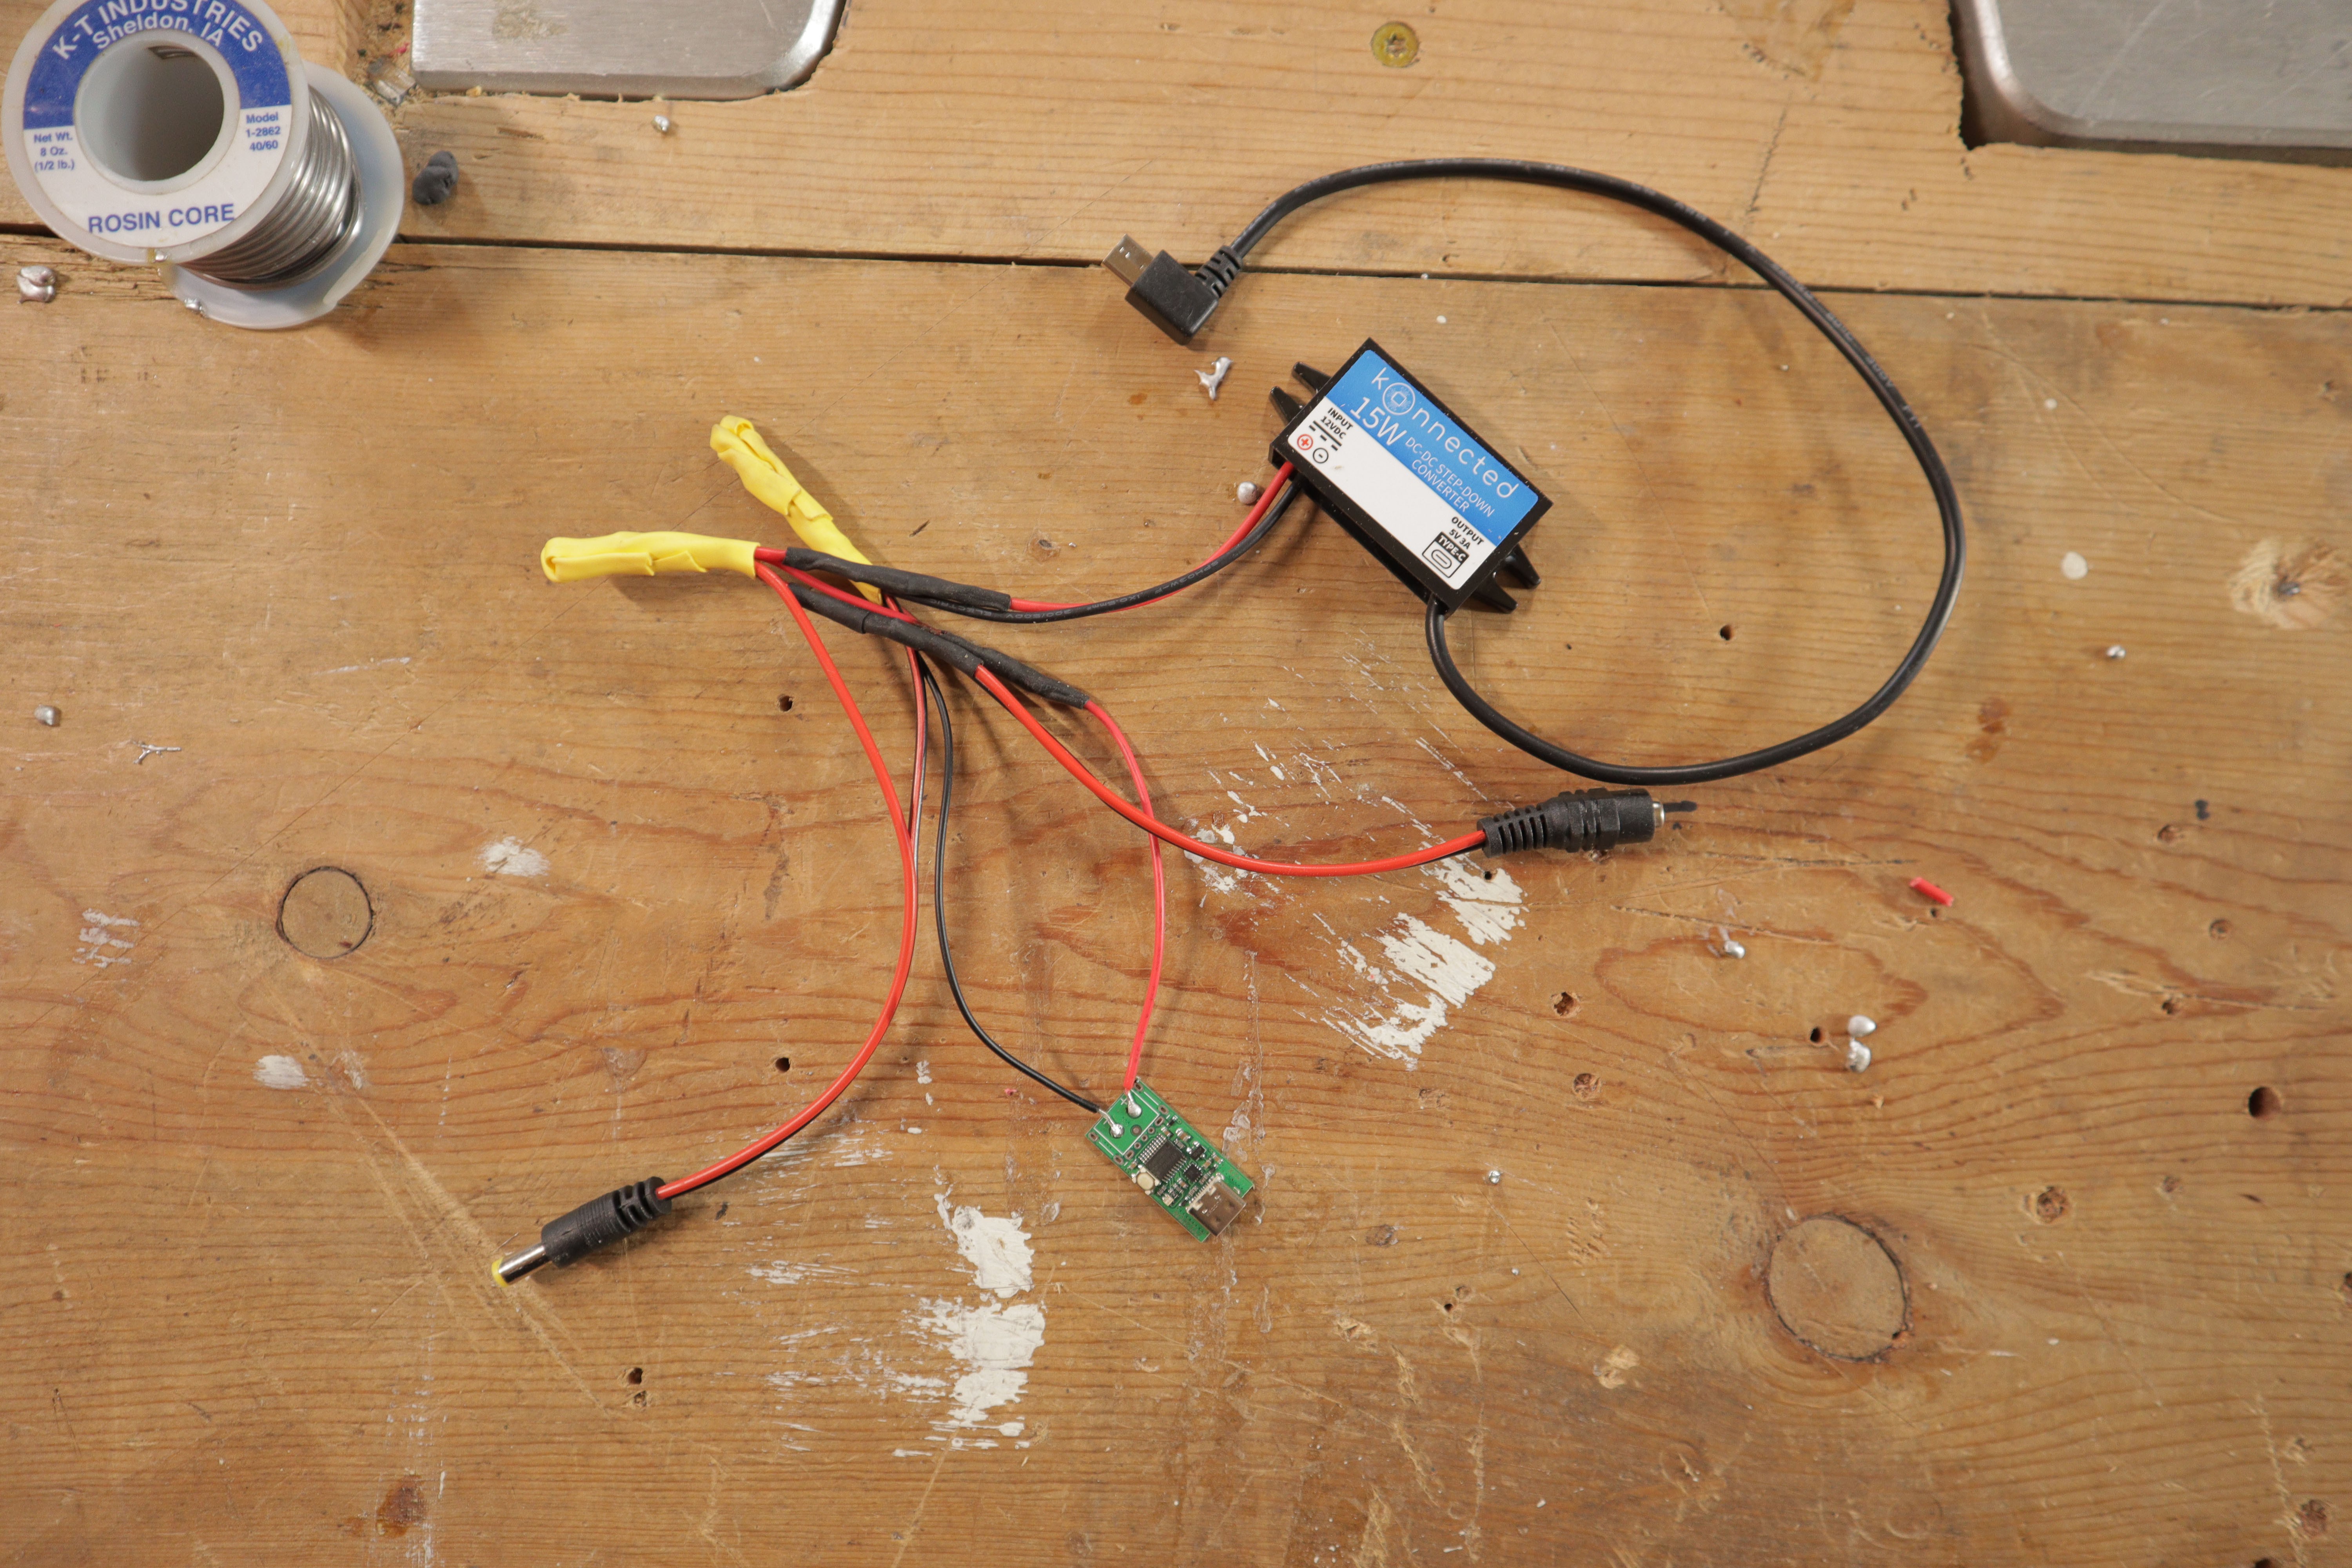
**The owner simply can choose to plug the other end of the USB-C cable into the battery for portable operation, or pull out the adapter and plug it into the wall for home use**Control System
- Control System
I plugged the the USB DAC and USB Microphone with a (USB extension) into the Raspberry Pi. I then screwed the Raspberry Pi into the plywood (with the speakers) using some small wood screws. I plugged the 3.5mm Aux end of an "Aux to RCA" cable into the USB DAC, and the RCAs into their respective plugs on the amplifier. I used some foam mounting tape on the microphone and mounted it on the chassis rail behind the power switch, where there was a small gap that would allow speech to be picked up
Final Thoughts
The end result turned out so much better than I had imagined in the beginning. The sound quality is excellent, it has a very premium feel to it. I love that the vintage exterior hasn't changed, and it can still carry its same sentimental value while having all the modern functionality for the 21st century.
The Alexa functions works really well, especially when paired with the Alexa smartphone app. Amazon doesn't support music streaming to a 3rd party device like a Raspberry Pi, so all it can do on its own is perform voice search functions, games, jokes, and conversational things. But this can be worked around by streaming subscription services or radio stations with the Alexa app.
Bluetooth works flawlessly
The battery will last for about 4-6 hours of solid music playing depending on the volume, and can stay on standby for a day or two. Though the real performance comes when plugged into a wall. With 3 amps of current, the amplifier can crank out some serious room-filling sound.
I hope you enjoyed this project, thank you for reading!