Close
0%
0%

Present! Availability sensing for Zoom meetings

Detect whether the user is infront of the computer, if they aren't, the camera and audio is disabled after a timeout

Public Chat
Similar projects worth following
With the COVID-19 restrictions, most people have been confined to homes and professionals have to hold meetings via meeting tools such as Zoom, Teams etc. However, working from home isn't easy when you have to balance the home life while meetings are going on. Sometimes, people would have to leave the meetings unexpectedly (especially mothers) and would forget to mute the mics and turn the cameras off. As a result, the meeting would be disturbed from any noise and visuals. and embarrassing situations could occur. Present! removes the hassle of worrying about the camera and mic. It turns the camera and mics off if there isn't anyone in the vicinity.

The Project explores a solution to embarrassing moments that happens in virtual meetings. People are often forgetful and this is the suggested solution.

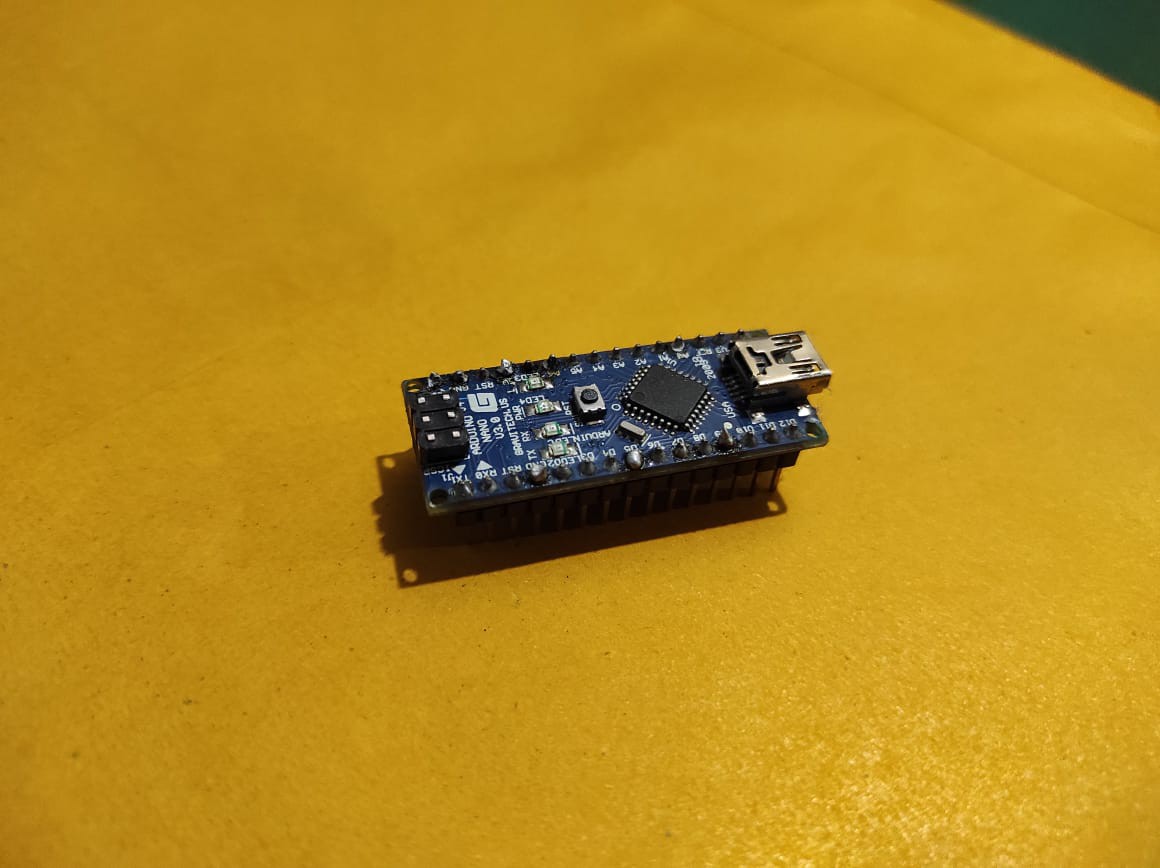
The project has been focused in using low cost equipment. so that in mass production (if it ever comes to that), the production cost would be low, and the retail price would be low too.. therefore it will be accessible by everyone. 

Thought occurred of doing this with a camera, but these issues occurred 1) while the camera is busy with the zoom meetings, accessing that would cause issues 2) using a separate camera, some people would dislike the idea of another camera (some individuals are paranoid about privacy). and it would add to the cost. 

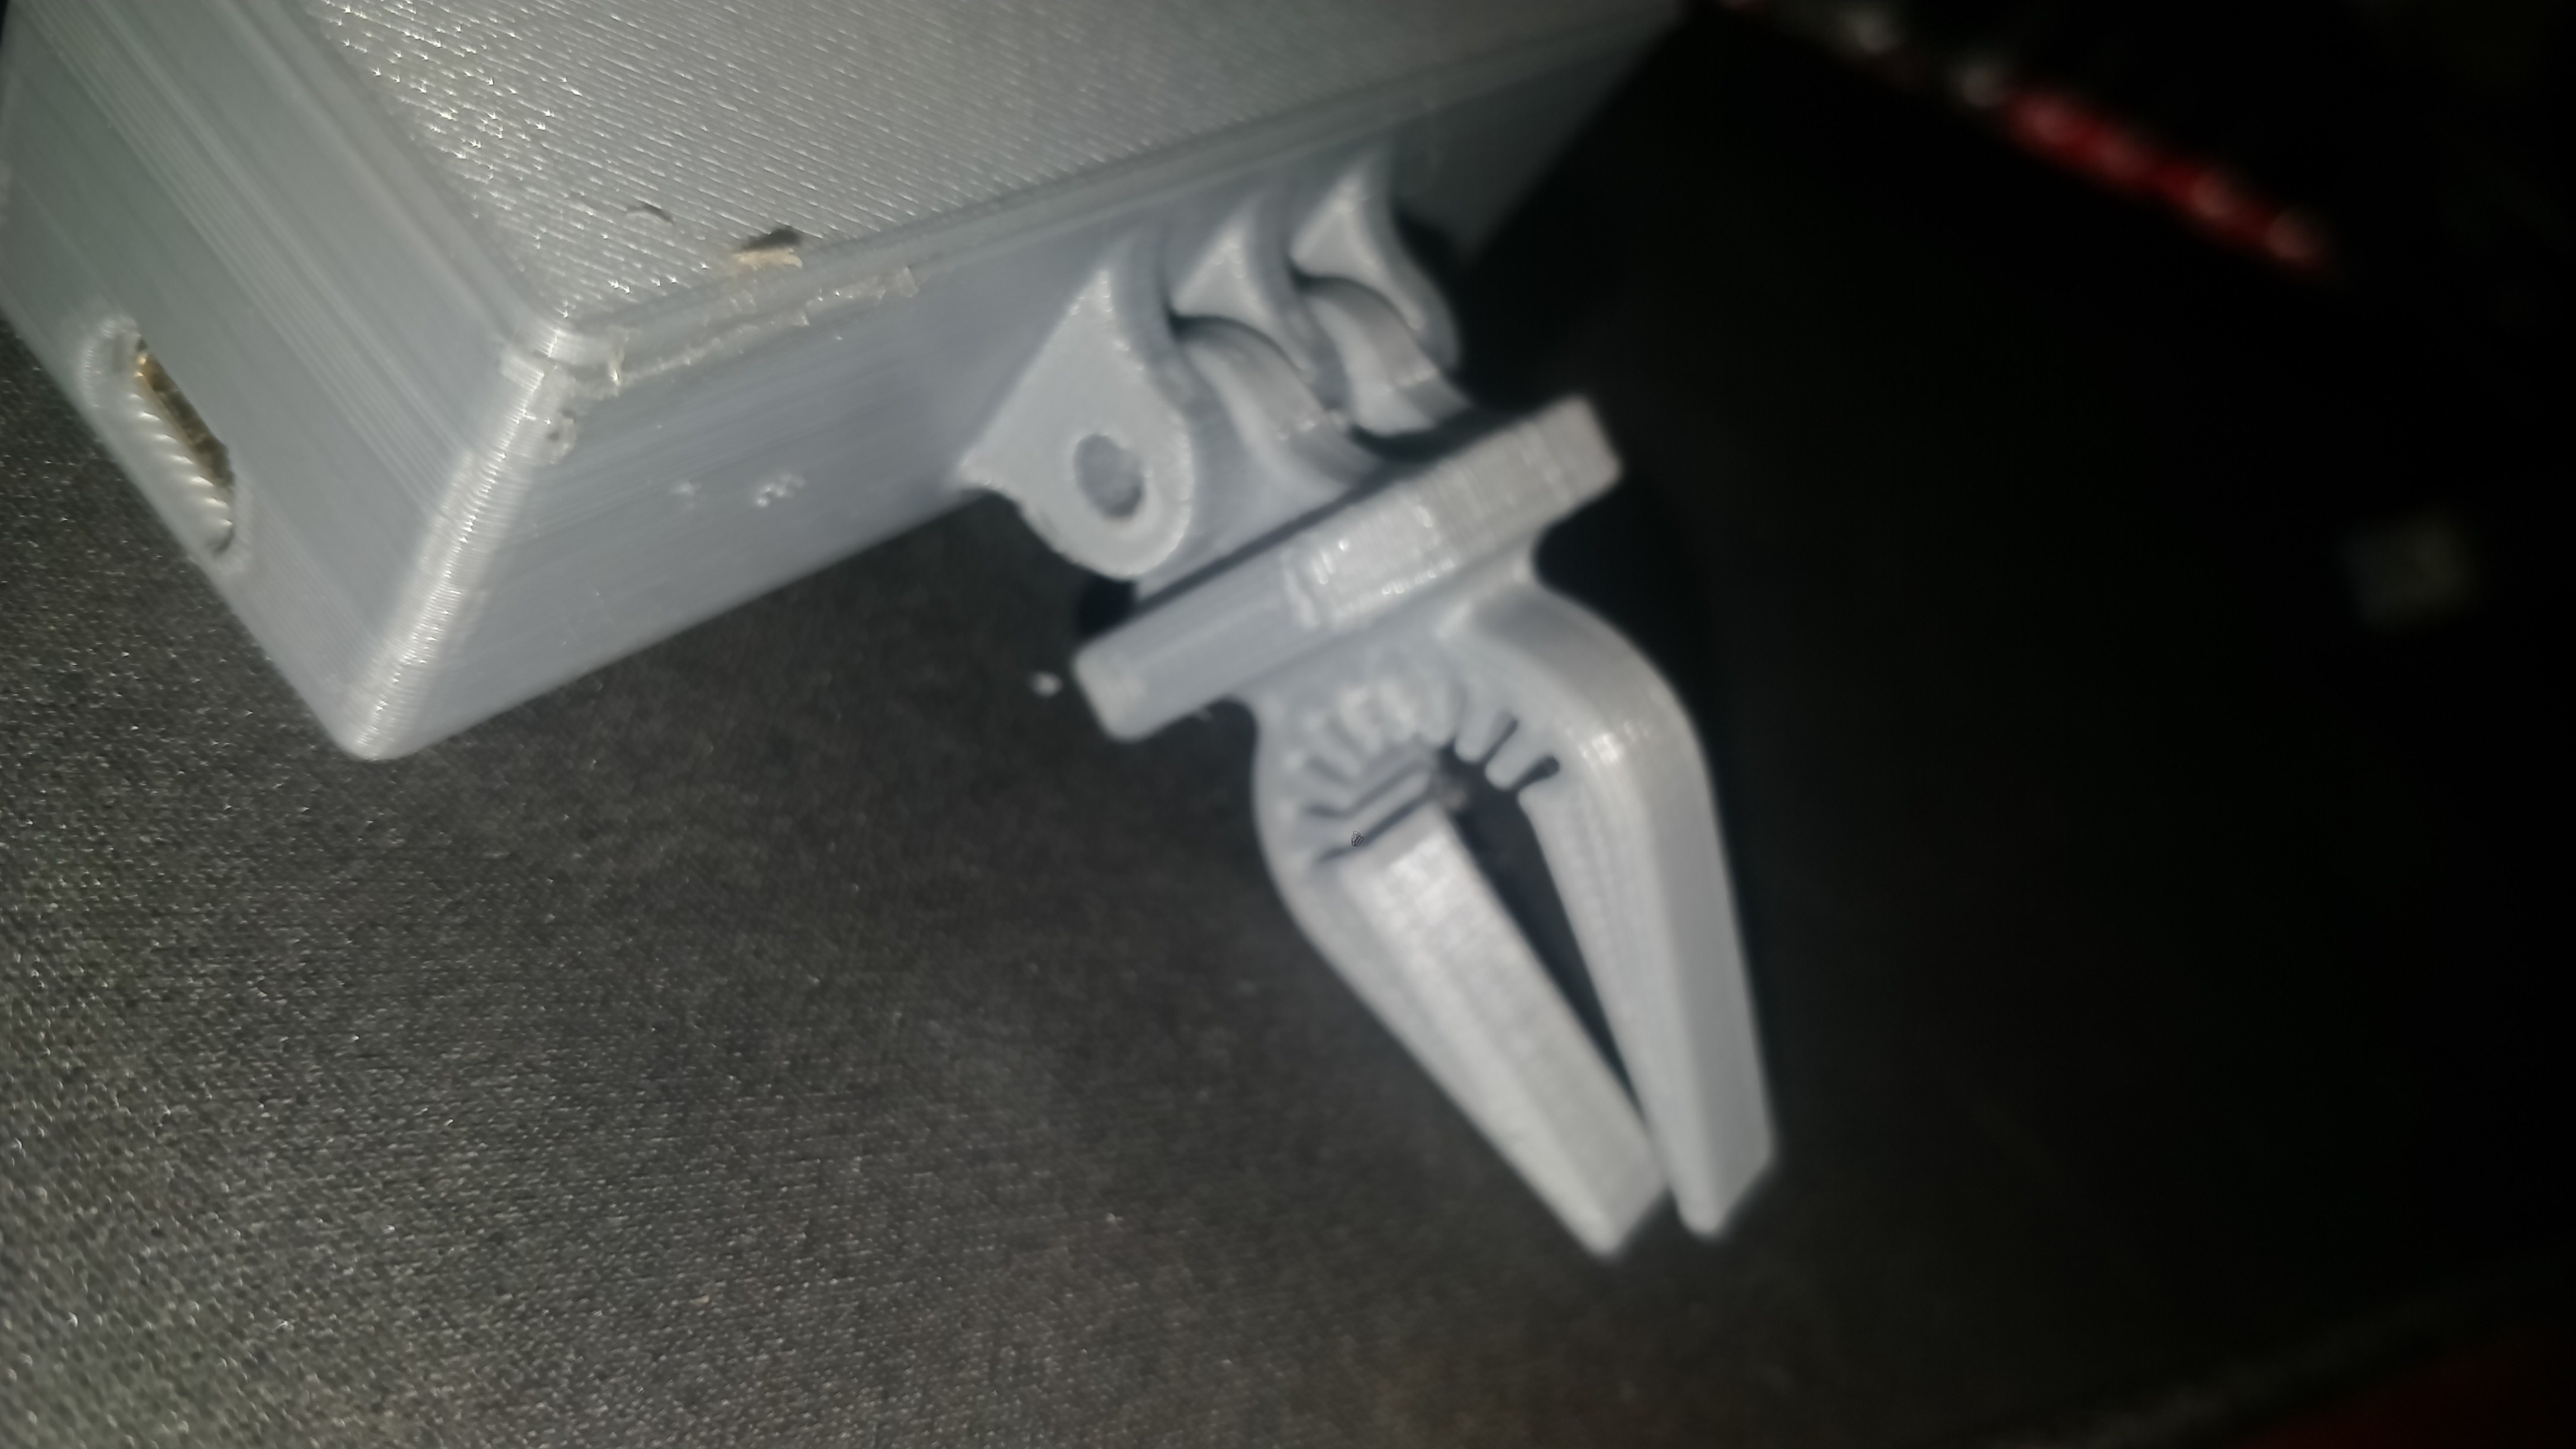
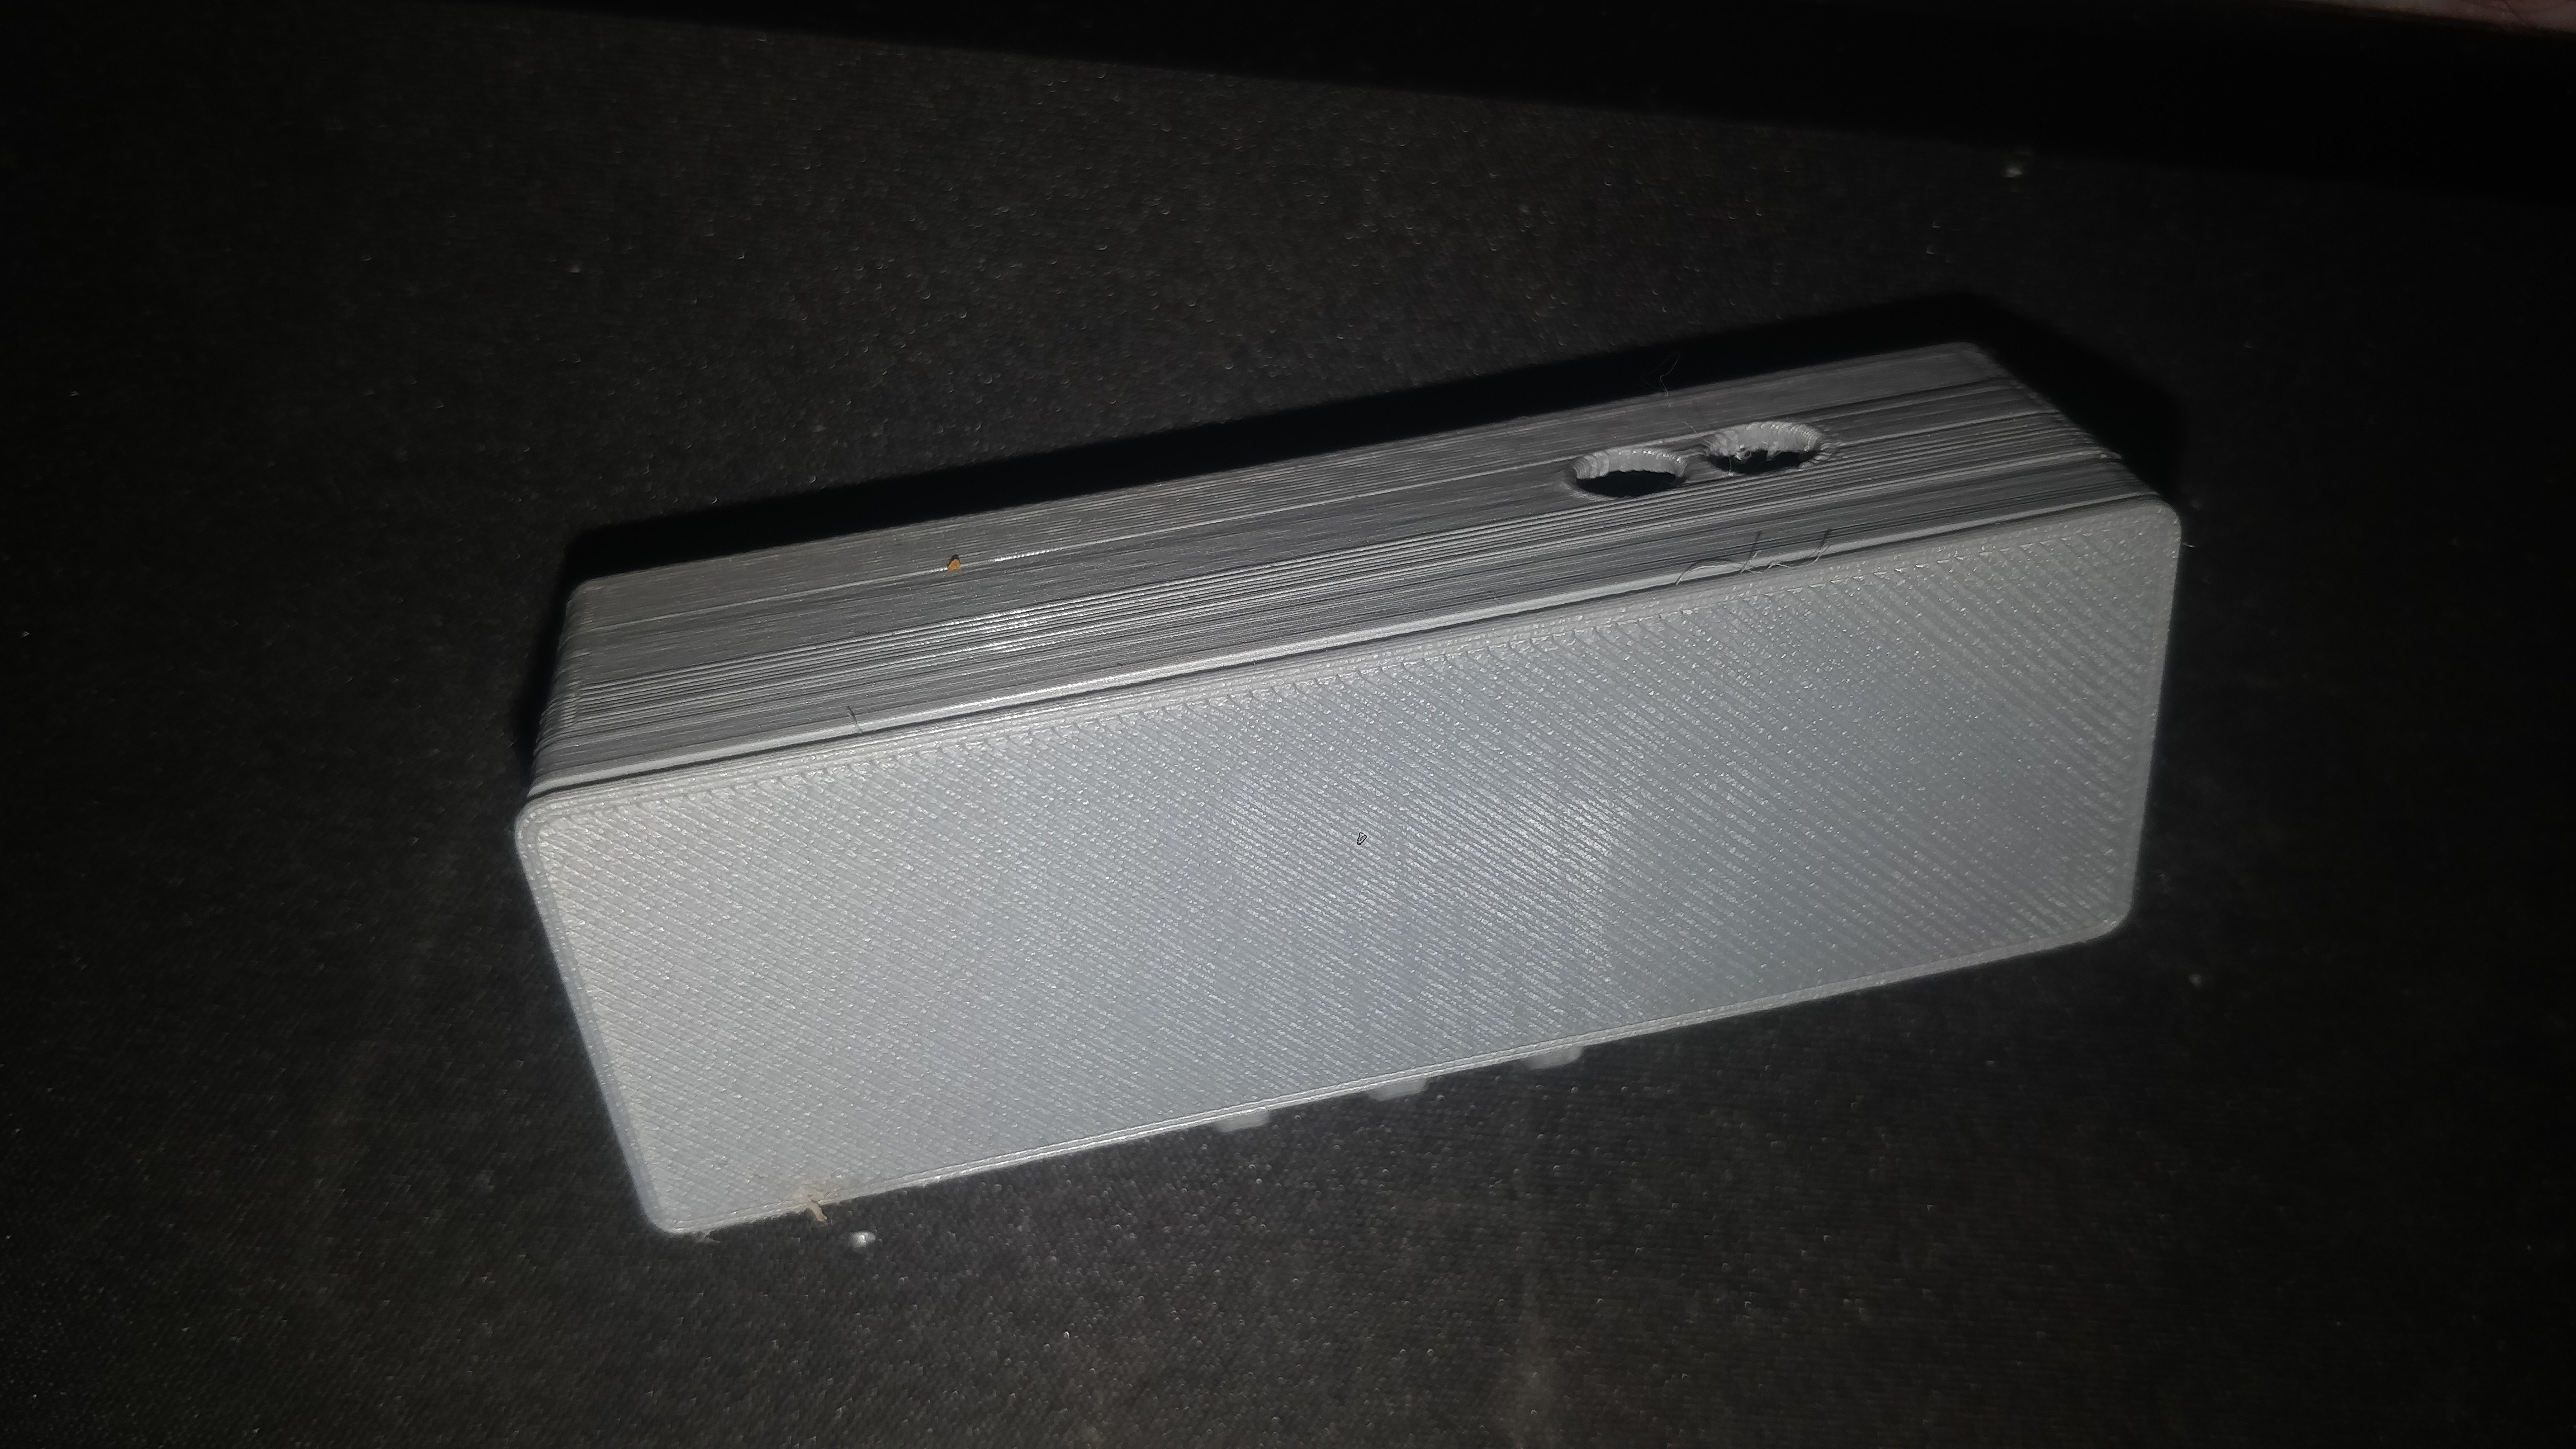
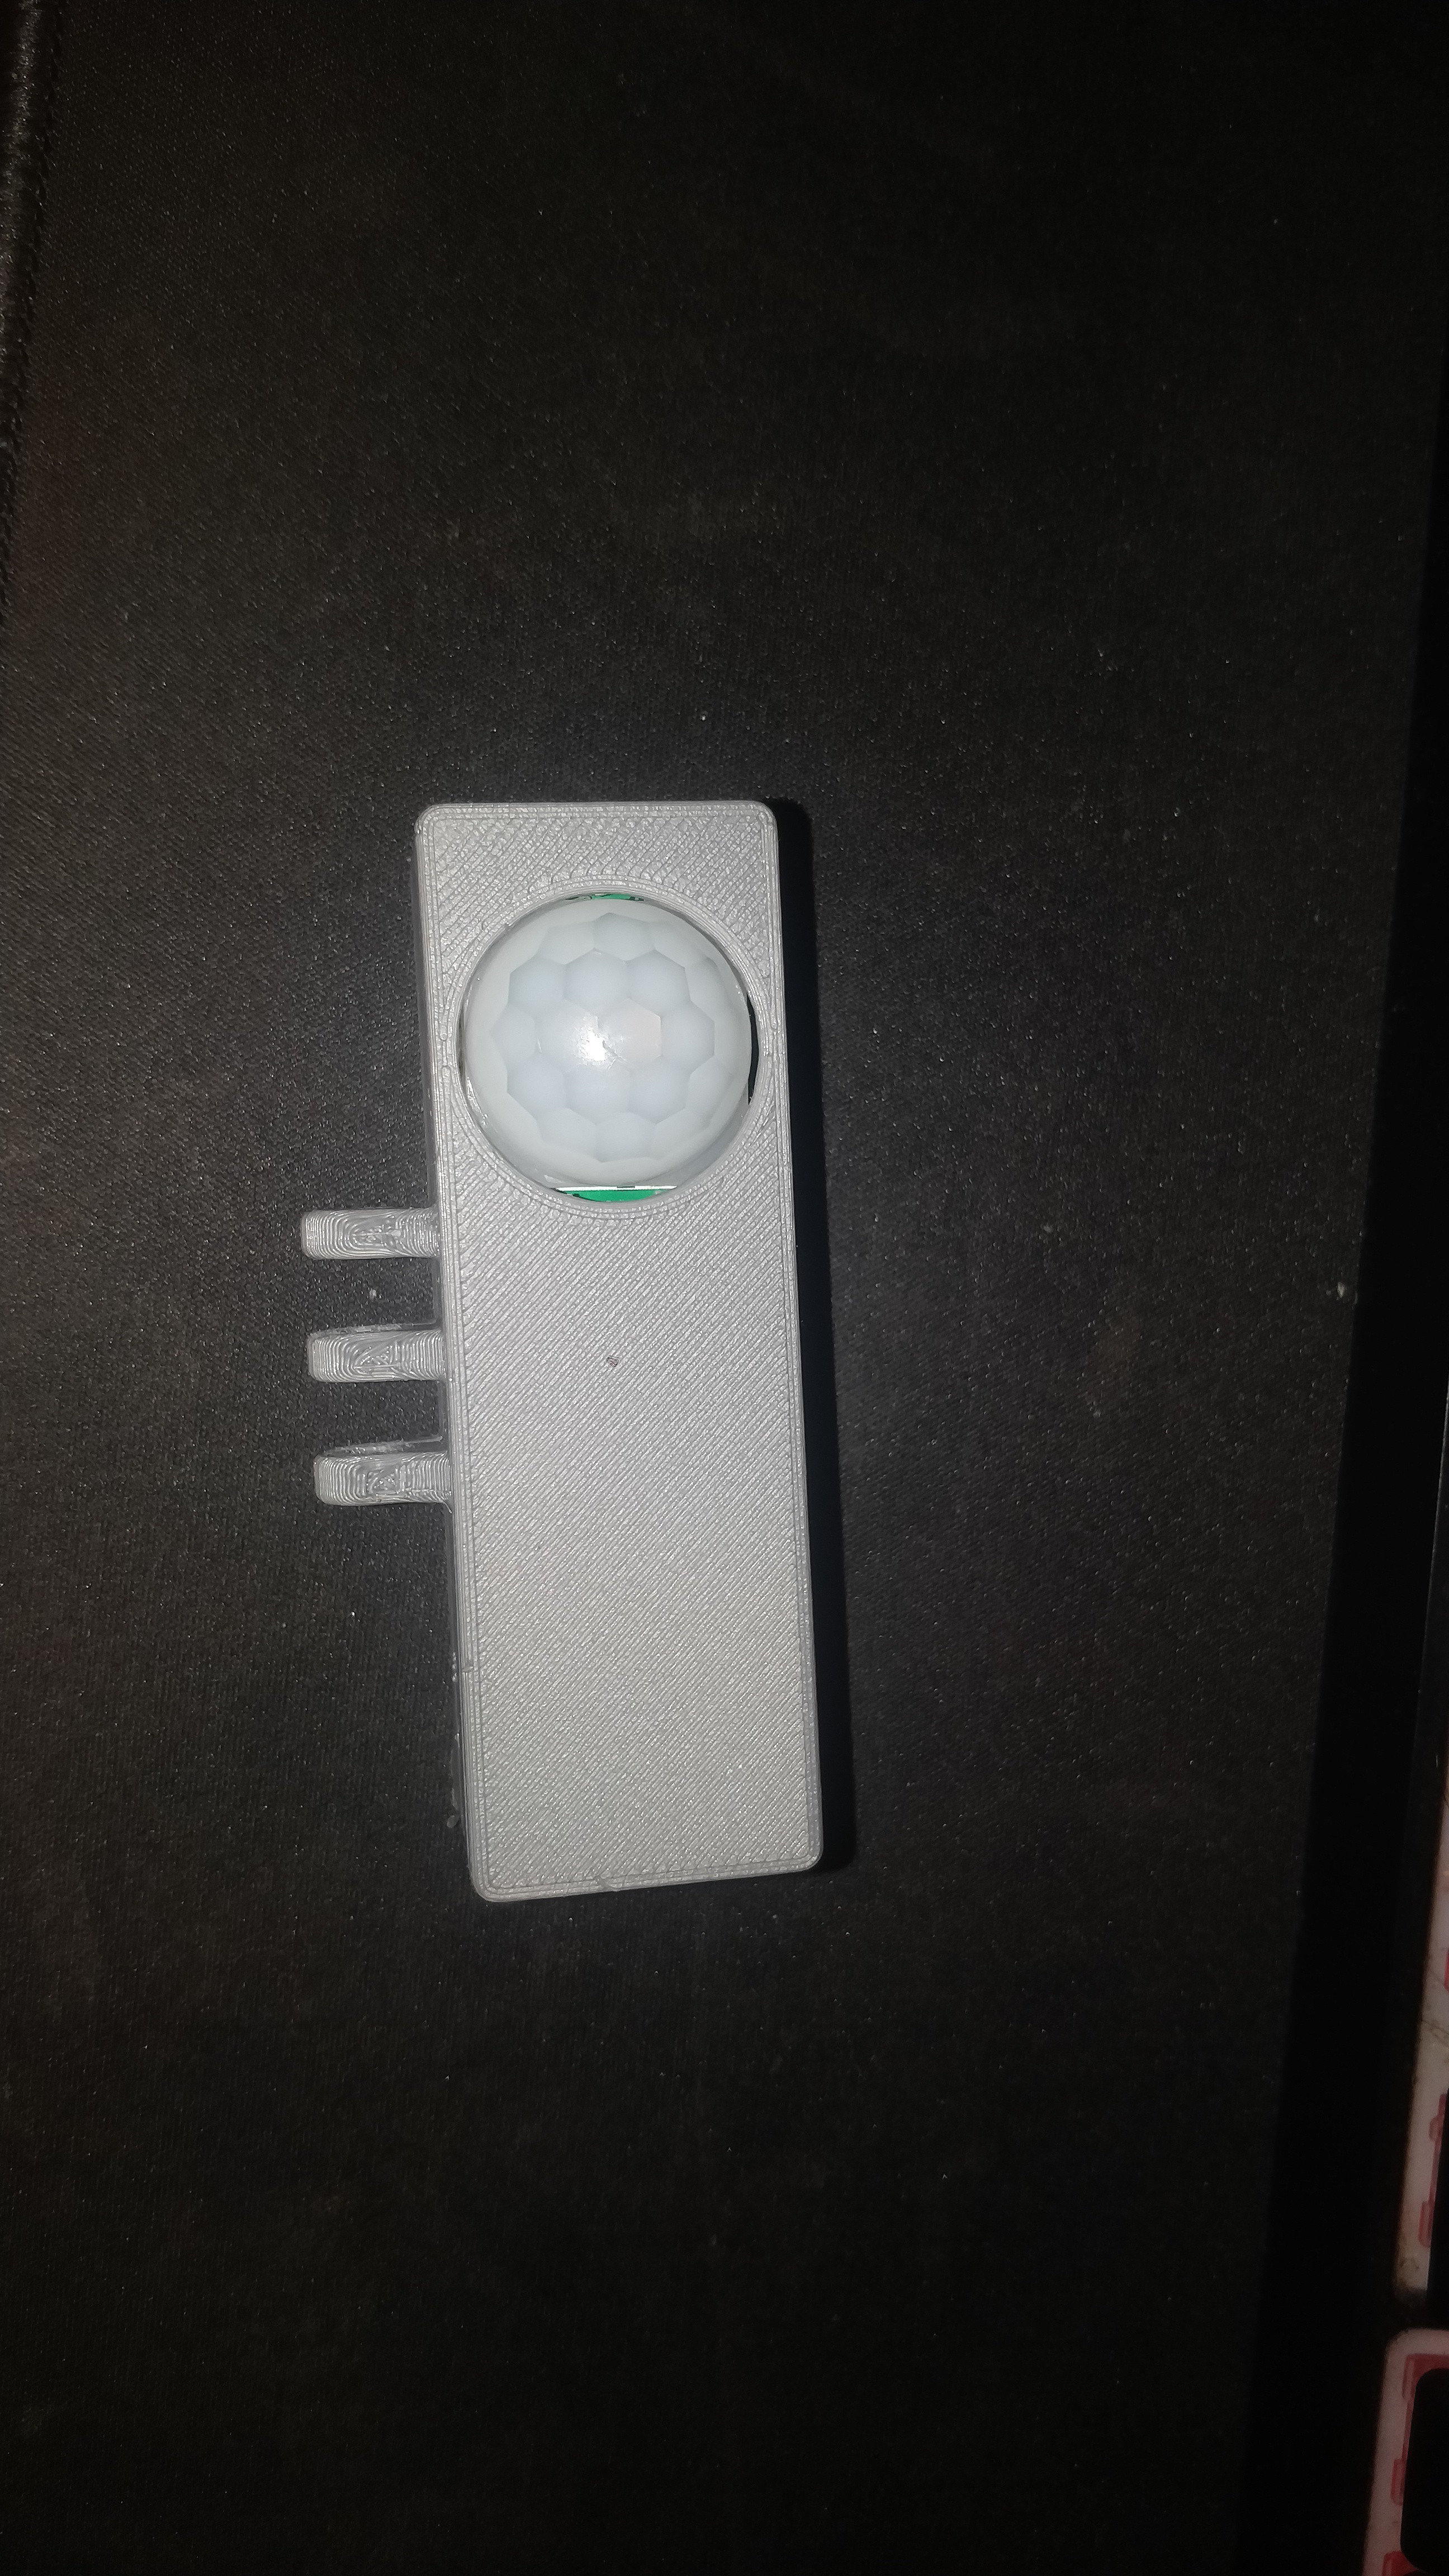
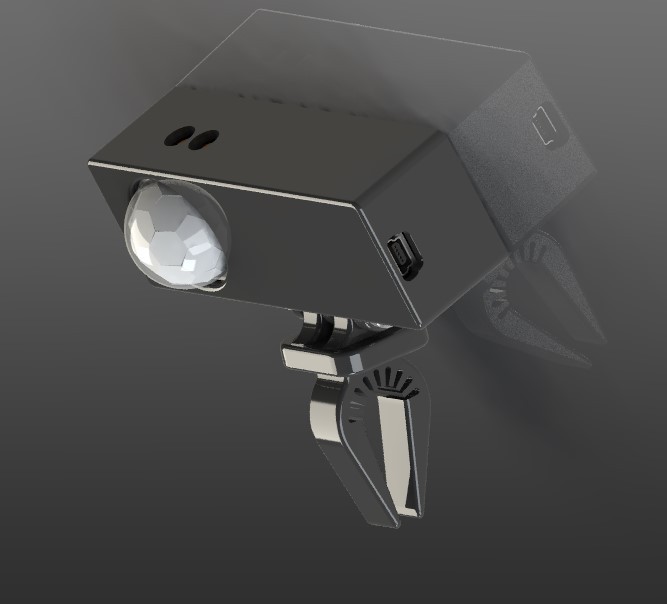
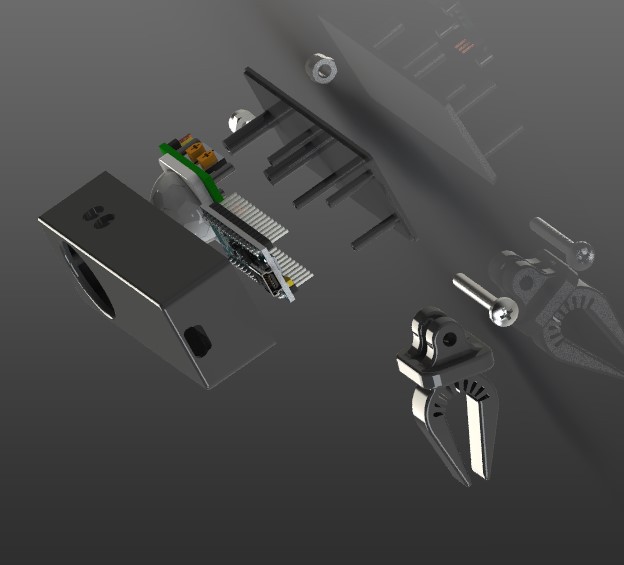
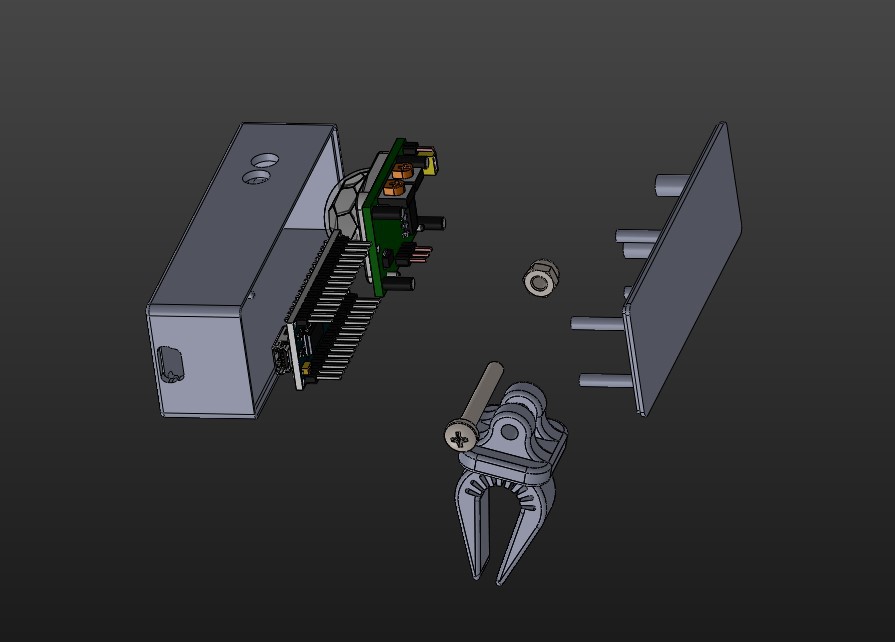
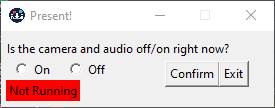
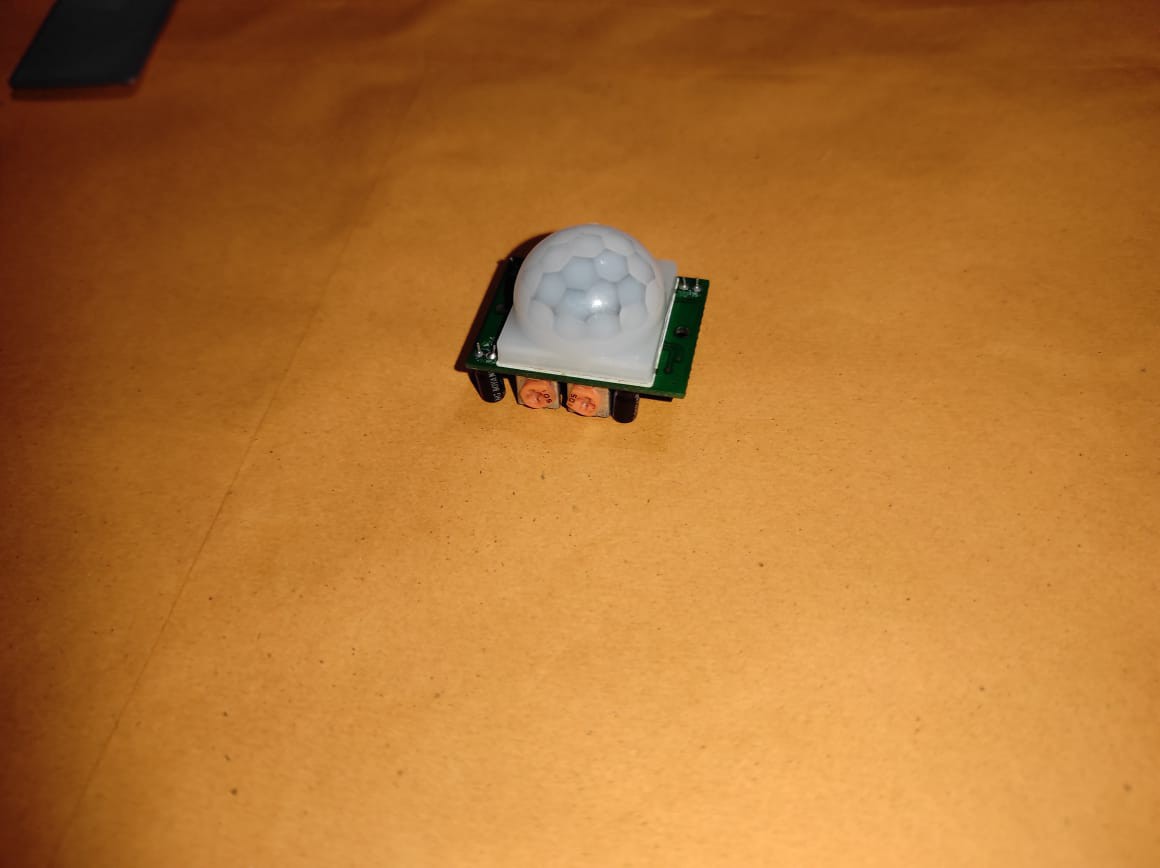
Project utilizes a PIR sensor to sense the presence, Microcontroller to capture the data and send to the PC, PC runs a python script with a GUI which automates the Zoom to turn on/off the camera and mic in the PC. PIR senses the close vicinity movements (this can be adjusted).   Logs contains the in-detail explanation 

clip.STL

3D printable part

stl-binary - 228.99 kB - 07/16/2021 at 13:49

Download

front_housing.STL

3D printable part

stl-binary - 235.04 kB - 07/16/2021 at 13:49

Download

back_cover_housing.STL

3D printable part

stl-binary - 58.48 kB - 07/16/2021 at 13:49

Download

ZoomTest.ino

Arduino Code

ino - 779.00 bytes - 07/16/2021 at 09:28

Download

pythonProject.zip

Python Code

Zip Archive - 5.28 MB - 07/16/2021 at 09:26

Download

  • 1 × HC-SR501 PIR Sensor
  • 1 × Arduino Nano

  • Final Test and Verdict

    Charitha Jayaweera07/18/2021 at 12:45 0 comments

    After assembly, the code was uploaded to the Arduino and the python script was run, and everything was working perfectly. Video below.

    Future improvements - add a choice to choose between apps (Teams / Skype etc.) since it only works with zoom as it is. 

  • Printing out and Assembly

    Charitha Jayaweera07/18/2021 at 12:31 0 comments

    The STLs were printed out, and apart from a few hiccups here and there, the print was okay. Not the BEST quality, but not the worst either. with local travel restrictions, it was hard to find tools to finish the print, but all in all, not bad. everything fits, and the clamping works well. hinge works well. Top holes are used to change the PIR settings. 

  • Modelling the enclosure

    Charitha Jayaweera07/16/2021 at 13:48 0 comments

    Now, we turn to trusty solidworks, Needed something that is easily printable with my ender and something that resembled a webcam, so I went with this design. Designing the clip was interesting, and hope that it works, and is flexible.. I only have PLA at the moment, and not sure whether it will be flexible.

    I'll upload the STL files.. and On to printing, assembling and testing it out. 

  • Coding the Software side (Python)

    Charitha Jayaweera07/16/2021 at 09:24 0 comments

    Now that the micro controller is programmed, Remainder is to code for reading the serial input and turn the camera and mic on/off depending on the situation. Needed to find some way that Zoom application can be manipulated thru code. As an API for zoom did not exist, first thought was to turn the camera and mic off in device level. but, that seemed like an inefficient way, as there could be issues when reconnecting the devices to zoom app (automatically). the only remaining option was - automation. 

    Python seemed like the best choice for this. simply due to the support , ease of use, and familiarity. There was no way to get the initial status of the camera and the mic, therefore, a simple GUI was created to launch the application and to see whether the camera and mic is open when the app is open (user input).

    GUI indicates whether the app is started or not, and a radio button to indicate the status of the camera/mic. The code is below

    import time
    import tkinter
    import tkinter as tk
    from tkinter import messagebox
    from threading import *
    import sys,os
    from main import PresentEx
    from PIL import ImageTk
    
    
    def Confirm():
        # print("Thread")
        if(t1.isAlive()):
            messagebox.showwarning(title=None, message="Program is already running")
            labelRunning['text'] = 'Running'
            labelRunning['bg'] = 'green'
        else:
            labelRunning['text'] = 'Not Running'
            labelRunning['bg'] = 'red'
            if (var.get()<=0):
                messagebox.showwarning(title=None, message="Please Select camera/audio status")
            else:
                Threading()
                labelRunning['text'] = 'Running'
                labelRunning['bg'] = 'green'
    
    def work():
        MainCode = PresentEx(var.get())
        MainCode.main()
    
    t1 = Thread(target = work)
    
    def Threading():
        global t1
        t1.start()
        # t1.join()
        # time.sleep(5)
    
    def Exit():
        global window
        global t1
        window.destroy()
        window.quit()
        os._exit(1)
        t1.terminate
    
    
    window = tk.Tk()
    window.title('Present!')
    window.geometry
    window.resizable(False,False)
    screen_width = window.winfo_screenwidth()
    screen_height = window.winfo_screenheight()
    window_width = int(screen_width*0.2)
    window_height = int(screen_height*0.1)
    
    window.geometry(f'{window_width}x{window_height}')
    var = tk.IntVar()
    
    CameraStatus = tk.Label(window, text= "Is the camera and audio off/on right now?").place(x =(window_width*0.01),y=(window_height*0.09))
    
    p1 = ImageTk.PhotoImage(file ='meeting2.png')
    window.iconphoto(False, p1)
    
    labelRunning = tkinter.Label(window, text="")
    labelRunning.pack(side=tk.LEFT, pady=30, padx=10)
    labelRunning.place(x=window_width * 0.02, y=window_height * 0.65)
    
    if (t1.isAlive()):
        labelRunning['text'] = 'Running'
        labelRunning['bg'] = 'green'
    else:
        labelRunning['text'] = 'Not Running'
        labelRunning['bg'] = 'red'
    
    print("thread Status")
    print(t1.isAlive())
    
    R1 = tk.Radiobutton(window, text="On", variable=var, value=1)
    R1.pack(side=tk.LEFT,pady=30,padx=10)
    
    R2 = tk.Radiobutton(window, text="Off", variable=var, value=2)
    R2.pack(side=tk.LEFT,pady=30)
    
    B = tk.Button(window, text ="Confirm", command = Confirm)
    B.place(x=window_width*0.6, y=window_height*0.4)
    
    B = tk.Button(window, text ="Exit", command = Exit)
    B.place(x=window_width*0.8, y=window_height*0.4)
    
    print(window_height,window_width)
    
    
    window.mainloop()

    The GUI starts the background process on a separate thread, so as to avoid crashing the GUI. Tkinter has been used to create the GUI. the GUI calls the PresentEX class from main.py. which has the functionality of automation. The main.py is as below

    import serial
    import time
    import keyboard
    import win32gui, win32com.client
    import pyautogui
    
    testArray = []
    
    class PresentEx():
    
        serialLine = ""
    
    
        def __init__(self,status):
            self.status = status
    
        def winEnumHandler(hwnd, ctx):
    
            global testArray
            if win32gui.IsWindowVisible(hwnd):
                count = 0
                a = win32gui.GetWindowText(hwnd)
                testArray.append(a)
    
    
        def SerialInitiate(self):
            serialLine = serial.Serial('COM3', 9600)
            time.sleep(0.1)
            return serialLine
    
        def ZoomFunctionality(self,ProgramArray):
            global testArray
            print(ProgramArray)
    
            if(self.status...
    Read more »

  • Coding for the Arduino

    Charitha Jayaweera07/15/2021 at 02:20 0 comments

    Game plan was simple, send some serial data once the PIR detects a person. seemed simple enough, PIR was in the repeat trigger mode. and  I used repeat trigger mode, because system should ALWAYS be aware if the person is there or not. However, I still needed a timeout for turning off the camera and mic, or else it will keep turning everything off all the time. (PIR get some wrong readings and garbage values at times.) therefore, the code waits for 30 seconds until the person isn't there to turn the camera and mic off. 

    I had to manage the serial data that was being sent to the PC. we obviously do not need the data all the time, just when we detect / undetected  someone. Therefore, only 5 lines were sent thru serial line to the PC. and used strings as opposed to binary values (1 or a 0) just so that we can confirm that its the correct data and not some random value, 

    That was it for the Arduino section.  Code is below

    int PIRSensor = 12;
    unsigned long timeInLoop = 0;
    unsigned long elapsedTime = 0;
    void setup()
    {
      Serial.begin(9600);
      pinMode(PIRSensor, INPUT_PULLUP);
    }
    
    void loop()
    {
    
      int count = 0;
      while (digitalRead(PIRSensor))
      {
        if (count < 5)
        {
          Serial.println("PERSON DETECTED");
        }
        count = count + 1;
        delay(1);
    
      }
      unsigned long currentTime = millis();
      while (!digitalRead(PIRSensor))
      {
        timeInLoop = millis();
        elapsedTime = timeInLoop - currentTime;
        if (elapsedTime > 30000)
        {
          Serial.println("NO PERSON DETECTED");
        }
      }
    }

  • Gathering the Parts

    Charitha Jayaweera07/15/2021 at 02:03 0 comments

    Found a arduino nano and a PIR. the wiring was standard and just the connection to the PIR was needed. Arduino IDE was installed alongside python

  • Researching of methods/ Finalizing methods

    Charitha Jayaweera07/13/2021 at 12:07 0 comments

    Several methods came to mind.  The first thing needed was the integrating it with software. We decided to focus on Zoom since its the most used platform. After searching the internet, found that there is no SDK that works from user side. 

    Next option was to run a python automation script on command. 

    Next, the feedback, computer vision seemed like the best option but 1. it was expensive, 2. some people might not like having a camera (privacy concerns) therefore, we decided to go with a simple PIR sensor. 

    used Arduino nano because that was available, and we did not need a lot of inputs and outputs. 

  • Ideation

    Charitha Jayaweera07/13/2021 at 11:49 0 comments

    I did not see the Log update was required from the beginning, but i will explain all the steps here. The idea came to me and my friend sachith while brainstorming project ideas for the contest. mainly because we've witnessed some embarrassing situations of people that have been uploaded to social media platforms. Seems like with this invention we could ease the mind of people who are working from home. 

View all 8 project logs

Enjoy this project?

Share

Discussions

MerryKoft wrote 12/28/2021 at 19:53 point

This is a great enhancement, which is very important in online conferences when there are more than ten people participating in the discussion. After all, sometimes you have to do a meeting for 100 people, just imagine how complicated that process is. The best platform for online meetings is https://stork.ai/

  Are you sure? yes | no

Colin Russell-Conway wrote 07/28/2021 at 08:40 point

Wouldn't you be better off with an ultrasonic sensor (like the SR04) to check the distance to the user? This could easily be calibrated with an LED and a pot to adjust the distance to where the user sits.  PIR sensors arent great and only detect large movements (in my experience).  

  Are you sure? yes | no

Charitha Jayaweera wrote 07/28/2021 at 16:21 point

Actually we didn't get a lot of problems with the PIR.. that's why we stuck with it.. but what you suggested makes sense too.. a POT and an LED is a good idea. I'll try out with SR04.. thanks for the suggestion! (With covid, we actually had to build with stuff we had at hand, it was hard to find stuff here too. We had the nano and the PIR with us) 

  Are you sure? yes | no

WJCarpenter wrote 07/24/2021 at 18:48 point

Pretty nice. 

I don't know much about Windows APIs. Do you think there is a way to detect the initial states of the mic or camera instead of having to ask the user? 

All of these conferencing systems seem to just have a hotkey toggle. It's odd that they don't provide hotkeys to turn on or off explicitly. How many times have you been in a meeting where someone meant to unmute and instead muted themselves?

  Are you sure? yes | no

Charitha Jayaweera wrote 07/25/2021 at 02:38 point

I think there should be. I'm gonna look into it a bit more about the initial detection part. 

  Are you sure? yes | no

rōnin wrote 07/13/2021 at 12:18 point

Nice job 👍

  Are you sure? yes | no

Charitha Jayaweera wrote 07/15/2021 at 01:59 point

Thanks!

  Are you sure? yes | no

Similar Projects

Does this project spark your interest?

Become a member to follow this project and never miss any updates