Close
0%
0%

The DeathBoard

A sandboard built by a friend for a day of fun. Sand performance was iffy but it sure looks cool, so now it's art and needed some LEDs.

Similar projects worth following

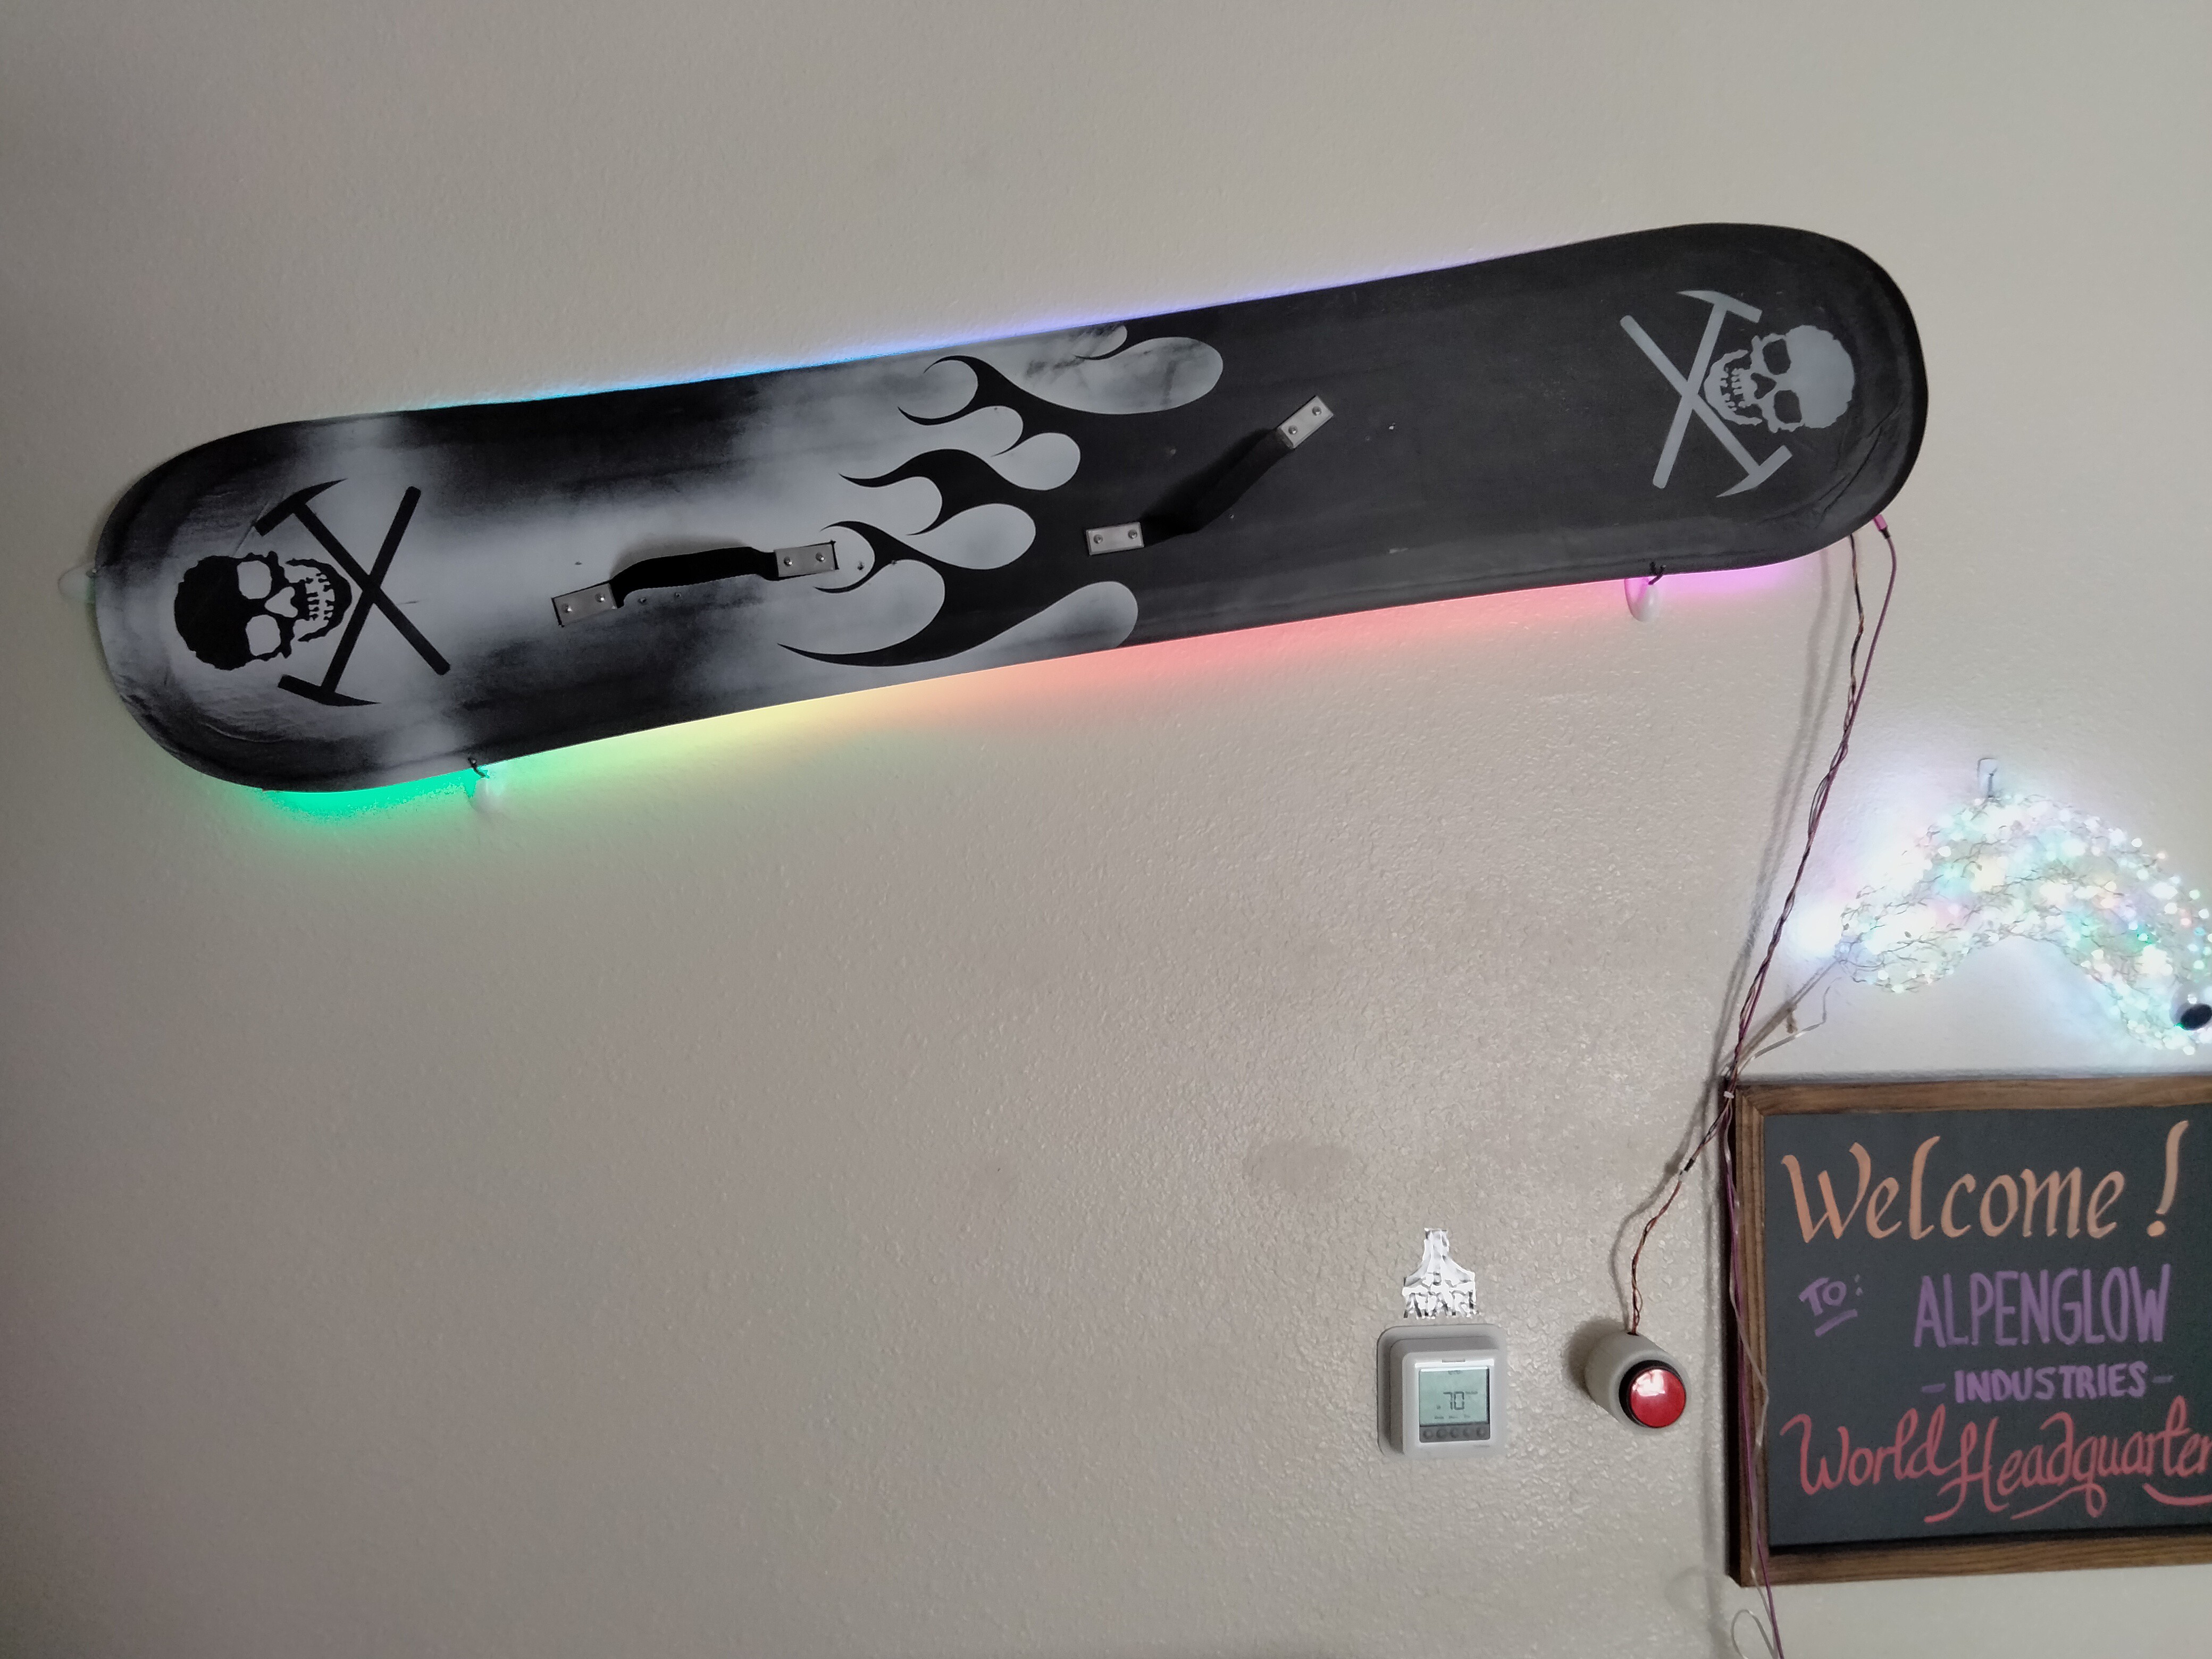
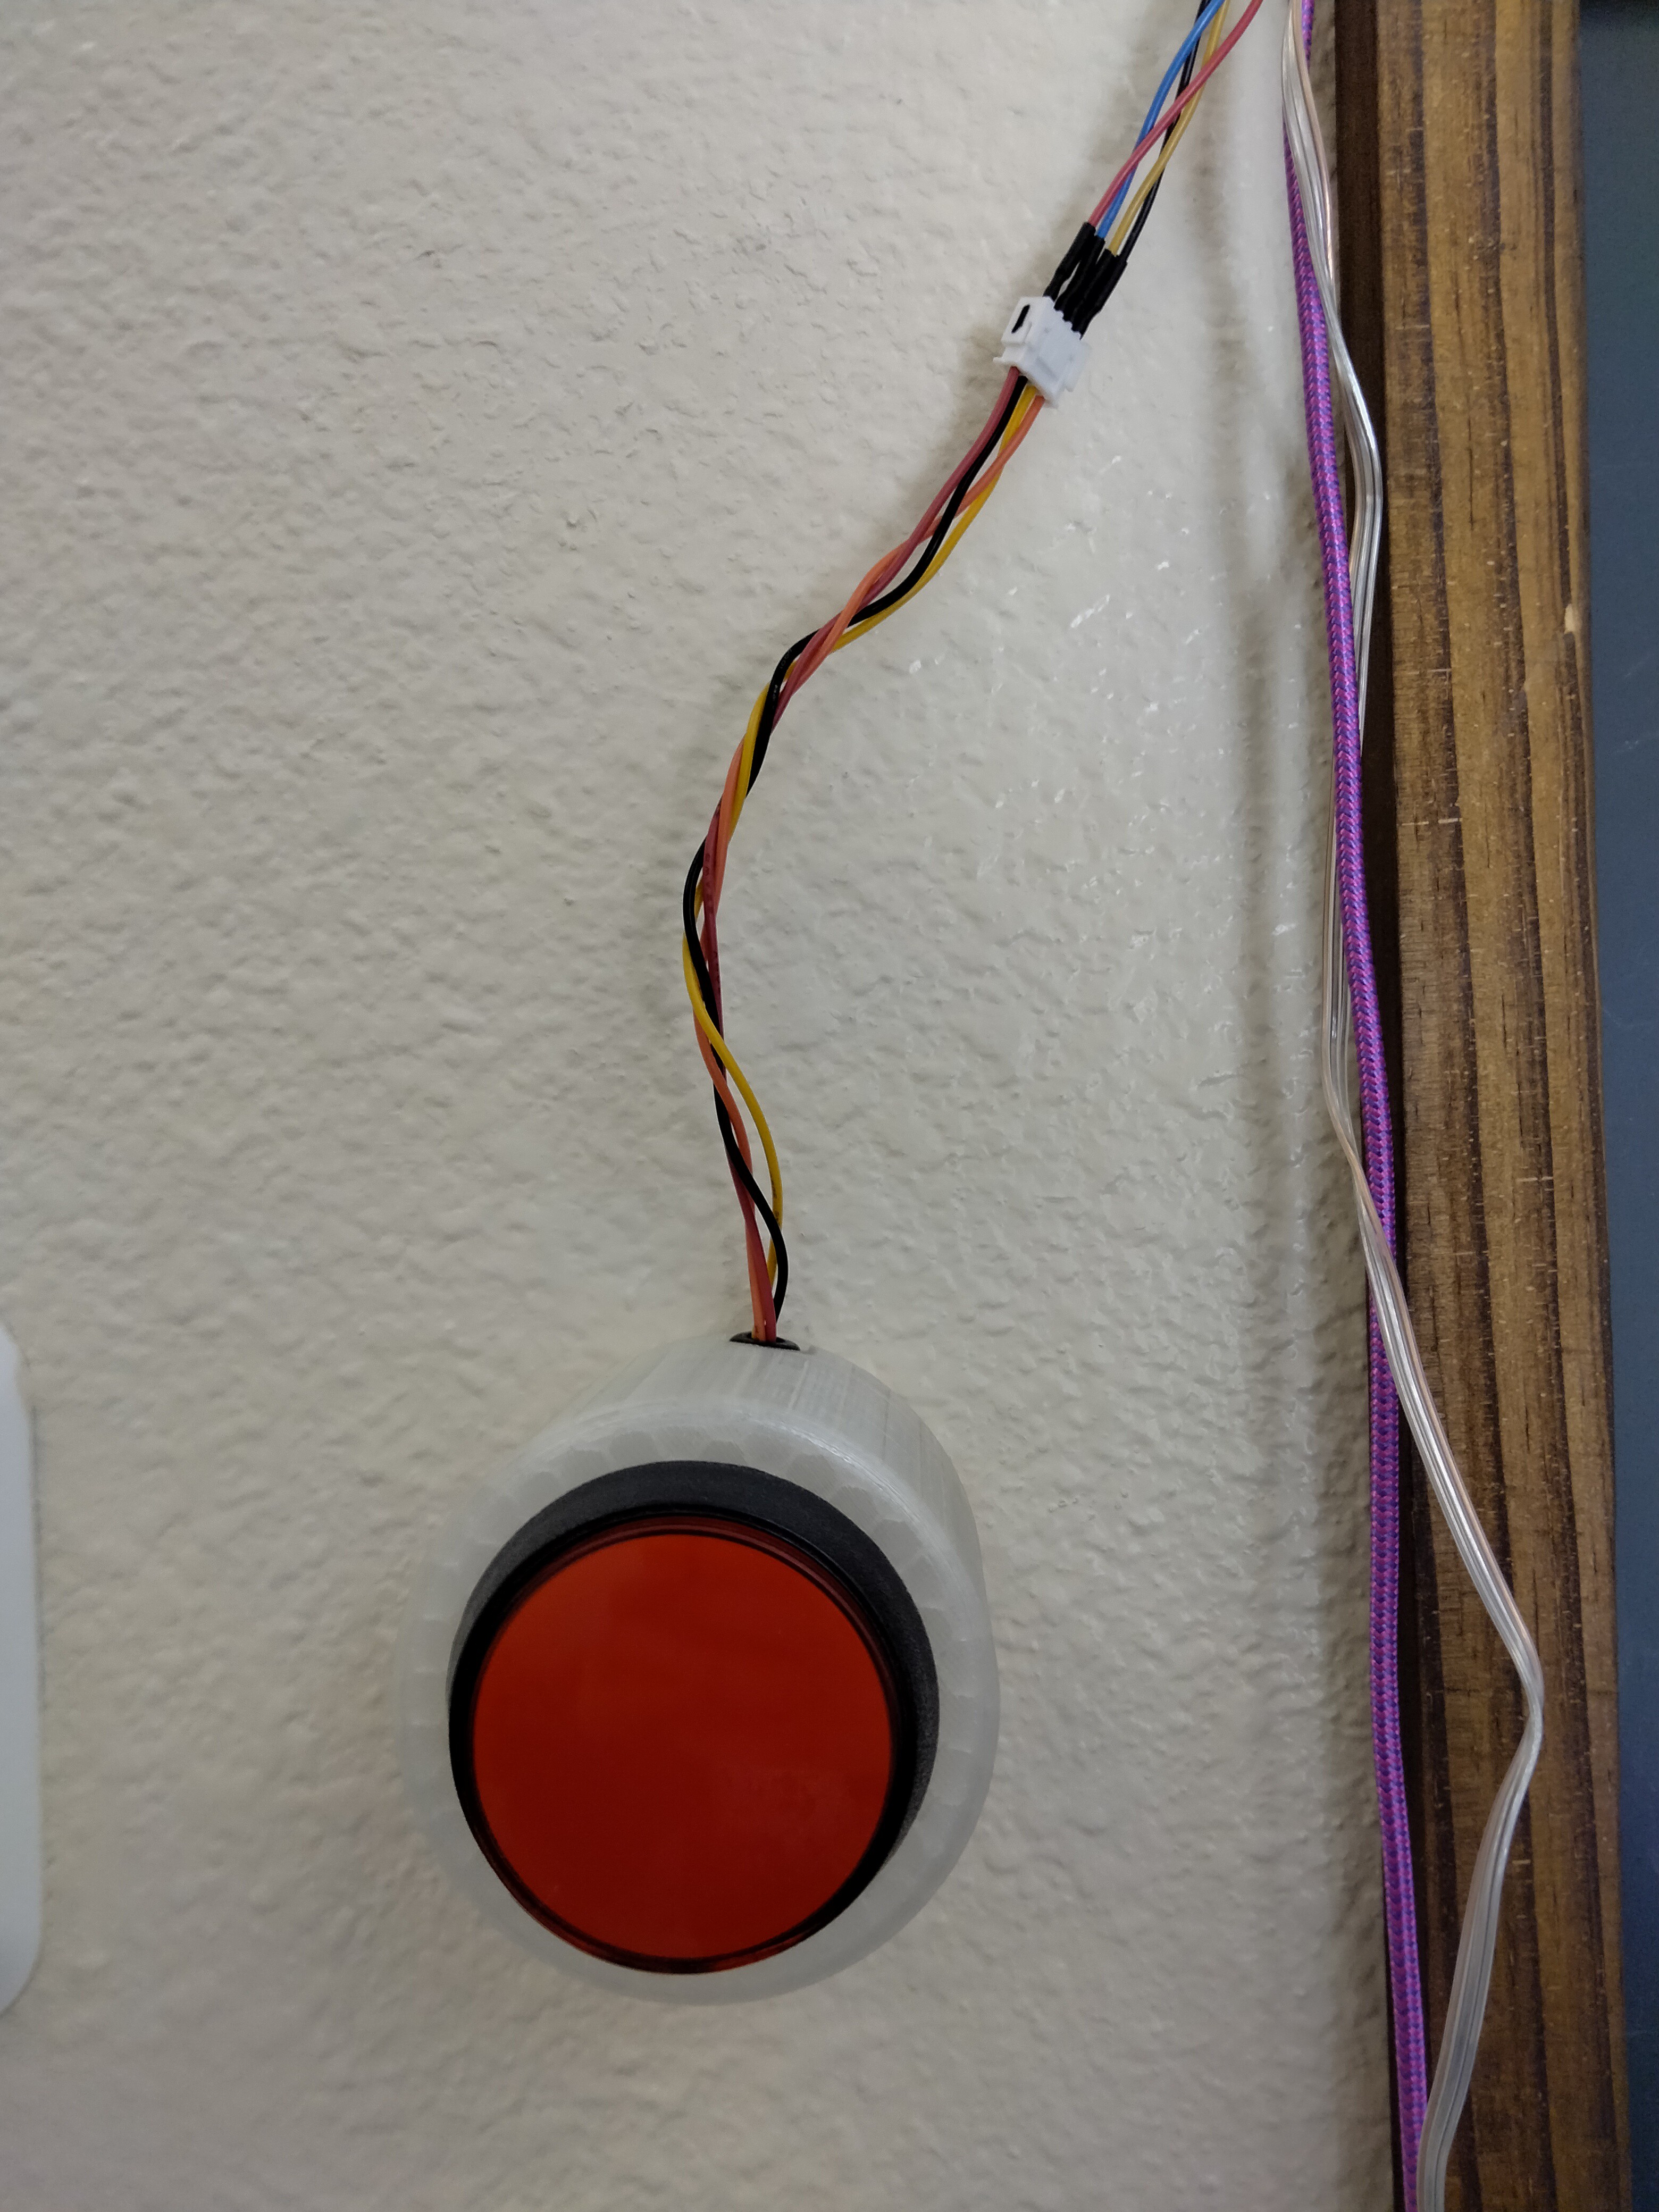
A friend who is an accomplished composites fabricator and RC/UAV/drone pilot made this sweet sandboard for some shenanigans at the beach years and years ago.  While it resulted in more tumbles in the sand than epic rides, it was a fun day, and the board remained a favorite piece of artwork.  Now it finally gets its due with the addition of RGB LED backlighting, a button for changing modes, and official wall mounting.

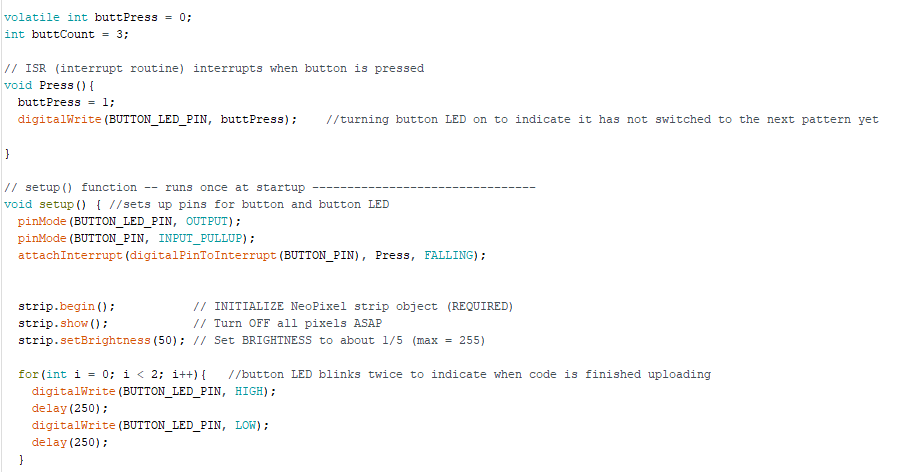
Check out the Project Logs for all the details!

MVI_0060_Trim.mp4

LEDs on DeathBoard

MPEG-4 Video - 8.24 MB - 10/26/2021 at 19:42

Download

  • Mounting the DeathBoard and the Button

    Alpenglow Industries10/26/2021 at 19:39 0 comments

    Two words: Command Strips.

    They work for practically everything. We used three hooks and added heat shrink tubing to them so the board wouldn't slip on the metal. For the button we put a command strip on the bottom and just stuck it to the wall. We used a few small zip ties to make the wires look a bit cleaner.

  • Adding a Button and Code

    Alpenglow Industries10/26/2021 at 19:09 0 comments

    We wanted the deathboard to have a few different pattern options that we could cycle through with a button.

    We  defined the button pins

    Added an interrupt, set brightness to 50% and added a blink to the button LED to indicate when the code is finished uploading.

    We added a switch case with 3 different light patterns and a 4th one that would turn all the lights off.

  • Test Code

    Alpenglow Industries07/14/2021 at 22:43 0 comments

    For testing to see how the LEDs looked on the back of the board I uploaded the strandtest example from the Adafruit NeoPixel library.

    I had to change the LED count so all the LEDs would light up. (I missed this step the first time and ended up replacing a large section of the LED strip because I thought it was bad...oops)

  • Arduino nano

    Alpenglow Industries07/14/2021 at 22:28 0 comments

    The wires connecting the Arduino to the LED strip are soldered to 5V, GND and D6(for data).

    The wires connecting the Arduino to the Big Red Button are soldered to D3(LED output) and GND & D2(switch input) and GND.

  • Measuring, Soldering, Attaching LED Strips

    Alpenglow Industries07/14/2021 at 22:15 0 comments

    I took LED strips and measured the length and width of the board,
    Cut Those strips to the correct length and then cut 2 more strips the same.

    I soldered 90-degree connector strips to the LEDs to make a rectangle shape, 
    leaving one corner unconnected so I could attach wires and a connector for the Arduino nano to plug into.

    I placed Kapton tape on the backs of the LED strips so they wouldn't touch the metal surface of the sand board and short. 

View all 5 project logs

Enjoy this project?

Share

Discussions

Similar Projects

Does this project spark your interest?

Become a member to follow this project and never miss any updates