0%
0%
INVIDUINO
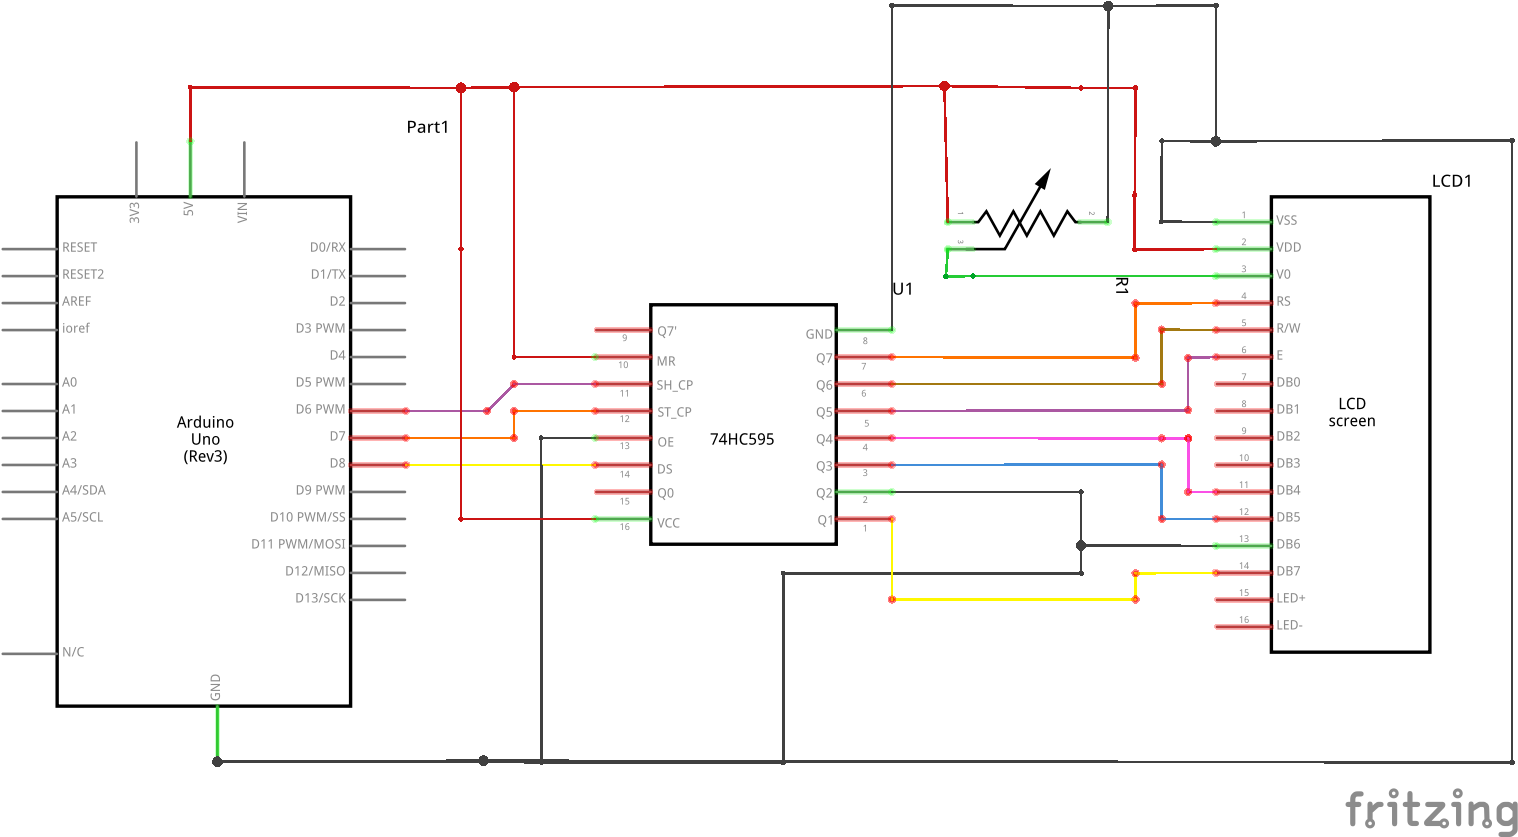
A rudimental graphic card for LCCDs, using 74HC595 shift register
 Martino
Become a Hackaday.io member
Already have an account? Log in.
Just one more thing
To make the experience fit your profile, pick a username and tell us what interests you.
Pick an awesome username
hackaday.io/
Your profile's URL: hackaday.io/username. Max 25 alphanumeric characters.
Pick a few interests
Projects that share your interests
People that share your interests


 ogdento
 alcor6502
 dkrum
dkrum
A "graphics card" this is not =) It's an interface adapter, serial interface to parallel. If you were to make a circuit that'd take a custom protocol of some sort and then convert it into what HD44780 displays understand, it'd be more comparable to a graphics card!
The schematic connects Q4 to DB0, but it should connect to DB4. It also connects DB6 to GND, where it should connect it to, apparently, Q2. Also, VDD on the display is +5V and VSS is GND, not the other way around - possible that your schematic will destroy displays?
And a 100nF capacitor between VCC and GND, close to the shift register, wouldn't hurt =)