 Max Schnorpfeil
After the Template has been finished, the logic ist added.
Controller:
As controller, I am going for the ATmega328P-AU (that's the Arduino Uno µC). The display driver will be the HT1621B.
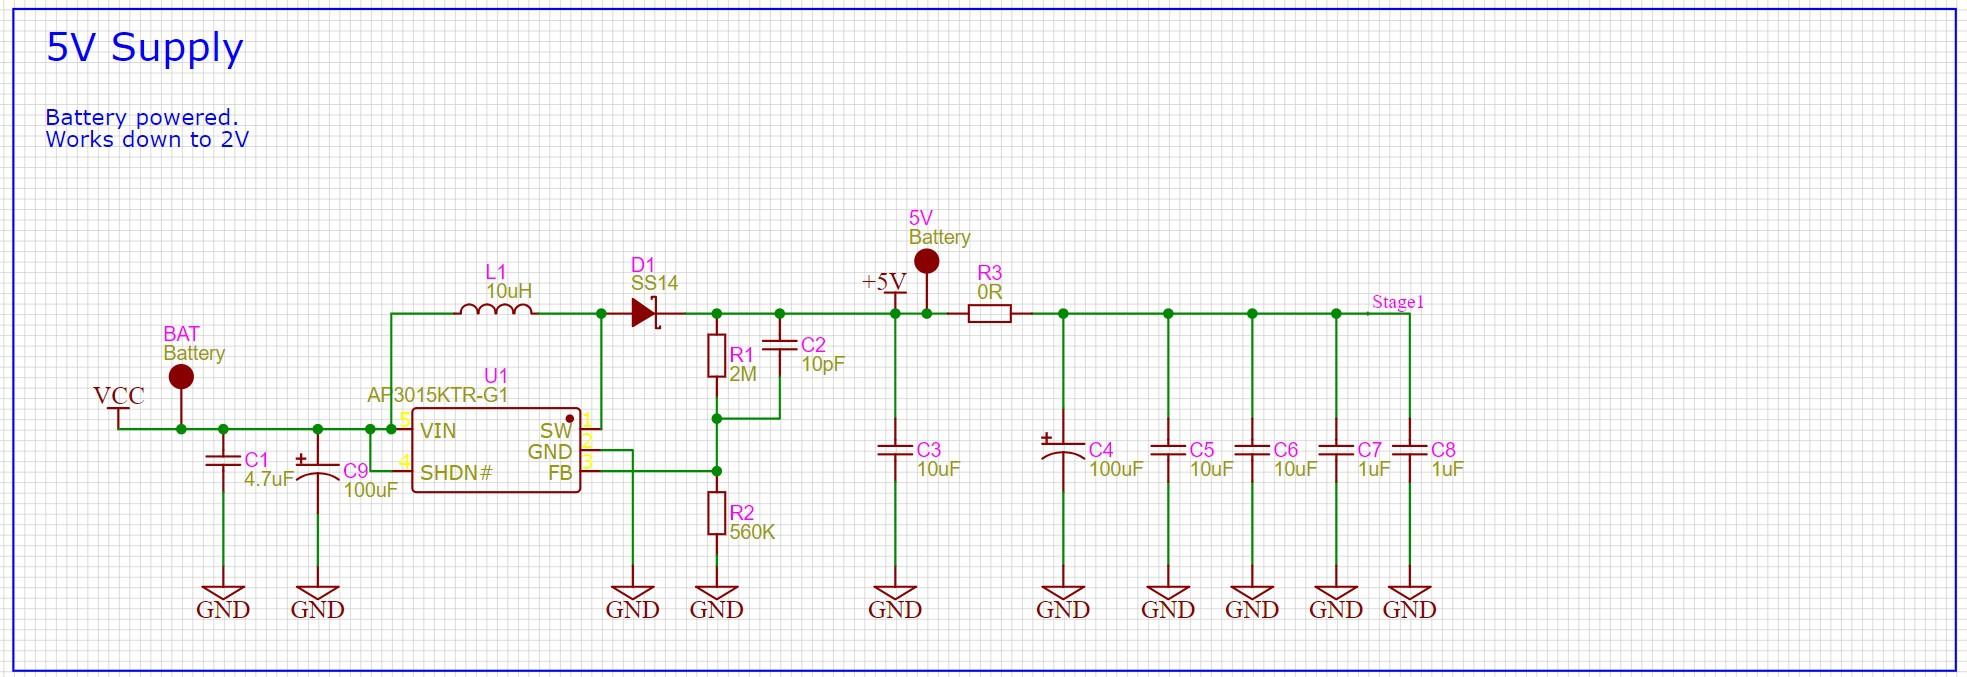
Power:
The two AA batteries will only deliver 2.5 - 3V (Datasheet Energizer). Many IC's require higher voltages., especially high voltage boost converters, which I need for the measurement of >40V Zener diodes.
In this expamle I am using an AR3015KTR boost converter to get to 5V because it was just available. But honestly, every cheap boost converter (min V < 2.4V) will do. Just check what JLC will assemble at the moment you are building it.
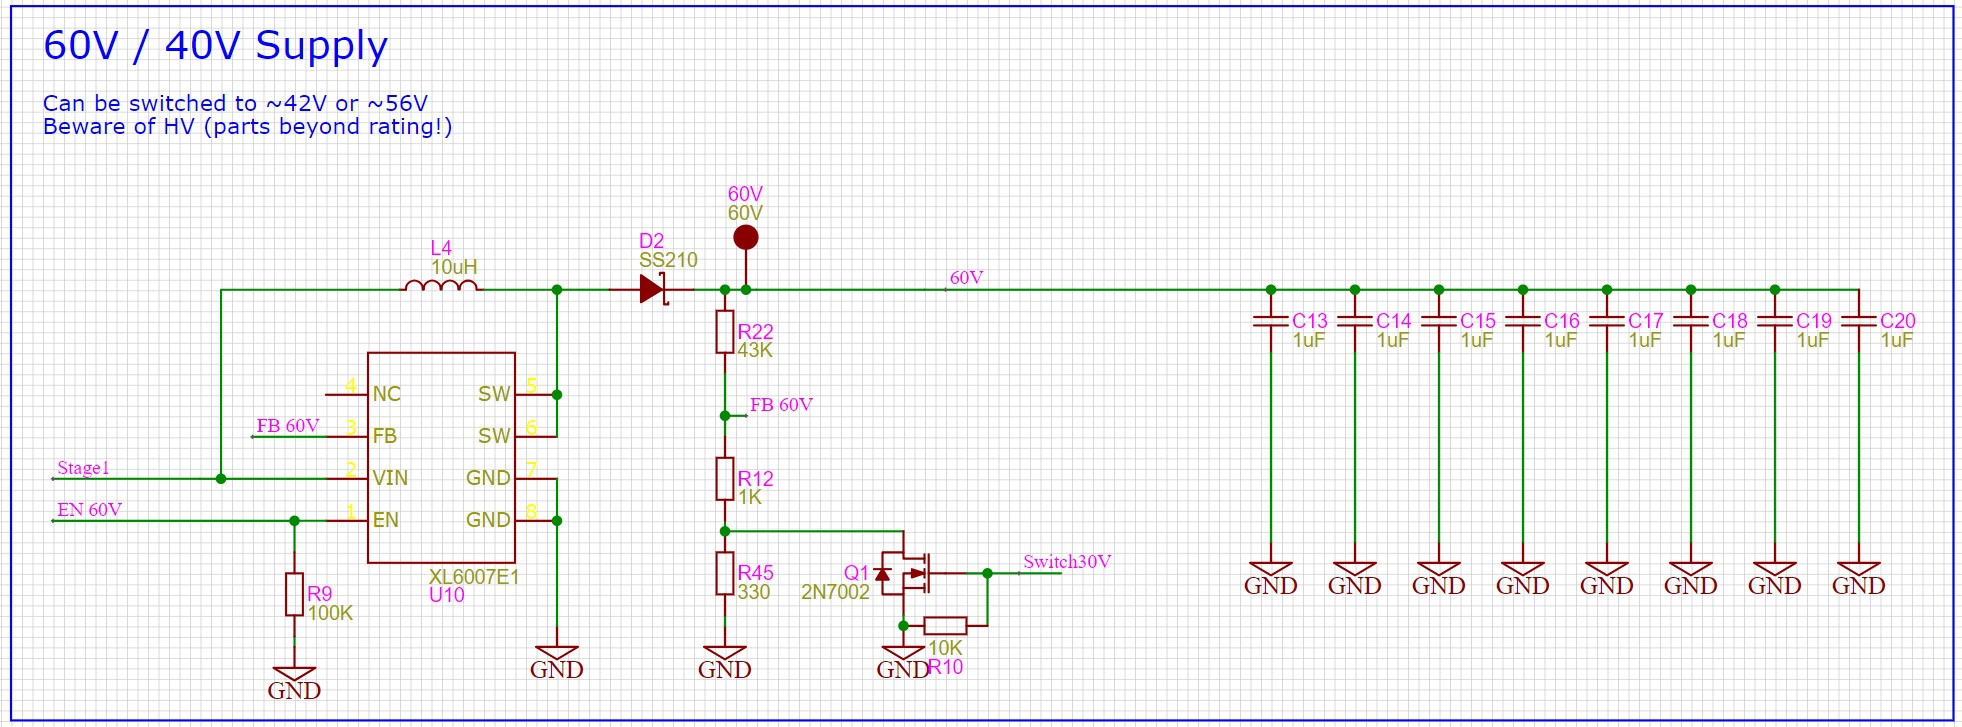
For the high voltage stage, the voltage is made adjustable by placing a MOSFET switch in the feedback path. Messing around with the feedback path, is often not the greatest idea, but in this case, we don't have to be exact with the voltage.
For the voltages we get:
As boost converter, we can again select what is currently offered. Here the XL6007E.
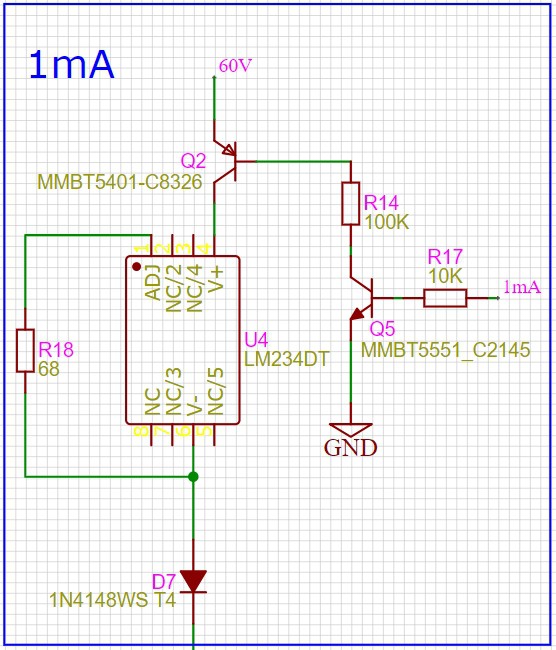
LED supply:
I want to measure the voltage over a Zener-Diode or long LED string. Target is here 1V - 42V, with the option for higher voltages.
The voltage depends on many factors such as temperature and current. To get more useful results, 3 current settings should be available (0.1mA - 1mA - 10mA).
For this, I am using current sources. A PNP transistor in the supply will be used to switch it ON or OFF. Yes, I could have used a MOSFET, but bipolars are a bit more robust, and I don't really need the performance.
But, of course, we need to have enough voltage margin of the supply voltage. Current regulator LM234 is fast and will comensate the voltage difference of up to 40V. This means, with the 60V supply, we should only measure Zener-Diodes with >20V
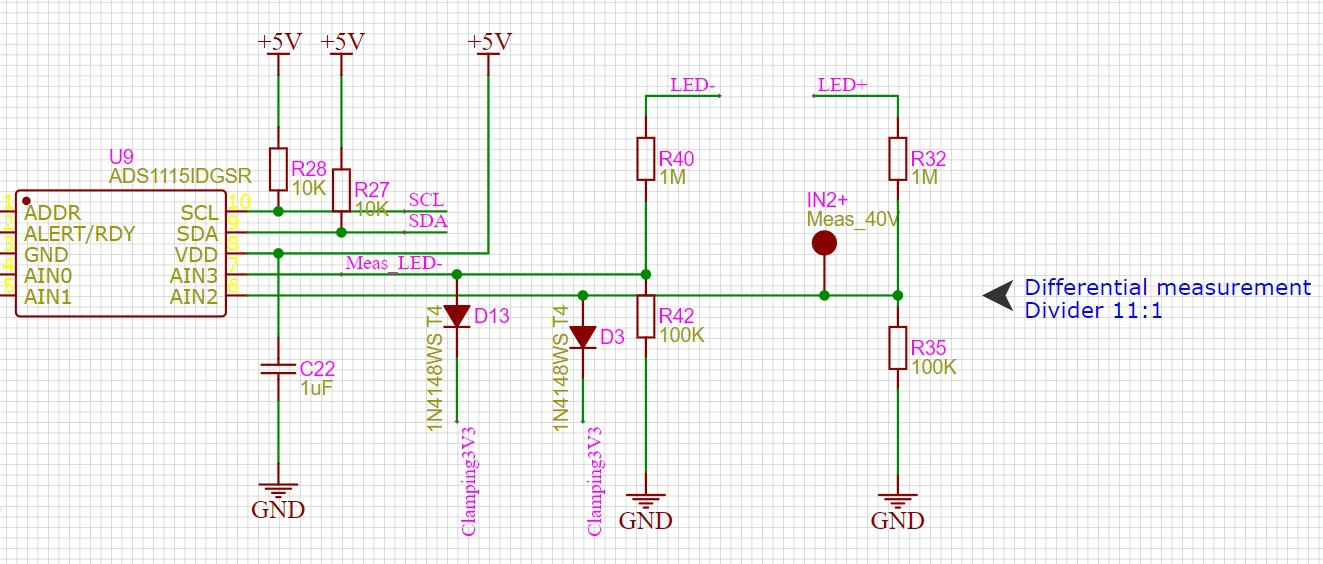
For the actual measurement, I went a bit over board by using the ADS1115. It's not too expensive and has plenty of performance.
Also, as protection of over-voltage, diodes have been added to a 3.3V rail. In this application, you don't want to use a 3.3V Zener directly, because it will leak significant current below 3.3V!!!
Discussions
Become a Hackaday.io Member
Create an account to leave a comment. Already have an account? Log In.